check oil Hyundai Accent 2005 Owner's Manual
[x] Cancel search | Manufacturer: HYUNDAI, Model Year: 2005, Model line: Accent, Model: Hyundai Accent 2005Pages: 219, PDF Size: 7.07 MB
Page 52 of 219
1FEATURES OF YOUR HYUNDAI40
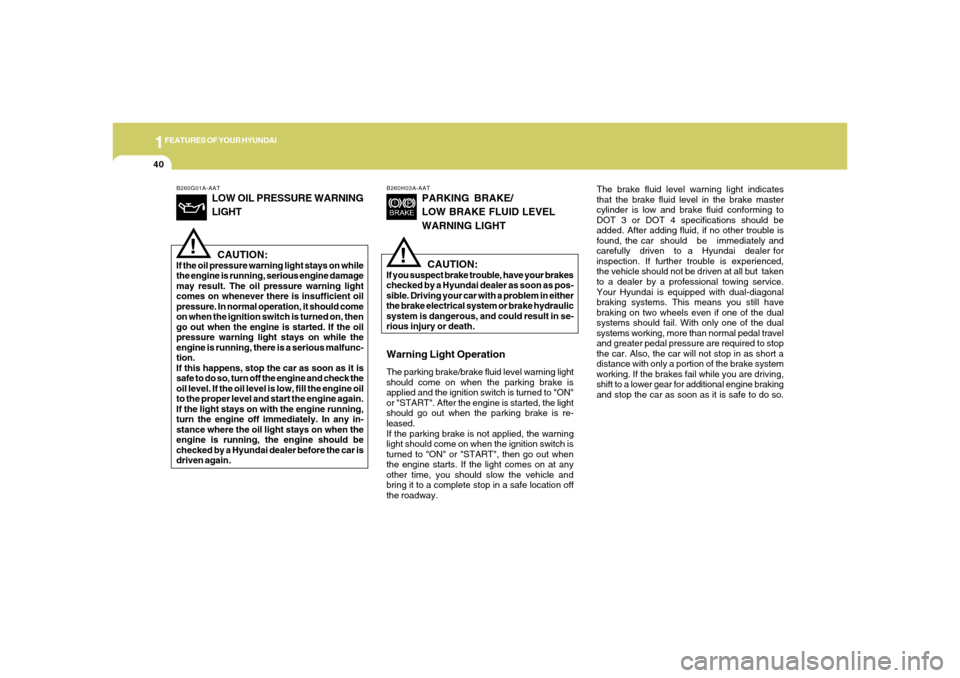
B260G01A-AAT
LOW OIL PRESSURE WARNING
LIGHTCAUTION:
If the oil pressure warning light stays on while
the engine is running, serious engine damage
may result. The oil pressure warning light
comes on whenever there is insufficient oil
pressure. In normal operation, it should come
on when the ignition switch is turned on, then
go out when the engine is started. If the oil
pressure warning light stays on while the
engine is running, there is a serious malfunc-
tion.
If this happens, stop the car as soon as it is
safe to do so, turn off the engine and check the
oil level. If the oil level is low, fill the engine oil
to the proper level and start the engine again.
If the light stays on with the engine running,
turn the engine off immediately. In any in-
stance where the oil light stays on when the
engine is running, the engine should be
checked by a Hyundai dealer before the car is
driven again.
!
B260H03A-AAT
PARKING BRAKE/
LOW BRAKE FLUID LEVEL
WARNING LIGHT
CAUTION:
If you suspect brake trouble, have your brakes
checked by a Hyundai dealer as soon as pos-
sible. Driving your car with a problem in either
the brake electrical system or brake hydraulic
system is dangerous, and could result in se-
rious injury or death.Warning Light OperationThe parking brake/brake fluid level warning light
should come on when the parking brake is
applied and the ignition switch is turned to "ON"
or "START". After the engine is started, the light
should go out when the parking brake is re-
leased.
If the parking brake is not applied, the warning
light should come on when the ignition switch is
turned to "ON" or "START", then go out when
the engine starts. If the light comes on at any
other time, you should slow the vehicle and
bring it to a complete stop in a safe location off
the roadway.
!
The brake fluid level warning light indicates
that the brake fluid level in the brake master
cylinder is low and brake fluid conforming to
DOT 3 or DOT 4 specifications should be
added. After adding fluid, if no other trouble is
found, the car should be immediately and
carefully driven to a Hyundai dealer for
inspection. If further trouble is experienced,
the vehicle should not be driven at all but taken
to a dealer by a professional towing service.
Your Hyundai is equipped with dual-diagonal
braking systems. This means you still have
braking on two wheels even if one of the dual
systems should fail. With only one of the dual
systems working, more than normal pedal travel
and greater pedal pressure are required to stop
the car. Also, the car will not stop in as short a
distance with only a portion of the brake system
working. If the brakes fail while you are driving,
shift to a lower gear for additional engine braking
and stop the car as soon as it is safe to do so.
Page 108 of 219
2
DRIVING YOUR HYUNDAI2
!
WARNING: ENGINE EXHAUST CAN BE DANGEROUS!
C010A03A-AATEngine exhaust fumes can be extremely dangerous. If, at any time, you smell exhaust fumes inside the vehicle, open the windows immediately.o Do not inhale exhaust fumes.Exhaust fumes contain carbon monoxide, a colorless, odorless gas that can cause unconsciousness and death by asphyxiation.o Be sure the exhaust system does not leak.The exhaust system should be checked whenever the vehicle is raised to change the oil or for any other purpose. If you hear a change
in the sound of the exhaust or if you drive over something that strikes the underneath side of the car, have the exhaust system checked
as soon as possible by your Hyundai dealer.o Do not run the engine in an enclosed area.Letting the engine idle in your garage, even with the garage door open, is a hazardous practice. Never run the engine in your garage any
longer than it takes to start the engine and back the car out.o Avoid idling the engine for prolonged periods with people inside the car.If it is necessary to idle the engine for a prolonged period with people inside the car, be sure to do so only in an open area with the air intake
set at "Fresh" and fan operating at one of the higher speeds so fresh air is drawn into the interior.
If you must drive with the trunk lid/ tail gate open because you are carrying objects that make this necessary:
1. Close all windows.
2. Open side vents.
3. Set the air intake control at "Fresh", the air flow control at "Floor" or "Face" and the fan at one of the higher speeds.
To assure proper operation of the ventilation system, be sure the ventilation air intakes located just in front of the windshield are kept clear
of snow, ice, leaves or other obstructions.
!
PROPOSITION 65 WARNING:
Engine exhaust and a wide variety of automobile components and parts, including components found in the interior furnishings
in a vehicle, contain or emit chemicals known to the State of California to cause cancer and birth defects and reproductive harm.
In addition, certain fluids contained in vehicles and certain products of component wear contain or emit chemicals known to
the State of California to cause cancer and birth defects or other reproductive harm.
Page 109 of 219
DRIVING YOUR HYUNDAI
32
TO START THE ENGINE
BEFORE STARTING THE ENGINEC020A01A-AATBefore you start the engine, you should al-
ways:
1. Look around the vehicle to be sure there
are no flat tires, puddles of oil or water or
other indications of possible trouble.
2. After entering the car, check to be sure the
parking brake is engaged.
3. Check that all windows, and lights are clean.
4. Check that the interior and exterior mirrors
are clean and in position.
5. Check your seat, seatback and headrest to
be sure they are in their proper positions.
6. Lock all the doors.
7. Fasten your seat belt and be sure that all
other occupants have fastened theirs.
8. Turn off all lights and accessories that are
not needed.
9. When you turn the ignition switch to "ON",
check that all appropriate warning lights are
operating and that you have sufficient fuel.
10. Check the operation of warning lights and all
bulbs when key is in the "ON" position.
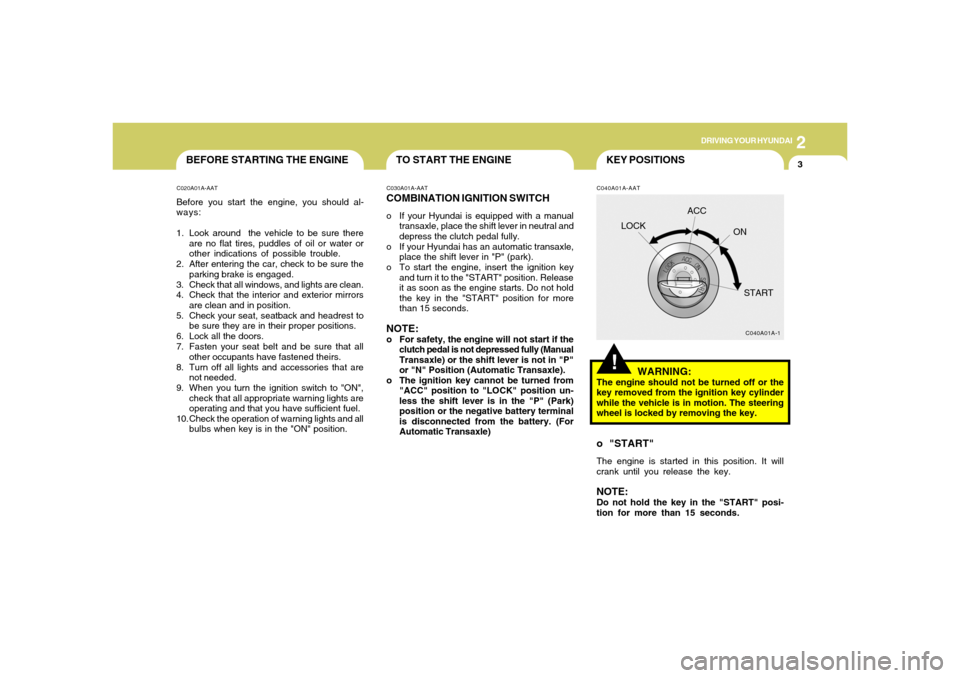
C030A01A-AATCOMBINATION IGNITION SWITCHo If your Hyundai is equipped with a manual
transaxle, place the shift lever in neutral and
depress the clutch pedal fully.
o If your Hyundai has an automatic transaxle,
place the shift lever in "P" (park).
o To start the engine, insert the ignition key
and turn it to the "START" position. Release
it as soon as the engine starts. Do not hold
the key in the "START" position for more
than 15 seconds.NOTE:o For safety, the engine will not start if the
clutch pedal is not depressed fully (Manual
Transaxle) or the shift lever is not in "P"
or "N" Position (Automatic Transaxle).
o The ignition key cannot be turned from
"ACC" position to "LOCK" position un-
less the shift lever is in the "P" (Park)
position or the negative battery terminal
is disconnected from the battery. (For
Automatic Transaxle)
C040A01A-AAT
C040A01A-1
LOCKACC
ON
START
WARNING:
The engine should not be turned off or the
key removed from the ignition key cylinder
while the vehicle is in motion. The steering
wheel is locked by removing the key.o "START"The engine is started in this position. It will
crank until you release the key.NOTE:Do not hold the key in the "START" posi-
tion for more than 15 seconds.
!KEY POSITIONS
Page 120 of 219
2
DRIVING YOUR HYUNDAI
14
C160D01A-AATCheck Battery and CablesWinter puts additional burdens on the battery
system. Visually inspect the battery and cables
as described in Section 6. The level of charge in
your battery can be checked by your Hyundai
dealer or a service station.
C160E01A-AATChange to "Winter Weight" Oil if
NecessaryIn some climates it is recommended that a lower
viscosity "winter weight" oil be used during cold
weather. See Section 9 for recommendations. If
you aren't sure what weight oil you should use,
consult your Hyundai dealer.
C160C01A-AATUse High Quality Ethylene Glycol
CoolantYour Hyundai is delivered with high quality eth-
ylene glycol coolant in the cooling system. It is
the only type of coolant that should be used
because it helps prevent corrosion in the cooling
system, lubricates the water pump and prevents
freezing. Be sure to replace or replenish your
coolant in accordance with the maintenance
schedule in Section 5. Before winter, have your
coolant tested to assure that its freezing point is
sufficient for the temperatures anticipated dur-
ing the winter.
C160H01A-AATUse Approved Anti-Freeze in Window
Washer SystemTo keep the water in the window washer system
from freezing, add an approved anti-freeze so-
lution in accordance with instructions on the
container. Window washer anti-freeze is avail-
able from Hyundai dealers and most auto parts
outlets. Do not use engine coolant or other types
of anti-freeze as these may damage the finish.
C160F01A-AATCheck Spark Plugs and Ignition
SystemInspect your spark plugs as described in Sec-
tion 6 and replace them if necessary. Also
check all ignition wiring and components to be
sure they are not cracked, worn or damaged in
any way.
C160G01A-AATTo Keep Locks from FreezingTo keep the locks from freezing, squirt an ap-
proved de-icer fluid or glycerine into the key
opening. If a lock is covered with ice, squirt it
with an approved de-icing fluid to remove the
ice. If the lock is frozen internally, you may be
able to thaw it out by using a heated key. Handle
the heated key with care to avoid injury.
Page 121 of 219
DRIVING YOUR HYUNDAI
152
HIGHER SPEED MOTORING
C160I01A-AATDon't Let Your Parking Brake FreezeUnder some conditions your parking brake can
freeze in the engaged position. This is most
likely to happen when there is an accumulation
of snow or ice around or near the rear brakes or
if the brakes are wet. If you think the parking
brake may freeze, apply it only temporarily while
you put the gear selector lever in "P" (automatic)
or in first or reverse gear (manual transaxle) and
block the rear wheels so the car cannot roll.
Then release the parking brake.
C160K01A-AATCarry Emergency EquipmentDepending on the severity of the weather where
you drive your car, you should carry appropriate
emergency equipment. Some of the items you
may want to carry include tire chains, tow straps
or chains, flashlight, emergency flares, sand, a
shovel, jumper cables, a window scraper, gloves,
ground cloth, coveralls, a blanket, etc.
C160J01A-AATDon't Let Ice and Snow Accumulate
UnderneathUnder some conditions, snow and ice can build
up under the fenders and interfere with the
steering. When driving in severe winter condi-
tions where this may happen, you should peri-
odically check underneath the car to be sure the
movement of the front wheels and the steering
components is not obstructed.
C170A01A-AATPre-Trip Inspections1. Tires:
Adjust the tire inflation pressures for highway
driving. Low tire inflation pressures will result in
overheating and possible failure of the tires.
Avoid using worn or damaged tires which may
result in reduced traction or tire failure.NOTE:Never exceed the maximum tire inflation pres-
sure shown on the tires.
2. Fuel, engine coolant and engine oil:
High speed travel consumes more fuel than
urban motoring. Do not forget to check both
engine coolant and engine oil.
3. Drive belt:
A loose or damaged drive belt may result in
overheating of the engine.
Page 128 of 219
32WHAT TO DO IN AN EMERGENCY
IF THE ENGINE WILL NOT START!
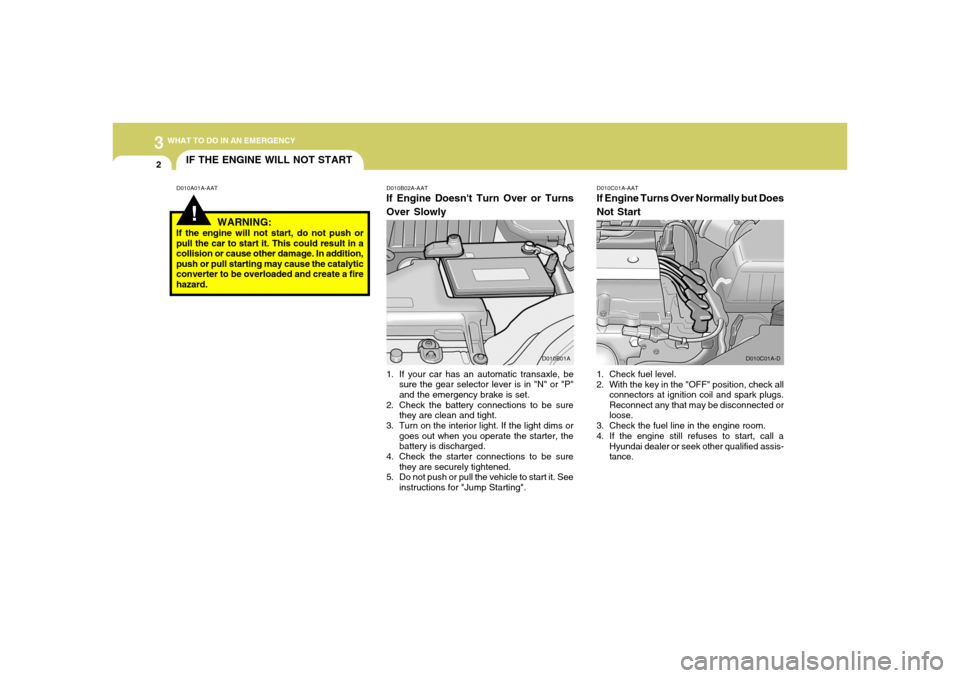
D010B02A-AATIf Engine Doesn't Turn Over or Turns
Over Slowly
D010A01A-AATD010C01A-AAT
If Engine Turns Over Normally but Does
Not Start1. Check fuel level.
2. With the key in the "OFF" position, check all
connectors at ignition coil and spark plugs.
Reconnect any that may be disconnected or
loose.
3. Check the fuel line in the engine room.
4. If the engine still refuses to start, call a
Hyundai dealer or seek other qualified assis-
tance.
WARNING:
If the engine will not start, do not push or
pull the car to start it. This could result in a
collision or cause other damage. In addition,
push or pull starting may cause the catalytic
converter to be overloaded and create a fire
hazard.
D010B01AD010C01A-D
1. If your car has an automatic transaxle, be
sure the gear selector lever is in "N" or "P"
and the emergency brake is set.
2. Check the battery connections to be sure
they are clean and tight.
3. Turn on the interior light. If the light dims or
goes out when you operate the starter, the
battery is discharged.
4. Check the starter connections to be sure
they are securely tightened.
5. Do not push or pull the vehicle to start it. See
instructions for "Jump Starting".
Page 148 of 219
5
VEHICLE MAINTENANCE REQUIREMENTS2
MAINTENANCE INTERVALSF010B01A-AATMaintenance RequirementsThe maintenance required for your Hyundai can
be divided into three main areas:
o Specified scheduled procedures
o General checks
o Do-it-yourself maintenanceF010A01A-AATService RequirementsTo ensure that you receive the greatest number
of miles of satisfying operation from your
Hyundai, certain maintenance procedures must
be performed. Although careful design and engi-
neering have reduced these to a minimum,
those that are required are of the utmost impor-
tance.
It is your responsibility to have these mainte-
nance procedures performed to comply with the
terms of the warranties covering your new
Hyundai. The Owner's Handbook supplied with
your new vehicle provides further information
about these warranties.
F010D01A-AATGeneral ChecksThese are the regular checks you should per-
form when you drive your Hyundai or you fill the
fuel tank. A list of these items will be found on
page 6-3.
F010C01A-AATSpecified Scheduled ProceduresThese are the procedures such as inspections,
adjustments and replacements that are listed in
the maintenance charts starting on page 5-4.
These procedures must be performed at the
intervals shown in the maintenance schedule to
assure that your warranty remains in effect.
Although it is strongly recommended that they
be performed by the factory-trained or distribu-
tor-trained technicians at your Hyundai dealer,
these procedures may be performed at any
qualified service facility.
It is suggested that genuine Hyundai service
parts be used for any required repairs or re-
placements. Other parts of equivalent quality
such as engine oil, engine coolant, manual or
auto transaxle oil, brake fluid and so on which
are not supplied by Hyundai Motor Company or
its distributor may be used without affecting your
warranty coverage but you should always be
sure these are equivalent to the quality of the
original Hyundai parts. Your Owner's Handbook
provides further information about your warranty
coverage.
F010E01A-AATDo-It-Yourself MaintenanceIf you are mechanically inclined, own a few tools
that are required and want to take the time to do
so, you can inspect and service a number of
items. For more information about doing it your-
self, see Section 6.
Page 153 of 219
5
VEHICLE MAINTENANCE REQUIREMENTS
7
EXPLANATION OF SCHEDULED
MAINTENANCE ITEMS
F060D01A-AATo Fuel Lines, Fuel Hoses and
ConnectionsCheck the fuel lines, fuel hoses and connec-
tions for leakage and damage. Have a trained
techincian, replace any damaged or leaking
parts immediately.
F060C01A-AATo Fuel FilterA clogged filter can limit the speed at which the
vehicle may be driven, damage the emission
system and cause hard starting. If an excessive
amount of foreign matter accumulates in the fuel
tank, the filter may require replacement more
frequently.
After installing a new filter, run the engine for
several minutes, and check for leaks at the
connections.
Fuel filters should be installed by trained techni-
cians.F060M01A-AATo Engine Oil and FilterThe engine oil and filter should be changed at
the intervals specified in the maintenance sched-
ule. If the car is being driven in severe condi-
tions, more frequent oil and filter changes are
required.
F060H01A-AATo Air Cleaner FilterA Genuine Hyundai air cleaner filter is recom-
mended when the filter is replaced.F060G01A-AATo Vapor Hose and Fuel Filler CapThe vapor hose and fuel filler cap should be
inspected at those intervals specified in the
maintenance schedule. Make sure that a new
vapor hose or fuel filler cap is correctly re-
placed.
F060F01A-AATo Vacuum, Crankcase Ventilation
HosesInspect the surface of hoses for evidence of
heat and/or mechanical damage. Hard and brittle
rubber, cracking, tears, cuts, abrasions, and
excessive swelling indicate deterioration. Par-
ticular attention should be paid to examine those
hose surfaces nearest to high heat sources,
such as the exhaust manifold.
Inspect the hose routing to assure that the
hoses do not come in contact with any heat
source, sharp edges or moving component which
might cause heat damage or mechanical wear.
Inspect all hose connections, such as clamps
and couplings, to make sure they are secure,
and that no leaks are present. Hoses should be
replaced immediately if there is any evidence of
deterioration or damage.
F060B01A-AATo Drive BeltsInspect all drive belts for evidence of cuts,
cracks, excessive wear or oil saturation and
replace if necessary. Drive belts should be
checked periodically for proper tension and ad-
justed as necessary.F060J01A-AATo Spark PlugsMake sure to install new spark plugs of the
correct heat range.
Page 154 of 219
5
VEHICLE MAINTENANCE REQUIREMENTS8
F070H01A-AATo Rear Brake Drums/Linings,
Parking BrakeCheck the rear brake drums and linings for
scoring, burning, leaking fluid, broken parts, and
excessive wear. Inspect the parking brake sys-
tem including the parking brake lever and cables.
For detailed service procedures, refer to the
Shop Manual.
F070F01A-AATo Brake Hoses and LinesVisually check for proper installation, chafing,
cracks, deterioration and any leakage. Replace
any deteriorated or damaged parts immediately.F070G02A-AATo Brake FluidCheck brake fluid level in the brake fluid reser-
voir. The level should be between "MIN" and
"MAX" marks on the side of the reservoir. Use
only hydraulic brake fluid conforming to DOT 3
or DOT 4.F070E06A-AATo Automatic Transaxle FluidThe fluid level should be in the “HOT” range of
the dipstick, after the engine and transaxle are
at normal operating temperature. Check the
automatic transaxle fluid level with the engine
running and the transaxle in neutral, with the
parking brake properly applied. Use HYUNDAI
GENUINE ATF SP III, DIAMOND ATF SP III,
SK
ATF SP III or other brands meeting the SP III
specification approved by Hyundai Motor Co.
when adding or changing fluid. Using the wrong
ATF may result in damage to the ATM.
F070K01A-AATo Exhaust Pipe and MufflerVisually inspect the exhaust pipes, muffler and
hangers for cracks, deterioration, or damage.
Start the engine and listen carefully for any
exhaust gas leakage. Tighten connections or
replace parts as necessary.F070J01A-AATo Brake Pads, Calipers and RotorsCheck the pads for excessive wear, discs for
run out and wear, and calipers for fluid leakage.
F070D01A-AATo Manual Transaxle OilInspect the manual transaxle oil according to
the maintenance schedule.NOTE:If the oil level is low, check for possible leaks
before adding oil. Do not overfill.F060E01A-AATo Timing BeltInspect all parts related to the timing belt for
damage and deformation. Replace any dam-
aged parts immediately.F070C01A-AATo CoolantThe coolant should be changed at the
intervals specified in the maintenance schedule.
Page 155 of 219
5
VEHICLE MAINTENANCE REQUIREMENTS
9
F070M01A-AATo Steering Gear Box, Linkage &
Boots/Lower Arm Ball JointWith the vehicle stopped and engine off, check
for excessive free-play in the steering wheel.
Check the linkage for bends or damage. Check
the dust boots and ball joints for deterioration,
cracks, or damage. Replace any damaged parts.F070L01A-AATo Suspension Mounting BoltsCheck the suspension connections for loose-
ness or damage. Retighten to the specified
torque.
F070Q01A-AATo Air Conditioning RefrigerantCheck the air conditioning lines and connec-
tions for leakage and damage. Check air condi-
tioning performance according to the relevant
shop manual if necessary.F070P01A-AATo Driveshafts and BootsCheck the drive shafts, boots and clamps for
cracks, deterioration, or damage. Replace any
damaged parts and, if necessary, repack the
grease.
F070N01A-AATo Power Steering Pump, Belt and
HosesCheck the power steering pump and hoses for
leakage and damage. Replace any damaged or
leaking parts immediately. Inspect the power
steering belt for evidence of cuts, cracks, ex-
cessive wear, oiliness and proper tension. Re-
place or adjust it if necessary.