light replacement Hyundai Accent 2005 Owner's Manual
[x] Cancel search | Manufacturer: HYUNDAI, Model Year: 2005, Model line: Accent, Model: Hyundai Accent 2005Pages: 219, PDF Size: 7.07 MB
Page 21 of 219
1
FEATURES OF YOUR HYUNDAI
9
WINDOW GLASS!
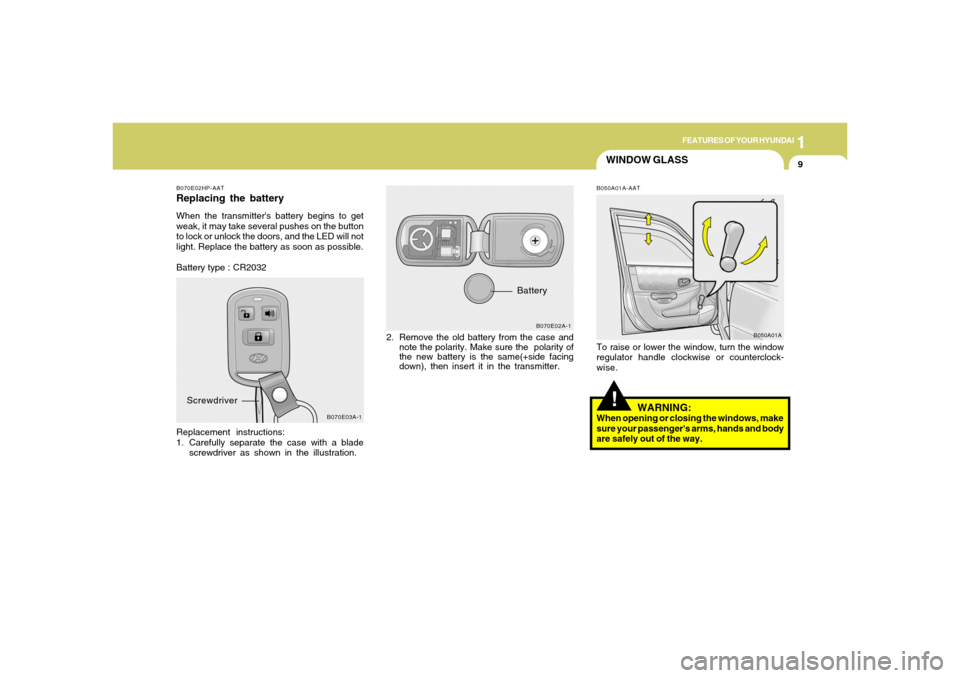
B070E02HP-AATReplacing the batteryWhen the transmitter's battery begins to get
weak, it may take several pushes on the button
to lock or unlock the doors, and the LED will not
light. Replace the battery as soon as possible.
Battery type : CR2032
Replacement instructions:
1. Carefully separate the case with a blade
screwdriver as shown in the illustration.2. Remove the old battery from the case and
note the polarity. Make sure the polarity of
the new battery is the same(+side facing
down), then insert it in the transmitter.
B070E03A-1
Screwdriver
Battery
B070E02A-1
B050A01A B050A01A-AAT
To raise or lower the window, turn the window
regulator handle clockwise or counterclock-
wise.
WARNING:
When opening or closing the windows, make
sure your passenger's arms, hands and body
are safely out of the way.
Page 64 of 219
1FEATURES OF YOUR HYUNDAI52
ASHTRAY
CIGARETTE LIGHTER
DIGITAL CLOCK
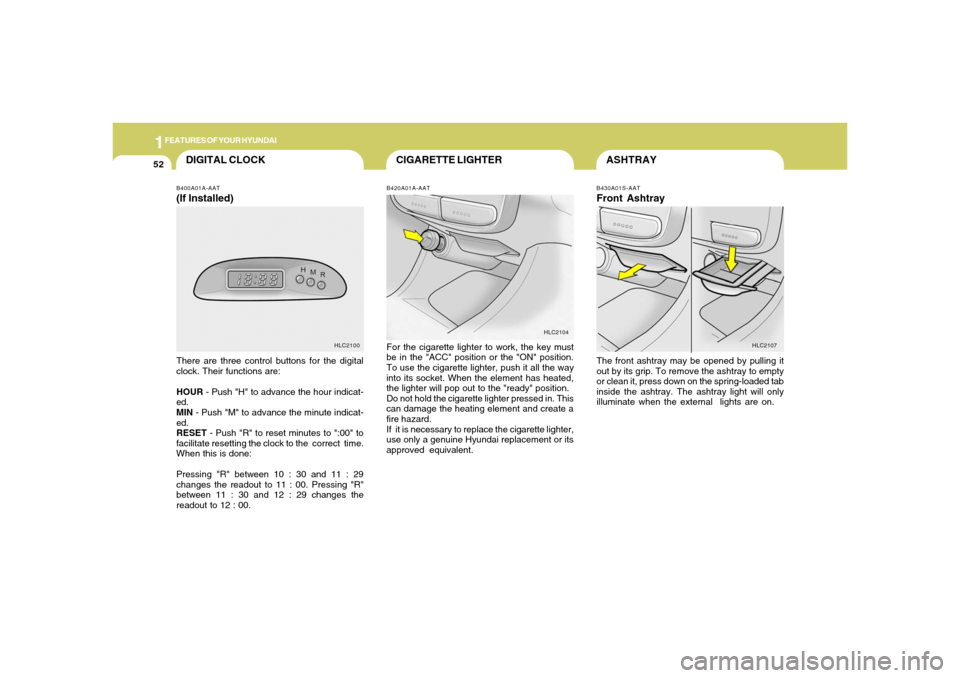
B420A01A-AATFor the cigarette lighter to work, the key must
be in the "ACC" position or the "ON" position.
To use the cigarette lighter, push it all the way
into its socket. When the element has heated,
the lighter will pop out to the "ready" position.
Do not hold the cigarette lighter pressed in. This
can damage the heating element and create a
fire hazard.
If it is necessary to replace the cigarette lighter,
use only a genuine Hyundai replacement or its
approved equivalent.
B430A01S-AATFront AshtrayThe front ashtray may be opened by pulling it
out by its grip. To remove the ashtray to empty
or clean it, press down on the spring-loaded tab
inside the ashtray. The ashtray light will only
illuminate when the external lights are on.
HLC2104
HLC2107
B400A01A-AAT(If Installed)There are three control buttons for the digital
clock. Their functions are:
HOUR - Push "H" to advance the hour indicat-
ed.
MIN - Push "M" to advance the minute indicat-
ed.
RESET - Push "R" to reset minutes to ":00" to
facilitate resetting the clock to the correct time.
When this is done:
Pressing "R" between 10 : 30 and 11 : 29
changes the readout to 11 : 00. Pressing "R"
between 11 : 30 and 12 : 29 changes the
readout to 12 : 00.
HLC2100
Page 179 of 219
6
DO-IT-YOURSELF MAINTENANCE
24
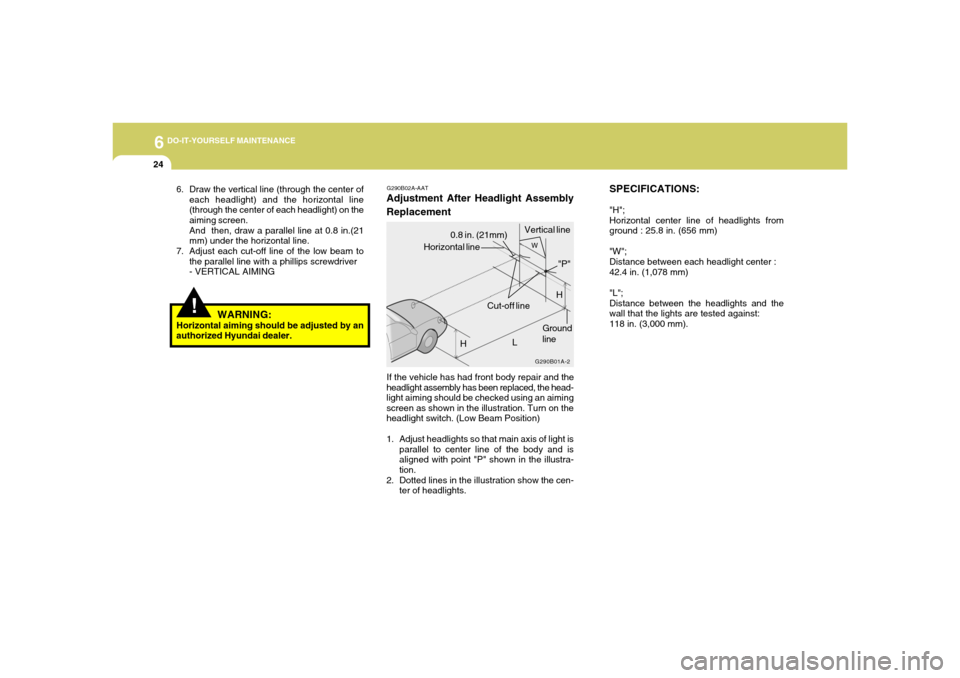
SPECIFICATIONS:"H";
Horizontal center line of headlights from
ground : 25.8 in. (656 mm)
"W";
Distance between each headlight center :
42.4 in. (1,078 mm)
"L";
Distance between the headlights and the
wall that the lights are tested against:
118 in. (3,000 mm).
G290B02A-AATAdjustment After Headlight Assembly
ReplacementIf the vehicle has had front body repair and the
headlight assembly has been replaced, the head-
light aiming should be checked using an aiming
screen as shown in the illustration. Turn on the
headlight switch. (Low Beam Position)
1. Adjust headlights so that main axis of light is
parallel to center line of the body and is
aligned with point "P" shown in the illustra-
tion.
2. Dotted lines in the illustration show the cen-
ter of headlights.
G290B01A-2
HGround
line Horizontal line0.8 in. (21mm)Vertical line
L
W
H
Cut-off line"P"
!
6. Draw the vertical line (through the center of
each headlight) and the horizontal line
(through the center of each headlight) on the
aiming screen.
And then, draw a parallel line at 0.8 in.(21
mm) under the horizontal line.
7. Adjust each cut-off line of the low beam to
the parallel line with a phillips screwdriver
- VERTICAL AIMING
WARNING:
Horizontal aiming should be adjusted by an
authorized Hyundai dealer.
Page 180 of 219
6
DO-IT-YOURSELF MAINTENANCE
25
REPLACEMENT OF LIGHT BULBS!
G260A02A-AATBefore attempting to replace a light bulb, be sure
the switch is turned to the "OFF" position.
The next paragraph shows how to reach the
light bulbs so they may be changed. Be sure to
replace the burned-out bulb with one of the
same number and wattage rating.
See page 6-31 for the wattage descriptions
CAUTION:
Keep the lamps out of contact with petro-
leum products, such as oil, gasoline, etc.
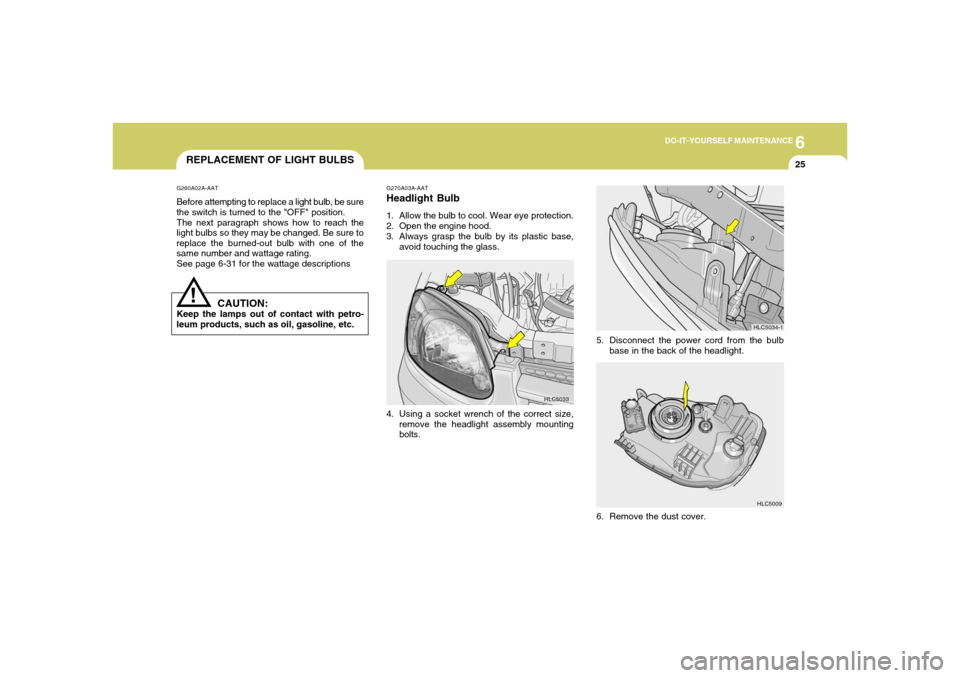
HLC5033 G270A03A-AAT
Headlight Bulb1. Allow the bulb to cool. Wear eye protection.
2. Open the engine hood.
3. Always grasp the bulb by its plastic base,
avoid touching the glass.
4. Using a socket wrench of the correct size,
remove the headlight assembly mounting
bolts.
6. Remove the dust cover.
HLC5009
5. Disconnect the power cord from the bulb
base in the back of the headlight.
HLC5034-1
Page 216 of 219
10
INDEX
4
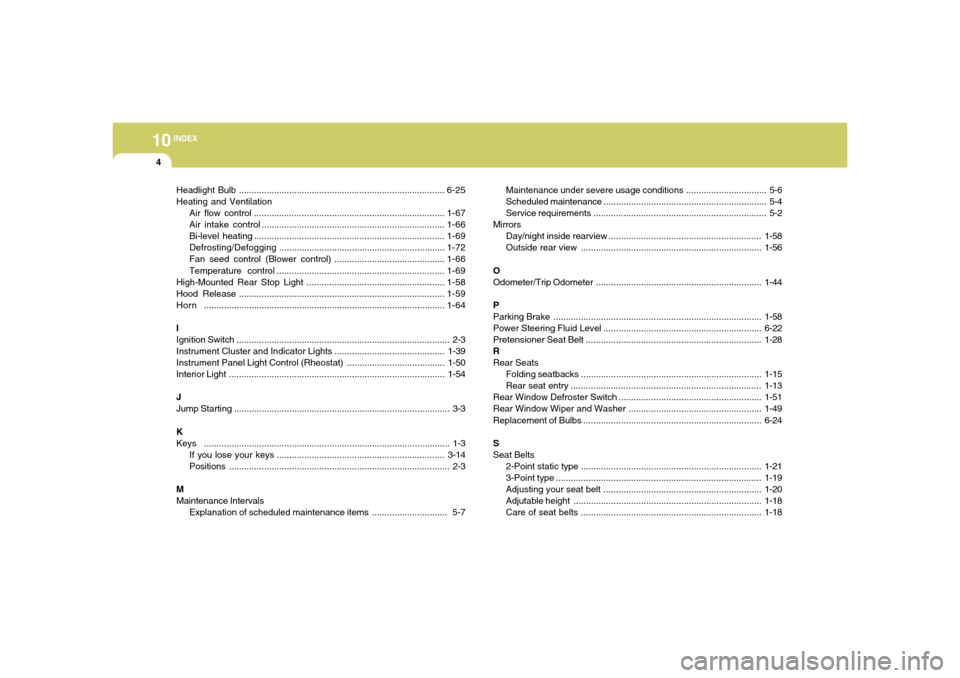
Maintenance under severe usage conditions ................................ 5-6
Scheduled maintenance................................................................. 5-4
Service requirements ..................................................................... 5-2
Mirrors
Day/night inside rearview.............................................................1-58
Outside rear view ........................................................................1-56
O
Odometer/Trip Odometer..................................................................1-44
P
Parking Brake...................................................................................1-58
Power Steering Fluid Level ...............................................................6-22
Pretensioner Seat Belt ......................................................................1-28
R
Rear Seats
Folding seatbacks........................................................................1-15
Rear seat entry ............................................................................1-13
Rear Window Defroster Switch .........................................................1-51
Rear Window Wiper and Washer.....................................................1-49
Replacement of Bulbs .......................................................................6-24
S
Seat Belts
2-Point static type ........................................................................1-21
3-Point type..................................................................................1-19
Adjusting your seat belt ...............................................................1-20
Adjutable height...........................................................................1-18
Care of seat belts ........................................................................1-18 Headlight Bulb..................................................................................6-25
Heating and Ventilation
Air flow control ............................................................................1-67
Air intake control.........................................................................1-66
Bi-level heating............................................................................1-69
Defrosting/Defogging ..................................................................1-72
Fan seed control (Blower control)............................................1-66
Temperature control...................................................................1-69
High-Mounted Rear Stop Light .......................................................1-58
Hood Release..................................................................................1-59
Horn................................................................................................1-64
I
Ignition Switch..................................................................................... 2-3
Instrument Cluster and Indicator Lights............................................
1-39
Instrument Panel Light Control (Rheostat).......................................1-50
Interior Light ......................................................................................1-54
J
Jump Starting...................................................................................... 3-3
K
Keys .................................................................................................. 1-3
If you lose your keys...................................................................3-14
Positions........................................................................................ 2-3
M
Maintenance Intervals
Explanation of scheduled maintenance items .............................. 5-7
Page 217 of 219
10
INDEX
5
Precautions..................................................................................1-16
Spark Plugs........................................................................................ 6-8
Speedometer....................................................................................1-43
Starting Procedures........................................................................... 2-5
Steering Wheel
Free-play.....................................................................................6-17
Stereo Sound System.....................................................................1-74
Sun Visor..........................................................................................1-63
T
Tachometer......................................................................................1-43
Tailgate .............................................................................................1-62
Theft-Alarm System........................................................................... 1-7
Tires
Balancing.....................................................................................8-11
Chains.........................................................................................8-10
Changing a flat tire ....................................................................... 3-7
If you have a flat tire .................................................................... 3-6
Information.................................................................................... 8-2
Pressure (see glove box) ............................................................ 8-3
Replacement...............................................................................8-11
Rotation.......................................................................................8-10
Snow tires..................................................................................... 8-9
Spare tire....................................................................................... 3-5
Traction.......................................................................................8-11
Towing
Emergency..................................................................................3-14
If your car must be towed .........................................................3-12Trailer towing..............................................................................2-16
Transaxle
Automatic....................................................................................... 2-7
Automatic transaxle fluid checking ............................................6-12
Manual........................................................................................... 2-5
Manual transaxle oil checking...................................................6-11
Trip Computer..................................................................................1-44
Trunk
Emergency latch release ...........................................................1-62
Remote release..........................................................................1-61
V
Vehicle Identification Number (VIN) ................................................. 8-2
Vehicle Load Limt ............................................................................2-16
Vehicle Specifications
Engine ............................................................................................ 9-3
Lubrication Chart.......................................................................... 9-4
Measurement................................................................................ 9-2
W
Warning and Indicatior Lights .........................................................
1-39
Windows
Manual........................................................................................... 1-9
Power..........................................................................................1-10
Windshield Wiper and Washer ........................................................1-48
Adjustable intermittent wiper operation.....................................1-49
Windshield Wiper Blades ............................................................6-10