Blink Hyundai Accent 2007 User Guide
[x] Cancel search | Manufacturer: HYUNDAI, Model Year: 2007, Model line: Accent, Model: Hyundai Accent 2007Pages: 282, PDF Size: 10.55 MB
Page 75 of 282
1
FEATURES OF YOUR HYUNDAI
63
B260E01TB-GAT Seat Belt Warning Light
(Except E.C)
The seat belt warning light blinks for about 6 seconds when the ignition key is turned from the "OFF" position to the "ON".
NOTE: If the red engine coolant temperature indicator light illuminates, it indi- cates overheating that may damagethe engine. B260E02HP-GAT Seat Belt Reminder Light and Chime (Mideast only)
The seat belt reminder light blinks for 6 seconds when the ignition key is turned from the "OFF" position to "ON" or"START". If the driver's seat belt is not fastened, the warning chime will sound at the same time.B265E01MC-GAT Seat Belt Warning Light
and Chime (E.C only)
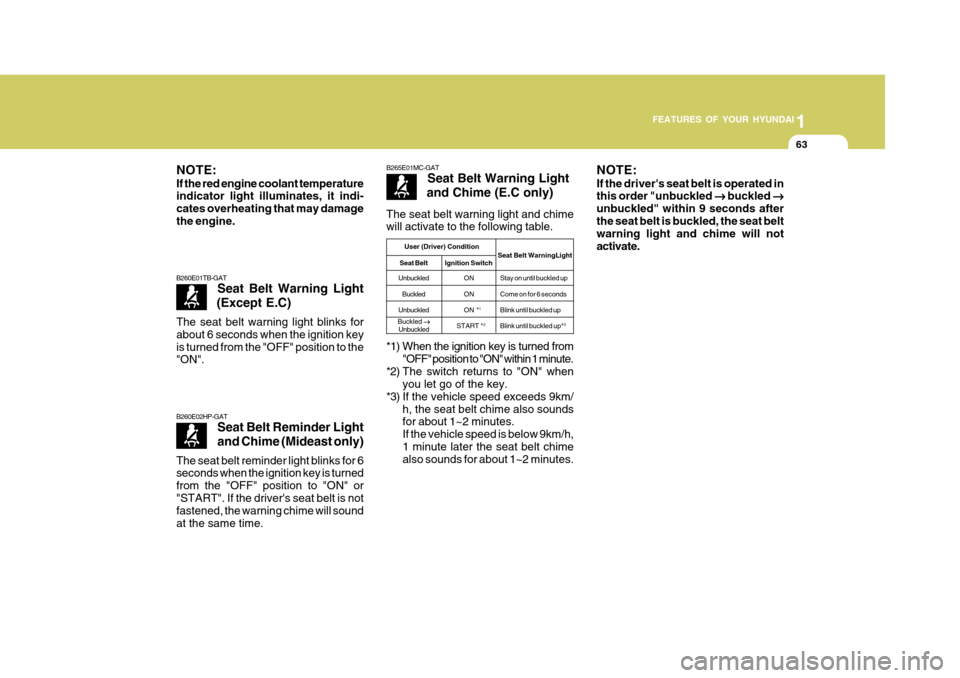
*1) When the ignition key is turned from "OFF" position to "ON" within 1 minute.
*2) The switch returns to "ON" when you let go of the key.
*3) If the vehicle speed exceeds 9km/ h, the seat belt chime also sounds for about 1~2 minutes. If the vehicle speed is below 9km/h,1 minute later the seat belt chime also sounds for about 1~2 minutes.
The seat belt warning light and chimewill activate to the following table.
User (Driver) Condition
Seat Belt WarningLight
Seat Belt Ignition Switch
Unbuckled ON Stay on until buckled up
Buckled ON Come on for 6 seconds
Unbuckled ON * 1
Blink until buckled up
START * 2
Blink until buckled up* 3
Buckled
��
��
�
Unbuckled NOTE: If the driver's seat belt is operated in this order "unbuckled
��
��
� buckled
��
��
�
unbuckled" within 9 seconds after the seat belt is buckled, the seat belt warning light and chime will not activate.
Page 76 of 282
1FEATURES OF YOUR HYUNDAI
64
B265C01NF-GAT
Electronic Stability Program Indicator Lights(If Installed)
The electronic stability program indica- tors change operation according to the ignition switch position and whether thesystem is in operation or not. They will illuminate when the ignition key is turned to the "ON" position, butshould go out after three seconds. If the ESP or ESP-OFF indicator stays on, take your car to your authorized Hyundaidealer and have the system checked. See section 2 for more information about the ESP.B260U01TB-GAT Immobilizer Warning Light (If Installed)
This indicator light comes on for some seconds after the ignition key is turnedto the "ON" position. At this time, you can start the engine. The light goes out after the engine is running. In case thislight goes out before you start the en- gine, you must turn to the "LOCK" position and restart the engine. In casethis light blinks for five seconds when the ignition key is turned to "ON" posi- tion, this indicates that the immobilizersystem is out of order. At this time, refer to the explanation of the Limp home procedure(See page 1-6) or con-sult to the Hyundai dealer.B260T01TB-GAT Electronic Power Steering (EPS) SystemWarning Light(If Installed)
This indicator light comes on about 4 seconds after the ignition key is turned to the "ON" position or after the engineis started, it will go out. This light also comes on when the EPS has some troubles. If it comes on whiledriving, have your vehicle inspected by an authorized Hyundai Dealer. NOTE: When you move the electronic power steering back-end and forth-end con- tinuously in stop position, steering wheel plays heavily to operate anti-overload system. It is normal condi- tion. It returns to be normal getting time.
Page 77 of 282
1
FEATURES OF YOUR HYUNDAI
65
B265A01MC-GAT Fuel Filter Warning Light (Diesel Engine)
This warning light illuminates for 6 sec- onds after the ignition switch is set tothe "ON" position or after the engine is started, it will go out. If it lights up while the engine is running, it indicates thatwater has accumulated inside the fuel filter. If this happens, remove the water from the fuel filter. (Refer to "6-25 page")
B260S01MC-GAT
Diesel Preheat Indicator Light
The indicator light illuminates amber when the ignition switch is placed at the"ON" position. The engine can be started after the preheat indicator light goes off. The illuminating time varies with thewater temperature, air temperature and battery condition. NOTE: If the engine were not started within 10 seconds after the preheating is completed, turn the ignition key once more to the "LOCK" position, andthen to the "ON" position, in order to preheat again.
! CAUTION:
If the preheat indicator light contin- ues to illuminate or flash on and off after the engine has warmed up orwhile driving, check the system by an authorized Hyundai dealer as soon as possible.
! CAUTION:
When the fuel filter warning light is illuminated, engine power (vehicle speed & idle speed) may decrease. If you keep driving with the warninglight on, you can damage your vehicle's engine parts and injection system of the Common Rail. If thisoccurs, have your vehicle checked by an authorized Hyundai dealer as soon as possible. B900A01A-GAT ACOUSTIC WARNING SOUND (If Installed) The acoustic warning chime sounds when the tail lights are on and the door in driver side is open. This prevents thebattery from discharging when the car is left with the tail lights on. The chime sounds until the tail lights are turned off.
SB210U1-G OVER SPEED WARNING BUZZER (If Installed) When the car speed is in excess of 120 km/h (75 mph), a buzzer will sound to warn you.
SB215U1-G
Overspeed warning light (If Installed)
If you drive with the speed of 120 km/h or more, the overspeed warning lightwill blink. This is to prevent you from driving your vehicle with overspeed.
120
km/h
Page 83 of 282
1
FEATURES OF YOUR HYUNDAI
71
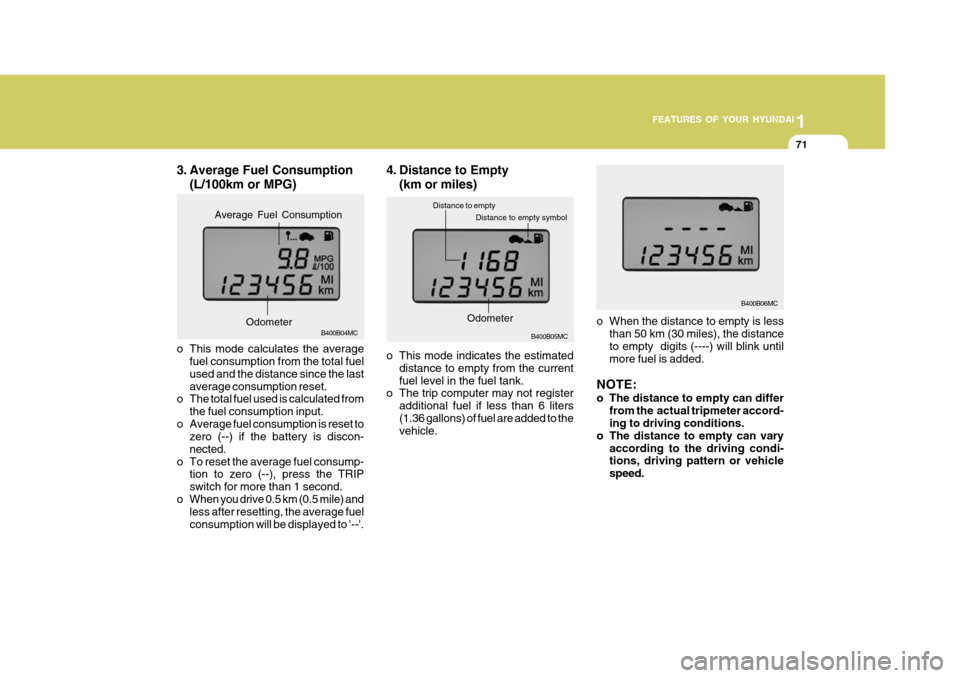
3. Average Fuel Consumption
(L/100km or MPG)
B400B04MC
o This mode calculates the average fuel consumption from the total fuel used and the distance since the lastaverage consumption reset.
o The total fuel used is calculated from
the fuel consumption input.
o Average fuel consumption is reset to zero (--) if the battery is discon-nected.
o To reset the average fuel consump- tion to zero (--), press the TRIPswitch for more than 1 second.
o When you drive 0.5 km (0.5 mile) and less after resetting, the average fuelconsumption will be displayed to '--'.
Odometer
Average Fuel Consumption
o When the distance to empty is less
than 50 km (30 miles), the distance to empty digits (----) will blink untilmore fuel is added.
NOTE:
o The distance to empty can differ from the actual tripmeter accord- ing to driving conditions.
o The distance to empty can vary according to the driving condi-tions, driving pattern or vehicle speed.
4. Distance to Empty
(km or miles)
o This mode indicates the estimated distance to empty from the currentfuel level in the fuel tank.
o The trip computer may not register
additional fuel if less than 6 liters(1.36 gallons) of fuel are added to the vehicle. B400B05MC
Distance to empty symbol
Distance to empty
B400B06MC
Odometer
Page 84 of 282
1FEATURES OF YOUR HYUNDAI
72
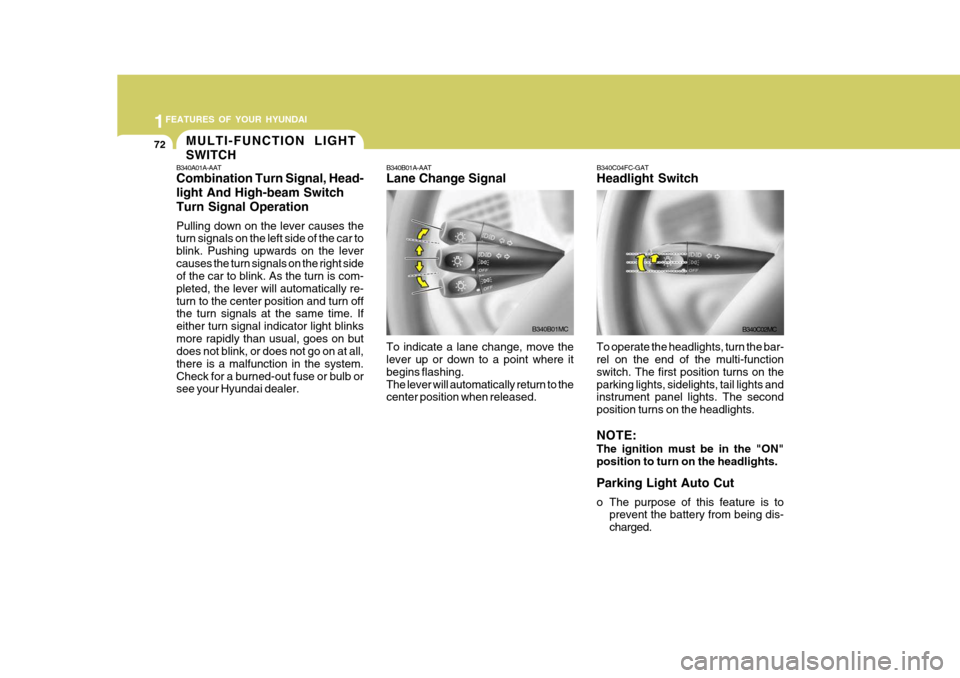
B340A01A-AAT Combination Turn Signal, Head- light And High-beam SwitchTurn Signal Operation Pulling down on the lever causes the turn signals on the left side of the car to blink. Pushing upwards on the levercauses the turn signals on the right side of the car to blink. As the turn is com- pleted, the lever will automatically re-turn to the center position and turn off the turn signals at the same time. If either turn signal indicator light blinksmore rapidly than usual, goes on but does not blink, or does not go on at all, there is a malfunction in the system.Check for a burned-out fuse or bulb or see your Hyundai dealer. B340B01A-AAT Lane Change Signal To indicate a lane change, move the lever up or down to a point where it begins flashing.The lever will automatically return to the center position when released.
B340B01MC
B340C04FC-GAT Headlight Switch
To operate the headlights, turn the bar- rel on the end of the multi-function switch. The first position turns on theparking lights, sidelights, tail lights and instrument panel lights. The second position turns on the headlights. NOTE: The ignition must be in the "ON" position to turn on the headlights. Parking Light Auto Cut
o The purpose of this feature is to prevent the battery from being dis- charged.B340C02MC
MULTI-FUNCTION LIGHT SWITCH
Page 88 of 282
1FEATURES OF YOUR HYUNDAI
76
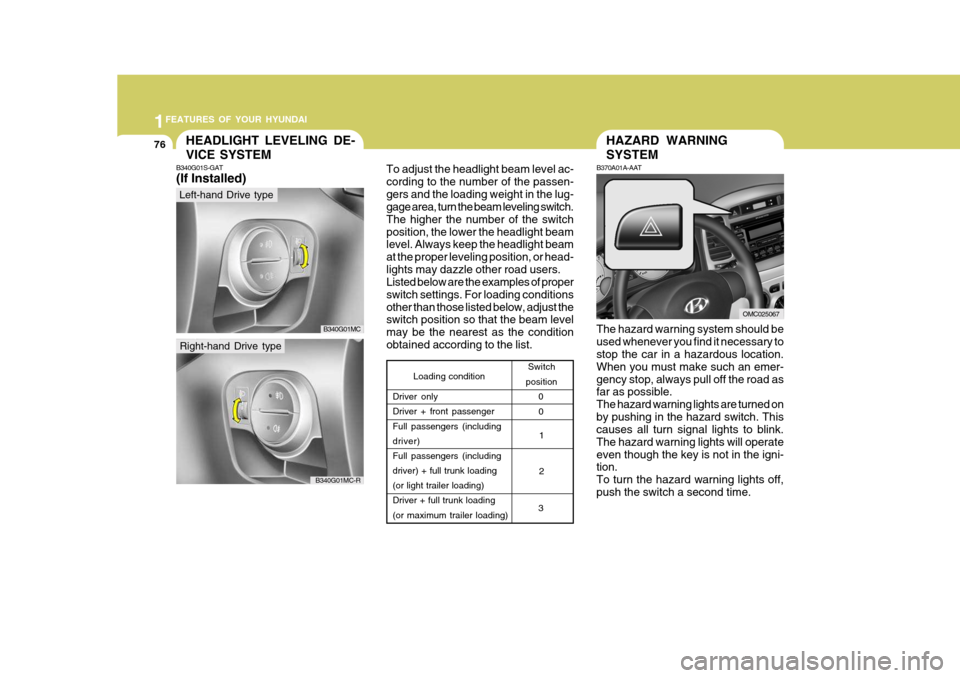
Loading condition Switch
position
Driver only Driver + front passenger Full passengers (including driver)Full passengers (including driver) + full trunk loading (or light trailer loading)Driver + full trunk loading (or maximum trailer loading) 0
1 2
3 0
To adjust the headlight beam level ac- cording to the number of the passen-gers and the loading weight in the lug- gage area, turn the beam leveling switch. The higher the number of the switchposition, the lower the headlight beam level. Always keep the headlight beam at the proper leveling position, or head-lights may dazzle other road users. Listed below are the examples of proper switch settings. For loading conditionsother than those listed below, adjust the switch position so that the beam level may be the nearest as the conditionobtained according to the list.
HAZARD WARNING SYSTEM
B370A01A-AAT
The hazard warning system should be used whenever you find it necessary to stop the car in a hazardous location. When you must make such an emer-gency stop, always pull off the road as far as possible. The hazard warning lights are turned onby pushing in the hazard switch. This causes all turn signal lights to blink. The hazard warning lights will operateeven though the key is not in the igni- tion. To turn the hazard warning lights off,push the switch a second time.
OMC025067
HEADLIGHT LEVELING DE- VICE SYSTEM
B340G01S-GAT (If Installed)
Left-hand Drive type
Right-hand Drive type
B340G01MC
B340G01MC-R
Page 157 of 282
1
FEATURES OF YOUR HYUNDAI
145
1
FEATURES OF YOUR HYUNDAI
145
1
FEATURES OF YOUR HYUNDAI
145
1
FEATURES OF YOUR HYUNDAI
145
M465F01MC-GAT 1. LOAD Button This compact disc player will accom- modate up to six compact discs.To insert multiple discs into the player, perform the following:
1. Press and release the LOAD Button.
2. Green light on the slot will be illumi- nated and the lowest number of empty slot will blink on the display. After “WAIT” is displayed on the LCD, the slot will open with “LOAD”displayed on the LCD.
3. Insert a disc partway into the slot,
label side up. The player will pull thedisc in.
When the disc is inserted, the disc willbegin to play automatically. NOTE :
o The disc can be only inserted while the green light is blinking on the slot.
o This CD player is suitable only for
12 cm discs, do not use irregularshaped CDs. To insert multiple discs do the follow- ings:
1. Press and hold the LOAD button for
one second or more. You will then hear a beep sound and the green light on the slot will be illuminated, and the numbers ofempty disc will blink on the display.
2. After “WAIT” is displayed on the LCD
with the lowest number of empty slotblinking, the slot will open with “LOAD” displayed on the LCD.
3. Insert a disc partway into the slot, label side up. The player will pull thedisc in. Once the disc is loaded, the num-bers of the empty disc will blink on the display continuously. If the next “DISC NO.” is displayedwhen the slot is illuminated, you can then load another disc.
4. Load the remaining disc by following the same procedures 1 and 2. Whenyou finished loading 6 discs, the CD player will begin to play the last CDloaded.
5. To load more than one disc but less
than six, complete Steps 1 and 2. When you have finished loading discs,press LOAD button to cancel the load-ing function or wait for 10 seconds. The CD player will begin to play the last CD loaded. As each CD starts to play, theDISC number will appear on the dis- play. NOTE : The disc player takes up to six discs. Do not try to load more than six. 2. CD/AUX Button
o Press the CD Button to start CD
playback, during radio operation or cassette tape playing.
o When discs are in the CD deck, if you press the CD button, the CD playerwill begin playing even if the radio orcassette player is being used.
o The CD player can be used when the
ignition switch is in either the “ON” or“ACC” position.
o Push the CD button to start CD
playback without pushing Power ON-OFF control knob. (Only when a CD is in the deck.
Page 177 of 282
2 DRIVING YOUR HYUNDAI
14
!
CAUTION:
Driving with varying tire or wheel size may cause the ESP system to malfunction. When replacing tires,make sure they are the same size as your original tires.!
ELECTRONIC STABILITY PROGRAM (ESP)
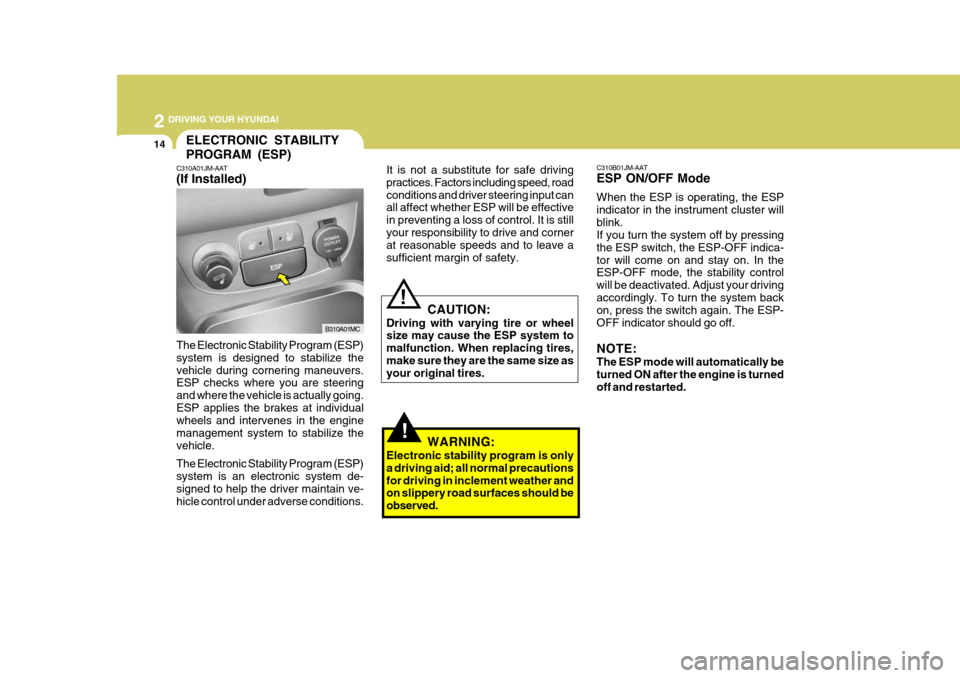
C310A01JM-AAT (If Installed) It is not a substitute for safe driving practices. Factors including speed, roadconditions and driver steering input can all affect whether ESP will be effective in preventing a loss of control. It is stillyour responsibility to drive and corner at reasonable speeds and to leave a sufficient margin of safety.
B310A01MC C310B01JM-AAT ESP ON/OFF Mode When the ESP is operating, the ESP indicator in the instrument cluster willblink. If you turn the system off by pressing the ESP switch, the ESP-OFF indica-tor will come on and stay on. In the ESP-OFF mode, the stability control will be deactivated. Adjust your drivingaccordingly. To turn the system back on, press the switch again. The ESP- OFF indicator should go off. NOTE: The ESP mode will automatically be turned ON after the engine is turnedoff and restarted.
The Electronic Stability Program (ESP)system is designed to stabilize thevehicle during cornering maneuvers. ESP checks where you are steering and where the vehicle is actually going.ESP applies the brakes at individual wheels and intervenes in the engine management system to stabilize thevehicle. The Electronic Stability Program (ESP) system is an electronic system de- signed to help the driver maintain ve- hicle control under adverse conditions. WARNING:
Electronic stability program is onlya driving aid; all normal precautionsfor driving in inclement weather and on slippery road surfaces should be observed.