Hyundai Accent 2008 Owner's Guide
Manufacturer: HYUNDAI, Model Year: 2008, Model line: Accent, Model: Hyundai Accent 2008Pages: 273, PDF Size: 9.36 MB
Page 21 of 273
1
FEATURES OF YOUR HYUNDAI
91
FEATURES OF YOUR HYUNDAI
9
!
B070B02MC-A B070B01MC-AAT
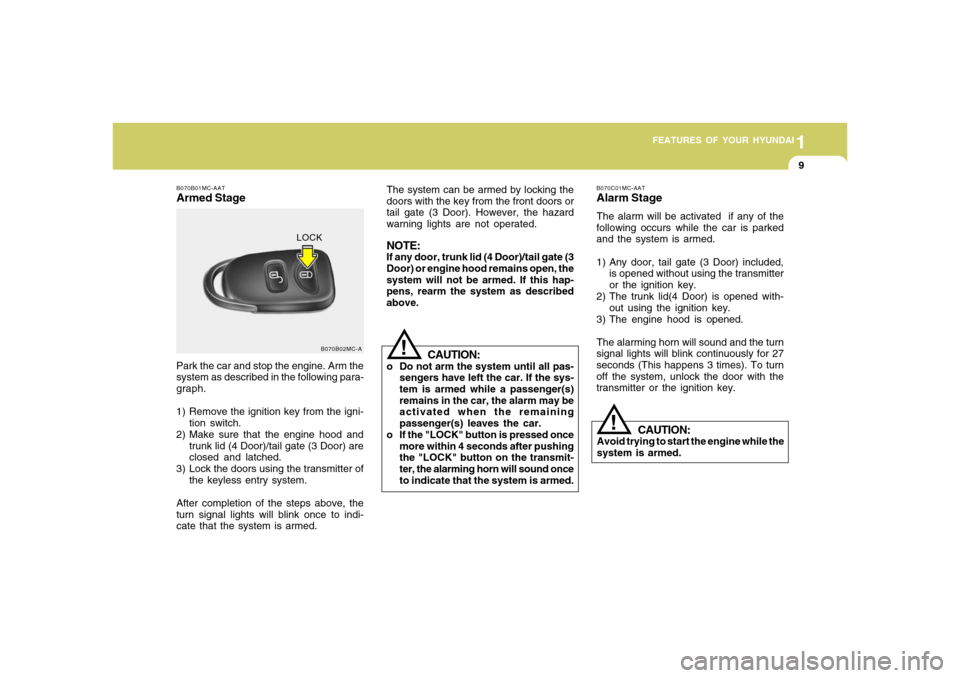
Armed StagePark the car and stop the engine. Arm the
system as described in the following para-
graph.
1) Remove the ignition key from the igni-
tion switch.
2) Make sure that the engine hood and
trunk lid (4 Door)/tail gate (3 Door) are
closed and latched.
3) Lock the doors using the transmitter of
the keyless entry system.
After completion of the steps above, the
turn signal lights will blink once to indi-
cate that the system is armed.The system can be armed by locking the
doors with the key from the front doors or
tail gate (3 Door). However, the hazard
warning lights are not operated.
NOTE:If any door, trunk lid (4 Door)/tail gate (3
Door) or engine hood remains open, the
system will not be armed. If this hap-
pens, rearm the system as described
above.
CAUTION:
o Do not arm the system until all pas-
sengers have left the car. If the sys-
tem is armed while a passenger(s)
remains in the car, the alarm may be
activated when the remaining
passenger(s) leaves the car.
o If the "LOCK" button is pressed once
more within 4 seconds after pushing
the "LOCK" button on the transmit-
ter, the alarming horn will sound once
to indicate that the system is armed.
LOCK
B070C01MC-AATAlarm StageThe alarm will be activated if any of the
following occurs while the car is parked
and the system is armed.
1) Any door, tail gate (3 Door) included,
is opened without using the transmitter
or the ignition key.
2) The trunk lid(4 Door) is opened with-
out using the ignition key.
3) The engine hood is opened.
The alarming horn will sound and the turn
signal lights will blink continuously for 27
seconds (This happens 3 times). To turn
off the system, unlock the door with the
transmitter or the ignition key.
CAUTION:
Avoid trying to start the engine while the
system is armed.
!
Page 22 of 273
1FEATURES OF YOUR HYUNDAI10
B070E01MC-AATReplacing the batteryWhen the transmitter's battery begins to
get weak, it may take several pushes on
the button to lock or unlock the doors, and
the LED will not light. Replace the battery
as soon as possible.
Battery type : CR2032
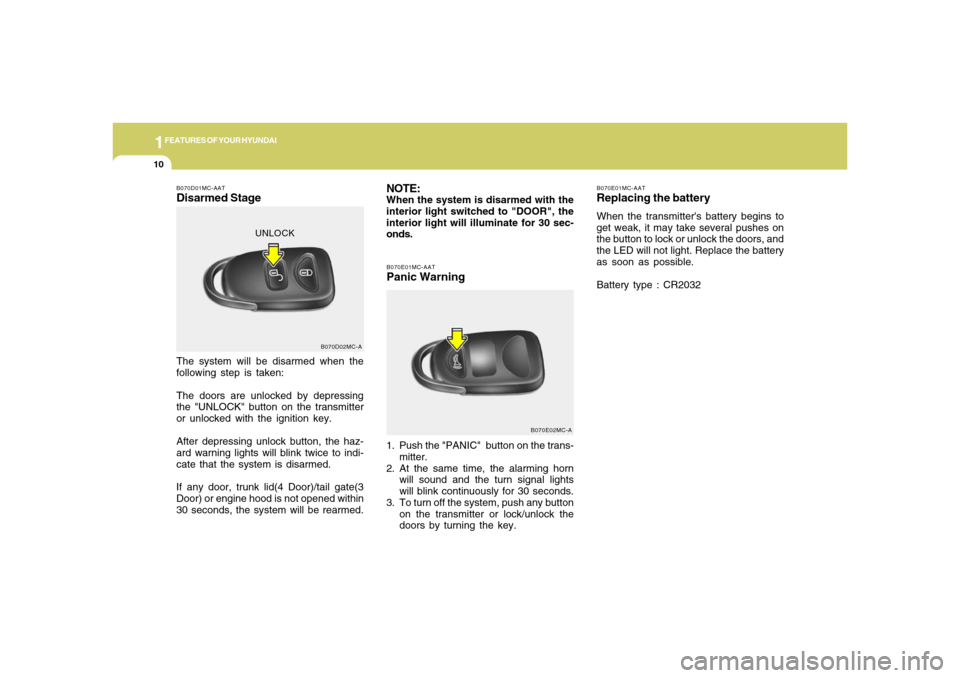
B070E01MC-AATPanic Warning1. Push the "PANIC" button on the trans-
mitter.
2. At the same time, the alarming horn
will sound and the turn signal lights
will blink continuously for 30 seconds.
3. To turn off the system, push any button
on the transmitter or lock/unlock the
doors by turning the key.
B070E02MC-A B070D01MC-AAT
Disarmed StageThe system will be disarmed when the
following step is taken:
The doors are unlocked by depressing
the "UNLOCK" button on the transmitter
or unlocked with the ignition key.
After depressing unlock button, the haz-
ard warning lights will blink twice to indi-
cate that the system is disarmed.
If any door, trunk lid(4 Door)/tail gate(3
Door) or engine hood is not opened within
30 seconds, the system will be rearmed.
B070D02MC-A
NOTE:When the system is disarmed with the
interior light switched to "DOOR", the
interior light will illuminate for 30 sec-
onds.
UNLOCK
Page 23 of 273
1
FEATURES OF YOUR HYUNDAI
111
FEATURES OF YOUR HYUNDAI
11
Battery
1KMA2003
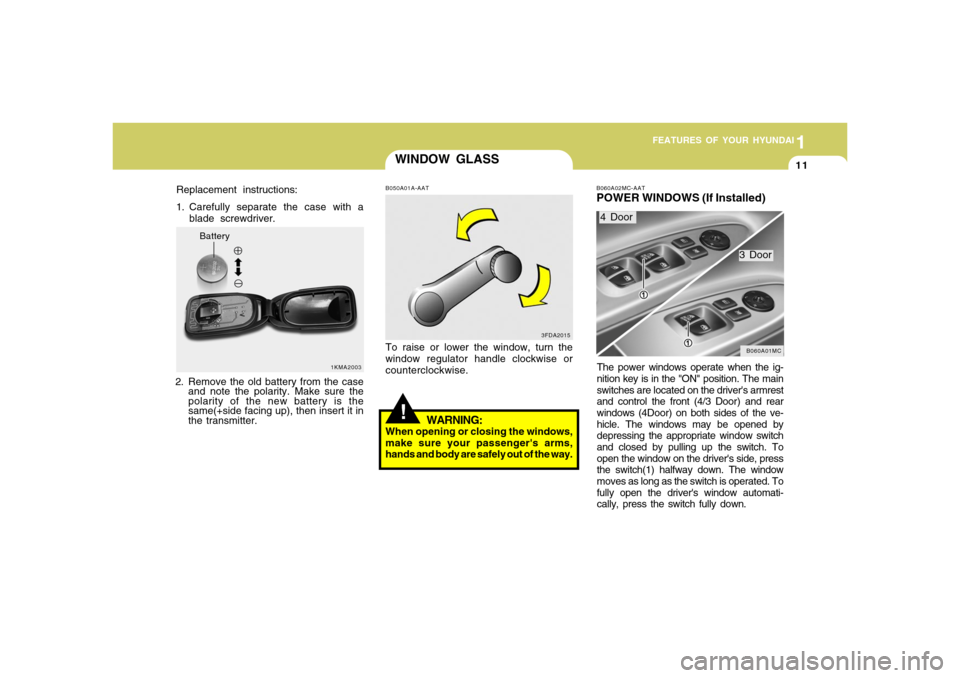
Replacement instructions:
1. Carefully separate the case with a
blade screwdriver.
2. Remove the old battery from the case
and note the polarity. Make sure the
polarity of the new battery is the
same(+side facing up), then insert it in
the transmitter.
WINDOW GLASS!
3FDA2015 B050A01A-AAT
To raise or lower the window, turn the
window regulator handle clockwise or
counterclockwise.
WARNING:
When opening or closing the windows,
make sure your passenger's arms,
hands and body are safely out of the way.
B060A02MC-AATPOWER WINDOWS (If Installed)The power windows operate when the ig-
nition key is in the "ON" position. The main
switches are located on the driver's armrest
and control the front (4/3 Door) and rear
windows (4Door) on both sides of the ve-
hicle. The windows may be opened by
depressing the appropriate window switch
and closed by pulling up the switch. To
open the window on the driver's side, press
the switch(1) halfway down. The window
moves as long as the switch is operated. To
fully open the driver's window automati-
cally, press the switch fully down.4 Door
3 Door
B060A01MC
Page 24 of 273
1FEATURES OF YOUR HYUNDAI12
!
WARNING:
o Passengers can be injured if their
head, hands or other body parts are
trapped by a closing window. Al-
ways check for obstructions before
raising any window.
o NEVER leave the ignition key in the
vehicle.
o NEVER leave any child unattended
in the vehicle. Even very young
children may inadvertently cause the
vehicle to move, entangle them-
selves in the windows, or otherwise
injure themselves or others.
o Do not attempt to operate the main
switch on the driver's door and a
switch on another door in opposing
directions at the same time. If this is
done, the window will stop and can-
not be opened or closed.
OMC025015
NOTE:The power windows can be operated for
30 seconds after the ignition key is
turned to the "ACC" or "LOCK" posi-
tions, or removed from the ignition
switch. If the front doors are opened
during this 30 second period, the power
windows can no longer be operated with-
out the ignition key turned to the "ON"
position.
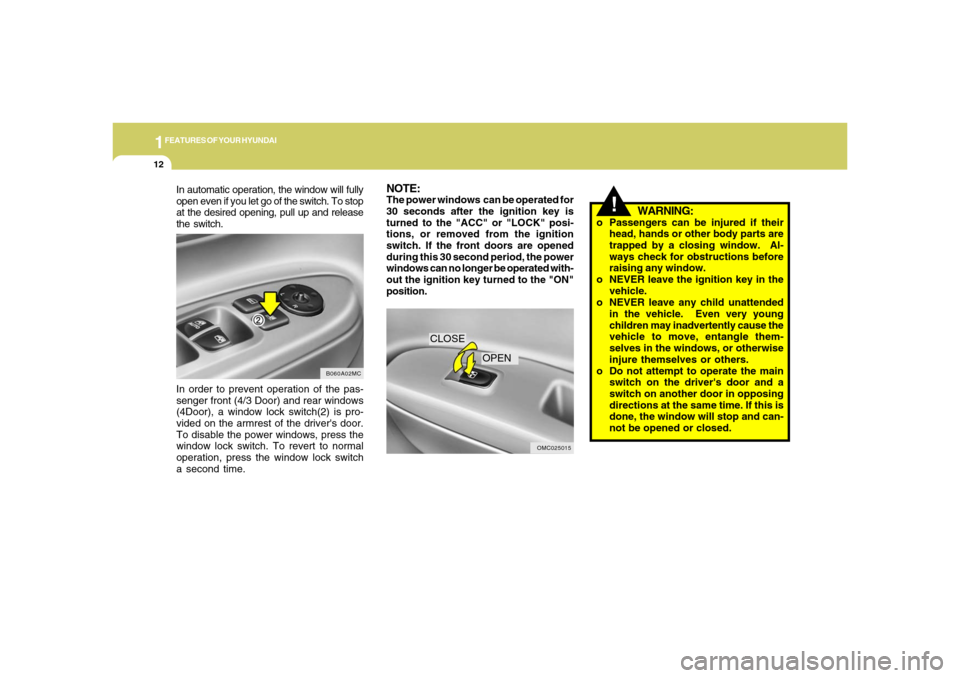
In order to prevent operation of the pas-
senger front (4/3 Door) and rear windows
(4Door), a window lock switch(2) is pro-
vided on the armrest of the driver's door.
To disable the power windows, press the
window lock switch. To revert to normal
operation, press the window lock switch
a second time.
B060A02MC
In automatic operation, the window will fully
open even if you let go of the switch. To stop
at the desired opening, pull up and release
the switch.
CLOSE
OPEN
Page 25 of 273
1
FEATURES OF YOUR HYUNDAI
131
FEATURES OF YOUR HYUNDAI
13
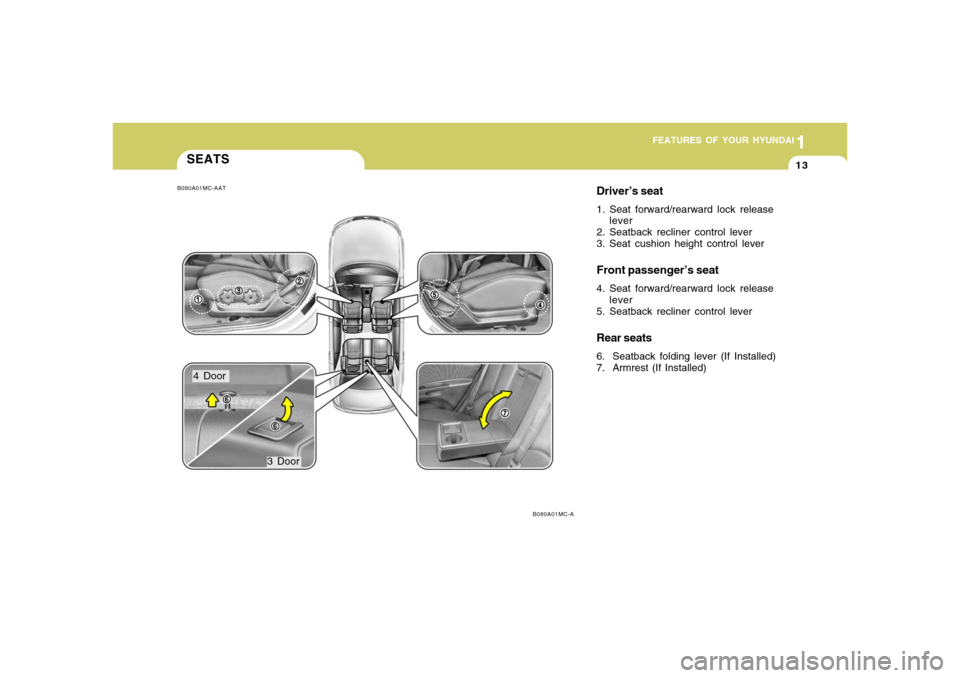
SEATSB080A01MC-AAT
B080A01MC-A
Driver’s seat1. Seat forward/rearward lock release
lever
2. Seatback recliner control lever
3. Seat cushion height control leverFront passenger’s seat4. Seat forward/rearward lock release
lever
5. Seatback recliner control leverRear seats6. Seatback folding lever (If Installed)
7. Armrest (If Installed)
4 Door
3 Door
Page 26 of 273
1FEATURES OF YOUR HYUNDAI14
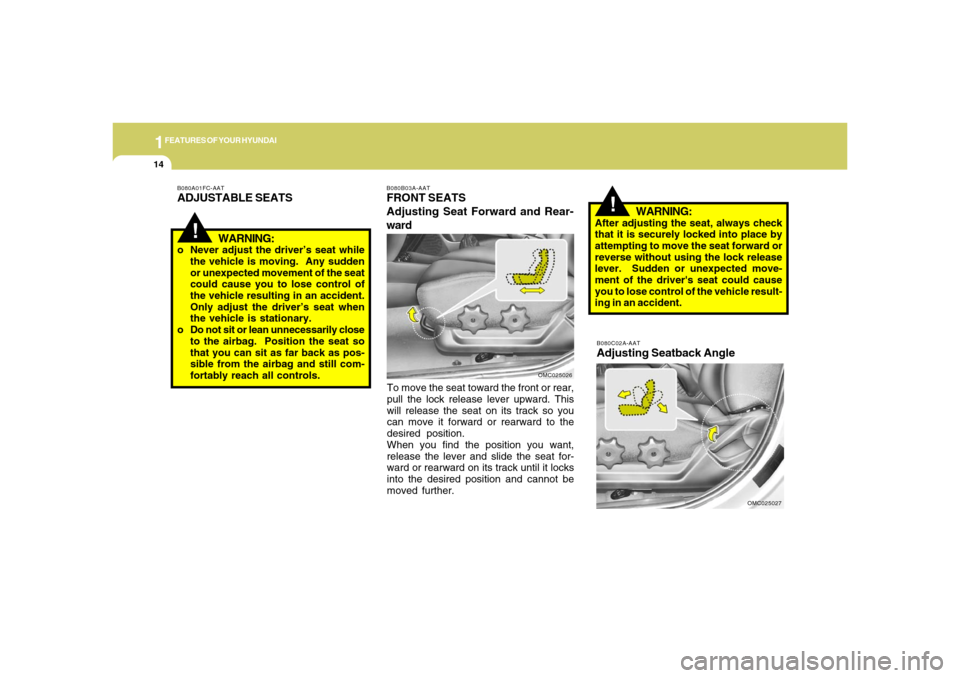
B080C02A-AATAdjusting Seatback Angle
OMC025027
To move the seat toward the front or rear,
pull the lock release lever upward. This
will release the seat on its track so you
can move it forward or rearward to the
desired position.
When you find the position you want,
release the lever and slide the seat for-
ward or rearward on its track until it locks
into the desired position and cannot be
moved further.
OMC025026
!
WARNING:
After adjusting the seat, always check
that it is securely locked into place by
attempting to move the seat forward or
reverse without using the lock release
lever. Sudden or unexpected move-
ment of the driver's seat could cause
you to lose control of the vehicle result-
ing in an accident.
B080B03A-AATFRONT SEATS
Adjusting Seat Forward and Rear-
ward
!
WARNING:
o Never adjust the driver’s seat while
the vehicle is moving. Any sudden
or unexpected movement of the seat
could cause you to lose control of
the vehicle resulting in an accident.
Only adjust the driver’s seat when
the vehicle is stationary.
o Do not sit or lean unnecessarily close
to the airbag. Position the seat so
that you can sit as far back as pos-
sible from the airbag and still com-
fortably reach all controls.B080A01FC-AATADJUSTABLE SEATS
Page 27 of 273
1
FEATURES OF YOUR HYUNDAI
151
FEATURES OF YOUR HYUNDAI
15
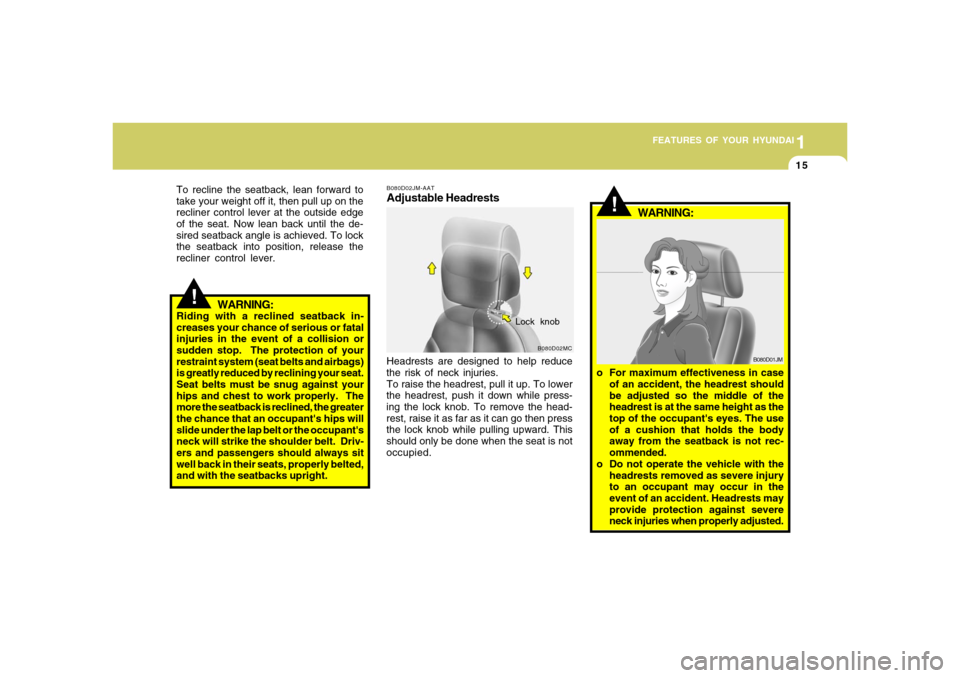
To recline the seatback, lean forward to
take your weight off it, then pull up on the
recliner control lever at the outside edge
of the seat. Now lean back until the de-
sired seatback angle is achieved. To lock
the seatback into position, release the
recliner control lever.
!
WARNING:
Riding with a reclined seatback in-
creases your chance of serious or fatal
injuries in the event of a collision or
sudden stop. The protection of your
restraint system (seat belts and airbags)
is greatly reduced by reclining your seat.
Seat belts must be snug against your
hips and chest to work properly. The
more the seatback is reclined, the greater
the chance that an occupant's hips will
slide under the lap belt or the occupant's
neck will strike the shoulder belt. Driv-
ers and passengers should always sit
well back in their seats, properly belted,
and with the seatbacks upright.
B080D02JM-AATAdjustable HeadrestsHeadrests are designed to help reduce
the risk of neck injuries.
To raise the headrest, pull it up. To lower
the headrest, push it down while press-
ing the lock knob. To remove the head-
rest, raise it as far as it can go then press
the lock knob while pulling upward. This
should only be done when the seat is not
occupied.
B080D02MC
Lock knob
!
WARNING:
o For maximum effectiveness in case
of an accident, the headrest should
be adjusted so the middle of the
headrest is at the same height as the
top of the occupant's eyes. The use
of a cushion that holds the body
away from the seatback is not rec-
ommended.
o Do not operate the vehicle with the
headrests removed as severe injury
to an occupant may occur in the
event of an accident. Headrests may
provide protection against severe
neck injuries when properly adjusted.
B080D01JM
Page 28 of 273
1FEATURES OF YOUR HYUNDAI16
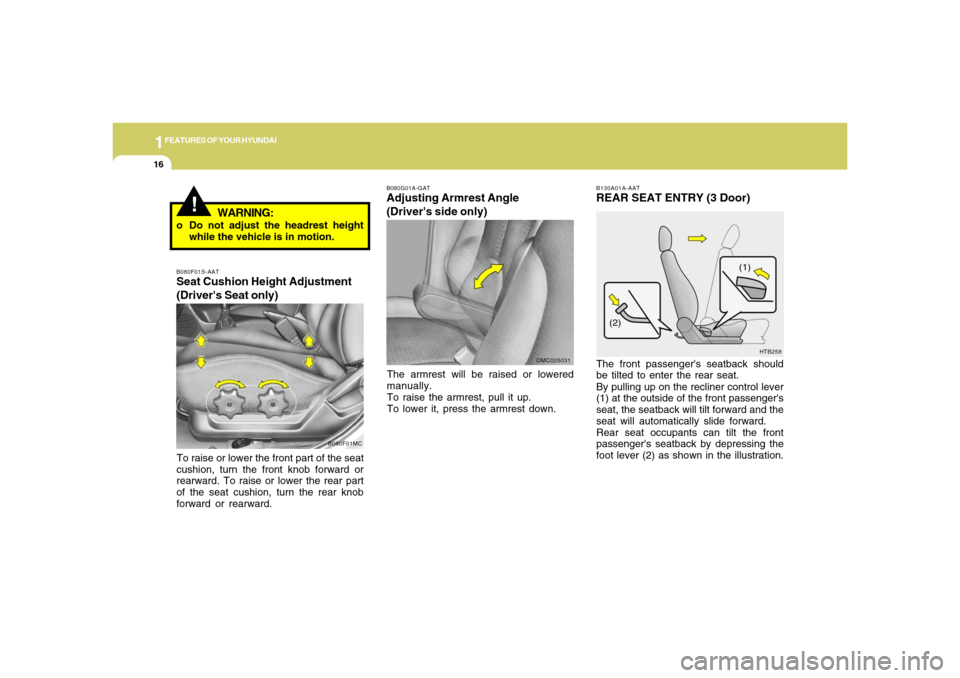
B130A01A-AATREAR SEAT ENTRY (3 Door)The front passenger's seatback should
be tilted to enter the rear seat.
By pulling up on the recliner control lever
(1) at the outside of the front passenger's
seat, the seatback will tilt forward and the
seat will automatically slide forward.
Rear seat occupants can tilt the front
passenger's seatback by depressing the
foot lever (2) as shown in the illustration.
HTB258
(1)
(2)
!
WARNING:
B080F01S-AATSeat Cushion Height Adjustment
(Driver's Seat only)To raise or lower the front part of the seat
cushion, turn the front knob forward or
rearward. To raise or lower the rear part
of the seat cushion, turn the rear knob
forward or rearward.
B080F01MCB080G01A-GAT
Adjusting Armrest Angle
(Driver's side only)The armrest will be raised or lowered
manually.
To raise the armrest, pull it up.
To lower it, press the armrest down.
OMC025031
o Do not adjust the headrest height
while the vehicle is in motion.
Page 29 of 273
1
FEATURES OF YOUR HYUNDAI
171
FEATURES OF YOUR HYUNDAI
17
!
WARNING:
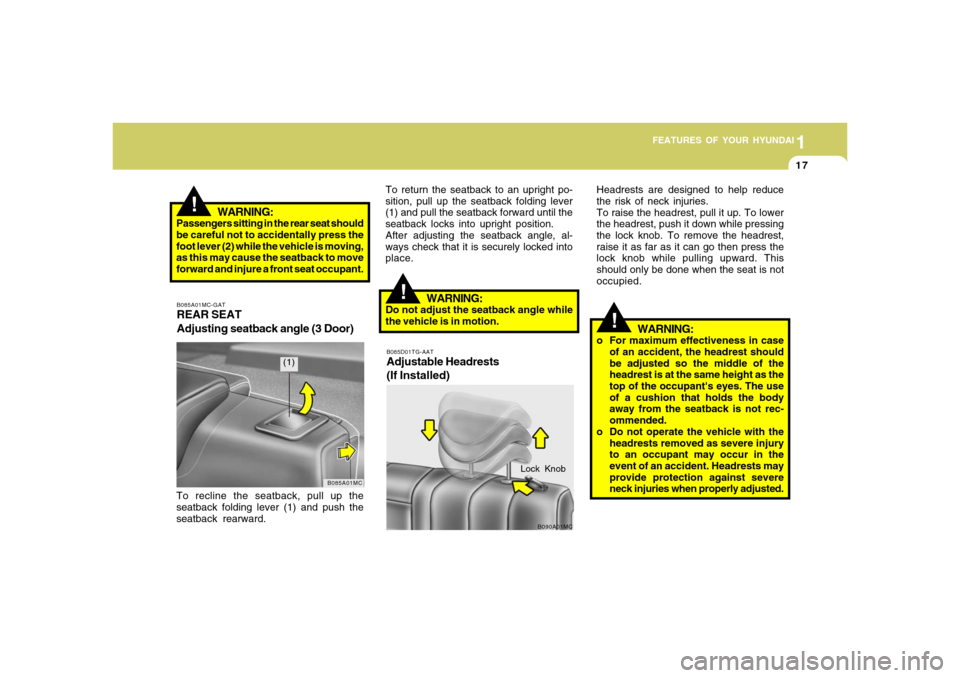
Passengers sitting in the rear seat should
be careful not to accidentally press the
foot lever (2) while the vehicle is moving,
as this may cause the seatback to move
forward and injure a front seat occupant.B085A01MC-GATREAR SEAT
Adjusting seatback angle (3 Door)To recline the seatback, pull up the
seatback folding lever (1) and push the
seatback rearward.
B085A01MC
(1)
To return the seatback to an upright po-
sition, pull up the seatback folding lever
(1) and pull the seatback forward until the
seatback locks into upright position.
After adjusting the seatback angle, al-
ways check that it is securely locked into
place.
!
WARNING:
Do not adjust the seatback angle while
the vehicle is in motion.
Lock Knob
B085D01TG-AATAdjustable Headrests
(If Installed)
B090A01MC
Headrests are designed to help reduce
the risk of neck injuries.
To raise the headrest, pull it up. To lower
the headrest, push it down while pressing
the lock knob. To remove the headrest,
raise it as far as it can go then press the
lock knob while pulling upward. This
should only be done when the seat is not
occupied.
!
WARNING:
o For maximum effectiveness in case
of an accident, the headrest should
be adjusted so the middle of the
headrest is at the same height as the
top of the occupant's eyes. The use
of a cushion that holds the body
away from the seatback is not rec-
ommended.
o Do not operate the vehicle with the
headrests removed as severe injury
to an occupant may occur in the
event of an accident. Headrests may
provide protection against severe
neck injuries when properly adjusted.
Page 30 of 273
1FEATURES OF YOUR HYUNDAI18
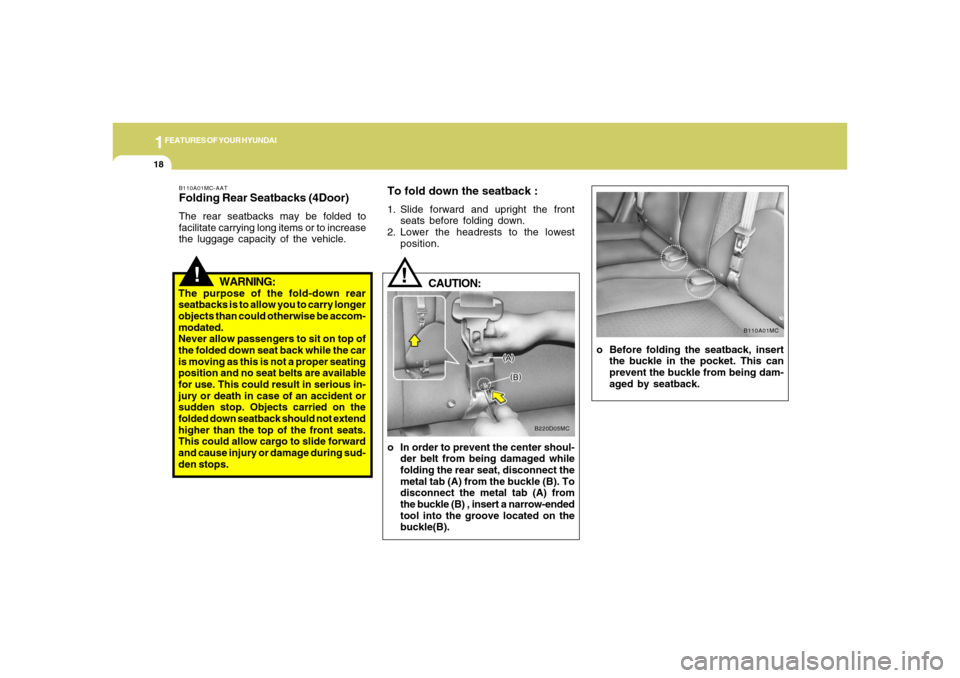
o Before folding the seatback, insert
the buckle in the pocket. This can
prevent the buckle from being dam-
aged by seatback.
B110A01MC
!
B110A01MC-AATFolding Rear Seatbacks (4Door)The rear seatbacks may be folded to
facilitate carrying long items or to increase
the luggage capacity of the vehicle.
WARNING:
The purpose of the fold-down rear
seatbacks is to allow you to carry longer
objects than could otherwise be accom-
modated.
Never allow passengers to sit on top of
the folded down seat back while the car
is moving as this is not a proper seating
position and no seat belts are available
for use. This could result in serious in-
jury or death in case of an accident or
sudden stop. Objects carried on the
folded down seatback should not extend
higher than the top of the front seats.
This could allow cargo to slide forward
and cause injury or damage during sud-
den stops.
To fold down the seatback :1. Slide forward and upright the front
seats before folding down.
2. Lower the headrests to the lowest
position.
B220D05MC
o In order to prevent the center shoul-
der belt from being damaged while
folding the rear seat, disconnect the
metal tab (A) from the buckle (B). To
disconnect the metal tab (A) from
the buckle (B) , insert a narrow-ended
tool into the groove located on the
buckle(B).
!
CAUTION: