clock Hyundai Accent 2009 - RHD (UK. Australia) User Guide
[x] Cancel search | Manufacturer: HYUNDAI, Model Year: 2009, Model line: Accent, Model: Hyundai Accent 2009Pages: 232, PDF Size: 8.36 MB
Page 131 of 232
2 DRIVING YOUR HYUNDAI
4
!
C040A01E
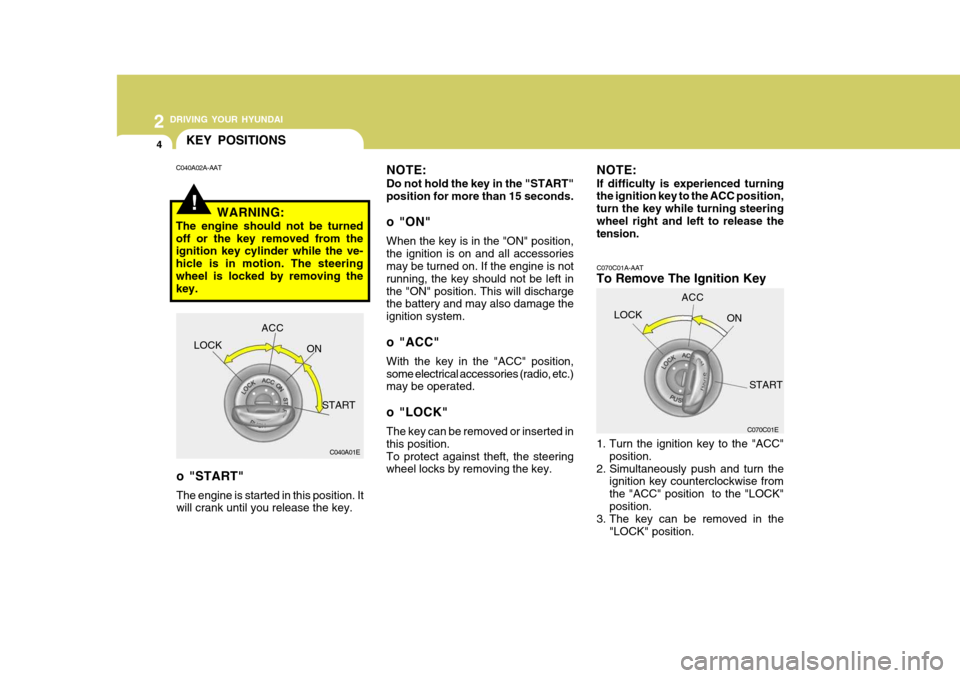
KEY POSITIONS
C070C01A-AAT
To Remove The Ignition Key
1. Turn the ignition key to the "ACC"position.
2. Simultaneously push and turn the ignition key counterclockwise from the "ACC" position to the "LOCK"position.
3. The key can be removed in the
"LOCK" position.
NOTE: Do not hold the key in the "START" position for more than 15 seconds.
o "ON" When the key is in the "ON" position, the ignition is on and all accessories may be turned on. If the engine is not running, the key should not be left inthe "ON" position. This will discharge the battery and may also damage the ignition system.
o "ACC" With the key in the "ACC" position, some electrical accessories (radio, etc.) may be operated.
o "LOCK" The key can be removed or inserted in this position.To protect against theft, the steering wheel locks by removing the key.
C040A02A-AAT
WARNING:
The engine should not be turned off or the key removed from the ignition key cylinder while the ve- hicle is in motion. The steeringwheel is locked by removing the key.
LOCK ACC
ON
START C070C01E
LOCK
ACC
ON
START
o "START" The engine is started in this position. It will crank until you release the key. NOTE: If difficulty is experienced turning the ignition key to the ACC position, turn the key while turning steeringwheel right and left to release the tension.
Page 164 of 232
3 WHAT TO DO IN AN EMERGENCY
12
CAUTION
It should be tightened firmly with your fingers until there is no more play in the towing hole. Towing hookis located in the jack case on the spare tyre.
! (3) Attach a tow cable, chain or strap to
the towing hook on the front bumper.
NOTE: Place the towing hook & towing hole cover in its original position when not in use.
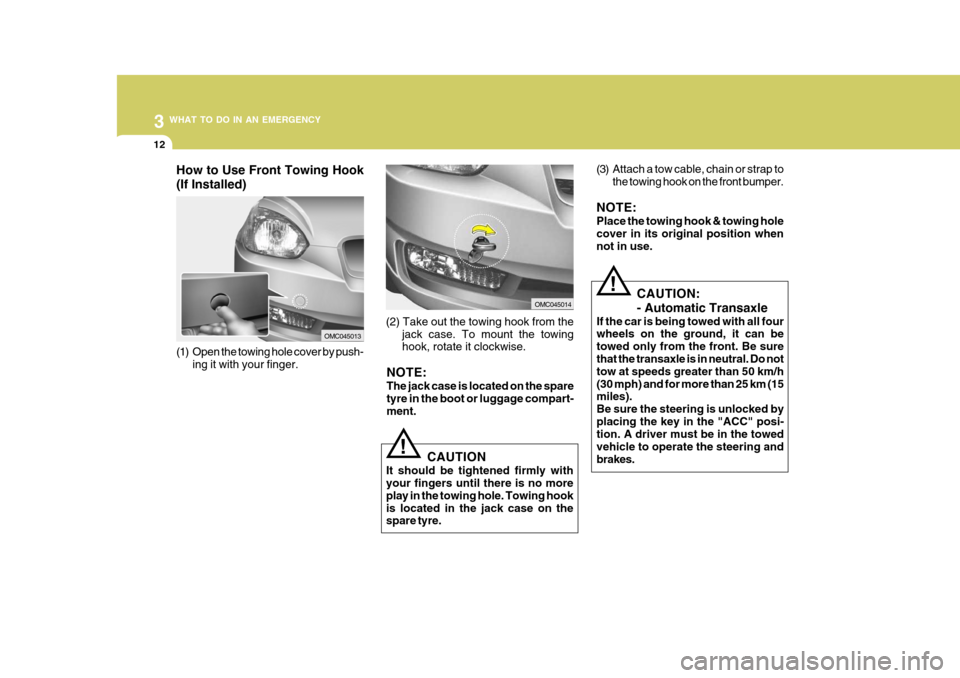
(2) Take out the towing hook from the jack case. To mount the towing hook, rotate it clockwise.
OMC045014
(1) Open the towing hole cover by push- ing it with your finger.
OMC045013
How to Use Front Towing Hook (If Installed)
NOTE: The jack case is located on the spare tyre in the boot or luggage compart- ment.
!CAUTION: - Automatic Transaxle
If the car is being towed with all four wheels on the ground, it can be towed only from the front. Be sure that the transaxle is in neutral. Do not tow at speeds greater than 50 km/h(30 mph) and for more than 25 km (15 miles). Be sure the steering is unlocked byplacing the key in the "ACC" posi- tion. A driver must be in the towed vehicle to operate the steering andbrakes.
Page 187 of 232
6 DO-IT-YOURSELF MAINTENANCE
6
!
!
!
CAUTION:
Slowly pour the recommended oil by using a funnel. Do not overfill not to damage engine.
WARNING:
Be very careful not to touch theradiator hose when adding the en-gine oil as it may be hot enough to burn you. NOTE:
o It is recommended that the engine oil and filter should be changed by an authorised Hyundai dealer.
o Always dispose of used engine oil
in an environmentally acceptablemanner. It is suggested that it be placed in a sealed container and taken to a service station for recla-mation. Do not pour the oil on the ground or put it in with the house- hold trash. WARNING:
Used motor oil may cause irritationor cancer of the skin if left in contactwith the skin for prolonged periods of time. Wash your hands thoroughly with soap and warm water as soon aspossible after handling used oil.
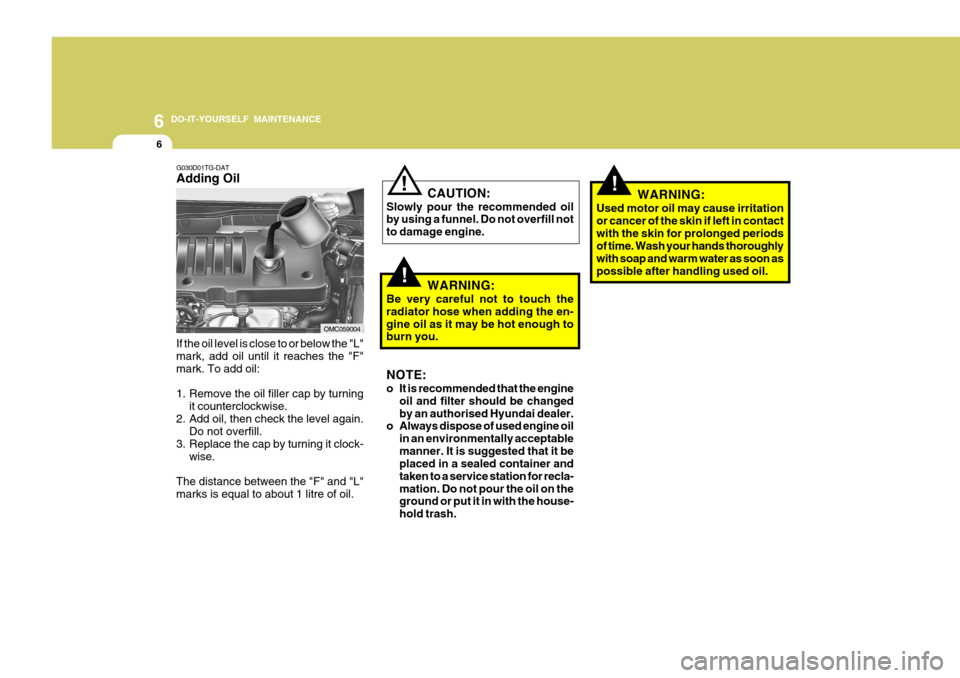
G030D01TG-DAT Adding Oil
If the oil level is close to or below the "L" mark, add oil until it reaches the "F" mark. To add oil:
1. Remove the oil filler cap by turning it counterclockwise.
2. Add oil, then check the level again. Do not overfill.
3. Replace the cap by turning it clock- wise.
The distance between the "F" and "L" marks is equal to about 1 litre of oil.
OMC059004
Page 200 of 232
6
DO-IT-YOURSELF MAINTENANCE
19
!
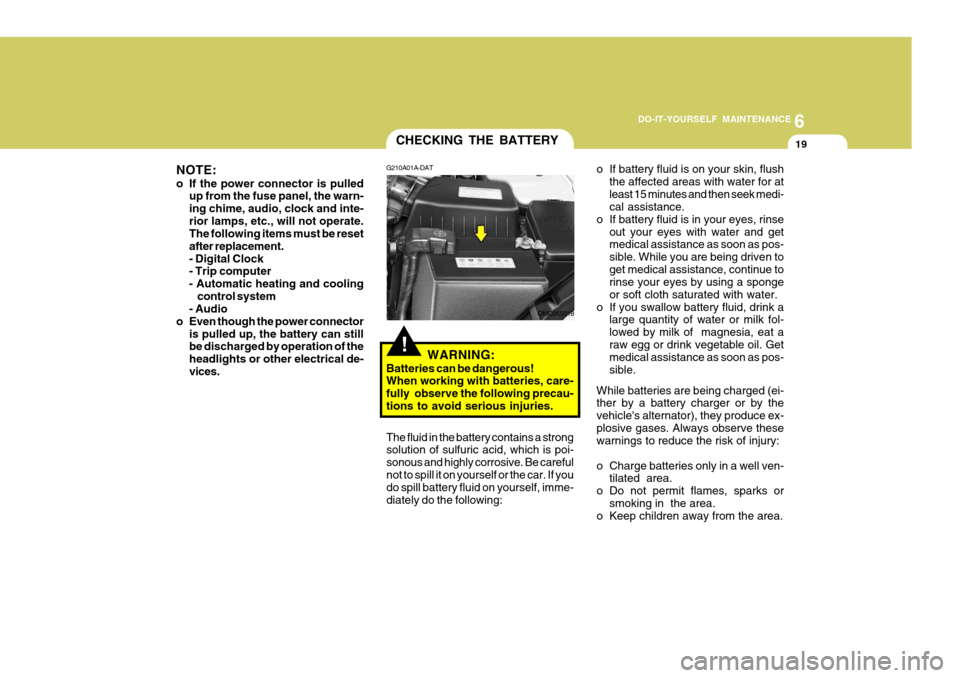
CHECKING THE BATTERY
o If battery fluid is on your skin, flushthe affected areas with water for at least 15 minutes and then seek medi- cal assistance.
o If battery fluid is in your eyes, rinse
out your eyes with water and getmedical assistance as soon as pos- sible. While you are being driven toget medical assistance, continue to rinse your eyes by using a sponge or soft cloth saturated with water.
o If you swallow battery fluid, drink a large quantity of water or milk fol-lowed by milk of magnesia, eat araw egg or drink vegetable oil. Get medical assistance as soon as pos- sible.
While batteries are being charged (ei- ther by a battery charger or by the vehicle's alternator), they produce ex-plosive gases. Always observe these warnings to reduce the risk of injury:
o Charge batteries only in a well ven- tilated area.
o Do not permit flames, sparks or smoking in the area.
o Keep children away from the area.
G210A01A-DAT
WARNING:
Batteries can be dangerous! When working with batteries, care- fully observe the following precau-tions to avoid serious injuries.
The fluid in the battery contains a strong solution of sulfuric acid, which is poi- sonous and highly corrosive. Be carefulnot to spill it on yourself or the car. If you do spill battery fluid on yourself, imme- diately do the following:
OMC055018
NOTE:
o If the power connector is pulled
up from the fuse panel, the warn- ing chime, audio, clock and inte-rior lamps, etc., will not operate. The following items must be reset after replacement.- Digital Clock - Trip computer
- Automatic heating and cooling control system
- Audio
o Even though the power connector is pulled up, the battery can stillbe discharged by operation of the headlights or other electrical de-vices.
Page 206 of 232
6
DO-IT-YOURSELF MAINTENANCE
25
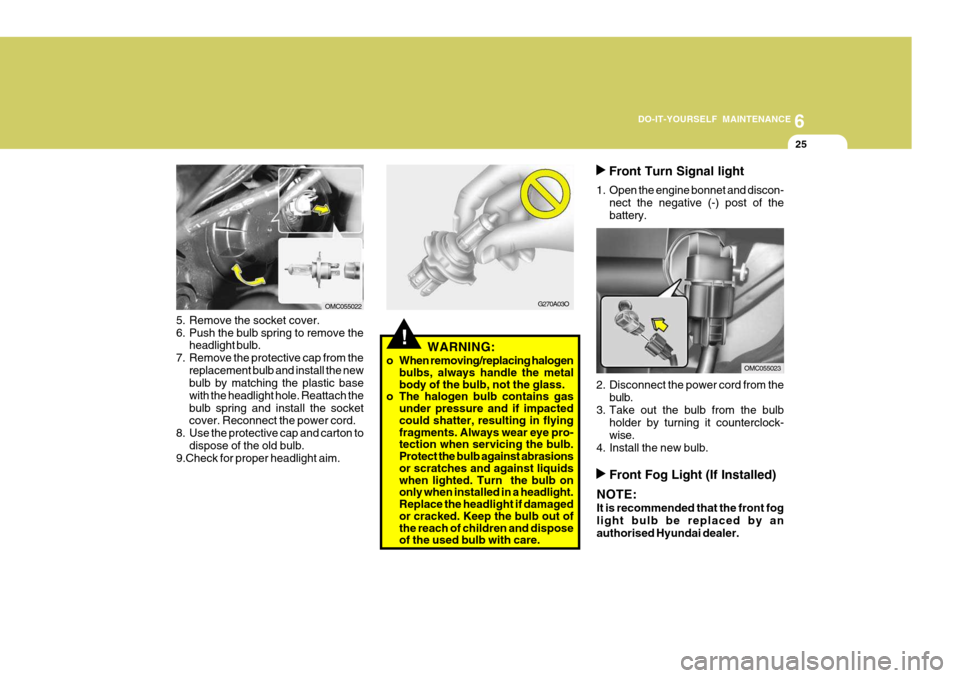
Front Turn Signal light
1. Open the engine bonnet and discon- nect the negative (-) post of the battery.
2. Disconnect the power cord from the bulb.
3. Take out the bulb from the bulb holder by turning it counterclock-wise.
4. Install the new bulb.
G270A03O
!WARNING:
o When removing/replacing halogen bulbs, always handle the metal body of the bulb, not the glass.
o The halogen bulb contains gas
under pressure and if impacted could shatter, resulting in flying fragments. Always wear eye pro- tection when servicing the bulb. Protect the bulb against abrasions or scratches and against liquids when lighted. Turn the bulb on only when installed in a headlight. Replace the headlight if damaged or cracked. Keep the bulb out of the reach of children and dispose of the used bulb with care.
5. Remove the socket cover.
6. Push the bulb spring to remove the
headlight bulb.
7. Remove the protective cap from the replacement bulb and install the new bulb by matching the plastic base with the headlight hole. Reattach thebulb spring and install the socket cover. Reconnect the power cord.
8. Use the protective cap and carton to dispose of the old bulb.
9.Check for proper headlight aim.
OMC055022
OMC055023
Front Fog Light (If Installed)
NOTE: It is recommended that the front fog light bulb be replaced by anauthorised Hyundai dealer.
Page 208 of 232
6
DO-IT-YOURSELF MAINTENANCE
27
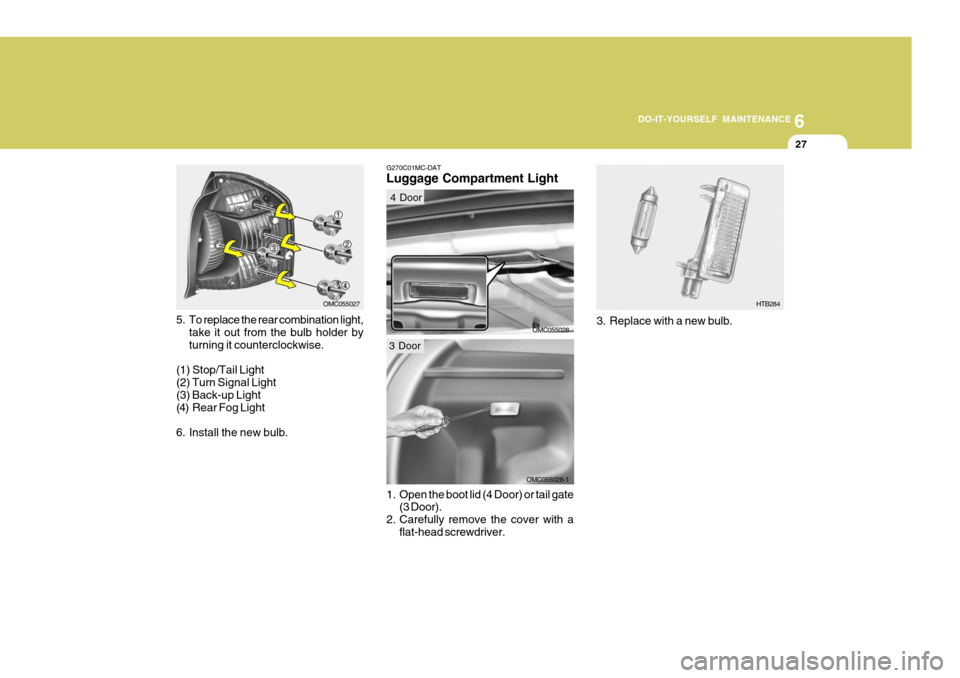
5. To replace the rear combination light, take it out from the bulb holder by turning it counterclockwise.
(1) Stop/Tail Light(2) Turn Signal Light (3) Back-up Light
(4) Rear Fog Light
6. Install the new bulb.
OMC055027
OMC055028-1
G270C01MC-DAT Luggage Compartment Light
OMC055028
1. Open the boot lid (4 Door) or tail gate (3 Door).
2. Carefully remove the cover with a
flat-head screwdriver.
HTB284
3. Replace with a new bulb.
4 Door
3 Door
Page 212 of 232
6
DO-IT-YOURSELF MAINTENANCE
31
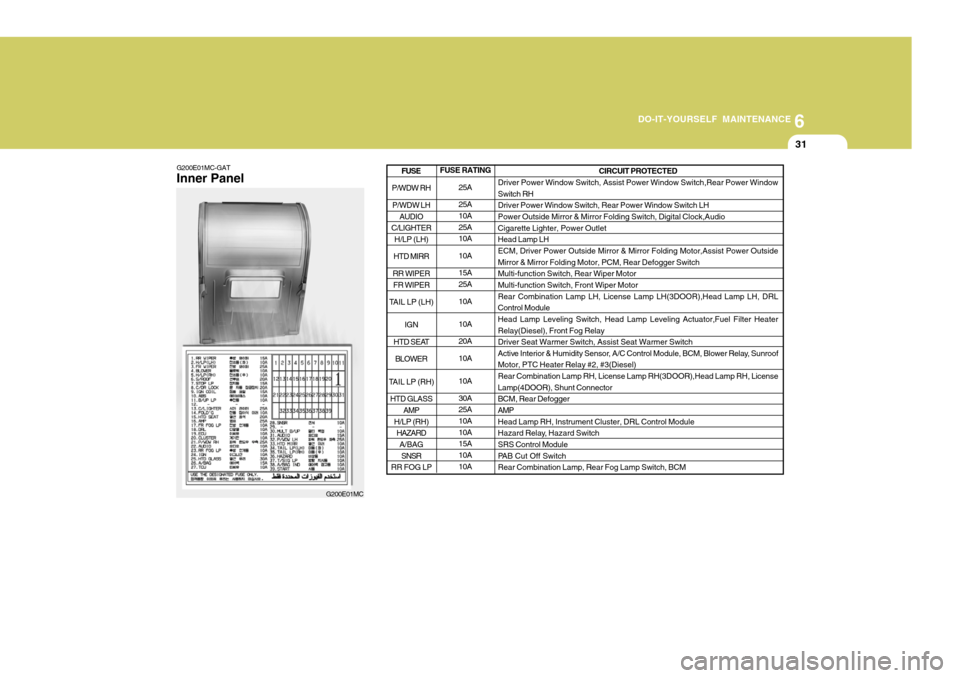
G200E01MC-GAT Inner Panel
G200E01MCFUSE RATING
25A 25A 10A 25A10A 10A15A 25A 10A 10A 20A10A 10A 30A 25A 10A 10A15A 10A 10A CIRCUIT PROTECTED
Driver Power Window Switch, Assist Power Window Switch,Rear Power Window Switch RH Driver Power Window Switch, Rear Power Window Switch LHPower Outside Mirror & Mirror Folding Switch, Digital Clock,Audio Cigarette Lighter, Power Outlet Head Lamp LHECM, Driver Power Outside Mirror & Mirror Folding Motor,Assist Power Outside Mirror & Mirror Folding Motor, PCM, Rear Defogger Switch Multi-function Switch, Rear Wiper MotorMulti-function Switch, Front Wiper Motor Rear Combination Lamp LH, License Lamp LH(3DOOR),Head Lamp LH, DRL Control ModuleHead Lamp Leveling Switch, Head Lamp Leveling Actuator,Fuel Filter Heater Relay(Diesel), Front Fog Relay Driver Seat Warmer Switch, Assist Seat Warmer Switch
Active Interior & Humidity Sensor, A/C Control Module, BCM, Blower Relay, SunroofMotor, PTC Heater Relay #2, #3(Diesel) Rear Combination Lamp RH, License Lamp RH(3DOOR),Head Lamp RH, License Lamp(4DOOR), Shunt ConnectorBCM, Rear Defogger AMP Head Lamp RH, Instrument Cluster, DRL Control Module
Hazard Relay, Hazard Switch SRS Control Module
PAB Cut Off SwitchRear Combination Lamp, Rear Fog Lamp Switch, BCM
P/WDW RH
P/WDW LH AUDIO
C/LIGHTER H/LP (LH)
HTD MIRR
RR WIPER FR WIPER
TAIL LP (LH)
IGN
HTD SEAT BLOWER
TAIL LP (RH) HTD GLASS AMP
H/LP (RH) HAZARD
A/BAG
SNSR
RR FOG LP
FUSE
Page 213 of 232

6 DO-IT-YOURSELF MAINTENANCE
32
FUSE RATING10A 20A10A 10A 15A 10A10A 20A 10A 15A 10A 15A 10A10A 10A 10A 10A CIRCUIT PROTECTED
Front Fog Lamp Switch, Front Fog Lamp LH, Front Fog Lamp RH,BCM Sunroof Motor Hazard SwitchOver Driver Switch, TCM(Diesel), Pulse Generator 'A'(Diesel),Pulse Generator
'B'(Diesel), Vehicle Speed Sensor
Data Link Connector, Stop Lamp Switch, P/WDW Relay,Multipurpose CheckConnector Instrument Cluster ECM, PCM, EPS Control Module, Mass Air Flow Sensor(Diesel), Fuel FilterWarning Switch(Diesel) Driver Door Lock Actuator, Assist Door Lock Actuator, BCM,Rear Door Lock
Actuator LH, Rear Door Lock Actuator RH,Driver Power Window Switch, TailGate Lock Actuator Start Relay BCM, Instrument Cluster, Generator, DRL Control ModuleIgnition Coil #1, #2, #3, #4, CondenserAudio
Luggage Lamp, Room Lamp, Vanity Lamp Switch, Digital Clock,Overhead Consol Lamp, A/C Control Module, Instrument Cluster, Rear Parking Assist Buzzer, Door Warning Switch, BCM ESP Switch, Steering Angle Sensor, ABS Control Module,ESP Module,Multipurpose Check Connector
Back-up Lamp Switch, Transaxle Range Switch DRL Control ModulePower Outside Mirror & Mirror Folding Switch
FR FOG LP S/ROOF
T/SIG LP
TCU
STOP LP
A/BAG IND ECU
C/DR LOCK START
CLUSTER IGN COIL AUDIO
(Power Connector)
MULT B/UP
(Power Connector)
ABS
B/UP LP DRL
FOLD'G
FUSE
Page 229 of 232

10INDEX
2
A Airbag ........................................................................ 1-37
Curtain airbag ......................................................... 1-42
Driver's and passenger's front airbag ...................... 1-38
Side impact airbag .................................................. 1-41
Air Cleaner Filter .......................................................... 6-8
Air Conditioning
Care ........................................................................ 6-15
Operation ................................................................ 1-96
Switch ..................................................................... 1-96
Antenna ................................................................... 1-103
Ashtray ...................................................................... 1-69
Audio System .......................................................... 1-104
Audio remote control switch ................................... 1-87
B Battery ....................................................................... 6-19
Boot Lid ..................................................................... 1-82
Bonnet Release ......................................................... 1-79
Brake Anti-lock system ..................................................... 2-12
Checking the brakes ............................................... 6-13
Fluid ........................................................................ 6-13
Pad wear warning sound ......................................... 1-55
Bulbs Replacem ent .................................................... 6-24
Bulbs W attage ........................................................... 6-29C
Care of Cassette Tapes ..........................................
1-101
Care of Discs .......................................................... 1-101
Cargo Area Cover ...................................................... 1-84
Catalytic Converter ...................................................... 7-3
Child-Protector Rear Door Lock ................................... 1-6
Child Restraint System .............................................. 1-28
Cigarette Lighter ........................................................ 1-68
Climate Control Air Filter .................................. 1-98, 6-16
Clock ......................................................................... 1-68
Clutch
Checking the cluch fluid ......................................... 6-14
Cooling Fans ............................................................. 6-21
Corrosion Protection .................................................... 4-2
Cleaning the interior .................................................. 4-6
Protecting your Hyundai from corrosion ................... 4-2
Washing and waxing ................................................. 4-4
DDoor Central door locks .................................................... 1-7
Door locks ................................................................ 1-5 Locking, unlocking front doors with a key ................ 1-5
Drink Holder ............................................................... 1-70
Driving
Economical driving ................................................. 2-17
Smooth corneri ng .................................................... 2-18
Winter driving .......................................................... 2-19