turn signal Hyundai Accent 2010 User Guide
[x] Cancel search | Manufacturer: HYUNDAI, Model Year: 2010, Model line: Accent, Model: Hyundai Accent 2010Pages: 284, PDF Size: 10.23 MB
Page 94 of 284
1FEATURES OF YOUR HYUNDAI
82
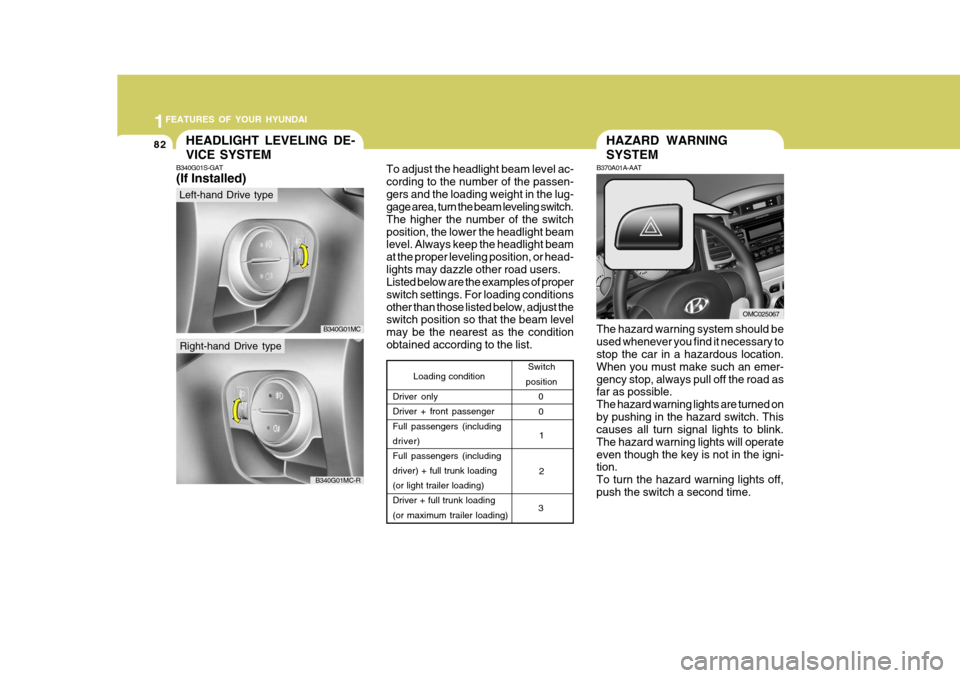
Loading condition Switch
position
Driver only Driver + front passenger Full passengers (including driver)Full passengers (including driver) + full trunk loading (or light trailer loading)Driver + full trunk loading (or maximum trailer loading) 0
1 2
3 0
To adjust the headlight beam level ac- cording to the number of the passen-gers and the loading weight in the lug- gage area, turn the beam leveling switch. The higher the number of the switchposition, the lower the headlight beam level. Always keep the headlight beam at the proper leveling position, or head-lights may dazzle other road users. Listed below are the examples of proper switch settings. For loading conditionsother than those listed below, adjust the switch position so that the beam level may be the nearest as the conditionobtained according to the list.
HAZARD WARNING SYSTEM
B370A01A-AAT
The hazard warning system should be used whenever you find it necessary to stop the car in a hazardous location. When you must make such an emer-gency stop, always pull off the road as far as possible. The hazard warning lights are turned onby pushing in the hazard switch. This causes all turn signal lights to blink. The hazard warning lights will operateeven though the key is not in the igni- tion. To turn the hazard warning lights off,push the switch a second time.
OMC025067
HEADLIGHT LEVELING DE- VICE SYSTEM
B340G01S-GAT (If Installed)
Left-hand Drive type
Right-hand Drive type
B340G01MC
B340G01MC-R
Page 137 of 284

1
FEATURES OF YOUR HYUNDAI125125125
NOTE:
Look at a tape before you insert it. If the tape is loose, tighten it byturning one of the hubs with a pencil
or your finger.
If the label is peeling off, do not put it in the drive mechanism.
Do not leave tapes sitting where they
are exposed to hot, warm, or high humidity, such as on top of the dash- board or in the player.
If a tape is exposed to excessively
hot or cold, let it reach a moderate temperature before putting it in the
player.B860A03LANTENNA
B870D02MC-GAT
MICRO ANTENNA
Your car uses the micro antenna to
receive both AM and FM broadcast
signals.
This antenna is a removable type. OMC025111-1CAUTION:
oBefore entering an automatic car wash, remove by turning the an-
tenna counterclockwise to preventdamage to the micro antenna. To
install the antenna, turn the an-
tenna clockwise.
oBe sure to remove the micro an-
tenna before entering a garage
with a low height or installing a
car cover.!
Page 189 of 284
2
DRIVING YOUR HYUNDAI
27
2
DRIVING YOUR HYUNDAI
27
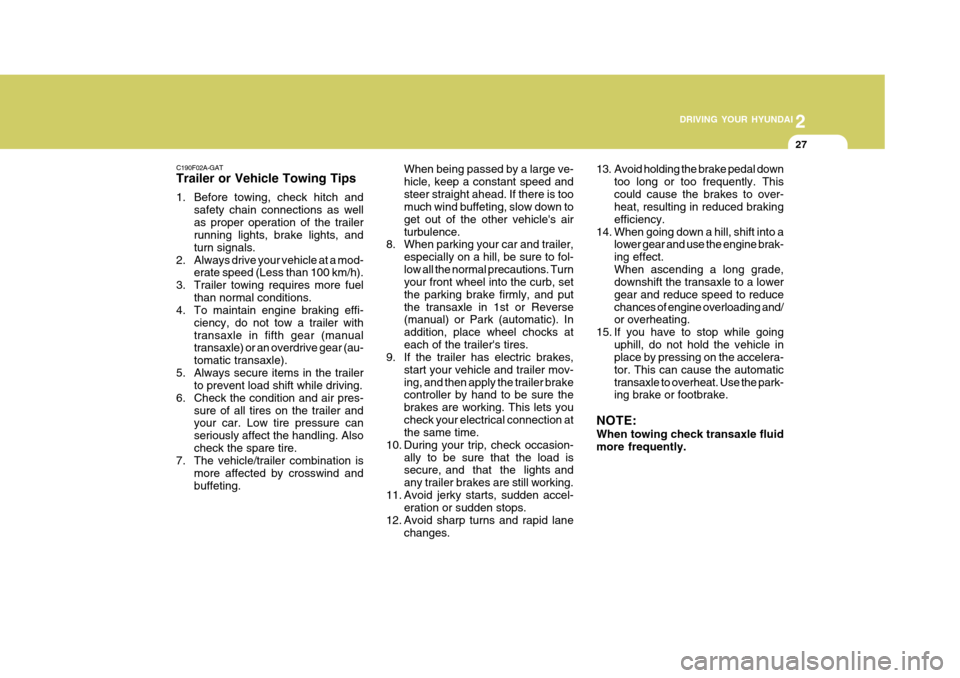
13. Avoid holding the brake pedal down too long or too frequently. This could cause the brakes to over- heat, resulting in reduced braking efficiency.
14. When going down a hill, shift into a lower gear and use the engine brak-ing effect.When ascending a long grade, downshift the transaxle to a lower gear and reduce speed to reducechances of engine overloading and/ or overheating.
15. If you have to stop while going uphill, do not hold the vehicle inplace by pressing on the accelera- tor. This can cause the automatictransaxle to overheat. Use the park- ing brake or footbrake.
NOTE: When towing check transaxle fluid more frequently.
When being passed by a large ve-hicle, keep a constant speed andsteer straight ahead. If there is too much wind buffeting, slow down to get out of the other vehicle's airturbulence.
8. When parking your car and trailer,
especially on a hill, be sure to fol-low all the normal precautions. Turn your front wheel into the curb, set the parking brake firmly, and putthe transaxle in 1st or Reverse (manual) or Park (automatic). In addition, place wheel chocks ateach of the trailer's tires.
9. If the trailer has electric brakes,
start your vehicle and trailer mov-ing, and then apply the trailer brake controller by hand to be sure the brakes are working. This lets youcheck your electrical connection at the same time.
10. During your trip, check occasion- ally to be sure that the load issecure, and that the lights and any trailer brakes are still working.
11. Avoid jerky starts, sudden accel- eration or sudden stops.
12. Avoid sharp turns and rapid lane changes.
C190F02A-GAT Trailer or Vehicle Towing Tips
1. Before towing, check hitch and
safety chain connections as well as proper operation of the trailer running lights, brake lights, and turn signals.
2. Always drive your vehicle at a mod- erate speed (Less than 100 km/h).
3. Trailer towing requires more fuel than normal conditions.
4. To maintain engine braking effi-
ciency, do not tow a trailer withtransaxle in fifth gear (manual transaxle) or an overdrive gear (au- tomatic transaxle).
5. Always secure items in the trailer to prevent load shift while driving.
6. Check the condition and air pres- sure of all tires on the trailer and your car. Low tire pressure can seriously affect the handling. Alsocheck the spare tire.
7. The vehicle/trailer combination is
more affected by crosswind andbuffeting.
Page 231 of 284
6
DO-IT-YOURSELF MAINTENANCE
5
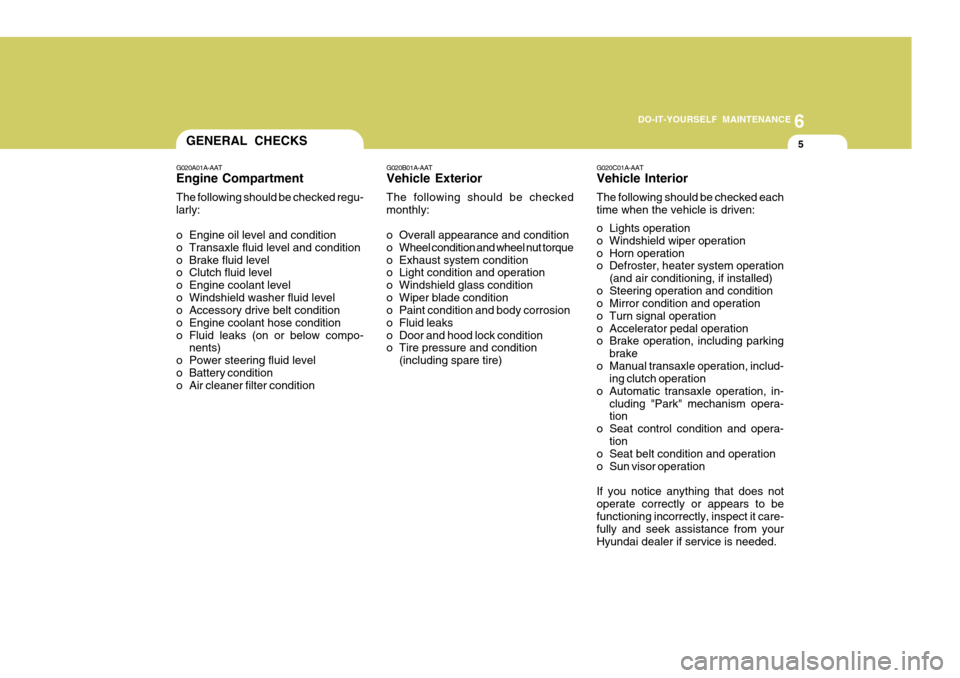
G020A01A-AAT Engine Compartment The following should be checked regu- larly:
o Engine oil level and condition
o Transaxle fluid level and condition
o Brake fluid level
o Clutch fluid level
o Engine coolant level
o Windshield washer fluid level
o Accessory drive belt condition
o Engine coolant hose condition
o Fluid leaks (on or below compo-
nents)
o Power steering fluid level
o Battery condition
o Air cleaner filter condition G020C01A-AAT Vehicle Interior The following should be checked each time when the vehicle is driven:
o Lights operation
o Windshield wiper operation
o Horn operation
o Defroster, heater system operation
(and air conditioning, if installed)
o Steering operation and condition
o Mirror condition and operation
o Turn signal operation
o Accelerator pedal operation
o Brake operation, including parking
brake
o Manual transaxle operation, includ- ing clutch operation
o Automatic transaxle operation, in- cluding "Park" mechanism opera-tion
o Seat control condition and opera- tion
o Seat belt condition and operation
o Sun visor operation If you notice anything that does not operate correctly or appears to befunctioning incorrectly, inspect it care- fully and seek assistance from your Hyundai dealer if service is needed.
G020B01A-AAT Vehicle Exterior The following should be checked monthly:
o Overall appearance and condition
o Wheel condition and wheel nut torque
o Exhaust system condition
o Light condition and operation
o Windshield glass condition
o Wiper blade condition
o Paint condition and body corrosion
o Fluid leaks
o Door and hood lock condition
o Tire pressure and condition
(including spare tire)
GENERAL CHECKS
Page 253 of 284

6
DO-IT-YOURSELF MAINTENANCE
27REPLACEMENT OF LIGHT BULBS
SPECIFICATIONS: "H" Horizontal center line of headlights from ground.: 665 mm (26.18 in.) "W" Distance between each headlight center. : 1,170 mm (46.06 in.) "L" Distance between the headlightsand the wall that the lights are tested against. : 3,000 mm (118.11 in.). G260A01MC-AAT Before attempting to replace a light bulb, be sure the switch is turned to the "OFF" position.The next paragraph shows how to reach the light bulbs so they may be changed. Be sure to replace the burned-out bulbwith one of the same number and watt- age rating. See page 6-34 for the wattage descrip-tions.
CAUTION:
o Keep the lamps out of contact with petroleum products, such as oil,gasoline, etc.
o If you don't have necessary tools,
the correct bulbs and the exper-tise, consult your authorized Hyundai dealer.
! G270A03MC-GAT Headlight, Front Turn Signal Light and Front Fog LightOMC055021
Turn signal light
Headlight Fog light
OMC050021
Headlight Turn signal light
Fog light
Type A
Type B
Page 256 of 284
6 DO-IT-YOURSELF MAINTENANCE
30
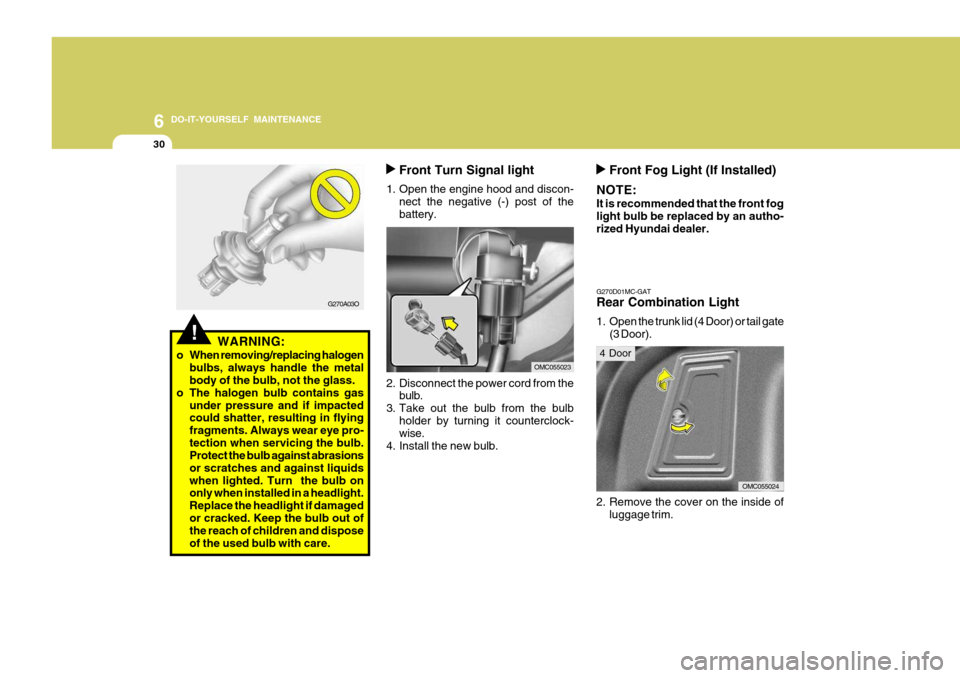
Front Turn Signal light
1. Open the engine hood and discon- nect the negative (-) post of the battery.
2. Disconnect the power cord from the bulb.
3. Take out the bulb from the bulb holder by turning it counterclock- wise.
4. Install the new bulb.
OMC055023
Front Fog Light (If Installed)
NOTE: It is recommended that the front fog light bulb be replaced by an autho- rized Hyundai dealer.
G270D01MC-GAT Rear Combination Light
1. Open the trunk lid (4 Door) or tail gate (3 Door).
OMC055024
2. Remove the cover on the inside of luggage trim.
4 Door
G270A03O
!WARNING:
o When removing/replacing halogen bulbs, always handle the metal body of the bulb, not the glass.
o The halogen bulb contains gas under pressure and if impactedcould shatter, resulting in flying fragments. Always wear eye pro-tection when servicing the bulb. Protect the bulb against abrasions or scratches and against liquidswhen lighted. Turn the bulb on only when installed in a headlight. Replace the headlight if damagedor cracked. Keep the bulb out of the reach of children and dispose of the used bulb with care.
Page 257 of 284

6
DO-IT-YOURSELF MAINTENANCE
31
5. To replace the rear combination light, take it out from the bulb holder by turning it counterclockwise.
(1) Stop/Tail Light (2) Turn Signal Light(3) Back-up Light
(4) Stop/Tail Light, Rear Fog Light (If Installed)
6. Install the new bulb.
4.
Detach the rear combination lamp by pulling it out (4 Door) or remove the mounting screws of the rear combi- nation lamp with a phillips screw-driver (3 Door).
OMC055027OMC055026
4 Door
OMC055026-1
3 Door
3. Remove the nuts of the rear combi-
nation light with a spanner.
OMC055025
4 Door
Page 260 of 284

6 DO-IT-YOURSELF MAINTENANCE
34BULB WATTAGE
G280A01MC-GAT
OMC059020N
Socket Type P43t-38
BAU15s
W2.1X9.5d W2.1X9.5d
S8.5/8.5PG13
LED Type
W2.1X9.5d Part Name
Stop/Tail Light
High Mounted Rear Stop Light (If Installed) Luggage Compartment Light
Rear Turn Signal Light Rear Fog Light (If Installed) Back-up Light
License Plate Light
Part Name
Headlight (High/Low)Front Turn Signal LightFront Position Light Map Light Interior LightFront Fog Light (If Installed) Side Repeater Light (If Installed) Side Repeater Light (If Installed)
No.
12 3 4 5 67 No.
8 9
10 11 12 1314
Wattage
55/60
215
1010 27
0.4 5
Wattage
21/5
165
21 21 16 5 Socket Type
BAY15d
W2.1X9.5d S8.5/8.5BAU15sBA15s
W2.1X9.5d
S8.5/8.5
4 Door 3 Door
Page 283 of 284
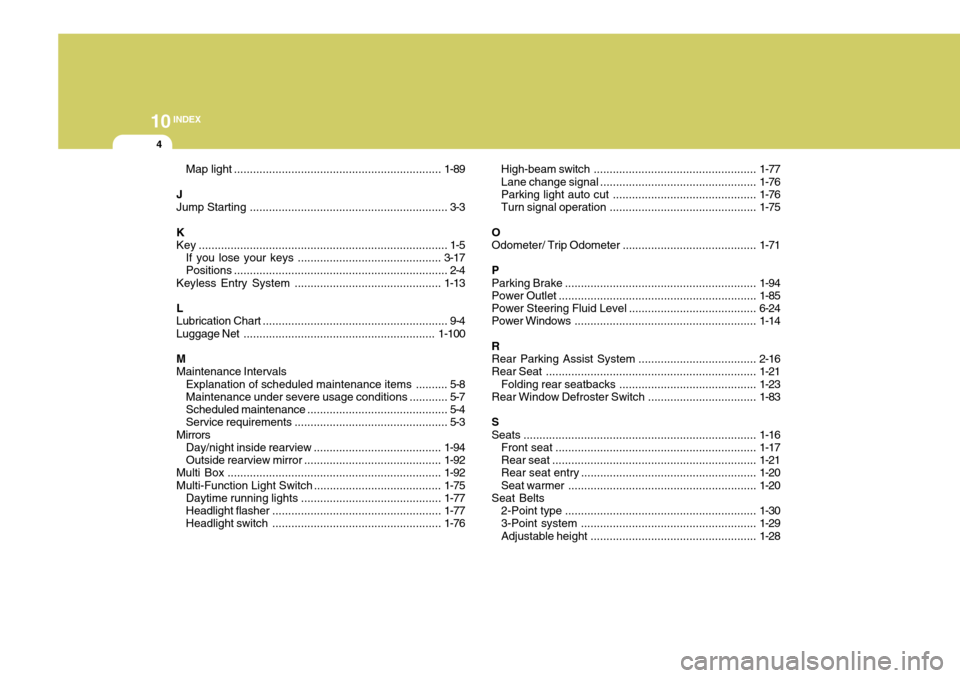
10INDEX
4
Map light ................................................................. 1-89
J Jump Starting .............................................................. 3-3
K
Key .............................................................................. 1-5 If you lose y our keys ............................................. 3-17
Positions ................................................................... 2-4
Keyless Entry System .............................................. 1-13
L
Lubrication Chart .......................................................... 9-4
Luggage Net ............................................................ 1-100
MMaintenance Intervals Explanation of scheduled maintenance items .......... 5-8Maintenance under severe usage conditions ............ 5-7
Scheduled maintenance ............................................ 5-4
Service requirements ................................................ 5-3
Mirrors Day/night inside rearview .. ......................................1-94
Outside rearview mirror .. ......................................... 1-92
Multi Box ................................................................... 1-92
Multi-Function Light Switch ........................................ 1-75
Daytime running lights ............................................ 1-77
Headlight flasher ..................................................... 1-77
Headlight switch ..................................................... 1-76High-beam switch
................................................... 1-77
Lane change si gnal ................................................. 1-76
Parking light auto cut ............................................. 1-76
Turn signal operation .............................................. 1-75
O
Odometer/ Trip Odometer ...... ....................................1-71
P Parking Brake ............................................................ 1-94
Power Outlet .............................................................. 1-85
Power Steering Fluid Level ....... .................................6-24
Power Windows ......................................................... 1-14
RRear Parking Assist System ..................................... 2-16
Rear Seat .................................................................. 1-21
Folding rear seatbacks .... .......................................1-23
Rear Window Defroster Switch .................................. 1-83
SSeats ......................................................................... 1-16
Front seat ............................................................... 1-17
Rear seat ................................................................ 1-21
Rear seat entry ....................................................... 1-20
Seat warmer ........................................................... 1-20
Seat Belts
2-Point type ............................................................ 1-30
3-Point system ....................................................... 1-29
Adjustable height .................................................... 1-28