check engine light Hyundai Accent 2011 - RHD (UK. Australia) User Guide
[x] Cancel search | Manufacturer: HYUNDAI, Model Year: 2011, Model line: Accent, Model: Hyundai Accent 2011Pages: 232, PDF Size: 8.41 MB
Page 148 of 232
2
DRIVING YOUR HYUNDAI
21
2
DRIVING YOUR HYUNDAI
21USE OF LIGHTS
C180A01A-AAT Check your lights regularly for correct operation and always keep them clean. When driving during the day in condi- tions of poor visibility, it is helpful todrive with headlights on low beam. This enables you to be seen as well as to see.HIGH SPEED MOTORING
C170A01A-DAT Pre-Trip Inspections
1. Tyres: Adjust the tyre inflation pressures to specification. Low tyre inflation pres- sures will result in overheating and possible failure of the tyres. Avoidusing worn or damaged tyres which may result in reduced traction or tyre failure. NOTE: Never exceed the maximum tyre inflation pressure shown on the tyres.
2. Fuel, engine coolant and en gine oil:
High speed travel consumes more fuel than urban motoring. Do not forget tocheck both engine coolant and engine oil.
3. Drive belt: A loose or damaged drive belt may result in overheating of the engine.TRAILER OR VEHICLE TOW- ING
C190A01A-DAT If you are considering towing with your car, you should first check with your State Department of Motor Vehicles to determine their legal requirements.Since laws vary from state to state, the requirements for towing trailers, cars, or other types of vehicles or apparatusmay differ. Ask your Hyundai dealer for further details before towing.
! CAUTION :
Do not do any towing with your car during its first 2,000 km (1,200 miles) in order to allow the engine to prop-erly break in. Failure to heed this caution may result in serious en- gine or transaxle damage.
Page 151 of 232
2 DRIVING YOUR HYUNDAI
24
8. When parking your car and trailer,especially on a hill, be sure to follow all the normal precautions. Turn your front wheel into the curb, set the hand brake firmly, and put thetransaxle in 1st or Reverse (manual) or Park (automatic). In addition, place wheel chocks at each of thetrailer's tyres.
9. If the trailer has electric brakes,
drive your vehicle with the trailerattached, and then apply the trailer brakes by hand. This test confirms the operation of the trailer brakesand also checks your electrical con- nection at the same time.
10. During your trip, check occasionally to be sure that the load is secure,and that the lights and any trailer brakes are still working.
11.Avoid jerky starts, sudden accel- eration or sudden stops.
12.Avoid sharp turns and rapid lane changes.
13.Avoid holding the brake pedal down
too long or too frequently. This couldcause the brakes to overheat, re- sulting in reduced braking efficiency.
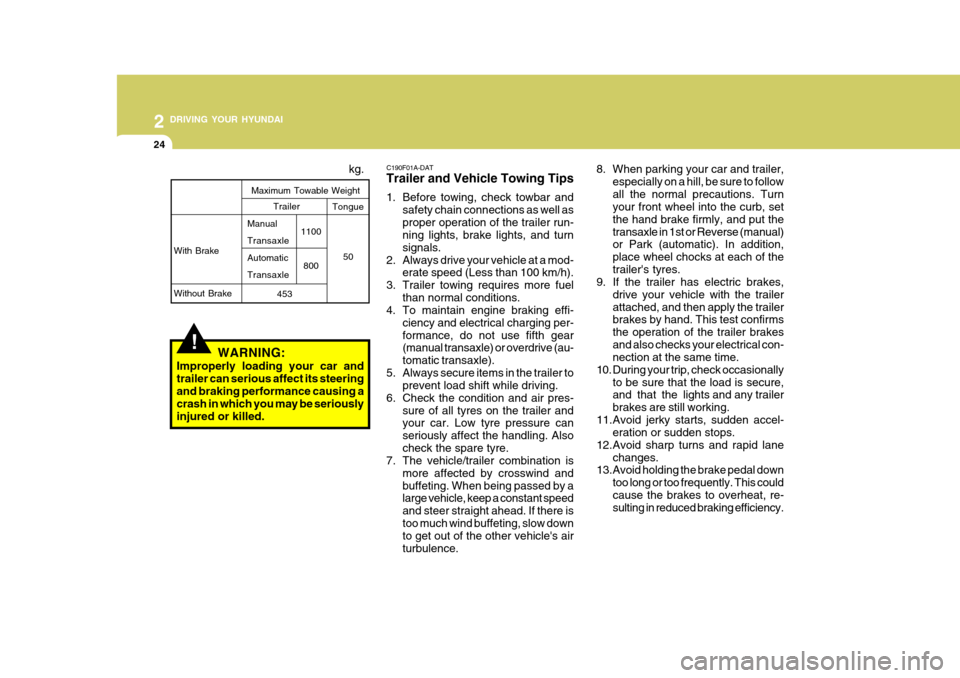
!WARNING:
Improperly loading your car and trailer can serious affect its steeringand braking performance causing a crash in which you may be seriously injured or killed. kg.
With Brake Without Brake
Maximum Towable Weight
1100800
Trailer Tongue
50
453
Manual TransaxleAutomaticTransaxle C190F01A-DAT Trailer and Vehicle Towing Tips
1. Before towing, check towbar and
safety chain connections as well as proper operation of the trailer run- ning lights, brake lights, and turn signals.
2. Always drive your vehicle at a mod- erate speed (Less than 100 km/h).
3. Trailer towing requires more fuel than normal conditions.
4. To maintain engine braking effi-
ciency and electrical charging per-formance, do not use fifth gear (manual transaxle) or overdrive (au- tomatic transaxle).
5. Always secure items in the trailer to prevent load shift while driving.
6. Check the condition and air pres- sure of all tyres on the trailer and your car. Low tyre pressure can seriously affect the handling. Alsocheck the spare tyre.
7. The vehicle/trailer combination is
more affected by crosswind andbuffeting. When being passed by a large vehicle, keep a constant speed and steer straight ahead. If there istoo much wind buffeting, slow down to get out of the other vehicle's air turbulence.
Page 154 of 232
3 WHAT TO DO IN AN EMERGENCY
2
!
IF THE ENGINE WILL NOT START
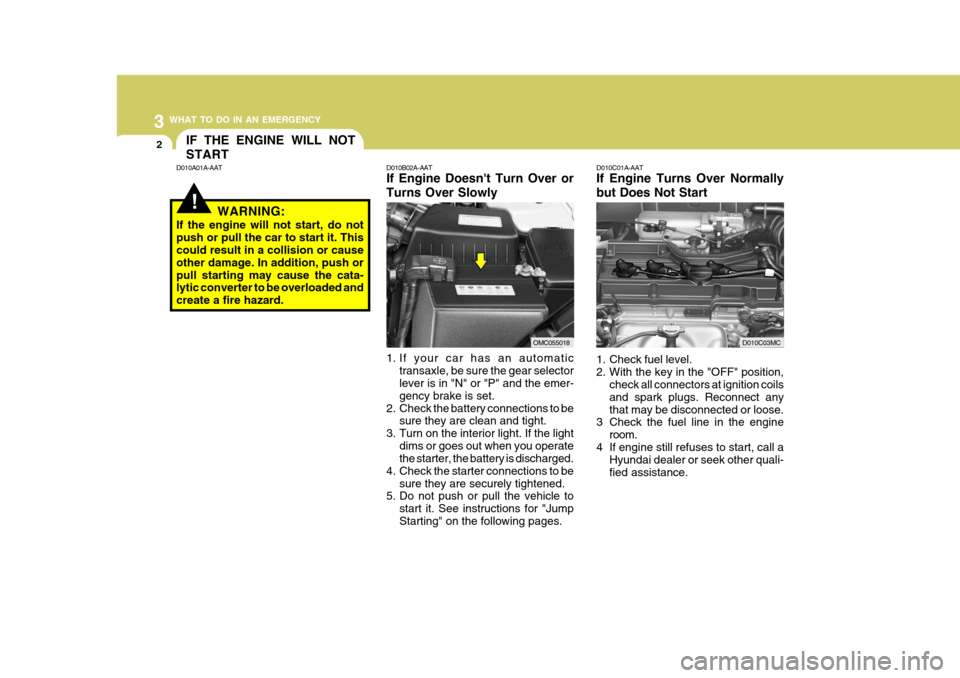
D010B02A-AAT If Engine Doesn't Turn Over or Turns Over Slowly
1. If your car has an automatic
transaxle, be sure the gear selector lever is in "N" or "P" and the emer- gency brake is set.
2. Check the battery connections to be sure they are clean and tight.
3. Turn on the interior light. If the light
dims or goes out when you operate the starter, the battery is discharged.
4. Check the starter connections to be
sure they are securely tightened.
5. Do not push or pull the vehicle to
start it. See instructions for "Jump Starting" on the following pages. D010C01A-AAT If Engine Turns Over Normally but Does Not Start
1. Check fuel level.
2. With the key in the "OFF" position,
check all connectors at ignition coilsand spark plugs. Reconnect anythat may be disconnected or loose.
3 Check the fuel line in the engine
room.
4 If engine still refuses to start, call a Hyundai dealer or seek other quali-fied assistance.
D010A01A-AAT
WARNING:
If the engine will not start, do notpush or pull the car to start it. This could result in a collision or cause other damage. In addition, push orpull starting may cause the cata- lytic converter to be overloaded and create a fire hazard.
OMC055018D010C03MC
Page 156 of 232
3 WHAT TO DO IN AN EMERGENCY
4IF THE ENGINE OVERHEATS
D030A01A-DAT If your temperature gauge indicates overheating, you experience a loss of power, or hear loud pinging or knock- ing, the engine is probably too hot. Ifthis happens, you should:
1. Pull off the road and stop as soon as it is safe to do so.
2. Place the gear selector lever in "P"
(automatic), or neutral (manual transaxle) and set the hand brake. If the air conditioning is on, turn it off.
3. If coolant is running out under the car or steam is coming out from under-neath the bonnet, stop the engine. Do not open the bonnet until thecoolant has stopped running or the steaming has stopped. If there is no visible loss of coolant and no steam,leave the engine running and check to be sure the engine cooling fan is operating. If the fan is not running,turn the engine off.
4. Check to see if the water pump drive
belt is missing. If it is not missing,check to see that it is tight. If the drive belt seems to be satisfactory, check for coolant leaking from theradiator, hoses or under the car.
6. Carefully remove the jumper cables
in the reverse order of attachment.
If you do not know why your batterybecame discharged (because the lightswere left on, etc.), have the charging system checked by your Hyundai dealer.
3. Attach the clamps of the jumper
cable in the exact order shown in theillustration. That is, first, attach one clamp of the jumper cable to the positive (+) post or cable of thedischarged battery. Then attach the other end of the same cable to the positive (+) post or cable of thebooster battery. Next, using the other cable, attach one clamp to the negative (-) post or cable of thebooster battery. Then attach the other end of that cable to a solid metal part of the engine away fromthe battery. Do not connect the cable to any moving part.
4. Start the engine in the car with the booster battery and let it run for afew minutes. This will help to as- sure that the booster battery is fullycharged. During the jumping opera- tion, run the engine in this vehicle at about 2,000 rpm.
5. Start the engine in the car with the discharged battery using the normalstarting procedure. After the enginestarts, leave the jumper cables con- nected and let the engine run at fast idle or about 2,000 rpm for severalminutes.
Page 182 of 232
Engine Compartment .................................................... 6-2
General Checks ........................................................... 6-3
Maintenance Precautions ............................................. 6-4
Checking the Engine Oil ............................................... 6-4
Checking and Changing the Engine Coolant ................ 6-7
Changing the Air Cleaner Filter ..................................... 6-8
Checking the Transaxle Oil (Manual) ..........................6-11
Checking the Transaxle Fluid (Automatic)..................6-11
Checking the B rakes ................................................... 6-13
Checking the Clutch Fluid ............................................ 6-14
Air Conditioning Care ................................................... 6-15
Changing the Climate Control Air Filter........................ 6-16
Checking and Replacing Fuses .................................. 6-17
Checking the Battery ................................................... 6-19
Power Steering Fluid Level .......................................... 6-21
Headlight Aiming Adjustment ....................................... 6-22
Replacement of Light Bulbs ......................................... 6-23
Bulb Wattage ............................................................... 6-29
Fuse Panel Description ............................................... 6-30
DO-IT-YOURSELF MAINTENANCE
6
6
Page 184 of 232
6
DO-IT-YOURSELF MAINTENANCE
3GENERAL CHECKS
G020A01A-AAT Engine Compartment The following should be checked regu- larly:
o Engine oil level and condition
o Transaxle fluid level and condition
o Brake fluid level
o Clutch fluid level
o Engine coolant level
o Windshield washer fluid level
o Accessory drive belt condition
o Engine coolant hose condition
o Fluid leaks (on or below compo- nents)
o Power steering fluid level
o Battery condition
o Air cleaner filter condition G020C01A-DAT Vehicle Interior The following should be checked each time when the vehicle is driven:
o Lights operation
o Windshield wiper operation
o Horn operation
o Demister, heating system operation
(and air conditioning, if installed)
o Steering operation and condition
o Mirror condition and operation
o Turn signal light operation
o Accelerator pedal operation
o Brake operation, including hand
brake
o Manual transaxle operation, includ- ing clutch operation
o Automatic transaxle operation, in- cluding "Park" mechanism opera-tion
o Seat control condition and opera- tion
o Seat belt condition and operation
o Sunvisor operation If you notice anything that does not operate correctly or appears to befunctioning incorrectly, inspect it care- fully and seek assistance from your Hyundai dealer if service is needed.
G020B01A-DAT Vehicle Exterior The following should be checked monthly:
o Overall appearance and condition
o Wheel condition and wheel nut torque
o Exhaust system condition
o Light condition and operation
o Windshield glass condition
o Wiper blade condition
o Paint condition and body corrosion
o Fluid leaks
o Door and bonnet lock condition
o Tyre pressure and condition (includ-
ing spare tyre)
Page 198 of 232
6
DO-IT-YOURSELF MAINTENANCE
17CHECKING AND REPLAC- ING FUSES
!
CAUTION:
When replacing a fusible link, never use anything but a new fusible linkwith the same or lower amperage rating. Never use a piece of wire or a higher-rated fusible link. Thiscould result in serious damage and create a fire hazard. G200B02HP-AAT Replacing Accessory Fuse The fuse box for the lights and other electrical accessories will be found lowon the dashboard on the driver's side. Inside the box you will find a list show- ing the circuits protected by each fuse.If any of your car's lights or other elec- trical accessories stop working, a blown fuse could be the reason. If the fuse hasburned out, you will see that the metal strip inside the fuse has burned through. If you suspect a blown fuse, follow thisprocedure:
1. Turn off the ignition and all other
switches.
2. Open the fuse box and examine
each fuse. Remove each fuse by pulling it toward you (a small "fuse puller" tool is contained in the relay and fuse box of the engine room tosimplify this operation).
3. Be sure to check all other fuses even
if you find one that appears to haveburned out.
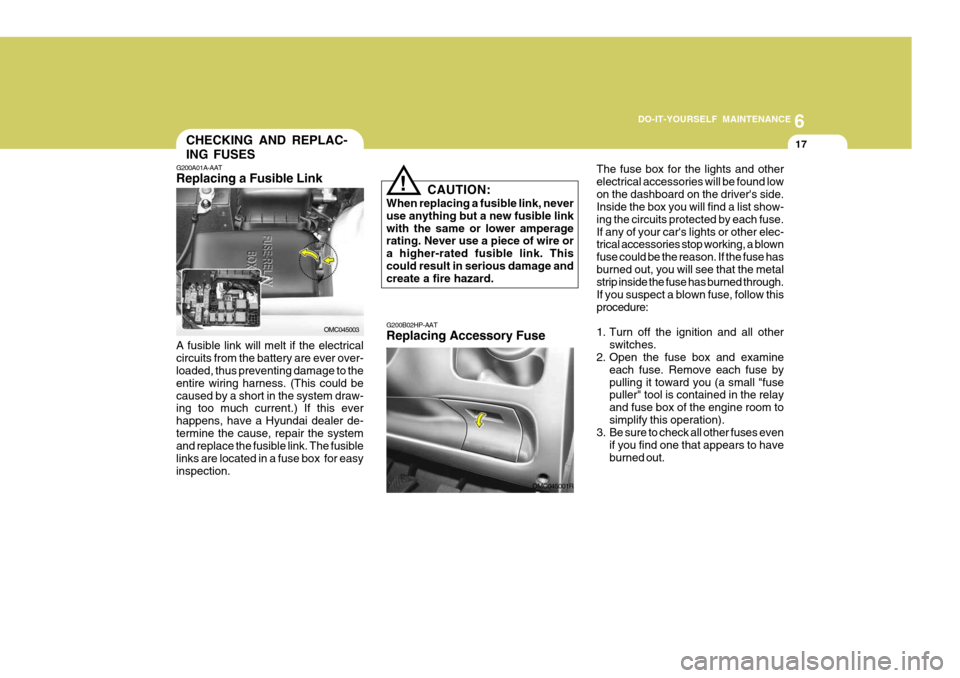
G200A01A-AAT Replacing a Fusible Link
OMC045003
A fusible link will melt if the electrical circuits from the battery are ever over- loaded, thus preventing damage to the entire wiring harness. (This could becaused by a short in the system draw- ing too much current.) If this ever happens, have a Hyundai dealer de-termine the cause, repair the system and replace the fusible link. The fusible links are located in a fuse box for easyinspection.
OMC045001R
Page 201 of 232
6 DO-IT-YOURSELF MAINTENANCE
20
!
o When lifting a plastic-cased bat-
tery, excessive pressure on the case may cause battery acid toleak, resulting in personal injury. Lift with a battery carrier or with your hands on opposite corners.
o Never attempt to charge the bat- tery when the battery cables areconnected.
o The electrical ignition system works with high voltage.Never touch these componentswith the engine running or the ignition switched on.
!
G210B01Y-AAT Checking the Battery Keep the battery clean. Any evidence of corrosion around the battery postsor terminals should be removed using a solution of household baking soda and warm water. After the battery ter-minals are dry, cover them with a light coating of grease.
WARNING:
Always read the following instructions carefully when handling a battery.Keep lighted cigarettes and all other flames or sparks away from the battery.Hydrogen, which is a highly combustible gas, is always present in battery cells andmay explode if ignited. Keep batteries out of the reach of children becausebatteries contain highly cor- rosive SULFURIC ACID. Do not allow battery acid to con-tact your skin, eyes, cloth- ing or paint finish.
If any electrolyte gets into your eyes, flush your eyes with clean water for at least15 minutes and get immedi- ate medical attention. If pos- sible, continue to applywater with a sponge or cloth until medical attention is re- ceived.If electrolyte gets on your skin, thoroughly wash the contacted area.If you feel a pain or a burn- ing sensation, get medical attention immediately.Wear eye protection when charging or working near a battery.Always provide ventilation when working in an en- closed space.An inappropriately disposed battery can be harmful to the environment and humanhealth. Dispose the battery according to your local law(s) or regulation.
Page 203 of 232
6 DO-IT-YOURSELF MAINTENANCE
22
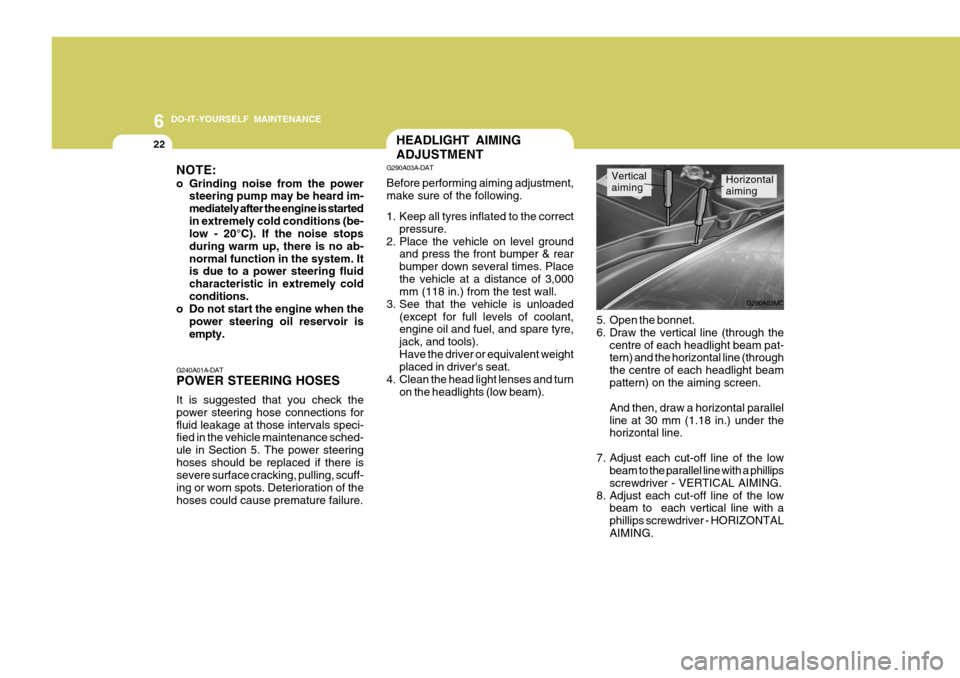
Horizontal
aimingVertical
aiming
5. Open the bonnet.
6. Draw the vertical line (through the centre of each headlight beam pat- tern) and the horizontal line (through the centre of each headlight beampattern) on the aiming screen. And then, draw a horizontal parallel line at 30 mm (1.18 in.) under the horizontal line.
7. Adjust each cut-off line of the low beam to the parallel line with a phillips screwdriver - VERTICAL AIMING.
8. Adjust each cut-off line of the low beam to each vertical line with aphillips screwdriver - HORIZONTALAIMING.
HEADLIGHT AIMING ADJUSTMENT
G290A03A-DAT Before performing aiming adjustment, make sure of the following.
1. Keep all tyres inflated to the correct
pressure.
2. Place the vehicle on level ground and press the front bumper & rear bumper down several times. Placethe vehicle at a distance of 3,000 mm (118 in.) from the test wall.
3. See that the vehicle is unloaded (except for full levels of coolant,engine oil and fuel, and spare tyre, jack, and tools).Have the driver or equivalent weight placed in driver's seat.
4. Clean the head light lenses and turn on the headlights (low beam). G290A03MC
NOTE:
o Grinding noise from the power
steering pump may be heard im- mediately after the engine is startedin extremely cold conditions (be- low - 20°C). If the noise stops during warm up, there is no ab-normal function in the system. It is due to a power steering fluid characteristic in extremely coldconditions.
o Do not start the engine when the
power steering oil reservoir isempty.
G240A01A-DAT POWER STEERING HOSES It is suggested that you check the power steering hose connections forfluid leakage at those intervals speci- fied in the vehicle maintenance sched- ule in Section 5. The power steeringhoses should be replaced if there is severe surface cracking, pulling, scuff- ing or worn spots. Deterioration of thehoses could cause premature failure.
Page 205 of 232
6 DO-IT-YOURSELF MAINTENANCE
24
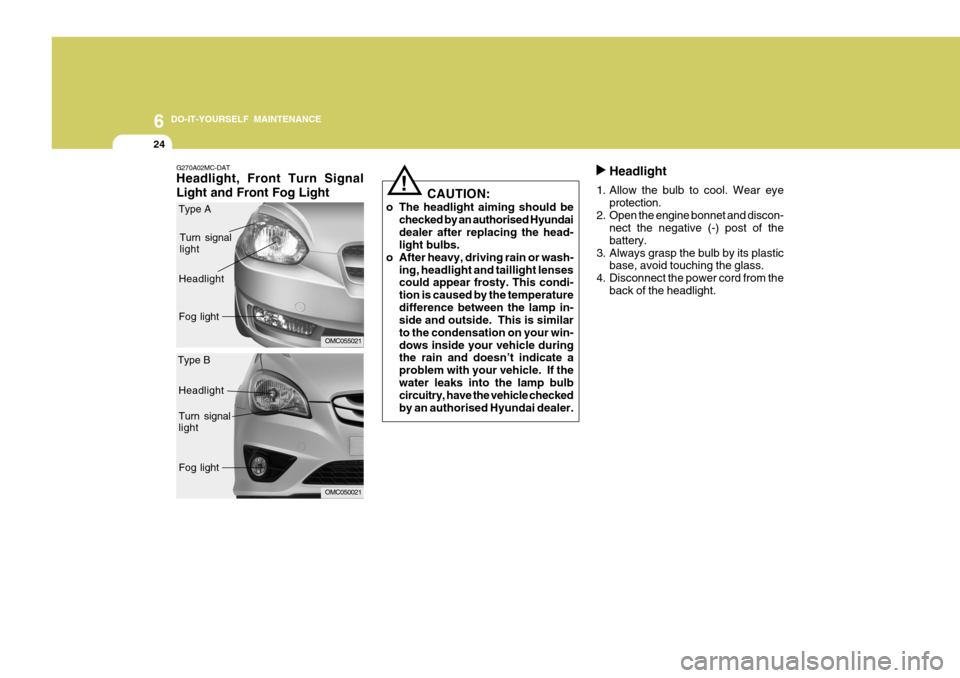
Headlight
1. Allow the bulb to cool. Wear eye protection.
2. Open the engine bonnet and discon- nect the negative (-) post of the battery.
3. Always grasp the bulb by its plastic base, avoid touching the glass.
4. Disconnect the power cord from the
back of the headlight.
G270A02MC-DAT Headlight, Front Turn Signal Light and Front Fog Light CAUTION:
o The headlight aiming should be checked by an authorised Hyundai dealer after replacing the head- light bulbs.
o After heavy, driving rain or wash- ing, headlight and taillight lensescould appear frosty. This condi- tion is caused by the temperaturedifference between the lamp in- side and outside. This is similar to the condensation on your win-dows inside your vehicle during the rain and doesn’t indicate a problem with your vehicle. If thewater leaks into the lamp bulb circuitry, have the vehicle checked by an authorised Hyundai dealer.
!
OMC055021
Turn signal light
Headlight Fog light
OMC050021
Headlight Turn signal light
Fog light
Type A
Type B