change time Hyundai Accent 2013 Owner's Manual
[x] Cancel search | Manufacturer: HYUNDAI, Model Year: 2013, Model line: Accent, Model: Hyundai Accent 2013Pages: 402, PDF Size: 8.49 MB
Page 1 of 402
All information in this Owner's Manual is current at the time of publication.
However, Hyundai reserves the right to make changes at any time so that
our policy of continual product improvement may be carried out.
This manual applies to all models of this vehicle and includes descriptions
and explanations of optional as well as standard equipment. As a result,
you may find material in this manual that does not apply to your specific
vehicle.
Please note that some models are equipped with Right-Hand Drive (RHD).
The explanations and illustrations for some operations in RHD models are
opposite of those written in this manual.
OWNER'S
MANUAL
Operation
Maintenance
Specifications
Page 23 of 402
35
Safety features of your vehicle
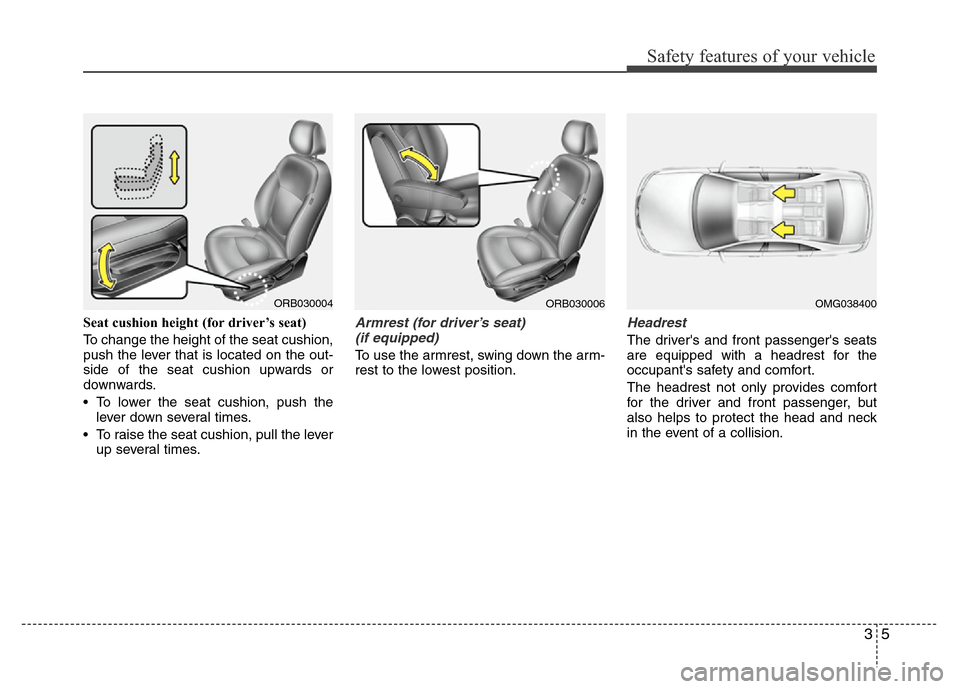
Seat cushion height (for driver’s seat)
To change the height of the seat cushion,
push the lever that is located on the out-
side of the seat cushion upwards or
downwards.
• To lower the seat cushion, push the
lever down several times.
• To raise the seat cushion, pull the lever
up several times.Armrest (for driver’s seat)
(if equipped)
To use the armrest, swing down the arm-
rest to the lowest position.
Headrest
The driver's and front passenger's seats
are equipped with a headrest for the
occupant's safety and comfort.
The headrest not only provides comfort
for the driver and front passenger, but
also helps to protect the head and neck
in the event of a collision.
ORB030004ORB030006OMG038400
Page 122 of 402
Features of your vehicle
52 4
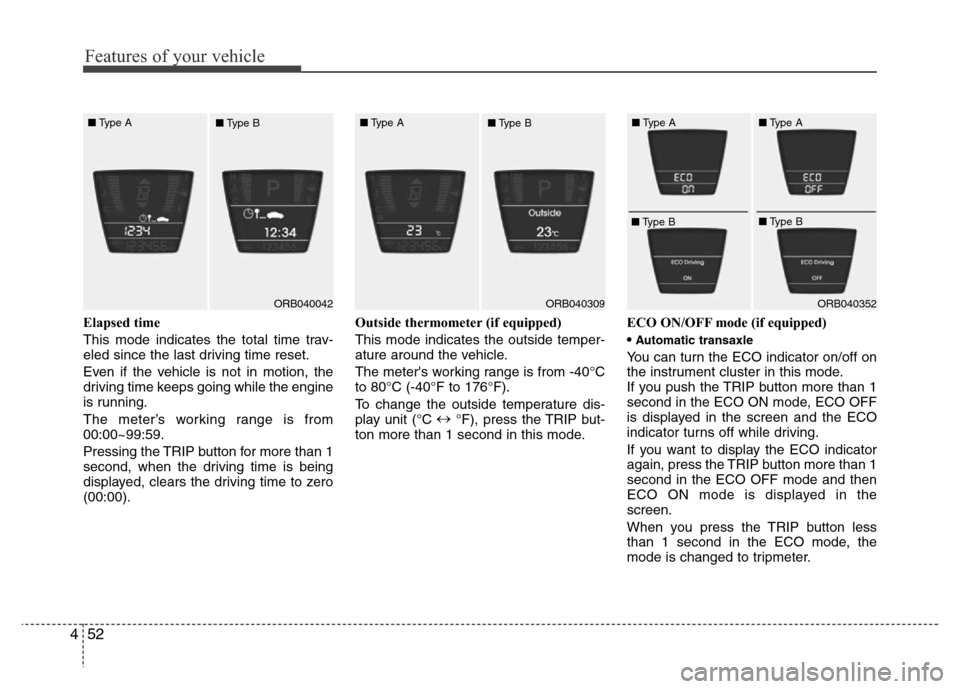
Elapsed time
This mode indicates the total time trav-
eled since the last driving time reset.
Even if the vehicle is not in motion, the
driving time keeps going while the engine
is running.
The meter’s working range is from
00:00~99:59.
Pressing the TRIP button for more than 1
second, when the driving time is being
displayed, clears the driving time to zero
(00:00).Outside thermometer (if equipped)
This mode indicates the outside temper-
ature around the vehicle.
The meter's working range is from -40°C
to 80°C (-40°F to 176°F).
To change the outside temperature dis-
play unit (°C ↔
°F), press the TRIP but-
ton more than 1 second in this mode.ECO ON/OFF mode (if equipped)
•
Automatic transaxle
You can turn the ECO indicator on/off on
the instrument cluster in this mode.
If you push the TRIP button more than 1
second in the ECO ON mode, ECO OFF
is displayed in the screen and the ECO
indicator turns off while driving.
If you want to display the ECO indicator
again, press the TRIP button more than 1
second in the ECO OFF mode and then
ECO ON mode is displayed in the
screen.
When you press the TRIP button less
than 1 second in the ECO mode, the
mode is changed to tripmeter.
ORB040042ORB040352 ■Type A
■Type BORB040309 ■Type A
■Type B■Type A
■Type B■Type A
■Type B
Page 148 of 402
Features of your vehicle
78 4
If the indicator continues to flash after a
turn, manually return the lever to the OFF
position.
To signal a lane change, move the turn
signal lever slightly and hold it in position
(B). The lever will return to the OFF posi-
tion when released.
If an indicator stays on and does not
flash or if it flashes abnormally, one of the
turn signal bulbs may be burned out and
will require replacement.
One-touch lane change function
(if equipped)
To activate an one-touch lane change
function, move the turn signal lever
slightly and then release it. The lane
change signals will blink 3 times.
✽NOTICE
If an indicator flash is abnormally quick
or slow, a bulb may be burned out or
have a poor electrical connection in the
circuit.
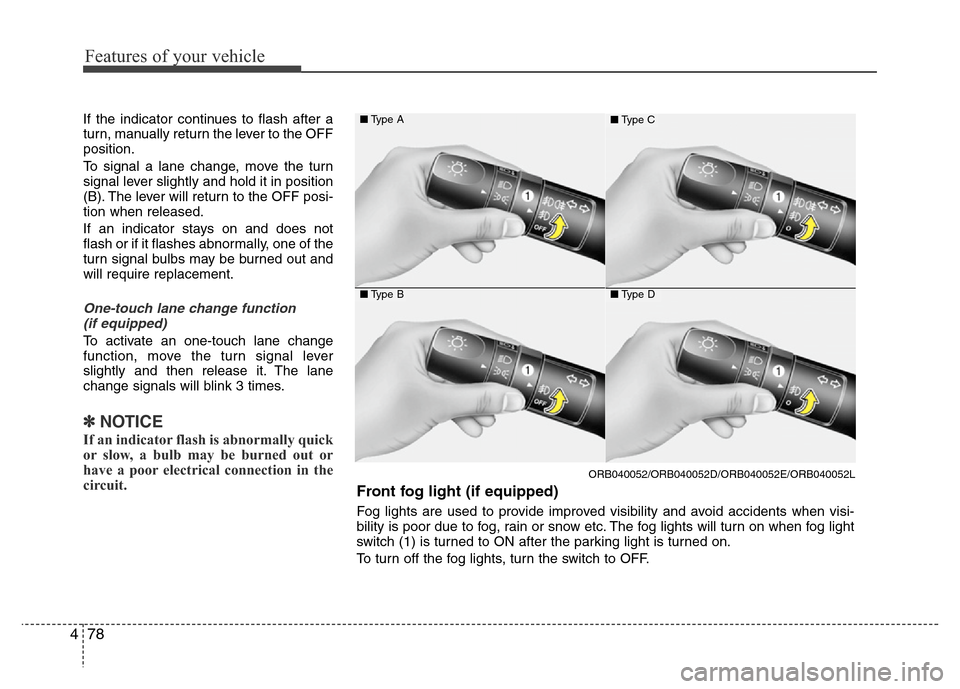
ORB040052/ORB040052D/ORB040052E/ORB040052L
■Type A
■Type B
■Type C
■Type D
Front fog light (if equipped)
Fog lights are used to provide improved visibility and avoid accidents when visi-
bility is poor due to fog, rain or snow etc. The fog lights will turn on when fog light
switch (1) is turned to ON after the parking light is turned on.
To turn off the fog lights, turn the switch to OFF.
Page 165 of 402
495
Features of your vehicle
✽NOTICE
• When using the air conditioning sys-
tem, monitor the temperature gauge
closely while driving up hills or in
heavy traffic when outside tempera-
tures are high. Air conditioning sys-
tem operation may cause engine over-
heating. Continue to use the blower
fan but turn the air conditioning sys-
tem off if the temperature gauge indi-
cates engine overheating.
• When opening the windows in humid
weather air conditioning may create
water droplets inside the vehicle.
Since excessive water droplets may
cause damage to electrical equipment,
air conditioning should only be used
with the windows closed.
Air conditioning system operation tips
• If the vehicle has been parked in direct
sunlight during hot weather, open the
windows for a short time to let the hot
air inside the vehicle escape.
• To help reduce moisture inside of the
windows on rainy or humid days,
decrease the humidity inside the vehi-
cle by operating the air conditioning
system.
• During air conditioning system opera-
tion, you may occasionally notice a
slight change in engine speed as the
air conditioning compressor cycles.
This is a normal system operation
characteristic.
• Use the air conditioning system every
month only for a few minutes to ensure
maximum system performance.• When using the air conditioning sys-
tem, you may notice clear water drip-
ping (or even puddling) on the ground
under the passenger side of the vehi-
cle. This is a normal system operation
characteristic.
• Operating the air conditioning system
in the recirculated air position provides
maximum cooling, however, continual
operation in this mode may cause the
air inside the vehicle to become stale.
• During cooling operation, you may
occasionally notice a misty air flow
because of rapid cooling and humid air
intake. This is a normal system opera-
tion characteristic.
• If you operate air conditioner exces-
sively, the difference between the tem-
perature of the outside air and that of
the windshield could cause the outer
surface of the windshield to fog up,
causing loss of visibility. In this case,
set the mode selection knob or button
to the position and fan speed con-
trol to the lower speed.
Page 166 of 402
Features of your vehicle
96 4
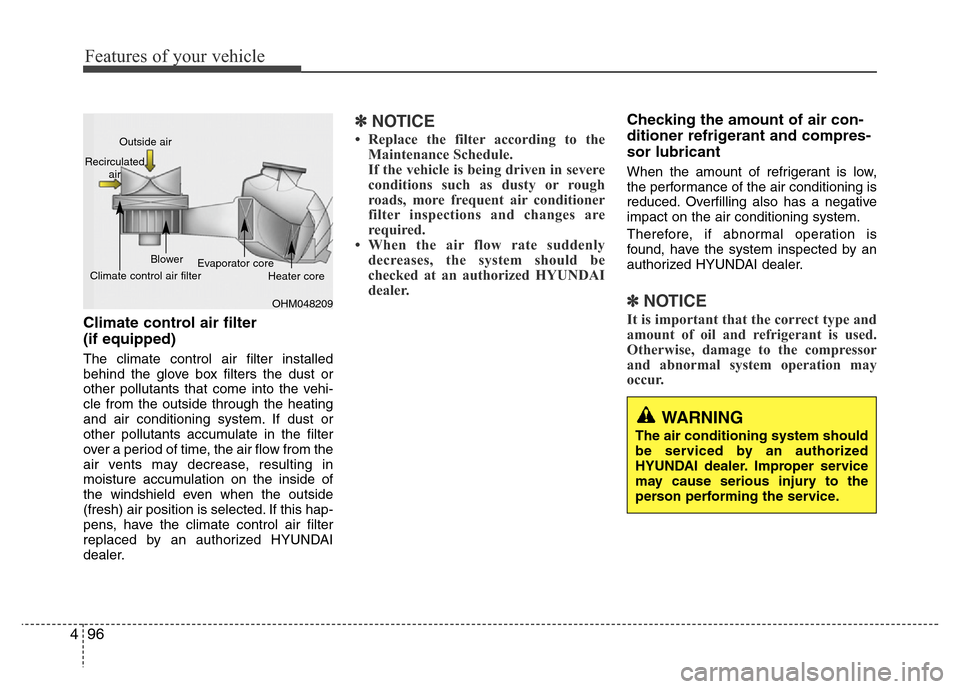
Climate control air filter
(if equipped)
The climate control air filter installed
behind the glove box filters the dust or
other pollutants that come into the vehi-
cle from the outside through the heating
and air conditioning system. If dust or
other pollutants accumulate in the filter
over a period of time, the air flow from the
air vents may decrease, resulting in
moisture accumulation on the inside of
the windshield even when the outside
(fresh) air position is selected. If this hap-
pens, have the climate control air filter
replaced by an authorized HYUNDAI
dealer.
✽NOTICE
• Replace the filter according to the
Maintenance Schedule.
If the vehicle is being driven in severe
conditions such as dusty or rough
roads, more frequent air conditioner
filter inspections and changes are
required.
• When the air flow rate suddenly
decreases, the system should be
checked at an authorized HYUNDAI
dealer.
Checking the amount of air con-
ditioner refrigerant and compres-
sor lubricant
When the amount of refrigerant is low,
the performance of the air conditioning is
reduced. Overfilling also has a negative
impact on the air conditioning system.
Therefore, if abnormal operation is
found, have the system inspected by an
authorized HYUNDAI dealer.
✽NOTICE
It is important that the correct type and
amount of oil and refrigerant is used.
Otherwise, damage to the compressor
and abnormal system operation may
occur.
WARNING
The air conditioning system should
be serviced by an authorized
HYUNDAI dealer. Improper service
may cause serious injury to the
person performing the service.
OHM048209 Outside air
Recirculated
air
Climate control air filterBlower
Evaporator core
Heater core
Page 194 of 402
Features of your vehicle
124 4
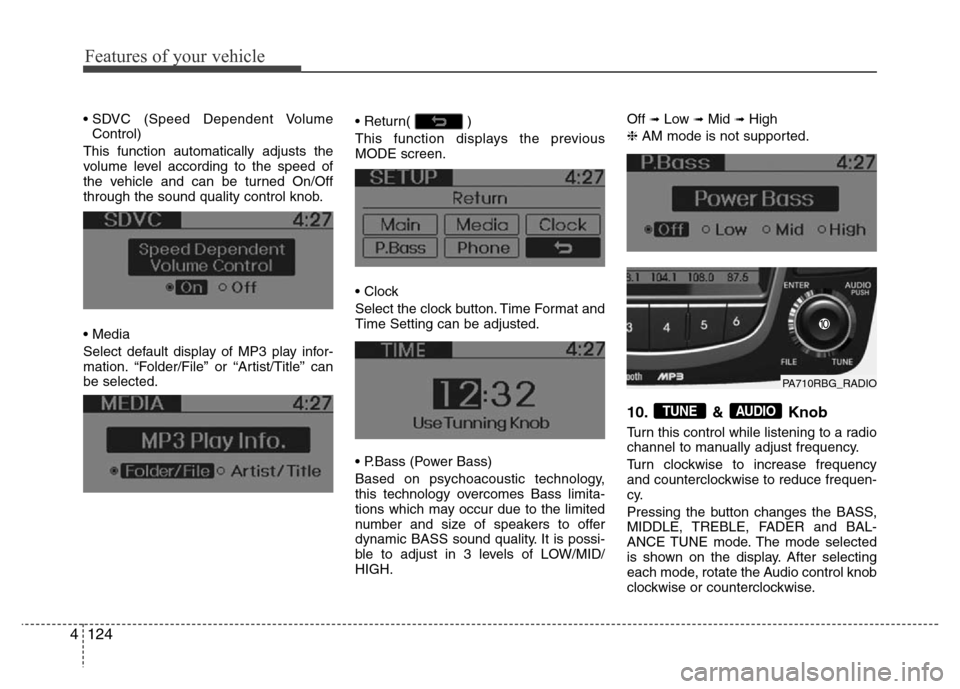
• SDVC (Speed Dependent Volume
Control)
This function automatically adjusts the
volume level according to the speed of
the vehicle and can be turned On/Off
through the sound quality control knob.
• Media
Select default display of MP3 play infor-
mation. “Folder/File” or “Artist/Title” can
be selected.• Return( )
This function displays the previous
MODE screen.
• Clock
Select the clock button. Time Format and
Time Setting can be adjusted.
• P.Bass (Power Bass)
Based on psychoacoustic technology,
this technology overcomes Bass limita-
tions which may occur due to the limited
number and size of speakers to offer
dynamic BASS sound quality. It is possi-
ble to adjust in 3 levels of LOW/MID/
HIGH.Off ➟Low ➟Mid ➟High
❈AM mode is not supported.
10. & Knob
Turn this control while listening to a radio
channel to manually adjust frequency.
Turn clockwise to increase frequency
and counterclockwise to reduce frequen-
cy.
Pressing the button changes the BASS,
MIDDLE, TREBLE, FADER and BAL-
ANCE TUNE mode. The mode selected
is shown on the display. After selecting
each mode, rotate the Audio control knob
clockwise or counterclockwise.
AUDIOTUNE
PA710RBG_RADIO
Page 206 of 402
Features of your vehicle
136 4
• Pairing a phone
Before using Bluetooth®Wireless
Technology features, the phone must be
paired (registered) with the audio sys-
tem. Up to 5 phones can be paired with
the system.
✽NOTICE
• The pairing procedure of the phone
varies according to each phone model.
Before attempting to pair phone,
please see your phone’s User’s Guide
for instructions.
• Once pairing with the phone is com-
pleted, there is no need to pair with
that phone again unless the phone is
deleted manually from the audio sys-
tem (refer “Deleting a Phone” section)
or the vehicle’s information is
removed from the phone.
1. Press button to enter SETUP
mode.
2. Select “PHONE”, then “PAIR” in
PHONE menu.
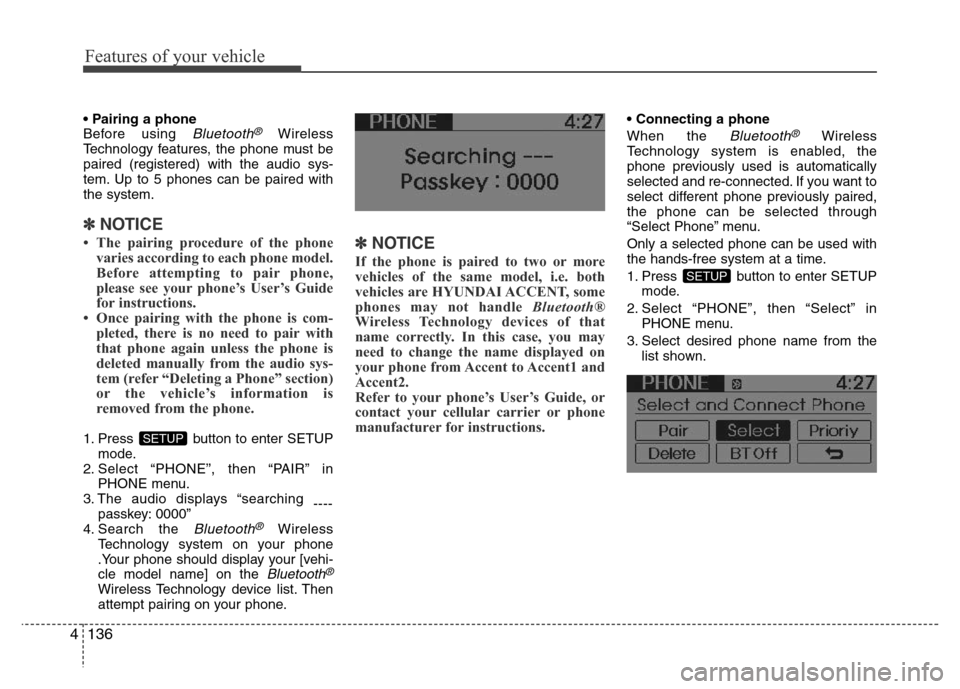
3. The audio displays “searching
----
passkey: 0000”
4. Search the
Bluetooth®Wireless
Technology system on your phone
.Your phone should display your [vehi-
cle model name] on the
Bluetooth®
Wireless Technology device list. Then
attempt pairing on your phone.
✽NOTICE
If the phone is paired to two or more
vehicles of the same model, i.e. both
vehicles are HYUNDAI ACCENT, some
phones may not handle Bluetooth®
Wireless Technology devices of that
name correctly. In this case, you may
need to change the name displayed on
your phone from Accent to Accent1 and
Accent2.
Refer to your phone’s User’s Guide, or
contact your cellular carrier or phone
manufacturer for instructions.
• Connecting a phone
When the
Bluetooth®Wireless
Technology system is enabled, the
phone previously used is automatically
selected and re-connected. If you want to
select different phone previously paired,
the phone can be selected through
“Select Phone” menu.
Only a selected phone can be used with
the hands-free system at a time.
1. Press button to enter SETUP
mode.
2. Select “PHONE”, then “Select” in
PHONE menu.
3. Select desired phone name from the
list shown.
SETUP
SETUP
Page 208 of 402
Features of your vehicle
138 4
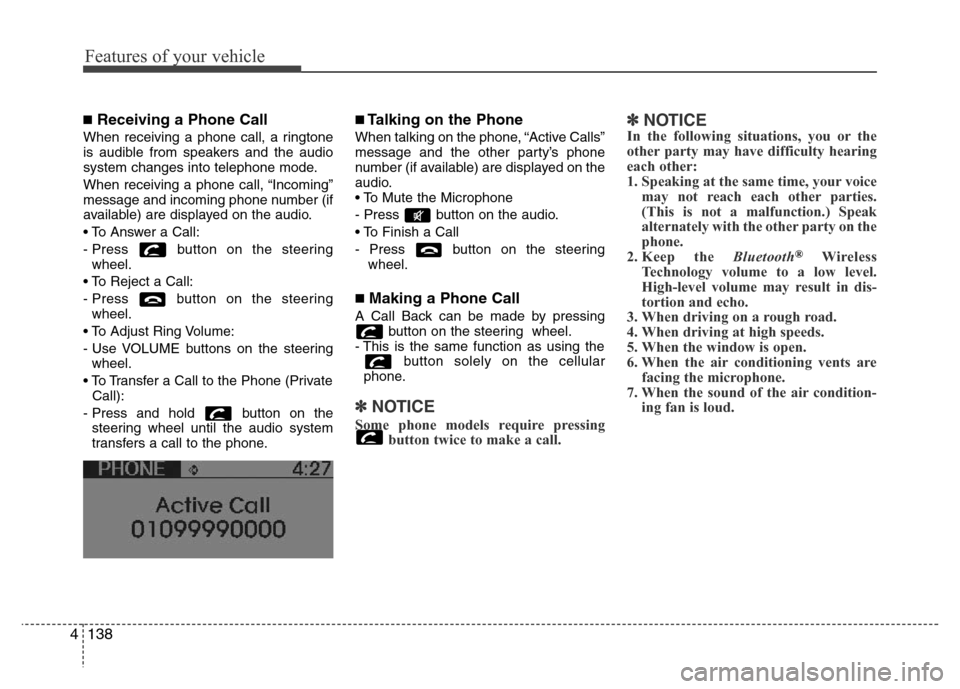
■Receiving a Phone Call
When receiving a phone call, a ringtone
is audible from speakers and the audio
system changes into telephone mode.
When receiving a phone call, “Incoming”
message and incoming phone number (if
available) are displayed on the audio.
• To Answer a Call:
- Press button on the steering
wheel.
• To Reject a Call:
- Press button on the steering
wheel.
• To Adjust Ring Volume:
- Use VOLUME buttons on the steering
wheel.
• To Transfer a Call to the Phone (Private
Call):
- Press and hold button on the
steering wheel until the audio system
transfers a call to the phone.
■Talking on the Phone
When talking on the phone, “Active Calls”
message and the other party’s phone
number (if available) are displayed on the
audio.
• To Mute the Microphone
- Press button on the audio.
• To Finish a Call
- Press button on the steering
wheel.
■Making a Phone Call
A Call Back can be made by pressing
button on the steering wheel.
- This is the same function as using the
button solely on the cellular
phone.
✽NOTICE
Some phone models require pressing
button twice to make a call.
✽NOTICEIn the following situations, you or the
other party may have difficulty hearing
each other:
1. Speaking at the same time, your voice
may not reach each other parties.
(This is not a malfunction.) Speak
alternately with the other party on the
phone.
2. Keep the Bluetooth
®Wireless
Technology volume to a low level.
High-level volume may result in dis-
tortion and echo.
3. When driving on a rough road.
4. When driving at high speeds.
5. When the window is open.
6. When the air conditioning vents are
facing the microphone.
7. When the sound of the air condition-
ing fan is loud.
Page 212 of 402
Features of your vehicle
142 4
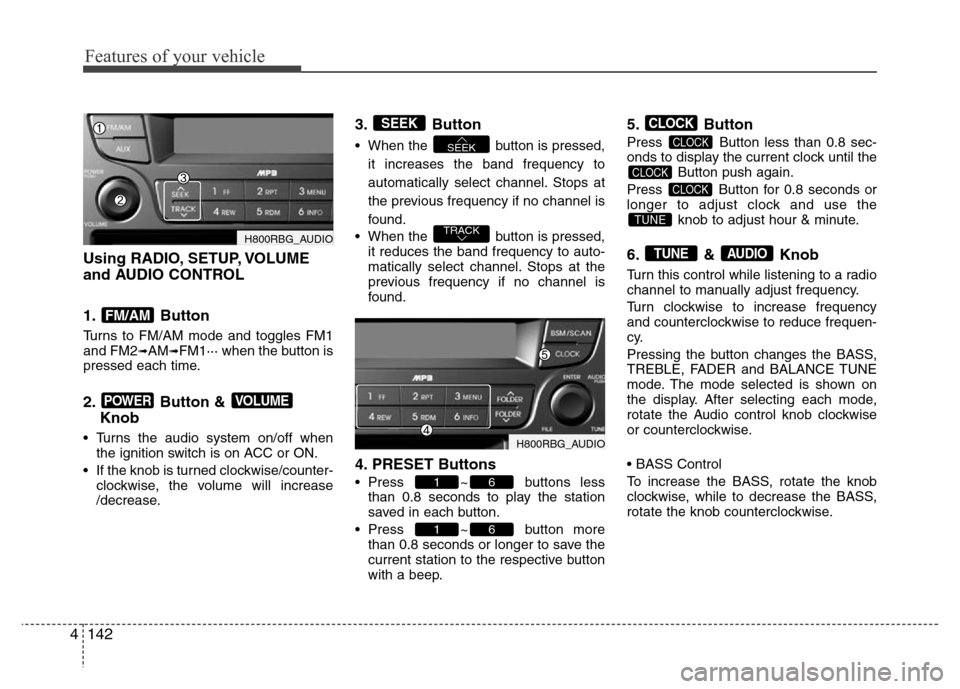
Using RADIO, SETUP, VOLUME
and AUDIO CONTROL
1. Button
Turns to FM/AM mode and toggles FM1
and FM2➟AM➟FM1··· when the button is
pressed each time.
2. Button &
Knob
• Turns the audio system on/off when
the ignition switch is on ACC or ON.
• If the knob is turned clockwise/counter-
clockwise, the volume will increase
/decrease.
3. Button
• When the button is pressed,
it increases the band frequency to
automatically select channel. Stops at
the previous frequency if no channel is
found.
• When the button is pressed,
it reduces the band frequency to auto-
matically select channel. Stops at the
previous frequency if no channel is
found.
4. PRESET Buttons
• Press ~ buttons less
than 0.8 seconds to play the station
saved in each button.
• Press ~ button more
than 0.8 seconds or longer to save the
current station to the respective button
with a beep.
5. Button
Press Button less than 0.8 sec-
onds to display the current clock until the
Button push again.
Press Button for 0.8 seconds or
longer to adjust clock and use the
knob to adjust hour & minute.
6. & Knob
Turn this control while listening to a radio
channel to manually adjust frequency.
Turn clockwise to increase frequency
and counterclockwise to reduce frequen-
cy.
Pressing the button changes the BASS,
TREBLE, FADER and BALANCE TUNE
mode. The mode selected is shown on
the display. After selecting each mode,
rotate the Audio control knob clockwise
or counterclockwise.
• BASS Control
To increase the BASS, rotate the knob
clockwise, while to decrease the BASS,
rotate the knob counterclockwise.
AUDIOTUNE
TUNE
CLOCK
CLOCK
CLOCK
CLOCK
61
61
TRACK
SEEK
SEEK
VOLUMEPOWER
FM/AM
H800RBG_AUDIO
H800RBG_AUDIO