reset Hyundai Accent 2013 Owner's Manual
[x] Cancel search | Manufacturer: HYUNDAI, Model Year: 2013, Model line: Accent, Model: Hyundai Accent 2013Pages: 402, PDF Size: 8.49 MB
Page 95 of 402
425
Features of your vehicle
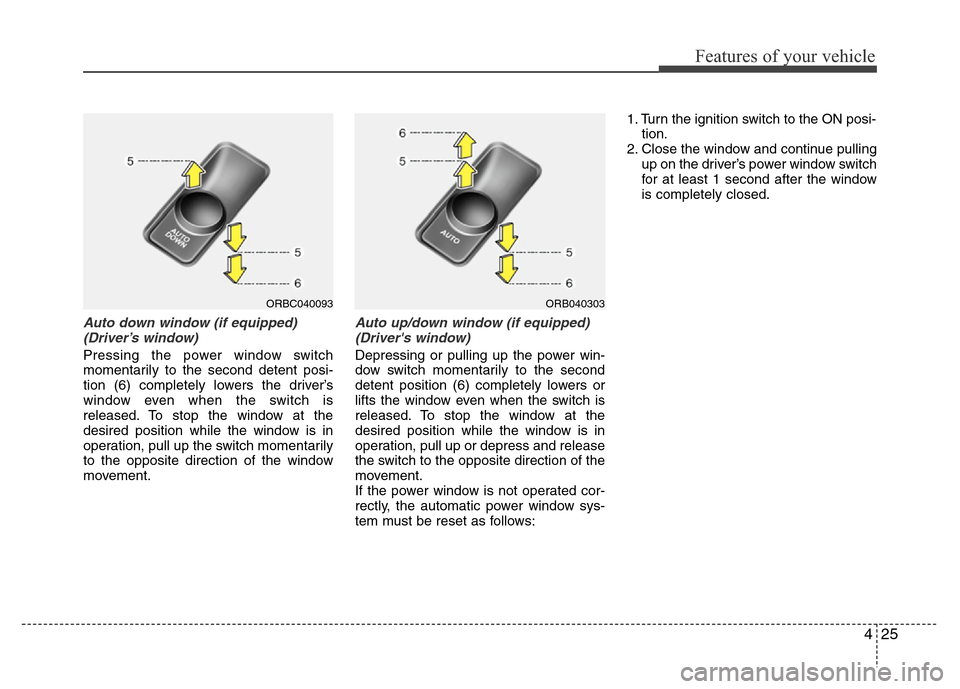
Auto down window (if equipped)
(Driver’s window)
Pressing the power window switch
momentarily to the second detent posi-
tion (6) completely lowers the driver’s
window even when the switch is
released. To stop the window at the
desired position while the window is in
operation, pull up the switch momentarily
to the opposite direction of the window
movement.
Auto up/down window (if equipped)
(Driver's window)
Depressing or pulling up the power win-
dow switch momentarily to the second
detent position (6) completely lowers or
lifts the window even when the switch is
released. To stop the window at the
desired position while the window is in
operation, pull up or depress and release
the switch to the opposite direction of the
movement.
If the power window is not operated cor-
rectly, the automatic power window sys-
tem must be reset as follows:1. Turn the ignition switch to the ON posi-
tion.
2. Close the window and continue pulling
up on the driver’s power window switch
for at least 1 second after the window
is completely closed.
ORB040303ORBC040093
Page 106 of 402
Features of your vehicle
36 4
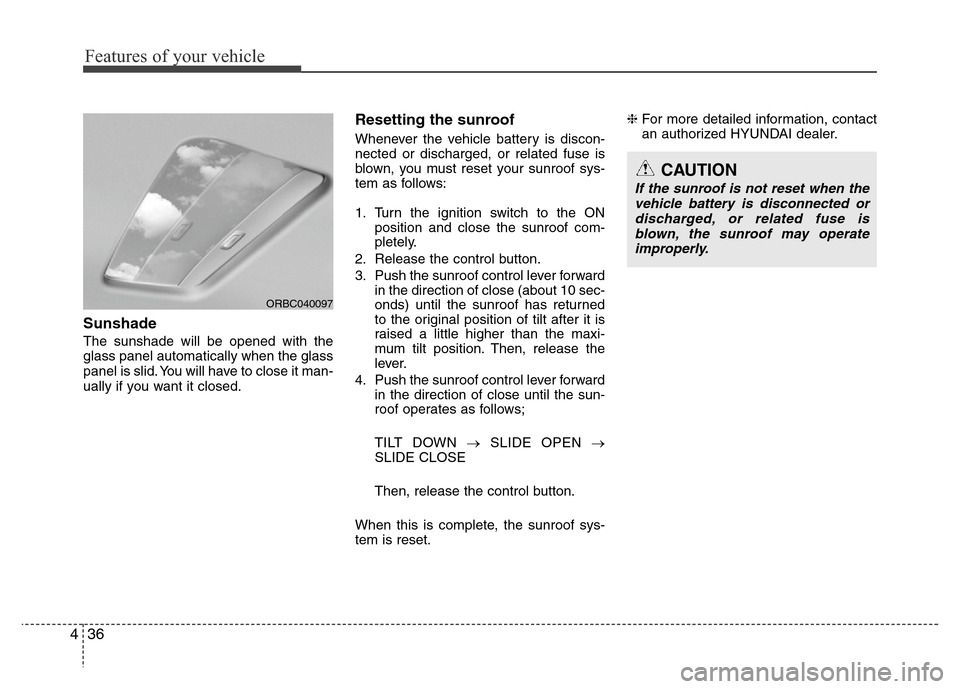
Sunshade
The sunshade will be opened with the
glass panel automatically when the glass
panel is slid. You will have to close it man-
ually if you want it closed.
Resetting the sunroof
Whenever the vehicle battery is discon-
nected or discharged, or related fuse is
blown, you must reset your sunroof sys-
tem as follows:
1. Turn the ignition switch to the ON
position and close the sunroof com-
pletely.
2. Release the control button.
3. Push the sunroof control lever forward
in the direction of close (about 10 sec-
onds) until the sunroof has returned
to the original position of tilt after it is
raised a little higher than the maxi-
mum tilt position. Then, release the
lever.
4. Push the sunroof control lever forward
in the direction of close until the sun-
roof operates as follows;
TILT DOWN →SLIDE OPEN →
SLIDE CLOSE
Then, release the control button.
When this is complete, the sunroof sys-
tem is reset.❈For more detailed information, contact
an authorized HYUNDAI dealer.
ORBC040097
CAUTION
If the sunroof is not reset when the
vehicle battery is disconnected or
discharged, or related fuse is
blown, the sunroof may operate
improperly.
Page 119 of 402
449
Features of your vehicle
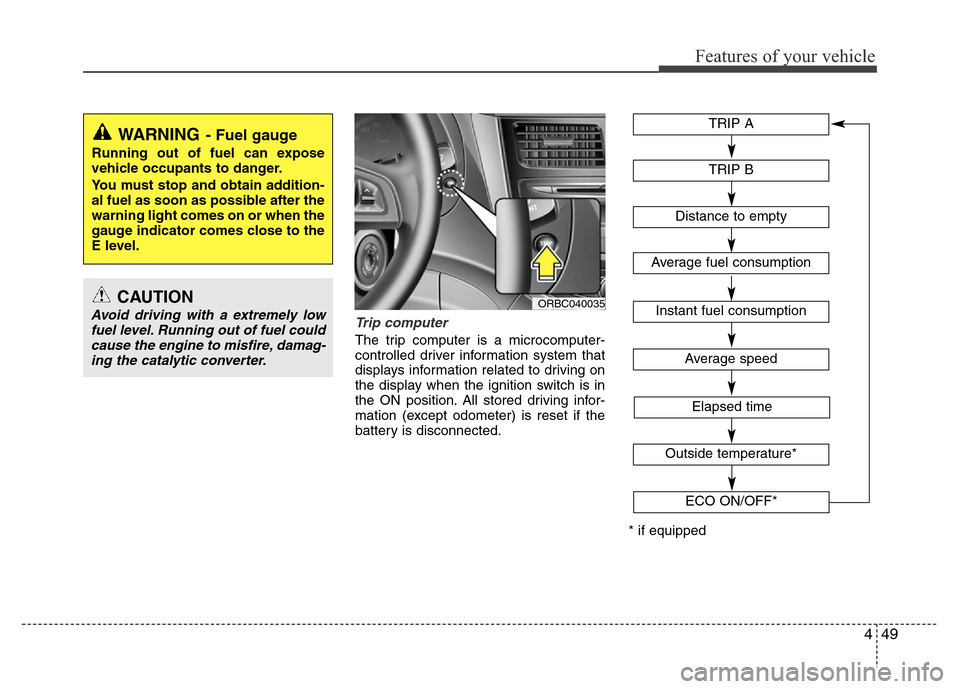
Trip computer
The trip computer is a microcomputer-
controlled driver information system that
displays information related to driving on
the display when the ignition switch is in
the ON position. All stored driving infor-
mation (except odometer) is reset if the
battery is disconnected.
WARNING- Fuel gauge
Running out of fuel can expose
vehicle occupants to danger.
You must stop and obtain addition-
al fuel as soon as possible after the
warning light comes on or when the
gauge indicator comes close to the
E level.
CAUTION
Avoid driving with a extremely low
fuel level. Running out of fuel could
cause the engine to misfire, damag-
ing the catalytic converter.ORBC040035
TRIP A
TRIP B
Average speed
Elapsed time
Distance to empty
Average fuel consumption
Instant fuel consumption
Outside temperature*
* if equippedECO ON/OFF*
Page 120 of 402
Features of your vehicle
50 4
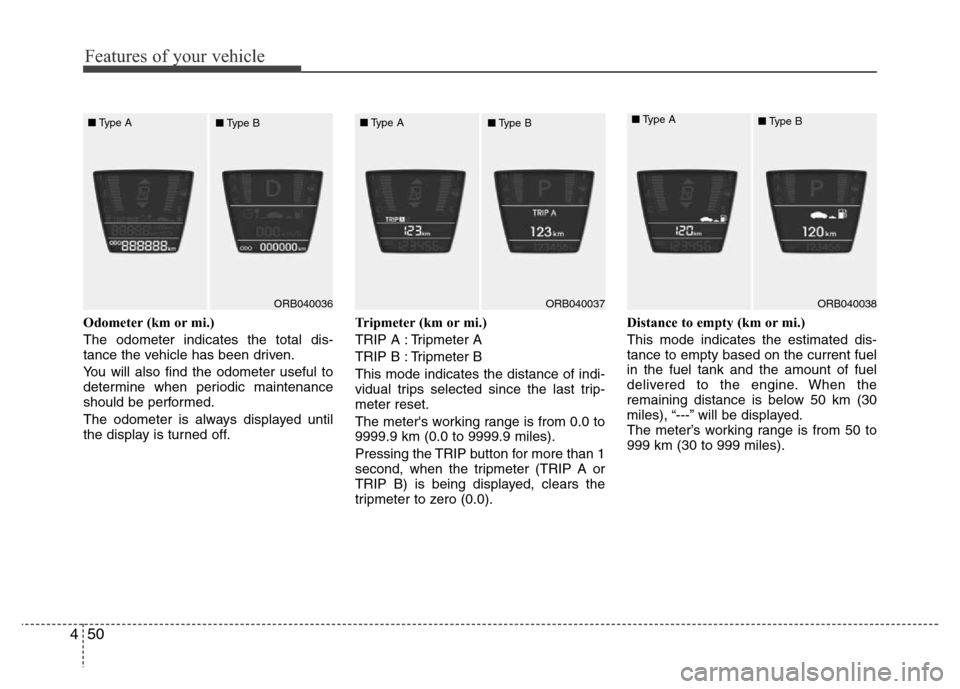
Odometer (km or mi.)
The odometer indicates the total dis-
tance the vehicle has been driven.
You will also find the odometer useful to
determine when periodic maintenance
should be performed.
The odometer is always displayed until
the display is turned off.Tripmeter (km or mi.)
TRIP A : Tripmeter A
TRIP B : Tripmeter B
This mode indicates the distance of indi-
vidual trips selected since the last trip-
meter reset.
The meter's working range is from 0.0 to
9999.9 km (0.0 to 9999.9 miles).
Pressing the TRIP button for more than 1
second, when the tripmeter (TRIP A or
TRIP B) is being displayed, clears the
tripmeter to zero (0.0).Distance to empty (km or mi.)
This mode indicates the estimated dis-
tance to empty based on the current fuel
in the fuel tank and the amount of fuel
delivered to the engine. When the
remaining distance is below 50 km (30
miles), “---” will be displayed.
The meter’s working range is from 50 to
999 km (30 to 999 miles).
ORB040036ORB040037ORB040038 ■Type A
■Type B■Type A
■Type B
■Type A
■Type B
Page 121 of 402
451
Features of your vehicle
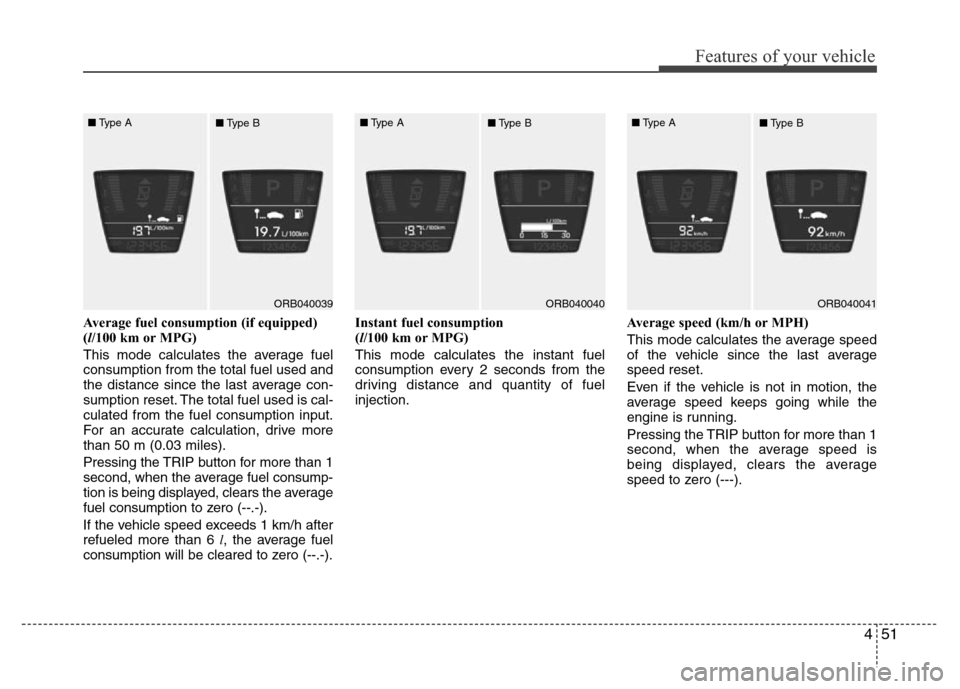
Average fuel consumption (if equipped)
(l/100 km or MPG)
This mode calculates the average fuel
consumption from the total fuel used and
the distance since the last average con-
sumption reset. The total fuel used is cal-
culated from the fuel consumption input.
For an accurate calculation, drive more
than 50 m (0.03 miles).
Pressing the TRIP button for more than 1
second, when the average fuel consump-
tion is being displayed, clears the average
fuel consumption to zero (--.-).
If the vehicle speed exceeds 1 km/h after
refueled more than 6 l, the average fuel
consumption will be cleared to zero (--.-).Instant fuel consumption
(l/100 km or MPG)
This mode calculates the instant fuel
consumption every 2 seconds from the
driving distance and quantity of fuel
injection.Average speed (km/h or MPH)
This mode calculates the average speed
of the vehicle since the last average
speed reset.
Even if the vehicle is not in motion, the
average speed keeps going while the
engine is running.
Pressing the TRIP button for more than 1
second, when the average speed is
being displayed, clears the average
speed to zero (---).
ORB040039ORB040040ORB040041 ■Type A
■Type B■Type A
■Type B■Type A
■Type B
Page 122 of 402
Features of your vehicle
52 4
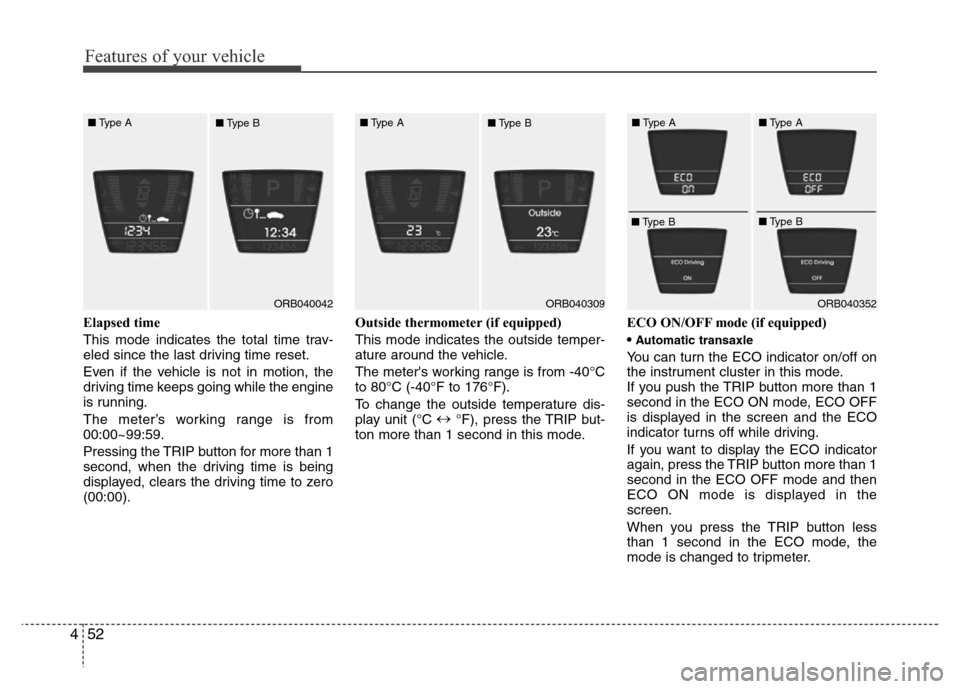
Elapsed time
This mode indicates the total time trav-
eled since the last driving time reset.
Even if the vehicle is not in motion, the
driving time keeps going while the engine
is running.
The meter’s working range is from
00:00~99:59.
Pressing the TRIP button for more than 1
second, when the driving time is being
displayed, clears the driving time to zero
(00:00).Outside thermometer (if equipped)
This mode indicates the outside temper-
ature around the vehicle.
The meter's working range is from -40°C
to 80°C (-40°F to 176°F).
To change the outside temperature dis-
play unit (°C ↔
°F), press the TRIP but-
ton more than 1 second in this mode.ECO ON/OFF mode (if equipped)
•
Automatic transaxle
You can turn the ECO indicator on/off on
the instrument cluster in this mode.
If you push the TRIP button more than 1
second in the ECO ON mode, ECO OFF
is displayed in the screen and the ECO
indicator turns off while driving.
If you want to display the ECO indicator
again, press the TRIP button more than 1
second in the ECO OFF mode and then
ECO ON mode is displayed in the
screen.
When you press the TRIP button less
than 1 second in the ECO mode, the
mode is changed to tripmeter.
ORB040042ORB040352 ■Type A
■Type BORB040309 ■Type A
■Type B■Type A
■Type B■Type A
■Type B
Page 176 of 402
Features of your vehicle
106 4
Defogging logic
To reduce the probability of fogging up
the inside of the windshield, the air intake
or air conditioning are controlled auto-
matically according to certain conditions
such as or position. To cancel or
return the defogging logic, do the follow-
ing.
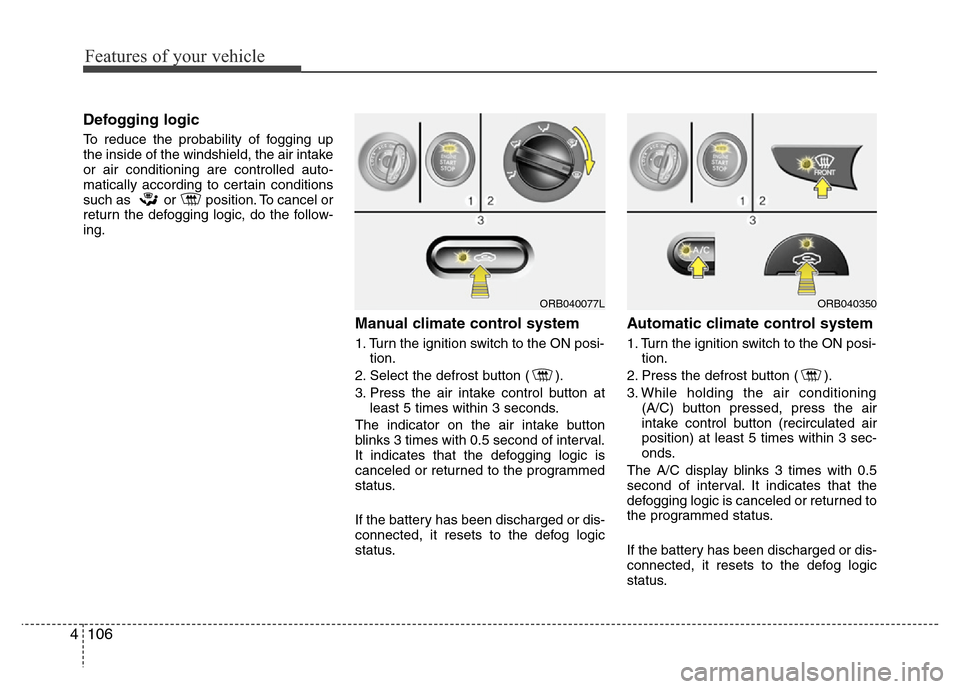
Manual climate control system
1. Turn the ignition switch to the ON posi-
tion.
2. Select the defrost button ( ).
3. Press the air intake control button at
least 5 times within 3 seconds.
The indicator on the air intake button
blinks 3 times with 0.5 second of interval.
It indicates that the defogging logic is
canceled or returned to the programmed
status.
If the battery has been discharged or dis-
connected, it resets to the defog logic
status.
Automatic climate control system
1. Turn the ignition switch to the ON posi-
tion.
2. Press the defrost button ( ).
3. While holding the air conditioning
(A/C) button pressed, press the air
intake control button (recirculated air
position) at least 5 times within 3 sec-
onds.
The A/C display blinks 3 times with 0.5
second of interval. It indicates that the
defogging logic is canceled or returned to
the programmed status.
If the battery has been discharged or dis-
connected, it resets to the defog logic
status.
ORB040077LORB040350
Page 182 of 402
Features of your vehicle
112 4
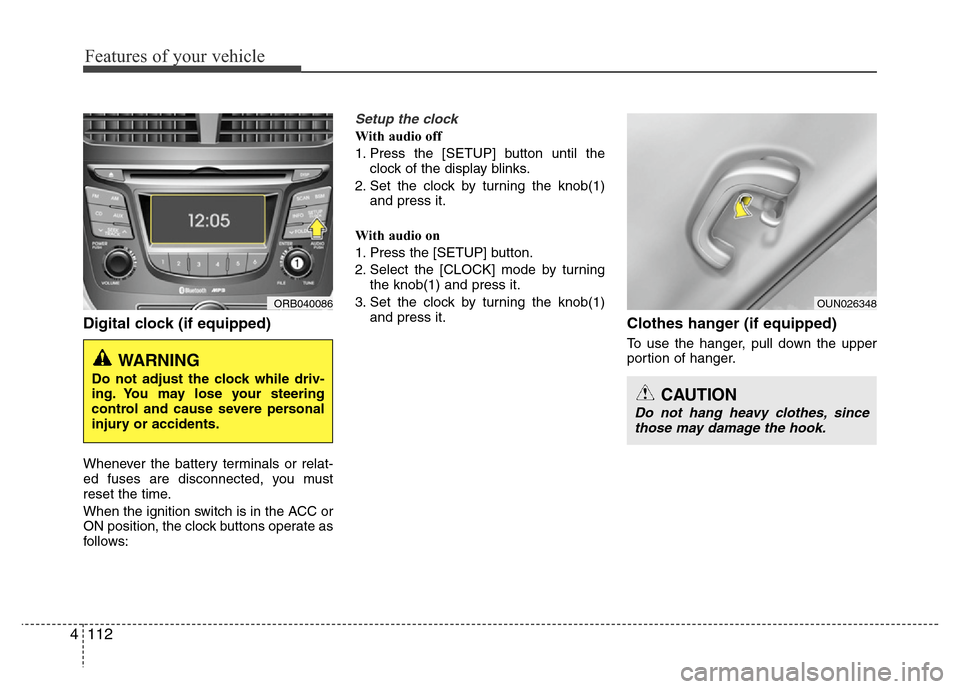
Digital clock (if equipped)
Whenever the battery terminals or relat-
ed fuses are disconnected, you must
reset the time.
When the ignition switch is in the ACC or
ON position, the clock buttons operate as
follows:
Setup the clock
With audio off
1. Press the [SETUP] button until the
clock of the display blinks.
2. Set the clock by turning the knob(1)
and press it.
With audio on
1. Press the [SETUP] button.
2. Select the [CLOCK] mode by turning
the knob(1) and press it.
3. Set the clock by turning the knob(1)
and press it.
Clothes hanger (if equipped)
To use the hanger, pull down the upper
portion of hanger.
ORB040086
WARNING
Do not adjust the clock while driv-
ing. You may lose your steering
control and cause severe personal
injury or accidents.
OUN026348
CAUTION
Do not hang heavy clothes, since
those may damage the hook.
Page 187 of 402
4117
Features of your vehicle
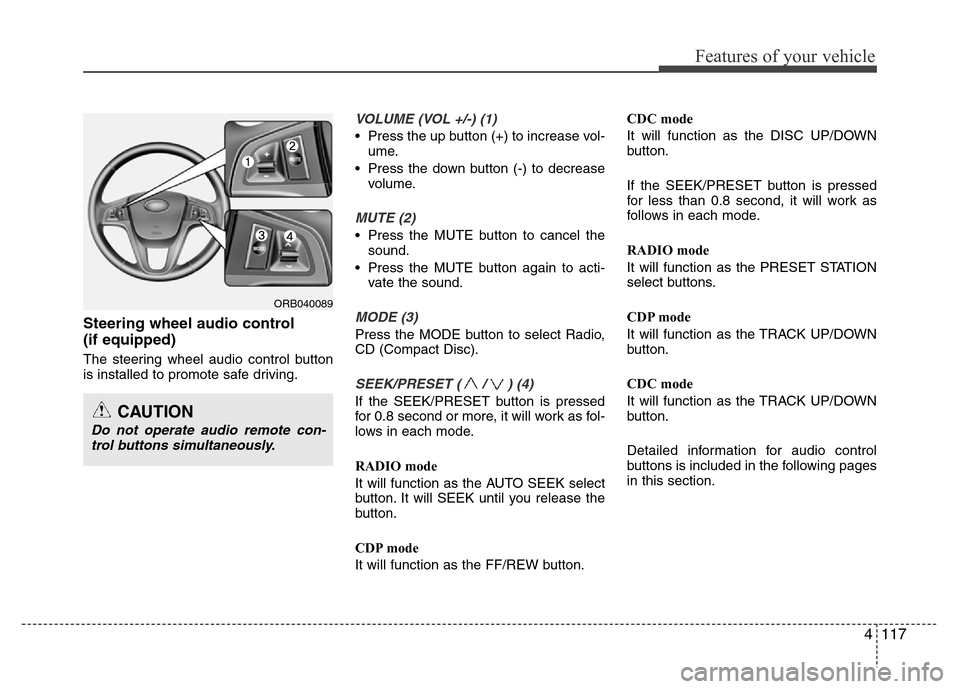
Steering wheel audio control
(if equipped)
The steering wheel audio control button
is installed to promote safe driving.
VOLUME (VOL +/-) (1)
• Press the up button (+) to increase vol-
ume.
• Press the down button (-) to decrease
volume.
MUTE (2)
• Press the MUTE button to cancel the
sound.
• Press the MUTE button again to acti-
vate the sound.
MODE (3)
Press the MODE button to select Radio,
CD (Compact Disc).
SEEK/PRESET ( / ) (4)
If the SEEK/PRESET button is pressed
for 0.8 second or more, it will work as fol-
lows in each mode.
RADIO mode
It will function as the AUTO SEEK select
button. It will SEEK until you release the
button.
CDP mode
It will function as the FF/REW button.CDC mode
It will function as the DISC UP/DOWN
button.
If the SEEK/PRESET button is pressed
for less than 0.8 second, it will work as
follows in each mode.
RADIO mode
It will function as the PRESET STATION
select buttons.
CDP mode
It will function as the TRACK UP/DOWN
button.
CDC mode
It will function as the TRACK UP/DOWN
button.
Detailed information for audio control
buttons is included in the following pages
in this section.
ORB040089
CAUTION
Do not operate audio remote con-
trol buttons simultaneously.
Page 192 of 402
Features of your vehicle
122 4
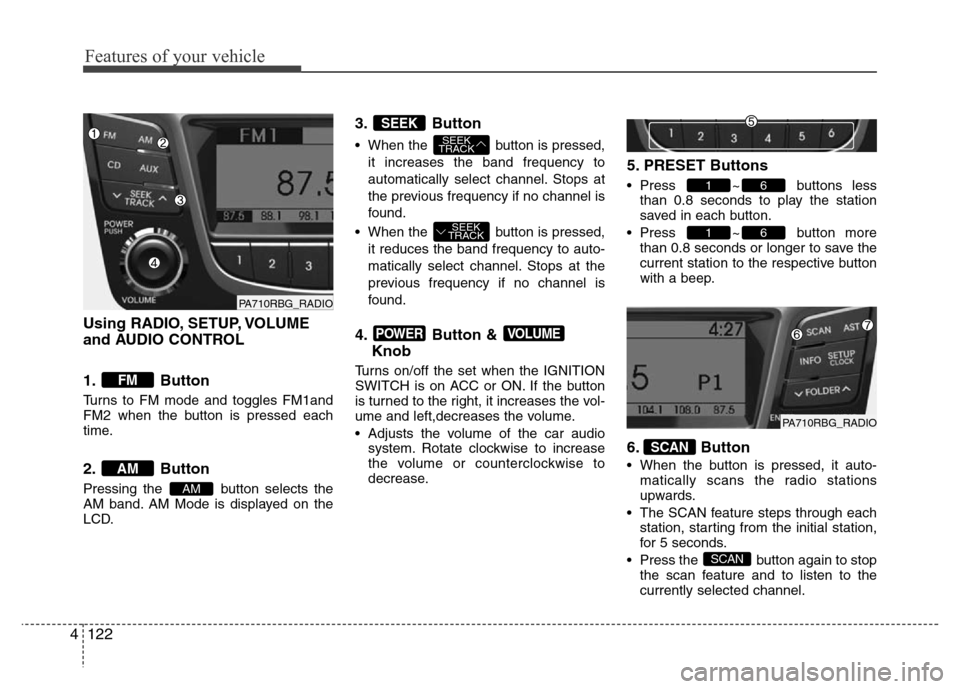
Using RADIO, SETUP, VOLUME
and AUDIO CONTROL
1. Button
Turns to FM mode and toggles FM1and
FM2 when the button is pressed each
time.
2. Button
Pressing the button selects the
AM band. AM Mode is displayed on the
LCD.
3. Button
• When the button is pressed,
it increases the band frequency to
automatically select channel. Stops at
the previous frequency if no channel is
found.
• When the button is pressed,
it reduces the band frequency to auto-
matically select channel. Stops at the
previous frequency if no channel is
found.
4. Button &
Knob
Turns on/off the set when the IGNITION
SWITCH is on ACC or ON. If the button
is turned to the right, it increases the vol-
ume and left,decreases the volume.
• Adjusts the volume of the car audio
system. Rotate clockwise to increase
the volume or counterclockwise to
decrease.
5. PRESET Buttons
• Press ~ buttons less
than 0.8 seconds to play the station
saved in each button.
• Press ~ button more
than 0.8 seconds or longer to save the
current station to the respective button
with a beep.
6. Button
• When the button is pressed, it auto-
matically scans the radio stations
upwards.
• The SCAN feature steps through each
station, starting from the initial station,
for 5 seconds.
• Press the button again to stop
the scan feature and to listen to the
currently selected channel.
SCAN
SCAN
61
61
VOLUMEPOWER
SEEK
TRACK
SEEK
TRACK
SEEK
AM
AM
FM
PA710RBG_RADIO
PA710RBG_RADIO