jack Hyundai Accent 2017 Owner's Manual
[x] Cancel search | Manufacturer: HYUNDAI, Model Year: 2017, Model line: Accent, Model: Hyundai Accent 2017Pages: 380, PDF Size: 12.45 MB
Page 79 of 380
4-5
Features of your vehicle
(Continued)
If the transmitter is in close proximity to
your cell phone or smart phone, the sig-
nal from the transmitter could be
blocked by normal operation of your
cell phone or smart phone. This is espe-
cially important when the phone is
active such as making call, receiving
calls, text messaging, and/or sending/
receiving emails.
Avoid placing the transmitter and your
cell phone or smart phone in the same
pants or jacket pocket and maintain
adequate distance between the two
devices. This device complies with Part 15 of
the FCC rules.
Operation is subject to the following two
conditions:
1. This device may not cause harmfulinterference, and
2. This device must accept any interfer- ence received, including interference
that may cause undesired operation.
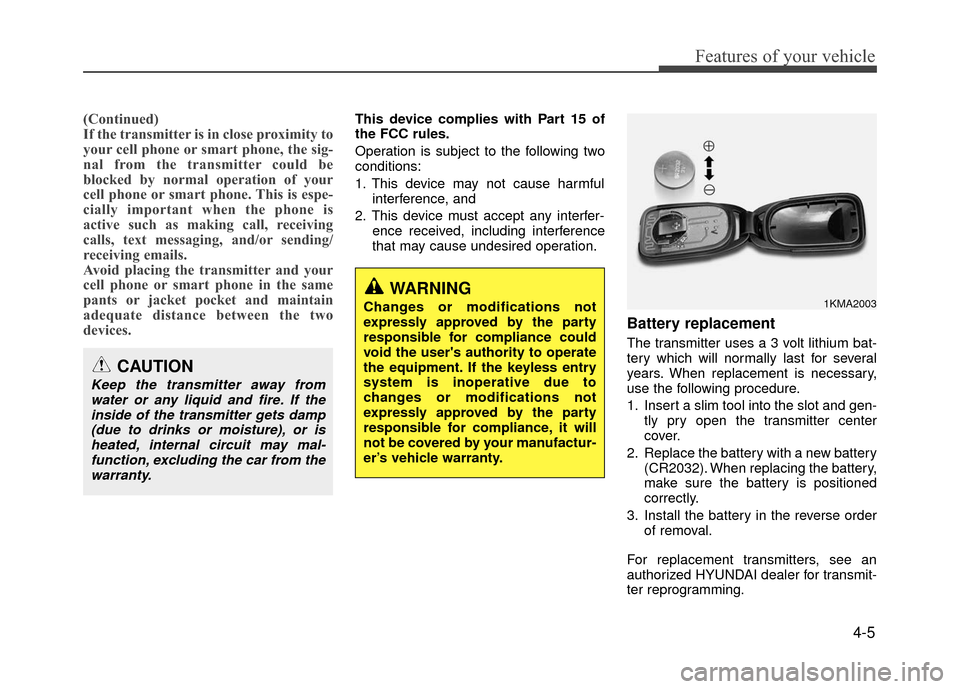
Battery replacement
The transmitter uses a 3 volt lithium bat-
tery which will normally last for several
years. When replacement is necessary,
use the following procedure.
1. Insert a slim tool into the slot and gen-tly pry open the transmitter center
cover.
2. Replace the battery with a new battery (CR2032). When replacing the battery,
make sure the battery is positioned
correctly.
3. Install the battery in the reverse order of removal.
For replacement transmitters, see an
authorized HYUNDAI dealer for transmit-
ter reprogramming.
CAUTION
Keep the transmitter away from water or any liquid and fire. If theinside of the transmitter gets damp(due to drinks or moisture), or isheated, internal circuit may mal- function, excluding the car from thewarranty.
WARNING
Changes or modifications not
expressly approved by the party
responsible for compliance could
void the user's authority to operate
the equipment. If the keyless entry
system is inoperative due to
changes or modifications not
expressly approved by the party
responsible for compliance, it will
not be covered by your manufactur-
er’s vehicle warranty.1KMA2003
Page 166 of 380
Features of your vehicle
4-92
(Continued)
• Some USB flash memory readers(such as CF, SD, micro SD, etc.) or
external-HDD type devices can be
unrecognizable.
• Music files protected by DRM (DIGITAL RIGHTS MANAGE-
MENT) are not recognizable.
• The data in the USB memory may be lost while using this audio.
Always back up important data on
a personal storage device.
• Please avoid using USB memory products which can be used as key
chains or cellular phone
accessories as they could
cause damage to the
USB jack. Please make
certain only to use plug
type connector products.✽
✽ NOTICE - USING THE
iPod®DEVICE
• iPhone is a registered trademark of
Apple inc.
• Some iPod
®models may not sup-
port communication protocol and
files may not properly play.
Supported iPod
®models:
- iPhone®3GS/4
- iPod®touch 1st~4th generation
- iPod®nano 1st~6th generation
- iPod®classic
• The order of search or playback of songs in the iPod
®can be different
from the order searched in the
audio system.
• If the iPod
®is disabled due to its
own malfunction, reset the iPod®.
(Reset: Refer to iPod®manual)
• An iPod®may not operate normal-
ly on low battery. (Continued)(Continued)
• Some iPod
®devices, such as the
iPhone®, can be connected through
the Bluetooth®Wireless Technology
interface. The device must have
audio Bluetooth
®Wireless
Technology capability (such as for
stereo headphone Bluetooth
®
Wireless Technology).
The device can play, but it will not
be controlled by the audio system.
• To use iPod
®features within the
audio, use the cable provided upon
purchasing an iPod
®device.
• Skipping or improper operation may occur depending on the char-
acteristics of your iPod
®/ iPhone®
device.
• If your iPhone®is connected to
both the Bluetooth®Wireless
Technology and USB, the sound
may not be properly played. In
your iPhone
®, select the Dock con-
nector or Bluetooth®Wireless
Technology to change the sound
output (source). (Continued)
Page 233 of 380
Driving your vehicle
5-30
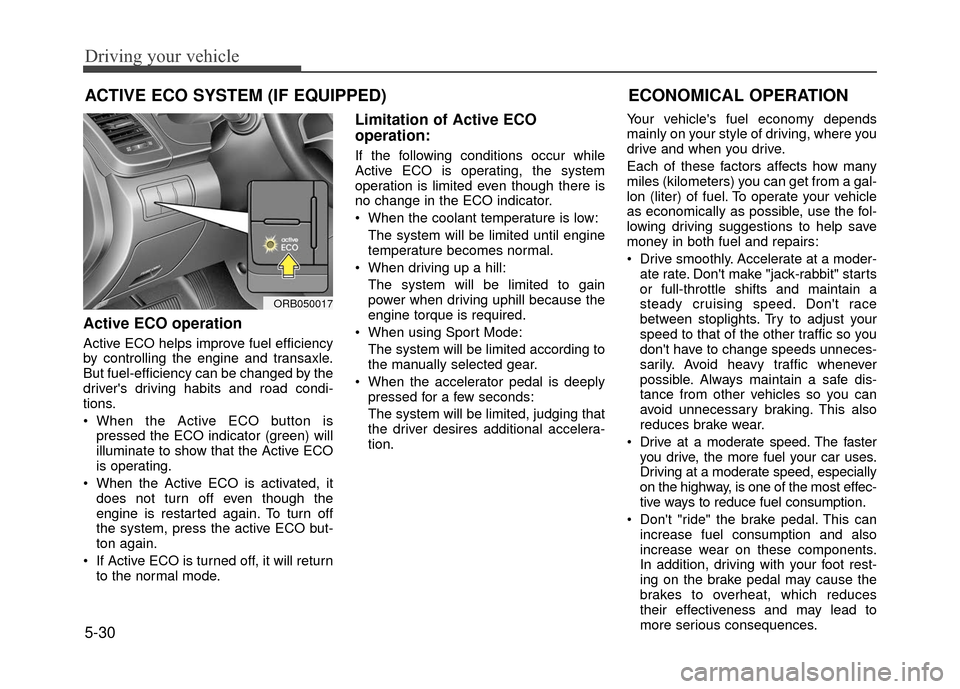
Active ECO operation
Active ECO helps improve fuel efficiency
by controlling the engine and transaxle.
But fuel-efficiency can be changed by the
driver's driving habits and road condi-
tions.
When the Active ECO button ispressed the ECO indicator (green) will
illuminate to show that the Active ECO
is operating.
When the Active ECO is activated, it does not turn off even though the
engine is restarted again. To turn off
the system, press the active ECO but-
ton again.
If Active ECO is turned off, it will return to the normal mode.
Limitation of Active ECO
operation:
If the following conditions occur while
Active ECO is operating, the system
operation is limited even though there is
no change in the ECO indicator.
When the coolant temperature is low:
The system will be limited until engine
temperature becomes normal.
When driving up a hill: The system will be limited to gain
power when driving uphill because the
engine torque is required.
When using Sport Mode: The system will be limited according to
the manually selected gear.
When the accelerator pedal is deeply pressed for a few seconds:
The system will be limited, judging that
the driver desires additional accelera-
tion. Your vehicle's fuel economy depends
mainly on your style of driving, where you
drive and when you drive.
Each of these factors affects how many
miles (kilometers) you can get from a gal-
lon (liter) of fuel. To operate your vehicle
as economically as possible, use the fol-
lowing driving suggestions to help save
money in both fuel and repairs:
Drive smoothly. Accelerate at a moder-
ate rate. Don't make "jack-rabbit" starts
or full-throttle shifts and maintain a
steady cruising speed. Don't race
between stoplights. Try to adjust your
speed to that of the other traffic so you
don't have to change speeds unneces-
sarily. Avoid heavy traffic whenever
possible. Always maintain a safe dis-
tance from other vehicles so you can
avoid unnecessary braking. This also
reduces brake wear.
Drive at a moderate speed. The faster you drive, the more fuel your car uses.
Driving at a moderate speed, especially
on the highway, is one of the most effec-
tive ways to reduce fuel consumption.
Don't "ride" the brake pedal. This can increase fuel consumption and also
increase wear on these components.
In addition, driving with your foot rest-
ing on the brake pedal may cause the
brakes to overheat, which reduces
their effectiveness and may lead to
more serious consequences.
ACTIVE ECO SYSTEM (IF EQUIPPED)
ORB050017
ECONOMICAL OPERATION
Page 265 of 380
6-17
What to do in an emergency
IF YOU HAVE A FLAT TIRE (WITH SPARE TIRE, IF EQUIPPED)
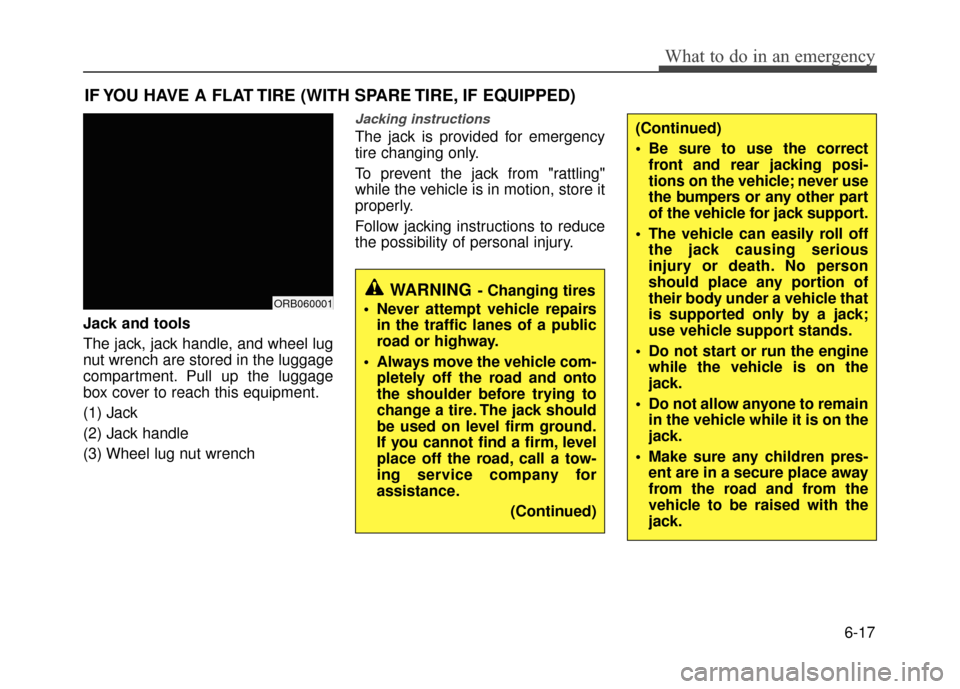
Jack and tools
The jack, jack handle, and wheel lug
nut wrench are stored in the luggage
compartment. Pull up the luggage
box cover to reach this equipment.
(1) Jack
(2) Jack handle
(3) Wheel lug nut wrench
Jacking instructions
The jack is provided for emergency
tire changing only.
To prevent the jack from "rattling"
while the vehicle is in motion, store it
properly.
Follow jacking instructions to reduce
the possibility of personal injury.
WARNING- Changing tires
Never attempt vehicle repairs in the traffic lanes of a public
road or highway.
Always move the vehicle com- pletely off the road and onto
the shoulder before trying to
change a tire. The jack should
be used on level firm ground.
If you cannot find a firm, level
place off the road, call a tow-
ing service company for
assistance.
(Continued)ORB060001
(Continued)
Be sure to use the correctfront and rear jacking posi-
tions on the vehicle; never use
the bumpers or any other part
of the vehicle for jack support.
The vehicle can easily roll off the jack causing serious
injury or death. No person
should place any portion of
their body under a vehicle that
is supported only by a jack;
use vehicle support stands.
Do not start or run the engine while the vehicle is on the
jack.
Do not allow anyone to remain in the vehicle while it is on the
jack.
Make sure any children pres- ent are in a secure place away
from the road and from the
vehicle to be raised with the
jack.
Page 266 of 380
What to do in an emergency
6-18
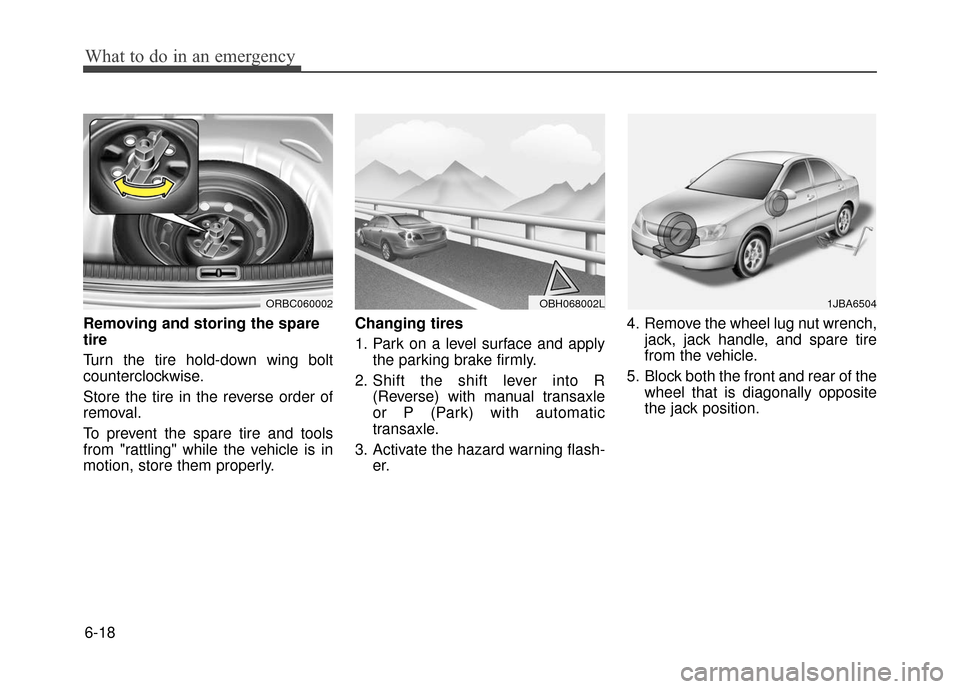
Removing and storing the spare
tire
Turn the tire hold-down wing bolt
counterclockwise.
Store the tire in the reverse order of
removal.
To prevent the spare tire and tools
from "rattling" while the vehicle is in
motion, store them properly.Changing tires
1. Park on a level surface and apply
the parking brake firmly.
2. Shift the shift lever into R (Reverse) with manual transaxle
or P (Park) with automatic
transaxle.
3. Activate the hazard warning flash- er. 4. Remove the wheel lug nut wrench,
jack, jack handle, and spare tire
from the vehicle.
5. Block both the front and rear of the wheel that is diagonally opposite
the jack position.
ORBC060002OBH068002L1JBA6504
Page 267 of 380
6-19
What to do in an emergency
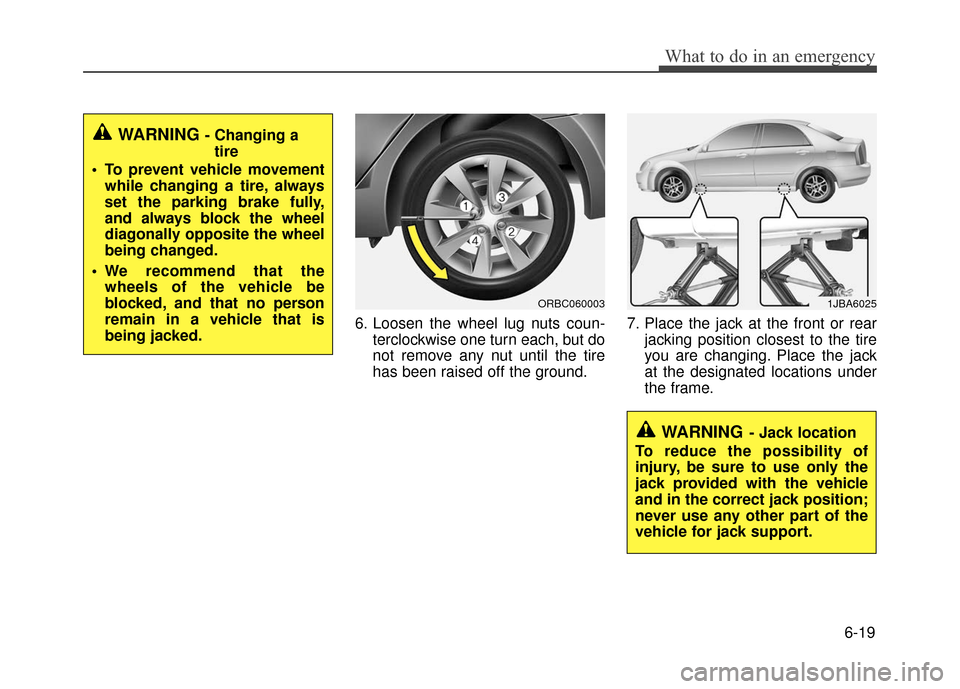
6. Loosen the wheel lug nuts coun-terclockwise one turn each, but do
not remove any nut until the tire
has been raised off the ground. 7. Place the jack at the front or rear
jacking position closest to the tire
you are changing. Place the jack
at the designated locations under
the frame.
WARNING - Changing atire
To prevent vehicle movement while changing a tire, always
set the parking brake fully,
and always block the wheel
diagonally opposite the wheel
being changed.
We recommend that the wheels of the vehicle be
blocked, and that no person
remain in a vehicle that is
being jacked.
ORBC060003
WARNING- Jack location
To reduce the possibility of
injury, be sure to use only the
jack provided with the vehicle
and in the correct jack position;
never use any other part of the
vehicle for jack support.
1JBA6025
Page 268 of 380
What to do in an emergency
6-20
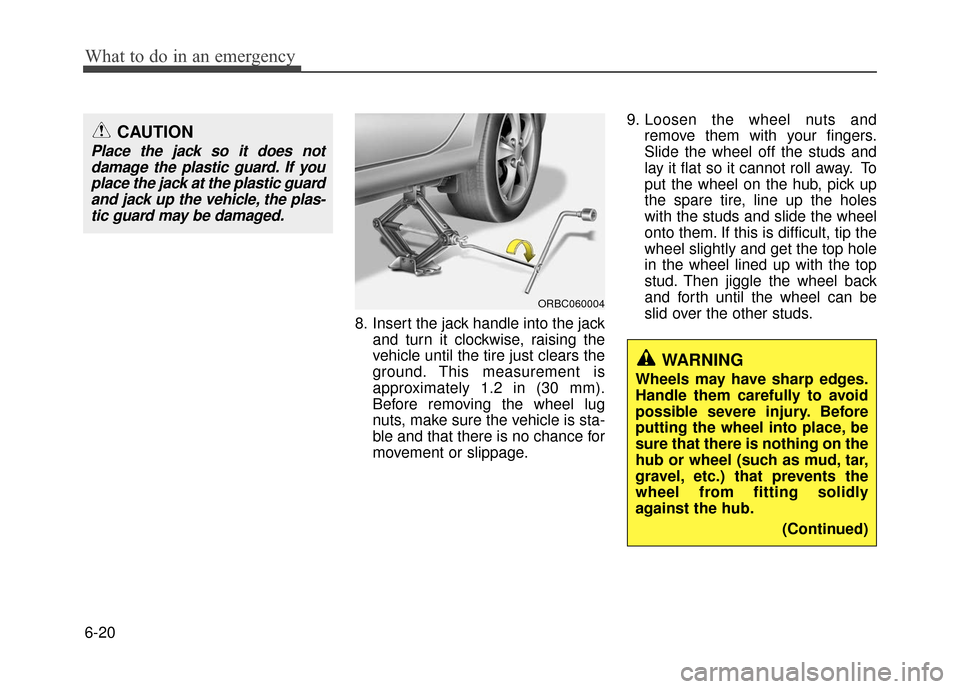
8. Insert the jack handle into the jackand turn it clockwise, raising the
vehicle until the tire just clears the
ground. This measurement is
approximately 1.2 in (30 mm).
Before removing the wheel lug
nuts, make sure the vehicle is sta-
ble and that there is no chance for
movement or slippage. 9. Loosen the wheel nuts and
remove them with your fingers.
Slide the wheel off the studs and
lay it flat so it cannot roll away. To
put the wheel on the hub, pick up
the spare tire, line up the holes
with the studs and slide the wheel
onto them. If this is difficult, tip the
wheel slightly and get the top hole
in the wheel lined up with the top
stud. Then jiggle the wheel back
and forth until the wheel can be
slid over the other studs.
ORBC060004
CAUTION
Place the jack so it does notdamage the plastic guard. If youplace the jack at the plastic guardand jack up the vehicle, the plas-tic guard may be damaged.
WARNING
Wheels may have sharp edges.
Handle them carefully to avoid
possible severe injury. Before
putting the wheel into place, be
sure that there is nothing on the
hub or wheel (such as mud, tar,
gravel, etc.) that prevents the
wheel from fitting solidly
against the hub.
(Continued)
Page 269 of 380
6-21
What to do in an emergency
10. To reinstall the wheel, hold it onthe studs, put the wheel nuts on
the studs and tighten them finger
tight. The nuts should be installed
with their tapered small diameter
ends directed inward. Jiggle the
tire to be sure it is completely
seated, then tighten the nuts as
much as possible with your fin-
gers again.
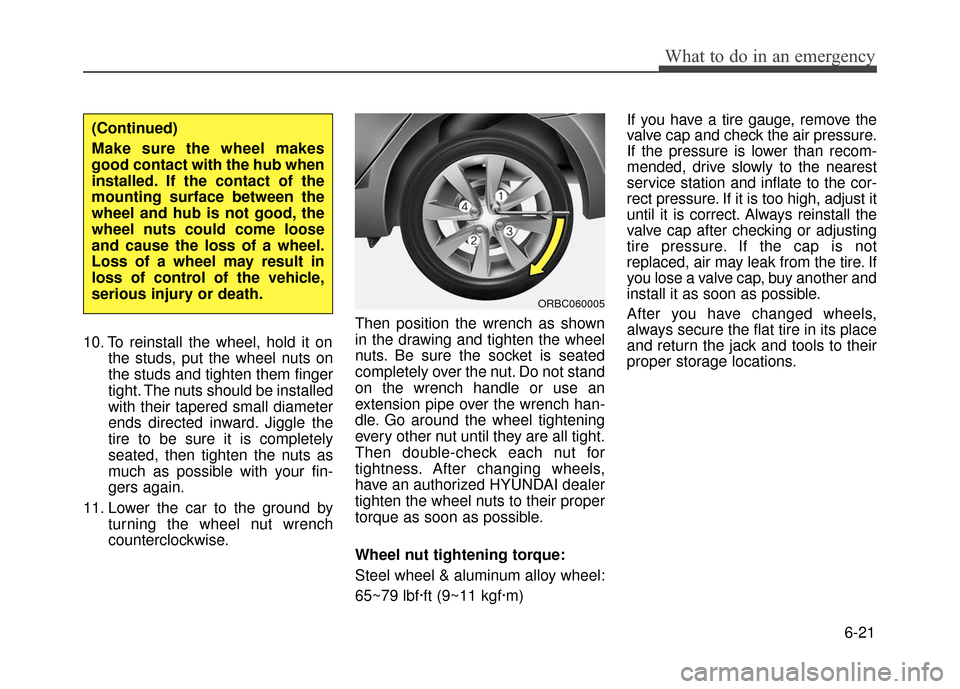
11. Lower the car to the ground by turning the wheel nut wrench
counterclockwise. Then position the wrench as shown
in the drawing and tighten the wheel
nuts. Be sure the socket is seated
completely over the nut. Do not stand
on the wrench handle or use an
extension pipe over the wrench han-
dle. Go around the wheel tightening
every other nut until they are all tight.
Then double-check each nut for
tightness. After changing wheels,
have an authorized HYUNDAI dealer
tighten the wheel nuts to their proper
torque as soon as possible.
Wheel nut tightening torque:
Steel wheel & aluminum alloy wheel:
65~79 lbf·ft (9~11 kgf·m) If you have a tire gauge, remove the
valve cap and check the air pressure.
If the pressure is lower than recom-
mended, drive slowly to the nearest
service station and inflate to the cor-
rect pressure. If it is too high, adjust it
until it is correct. Always reinstall the
valve cap after checking or adjusting
tire pressure. If the cap is not
replaced, air may leak from the tire. If
you lose a valve cap, buy another and
install it as soon as possible.
After you have changed wheels,
always secure the flat tire in its place
and return the jack and tools to their
proper storage locations.
(Continued)
Make sure the wheel makes
good contact with the hub when
installed. If the contact of the
mounting surface between the
wheel and hub is not good, the
wheel nuts could come loose
and cause the loss of a wheel.
Loss of a wheel may result in
loss of control of the vehicle,
serious injury or death.
ORBC060005
Page 270 of 380
What to do in an emergency
6-22
To prevent the jack, jack handle,
wheel lug nut wrench and spare tire
from rattling while the vehicle is in
motion, store them properly.
Important - use of compact spare tire(if equipped)
If your vehicle is equipped with a
compact spare tire, it will take up less
space than a regular-size tire. This
tire is smaller than a conventional tire
and is designed for temporary use
only.
CAUTION
Your vehicle has metric threadson the wheel studs and nuts.Make certain during wheelremoval that the same nuts thatwere removed are reinstalled -or, if replaced, that nuts withmetric threads and the samechamfer configuration are used.Installation of a non-metricthread nut on a metric stud orvice-versa will not secure thewheel to the hub properly andwill damage the stud so that itmust be replaced.
Note that most lug nuts do nothave metric threads. Be sure touse extreme care in checkingfor thread style before installingaftermarket lug nuts or wheels.If in doubt, consult an author-ized HYUNDAI dealer.
CAUTION
You should drive carefully when the compact spare is inuse. The compact spareshould be replaced by theproper conventional tire andrim at the first opportunity.
The operation of this vehicle is not recommended withmore than one compact sparetire in use at the same time.
WARNING- Wheel studs
If the studs are damaged, they
may lose their ability to retain
the wheel. This could lead to the
loss of the wheel and a collision
resulting in serious injuries.
WARNING - Inadequate
spare tire pressure
Check the inflation pressures
as soon as possible after
installing the spare tire. Adjust
it to the specified pressure, if
necessary. Refer to "Tires and
wheels" section 8.
Page 272 of 380
What to do in an emergency
6-24
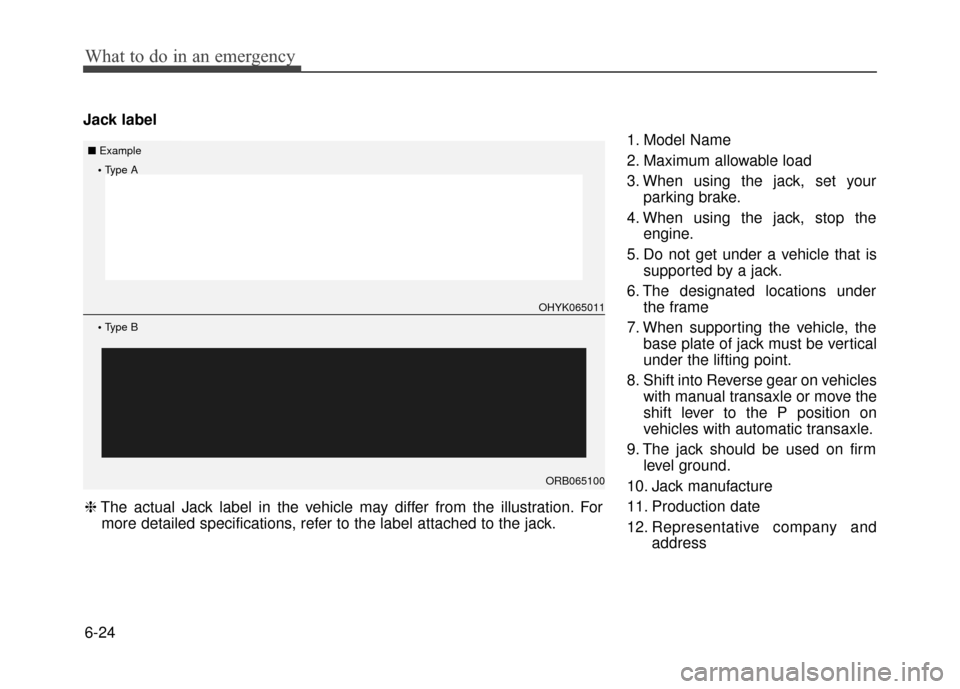
Jack label1. Model Name
2. Maximum allowable load
3. When using the jack, set yourparking brake.
4. When using the jack, stop the engine.
5. Do not get under a vehicle that is supported by a jack.
6. The designated locations under the frame
7. When supporting the vehicle, the base plate of jack must be vertical
under the lifting point.
8. Shift into Reverse gear on vehicles with manual transaxle or move the
shift lever to the P position on
vehicles with automatic transaxle.
9. The jack should be used on firm level ground.
10. Jack manufacture
11. Production date
12. Representative company and address
Type A
■ Example
Type B
OHYK065011
ORB065100
❈ The actual Jack label in the vehicle may differ from the illustration. For
more detailed specifications, refer to the label attached to the jack.