ESP Hyundai Atos 2002 User Guide
[x] Cancel search | Manufacturer: HYUNDAI, Model Year: 2002, Model line: Atos, Model: Hyundai Atos 2002Pages: 249, PDF Size: 3.11 MB
Page 80 of 249
WHAT TO DO IN AN EMERGENCY
WHAT TO DO IN AN EMERGENCY WHAT TO DO IN AN EMERGENCY
WHAT TO DO IN AN EMERGENCY
WHAT TO DO IN AN EMERGENCY
3-3
WARNING:
WARNING: WARNING:
WARNING:
WARNING:
While the engine is running, keep hands,
While the engine is running, keep hands, While the engine is running, keep hands,
While the engine is running, keep hands,
While the engine is running, keep hands, long hair
long hair long hair
long hair
long hair
and clothing away from moving
and clothing away from moving and clothing away from moving
and clothing away from moving
and clothing away from moving
parts such as the fan and drive belts to
parts such as the fan and drive belts to parts such as the fan and drive belts to
parts such as the fan and drive belts to
parts such as the fan and drive belts to
prevent
prevent prevent
prevent
prevent
injury.
injury. injury.
injury.
injury.
5. If the water pump drive belt is broken or engine coolant is leaking out, stop the en- gine immediately and call the nearestHyundai dealer for assistance.
WARNING:
WARNING: WARNING:
WARNING:
WARNING:
Do not remove the radiator cap when the
Do not remove the radiator cap when the Do not remove the radiator cap when the
Do not remove the radiator cap when the
Do not remove the radiator cap when the engine is hot. This may allow
engine is hot. This may allow engine is hot. This may allow
engine is hot. This may allow
engine is hot. This may allow coolant to be
coolant to be coolant to be
coolant to be
coolant to be
blown out of the opening and cause serious
blown out of the opening and cause serious blown out of the opening and cause serious
blown out of the opening and cause serious
blown out of the opening and cause serious
burns.
burns. burns.
burns.
burns.
6. If you cannot find the cause of the overheat-
ing, wait until the engine temperature has returned to normal. Then, if engine coolanthas been lost, carefully remove the radiator
cap and add engine coolant to bring the fluidlevel in the reservoir up to the halfway mark.
7. Proceed with caution, keeping alert for fur- ther signs of overheating. If overheating hap-pens again, call a Hyundai dealer for assis-tance.
CAUTION:
CAUTION: CAUTION:
CAUTION:
CAUTION:
Serious loss of engine coolant indicates
Serious loss of engine coolant indicates Serious loss of engine coolant indicates
Serious loss of engine coolant indicates
Serious loss of engine coolant indicates there is a leak in
there is a leak in there is a leak in
there is a leak in
there is a leak in the cooling system and this
the cooling system and this the cooling system and this
the cooling system and this
the cooling system and this
should be checked as soon as possible by a
should be checked as soon as possible by a should be checked as soon as possible by a
should be checked as soon as possible by a
should be checked as soon as possible by a
Hyundai
Hyundai Hyundai
Hyundai
Hyundai dealer.
dealer. dealer.
dealer.
dealer. D040A01A-GAT
SPARE TIRE
SPARE TIRE SPARE TIRE
SPARE TIRE
SPARE TIRE
The following instructions for the FULL SIZE
spare tire should be observed:
Check inflation pressure as soon as practical
after installing the spare tire, and adjust to the specified pressure. The tire pressure should beperiodically checked and maintained at thespecified pressure while the tire is stored.
Tire Size Inflation Pressure Full Size 210 kPa (30 psi)
Spare Tire Pressure
D040B01A-AAT
Handling the Spare Tire
Handling the Spare Tire Handling the Spare Tire
Handling the Spare Tire
Handling the Spare Tire
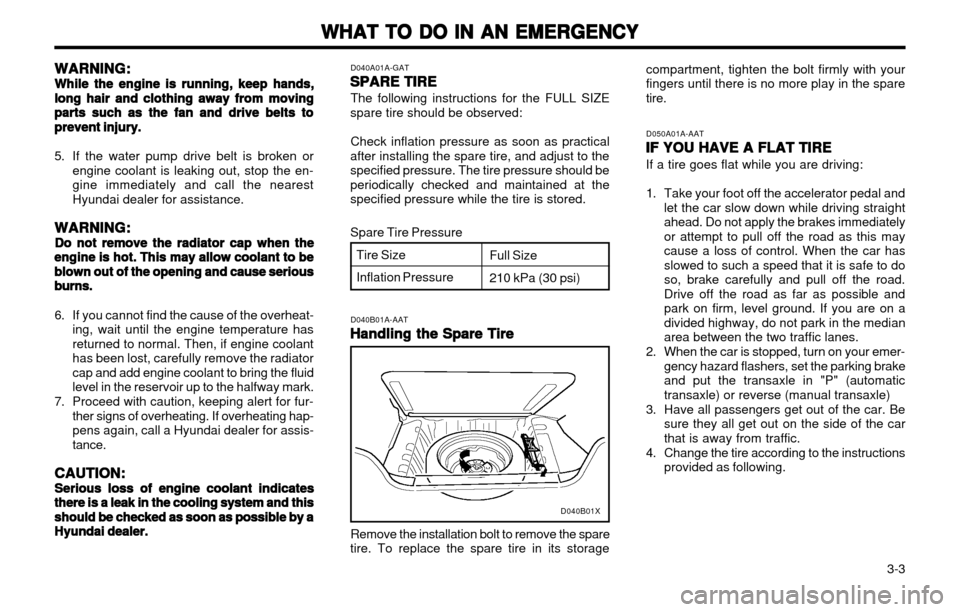
Remove the installation bolt to remove the spare
tire. To replace the spare tire in its storage D050A01A-AAT
IF YOU HAVE A FLAT TIRE
IF YOU HAVE A FLAT TIRE IF YOU HAVE A FLAT TIRE
IF YOU HAVE A FLAT TIRE
IF YOU HAVE A FLAT TIRE If a tire goes flat while you are driving:
1. Take your foot off the accelerator pedal and
let the car slow down while driving straight ahead. Do not apply the brakes immediatelyor attempt to pull off the road as this may
cause a loss of control. When the car hasslowed to such a speed that it is safe to doso, brake carefully and pull off the road.Drive off the road as far as possible and
park on firm, level ground. If you are on adivided highway, do not park in the medianarea between the two traffic lanes.
2. When the car is stopped, turn on your emer- gency hazard flashers, set the parking brakeand put the transaxle in "P" (automatic
transaxle) or reverse (manual transaxle)
3. Have all passengers get out of the car. Be sure they all get out on the side of the carthat is away from traffic.
4. Change the tire according to the instructions provided as following.
compartment, tighten the bolt firmly with yourfingers until there is no more play in the sparetire.
D040B01X
Page 90 of 249
VEHICLE MAINTENANCE REQUIREMENTS
VEHICLE MAINTENANCE REQUIREMENTS VEHICLE MAINTENANCE REQUIREMENTS
VEHICLE MAINTENANCE REQUIREMENTS
VEHICLE MAINTENANCE REQUIREMENTS
5-1
5.5.
5.5.
5.
VEHICLE MAINTE-
VEHICLE MAINTE- VEHICLE MAINTE-
VEHICLE MAINTE-
VEHICLE MAINTE-
NANCE REQ
NANCE REQ NANCE REQ
NANCE REQ
NANCE REQ
UIRE-
UIRE- UIRE-
UIRE-
UIRE-
MENTS
MENTS MENTS
MENTS
MENTS
F010A01A-GAT MAINTENANCE INTERVALS
MAINTENANCE INTERVALS MAINTENANCE INTERVALS
MAINTENANCE INTERVALS
MAINTENANCE INTERVALS
Service requirements
Service requirements Service requirements
Service requirements
Service requirements
To assure that you receive the greatest number
of kilometers of satisfying operation from your Hyundai, certain maintenance procedures must
be performed. Although careful design and en-
gineering have reduced these to a minimum,those that are required are of the utmost impor-tance. It is your responsibility to have these mainte-
nance procedures performed to comply with theterms of the warranties covering your newHyundai. The Service Passport supplied withyour new vehicle provides further information
about these warranties. F010B01A-AAT
Maintenance Requirements
Maintenance Requirements Maintenance Requirements
Maintenance Requirements
Maintenance Requirements
The maintenance required for your Hyundai
can be divided into three main areas:
o Specified scheduled procedures
o General everyday checks
o Do-it-yourself maintenance F010C01A-GAT
Specified Scheduled Procedures
Specified Scheduled Procedures Specified Scheduled Procedures
Specified Scheduled Procedures
Specified Scheduled Procedures
These are the procedures such as inspections,
adjustments and replacements that are listed in the maintenance charts starting on page 5-2.These procedures must be performed at theintervals shown in the maintenance schedule to
assure that your warranty remains in effect.Although it is strongly recommended that they
be performed by the factory-trained or distribu-tor-trained technicians at your Hyundai dealer,
these procedures may be performed at any
qualified service facility.
It is suggested that genuine Hyundai service
parts be used for any required repairs or re-placements. Other parts of equivalent quality
such as engine oil, engine coolant, manual orauto transaxle oil, brake fluid and so on which
are not supplied by Hyundai Motor Company or
its distributor may be used without affectingyour warranty coverage but you should always
be sure these are equivalent to the quality of theoriginal Hyundai parts. Your Service Passport
provides further information about your warran-ty coverage. F010E01A-AAT
Do-It-Yourself Maintenance
Do-It-Yourself Maintenance Do-It-Yourself Maintenance
Do-It-Yourself Maintenance
Do-It-Yourself Maintenance
If you are mechanically inclined, own a few
tools that are required and want to take the timeto do so, you can inspect and service a number
of items. For more information about doing ityourself, see Section 6.
F010F01A-AATA Few Tips
A Few Tips A Few Tips
A Few Tips
A Few Tips
o Whenever you have your Hyundai serviced,
keep copies of the service records in your
glovebox. This will help ensure that you candocument that the required procedures have
been performed to keep your warranties ineffect. This is especially important when
service is not performed by an authorizedHyundai dealer.
o If you choose to do your own maintenance and repairs, you may find it helpful to havean official Hyundai Shop Manual. A copy of
this publication may be purchased at yourHyundai dealer's parts department.
F020A02X-GAT SCHEDULED MAINTENANCE RE-
SCHEDULED MAINTENANCE RE- SCHEDULED MAINTENANCE RE-
SCHEDULED MAINTENANCE RE-
SCHEDULED MAINTENANCE RE-
QUIREMENTS
QUIREMENTS QUIREMENTS
QUIREMENTS
QUIREMENTS
Inspection should be performed any time a
malfunction is experienced or suspected. Re-ceipts for all emission control system services
should be retained to demonstrate compliancewith conditions of the emissions system war-ranty. For severe usage maintenance require-ments, see page 5-4 of this section.
F010D01A-AAT
General Checks
General Checks General Checks
General Checks
General Checks
These are the regular checks you should per-
form when you drive your Hyundai or you fill thefuel tank. A list of these items will be found onpage 6-2.
55
55
5
Page 120 of 249
CONSUMER INFORMATION
CONSUMER INFORMATION CONSUMER INFORMATION
CONSUMER INFORMATION
CONSUMER INFORMATION
8-2
o Lower-than-recommended tire pressures
cause uneven tread wear and poor han- dling.
o Higher-than-recommended tire pressures increase the chance of damage from im-pacts and cause uneven tread wear.
CAUTION:
CAUTION: CAUTION:
CAUTION:
CAUTION:
Always observe the following:
Always observe the following: Always observe the following:
Always observe the following:
Always observe the following:
oo
oo
o Check pressures when the tires are cold.
Check pressures when the tires are cold. Check pressures when the tires are cold.
Check pressures when the tires are cold.
Check pressures when the tires are cold.
That is, after the car has been parked for
That is, after the car has been parked for That is, after the car has been parked for
That is, after the car has been parked for
That is, after the car has been parked for
at least three hours and hasn't been driv-
at least three hours and hasn't been driv- at least three hours and hasn't been driv-
at least three hours and hasn't been driv-
at least three hours and hasn't been driv-
en more than 1.6 km or one mile since
en more than 1.6 km or one mile since en more than 1.6 km or one mile since
en more than 1.6 km or one mile since
en more than 1.6 km or one mile since
starting up.
starting up. starting up.
starting up.
starting up.
oo
oo
o Check the pressure of your spare tire
Check the pressure of your spare tire Check the pressure of your spare tire
Check the pressure of your spare tire
Check the pressure of your spare tire
each time you check the pressure of
each time you check the pressure of each time you check the pressure of
each time you check the pressure of
each time you check the pressure of
other tires.
other tires. other tires.
other tires.
other tires.
oo
oo
o Never overload your car. Be especially
Never overload your car. Be especially Never overload your car. Be especially
Never overload your car. Be especially
Never overload your car. Be especially
careful about overloading if you equip
careful about overloading if you equip careful about overloading if you equip
careful about overloading if you equip
careful about overloading if you equip
your car with a luggage rack or car top
your car with a luggage rack or car top your car with a luggage rack or car top
your car with a luggage rack or car top
your car with a luggage rack or car top
carrier.
carrier. carrier.
carrier.
carrier. I040A01A-GAT
SNOW TIRES
SNOW TIRES SNOW TIRES
SNOW TIRES
SNOW TIRES
If you equip your car with snow tires, they
should be the same size and have the sameload capacity as the original tires. Snow tiresshould be installed on all four wheels; other-wise, poor handling may result.
Snow tires should carry 28 kPa (4 psi) more air
pressure than the pressure recommended forthe standard tires on the tire label on the driverside center pillar outer panel, or up to themaximum pressure shown on the tire sidewallwhichever is less.
Do not drive faster than the speed limit when
your car is equipped with snow tires. I050A01X-GAT
TIRE CHAINS
TIRE CHAINS TIRE CHAINS
TIRE CHAINS
TIRE CHAINS Tire chains, if necessary, should be installed on the front wheels. Be sure that the chains are theproper size and that they are installed in accor-dance with the manufacturer's instructions. To minimize tire and chain wear, do not con- tinue to use tire chains when they are no longerneeded.
WARNING:
WARNING: WARNING:
WARNING:
WARNING:
When driving on roads covered with snow
When driving on roads covered with snow When driving on roads covered with snow
When driving on roads covered with snow
When driving on roads covered with snow
or ice, drive at less
or ice, drive at less or ice, drive at less
or ice, drive at less
or ice, drive at less than 30 km/h (20 mph).
than 30 km/h (20 mph). than 30 km/h (20 mph).
than 30 km/h (20 mph).
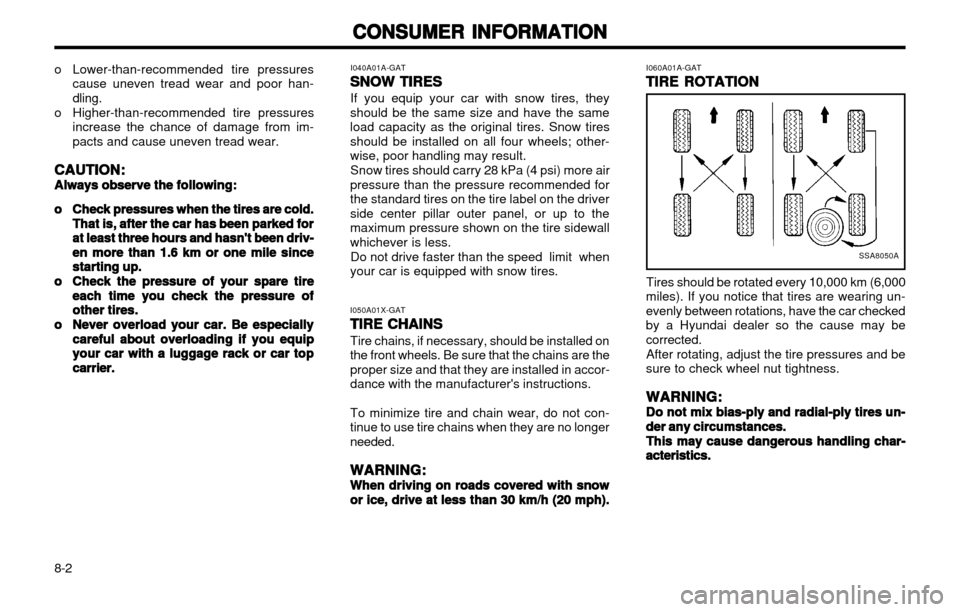
than 30 km/h (20 mph). I060A01A-GAT
TIRE ROTATION
TIRE ROTATION TIRE ROTATION
TIRE ROTATION
TIRE ROTATION
SSA8050A
Tires should be rotated every 10,000 km (6,000
miles). If you notice that tires are wearing un- evenly between rotations, have the car checkedby a Hyundai dealer so the cause may becorrected.
After rotating, adjust the tire pressures and be
sure to check wheel nut tightness.
WARNING:
WARNING: WARNING:
WARNING:
WARNING:
Do not mix bias-ply and radial-ply tires un-
Do not mix bias-ply and radial-ply tires un- Do not mix bias-ply and radial-ply tires un-
Do not mix bias-ply and radial-ply tires un-
Do not mix bias-ply and radial-ply tires un- der any circumstances.
der any circumstances. der any circumstances.
der any circumstances.
der any circumstances.
This may cause dangerous handling char-
This may cause dangerous handling char- This may cause dangerous handling char-
This may cause dangerous handling char-
This may cause dangerous handling char-acteristics.
acteristics. acteristics.
acteristics.
acteristics.
Page 131 of 249
XV020A1-E
OWNER’S MANUAL OperationMaintenanceSpecifications
The information in this Owner’s Manual is current at the time of publication. However, the right to amend specifications without notice or obligation to incorporate such amendments into vehicles already produced is reserved. This manual applies to all markets and includes descriptions and explanations of optional as well as standard equipment. As a result,
some of the equipment operating descriptions referred to may not apply to the particular vehicle with which this manual is supp lied.
Please refer to the nearest franchised Hyundai dealer for information regarding current standard and optional equipment levels. A030A02X
Page 132 of 249
A020A01A-EATResponsibilty For Maintenance
It is the responsibility of the vehicle owner/driver to ensure that all routine maintenance services are undertaken in line with the recommendations specifiedin Section 5 of this manual. In addition, in order to ensure continued validity ofthe new vehicle warranty and safe operation of the vehicle, non scheduledmaintenance/running repairs should be undertaken at the earliest availableopportunity. Under severe operating conditions, more frequent maintenance isrequired. Details of the maintenance schedule for such conditions are also givenin section 5.It is recommended that all maintenance operations and repairs are entrusted toa franchised Hyundai dealer to ensure that the latest repair methods, specializedtooling and genuine Hyundai parts are used to ensure the continued reliabilityand safety of the vehicle.
Page 138 of 249
FEATURES OF YOUR HYUNDAI 1-1
ZB000A1-A
1. FEATURES OF
YOUR HYUNDAI cised when charging the vehicle tank from jerry cans or by means of a funnel that the fuel beingused is unleaded.
The use of leaded fuel in this vehicle will result
in irreversible pollution of the catalyst element.Such pollution will prevent correct operation ofthe catalyst and give rise to increased operat-ing temperatures leading to the catalyst ele-ment melting and restricting the exhaust flowalong with an increase in exhaust emissionlevels.
CAUTION: The vehicle warranty will not extend to dam-
age arising from the use of incorrect fuels.
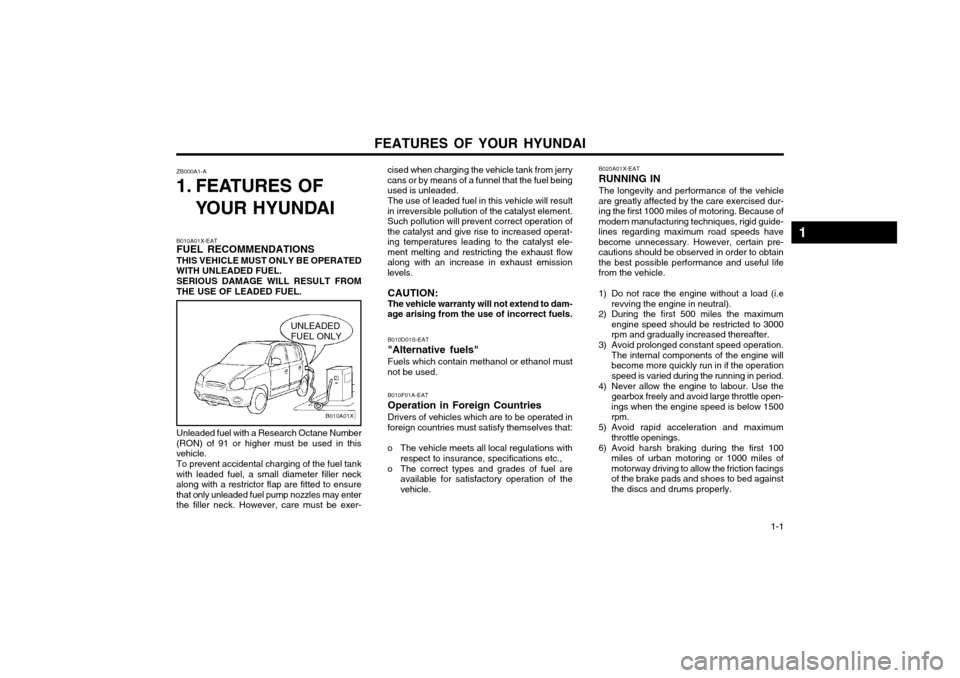
Unleaded fuel with a Research Octane Number
(RON) of 91 or higher must be used in this vehicle.
To prevent accidental charging of the fuel tank
with leaded fuel, a small diameter filler neckalong with a restrictor flap are fitted to ensurethat only unleaded fuel pump nozzles may enterthe filler neck. However, care must be exer-
B010A01X
UNLEADED FUEL ONLY
B010A01X-EAT FUEL RECOMMENDATIONS THIS VEHICLE MUST ONLY BE OPERATED
WITH UNLEADED FUEL.
SERIOUS DAMAGE WILL RESULT FROM
THE USE OF LEADED FUEL. B020A01X-EAT RUNNING INThe longevity and performance of the vehicle
are greatly affected by the care exercised dur- ing the first 1000 miles of motoring. Because ofmodern manufacturing techniques, rigid guide-lines regarding maximum road speeds havebecome unnecessary. However, certain pre-cautions should be observed in order to obtainthe best possible performance and useful lifefrom the vehicle.
1) Do not race the engine without a load (i.e revving the engine in neutral).
2) During the first 500 miles the maximum engine speed should be restricted to 3000 rpm and gradually increased thereafter.
3) Avoid prolonged constant speed operation. The internal components of the engine willbecome more quickly run in if the operationspeed is varied during the running in period.
4) Never allow the engine to labour. Use the gearbox freely and avoid large throttle open-ings when the engine speed is below 1500rpm.
5) Avoid rapid acceleration and maximum throttle openings.
6) Avoid harsh braking during the first 100 miles of urban motoring or 1000 miles ofmotorway driving to allow the friction facingsof the brake pads and shoes to bed againstthe discs and drums properly.
B010D01S-EAT "Alternative fuels"Fuels which contain methanol or ethanol must
not be used.
B010F01A-EATOperation in Foreign CountriesDrivers of vehicles which are to be operated in
foreign countries must satisfy themselves that:
o The vehicle meets all local regulations with respect to insurance, specifications etc.,
o The correct types and grades of fuel are available for satisfactory operation of the vehicle.
1
Page 140 of 249
FEATURES OF YOUR HYUNDAI 1-3
CAUTION:
o If you fail to try the limp home procedure with the sequence of three times, you have to wait for about one hour to do thelimp home procedure again.
o If you cannot start your engine in spite of limp home procedure, have your vehicletowed by an authorized Hyundai dealer.
1. To set the password you may turn the igni-
tion key "ON" and then turn it "OFF" accord-ing to the digit numbers, then the immobi-lizer indicator will blink along with the opera-tion of the ignition key. For example, turn theignition key once for digit number "1", andtwice for "2", and so on. However, for thedigit number "0", you must turn the ignitionkey for 10 times.
2. Wait for 3~10 seconds.
3. You may set the remaining number of digits by following the same procedures 1 and 2.
4. If all of four digits have been tried success- fully, turn the ignition key "ON" and check that the immobilizer indicator illuminates.From this time, you have to start your enginewithin 30 seconds. If you start your engineafter 30 seconds, your engine will not start.
NOTE: If the engine dies while driving after limp
home procedure, you can start your engine within 8 seconds without limp home proce-dure again.
5. If the immobilizer indicator blinks for five seconds, you have to try the limp home procedure again from the beginning.
After doing the limp home procedure, you have
to consult with your authorized Hyundai dealeras soon as possible. SB040A1-F DOOR LOCKS WARNING:
o Unlocked doors can be dangerous. Before you drive away-especially if there are children in the car-be sure that all thedoors are securely closed and locked, the doors cannot be opened from inside. This helps assure that doors will not beopened accidentally. Also, when com-bined with the proper use of seat belts,locking the doors helps keep occupantsfrom being ejected from the car in caseof an accident.
o Before opening the door, always look for and avoid oncoming traffic.
XV10050E
Unlock Lock
SB040B1-F Locking, unlocking front doors with key
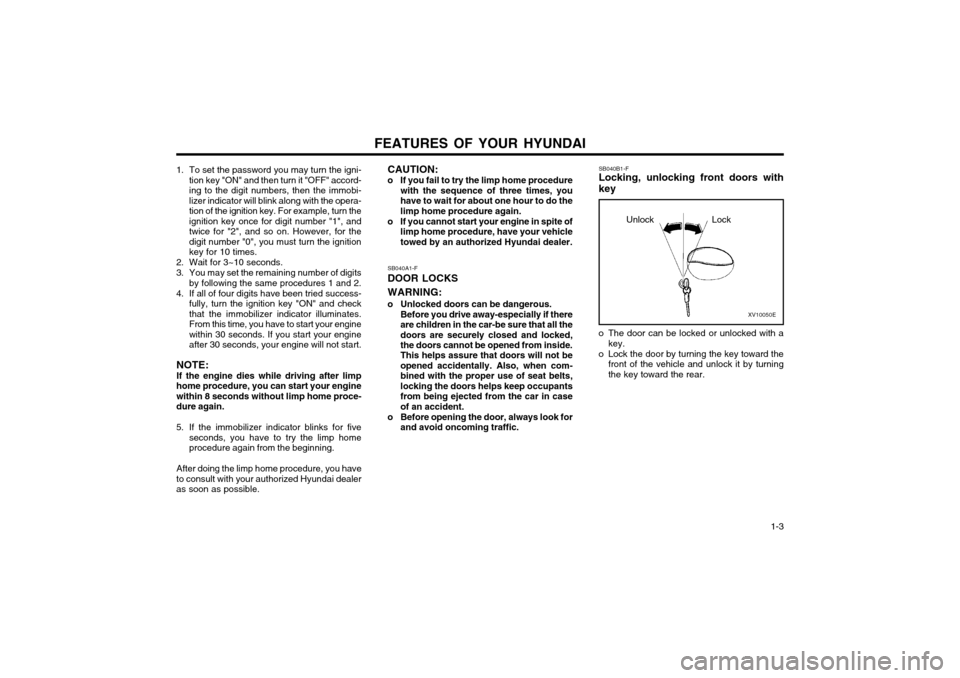
o The door can be locked or unlocked with a key.
o Lock the door by turning the key toward the front of the vehicle and unlock it by turning the key toward the rear.
Page 143 of 249
FEATURES OF YOUR HYUNDAI
1-6 B060A01V-GAT POWER WINDOWS (Not all models)
B060A01V.DAG
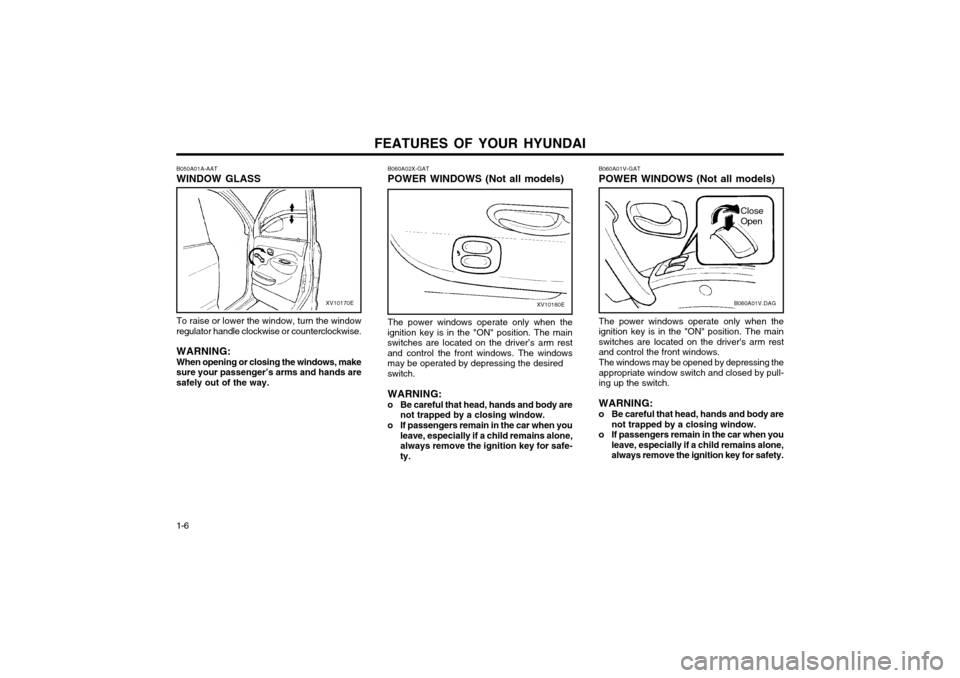
The power windows operate only when the
ignition key is in the "ON" position. The mainswitches are located on the driver's arm restand control the front windows. The windows may be opened by depressing the appropriate window switch and closed by pull-ing up the switch. WARNING:
o Be careful that head, hands and body are not trapped by a closing window.
o If passengers remain in the car when you leave, especially if a child remains alone, always remove the ignition key for safety.
Close Open
The power windows operate only when the
ignition key is in the "ON" position. The main switches are located on the driver’s arm restand control the front windows. The windowsmay be operated by depressing the desired switch. WARNING:
o Be careful that head, hands and body are not trapped by a closing window.
o If passengers remain in the car when you leave, especially if a child remains alone, always remove the ignition key for safe-ty.
B060A02X-GAT POWER WINDOWS (Not all models)
XV10180E
B050A01A-AAT WINDOW GLASS
XV10170E
To raise or lower the window, turn the window
regulator handle clockwise or counterclockwise.
WARNING: When opening or closing the windows, make
sure your passenger’s arms and hands are safely out of the way.
Page 174 of 249
FEATURES OF YOUR HYUNDAI 1-37
B740D01A-AAT OPERATION TIPS
o If the interior of the car is hot when you first get in, open the windows for a few minutes to expel the hot air.
o When you are using the air conditioning system, keep all windows closed to keephot air out.
o When moving slowly, as in heavy traffic, shift to a lower gear. This increases enginespeed, which in turn increases the speed ofthe air conditioning compressor.
o On steep grades, turn the air conditioning off to avoid the possibility of the engine over-heating.
o During winter months or in periods when the air conditioning is not used regularly, run theair conditioning once every month for a few
minutes. This will help circulate the lubri-cants and keep your system in peak operat-ing condition.
B680A02X-DAG
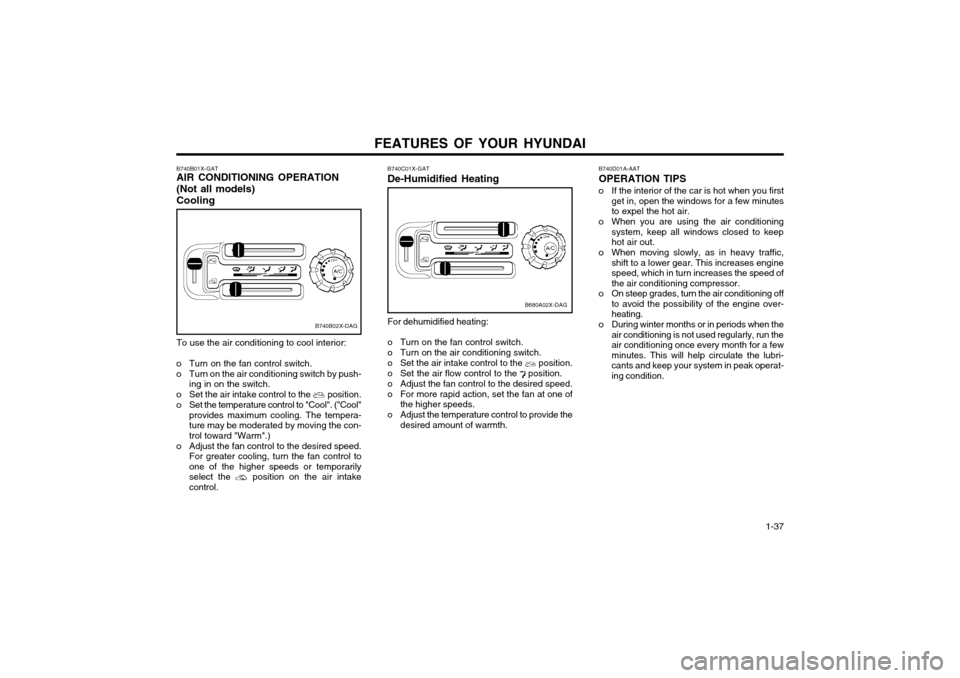
B740C01X-GAT De-Humidified Heating For dehumidified heating:
o Turn on the fan control switch.
o Turn on the air conditioning switch.
o Set the air intake control to the
position.
o Set the air flow control to the position.
o Adjust the fan control to the desired speed.
o For more rapid action, set the fan at one of the higher speeds.
o Adjust the temperature control to provide the desired amount of warmth.
B740B02X-DAG
B740B01X-GAT AIR CONDITIONING OPERATION (Not all models)Cooling
To use the air conditioning to cool interior:
o Turn on the fan control switch.
o Turn on the air conditioning switch by push- ing in on the switch.
o Set the air intake control to the
position.
o Set the temperature control to "Cool". ("Cool" provides maximum cooling. The tempera- ture may be moderated by moving the con-trol toward "Warm".)
o Adjust the fan control to the desired speed. For greater cooling, turn the fan control toone of the higher speeds or temporarilyselect the
position on the air intake
control.
Page 178 of 249
FEATURES OF YOUR HYUNDAI 1-41
3. BAND Selector Pressing the button changes the AM, FM1
and FM2 bands. The mode selected is dis- played on LCD.
4. TUNE (Manual) Select Button Press the (+) side or (-) side to increase or to
decrease the frequency. With the button held down for 0.5 sec. or more, the stop signal(broadcasting radio wave) is ignored and chan-nel selection continues.
SEEK Operation (Automatic Channel
Selection) Press the TUNE select button 1 sec. or more.
When the (+) side is pressed, the unit willautomatically tune to the next higher frequencyand when the (-) side is pressed, it will automat-ically tune to the next lower frequency.
5. PRESET STATION SELECT Six (6) stations for AM, FM and FM2 respec-
tively can be preset in the electronic memory circuit on this unit.
HOW TO PRESET STATIONS Six AM and twelve FM stations may be pro-
grammed into the memory of the radio. Then, by simply pressing the band select button and/or one of the six station select buttons, you mayrecall any of these stations instantly. To pro-gram the stations, follow these steps:
B901B02X-GAT
1. POWER ON-OFF/VOLUME CON-
TROL KNOB
The radio unit may be operated when the igni-
tion key is in the "ACC" or "ON" position. Rotate the knob clockwise to switch the radio unit on,
and to increase the volume.
The LCD shows the radio frequency in the radio
mode. Turn the knob counterclockwise to re-duce the volume, and to switch the radio unitoff.
BAL (Balance Control) Knob Pull and turn the control knob clockwise to
emphasize right speaker sound (Left speaker sound will be attenuated). When the controlknob is turned counterclockwise, left speakersound will be emphasized (Right speaker sound
will be attenuated). 2. BASS Control Knob Press to pop the knob out and turn to the left or
right for the desired bass tone.
TREBLE Control Knob Further pull-lock position of popped-up knob.
Turn to the left or right for the desired treble tone.
FM
AMo Press band selector to set the band for AM,
FM and FM2.
o Select the desired station to be stored by seek, scan or manual tuning.
o Determine the preset station select button you wish to use to access that station.
o Press the station select button for more than two seconds. A select button indicator will show in the display indicating which selectbutton you have depressed. The frequencydisplay will flash after it has been stored intothe memory. You should then release thebutton, and proceed to program the nextdesired station. A total of 18 stations can beprogrammed by selecting one AM and twoFM stations per button.
o When completed, any preset station may be recalled by selecting AM, FM or FM2 bandand the appropriate station button.