Radiator cap pressure Hyundai Atos 2002 Owner's Manual
[x] Cancel search | Manufacturer: HYUNDAI, Model Year: 2002, Model line: Atos, Model: Hyundai Atos 2002Pages: 249, PDF Size: 3.11 MB
Page 40 of 249
FEATURES OF YOUR HYUNDAI
FEATURES OF YOUR HYUNDAI FEATURES OF YOUR HYUNDAI
FEATURES OF YOUR HYUNDAI
FEATURES OF YOUR HYUNDAI
1- 31
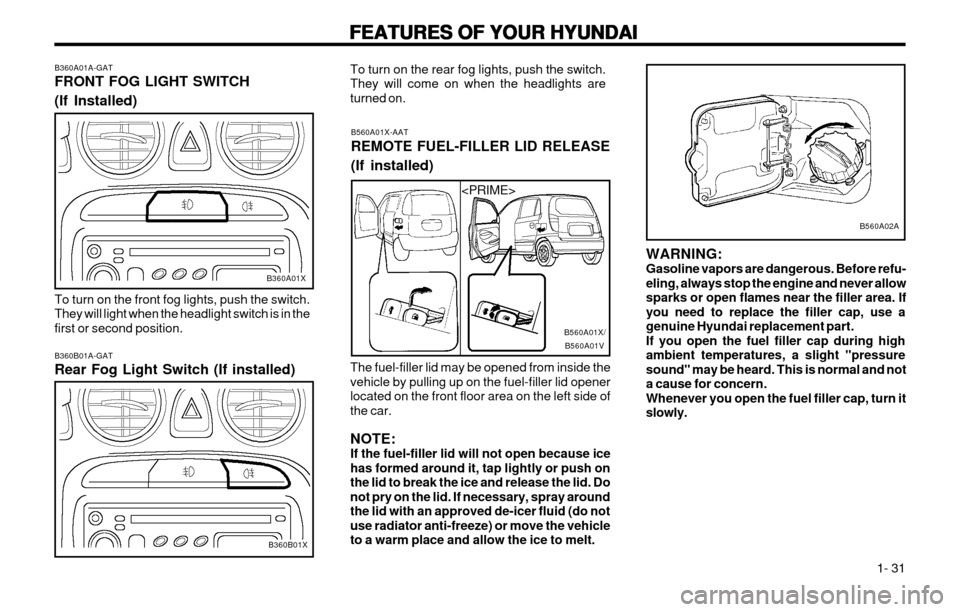
B560A01X-AAT REMOTE FUEL-FILLER LID RELEASE (If installed)
The fuel-filler lid may be opened from inside the vehicle by pulling up on the fuel-filler lid openerlocated on the front floor area on the left side ofthe car. NOTE: If the fuel-filler lid will not open because icehas formed around it, tap lightly or push onthe lid to break the ice and release the lid. Donot pry on the lid. If necessary, spray around
the lid with an approved de-icer fluid (do notuse radiator anti-freeze) or move the vehicleto a warm place and allow the ice to melt.
To turn on the rear fog lights, push the switch.They will come on when the headlights areturned on.
B560A01V
B560A01X/
B360A01A-GAT FRONT FOG LIGHT SWITCH (If Installed) To turn on the front fog lights, push the switch. They will light when the headlight switch is in thefirst or second position. B360B01A-GAT Rear Fog Light Switch (If installed)
B360A01X
B360B01X WARNING: Gasoline vapors are dangerous. Before refu-
eling, always stop the engine and never allowsparks or open flames near the filler area. Ifyou need to replace the filler cap, use agenuine Hyundai replacement part.If you open the fuel filler cap during highambient temperatures, a slight "pressuresound" may be heard. This is normal and nota cause for concern.Whenever you open the fuel filler cap, turn itslowly.
B560A02A
Page 80 of 249
WHAT TO DO IN AN EMERGENCY
WHAT TO DO IN AN EMERGENCY WHAT TO DO IN AN EMERGENCY
WHAT TO DO IN AN EMERGENCY
WHAT TO DO IN AN EMERGENCY
3-3
WARNING:
WARNING: WARNING:
WARNING:
WARNING:
While the engine is running, keep hands,
While the engine is running, keep hands, While the engine is running, keep hands,
While the engine is running, keep hands,
While the engine is running, keep hands, long hair
long hair long hair
long hair
long hair
and clothing away from moving
and clothing away from moving and clothing away from moving
and clothing away from moving
and clothing away from moving
parts such as the fan and drive belts to
parts such as the fan and drive belts to parts such as the fan and drive belts to
parts such as the fan and drive belts to
parts such as the fan and drive belts to
prevent
prevent prevent
prevent
prevent
injury.
injury. injury.
injury.
injury.
5. If the water pump drive belt is broken or engine coolant is leaking out, stop the en- gine immediately and call the nearestHyundai dealer for assistance.
WARNING:
WARNING: WARNING:
WARNING:
WARNING:
Do not remove the radiator cap when the
Do not remove the radiator cap when the Do not remove the radiator cap when the
Do not remove the radiator cap when the
Do not remove the radiator cap when the engine is hot. This may allow
engine is hot. This may allow engine is hot. This may allow
engine is hot. This may allow
engine is hot. This may allow coolant to be
coolant to be coolant to be
coolant to be
coolant to be
blown out of the opening and cause serious
blown out of the opening and cause serious blown out of the opening and cause serious
blown out of the opening and cause serious
blown out of the opening and cause serious
burns.
burns. burns.
burns.
burns.
6. If you cannot find the cause of the overheat-
ing, wait until the engine temperature has returned to normal. Then, if engine coolanthas been lost, carefully remove the radiator
cap and add engine coolant to bring the fluidlevel in the reservoir up to the halfway mark.
7. Proceed with caution, keeping alert for fur- ther signs of overheating. If overheating hap-pens again, call a Hyundai dealer for assis-tance.
CAUTION:
CAUTION: CAUTION:
CAUTION:
CAUTION:
Serious loss of engine coolant indicates
Serious loss of engine coolant indicates Serious loss of engine coolant indicates
Serious loss of engine coolant indicates
Serious loss of engine coolant indicates there is a leak in
there is a leak in there is a leak in
there is a leak in
there is a leak in the cooling system and this
the cooling system and this the cooling system and this
the cooling system and this
the cooling system and this
should be checked as soon as possible by a
should be checked as soon as possible by a should be checked as soon as possible by a
should be checked as soon as possible by a
should be checked as soon as possible by a
Hyundai
Hyundai Hyundai
Hyundai
Hyundai dealer.
dealer. dealer.
dealer.
dealer. D040A01A-GAT
SPARE TIRE
SPARE TIRE SPARE TIRE
SPARE TIRE
SPARE TIRE
The following instructions for the FULL SIZE
spare tire should be observed:
Check inflation pressure as soon as practical
after installing the spare tire, and adjust to the specified pressure. The tire pressure should beperiodically checked and maintained at thespecified pressure while the tire is stored.
Tire Size Inflation Pressure Full Size 210 kPa (30 psi)
Spare Tire Pressure
D040B01A-AAT
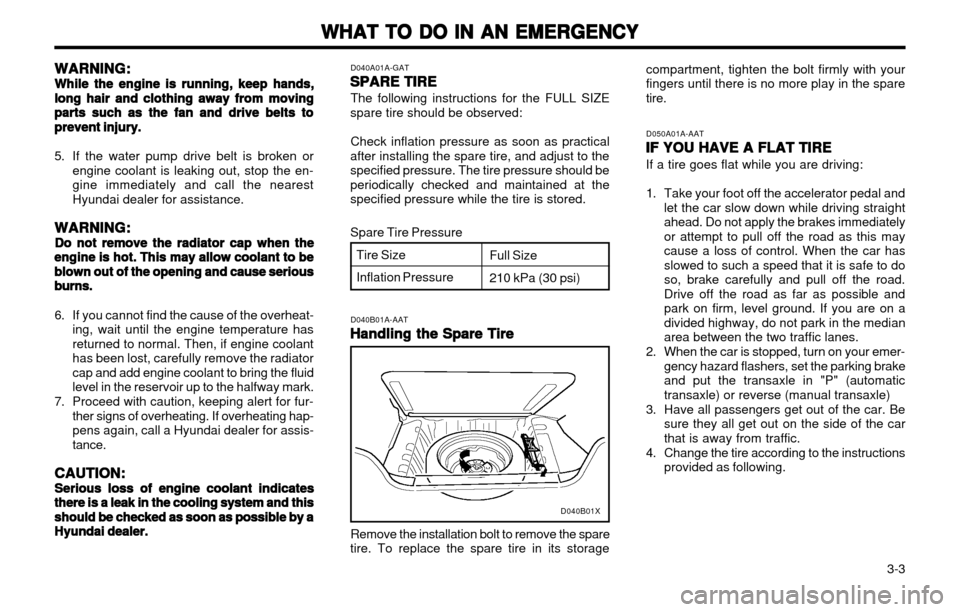
Handling the Spare Tire
Handling the Spare Tire Handling the Spare Tire
Handling the Spare Tire
Handling the Spare Tire
Remove the installation bolt to remove the spare
tire. To replace the spare tire in its storage D050A01A-AAT
IF YOU HAVE A FLAT TIRE
IF YOU HAVE A FLAT TIRE IF YOU HAVE A FLAT TIRE
IF YOU HAVE A FLAT TIRE
IF YOU HAVE A FLAT TIRE If a tire goes flat while you are driving:
1. Take your foot off the accelerator pedal and
let the car slow down while driving straight ahead. Do not apply the brakes immediatelyor attempt to pull off the road as this may
cause a loss of control. When the car hasslowed to such a speed that it is safe to doso, brake carefully and pull off the road.Drive off the road as far as possible and
park on firm, level ground. If you are on adivided highway, do not park in the medianarea between the two traffic lanes.
2. When the car is stopped, turn on your emer- gency hazard flashers, set the parking brakeand put the transaxle in "P" (automatic
transaxle) or reverse (manual transaxle)
3. Have all passengers get out of the car. Be sure they all get out on the side of the carthat is away from traffic.
4. Change the tire according to the instructions provided as following.
compartment, tighten the bolt firmly with yourfingers until there is no more play in the sparetire.
D040B01X
Page 101 of 249
DO-IT-YOURSELF MAINTENANCE
DO-IT-YOURSELF MAINTENANCE DO-IT-YOURSELF MAINTENANCE
DO-IT-YOURSELF MAINTENANCE
DO-IT-YOURSELF MAINTENANCE
6-5
G050A01A-AAT
CHECKING AND CHANGING THE EN-
CHECKING AND CHANGING THE EN- CHECKING AND CHANGING THE EN-
CHECKING AND CHANGING THE EN-
CHECKING AND CHANGING THE EN-
GINE COOLANT
GINE COOLANT GINE COOLANT
GINE COOLANT
GINE COOLANT
WARNING:
WARNING: WARNING:
WARNING:
WARNING:
Do not remove the radiator cap when the
Do not remove the radiator cap when the Do not remove the radiator cap when the
Do not remove the radiator cap when the
Do not remove the radiator cap when the engine is hot. When the engine is hot, the
engine is hot. When the engine is hot, the engine is hot. When the engine is hot, the
engine is hot. When the engine is hot, the
engine is hot. When the engine is hot, the
engine coolant is under pressure and may
engine coolant is under pressure and may engine coolant is under pressure and may
engine coolant is under pressure and may
engine coolant is under pressure and may
erupt through the opening if the cap is
erupt through the opening if the cap is erupt through the opening if the cap is
erupt through the opening if the cap is
erupt through the opening if the cap is
removed. You could be seriously burned if
removed. You could be seriously burned if removed. You could be seriously burned if
removed. You could be seriously burned if
removed. You could be seriously burned if
you do not observe this precaution. Do not
you do not observe this precaution. Do not you do not observe this precaution. Do not
you do not observe this precaution. Do not
you do not observe this precaution. Do not
remove the radiator cap until the radiator is
remove the radiator cap until the radiator is remove the radiator cap until the radiator is
remove the radiator cap until the radiator is
remove the radiator cap until the radiator is
cool to the touch.
cool to the touch. cool to the touch.
cool to the touch.
cool to the touch.
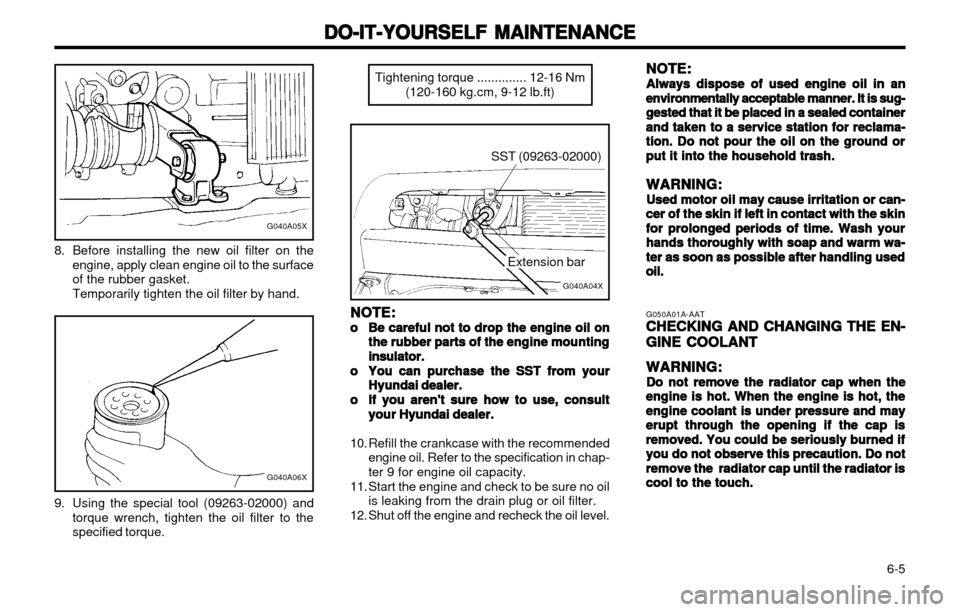
8. Before installing the new oil filter on the
engine, apply clean engine oil to the surface of the rubber gasket. Temporarily tighten the oil filter by hand.
G040A05X
G040A06X
9. Using the special tool (09263-02000) andtorque wrench, tighten the oil filter to the specified torque. Tightening torque .............. 12-16 Nm
(120-160 kg.cm, 9-12 lb.ft)
SST (09263-02000)
G040A04X
Extension bar
NOTE:
NOTE: NOTE:
NOTE:
NOTE:
oo
oo
o Be careful not to drop the engine oil on
Be careful not to drop the engine oil on Be careful not to drop the engine oil on
Be careful not to drop the engine oil on
Be careful not to drop the engine oil on
the rubber
the rubber the rubber
the rubber
the rubber
parts of the engine mounting
parts of the engine mounting parts of the engine mounting
parts of the engine mounting
parts of the engine mounting
insulator.
insulator. insulator.
insulator.
insulator.
oo
oo
o You can purchase the SST from your
You can purchase the SST from your You can purchase the SST from your
You can purchase the SST from your
You can purchase the SST from your
Hyundai dealer.
Hyundai dealer. Hyundai dealer.
Hyundai dealer.
Hyundai dealer.
oo
oo
o If you aren't sure how to use, consult
If you aren't sure how to use, consult If you aren't sure how to use, consult
If you aren't sure how to use, consult
If you aren't sure how to use, consult
your Hyundai dealer.
your Hyundai dealer. your Hyundai dealer.
your Hyundai dealer.
your Hyundai dealer.
10. Refill the crankcase with the recommended engine oil. Refer to the specification in chap- ter 9 for engine oil capacity.
11. Start the engine and check to be sure no oil is leaking from the drain plug or oil filter.
12. Shut off the engine and recheck the oil level. NOTE:
NOTE: NOTE:
NOTE:
NOTE:
Always dispose of used engine oil in an
Always dispose of used engine oil in an Always dispose of used engine oil in an
Always dispose of used engine oil in an
Always dispose of used engine oil in an environmentally acceptable
environmentally acceptable environmentally acceptable
environmentally acceptable
environmentally acceptable
manner. It is sug-
manner. It is sug- manner. It is sug-
manner. It is sug-
manner. It is sug-
gested that it be placed in a sealed container
gested that it be placed in a sealed container gested that it be placed in a sealed container
gested that it be placed in a sealed container
gested that it be placed in a sealed container
and taken
and taken and taken
and taken
and taken
to a service station for reclama-
to a service station for reclama- to a service station for reclama-
to a service station for reclama-
to a service station for reclama-
tion. Do not pour the oil on the ground or
tion. Do not pour the oil on the ground or tion. Do not pour the oil on the ground or
tion. Do not pour the oil on the ground or
tion. Do not pour the oil on the ground or
put it into the household trash.
put it into the household trash. put it into the household trash.
put it into the household trash.
put it into the household trash.
WARNING:
WARNING: WARNING:
WARNING:
WARNING:
Used motor oil may cause irritation or can-
Used motor oil may cause irritation or can- Used motor oil may cause irritation or can-
Used motor oil may cause irritation or can-
Used motor oil may cause irritation or can-cer of the skin if
cer of the skin if cer of the skin if
cer of the skin if
cer of the skin if left in contact with the skin
left in contact with the skin left in contact with the skin
left in contact with the skin
left in contact with the skin
for prolonged periods of time. Wash your
for prolonged periods of time. Wash your for prolonged periods of time. Wash your
for prolonged periods of time. Wash your
for prolonged periods of time. Wash your
hands
hands hands
hands
hands thoroughly with soap and warm wa-
thoroughly with soap and warm wa- thoroughly with soap and warm wa-
thoroughly with soap and warm wa-
thoroughly with soap and warm wa-
ter as soon as possible after handling used
ter as soon as possible after handling used ter as soon as possible after handling used
ter as soon as possible after handling used
ter as soon as possible after handling used
oil.oil.
oil.oil.
oil.
Page 103 of 249
DO-IT-YOURSELF MAINTENANCE
DO-IT-YOURSELF MAINTENANCE DO-IT-YOURSELF MAINTENANCE
DO-IT-YOURSELF MAINTENANCE
DO-IT-YOURSELF MAINTENANCE
6-7
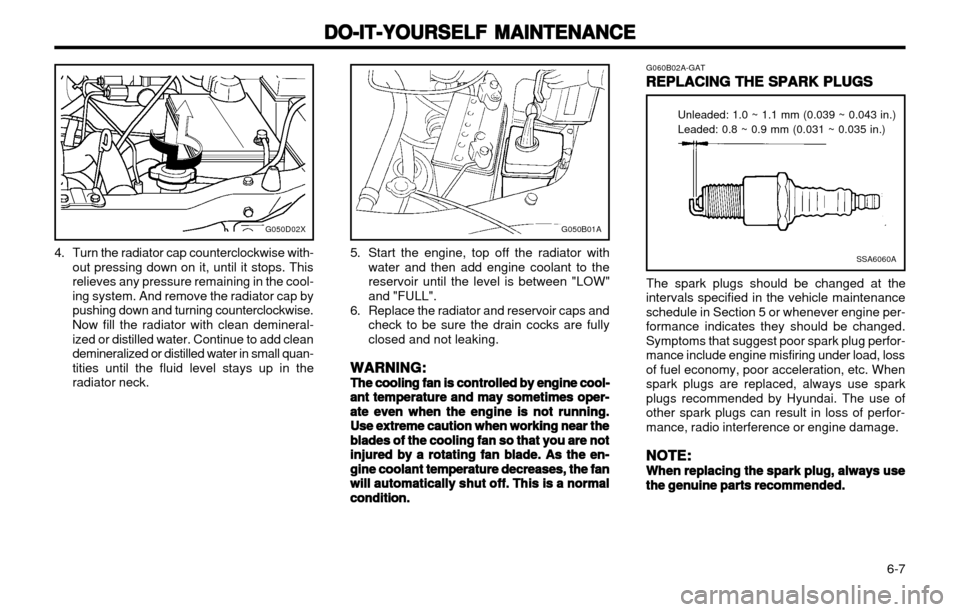
4. Turn the radiator cap counterclockwise with-out pressing down on it, until it stops. This relieves any pressure remaining in the cool-ing system. And remove the radiator cap bypushing down and turning counterclockwise. Now fill the radiator with clean demineral- ized or distilled water. Continue to add cleandemineralized or distilled water in small quan-tities until the fluid level stays up in theradiator neck.SSA6060A
Unleaded: 1.0 ~ 1.1 mm (0.039 ~ 0.043 in.) Leaded: 0.8 ~ 0.9 mm (0.031 ~ 0.035 in.)
G060B02A-GAT
REPLACING THE SPARK PLUGS
REPLACING THE SPARK PLUGS REPLACING THE SPARK PLUGS
REPLACING THE SPARK PLUGS
REPLACING THE SPARK PLUGS
The spark plugs should be changed at the
intervals specified in the vehicle maintenance schedule in Section 5 or whenever engine per-formance indicates they should be changed.Symptoms that suggest poor spark plug perfor-mance include engine misfiring under load, lossof fuel economy, poor acceleration, etc. Whenspark plugs are replaced, always use sparkplugs recommended by Hyundai. The use ofother spark plugs can result in loss of perfor-mance, radio interference or engine damage.
NOTE:
NOTE: NOTE:
NOTE:
NOTE:
When replacing the spark plug, always use
When replacing the spark plug, always use When replacing the spark plug, always use
When replacing the spark plug, always use
When replacing the spark plug, always use the genuine parts recommended.
the genuine parts recommended. the genuine parts recommended.
the genuine parts recommended.
the genuine parts recommended.
G050D02X
5. Start the engine, top off the radiator with
water and then add engine coolant to the reservoir until the level is between "LOW"and "FULL".
6. Replace the radiator and reservoir caps and check to be sure the drain cocks are fullyclosed and not leaking.
WARNING:
WARNING: WARNING:
WARNING:
WARNING:
The cooling fan is controlled by engine cool-
The cooling fan is controlled by engine cool- The cooling fan is controlled by engine cool-
The cooling fan is controlled by engine cool-
The cooling fan is controlled by engine cool- ant temperature and may sometimes oper-
ant temperature and may sometimes oper- ant temperature and may sometimes oper-
ant temperature and may sometimes oper-
ant temperature and may sometimes oper-
ate even when the engine is not running.
ate even when the engine is not running. ate even when the engine is not running.
ate even when the engine is not running.
ate even when the engine is not running.
Use extreme caution when working near the
Use extreme caution when working near the Use extreme caution when working near the
Use extreme caution when working near the
Use extreme caution when working near the
blades of the cooling fan so that you are not
blades of the cooling fan so that you are not blades of the cooling fan so that you are not
blades of the cooling fan so that you are not
blades of the cooling fan so that you are not
injured by a rotating fan blade. As the en-
injured by a rotating fan blade. As the en- injured by a rotating fan blade. As the en-
injured by a rotating fan blade. As the en-
injured by a rotating fan blade. As the en-
gine coolant temperature decreases, the fan
gine coolant temperature decreases, the fan gine coolant temperature decreases, the fan
gine coolant temperature decreases, the fan
gine coolant temperature decreases, the fan
will automatically shut off. This is a normal
will automatically shut off. This is a normal will automatically shut off. This is a normal
will automatically shut off. This is a normal
will automatically shut off. This is a normal
condition.
condition. condition.
condition.
condition.
G050B01A
Page 157 of 249
FEATURES OF YOUR HYUNDAI
1-20 WARNING: Never remove the radiator cap when the engine is hot. The engine coolant is underpressure and could erupt and cause severeburns. Wait until the engine is cool beforeremoving the radiator cap. The needle on the engine coolant temperature
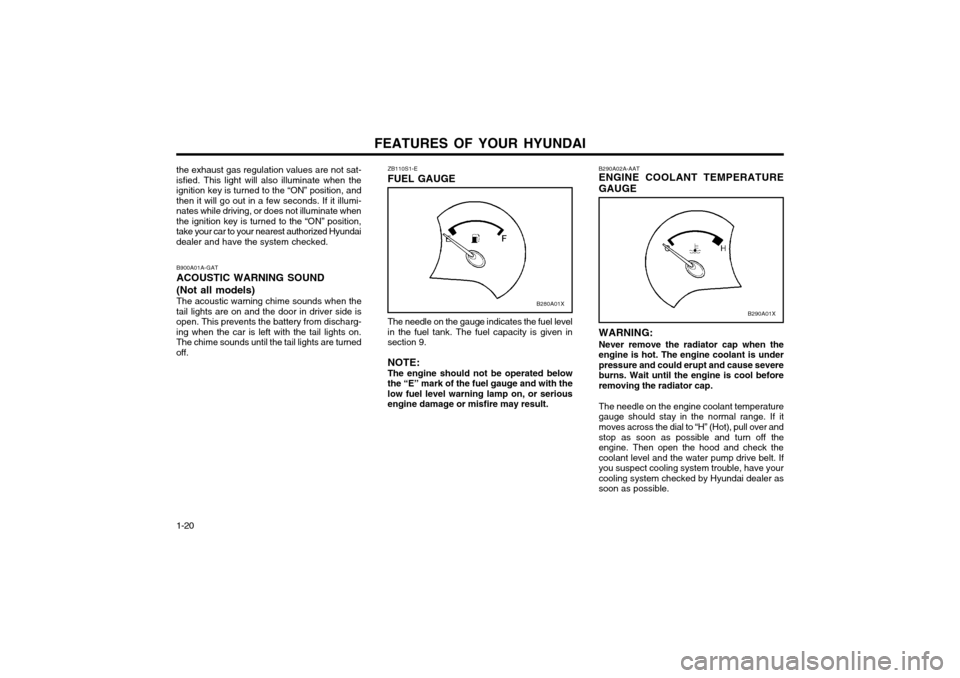
gauge should stay in the normal range. If itmoves across the dial to “H” (Hot), pull over and stop as soon as possible and turn off the engine. Then open the hood and check thecoolant level and the water pump drive belt. If
you suspect cooling system trouble, have yourcooling system checked by Hyundai dealer assoon as possible.
The needle on the gauge indicates the fuel levelin the fuel tank. The fuel capacity is given insection 9. NOTE: The engine should not be operated below the “E” mark of the fuel gauge and with thelow fuel level warning lamp on, or seriousengine damage or misfire may result. B290A02A-AAT ENGINE COOLANT TEMPERATURE GAUGE
ZB110S1-E FUEL GAUGE
B900A01A-GATACOUSTIC WARNING SOUND (Not all models) The acoustic warning chime sounds when the
tail lights are on and the door in driver side is open. This prevents the battery from discharg-ing when the car is left with the tail lights on.The chime sounds until the tail lights are turnedoff.
the exhaust gas regulation values are not sat-isfied. This light will also illuminate when theignition key is turned to the “ON” position, andthen it will go out in a few seconds. If it illumi-nates while driving, or does not illuminate whenthe ignition key is turned to the “ON” position,take your car to your nearest authorized Hyundaidealer and have the system checked.
B280A01XB290A01X
Page 204 of 249
3-3
WHAT TO DO IN AN EMERGENCY
ZD050B1-E
Handling Spare Tyre
6. If the cause of the overheating cannot be
found, wait until the engine temperature has returned to normal. Then, if coolant hasbeen lost, carefully remove the radiator capand add water to bring the fluid level in thereservoir up to the base of the radiator fill
opening. Fill the coolant expansion tank tothe halfway mark.
7. Proceed with caution until it is established that the engine is operating normally. If theengine overheats repeatedly, the advice of aHyundai dealer should be sought.
CAUTION: Serious loss of coolant indicates there is aleak in the cooling system and this shouldbe checked as soon as possible by a Hyundaidealer. 3. Passengers must not be allowed to remain
inside the vehicle during wheel changing. Ifa puncture occurs whilst the vehicle is on amotorway, the passengers should take ref-uge on the motorway embankment to avoidthe possibility of injury occurring should thevehicle be struck by other motorway traffic.
4. Wheel changing should be performed ac- cording to the following instructions.
ZD050A1-E
FULL-SIZED SPARE TYRE For customer convenience and satisfaction,Hyundai has included a full-sized spare tyreand wheel. The following instructions should be observed.
1. Check inflation pressure as soon as possi- ble after installing the spare tyre, and adjust to the specified pressure.
2. The spare tyre pressure should be checked once a month while the tyre is stored.
Spare Tyre Pressure (cold)
D040B01X
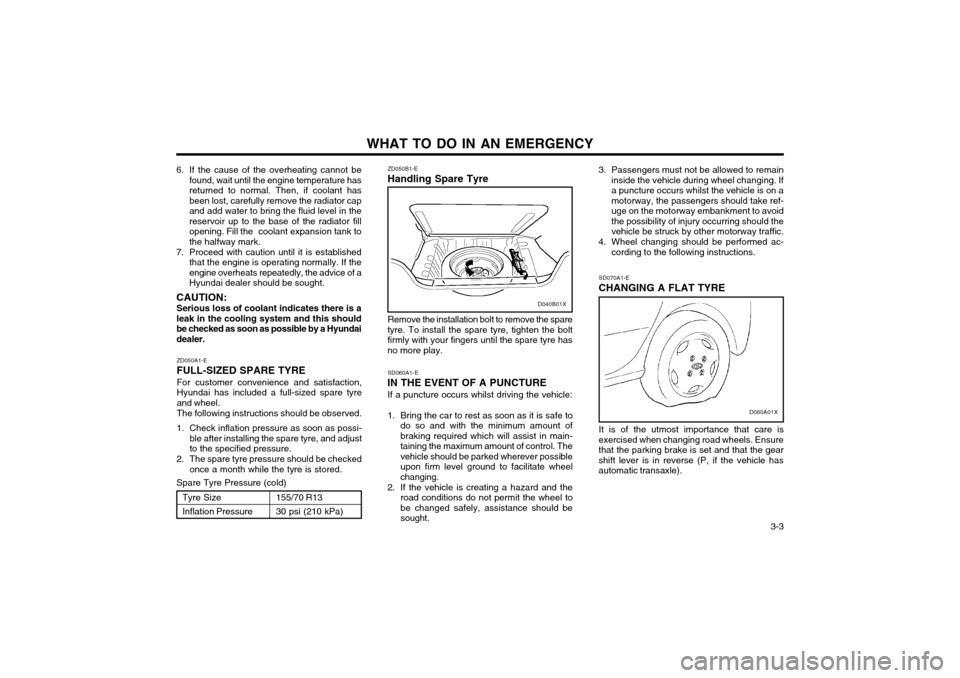
Remove the installation bolt to remove the spare
tyre. To install the spare tyre, tighten the bolt firmly with your fingers until the spare tyre hasno more play.
SD060A1-E
IN THE EVENT OF A PUNCTURE
If a puncture occurs whilst driving the vehicle:
1. Bring the car to rest as soon as it is safe to do so and with the minimum amount ofbraking required which will assist in main-taining the maximum amount of control. Thevehicle should be parked wherever possibleupon firm level ground to facilitate wheelchanging.
2. If the vehicle is creating a hazard and the road conditions do not permit the wheel tobe changed safely, assistance should besought. SD070A1-E
CHANGING A FLAT TYRE
D060A01X
It is of the utmost importance that care is
exercised when changing road wheels. Ensure that the parking brake is set and that the gearshift lever is in reverse (P, if the vehicle hasautomatic transaxle).
Tyre Size Inflation Pressure 155/70 R1330 psi (210 kPa)
Page 223 of 249
DO-IT-YOURSELF MAINTENANCE 6-5
G040A05XNOTE: Always dispose of used engine oil in an
environmentally acceptable manner. It is suggested that it be placed in a sealed con-tainer and taken to a service station forreclamation. Do not pour the oil on theground or put it into the household trash.
WARNING: Used motor oil may cause irritation or can-
cer of the skin if left in contact with the skin for prolonged periods of time. Wash yourhands thoroughly with soap and warm wa-ter as soon as possible after handling usedoil.
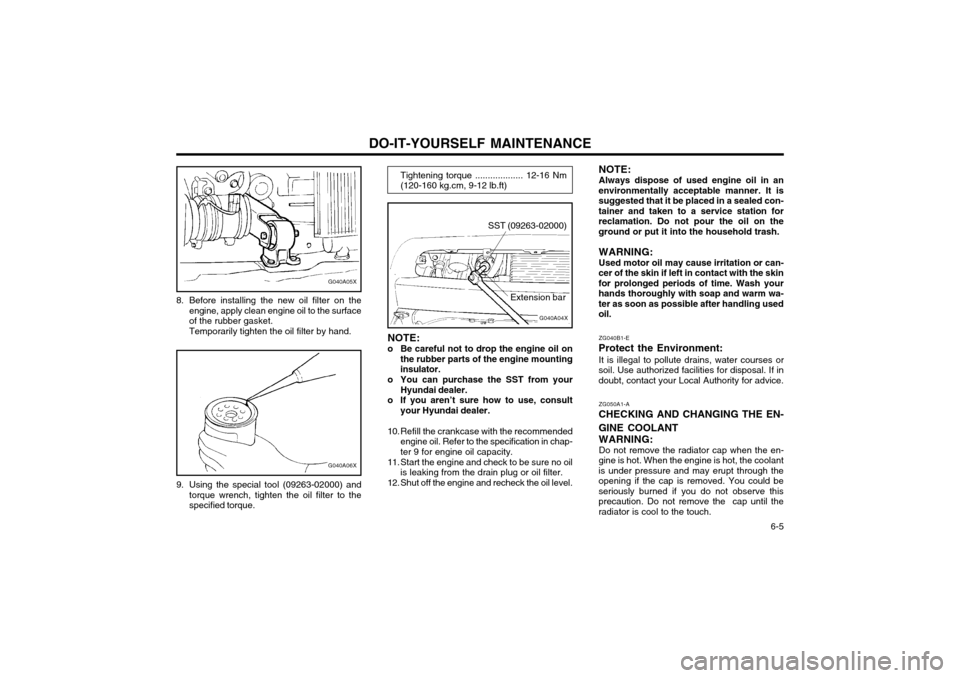
8. Before installing the new oil filter on the
engine, apply clean engine oil to the surfaceof the rubber gasket.Temporarily tighten the oil filter by hand.
G040A06X
9. Using the special tool (09263-02000) andtorque wrench, tighten the oil filter to the specified torque.
Tightening torque ................... 12-16 Nm (120-160 kg.cm, 9-12 lb.ft)
G040A04X
SST (09263-02000)
Extension bar
NOTE:
o Be careful not to drop the engine oil on the rubber parts of the engine mounting insulator.
o You can purchase the SST from your Hyundai dealer.
o If you aren’t sure how to use, consult your Hyundai dealer.
10. Refill the crankcase with the recommended engine oil. Refer to the specification in chap-ter 9 for engine oil capacity.
11. Start the engine and check to be sure no oil is leaking from the drain plug or oil filter.
12. Shut off the engine and recheck the oil level. ZG040B1-E
Protect the Environment: It is illegal to pollute drains, water courses or
soil. Use authorized facilities for disposal. If indoubt, contact your Local Authority for advice.
ZG050A1-A
CHECKING AND CHANGING THE EN- GINE COOLANT
WARNING: Do not remove the radiator cap when the en-
gine is hot. When the engine is hot, the coolant is under pressure and may erupt through theopening if the cap is removed. You could beseriously burned if you do not observe thisprecaution. Do not remove the cap until theradiator is cool to the touch.
Page 225 of 249
DO-IT-YOURSELF MAINTENANCE 6-7
G050D02XG050B01A
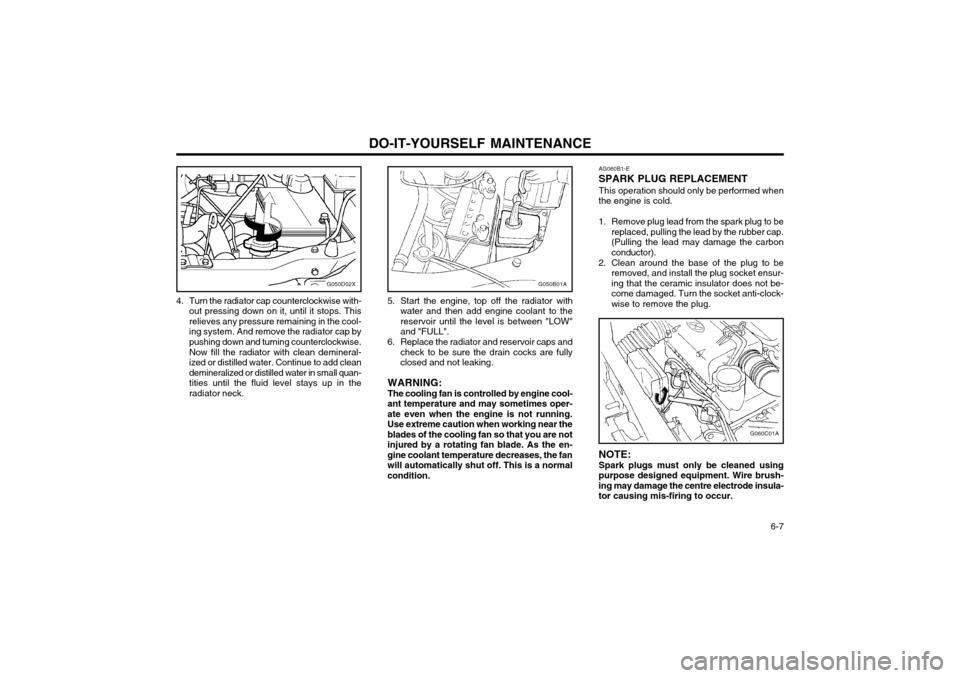
4. Turn the radiator cap counterclockwise with- out pressing down on it, until it stops. This relieves any pressure remaining in the cool-ing system. And remove the radiator cap bypushing down and turning counterclockwise. Now fill the radiator with clean demineral- ized or distilled water. Continue to add cleandemineralized or distilled water in small quan-tities until the fluid level stays up in theradiator neck. 5. Start the engine, top off the radiator with
water and then add engine coolant to thereservoir until the level is between "LOW"and "FULL".
6. Replace the radiator and reservoir caps and check to be sure the drain cocks are fullyclosed and not leaking.
WARNING: The cooling fan is controlled by engine cool-
ant temperature and may sometimes oper- ate even when the engine is not running.Use extreme caution when working near theblades of the cooling fan so that you are notinjured by a rotating fan blade. As the en-gine coolant temperature decreases, the fanwill automatically shut off. This is a normalcondition. AG060B1-E
SPARK PLUG REPLACEMENT
This operation should only be performed when
the engine is cold.
1. Remove plug lead from the spark plug to be replaced, pulling the lead by the rubber cap. (Pulling the lead may damage the carbonconductor).
2. Clean around the base of the plug to be removed, and install the plug socket ensur-ing that the ceramic insulator does not be-come damaged. Turn the socket anti-clock-wise to remove the plug.
G060C01A
NOTE: Spark plugs must only be cleaned using
purpose designed equipment. Wire brush-ing may damage the centre electrode insula-tor causing mis-firing to occur.