Hyundai Azera 2007 Owner's Manual
Manufacturer: HYUNDAI, Model Year: 2007, Model line: Azera, Model: Hyundai Azera 2007Pages: 308, PDF Size: 12.63 MB
Page 241 of 308
6
DO-IT-YOURSELF MAINTENANCE
3
G020C01TG-AATVehicle InteriorThe following should be checked each
time when the vehicle is driven:
o Lights operation
o Windshield wiper operation
o Horn operation
o Defroster, heating system operation
(and air conditioning, if installed)
o Steering operation and condition
o Mirror condition and operation
o Turn signal operation
o Accelerator pedal operation
o Brake operation, including parking
brake
o Automatic transaxle operation, includ-
ing "Park" mechanism operation
o Seat control condition and operation
o Seat belt condition and operation
o Sun visor operation
If you notice anything that does not operate
correctly or appears to be functioning cor-
rectly, inspect it carefully and seek assis-
tance from your Hyundai dealer if service
is needed.
G020B01A-AATVehicle ExteriorThe following should be checked monthly:
o Overall appearance and condition
o Wheel condition and wheel nut torque
o Exhaust system condition
o Light condition and operation
o Windshield glass condition
o Wiper blade condition
o Paint condition and body corrosion
o Fluid leaks
o Door and hood lock condition
o Tire pressure and condition
(including spare tire)
GENERAL CHECKSG020A01NF-AATEngine CompartmentThe following should be checked regu-
larly:
o Engine oil level and condition
o Transaxle fluid level and condition
o Brake fluid level
o Engine coolant level
o Windshield washer fluid level
o Accessory drive belt condition
o Engine coolant hose condition
o Fluid leaks (on or below components)
o Power steering fluid level
o Battery condition
o Air cleaner filter condition
o Engine vibration
Page 242 of 308
6
DO-IT-YOURSELF MAINTENANCE
4
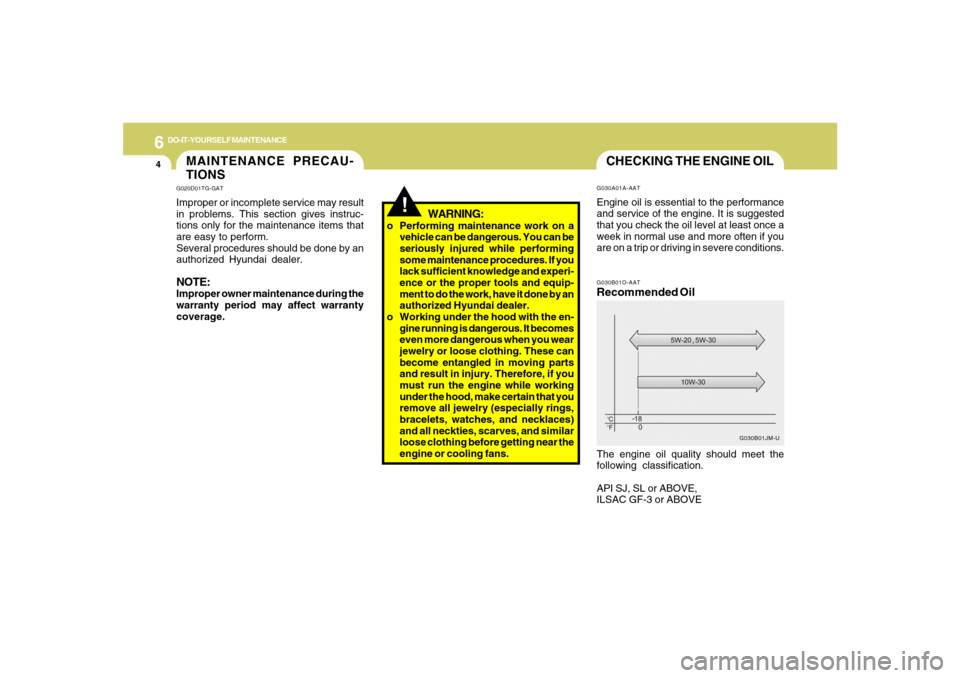
CHECKING THE ENGINE OILG030B01O-AATRecommended OilThe engine oil quality should meet the
following classification.
API SJ, SL or ABOVE,
ILSAC GF-3 or ABOVE
G030B01JM-U G030A01A-AAT
Engine oil is essential to the performance
and service of the engine. It is suggested
that you check the oil level at least once a
week in normal use and more often if you
are on a trip or driving in severe conditions.
MAINTENANCE PRECAU-
TIONS
!
G020D01TG-GATImproper or incomplete service may result
in problems. This section gives instruc-
tions only for the maintenance items that
are easy to perform.
Several procedures should be done by an
authorized Hyundai dealer.NOTE:Improper owner maintenance during the
warranty period may affect warranty
coverage.
WARNING:
o Performing maintenance work on a
vehicle can be dangerous. You can be
seriously injured while performing
some maintenance procedures. If you
lack sufficient knowledge and experi-
ence or the proper tools and equip-
ment to do the work, have it done by an
authorized Hyundai dealer.
o Working under the hood with the en-
gine running is dangerous. It becomes
even more dangerous when you wear
jewelry or loose clothing. These can
become entangled in moving parts
and result in injury. Therefore, if you
must run the engine while working
under the hood, make certain that you
remove all jewelry (especially rings,
bracelets, watches, and necklaces)
and all neckties, scarves, and similar
loose clothing before getting near the
engine or cooling fans.
Page 243 of 308
6
DO-IT-YOURSELF MAINTENANCE
5
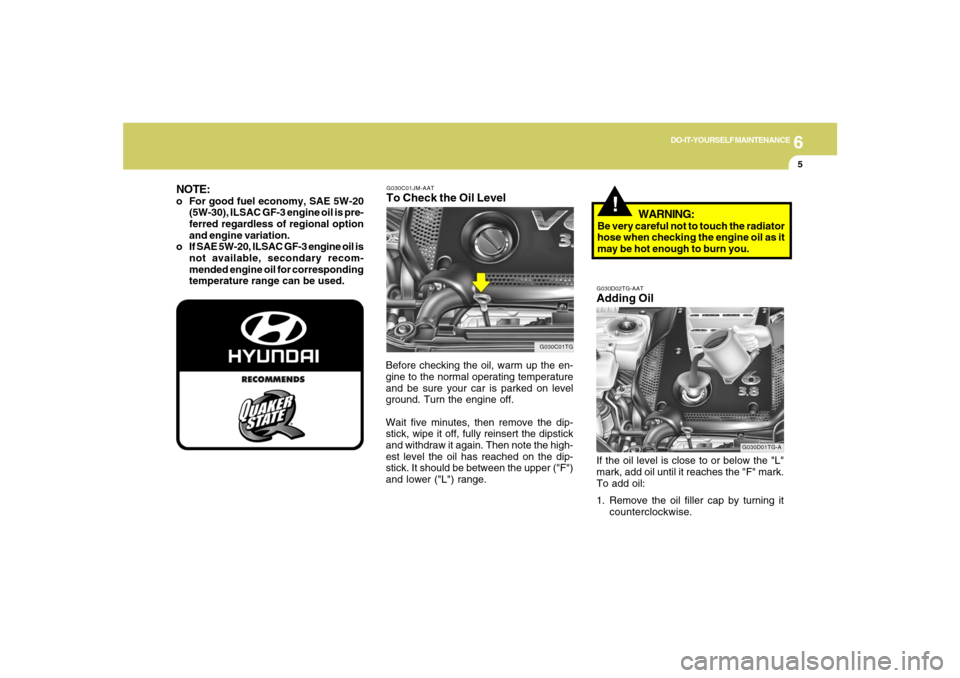
G030C01JM-AATTo Check the Oil LevelBefore checking the oil, warm up the en-
gine to the normal operating temperature
and be sure your car is parked on level
ground. Turn the engine off.
Wait five minutes, then remove the dip-
stick, wipe it off, fully reinsert the dipstick
and withdraw it again. Then note the high-
est level the oil has reached on the dip-
stick. It should be between the upper ("F")
and lower ("L") range.
!
G030C01TG
NOTE:o For good fuel economy, SAE 5W-20
(5W-30), ILSAC GF-3 engine oil is pre-
ferred regardless of regional option
and engine variation.
o If SAE 5W-20, ILSAC GF-3 engine oil is
not available, secondary recom-
mended engine oil for corresponding
temperature range can be used.
G030D02TG-AATAdding OilIf the oil level is close to or below the "L"
mark, add oil until it reaches the "F" mark.
To add oil:
1. Remove the oil filler cap by turning it
counterclockwise.
G030D01TG-A
WARNING:
Be very careful not to touch the radiator
hose when checking the engine oil as it
may be hot enough to burn you.
Page 244 of 308
6
DO-IT-YOURSELF MAINTENANCE
6
CHECKING AND CHANGING
THE ENGINE COOLANT!
G050A01TG-AAT
WARNING:
Do not remove the radiator cap when the
engine is hot. When the engine is hot, the
engine coolant is under pressure and
may erupt through the opening if the cap
is removed. You could be seriously
burned if you do not observe this precau-
tion. Do not remove the radiator cap until
the radiator is cool to the touch.
!
NOTE:o It is recommended that the engine oil
and filter should be changed by an
authorized Hyundai dealer.
o Always dispose of used engine oil in
an environmentally acceptable man-
ner. It is suggested that it be placed in
a sealed container and taken to a
service station for reclamation. Do
not pour the oil on the ground or put it
into the household trash.
PROPOSITION 65 WARNING:
This product contains a chemical known
to the State of California to cause can-
cer. Used engine oil may cause irritation
or cancer of the skin if left in contact with
the skin for prolonged periods of time.
Used engine oil contains chemicals that
have caused cancer in laboratory ani-
mals. Always protect your skin by wash-
ing your hands thoroughly with soap and
warm water as soon as possible after
handling used oil.
!!
CAUTION:
Slowly pour the recommended oil into a
funnel. Do not overfill to avoid damage to
the engine.
WARNING:
Be very careful not to touch the radiator
hose when adding the engine oil as it may
be hot enough to burn you.
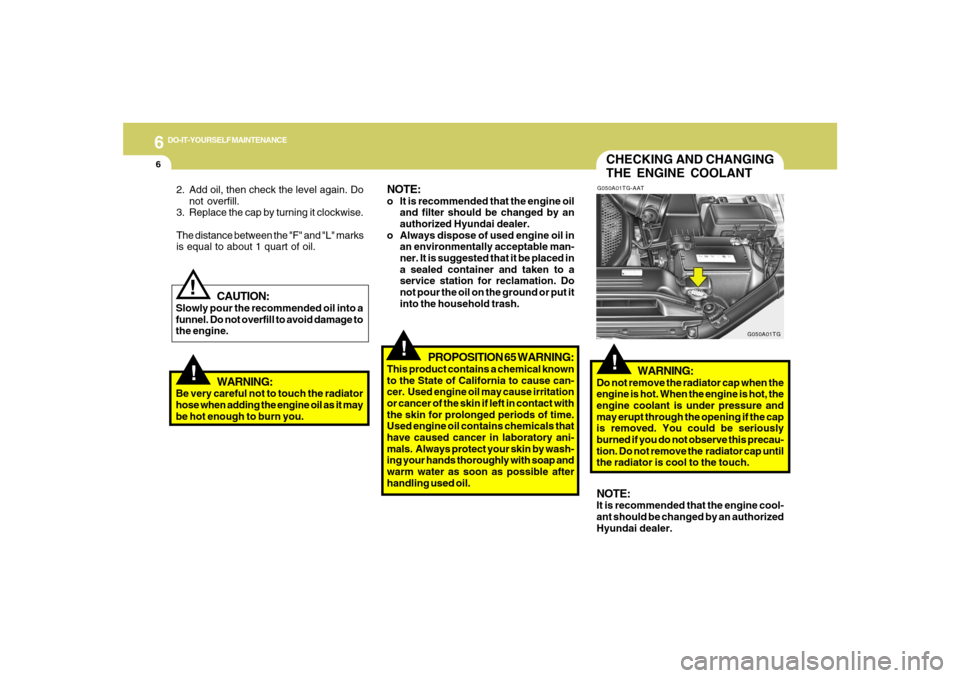
NOTE:It is recommended that the engine cool-
ant should be changed by an authorized
Hyundai dealer. 2. Add oil, then check the level again. Do
not overfill.
3. Replace the cap by turning it clockwise.
The distance between the "F" and "L" marks
is equal to about 1 quart of oil.
G050A01TG
Page 245 of 308
6
DO-IT-YOURSELF MAINTENANCE
7
!
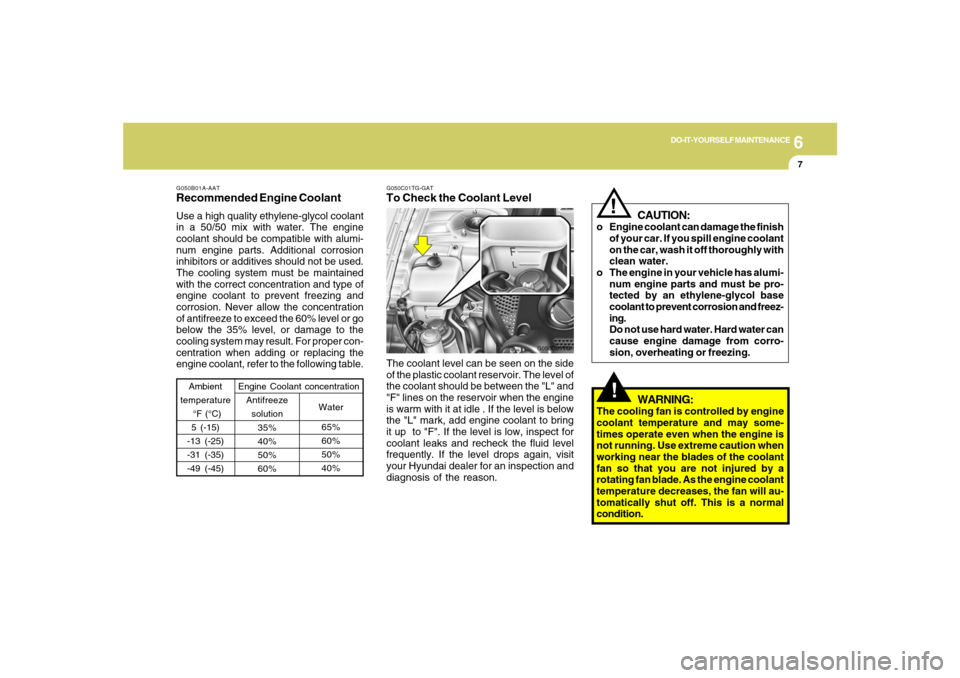
G050B01A-AATRecommended Engine CoolantUse a high quality ethylene-glycol coolant
in a 50/50 mix with water. The engine
coolant should be compatible with alumi-
num engine parts. Additional corrosion
inhibitors or additives should not be used.
The cooling system must be maintained
with the correct concentration and type of
engine coolant to prevent freezing and
corrosion. Never allow the concentration
of antifreeze to exceed the 60% level or go
below the 35% level, or damage to the
cooling system may result. For proper con-
centration when adding or replacing the
engine coolant, refer to the following table.
Ambient
temperature
°F (°C)
5 (-15)
-13 (-25)
-31 (-35)
-49 (-45)
65%
60%
50%
40% 35%
40%
50%
60%Water Antifreeze
solution Engine Coolant concentration
G050C01TG-GATTo Check the Coolant LevelThe coolant level can be seen on the side
of the plastic coolant reservoir. The level of
the coolant should be between the "L" and
"F" lines on the reservoir when the engine
is warm with it at idle . If the level is below
the "L" mark, add engine coolant to bring
it up to "F". If the level is low, inspect for
coolant leaks and recheck the fluid level
frequently. If the level drops again, visit
your Hyundai dealer for an inspection and
diagnosis of the reason.
G050C01TG
!
CAUTION:
o Engine coolant can damage the finish
of your car. If you spill engine coolant
on the car, wash it off thoroughly with
clean water.
o The engine in your vehicle has alumi-
num engine parts and must be pro-
tected by an ethylene-glycol base
coolant to prevent corrosion and freez-
ing.
Do not use hard water. Hard water can
cause engine damage from corro-
sion, overheating or freezing.
WARNING:
The cooling fan is controlled by engine
coolant temperature and may some-
times operate even when the engine is
not running. Use extreme caution when
working near the blades of the coolant
fan so that you are not injured by a
rotating fan blade. As the engine coolant
temperature decreases, the fan will au-
tomatically shut off. This is a normal
condition.
Page 246 of 308
6
DO-IT-YOURSELF MAINTENANCE
8
CAUTION:
o Operating your vehicle without using
a proper air cleaner filter in place can
result in excessive engine wear.
o When removing the air cleaner filter,
be careful that dust or dirt does not
enter the air intake. These may result
in damage to the air cleaner filter.
!
CHANGING THE AIR
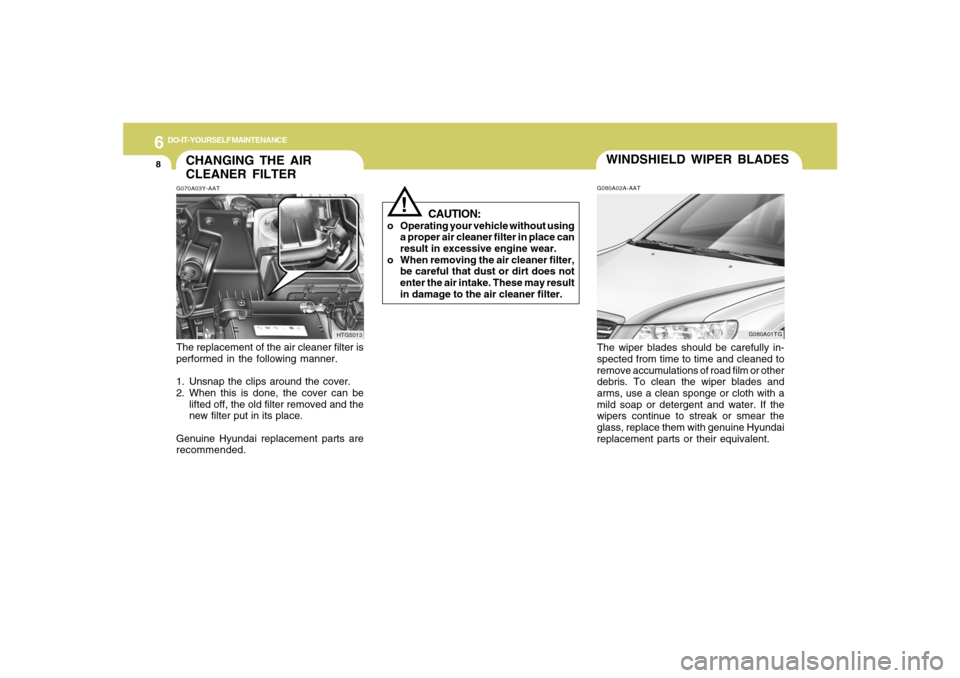
CLEANER FILTERG070A03Y-AATThe replacement of the air cleaner filter is
performed in the following manner.
1. Unsnap the clips around the cover.
2. When this is done, the cover can be
lifted off, the old filter removed and the
new filter put in its place.
Genuine Hyundai replacement parts are
recommended.
HTG5013
WINDSHIELD WIPER BLADESG080A02A-AATThe wiper blades should be carefully in-
spected from time to time and cleaned to
remove accumulations of road film or other
debris. To clean the wiper blades and
arms, use a clean sponge or cloth with a
mild soap or detergent and water. If the
wipers continue to streak or smear the
glass, replace them with genuine Hyundai
replacement parts or their equivalent.
G080A01TG
Page 247 of 308
6
DO-IT-YOURSELF MAINTENANCE
9
!
CAUTION:
o Do not operate the wipers on dry glass.
This can result in more rapid wear of
the wiper blades and may scratch the
glass.
o Keep the blade rubber out of contact
with petroleum products such as en-
gine oil, gasoline, etc.
HHR5049
G080B01TG-GATREPLACING THE WINDSHIELD
WIPER BLADES
Replacing driver's side windshield
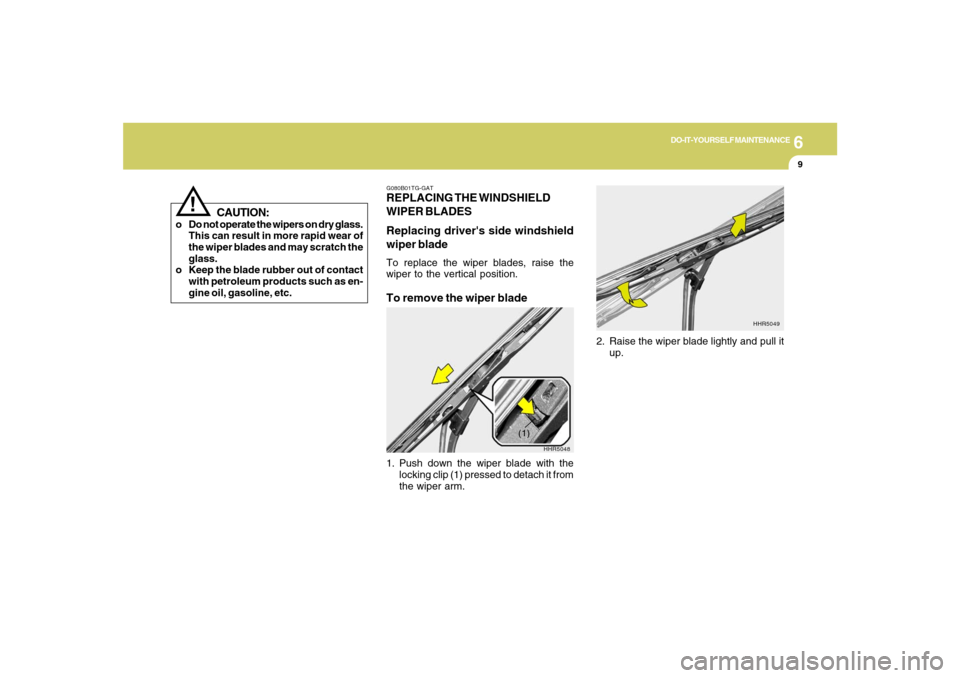
wiper bladeTo replace the wiper blades, raise the
wiper to the vertical position.To remove the wiper blade1. Push down the wiper blade with the
locking clip (1) pressed to detach it from
the wiper arm.
HHR5048
(1)
2. Raise the wiper blade lightly and pull it
up.
Page 248 of 308
6
DO-IT-YOURSELF MAINTENANCE
10
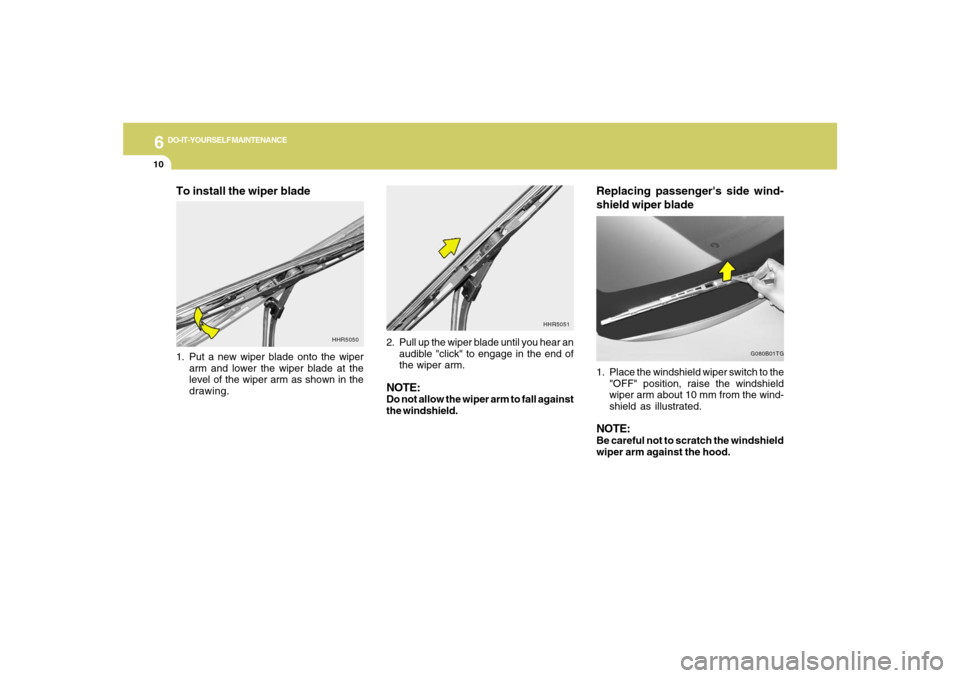
Replacing passenger's side wind-
shield wiper blade1. Place the windshield wiper switch to the
"OFF" position, raise the windshield
wiper arm about 10 mm from the wind-
shield as illustrated.NOTE:Be careful not to scratch the windshield
wiper arm against the hood.
G080B01TG
To install the wiper blade
HHR5050
2. Pull up the wiper blade until you hear an
audible "click" to engage in the end of
the wiper arm.NOTE:Do not allow the wiper arm to fall against
the windshield.
HHR5051
1. Put a new wiper blade onto the wiper
arm and lower the wiper blade at the
level of the wiper arm as shown in the
drawing.
Page 249 of 308
6
DO-IT-YOURSELF MAINTENANCE
11
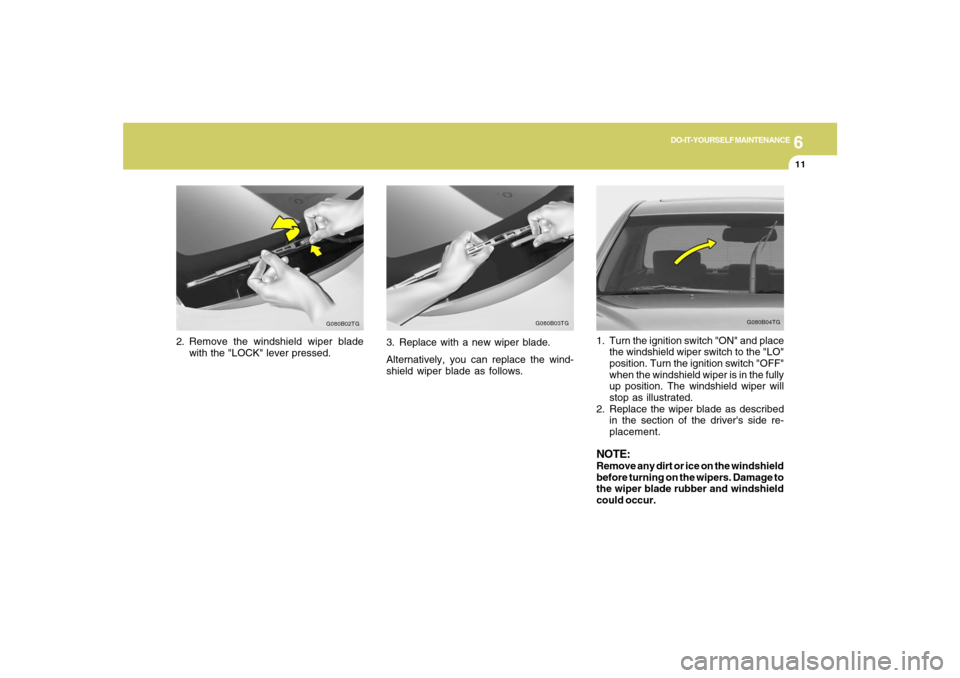
2. Remove the windshield wiper blade
with the "LOCK" lever pressed.
G080B02TG
G080B04TG
1. Turn the ignition switch "ON" and place
the windshield wiper switch to the "LO"
position. Turn the ignition switch "OFF"
when the windshield wiper is in the fully
up position. The windshield wiper will
stop as illustrated.
2. Replace the wiper blade as described
in the section of the driver's side re-
placement.NOTE:Remove any dirt or ice on the windshield
before turning on the wipers. Damage to
the wiper blade rubber and windshield
could occur.
G080B03TG
3. Replace with a new wiper blade.
Alternatively, you can replace the wind-
shield wiper blade as follows.
Page 250 of 308
6
DO-IT-YOURSELF MAINTENANCE
12
G110A01E-AATTransaxle fluid in the automatic transaxle
should be checked at those intervals speci-
fied in the vehicle maintenance schedule
in Section 5.NOTE:Automatic transaxle fluid is basically
red in color. As driving distance in-
creases, the fluid color turns darkish red
gradually. It is a normal condition and
you should not judge the need to replace
based upon the changing color.
You must replace the automatic
transaxle fluid in accordance with inter-
vals specified in the vehicle maintenance
schedule in section 5.
CAUTION:
o Radiator antifreeze (engine coolant)
should not be used in the washer sys-
tem because it will damage the car's
finish.
o The washer lever should not be pulled
and the washer should not be oper-
ated if the washer reservoir is empty.
This can damage the washer fluid
pump.
!!
WARNING:
o Windshield washer fluid agents con-
tain some amounts of alcohol and can
be flammable under certain circum-
stances. Do not allow sparks or flame
to contact the washer fluid or the
washer fluid reservoir. Damage to
the vehicle or its occupants could
occur.
o Windshield washer fluid is poisonous
to humans and animals. Do not drink
windshield washer fluid. Serious in-
jury or death could occur.
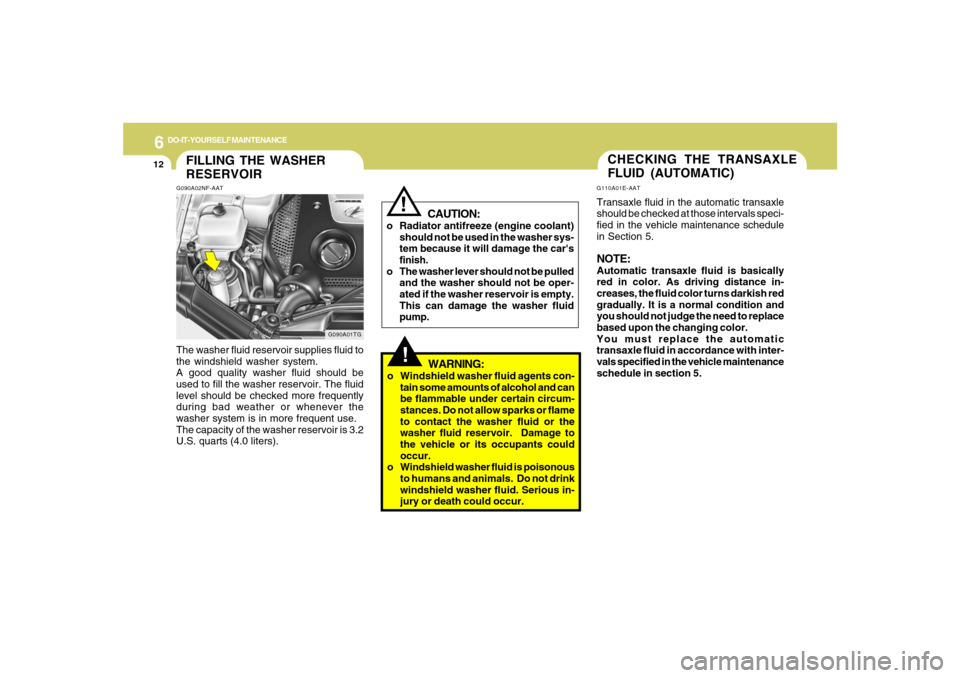
FILLING THE WASHER
RESERVOIRG090A02NF-AAT
G090A01TG
The washer fluid reservoir supplies fluid to
the windshield washer system.
A good quality washer fluid should be
used to fill the washer reservoir. The fluid
level should be checked more frequently
during bad weather or whenever the
washer system is in more frequent use.
The capacity of the washer reservoir is 3.2
U.S. quarts (4.0 liters).
CHECKING THE TRANSAXLE
FLUID (AUTOMATIC)