charging Hyundai Azera 2008 Owner's Manual
[x] Cancel search | Manufacturer: HYUNDAI, Model Year: 2008, Model line: Azera, Model: Hyundai Azera 2008Pages: 345, PDF Size: 14.61 MB
Page 14 of 345
YOUR VEHICLE AT A GLANCE
F12
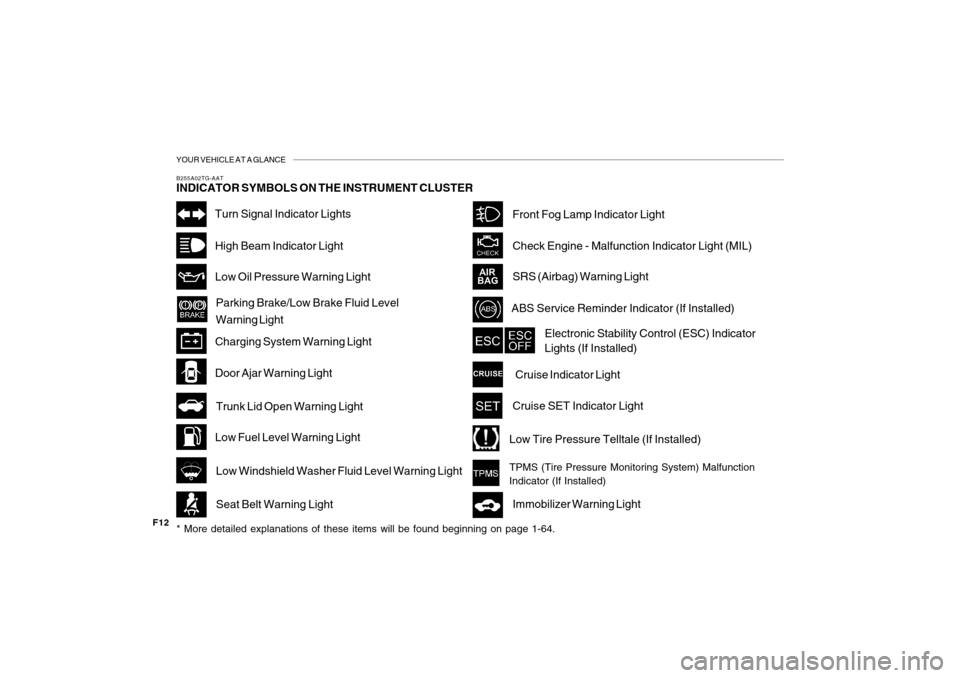
B255A02TG-AATINDICATOR SYMBOLS ON THE INSTRUMENT CLUSTER* More detailed explanations of these items will be found beginning on page 1-64.
Turn Signal Indicator LightsHigh Beam Indicator LightLow Oil Pressure Warning LightParking Brake/Low Brake Fluid Level
Warning Light
Charging System Warning LightDoor Ajar Warning LightTrunk Lid Open Warning LightLow Fuel Level Warning Light
Low Windshield Washer Fluid Level Warning LightSeat Belt Warning Light
Front Fog Lamp Indicator LightCheck Engine - Malfunction Indicator Light (MIL)SRS (Airbag) Warning LightABS Service Reminder Indicator (If Installed)
Electronic Stability Control (ESC) Indicator
Lights (If Installed)Cruise Indicator LightCruise SET Indicator LightLow Tire Pressure Telltale (If Installed)TPMS (Tire Pressure Monitoring System) Malfunction
Indicator (If Installed)Immobilizer Warning Light
Page 75 of 345
1
FEATURES OF YOUR HYUNDAI
61
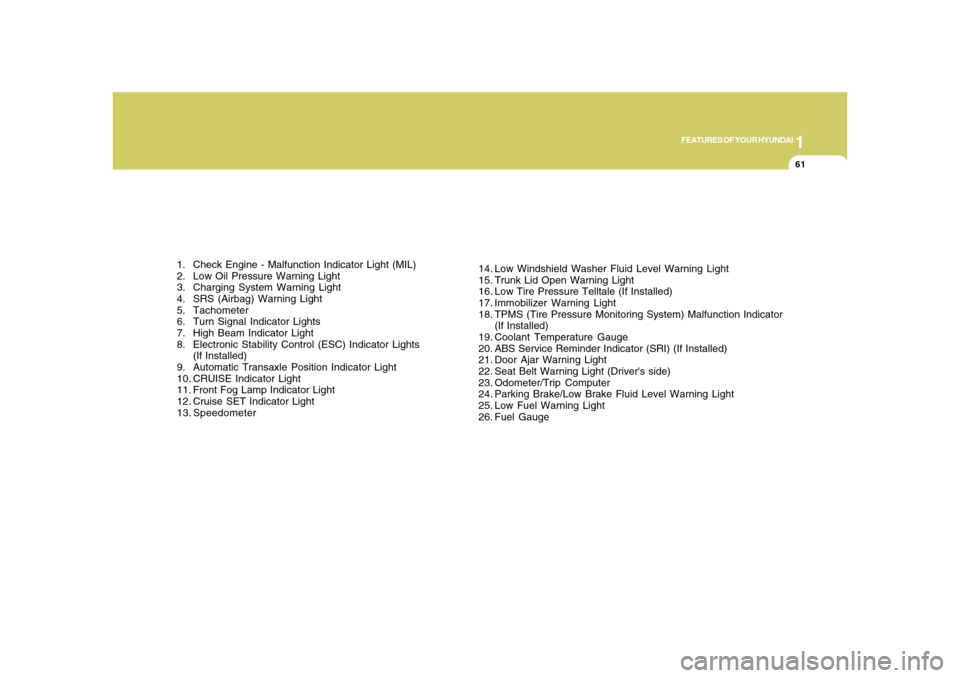
1. Check Engine - Malfunction Indicator Light (MIL)
2. Low Oil Pressure Warning Light
3. Charging System Warning Light
4. SRS (Airbag) Warning Light
5. Tachometer
6. Turn Signal Indicator Lights
7. High Beam Indicator Light
8. Electronic Stability Control (ESC) Indicator Lights
(If Installed)
9. Automatic Transaxle Position Indicator Light
10. CRUISE Indicator Light
11. Front Fog Lamp Indicator Light
12. Cruise SET Indicator Light
13. Speedometer14. Low Windshield Washer Fluid Level Warning Light
15. Trunk Lid Open Warning Light
16. Low Tire Pressure Telltale (If Installed)
17. Immobilizer Warning Light
18. TPMS (Tire Pressure Monitoring System) Malfunction Indicator
(If Installed)
19. Coolant Temperature Gauge
20. ABS Service Reminder Indicator (SRI) (If Installed)
21. Door Ajar Warning Light
22. Seat Belt Warning Light (Driver's side)
23. Odometer/Trip Computer
24. Parking Brake/Low Brake Fluid Level Warning Light
25. Low Fuel Warning Light
26. Fuel Gauge
Page 77 of 345
1
FEATURES OF YOUR HYUNDAI
63
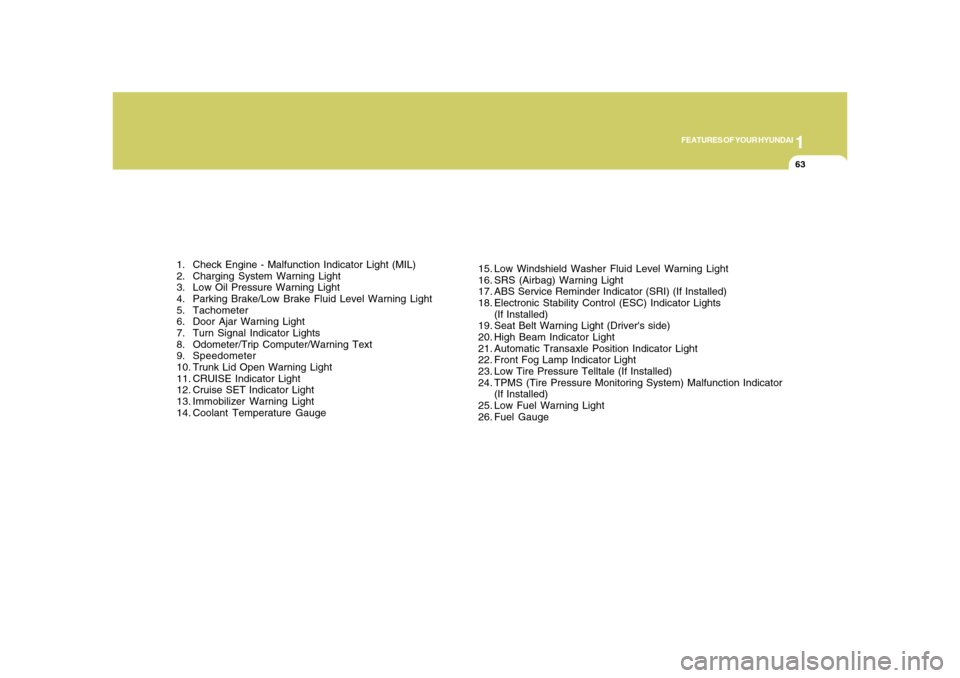
1. Check Engine - Malfunction Indicator Light (MIL)
2. Charging System Warning Light
3. Low Oil Pressure Warning Light
4. Parking Brake/Low Brake Fluid Level Warning Light
5. Tachometer
6. Door Ajar Warning Light
7. Turn Signal Indicator Lights
8. Odometer/Trip Computer/Warning Text
9. Speedometer
10. Trunk Lid Open Warning Light
11. CRUISE Indicator Light
12. Cruise SET Indicator Light
13. Immobilizer Warning Light
14. Coolant Temperature Gauge15. Low Windshield Washer Fluid Level Warning Light
16. SRS (Airbag) Warning Light
17. ABS Service Reminder Indicator (SRI) (If Installed)
18. Electronic Stability Control (ESC) Indicator Lights
(If Installed)
19. Seat Belt Warning Light (Driver's side)
20. High Beam Indicator Light
21. Automatic Transaxle Position Indicator Light
22. Front Fog Lamp Indicator Light
23. Low Tire Pressure Telltale (If Installed)
24. TPMS (Tire Pressure Monitoring System) Malfunction Indicator
(If Installed)
25. Low Fuel Warning Light
26. Fuel Gauge
Page 80 of 345
1FEATURES OF YOUR HYUNDAI66
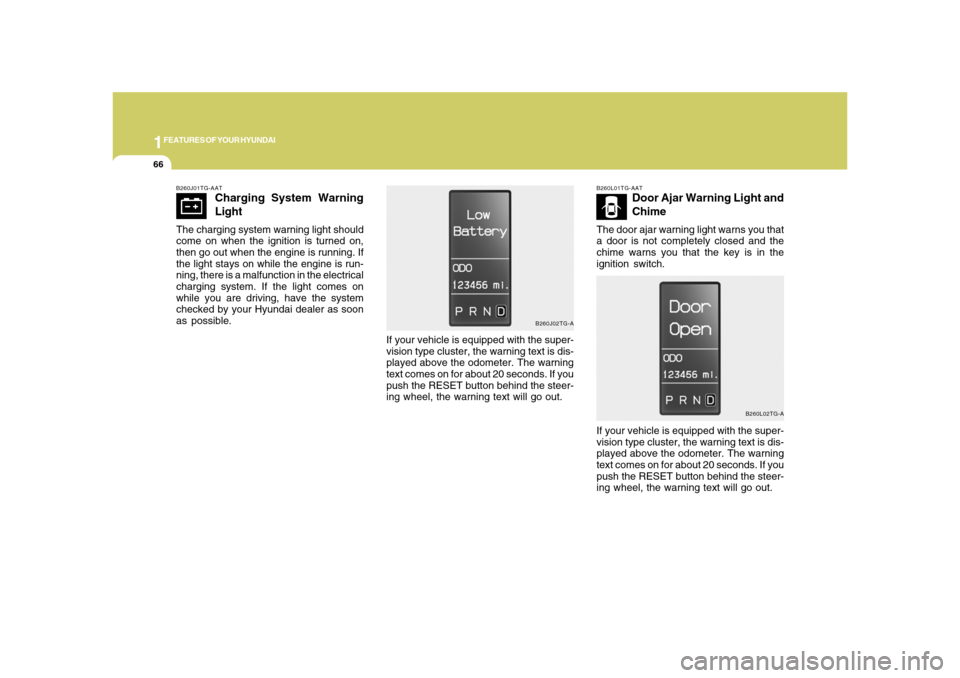
B260L01TG-AAT
Door Ajar Warning Light and
Chime
The door ajar warning light warns you that
a door is not completely closed and the
chime warns you that the key is in the
ignition switch.
B260L02TG-A
If your vehicle is equipped with the super-
vision type cluster, the warning text is dis-
played above the odometer. The warning
text comes on for about 20 seconds. If you
push the RESET button behind the steer-
ing wheel, the warning text will go out.
B260J01TG-AAT
Charging System Warning
Light
The charging system warning light should
come on when the ignition is turned on,
then go out when the engine is running. If
the light stays on while the engine is run-
ning, there is a malfunction in the electrical
charging system. If the light comes on
while you are driving, have the system
checked by your Hyundai dealer as soon
as possible.
B260J02TG-A
If your vehicle is equipped with the super-
vision type cluster, the warning text is dis-
played above the odometer. The warning
text comes on for about 20 seconds. If you
push the RESET button behind the steer-
ing wheel, the warning text will go out.
Page 235 of 345
2
DRIVING YOUR HYUNDAI
22
!
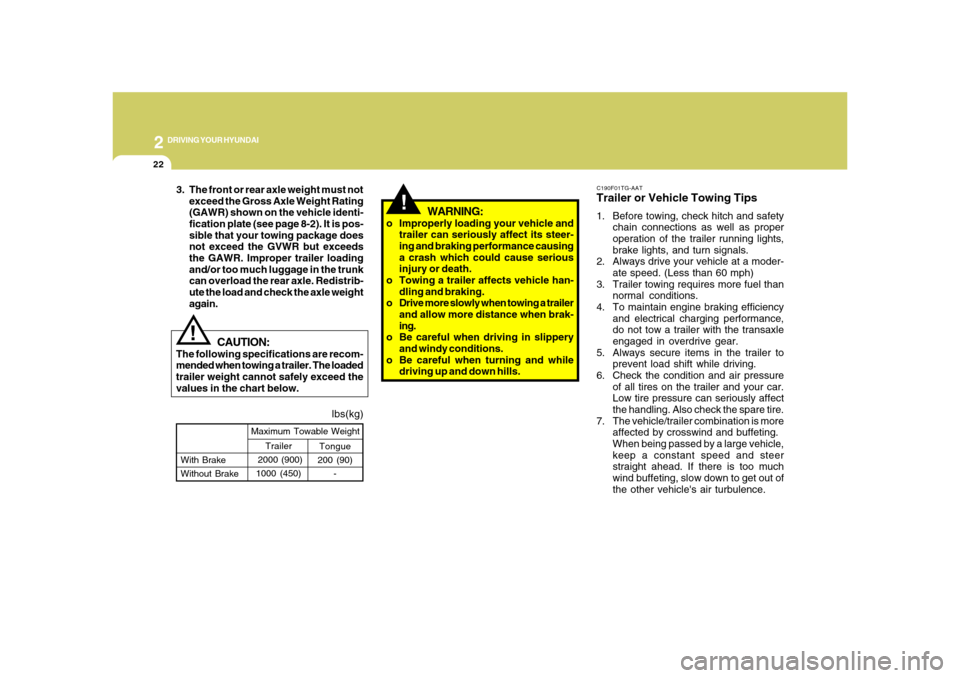
lbs(kg)
!
Tongue
200 (90)
- With Brake
Without BrakeMaximum Towable Weight
Trailer
2000 (900)
1000 (450)
CAUTION:
The following specifications are recom-
mended when towing a trailer. The loaded
trailer weight cannot safely exceed the
values in the chart below.
WARNING:
o Improperly loading your vehicle and
trailer can seriously affect its steer-
ing and braking performance causing
a crash which could cause serious
injury or death.
o Towing a trailer affects vehicle han-
dling and braking.
o Drive more slowly when towing a trailer
and allow more distance when brak-
ing.
o Be careful when driving in slippery
and windy conditions.
o Be careful when turning and while
driving up and down hills. 3. The front or rear axle weight must not
exceed the Gross Axle Weight Rating
(GAWR) shown on the vehicle identi-
fication plate (see page 8-2). It is pos-
sible that your towing package does
not exceed the GVWR but exceeds
the GAWR. Improper trailer loading
and/or too much luggage in the trunk
can overload the rear axle. Redistrib-
ute the load and check the axle weight
again.
C190F01TG-AATTrailer or Vehicle Towing Tips1. Before towing, check hitch and safety
chain connections as well as proper
operation of the trailer running lights,
brake lights, and turn signals.
2. Always drive your vehicle at a moder-
ate speed. (Less than 60 mph)
3. Trailer towing requires more fuel than
normal conditions.
4. To maintain engine braking efficiency
and electrical charging performance,
do not tow a trailer with the transaxle
engaged in overdrive gear.
5. Always secure items in the trailer to
prevent load shift while driving.
6. Check the condition and air pressure
of all tires on the trailer and your car.
Low tire pressure can seriously affect
the handling. Also check the spare tire.
7. The vehicle/trailer combination is more
affected by crosswind and buffeting.
When being passed by a large vehicle,
keep a constant speed and steer
straight ahead. If there is too much
wind buffeting, slow down to get out of
the other vehicle's air turbulence.
Page 244 of 345
3
WHAT TO DO IN AN EMERGENCY
3
JUMP STARTING!
o If you should accidentally get acid on
your skin or in your eyes, immediately
remove any contaminated clothing and
flush the area with clean water for at
least 15 minutes. Then promptly obtain
medical attention. If you must be trans-
ported to an emergency facility, con-
tinue to apply water to the affected area
with a sponge or cloth.
o The gas produced by the battery during
the jump-start operation is highly explo-
sive. Do not smoke or allow a spark or
an open flame in the vicinity.
o The battery being used to provide the
jump start must be 12-volt. If you cannot
determine that it is a 12-volt battery, do
not attempt to use it for the jump start.
o To jump start a car with a discharged
battery, follow this procedure exactly:
1. If the booster battery is installed in an-
other vehicle, be sure the two vehicles
are not touching.
2. Turn off all unnecessary lights and
acces-sories in both vehicles.
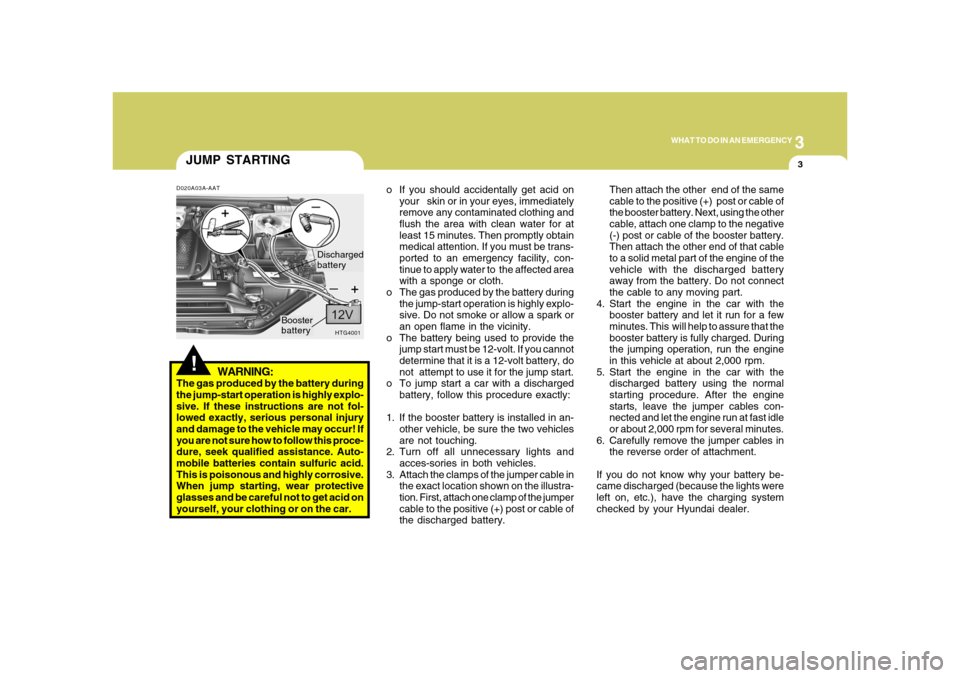
3. Attach the clamps of the jumper cable in
the exact location shown on the illustra-
tion. First, attach one clamp of the jumper
cable to the positive (+) post or cable of
the discharged battery.Then attach the other end of the same
cable to the positive (+) post or cable of
the booster battery. Next, using the other
cable, attach one clamp to the negative
(-) post or cable of the booster battery.
Then attach the other end of that cable
to a solid metal part of the engine of the
vehicle with the discharged battery
away from the battery. Do not connect
the cable to any moving part.
4. Start the engine in the car with the
booster battery and let it run for a few
minutes. This will help to assure that the
booster battery is fully charged. During
the jumping operation, run the engine
in this vehicle at about 2,000 rpm.
5. Start the engine in the car with the
discharged battery using the normal
starting procedure. After the engine
starts, leave the jumper cables con-
nected and let the engine run at fast idle
or about 2,000 rpm for several minutes.
6. Carefully remove the jumper cables in
the reverse order of attachment.
If you do not know why your battery be-
came discharged (because the lights were
left on, etc.), have the charging system
checked by your Hyundai dealer.
D020A03A-AAT
WARNING:
The gas produced by the battery during
the jump-start operation is highly explo-
sive. If these instructions are not fol-
lowed exactly, serious personal injury
and damage to the vehicle may occur! If
you are not sure how to follow this proce-
dure, seek qualified assistance. Auto-
mobile batteries contain sulfuric acid.
This is poisonous and highly corrosive.
When jump starting, wear protective
glasses and be careful not to get acid on
yourself, your clothing or on the car.
HTG4001
Booster
batteryDischarged
battery
Page 298 of 345
6
DO-IT-YOURSELF MAINTENANCE
22
!
!
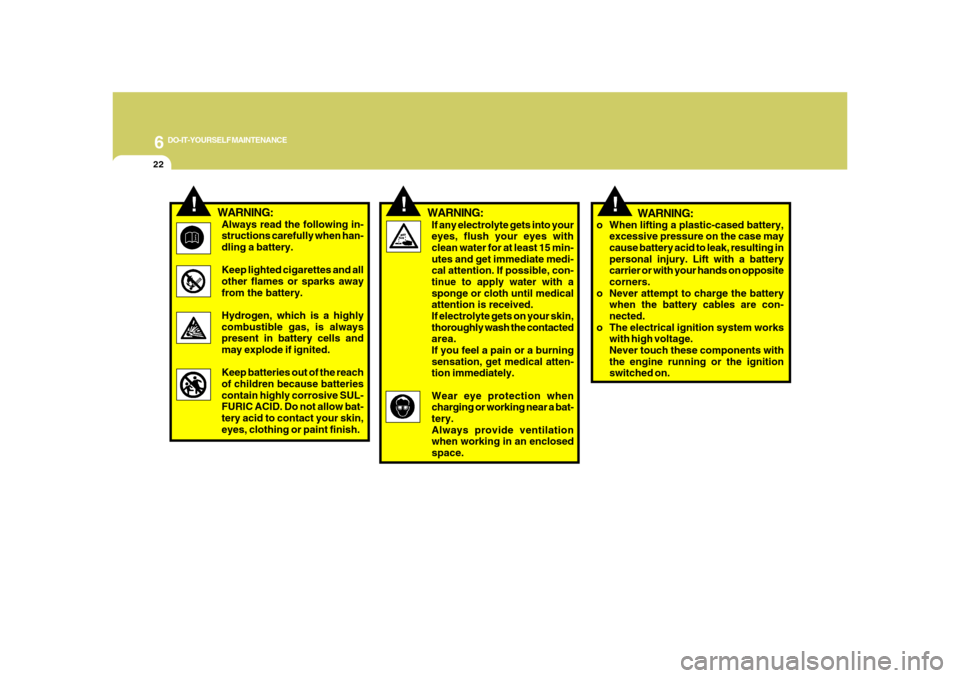
If any electrolyte gets into your
eyes, flush your eyes with
clean water for at least 15 min-
utes and get immediate medi-
cal attention. If possible, con-
tinue to apply water with a
sponge or cloth until medical
attention is received.
If electrolyte gets on your skin,
thoroughly wash the contacted
area.
If you feel a pain or a burning
sensation, get medical atten-
tion immediately.
Wear eye protection when
charging or working near a bat-
tery.
Always provide ventilation
when working in an enclosed
space.WARNING:
!
WARNING:Always read the following in-
structions carefully when han-
dling a battery.
Keep lighted cigarettes and all
other flames or sparks away
from the battery.
Hydrogen, which is a highly
combustible gas, is always
present in battery cells and
may explode if ignited.
Keep batteries out of the reach
of children because batteries
contain highly corrosive SUL-
FURIC ACID. Do not allow bat-
tery acid to contact your skin,
eyes, clothing or paint finish.
o When lifting a plastic-cased battery,
excessive pressure on the case may
cause battery acid to leak, resulting in
personal injury. Lift with a battery
carrier or with your hands on opposite
corners.
o Never attempt to charge the battery
when the battery cables are con-
nected.
o The electrical ignition system works
with high voltage.
Never touch these components with
the engine running or the ignition
switched on.
WARNING: