flat tire Hyundai Azera 2009 User Guide
[x] Cancel search | Manufacturer: HYUNDAI, Model Year: 2009, Model line: Azera, Model: Hyundai Azera 2009Pages: 335, PDF Size: 12.4 MB
Page 240 of 335
3
WHAT TO DO IN AN EMERGENCY
9
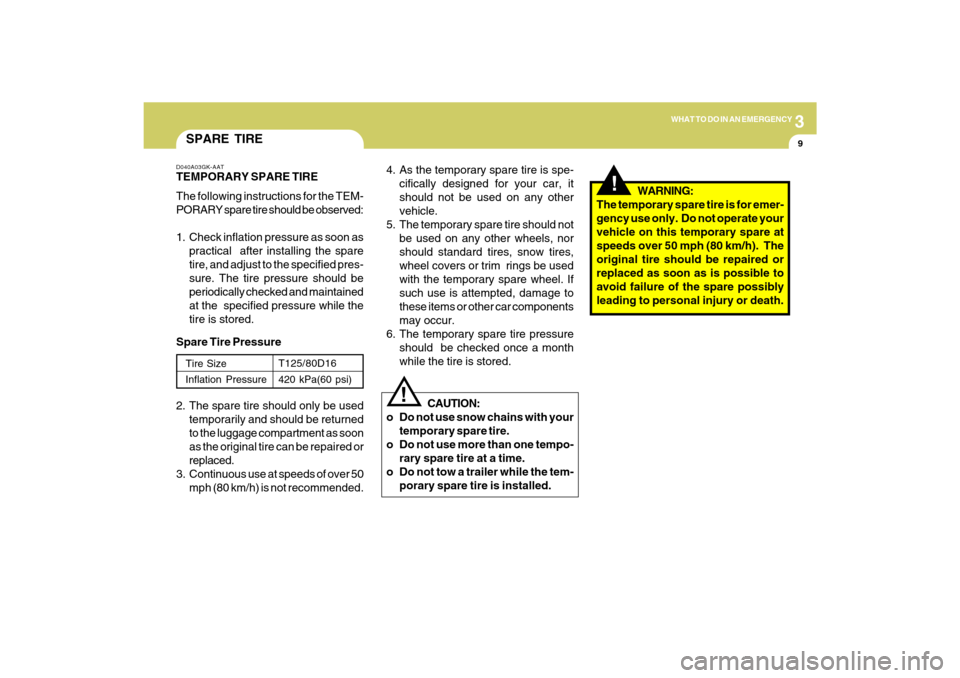
SPARE TIRED040A03GK-AATTEMPORARY SPARE TIRE
The following instructions for the TEM-
PORARY spare tire should be observed:
1. Check inflation pressure as soon as
practical after installing the spare
tire, and adjust to the specified pres-
sure. The tire pressure should be
periodically checked and maintained
at the specified pressure while the
tire is stored.Tire Size
Inflation Pressure
T125/80D16
420 kPa(60 psi)
4. As the temporary spare tire is spe-
cifically designed for your car, it
should not be used on any other
vehicle.
5. The temporary spare tire should not
be used on any other wheels, nor
should standard tires, snow tires,
wheel covers or trim rings be used
with the temporary spare wheel. If
such use is attempted, damage to
these items or other car components
may occur.
6. The temporary spare tire pressure
should be checked once a month
while the tire is stored.
2. The spare tire should only be used
temporarily and should be returned
to the luggage compartment as soon
as the original tire can be repaired or
replaced.
3. Continuous use at speeds of over 50
mph (80 km/h) is not recommended. Spare Tire Pressure
CAUTION:
o Do not use snow chains with your
temporary spare tire.
o Do not use more than one tempo-
rary spare tire at a time.
o Do not tow a trailer while the tem-
porary spare tire is installed.
!
!
WARNING:
The temporary spare tire is for emer-
gency use only. Do not operate your
vehicle on this temporary spare at
speeds over 50 mph (80 km/h). The
original tire should be repaired or
replaced as soon as is possible to
avoid failure of the spare possibly
leading to personal injury or death.
Page 241 of 335
310
WHAT TO DO IN AN EMERGENCY
IF YOU HAVE A FLAT TIRED050A01TG-AATIf a tire goes flat while you are driving:
1. Take your foot off the accelerator pedal
and let the car slow down while driving
straight ahead. Do not apply the brakes
immediately or attempt to pull off the
road as this may cause a loss of
control. When the car has slowed to
such a speed that it is safe to do so,
brake carefully and pull off the road.
Drive off the road as far as possible
and park on firm, level ground. If you
are on a divided highway, do not park
in the median area between the two
traffic lanes.
2. When the car is stopped, turn on your
emergency hazard flashers, set the
parking brake and put the transaxle in
"P".
3. Have all passengers get out of the car.
Be sure they all get out on the side of
the car that is away from traffic.
4. Change the tire according to the in-
structions provided as follows.
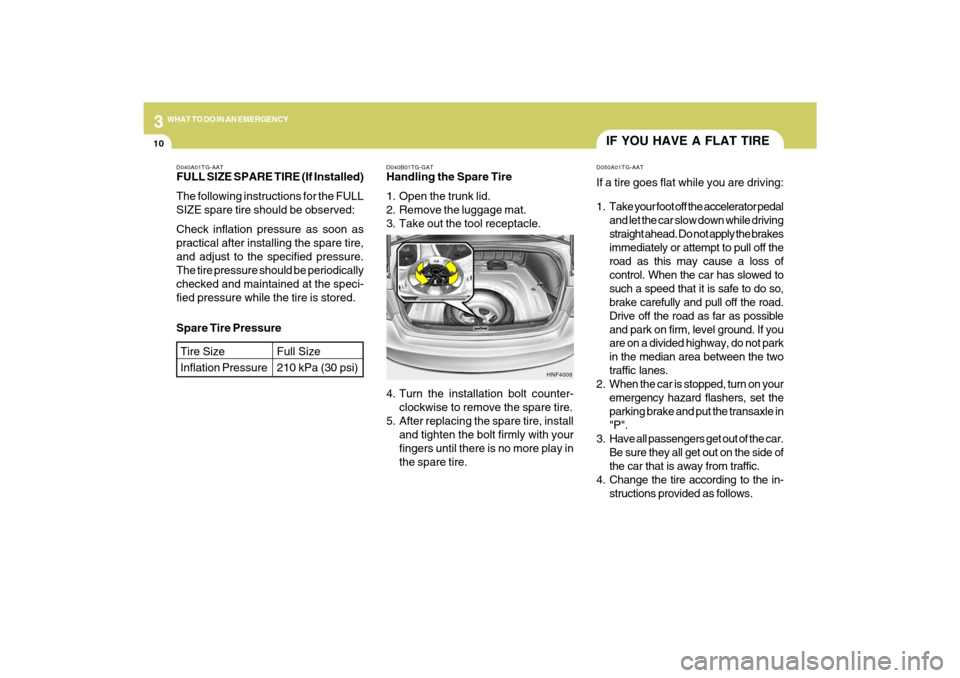
D040B01TG-GATHandling the Spare Tire
1. Open the trunk lid.
2. Remove the luggage mat.
3. Take out the tool receptacle.
HNF4008
4. Turn the installation bolt counter-
clockwise to remove the spare tire.
5. After replacing the spare tire, install
and tighten the bolt firmly with your
fingers until there is no more play in
the spare tire. Spare Tire Pressure
D040A01TG-AATFULL SIZE SPARE TIRE (If Installed)
The following instructions for the FULL
SIZE spare tire should be observed:
Check inflation pressure as soon as
practical after installing the spare tire,
and adjust to the specified pressure.
The tire pressure should be periodically
checked and maintained at the speci-
fied pressure while the tire is stored.Tire Size
Inflation Pressure
Full Size
210 kPa (30 psi)
Page 242 of 335
3
WHAT TO DO IN AN EMERGENCY
11
CHANGING A FLAT TIRED060A01TG-AATThe procedure described on the follow-
ing pages can be used to rotate tires as
well as to change a flat tire. When
preparing to change a flat tire, check to
be sure the gear selector lever is in "P"
and that the parking brake is set, then:
D060A01TG-A
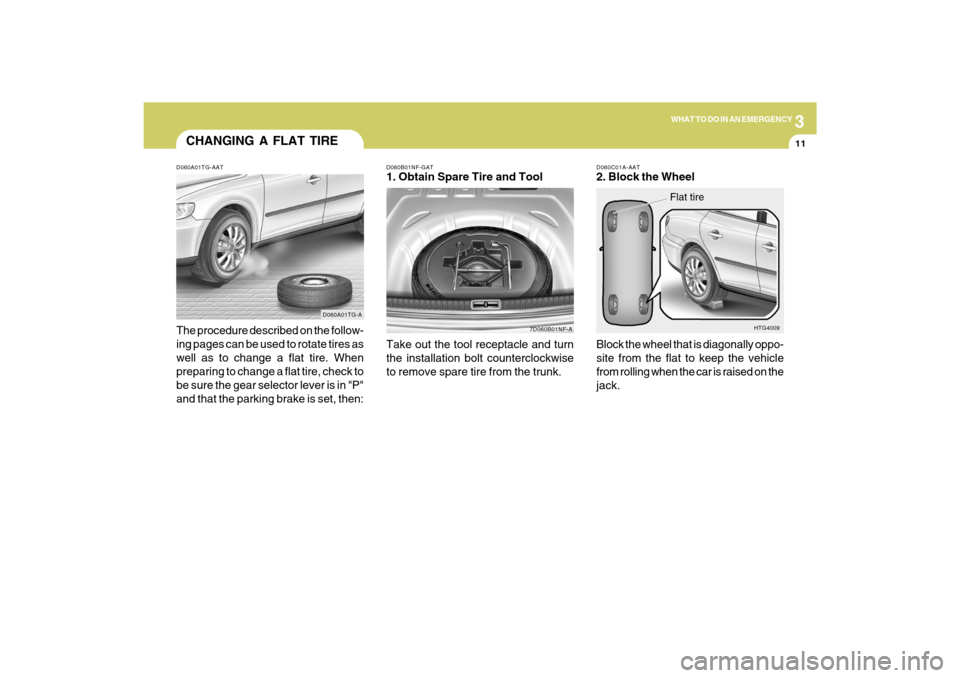
D060B01NF-GAT1. Obtain Spare Tire and Tool
7D060B01NF-A
Take out the tool receptacle and turn
the installation bolt counterclockwise
to remove spare tire from the trunk.
D060C01A-AAT2. Block the Wheel
Block the wheel that is diagonally oppo-
site from the flat to keep the vehicle
from rolling when the car is raised on the
jack.
HTG4009
Flat tire
Page 243 of 335
312
WHAT TO DO IN AN EMERGENCY
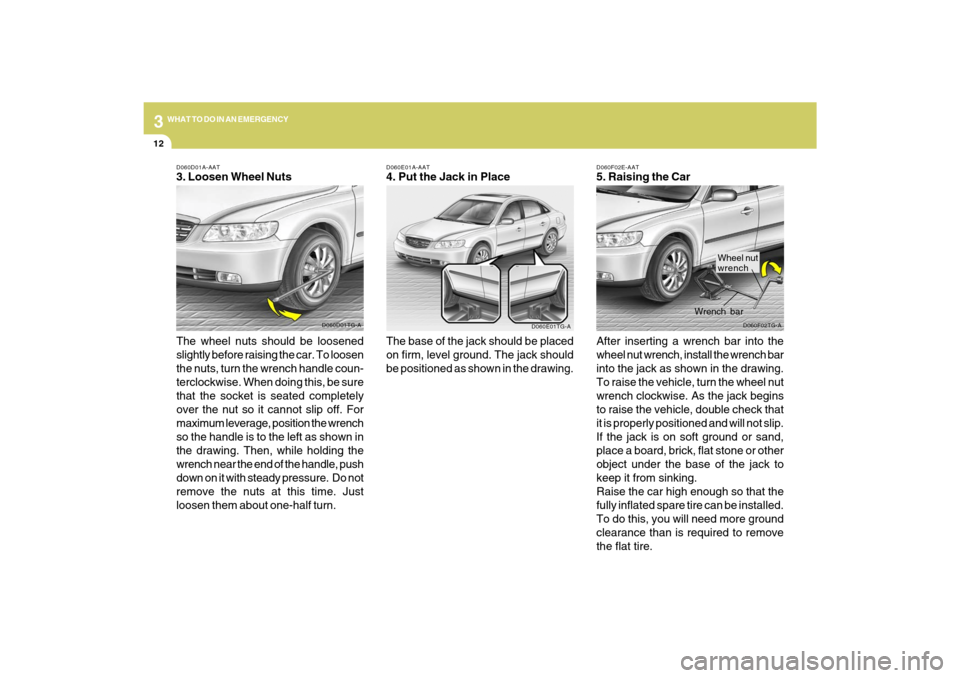
D060F02E-AAT5. Raising the Car
After inserting a wrench bar into the
wheel nut wrench, install the wrench bar
into the jack as shown in the drawing.
To raise the vehicle, turn the wheel nut
wrench clockwise. As the jack begins
to raise the vehicle, double check that
it is properly positioned and will not slip.
If the jack is on soft ground or sand,
place a board, brick, flat stone or other
object under the base of the jack to
keep it from sinking.
Raise the car high enough so that the
fully inflated spare tire can be installed.
To do this, you will need more ground
clearance than is required to remove
the flat tire.
D060F02TG-A
Wrench bar
D060E01A-AAT4. Put the Jack in Place
The base of the jack should be placed
on firm, level ground. The jack should
be positioned as shown in the drawing.
D060E01TG-A
Wheel nut
wrench
D060D01A-AAT3. Loosen Wheel Nuts
The wheel nuts should be loosened
slightly before raising the car. To loosen
the nuts, turn the wrench handle coun-
terclockwise. When doing this, be sure
that the socket is seated completely
over the nut so it cannot slip off. For
maximum leverage, position the wrench
so the handle is to the left as shown in
the drawing. Then, while holding the
wrench near the end of the handle, push
down on it with steady pressure. Do not
remove the nuts at this time. Just
loosen them about one-half turn.
D060D01TG-A
Page 244 of 335
3
WHAT TO DO IN AN EMERGENCY
13
!
WARNING:
Do not get under the car when it is
supported by the jack! This is very
dangerous as the vehicle could fall
and cause serious injury or death.
No one should stay in the car while
the jack is being used.
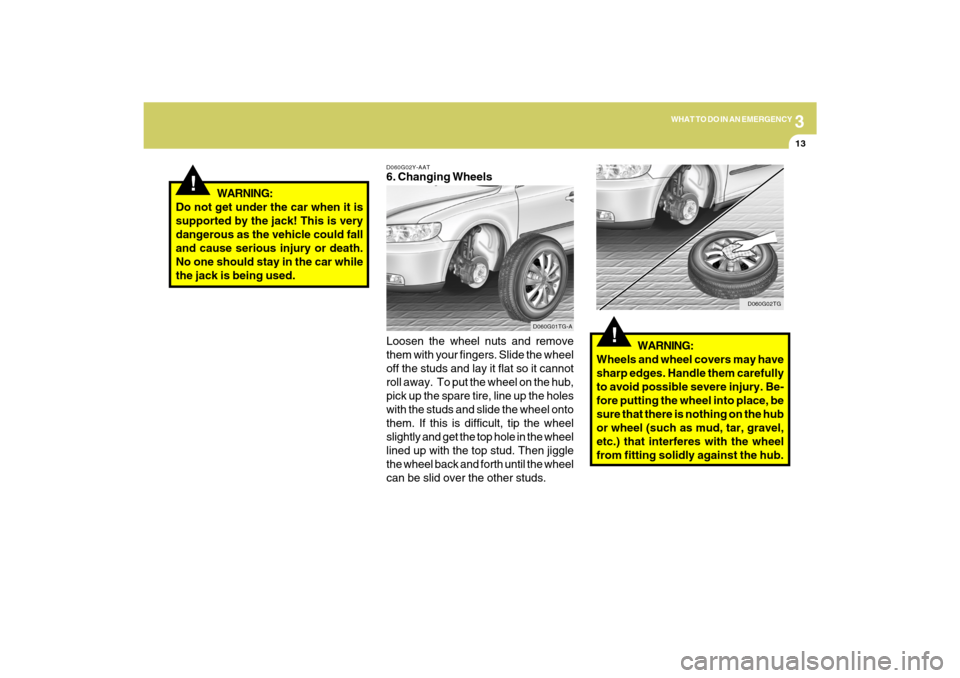
D060G02Y-AAT6. Changing Wheels
Loosen the wheel nuts and remove
them with your fingers. Slide the wheel
off the studs and lay it flat so it cannot
roll away. To put the wheel on the hub,
pick up the spare tire, line up the holes
with the studs and slide the wheel onto
them. If this is difficult, tip the wheel
slightly and get the top hole in the wheel
lined up with the top stud. Then jiggle
the wheel back and forth until the wheel
can be slid over the other studs.
D060G01TG-A
!
WARNING:
Wheels and wheel covers may have
sharp edges. Handle them carefully
to avoid possible severe injury. Be-
fore putting the wheel into place, be
sure that there is nothing on the hub
or wheel (such as mud, tar, gravel,
etc.) that interferes with the wheel
from fitting solidly against the hub.
D060G02TG
Page 246 of 335
3
WHAT TO DO IN AN EMERGENCY
15
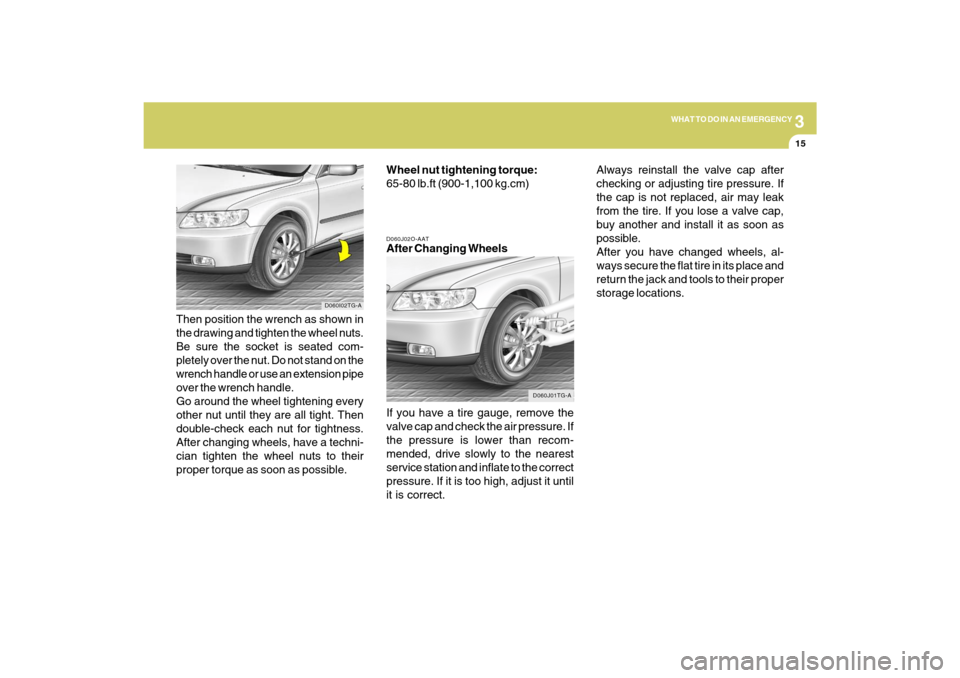
D060J02O-AATAfter Changing Wheels
If you have a tire gauge, remove the
valve cap and check the air pressure. If
the pressure is lower than recom-
mended, drive slowly to the nearest
service station and inflate to the correct
pressure. If it is too high, adjust it until
it is correct. Then position the wrench as shown in
the drawing and tighten the wheel nuts.
Be sure the socket is seated com-
pletely over the nut. Do not stand on the
wrench handle or use an extension pipe
over the wrench handle.
Go around the wheel tightening every
other nut until they are all tight. Then
double-check each nut for tightness.
After changing wheels, have a techni-
cian tighten the wheel nuts to their
proper torque as soon as possible.Wheel nut tightening torque:
65-80 lb.ft (900-1,100 kg.cm)
D060I02TG-A
D060J01TG-A
Always reinstall the valve cap after
checking or adjusting tire pressure. If
the cap is not replaced, air may leak
from the tire. If you lose a valve cap,
buy another and install it as soon as
possible.
After you have changed wheels, al-
ways secure the flat tire in its place and
return the jack and tools to their proper
storage locations.
Page 307 of 335
Vehicle Identification Number (VIN) .............................. 8-2
Engine Number ............................................................. 8-2
Tire Information ............................................................. 8-2
Recommended Cold Tire Inflation Pressures ............... 8-3
Checking Tire Inflation Pressure ................................... 8-5
Tire Sidewall Labeling ................................................... 8-6
Tire Terminology and Definitions ................................... 8-8
All Season Tires..........................................................8-10
Snow Tires..................................................................8-10
Tire Chains ..................................................................8-10
Tire Rotation................................................................8-11
Tire Balancing.............................................................8-12
Tire Traction................................................................8-12
When to Replace Tires ...............................................8-12
Tire Maintenance........................................................8-13
Spare Tire and Tools ...................................................8-14
Warranties for Your Hyundai Vehicle..........................8-14
Consumer Information.................................................8-15
Reporting Safety Defects............................................8-17
Binding Arbitration of Warranty Claims.......................8-18
8
8
CONSUMER INFORMATION, REPORTING
SAFETY DEFECTS & BINDING
ARBITRATION OF WARRANTY CLAIMS
Page 310 of 335

8
CONSUMER INFORMATION, REPORTING SAFETY DEFECTS & BINDING ARBITRATION OF WARRANTY CLAIMS4
!
These pressures were chosen to pro-
vide the most satisfactory combination
of ride comfort, tire wear and stability
under normal conditions. Tire pressures
should be checked at least monthly.
Proper tire inflation pressures should
be maintained for these reasons:
WARNING:
o Inspect your tires frequently for
proper inflation as well as wear
and damage. Always use a tire
pressure gauge.
o Tires with too much or too little
pressure wear unevenly causing
poor handling, loss of vehicle con-
trol, and sudden tire failure lead-
ing to accidents, injuries, and even
death. The recommended cold
tire pressure for your vehicle can
be found in this manual and on the
tire label located on the driver's
side of the center pillar.
OTG059300NOTG059302N
Type E
Type F
OTG059301NOTG059303N
Type G
Type H
Page 311 of 335

8
CONSUMER INFORMATION, REPORTING SAFETY DEFECTS & BINDING ARBITRATION OF WARRANTY CLAIMS
5
!
CAUTION:
Always observe the following:
o Check pressures when the tires
are cold. (After the vehicle has
been parked for at least three hours
or hasn't been driven more than 1
mile (1.6 km) since starting up.)
o Check the pressure of your spare
tire each time you check the pres-
sure of other tires.
o Worn, old tires can cause acci-
dents. If your tread is badly worn,
or if your tires have been dam-
aged, replace them.
!
WARNING:
Overinflation or underinflation can
reduce the tire life, adversely affect
vehicle handling, and lead to sud-
den tire failure. This could rusult in
loss of vehicle control and potential
injury.
!
o Worn tires can cause accidents.
Replace tires that are worn, show
uneven wear, or are damaged. See
page 8-12.
o Remember to check the pressure
of your spare tire. Hyundai recom-
mends that you check the spare
every time you check the pressure
of the other tires on your vehicle.WARNING:
NOTE:
o Underinflation also results in ex-
cessive wear, poor handling and
reduced fuel economy. Wheel de-
formation also is possible. Keep
your tire pressures at the proper
levels. If a tire frequently needs
refilling, have it checked by your
Hyundai Dealer.
o Overinflation produces a harsh
ride, excessive wear at the center
of the tire tread, and a greater
possibility of damage from road
hazards.
I035A01JM-AATCHECKING TIRE INFLATION PRES-
SURE
Check your tires once a month or more.
Also, check the tire pressure of the
spare tire.
How to Check
Use a good quality gauge to check tire
pressure. You cannot tell if your tires
are properly inflated simply by looking
at them. Radial tires may look properly
inflated even when they're underinflated.
Check the tire's inflation pressure when
the tires are cold. - "Cold" means your
vehicle has been sitting for at least
three hours or driven no more than 1
mile (1.6 km).
Page 312 of 335
8
CONSUMER INFORMATION, REPORTING SAFETY DEFECTS & BINDING ARBITRATION OF WARRANTY CLAIMS6
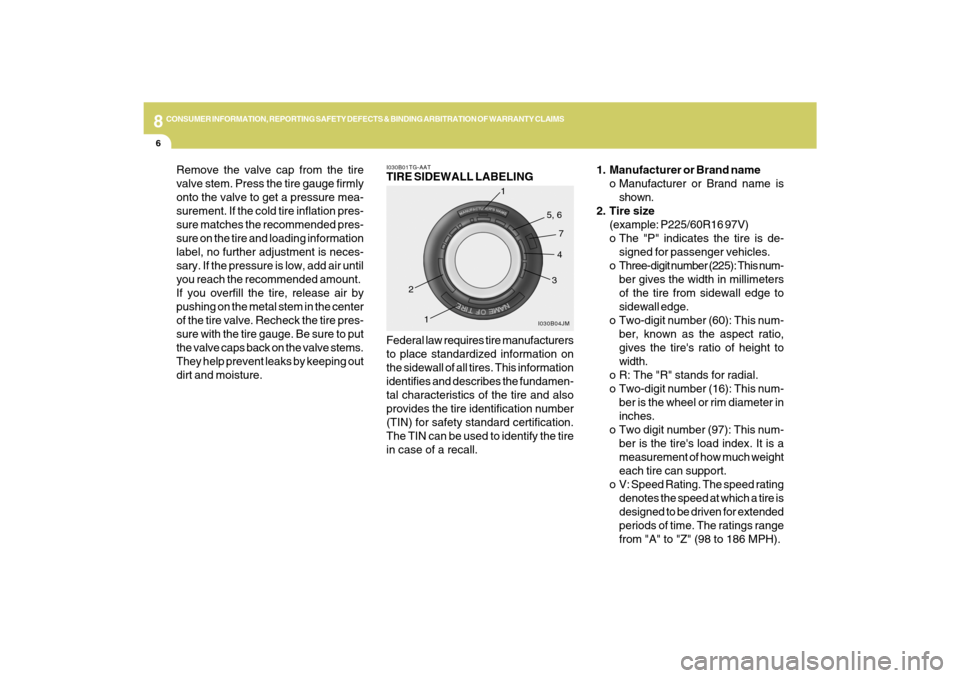
1. Manufacturer or Brand name
o Manufacturer or Brand name is
shown.
2. Tire size
(example: P225/60R16 97V)
o The "P" indicates the tire is de-
signed for passenger vehicles.
o Three-digit number (225): This num-
ber gives the width in millimeters
of the tire from sidewall edge to
sidewall edge.
o Two-digit number (60): This num-
ber, known as the aspect ratio,
gives the tire's ratio of height to
width.
o R: The "R" stands for radial.
o Two-digit number (16): This num-
ber is the wheel or rim diameter in
inches.
o Two digit number (97): This num-
ber is the tire's load index. It is a
measurement of how much weight
each tire can support.
o V: Speed Rating. The speed rating
denotes the speed at which a tire is
designed to be driven for extended
periods of time. The ratings range
from "A" to "Z" (98 to 186 MPH).
Remove the valve cap from the tire
valve stem. Press the tire gauge firmly
onto the valve to get a pressure mea-
surement. If the cold tire inflation pres-
sure matches the recommended pres-
sure on the tire and loading information
label, no further adjustment is neces-
sary. If the pressure is low, add air until
you reach the recommended amount.
If you overfill the tire, release air by
pushing on the metal stem in the center
of the tire valve. Recheck the tire pres-
sure with the tire gauge. Be sure to put
the valve caps back on the valve stems.
They help prevent leaks by keeping out
dirt and moisture.Federal law requires tire manufacturers
to place standardized information on
the sidewall of all tires. This information
identifies and describes the fundamen-
tal characteristics of the tire and also
provides the tire identification number
(TIN) for safety standard certification.
The TIN can be used to identify the tire
in case of a recall.
I030B01TG-AATTIRE SIDEWALL LABELING
I030B04JM
1
234 5, 6
7
1