parking brake Hyundai Azera 2010 Owner's Manual
[x] Cancel search | Manufacturer: HYUNDAI, Model Year: 2010, Model line: Azera, Model: Hyundai Azera 2010Pages: 334, PDF Size: 12.24 MB
Page 11 of 334
F11
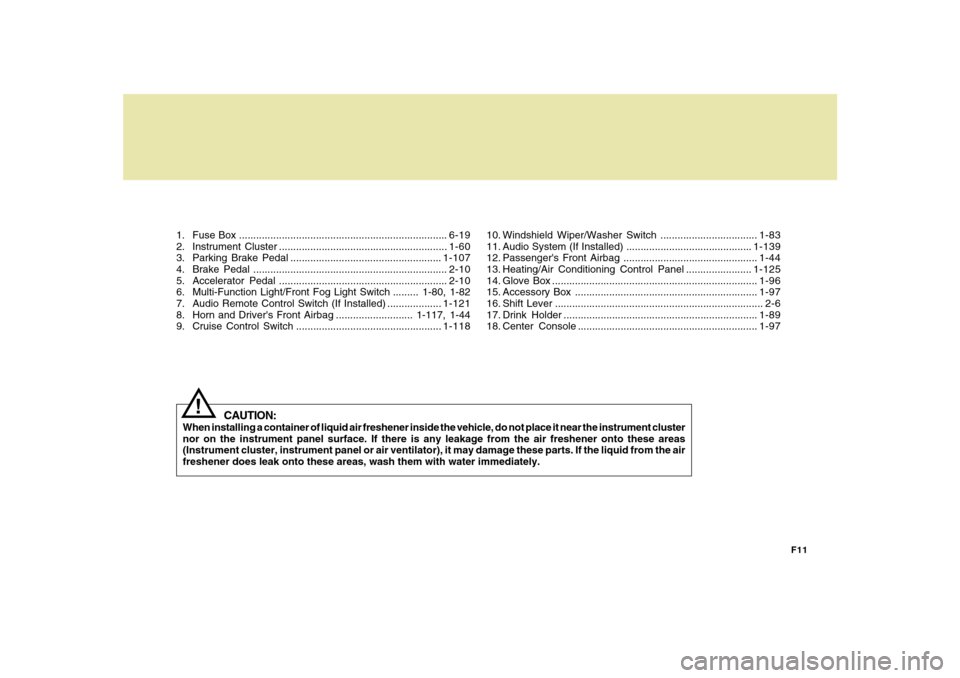
1. Fuse Box .........................................................................6-19
2. Instrument Cluster ...........................................................1-60
3. Parking Brake Pedal .....................................................1-107
4. Brake Pedal ....................................................................2-10
5. Accelerator Pedal ...........................................................2-10
6. Multi-Function Light/Front Fog Light Switch ......... 1-80, 1-82
7. Audio Remote Control Switch (If Installed) ...................1-121
8. Horn and Driver's Front Airbag ........................... 1-117, 1-44
9. Cruise Control Switch ...................................................1-118
CAUTION:
When installing a container of liquid air freshener inside the vehicle, do not place it near the instrument cluster
nor on the instrument panel surface. If there is any leakage from the air freshener onto these areas
(Instrument cluster, instrument panel or air ventilator), it may damage these parts. If the liquid from the air
freshener does leak onto these areas, wash them with water immediately.
!
10. Windshield Wiper/Washer Switch ..................................1-83
11. Audio System (If Installed) ............................................1-139
12. Passenger's Front Airbag ...............................................1-44
13. Heating/Air Conditioning Control Panel .......................1-125
14. Glove Box ........................................................................1-96
15. Accessory Box ................................................................1-97
16. Shift Lever ......................................................................... 2-6
17. Drink Holder ....................................................................1-89
18. Center Console ...............................................................1-97
Page 12 of 334
YOUR VEHICLE AT A GLANCE
F12
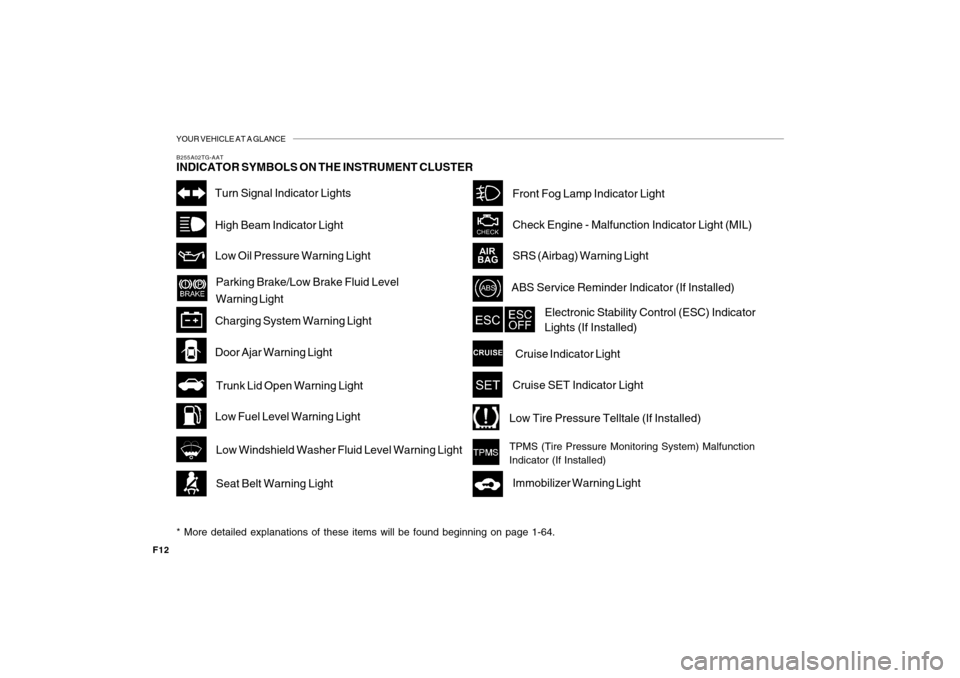
B255A02TG-AATINDICATOR SYMBOLS ON THE INSTRUMENT CLUSTER* More detailed explanations of these items will be found beginning on page 1-64.
Turn Signal Indicator LightsHigh Beam Indicator LightLow Oil Pressure Warning LightParking Brake/Low Brake Fluid Level
Warning Light
Charging System Warning LightDoor Ajar Warning LightTrunk Lid Open Warning LightLow Fuel Level Warning Light
Low Windshield Washer Fluid Level Warning LightSeat Belt Warning Light
Front Fog Lamp Indicator LightCheck Engine - Malfunction Indicator Light (MIL)SRS (Airbag) Warning LightABS Service Reminder Indicator (If Installed)
Electronic Stability Control (ESC) Indicator
Lights (If Installed)Cruise Indicator LightCruise SET Indicator LightLow Tire Pressure Telltale (If Installed)TPMS (Tire Pressure Monitoring System) Malfunction
Indicator (If Installed)Immobilizer Warning Light
Page 74 of 334
1
FEATURES OF YOUR HYUNDAI
61
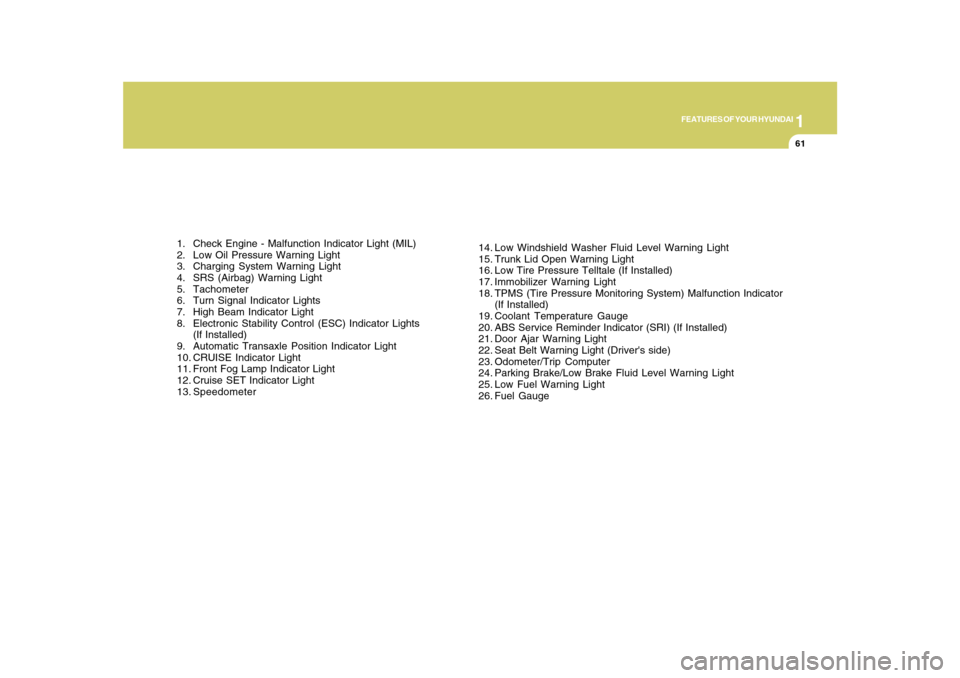
1. Check Engine - Malfunction Indicator Light (MIL)
2. Low Oil Pressure Warning Light
3. Charging System Warning Light
4. SRS (Airbag) Warning Light
5. Tachometer
6. Turn Signal Indicator Lights
7. High Beam Indicator Light
8. Electronic Stability Control (ESC) Indicator Lights
(If Installed)
9. Automatic Transaxle Position Indicator Light
10. CRUISE Indicator Light
11. Front Fog Lamp Indicator Light
12. Cruise SET Indicator Light
13. Speedometer14. Low Windshield Washer Fluid Level Warning Light
15. Trunk Lid Open Warning Light
16. Low Tire Pressure Telltale (If Installed)
17. Immobilizer Warning Light
18. TPMS (Tire Pressure Monitoring System) Malfunction Indicator
(If Installed)
19. Coolant Temperature Gauge
20. ABS Service Reminder Indicator (SRI) (If Installed)
21. Door Ajar Warning Light
22. Seat Belt Warning Light (Driver's side)
23. Odometer/Trip Computer
24. Parking Brake/Low Brake Fluid Level Warning Light
25. Low Fuel Warning Light
26. Fuel Gauge
Page 76 of 334
1
FEATURES OF YOUR HYUNDAI
63
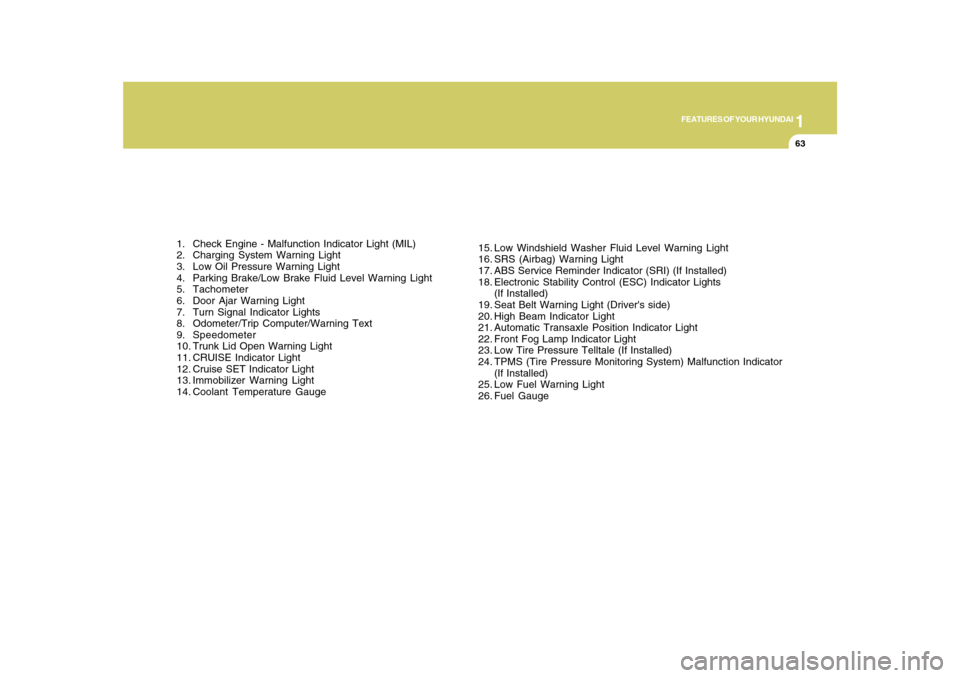
1. Check Engine - Malfunction Indicator Light (MIL)
2. Charging System Warning Light
3. Low Oil Pressure Warning Light
4. Parking Brake/Low Brake Fluid Level Warning Light
5. Tachometer
6. Door Ajar Warning Light
7. Turn Signal Indicator Lights
8. Odometer/Trip Computer/Warning Text
9. Speedometer
10. Trunk Lid Open Warning Light
11. CRUISE Indicator Light
12. Cruise SET Indicator Light
13. Immobilizer Warning Light
14. Coolant Temperature Gauge15. Low Windshield Washer Fluid Level Warning Light
16. SRS (Airbag) Warning Light
17. ABS Service Reminder Indicator (SRI) (If Installed)
18. Electronic Stability Control (ESC) Indicator Lights
(If Installed)
19. Seat Belt Warning Light (Driver's side)
20. High Beam Indicator Light
21. Automatic Transaxle Position Indicator Light
22. Front Fog Lamp Indicator Light
23. Low Tire Pressure Telltale (If Installed)
24. TPMS (Tire Pressure Monitoring System) Malfunction Indicator
(If Installed)
25. Low Fuel Warning Light
26. Fuel Gauge
Page 78 of 334
1
FEATURES OF YOUR HYUNDAI
65
!
B260H02A-AAT
Parking Brake/Low Brake
Fluid Level Warning Light
Your Hyundai is equipped with dual-di-
agonal braking systems. This means you
still have braking on two wheels even if
one of the dual systems should fail. With
only one of the dual systems working,
more than normal pedal travel and greater
pedal pressure are required to stop the
car. Also, the car will not stop in as short a
distance with only half of the brake system
working. If the brakes fail while you are
driving, shift to a lower gear for additional
engine braking and stop the car as soon as
it is safe to do so.
WARNING:
If you suspect brake trouble, have your
brakes checked by a Hyundai dealer as
soon as possible. Driving your car with
a problem in either the brake electrical
system or brake hydraulic system is
dangerous, and could result in a serious
injury or death.
Warning Light OperationThe parking brake/brake fluid level warn-
ing light should come on when the parking
brake is applied and the ignition switch is
turned to "ON" or "START". After the engine
is started, the light should go out when the
parking brake is released.
If the parking brake is not applied, the
warning light should come on when the
ignition switch is turned to "ON" or "START",
then go out when the engine starts. If the
light comes on at any other time, you should
slow the vehicle and bring it to a complete
stop in a safe location off the roadway.
The brake fluid level warning light indi-
cates that the brake fluid level in the brake
master cylinder is low and hydraulic brake
fluid conforming to DOT 3 or DOT 4 speci-
fications should be added. After adding
fluid, if no other trouble is found, the car
should be immediately and carefully driven
to a Hyundai dealer for inspection. If further
trouble is experienced, the vehicle should
not be driven at all but taken to a dealer by
a professional towing service.
Page 83 of 334
1FEATURES OF YOUR HYUNDAI70
B260B01JM-AAT
SRS (Airbag) Warning Light
The SRS warning light comes on for ap-
proximately 6 seconds after the key is
turned to the "ON" position or after the
engine is started, after which it will go out.
This light also comes on when the SRS is
not working properly. If the AIRBAG warn-
ing light does not come on, or continuously
remains on after operating for about 6
seconds when you turned the ignition key
to the "ON" position or started the engine,
or if it comes on while driving, have the
SRS inspected by an authorized Hyundai
dealer.
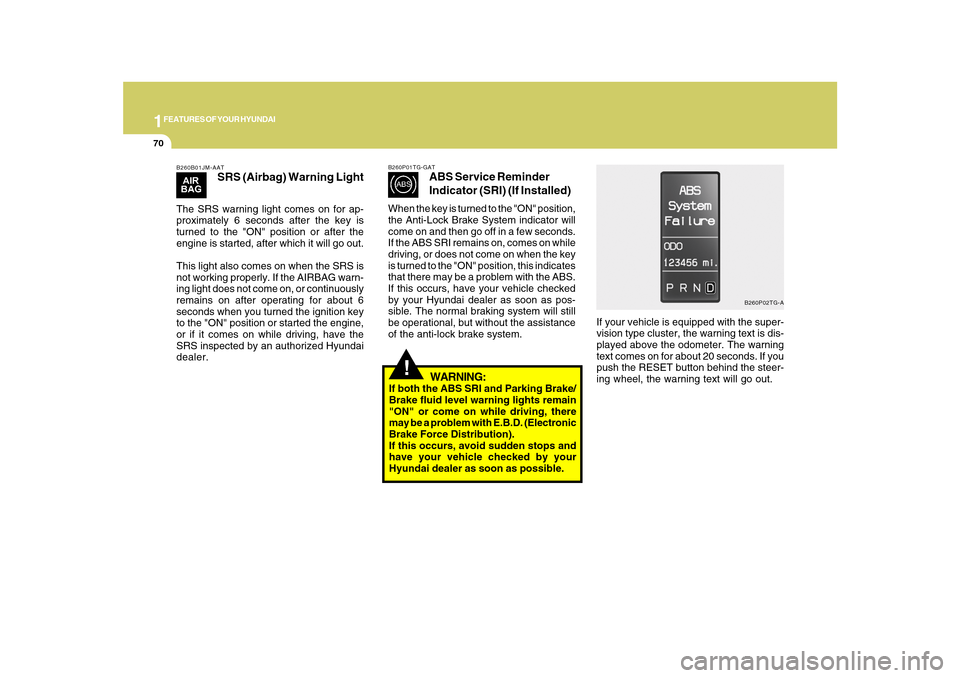
If your vehicle is equipped with the super-
vision type cluster, the warning text is dis-
played above the odometer. The warning
text comes on for about 20 seconds. If you
push the RESET button behind the steer-
ing wheel, the warning text will go out.
B260P02TG-A B260P01TG-GAT
ABS Service Reminder
Indicator (SRI) (If Installed)
When the key is turned to the "ON" position,
the Anti-Lock Brake System indicator will
come on and then go off in a few seconds.
If the ABS SRI remains on, comes on while
driving, or does not come on when the key
is turned to the "ON" position, this indicates
that there may be a problem with the ABS.
If this occurs, have your vehicle checked
by your Hyundai dealer as soon as pos-
sible. The normal braking system will still
be operational, but without the assistance
of the anti-lock brake system.
!
WARNING:
If both the ABS SRI and Parking Brake/
Brake fluid level warning lights remain
"ON" or come on while driving, there
may be a problem with E.B.D. (Electronic
Brake Force Distribution).
If this occurs, avoid sudden stops and
have your vehicle checked by your
Hyundai dealer as soon as possible.
Page 120 of 334
1
FEATURES OF YOUR HYUNDAI
107
!
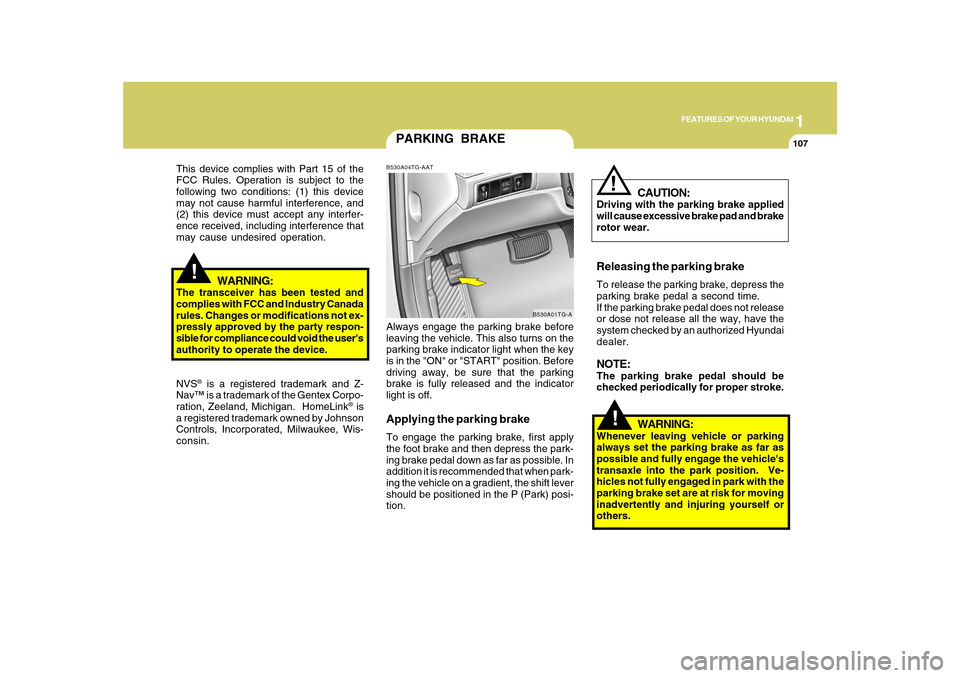
PARKING BRAKEB530A04TG-AATAlways engage the parking brake before
leaving the vehicle. This also turns on the
parking brake indicator light when the key
is in the "ON" or "START" position. Before
driving away, be sure that the parking
brake is fully released and the indicator
light is off.Applying the parking brakeTo engage the parking brake, first apply
the foot brake and then depress the park-
ing brake pedal down as far as possible. In
addition it is recommended that when park-
ing the vehicle on a gradient, the shift lever
should be positioned in the P (Park) posi-
tion.
B530A01TG-A
!
This device complies with Part 15 of the
FCC Rules. Operation is subject to the
following two conditions: (1) this device
may not cause harmful interference, and
(2) this device must accept any interfer-
ence received, including interference that
may cause undesired operation.
WARNING:
The transceiver has been tested and
complies with FCC and Industry Canada
rules. Changes or modifications not ex-
pressly approved by the party respon-
sible for compliance could void the user's
authority to operate the device.
NVS
® is a registered trademark and Z-
Nav™ is a trademark of the Gentex Corpo-
ration, Zeeland, Michigan. HomeLink
® is
a registered trademark owned by Johnson
Controls, Incorporated, Milwaukee, Wis-
consin.
WARNING:
Whenever leaving vehicle or parking
always set the parking brake as far as
possible and fully engage the vehicle's
transaxle into the park position. Ve-
hicles not fully engaged in park with the
parking brake set are at risk for moving
inadvertently and injuring yourself or
others.
CAUTION:
Driving with the parking brake applied
will cause excessive brake pad and brake
rotor wear.Releasing the parking brakeTo release the parking brake, depress the
parking brake pedal a second time.
If the parking brake pedal does not release
or dose not release all the way, have the
system checked by an authorized Hyundai
dealer.NOTE:The parking brake pedal should be
checked periodically for proper stroke.
!
Page 206 of 334
2
DRIVING YOUR HYUNDAI
3
!
!
PROPOSITION 65 WARNING:
Engine exhaust and a wide variety of
automobile components and parts, in-
cluding components found in the interior
furnishings in a vehicle, contain or emit
chemicals known to the State of Califor-
nia to cause cancer and birth defects
and reproductive harm. In addition, cer-
tain fluids contained in vehicles and cer-
tain products of component wear con-
tain or emit chemicals known to the State
of California to cause cancer and birth
defects or other reproductive harm.
BEFORE STARTING
THE ENGINEC020A02TG-AATBefore you start the engine, you should
always:
1. Look around the vehicle to be sure
there are no flat tires, puddles of oil,
water or other indications of possible
trouble.
2. After entering the car, check to be sure
the parking brake is engaged.
3. Check that all windows and lights are
clean.
4. Check that the interior and exterior
mirrors are clean and in position.
5. Check your seat, seatback and head-
rest to be sure they are in their proper
positions.
6. Lock all the doors.
7. Fasten your seat belt and be sure that
all other occupants have fastened
theirs.
8. Turn off all lights and accessories that
are not needed.
9. When you turn the ignition switch to
"ON", check that all appropriate warn-
ing lights are operating and that you
have sufficient fuel.
10. Check the operation of warning lights
and all bulbs when key is in the "ON"
position.
WARNING:
o Always wear appropriate shoes when
operating your vehicle. Unsuitable
shoes (high heels, ski boots, etc.) may
interfere with your ability to use the
brake and accelerator pedal.
o All passengers must be properly
belted whenever the vehicle is mov-
ing. Refer to pages: 1-27 through 1-
34 for more information on their proper
use.
o Always check the surrounding areas
near your vehicle for people, espe-
cially children, before putting a car
into 'drive'.
o When you intend to park or stop the
vehicle with the engine on, be careful
not to depress the accelerator pedal
for a long period of time. It may over-
heat the engine or exhaust system
and cause fire.
Page 210 of 334
2
DRIVING YOUR HYUNDAI
7
C090D02A-AATo N (Neutral):In the "N" position, the transaxle is in neu-
tral, which means that no gears are en-
gaged. The engine can be started with the
shift lever in "N" position, although this is
not recommended except if the engine
stalls while the car is moving.C090C01A-AATo R (Reverse):Use for backing up the vehicle. Bring the
car to a complete stop before shifting the
selector lever to "R" position.C090E02TG-GATo D (Drive):Use for normal driving. Bring the car to a
complete stop before shifting the selector
to "D" position. The transaxle will automati-
cally shift through a five gear sequence.
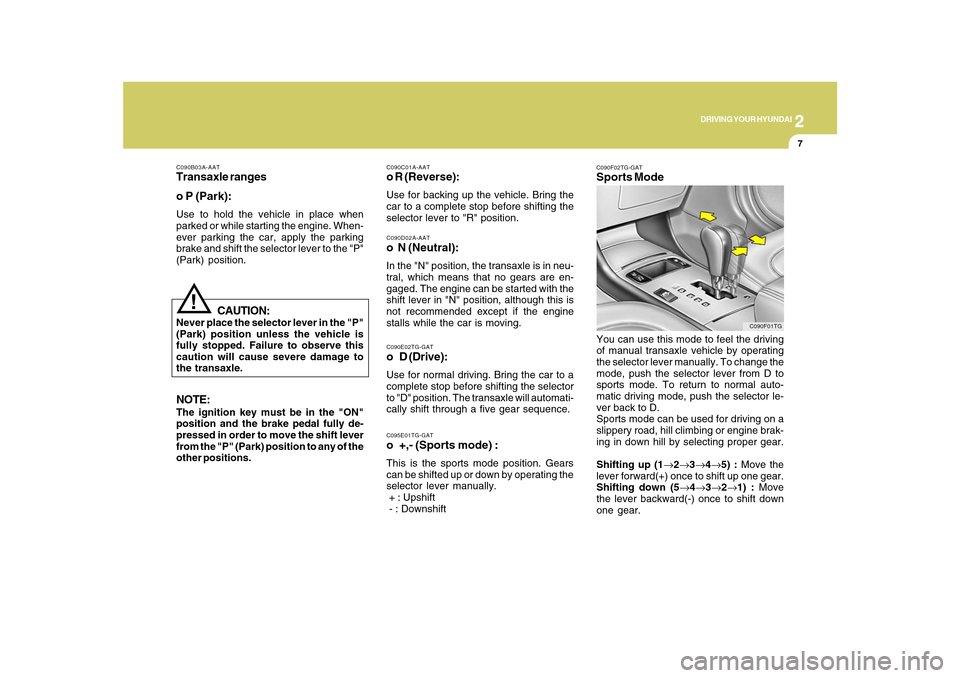
C090F02TG-GATSports ModeYou can use this mode to feel the driving
of manual transaxle vehicle by operating
the selector lever manually. To change the
mode, push the selector lever from D to
sports mode. To return to normal auto-
matic driving mode, push the selector le-
ver back to D.
Sports mode can be used for driving on a
slippery road, hill climbing or engine brak-
ing in down hill by selecting proper gear.
Shifting up (1→2→3→4→5) : Move the
lever forward(+) once to shift up one gear.
Shifting down (5→4→3→2→1) : Move
the lever backward(-) once to shift down
one gear.
C090F01TG
CAUTION:
Never place the selector lever in the "P"
(Park) position unless the vehicle is
fully stopped. Failure to observe this
caution will cause severe damage to
the transaxle.
!
NOTE:The ignition key must be in the "ON"
position and the brake pedal fully de-
pressed in order to move the shift lever
from the "P" (Park) position to any of the
other positions.C090B03A-AATTransaxle ranges
o P (Park):Use to hold the vehicle in place when
parked or while starting the engine. When-
ever parking the car, apply the parking
brake and shift the selector lever to the "P"
(Park) position.
C095E01TG-GATo +,- (Sports mode) :This is the sports mode position. Gears
can be shifted up or down by operating the
selector lever manually.
+ : Upshift
- : Downshift
Page 211 of 334
2
DRIVING YOUR HYUNDAI
8
NOTE:o In sports mode, downward shifts are
made automatically when the vehicle
slows down. When the vehicle stops,
1st gear is automatically selected.
o To maintain the required levels of ve-
hicle performance and safety, the sys-
tem may not execute certain gear-
shifts when the selector lever is oper-
ated.
o Before driving away from a stop on a
slippery road, push the selector lever
forward into the +(UP) position. This
causes the transaxle to shift into 2nd
gear which is better for smooth driv-
ing away on a slippery road. Push the
selector lever to the -(DOWN) side to
shift back to 1st gear.
!
C090I04L-GAT
CAUTION:
o Shift into "R", "D" and "P" position
only when the vehicle has completely
stopped.
o Do not accelerate the engine in re-
verse or any of the forward positions
with the brakes applied.
o Always apply the footbrake when
shifting from "P" or "N", to "R" or
"D"position.
o Do not use the "P" (Park) position in
place of the parking brake. Always
set the parking brake, shift the
transaxle into "P" (Park) position and
turn off the ignition when you leave the
vehicle, even momentarily. Never
leave the vehicle unattended while
the engine is running.
o When accelerating from a stop on a
steep hill, the vehicle may have a
tendency to roll backwards. Shifting
the shift lever into 2nd gear while in
Sport mode will help prevent the ve-
hicle from rolling backwards.
o Check the automatic transaxle fluid
level regularly, and add fluid as nec-
essary.
o See the maintenance schedule for
the proper fluid recommendation.
CAUTION:
o In sports mode, the driver must ex-
ecute upward shifts in accordance
with prevailing road conditions, tak-
ing care to keep the engine speed
below the red zone.
o For engine protection, upward shifts
are made automatically when the
engine rpm reaches the red zone.
o Since sudden engine braking and/or
rapid acceleration can cause a loss of
traction, downshifts must be made
carefully in accordance with the
vehicle's speed.
!