tow Hyundai Azera 2010 Owner's Manual
[x] Cancel search | Manufacturer: HYUNDAI, Model Year: 2010, Model line: Azera, Model: Hyundai Azera 2010Pages: 334, PDF Size: 12.24 MB
Page 16 of 334
1
FEATURES OF YOUR HYUNDAI
3
BREAKING IN YOUR NEW
HYUNDAI
B010F01A-AATOperation in Foreign CountriesIf you are going to drive your Hyundai in
another country, be sure to:
o Observe all regulations regarding reg-
istration and insurance.
o Determine that acceptable fuel is avail-
able.B010E01A-AATGasolines for Cleaner AirTo help contribute to cleaner air, Hyundai
recommends that you use gasolines
treated with detergent additives, which
help prevent deposit formation in the en-
gine. These gasolines will help the engine
run cleaner and enhance performance of
the Emission Control System.
B020A01TG-AATDuring the First 1,200 Miles (2,000
Km)No formal "break-in" procedure is required
with your new Hyundai. However, you can
contribute to the economical operation
and durability of your Hyundai by observ-
ing the following recommendations dur-
ing the first 1,200 miles (2,000 km).
o Don't drive faster than 55 MPH (88 km/
h).
o While driving, keep your engine speed
(rpm, or revolutions per minute) be-
tween 2,000 rpm and 4,000 rpm.
o Use moderate acceleration. Don't start
quickly or depress the accelerator pedal
fully.
o For the first 200 miles (300 km), try to
avoid hard stops.
o Whether going fast or slow, vary your
speed from time to time.
o Don't let the engine idle longer than 3
minutes at one time.
o Don't tow a trailer during the first 1,200
miles (2,000 km) of operation.
IMMOBILIZER SYSTEMB880A01TG-AATThe immobilizer system is an anti-theft
device, designed to deter automobile theft.NOTE:This device complies with Part 15 of the
FCC rules. Operation is subject to the
following two conditions:
(1) This device may not cause harmful
interference, and (2) this device must
accept any interference received, in-
cluding interference that may cause
undesired operation.
CAUTION:
Changes or modifications not expressly
approved by the party responsible for
compliance could void the user's au-
thority to operate the equipment.
!
Page 19 of 334
1FEATURES OF YOUR HYUNDAI6
!
NOTE:You can get a limp home password when
the vehicle is first delivered to you. If you
do not have a password, consult your
authorized Hyundai dealer.
1. To activate the password, turn the igni-
tion key "ON" and "OFF" according to
the digit numbers. The immobilizer indi-
cator will blink along with the operation
of the ignition key. For example, turn the
ignition key once for digit number "1",
and twice for "2", and so on. For the digit
number "0", you must cycle the ignition
key 10 times.
2. Wait for 3~10 seconds.
3. You may set the remaining number of
digits by following steps 1 and 2.
4. If all of the four password digits have
been successfully entered, turn the ig-
nition key "ON" and check that the im-
mobilizer indicator illuminates. From
this time, you have to start your engine
within 30 seconds. If you try to start your
engine after 30 seconds, your engine
will not start. If the immobilizer warning indicator blinks
for five seconds when the ignition key is
turned to the "ON" position, this indicates
the immobilizer system requires service.
The engine cannot be started without us-
ing the procedure below.
The following procedure describes how to
start the engine using the limp home func-
tion (0, 1, 2, 3 as a sample password).
CAUTION:
o If the password is entered incorrectly
three consecutive times, wait for about
one hour to perform the limp home
activation procedure again.
o If you cannot start your engine using
the limp home activation procedure,
have your vehicle towed by an autho-
rized Hyundai dealer.
B880D01TG-AAT"Limp Home" Mode and Related
Procedures
HNF2011
NOTE:If the engine stalls while driving in the
"limp home" mode, you can start your
engine within 3 seconds without re-en-
tering the password.
If the immobilizer indicator blinks for five
seconds, you must re-enter the password
(steps 1~4).
After performing the limp home activation
procedure, consult with your authorized
Hyundai dealer as soon as possible.
Page 20 of 334
1
FEATURES OF YOUR HYUNDAI
7
B030C01JM-AATILLUMINATED IGNITION SWITCHWhenever either front door is opened, the
ignition switch will be illuminated for your
convenience, provided the ignition switch
is not in the "ON" position.
The light will go off approximately 10 sec-
onds after closing the door or when the
ignition switch is turned on.
B030C01E
DOOR LOCKS!
B040A01A-AAT
WARNING:
o Before you drive away (especially if
there are children in the car), be sure
that all the doors are securely closed
and locked so that the doors cannot
be opened from the inside. This helps
ensure that the doors will not be
opened accidentally. Also, when com-
bined with the proper use of seat belts,
locking the doors helps keep occu-
pants from being ejected from the car
in case of an accident.
o Before opening the door, always look
for and avoid oncoming traffic.
B040B01O-AATLocking, unlocking front doors with
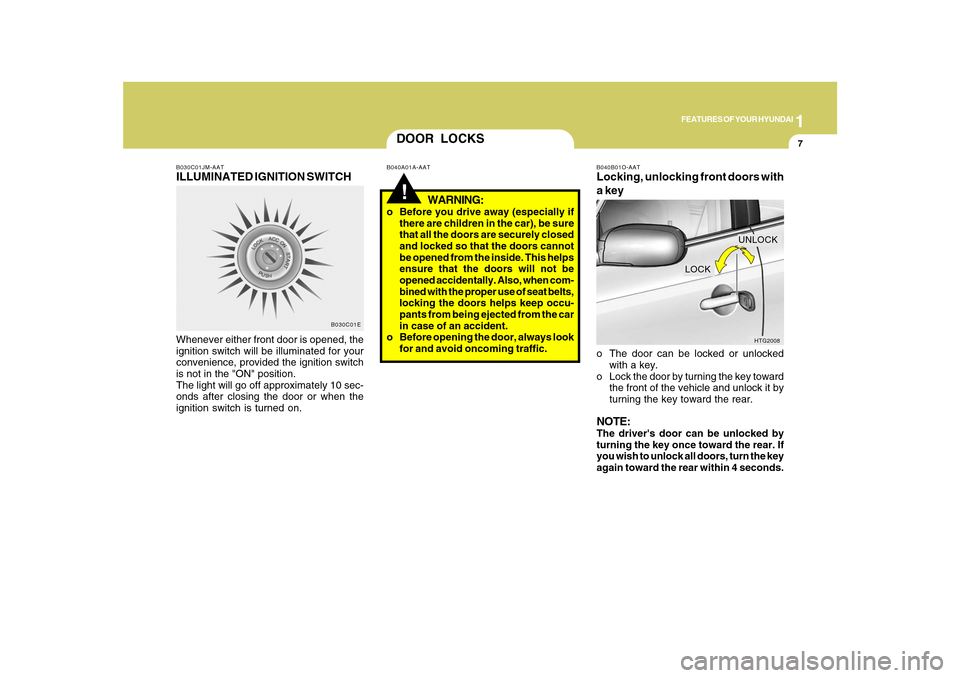
a keyo The door can be locked or unlocked
with a key.
o Lock the door by turning the key toward
the front of the vehicle and unlock it by
turning the key toward the rear.NOTE:The driver's door can be unlocked by
turning the key once toward the rear. If
you wish to unlock all doors, turn the key
again toward the rear within 4 seconds.
HTG2008
LOCKUNLOCK
Page 52 of 334
1
FEATURES OF YOUR HYUNDAI
39
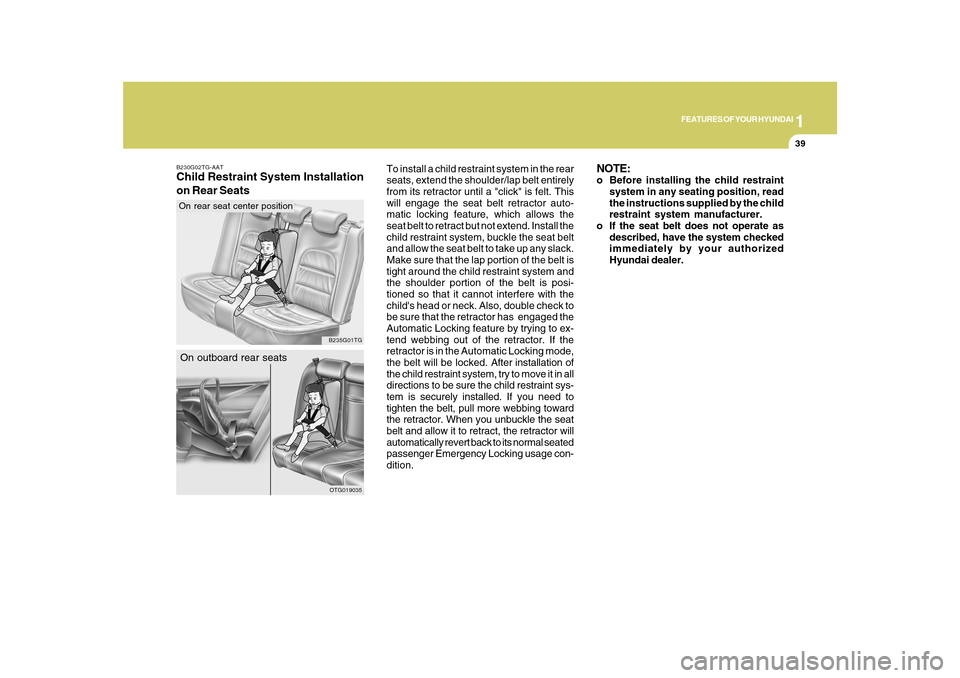
To install a child restraint system in the rear
seats, extend the shoulder/lap belt entirely
from its retractor until a "click" is felt. This
will engage the seat belt retractor auto-
matic locking feature, which allows the
seat belt to retract but not extend. Install the
child restraint system, buckle the seat belt
and allow the seat belt to take up any slack.
Make sure that the lap portion of the belt is
tight around the child restraint system and
the shoulder portion of the belt is posi-
tioned so that it cannot interfere with the
child's head or neck. Also, double check to
be sure that the retractor has engaged the
Automatic Locking feature by trying to ex-
tend webbing out of the retractor. If the
retractor is in the Automatic Locking mode,
the belt will be locked. After installation of
the child restraint system, try to move it in all
directions to be sure the child restraint sys-
tem is securely installed. If you need to
tighten the belt, pull more webbing toward
the retractor. When you unbuckle the seat
belt and allow it to retract, the retractor will
automatically revert back to its normal seated
passenger Emergency Locking usage con-
dition.
B230G02TG-AATChild Restraint System Installation
on Rear Seats
OTG019035
On outboard rear seats
B235G01TG
On rear seat center position
NOTE:o Before installing the child restraint
system in any seating position, read
the instructions supplied by the child
restraint system manufacturer.
o If the seat belt does not operate as
described, have the system checked
immediately by your authorized
Hyundai dealer.
Page 64 of 334
1
FEATURES OF YOUR HYUNDAI
51
B990A03TG-AATOCCUPANT CLASSIFICATION SYS-
TEMYour vehicle is equipped with an occupant
classification system in the front
passenger's seat.
The Occupant Classification system is de-
signed to detect the presence of a prop-
erly-seated front passenger and deter-
mine if the passenger's front airbag should
be enabled (may inflate) or not. The driver's
front airbag is not affected or controlled by
the Occupant Classification system.Main components of occupant clas-
sification systemo A detection device located within the
front passenger seat cushion.
o Electronic system to determine whether
passenger airbag systems (both front
and side) should be activated or deac-
tivated.
o A warning light located on the instru-
ment panel which illuminates the words
"PASS AIR BAG OFF" indicating the
front passenger airbag system is deac-
tivated.
o The instrument panel airbag warning
light is interconnected with the occu-
pant classification system.If the front passenger seat is occupied by
a person that the system determines to be
of adult size sitting properly (sitting upright
with the seatback in an upright position,
centered on the seat cushion with their
seat belt on, legs comfortably extended
and their feet on the floor), the "PASS AIR
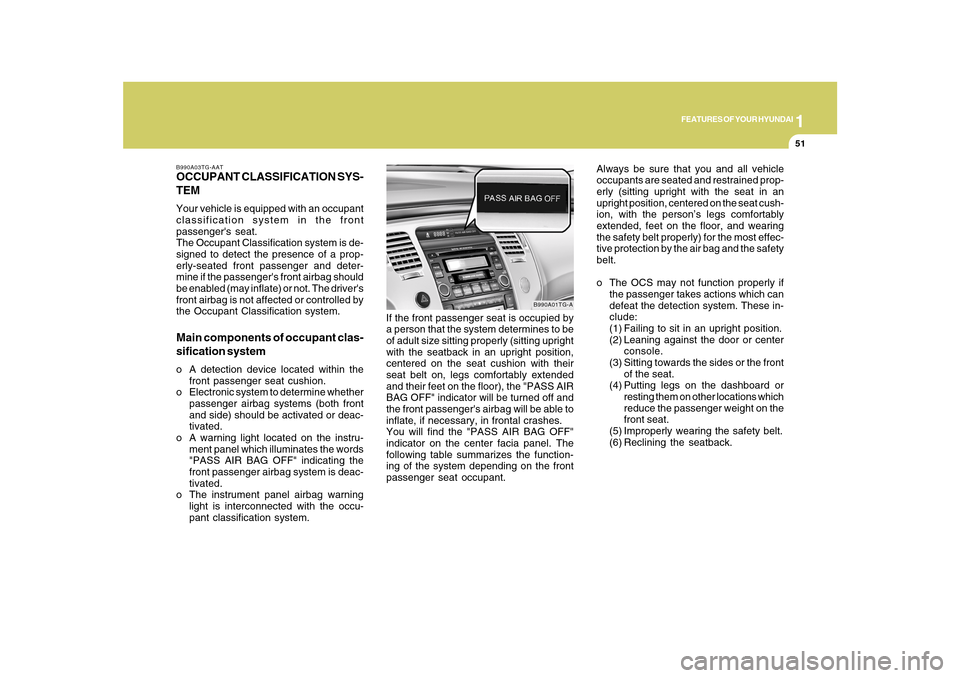
BAG OFF" indicator will be turned off and
the front passenger's airbag will be able to
inflate, if necessary, in frontal crashes.
You will find the "PASS AIR BAG OFF"
indicator on the center facia panel. The
following table summarizes the function-
ing of the system depending on the front
passenger seat occupant.
B990A01TG-A
Always be sure that you and all vehicle
occupants are seated and restrained prop-
erly (sitting upright with the seat in an
upright position, centered on the seat cush-
ion, with the person’s legs comfortably
extended, feet on the floor, and wearing
the safety belt properly) for the most effec-
tive protection by the air bag and the safety
belt.
o The OCS may not function properly if
the passenger takes actions which can
defeat the detection system. These in-
clude:
(1) Failing to sit in an upright position.
(2) Leaning against the door or center
console.
(3) Sitting towards the sides or the front
of the seat.
(4) Putting legs on the dashboard or
resting them on other locations which
reduce the passenger weight on the
front seat.
(5) Improperly wearing the safety belt.
(6) Reclining the seatback.
Page 66 of 334
1
FEATURES OF YOUR HYUNDAI
53
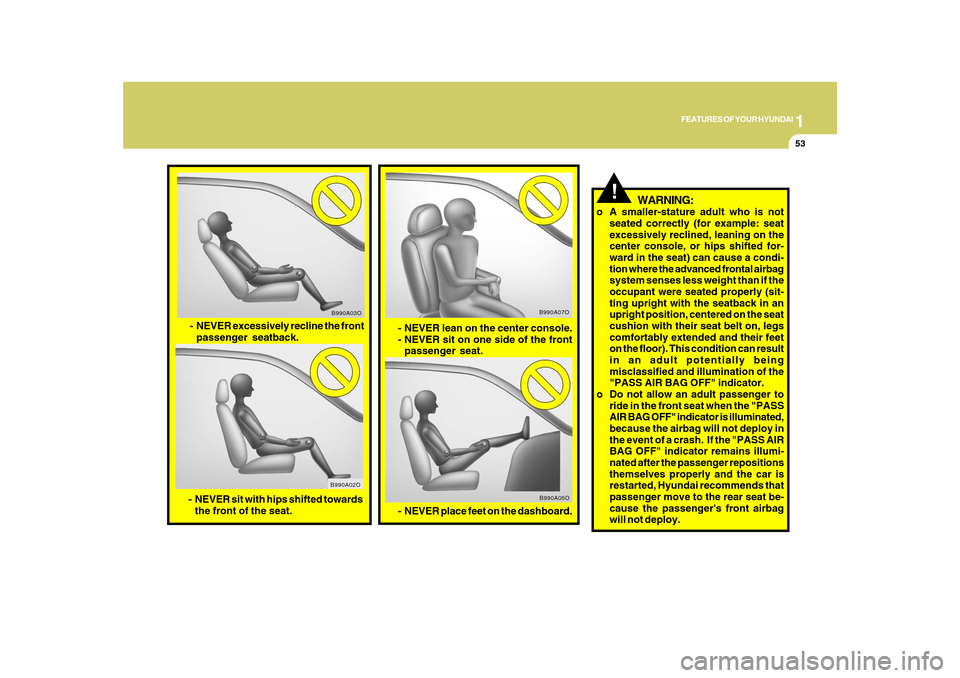
- NEVER lean on the center console.
- NEVER sit on one side of the front
passenger seat.
B990A07O
B990A05O
- NEVER place feet on the dashboard.
- NEVER excessively recline the front
passenger seatback.
- NEVER sit with hips shifted towards
the front of the seat.
B990A03O
B990A02O
!
WARNING:
o A smaller-stature adult who is not
seated correctly (for example: seat
excessively reclined, leaning on the
center console, or hips shifted for-
ward in the seat) can cause a condi-
tion where the advanced frontal airbag
system senses less weight than if the
occupant were seated properly (sit-
ting upright with the seatback in an
upright position, centered on the seat
cushion with their seat belt on, legs
comfortably extended and their feet
on the floor). This condition can result
in an adult potentially being
misclassified and illumination of the
"PASS AIR BAG OFF" indicator.
o Do not allow an adult passenger to
ride in the front seat when the "PASS
AIR BAG OFF" indicator is illuminated,
because the airbag will not deploy in
the event of a crash. If the "PASS AIR
BAG OFF" indicator remains illumi-
nated after the passenger repositions
themselves properly and the car is
restarted, Hyundai recommends that
passenger move to the rear seat be-
cause the passenger's front airbag
will not deploy.
Page 71 of 334
1FEATURES OF YOUR HYUNDAI58
WARNING:
o Do not install a child restraint system
in the front passenger seat position.
A child restraint system must never
be placed in the front seat. The infant
or child could be severely injured by
an airbag deployment in case of an
accident.
o Modification to SRS components or
wiring, including the addition of any
kind of badges to the pad covers or
modifications to the body structure,
can adversely affect SRS perfor-
mance and lead to possible injury.
o For cleaning the airbag pad covers,
use only a soft, dry cloth or one which
has been moistened with plain water.
Solvents or cleaners could adversely
affect the airbag covers and proper
deployment of the system.
o No objects should be placed over or
near the airbag modules on the steer-
ing wheel, instrument panel, and the
front passenger's panel above the
glove box, because any such object
could cause harm if the vehicle is in a
crash severe enough to cause the
airbags to inflate.
!
o If the airbags inflate, they must be
replaced by an authorized Hyundai
dealer.
o Do not tamper with or disconnect SRS
wiring, or other components of the
SRS system. Doing so could result in
injury, due to accidental inflation of
the airbags or by rendering the SRS
inoperative.
o If components of the airbag system
must be discarded, or if the vehicle
must be scrapped, certain safety pre-
cautions must be observed. Your
Hyundai dealer knows these precau-
tions and can give you the necessary
information. Failure to follow these
precautions and procedures could in-
crease the risk of personal injury.
o If your car was flooded and has soaked
carpeting or water on flooring, you
shouldn't try to start the engine; have
the car towed to an authorized Hyundai
dealer.
!
WARNING:
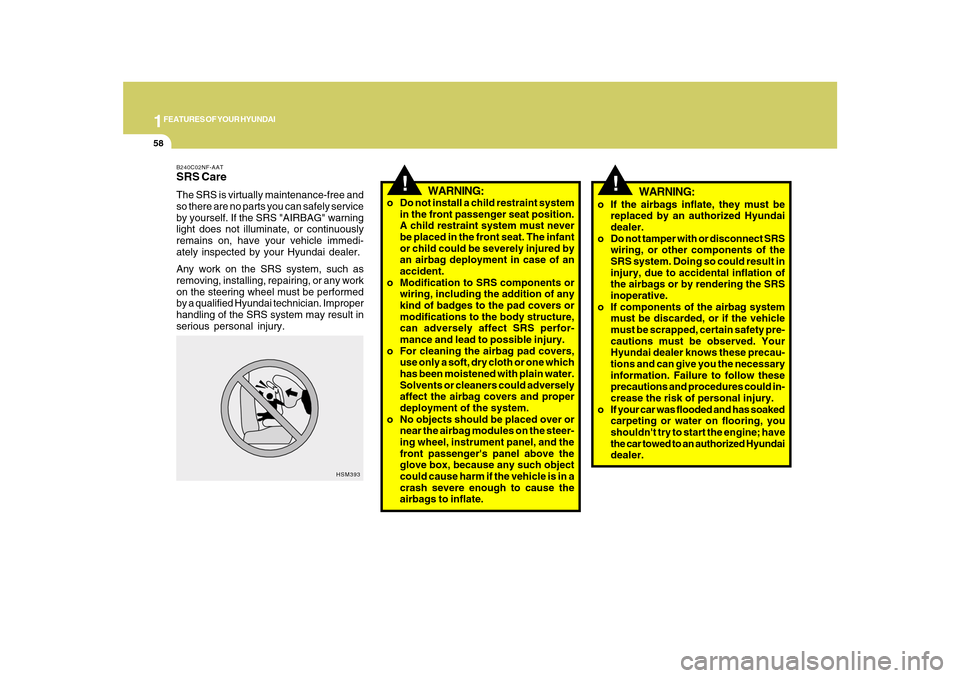
B240C02NF-AATSRS CareThe SRS is virtually maintenance-free and
so there are no parts you can safely service
by yourself. If the SRS "AIRBAG" warning
light does not illuminate, or continuously
remains on, have your vehicle immedi-
ately inspected by your Hyundai dealer.
Any work on the SRS system, such as
removing, installing, repairing, or any work
on the steering wheel must be performed
by a qualified Hyundai technician. Improper
handling of the SRS system may result in
serious personal injury.
HSM393
Page 78 of 334
1
FEATURES OF YOUR HYUNDAI
65
!
B260H02A-AAT
Parking Brake/Low Brake
Fluid Level Warning Light
Your Hyundai is equipped with dual-di-
agonal braking systems. This means you
still have braking on two wheels even if
one of the dual systems should fail. With
only one of the dual systems working,
more than normal pedal travel and greater
pedal pressure are required to stop the
car. Also, the car will not stop in as short a
distance with only half of the brake system
working. If the brakes fail while you are
driving, shift to a lower gear for additional
engine braking and stop the car as soon as
it is safe to do so.
WARNING:
If you suspect brake trouble, have your
brakes checked by a Hyundai dealer as
soon as possible. Driving your car with
a problem in either the brake electrical
system or brake hydraulic system is
dangerous, and could result in a serious
injury or death.
Warning Light OperationThe parking brake/brake fluid level warn-
ing light should come on when the parking
brake is applied and the ignition switch is
turned to "ON" or "START". After the engine
is started, the light should go out when the
parking brake is released.
If the parking brake is not applied, the
warning light should come on when the
ignition switch is turned to "ON" or "START",
then go out when the engine starts. If the
light comes on at any other time, you should
slow the vehicle and bring it to a complete
stop in a safe location off the roadway.
The brake fluid level warning light indi-
cates that the brake fluid level in the brake
master cylinder is low and hydraulic brake
fluid conforming to DOT 3 or DOT 4 speci-
fications should be added. After adding
fluid, if no other trouble is found, the car
should be immediately and carefully driven
to a Hyundai dealer for inspection. If further
trouble is experienced, the vehicle should
not be driven at all but taken to a dealer by
a professional towing service.
Page 95 of 334
1FEATURES OF YOUR HYUNDAI82
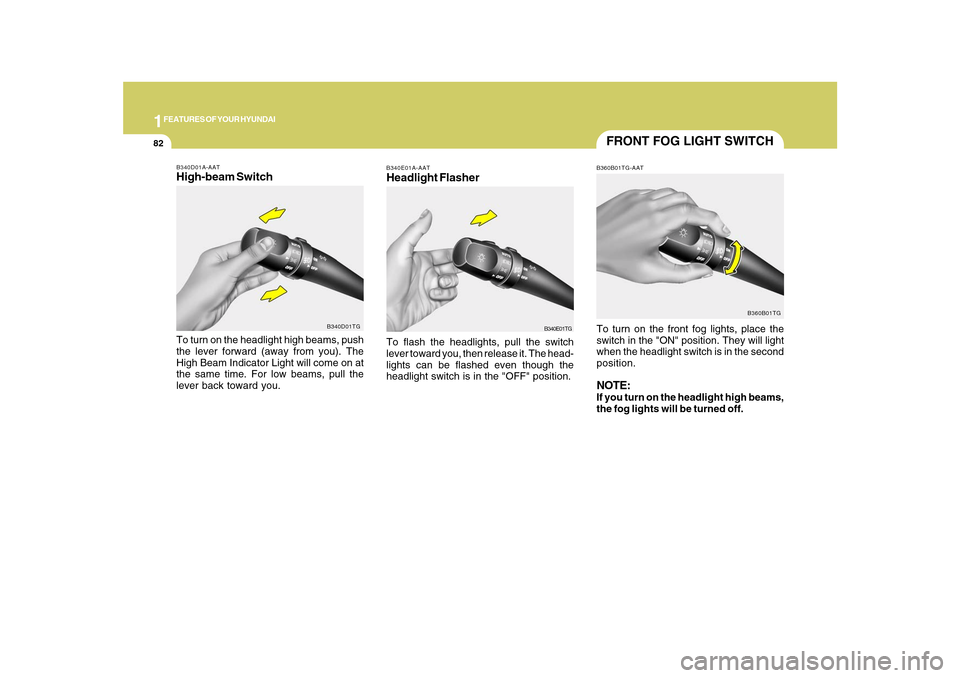
FRONT FOG LIGHT SWITCHB360B01TG-AATTo turn on the front fog lights, place the
switch in the "ON" position. They will light
when the headlight switch is in the second
position.NOTE:If you turn on the headlight high beams,
the fog lights will be turned off.
B360B01TG
B340E01A-AATHeadlight FlasherTo flash the headlights, pull the switch
lever toward you, then release it. The head-
lights can be flashed even though the
headlight switch is in the "OFF" position.
B340E01TG
B340D01A-AATHigh-beam SwitchTo turn on the headlight high beams, push
the lever forward (away from you). The
High Beam Indicator Light will come on at
the same time. For low beams, pull the
lever back toward you.
B340D01TG
Page 97 of 334
1FEATURES OF YOUR HYUNDAI84
!
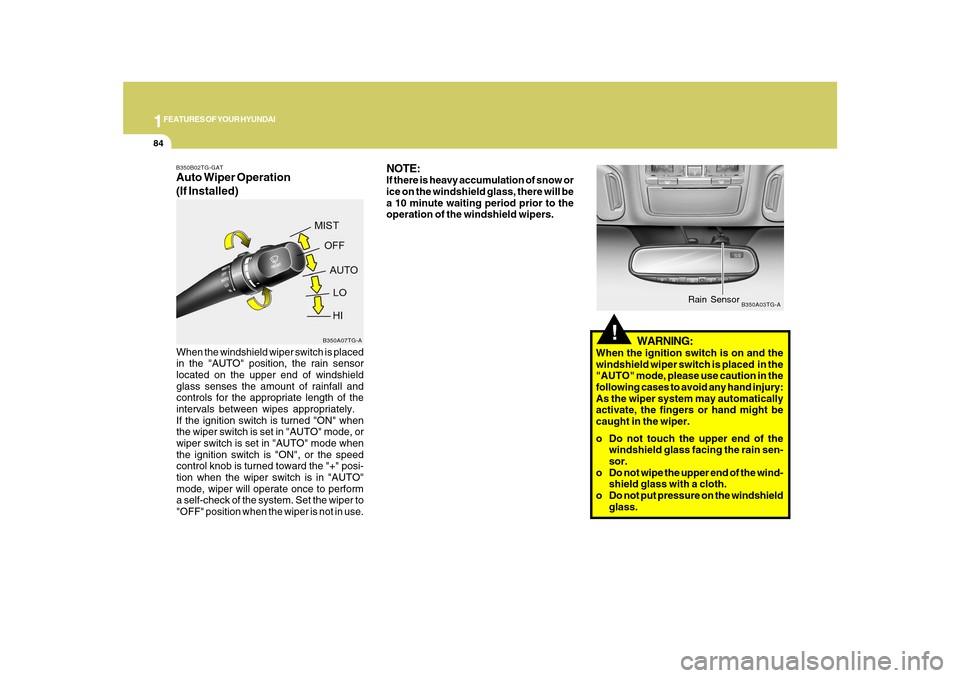
B350A03TG-A
Rain Sensor
B350B02TG-GATAuto Wiper Operation
(If Installed)When the windshield wiper switch is placed
in the "AUTO" position, the rain sensor
located on the upper end of windshield
glass senses the amount of rainfall and
controls for the appropriate length of the
intervals between wipes appropriately.
If the ignition switch is turned "ON" when
the wiper switch is set in "AUTO" mode, or
wiper switch is set in "AUTO" mode when
the ignition switch is "ON", or the speed
control knob is turned toward the "+" posi-
tion when the wiper switch is in "AUTO"
mode, wiper will operate once to perform
a self-check of the system. Set the wiper to
"OFF" position when the wiper is not in use.
B350A07TG-A
NOTE:If there is heavy accumulation of snow or
ice on the windshield glass, there will be
a 10 minute waiting period prior to the
operation of the windshield wipers.
WARNING:
When the ignition switch is on and the
windshield wiper switch is placed in the
"AUTO" mode, please use caution in the
following cases to avoid any hand injury:
As the wiper system may automatically
activate, the fingers or hand might be
caught in the wiper.
o Do not touch the upper end of the
windshield glass facing the rain sen-
sor.
o Do not wipe the upper end of the wind-
shield glass with a cloth.
o Do not put pressure on the windshield
glass.