set clock Hyundai Azera 2015 Owner's Manual
[x] Cancel search | Manufacturer: HYUNDAI, Model Year: 2015, Model line: Azera, Model: Hyundai Azera 2015Pages: 473, PDF Size: 11.92 MB
Page 216 of 473
4139
Features of your vehicle
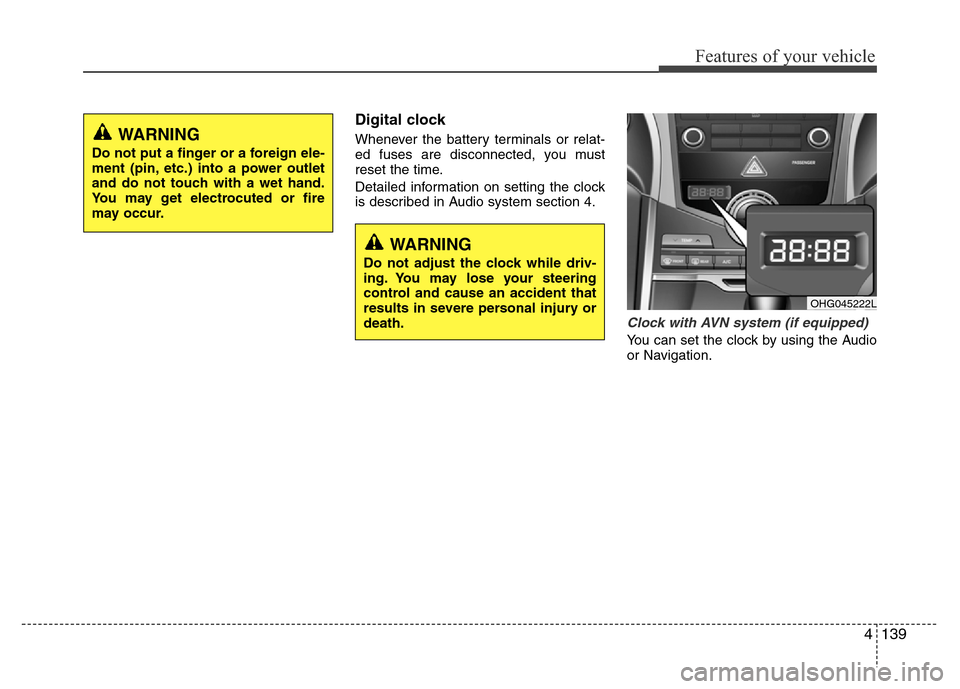
Digital clock
Whenever the battery terminals or relat-
ed fuses are disconnected, you must
reset the time.
Detailed information on setting the clock
is described in Audio system section 4.
Clock with AVN system (if equipped)
You can set the clock by using the Audio
or Navigation.
OHG045222L
WARNING
Do not adjust the clock while driv-
ing. You may lose your steering
control and cause an accident that
results in severe personal injury or
death.
WARNING
Do not put a finger or a foreign ele-
ment (pin, etc.) into a power outlet
and do not touch with a wet hand.
You may get electrocuted or fire
may occur.
Page 217 of 473
Features of your vehicle
140 4
GPS Time check
The clock is automatically updated
through the navigation system.
GPS Time non-check
The clock can be manually adjusted.
1. Select the "Setup" key on the H/Unit.
2. Select the "Clock".
3. Select the "Date/Time Settings".
For more details, please refer to the
manual that was supplied with your
vehicle.
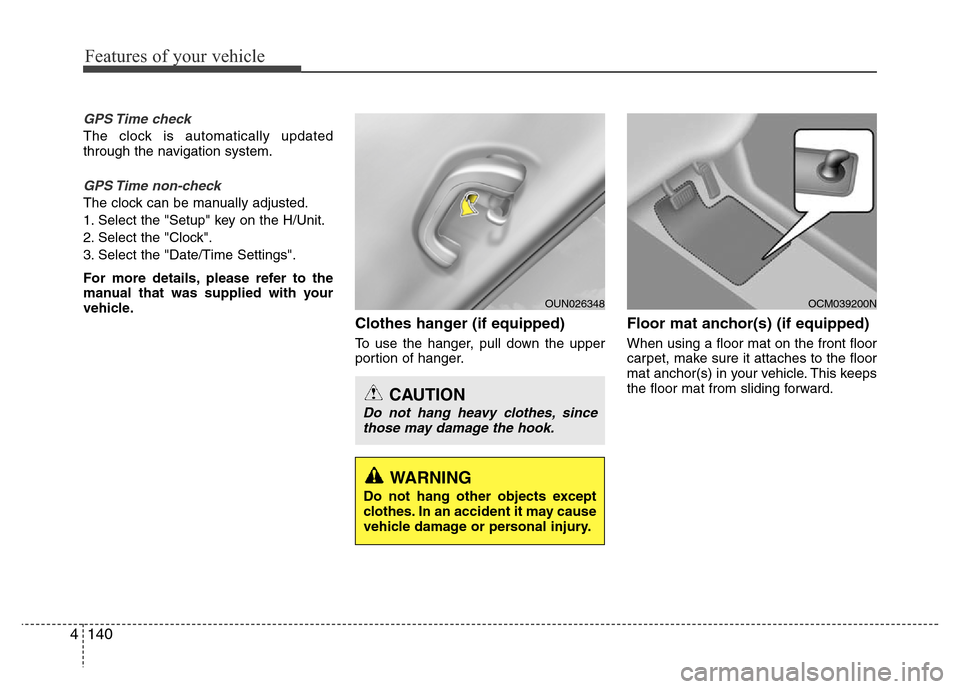
Clothes hanger (if equipped)
To use the hanger, pull down the upper
portion of hanger.
Floor mat anchor(s) (if equipped)
When using a floor mat on the front floor
carpet, make sure it attaches to the floor
mat anchor(s) in your vehicle. This keeps
the floor mat from sliding forward.
OCM039200N
CAUTION
Do not hang heavy clothes, since
those may damage the hook.
OUN026348
WARNING
Do not hang other objects except
clothes. In an accident it may cause
vehicle damage or personal injury.
Page 238 of 473
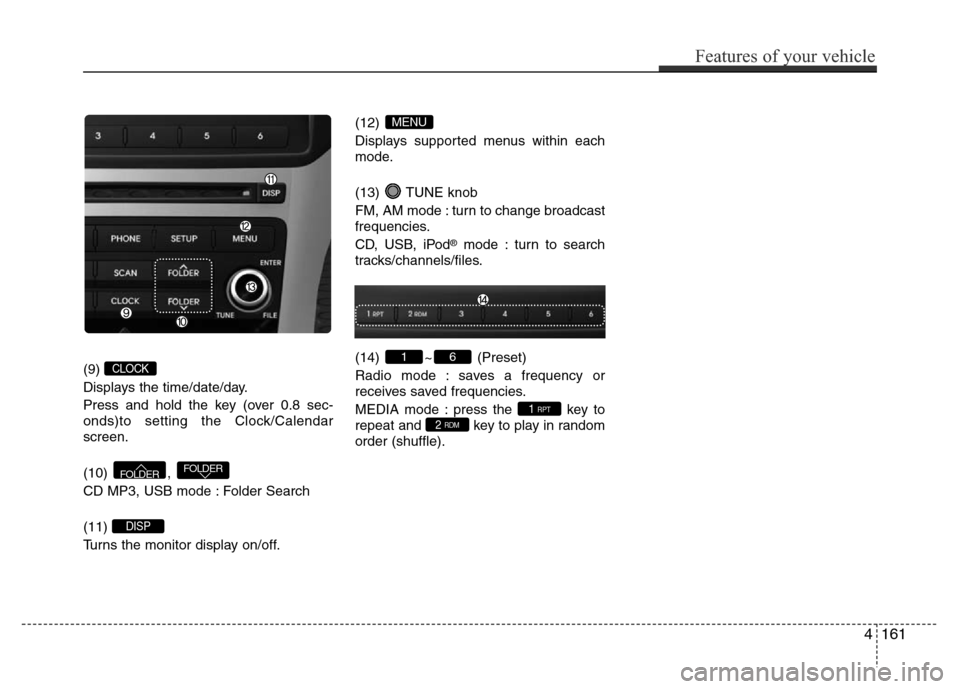
(9)
Displays the time/date/day.
Press and hold the key (over 0.8 sec-
onds)to setting the Clock/Calendar
screen.
(10) ,
CD MP3, USB mode : Folder Search
(11)
Turns the monitor display on/off.(12)
Displays supported menus within each
mode.
(13) TUNE knob
FM, AM mode : turn to change broadcast
frequencies.
CD, USB, iPod
®mode : turn to search
tracks/channels/files.
(14) ~ (Preset)
Radio mode : saves a frequency or
receives saved frequencies.
MEDIA mode : press the key to
repeat and key to play in random
order (shuffle).
2 RDM1 RPT
61
MENU
DISP
FOLDERFOLDER
CLOCK
Features of your vehicle
161 4
Page 275 of 473
![Hyundai Azera 2015 Owners Manual Features of your vehicle
198 4
USING SETUP
Starting Mode
Press the key to display the
Setup screen.
You can select and control options related
to [Display], [Sound], [Clock / Calendar],
[Phone] and [ Hyundai Azera 2015 Owners Manual Features of your vehicle
198 4
USING SETUP
Starting Mode
Press the key to display the
Setup screen.
You can select and control options related
to [Display], [Sound], [Clock / Calendar],
[Phone] and [](/img/35/14466/w960_14466-274.png)
Features of your vehicle
198 4
USING SETUP
Starting Mode
Press the key to display the
Setup screen.
You can select and control options related
to [Display], [Sound], [Clock / Calendar],
[Phone] and [System].
✽NOTICE
Once settings have been changed, press
the key to return to the previ-
ous menu.
Display Settings
Adjusting the Brightness
Press the key Select [Display]
Select [Brightness]
Use the
TUNE knobto adjust the
screen brightness or set the Brightness
on Automatic, Daylight, or Nightmode.
select the button to reset.
(1) Automatic : Adjusts the brightness
automatically
(2) Day : Always maintains the bright-
ness on high
(3) Night : Always maintains the bright-
ness on low
Mode Pop-up
Press the key Select [Display]
Select [Mode Pop up]
This feature is used to display the Mode
Pop-up screen when entering radio and
media modes.
When this feature is turned on, pressing
the or key will display
the Mode Pop-up screen.
✽NOTICE
The media Mode Pop-up screen can be
displayed only when two or more media
modes have been connected.
MEDIA RADIO
SETUP
Default
SETUP
MENU
SETUP
Page 277 of 473
Features of your vehicle
200 4
After selecting the Bass / Middle / Treble,
use the TUNE knob to adjust the set-
ting.
After selecting the Fader / Balance, use
TUNE knob to move the cursor on the
control screen to the desired position.
Select the button to reset.
Surround Settings(if equipped)
Press the key Select [Sound]
Select [Surround]
• Innocente (Normal) : Natural sonud
optimized for front seats
• Forza (Dynamic) : Strong sound with
enhanced bass and stereo
• Concerto (Concert) : Surround sound
with concert hall ambience
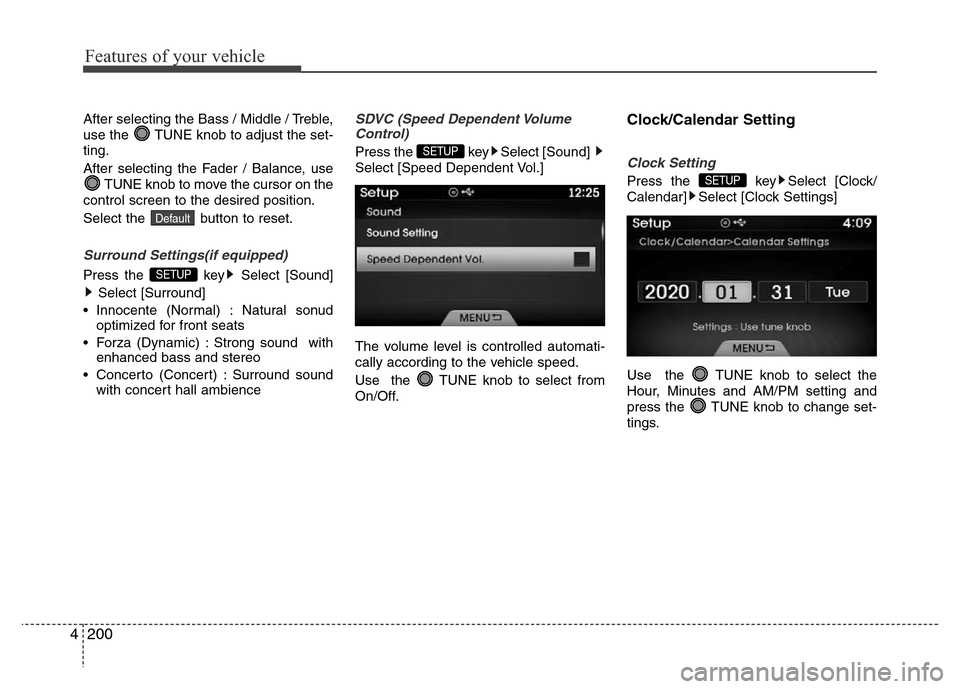
SDVC (Speed Dependent Volume
Control)
Press the key Select [Sound]
Select [Speed Dependent Vol.]
The volume level is controlled automati-
cally according to the vehicle speed.
Use the TUNE knob to select from
On/Off.
Clock/Calendar Setting
Clock Setting
Press the key Select [Clock/
Calendar] Select [Clock Settings]
Use the TUNE knob to select the
Hour, Minutes and AM/PM setting and
press the TUNE knob to change set-
tings.SETUP
SETUP
SETUP
Default
Page 278 of 473
![Hyundai Azera 2015 Owners Manual 4201
Features of your vehicle
Calendar Setting
Press the key Select [Clock/
Calendar] Select [Calendar Settings]
Use the TUNE knob to select the
Month, Day, and Year and press the knob
to change set Hyundai Azera 2015 Owners Manual 4201
Features of your vehicle
Calendar Setting
Press the key Select [Clock/
Calendar] Select [Calendar Settings]
Use the TUNE knob to select the
Month, Day, and Year and press the knob
to change set](/img/35/14466/w960_14466-277.png)
4201
Features of your vehicle
Calendar Setting
Press the key Select [Clock/
Calendar] Select [Calendar Settings]
Use the TUNE knob to select the
Month, Day, and Year and press the knob
to change settings.
Clock Display
Press the key Select [Clock/
Calendar] Select [Clock Display (Power
off)]
This feature is used to display a clock on
the screen when the audio system is
turned off.SETUP SETUP
Page 367 of 473
What to do in an emergency
10 6
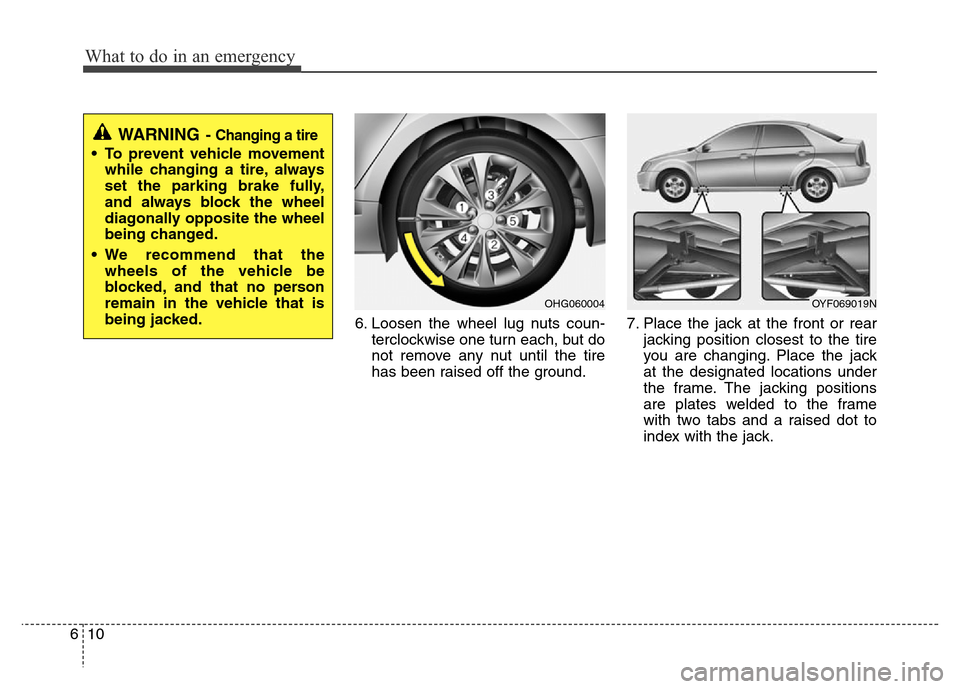
6. Loosen the wheel lug nuts coun-
terclockwise one turn each, but do
not remove any nut until the tire
has been raised off the ground.7. Place the jack at the front or rear
jacking position closest to the tire
you are changing. Place the jack
at the designated locations under
the frame. The jacking positions
are plates welded to the frame
with two tabs and a raised dot to
index with the jack.
WARNING- Changing a tire
• To prevent vehicle movement
while changing a tire, always
set the parking brake fully,
and always block the wheel
diagonally opposite the wheel
being changed.
• We recommend that the
wheels of the vehicle be
blocked, and that no person
remain in the vehicle that is
being jacked.
OHG060004OYF069019N
Page 379 of 473
What to do in an emergency
22 6
When towing your vehicle in an emer-
gency without wheel dollies :
1. Set the ignition switch in the ACC posi-
tion.
2. Place the shift lever in N (Neutral).
3. Release the parking brake.
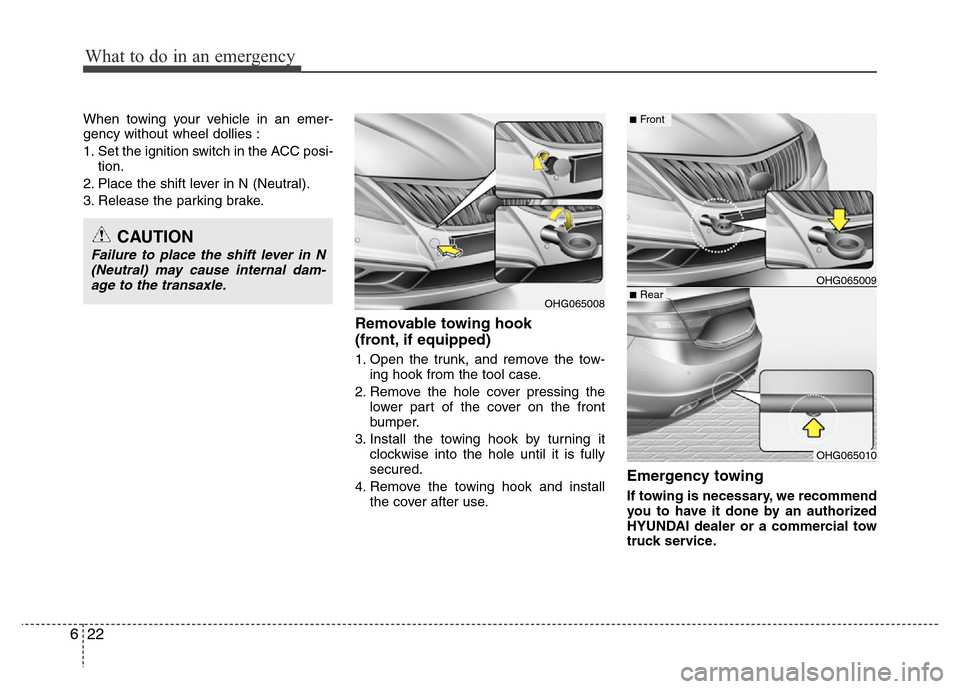
Removable towing hook
(front, if equipped)
1. Open the trunk, and remove the tow-
ing hook from the tool case.
2. Remove the hole cover pressing the
lower part of the cover on the front
bumper.
3. Install the towing hook by turning it
clockwise into the hole until it is fully
secured.
4. Remove the towing hook and install
the cover after use.
Emergency towing
If towing is necessary, we recommend
you to have it done by an authorized
HYUNDAI dealer or a commercial tow
truck service.
OHG065008
OHG065009■Rear
CAUTION
Failure to place the shift lever in N
(Neutral) may cause internal dam-
age to the transaxle.
■Front
OHG065010
Page 424 of 473
Maintenance
42 7
Battery recharging
Your vehicle has a maintenance-free,
calcium-based battery.
• If the battery becomes discharged in a
short time (because, for example, the
headlights or interior lights were left on
while the vehicle was not in use),
recharge it by slow charging (trickle)
for 10 hours.
• If the battery gradually discharges
because of high electric load while the
vehicle is being used, recharge it at 20-
30A for two hours.
Reset items
Items should be reset after the battery
has been discharged or the battery has
been disconnected.
• Auto up/down window (See section 4)
• Sunroof (See section 4)
• Driver position memory system
(See section 4)
• Trip computer (See section 4)
• Climate control system
(See section 4)
• Clock (See section 4)
• Audio (See section 4)
WARNING
• Before performing maintenance
or recharging the battery, turn off
all accessories and stop the
engine.
• The negative battery cable must
be removed first and installed
last when the battery is discon-
nected.
• We recommend that the system
be serviced by an authorized
HYUNDAI dealer.
CAUTION
• Keep the battery away from water
or any liquid.
• We recommend that you use
parts for replacement from an
authorized HYUNDAI dealer.
WARNING- Recharging
battery
When recharging the battery,
observe the following precautions:
• The battery must be removed
from the vehicle and placed in an
area with good ventilation.
• Do not allow cigarettes, sparks,
or flame near the battery.
• Watch the battery during charg-
ing, and stop or reduce the charg-
ing rate if the battery cells begin
gassing (boiling) violently or if
the temperature of the electrolyte
of any cell exceeds 49°C (120°F).
(Continued)
(Continued)
• Wear eye protection when check-
ing the battery during charging.
• Disconnect the battery charger in
the following order.
1. Turn off the battery charger main
switch.
2. Unhook the negative clamp from
the negative battery terminal.
3. Unhook the positive clamp from
the positive battery terminal.
Page 437 of 473
755
Maintenance
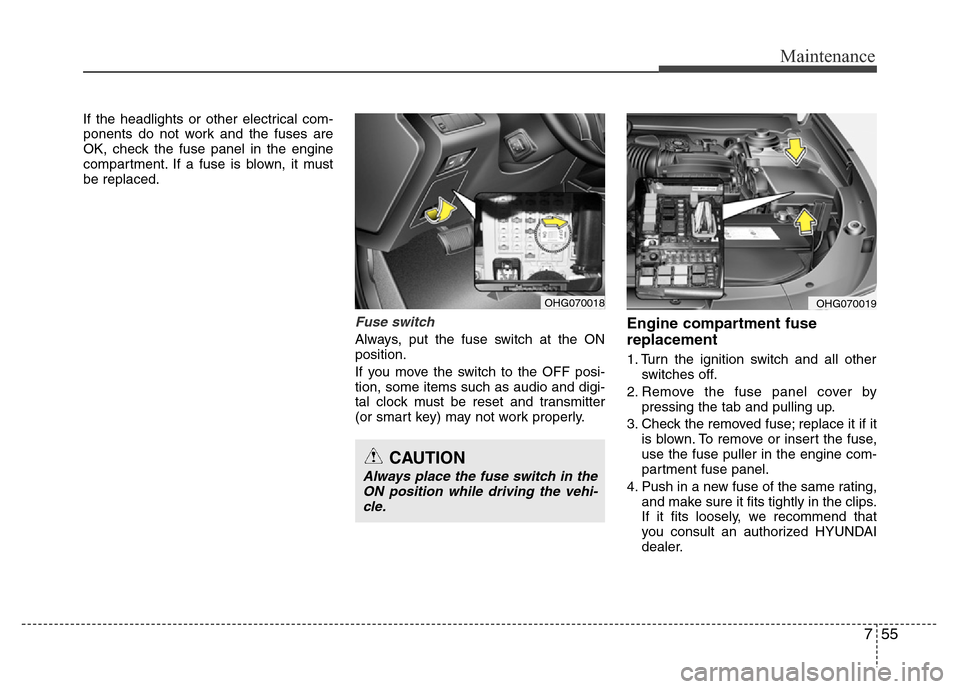
If the headlights or other electrical com-
ponents do not work and the fuses are
OK, check the fuse panel in the engine
compartment. If a fuse is blown, it must
be replaced.
Fuse switch
Always, put the fuse switch at the ON
position.
If you move the switch to the OFF posi-
tion, some items such as audio and digi-
tal clock must be reset and transmitter
(or smart key) may not work properly.
Engine compartment fuse
replacement
1. Turn the ignition switch and all other
switches off.
2. Remove the fuse panel cover by
pressing the tab and pulling up.
3. Check the removed fuse; replace it if it
is blown. To remove or insert the fuse,
use the fuse puller in the engine com-
partment fuse panel.
4. Push in a new fuse of the same rating,
and make sure it fits tightly in the clips.
If it fits loosely, we recommend that
you consult an authorized HYUNDAI
dealer.
OHG070018OHG070019
CAUTION
Always place the fuse switch in the
ON position while driving the vehi-
cle.