sensor Hyundai Azera 2017 User Guide
[x] Cancel search | Manufacturer: HYUNDAI, Model Year: 2017, Model line: Azera, Model: Hyundai Azera 2017Pages: 520, PDF Size: 16.33 MB
Page 76 of 520
357
Safety features of your vehicle
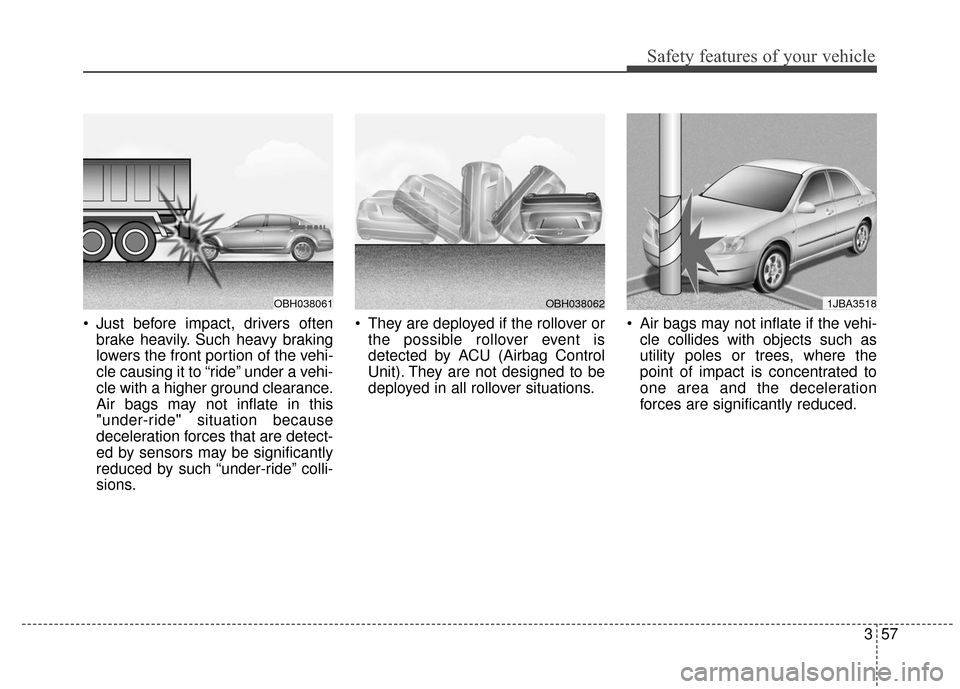
Just before impact, drivers oftenbrake heavily. Such heavy braking
lowers the front portion of the vehi-
cle causing it to “ride” under a vehi-
cle with a higher ground clearance.
Air bags may not inflate in this
"under-ride" situation because
deceleration forces that are detect-
ed by sensors may be significantly
reduced by such “under-ride” colli-
sions. They are deployed if the rollover or
the possible rollover event is
detected by ACU (Airbag Control
Unit). They are not designed to be
deployed in all rollover situations. Air bags may not inflate if the vehi-
cle collides with objects such as
utility poles or trees, where the
point of impact is concentrated to
one area and the deceleration
forces are significantly reduced.
OBH038061OBH0380621JBA3518
Page 125 of 520
Features of your vehicle
46
4
Inside rearview mirror
Adjust the rearview mirror so that the
center view through the rear window
is seen. Make this adjustment before
you start driving.
Do not place objects in the rear seat
or cargo area which would interfere
with your vision through the rear win-
dow.
Electric chromic mirror (ECM)
with HomeLink®system and
compass
Your vehicle may be equipped with a
Gentex Automatic-Dimming Mirror
with a Z-Nav™ Electronic Compass
Display and an Integrated
HomeLink
®Wireless Control
System. During nighttime driving,
this feature will automatically detect
and reduce rearview mirror glare
while the compass indicates the
direction the vehicle is pointed. The
HomeLink
®Universal Transceiver
allows you to activate your garage
door(s), electric gate, home lighting,
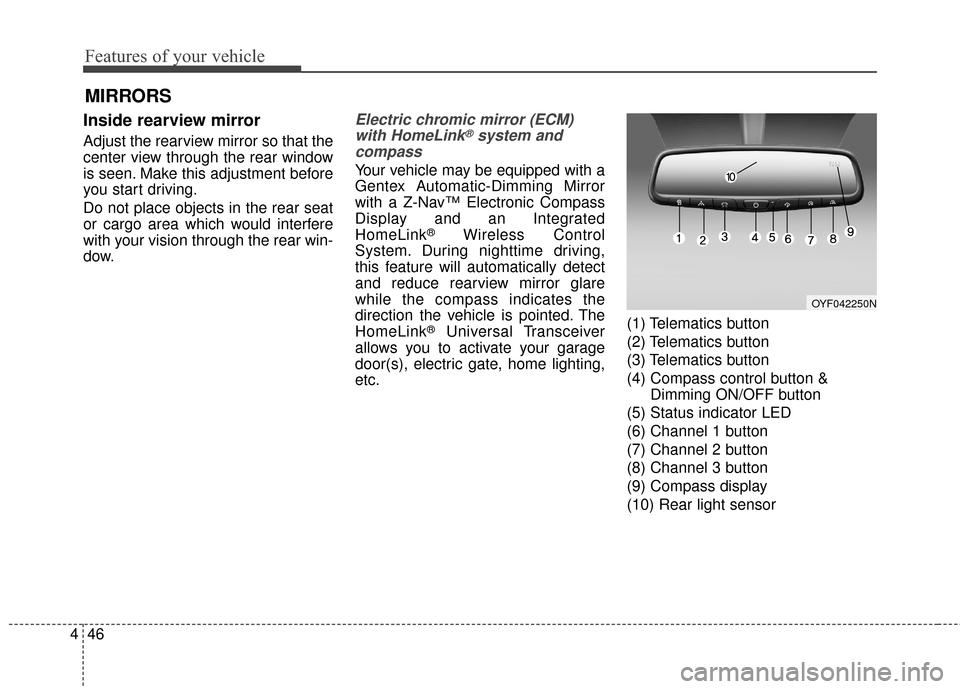
etc. (1) Telematics button
(2) Telematics button
(3) Telematics button
(4) Compass control button &
Dimming ON/OFF button
(5) Status indicator LED
(6) Channel 1 button
(7) Channel 2 button
(8) Channel 3 button
(9) Compass display
(10) Rear light sensor
MIRRORS
OYF042250N
Page 126 of 520
447
Features of your vehicle
Automatic-Dimming Night Vision
Safety™ (NVS®) Mirror
The NVS®Mirror in your vehicle is
the most advanced way to reduce
annoying glare in the rearview mirror
during any driving situation. For more
information regarding NVS
®mirrors
and other applications, please refer
to the Gentex website:
www.gentex.com
✽ ✽ NOTICE
The NVS®Mirror automatically
reduces glare during driving condi-
tions based upon light levels moni-
tored in front of the vehicle and
from the rear of the vehicle. These
light sensors are visible through
openings in the front and rear of the
mirror case. Any object that
obstructs either light sensor will
degrade the automatic dimming
control feature.
Automatic-dimming function
Your mirror will automatically dim
upon detecting glare from the vehi-
cles traveling behind you. The auto-
dimming function can be controlled
by the Dimming ON/OFF button:
1. Pressing and holding the button
for 3 seconds turns the autodim-
ming function OFF which is indi-
cated by the green Status
Indicator LED turning off.
2. Pressing and holding the button for 3 seconds again turns the
auto-dimming function ON which
is indicated by the green Status
Indicator LED turning on.
The mirror defaults to the ON posi-
tion each time the vehicle is started. Z-Nav™ Compass Display
The NVS™ Mirror in your vehicle is
also equipped with a Z-Nav™
Compass that shows the vehicle
Compass heading in the Display
Window using the 8 basic cardinal
headings (N, NE, E, SE, etc.).
Page 174 of 520
495
Features of your vehicle
REAR PARKING ASSIST SYSTEM (IF EQUIPPED)
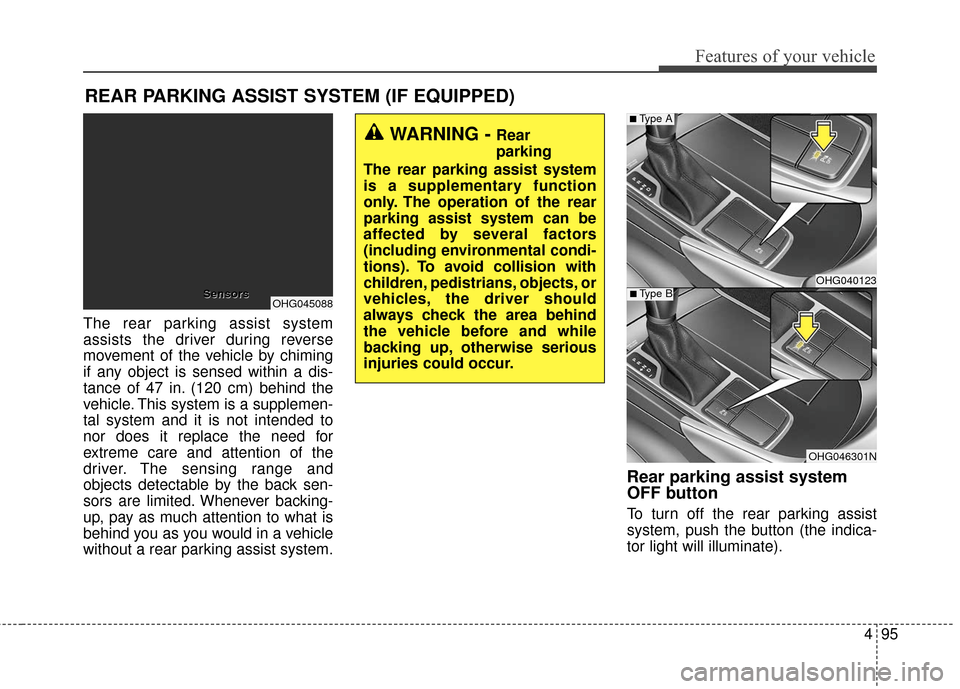
The rear parking assist system
assists the driver during reverse
movement of the vehicle by chiming
if any object is sensed within a dis-
tance of 47 in. (120 cm) behind the
vehicle. This system is a supplemen-
tal system and it is not intended to
nor does it replace the need for
extreme care and attention of the
driver. The sensing range and
objects detectable by the back sen-
sors are limited. Whenever backing-
up, pay as much attention to what is
behind you as you would in a vehicle
without a rear parking assist system.
Rear parking assist system
OFF button
To turn off the rear parking assist
system, push the button (the indica-
tor light will illuminate).
OHG045088
Sensor
Sensor
s
s
WARNING - Rear
parking
The rear parking assist system
is a supplementary function
only. The operation of the rear
parking assist system can be
affected by several factors
(including environmental condi-
tions). To avoid collision with
children, pedistrians, objects, or
vehicles, the driver should
always check the area behind
the vehicle before and while
backing up, otherwise serious
injuries could occur.
OHG040123
OHG046301N
■Type A
■Type B
Page 175 of 520
Features of your vehicle
96
4
Operation of the rear parking
assist system
Operating condition
This system will activate when
backing up with the ignition switch
ON.
The sensing distance while the rear parking assist system is in
operation is approximately 47 in.
(120 cm).
When more than two objects are sensed at the same time, the clos-
est one will be recognized first.
✽ ✽ NOTICE
The parking assist system may not
operate if the vehicle’s distance from
the object is already less than
approximately 12 in (30 cm) when
the system is ON.
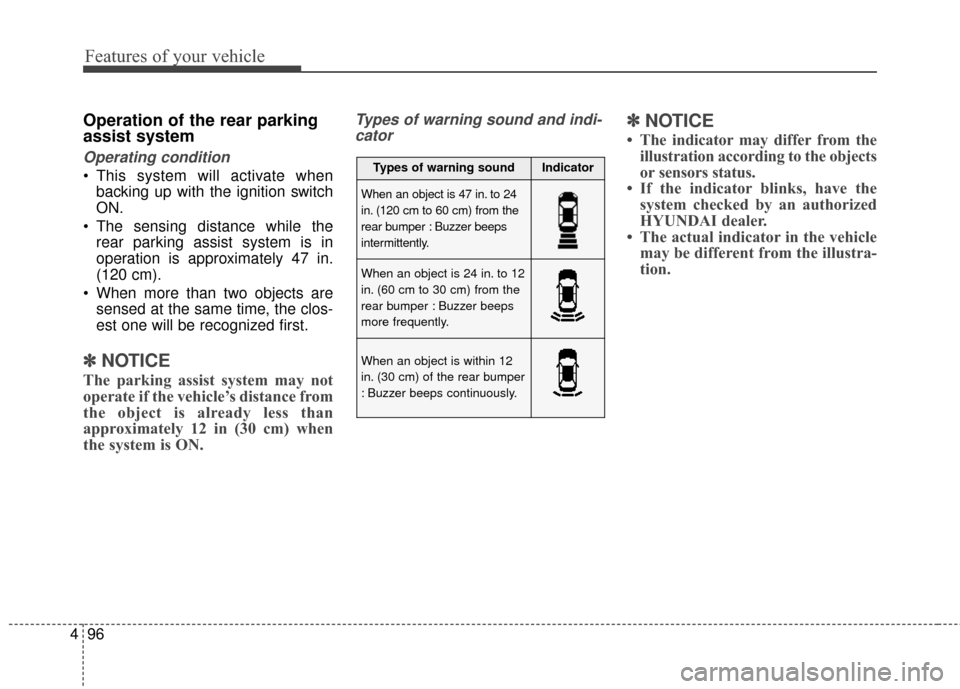
Types of warning sound and indi-
cator✽ ✽ NOTICE
• The indicator may differ from the
illustration according to the objects
or sensors status.
• If the indicator blinks, have the system checked by an authorized
HYUNDAI dealer.
• The actual indicator in the vehicle may be different from the illustra-
tion.
Types of warning soundIndicator
When an object is 47 in. to 24
in. (120 cm to 60 cm) from the
rear bumper : Buzzer beeps
intermittently.
When an object is 24 in. to 12
in. (60 cm to 30 cm) from the
rear bumper : Buzzer beeps
more frequently.
When an object is within 12
in. (30 cm) of the rear bumper
: Buzzer beeps continuously.
Page 176 of 520
497
Features of your vehicle
Non-operational conditions of
rear parking assist system
The rear parking assist system
may not operate properly when:
1. Moisture is frozen to the sensor. (Itwill operate normally when the
moisture has been cleared.)
2. The sensor is covered with foreign matter, such as snow or water, or
the sensor cover is blocked. (It will
operate normally when the materi-
al is removed or the sensor is no
longer blocked.)
3. Driving on uneven road surfaces (unpaved roads, gravel, bumps,
gradient).
4. Objects generating excessive noise (vehicle horns, loud motor-
cycle engines, or truck air brakes)
are within range of the sensor.
5. Heavy rain or water spray exists.
6. Wireless transmitters or mobile phones are within range of the
sensor.
7. The sensor is covered with snow.
8. Trailer towing The detecting range may decrease
when:
1. The sensor is stained with foreign
matter such as snow or water.
(The sensing range will return to
normal when removed.)
2. Outside air temperature is extremely hot or cold.
The following objects may not be
recognized by the sensor:
1. Sharp or slim objects such as ropes, chains or small poles.
2. Objects which tend to absorb the sensor frequency such as clothes,
spongy material or snow.
3. Undetectable objects smaller than 40 in. (1 m) in height and narrower
than 6 in. (14 cm) in diameter.
Rear parking assist system
precautions
The rear parking assist system maynot sound sequentially depending
on the speed and shapes of the
objects detected.
The rear parking assist system may malfunction if the vehicle bumper
height or sensor installation has
been modified or damaged. Any
non-factory installed equipment or
accessories may also interfere with
the sensor performance.
The sensor may not recognize objects less than 9.84 in. (25 cm)
from the sensor, or it may sense an
incorrect distance. Use caution.
When the sensor is frozen or stained with snow, dirt, or water,
the sensor may be inoperative until
the stains are removed using a soft
cloth.
Do not push, scratch or strike the sensor. Sensor damage could
occur.
Page 177 of 520
Features of your vehicle
98
4
This system can only sense objects
within the range and location of the
sensors; it can not detect objects in
other areas where sensors are not
installed. Also, small or slim objects,
such as poles or objects located
between sensors may not be detect-
ed by the sensors.
Always visually check behind the
vehicle when backing up.
Be sure to inform any drivers of the
vehicle that may be unfamiliar with
the system regarding the systems
capabilities and limitations.Self-diagnosis
When you shift the gear to the R
(Reverse) position and if one or more
of the below occurs you may have a
malfunction in the rear parking assist
system.
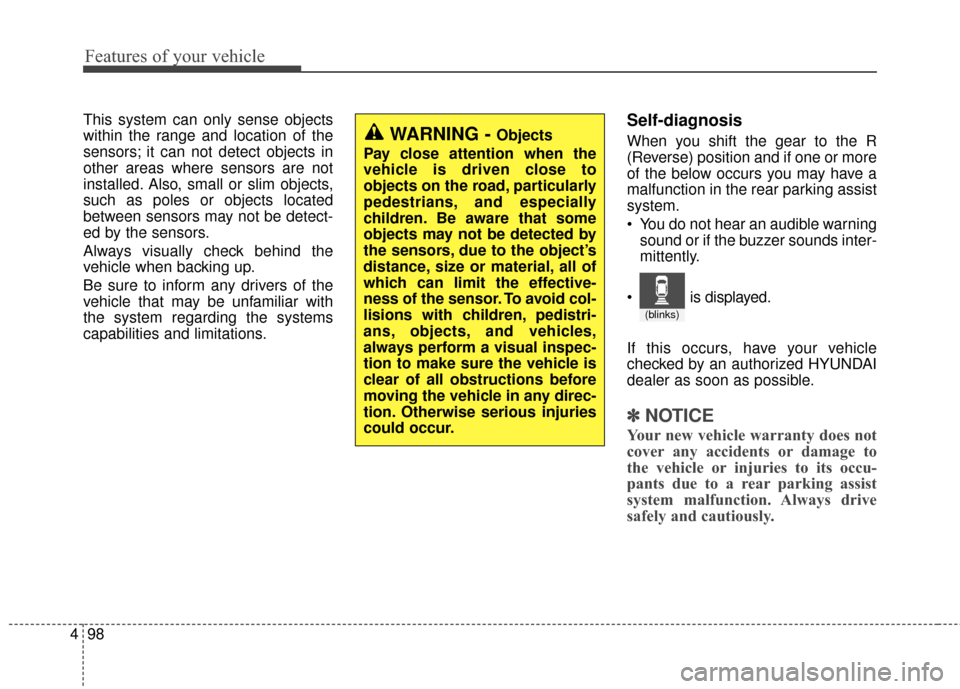
You do not hear an audible warning
sound or if the buzzer sounds inter-
mittently.
If this occurs, have your vehicle
checked by an authorized HYUNDAI
dealer as soon as possible.
✽ ✽ NOTICE
Your new vehicle warranty does not
cover any accidents or damage to
the vehicle or injuries to its occu-
pants due to a rear parking assist
system malfunction. Always drive
safely and cautiously.
WARNING - Objects
Pay close attention when the
vehicle is driven close to
objects on the road, particularly
pedestrians, and especially
children. Be aware that some
objects may not be detected by
the sensors, due to the object’s
distance, size or material, all of
which can limit the effective-
ness of the sensor. To avoid col-
lisions with children, pedistri-
ans, objects, and vehicles,
always perform a visual inspec-
tion to make sure the vehicle is
clear of all obstructions before
moving the vehicle in any direc-
tion. Otherwise serious injuries
could occur.
(blinks)
is displayed.
Page 182 of 520
4103
Features of your vehicle
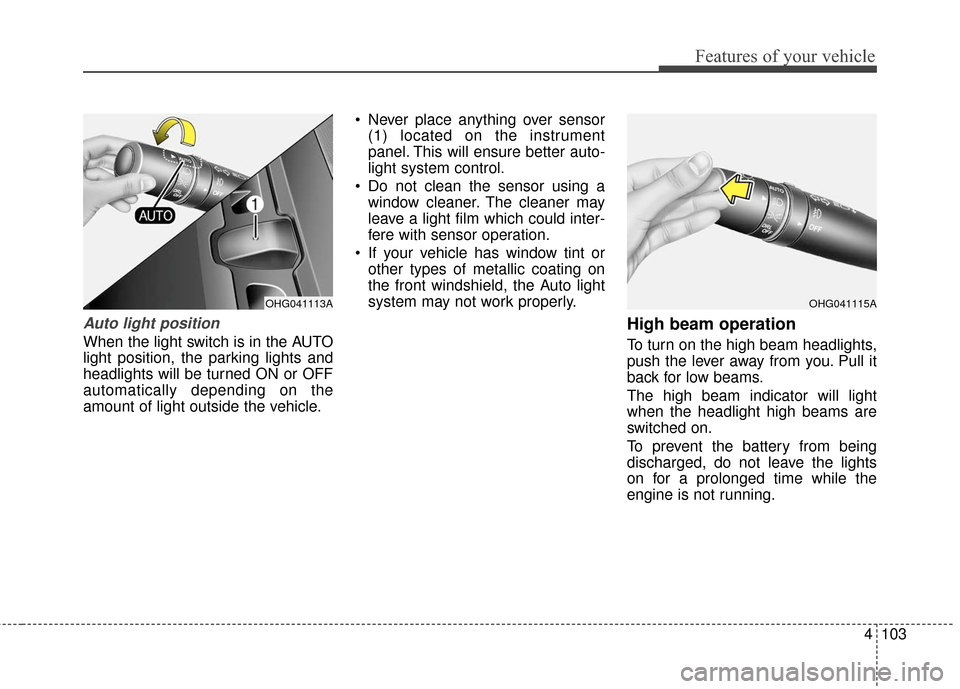
Auto light position
When the light switch is in the AUTO
light position, the parking lights and
headlights will be turned ON or OFF
automatically depending on the
amount of light outside the vehicle. Never place anything over sensor
(1) located on the instrument
panel. This will ensure better auto-
light system control.
Do not clean the sensor using a window cleaner. The cleaner may
leave a light film which could inter-
fere with sensor operation.
If your vehicle has window tint or other types of metallic coating on
the front windshield, the Auto light
system may not work properly.
High beam operation
To turn on the high beam headlights,
push the lever away from you. Pull it
back for low beams.
The high beam indicator will light
when the headlight high beams are
switched on.
To prevent the battery from being
discharged, do not leave the lights
on for a prolonged time while the
engine is not running.
OHG041115AOHG041113A
Page 194 of 520
4115
Features of your vehicle
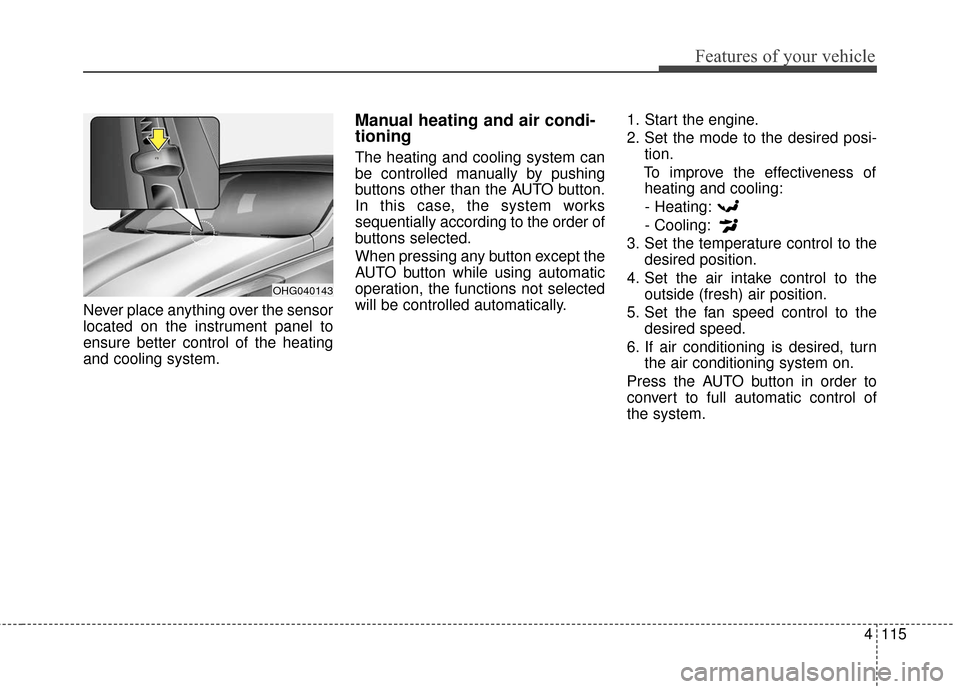
Never place anything over the sensor
located on the instrument panel to
ensure better control of the heating
and cooling system.
Manual heating and air condi-
tioning
The heating and cooling system can
be controlled manually by pushing
buttons other than the AUTO button.
In this case, the system works
sequentially according to the order of
buttons selected.
When pressing any button except the
AUTO button while using automatic
operation, the functions not selected
will be controlled automatically.1. Start the engine.
2. Set the mode to the desired posi-
tion.
To improve the effectiveness of heating and cooling:
- Heating:
- Cooling:
3. Set the temperature control to the desired position.
4. Set the air intake control to the outside (fresh) air position.
5. Set the fan speed control to the desired speed.
6. If air conditioning is desired, turn the air conditioning system on.
Press the AUTO button in order to
convert to full automatic control of
the system.
OHG040143
Page 205 of 520
Features of your vehicle
126
4
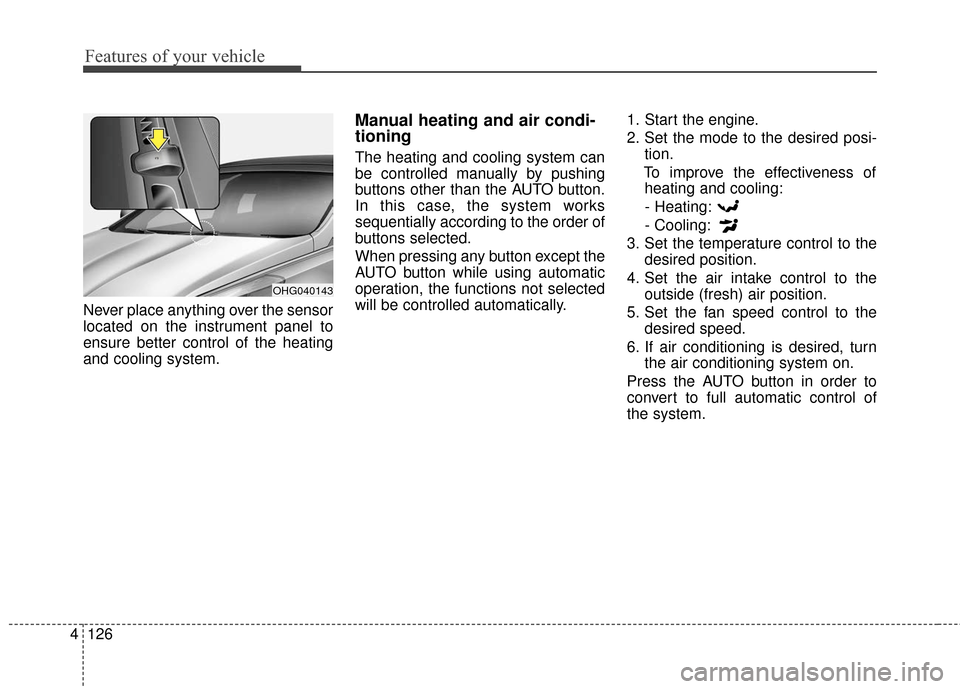
Never place anything over the sensor
located on the instrument panel to
ensure better control of the heating
and cooling system.
Manual heating and air condi-
tioning
The heating and cooling system can
be controlled manually by pushing
buttons other than the AUTO button.
In this case, the system works
sequentially according to the order of
buttons selected.
When pressing any button except the
AUTO button while using automatic
operation, the functions not selected
will be controlled automatically. 1. Start the engine.
2. Set the mode to the desired posi-
tion.
To improve the effectiveness of heating and cooling:
- Heating:
- Cooling:
3. Set the temperature control to the desired position.
4. Set the air intake control to the outside (fresh) air position.
5. Set the fan speed control to the desired speed.
6. If air conditioning is desired, turn the air conditioning system on.
Press the AUTO button in order to
convert to full automatic control of
the system.
OHG040143