door lock Hyundai Coupe 2002 Owner's Manual
[x] Cancel search | Manufacturer: HYUNDAI, Model Year: 2002, Model line: Coupe, Model: Hyundai Coupe 2002Pages: 140, PDF Size: 1.45 MB
Page 10 of 140
CONTROLS AND EQUIPMENT
1- 2 SB040A1-F DOOR LOCKS WARNING:
o Unlocked doors can be dangerous.
Before you drive away-especially if thereare children in the car-be sure that all the doors are securely closed and locked, the doors cannot be opened from inside. This helps assure that doors will not be opened accidentally. Also, when combined with the proper use of seat belts, locking the doors helps keep occupants from being ejected from the car in case of an accident.
o Before opening the door, always look for and avoid oncoming traffic.
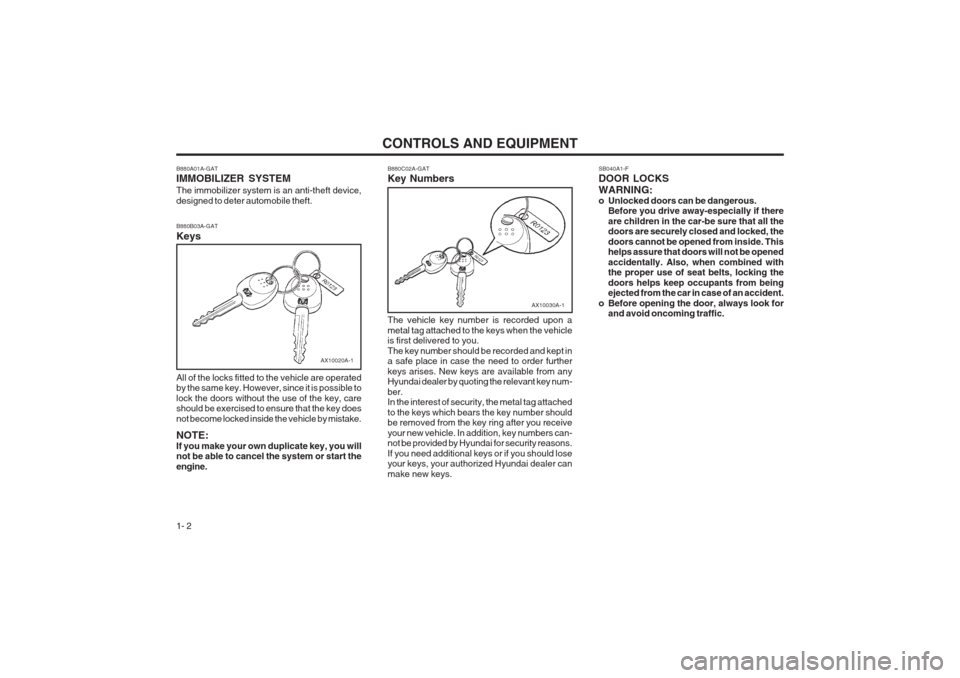
B880B03A-GAT Keys
All of the locks fitted to the vehicle are operated by the same key. However, since it is possible to lock the doors without the use of the key, care should be exercised to ensure that the key does not become locked inside the vehicle by mistake. NOTE: If you make your own duplicate key, you will not be able to cancel the system or start the engine. AX10020A-1B880C02A-GAT Key Numbers
AX10030A-1
The vehicle key number is recorded upon a metal tag attached to the keys when the vehicle is first delivered to you. The key number should be recorded and kept in a safe place in case the need to order further keys arises. New keys are available from any Hyundai dealer by quoting the relevant key num- ber. In the interest of security, the metal tag attached to the keys which bears the key number should be removed from the key ring after you receive your new vehicle. In addition, key numbers can- not be provided by Hyundai for security reasons. If you need additional keys or if you should lose your keys, your authorized Hyundai dealer can make new keys.
B880A01A-GAT IMMOBILIZER SYSTEM The immobilizer system is an anti-theft device, designed to deter automobile theft.
Page 11 of 140

CONTROLS AND EQUIPMENT1- 3
SB040B1-F Locking, unlocking front doors with a key
o The door can be locked or unlocked with a key.
o Lock the door by turning the key toward the
front of the vehicle and unlock it by turning thekey toward the rear.
HGK101-D
UNLOCK
LOCKHGK099-D
B040C01S-AAT Locking From the Outside The doors can be locked without a key. To lock the doors from the outside, first push the inside lock switch to the "LOCK" position, so that the red mark on the switch is not visible, then close the door. NOTE:
o When locking the door this way, be carefulnot to lock the door with the ignition keyleft in the vehicle.
o To protect against theft, always remove the ignition key, close all windows, and lock all doors when leaving your vehicle unattended.
HGK208-D
UNLOCK
LOCK
B040D01S-AAT Locking From the Inside To lock the doors from the inside, simply close the door and push the lock switch to the "LOCK" position. When this is done, neither the outside nor the inside door handle can be used. NOTE: When the door is locked, the red mark on the switch is not visible.
Page 12 of 140
CONTROLS AND EQUIPMENT
1- 4
HGK099-D
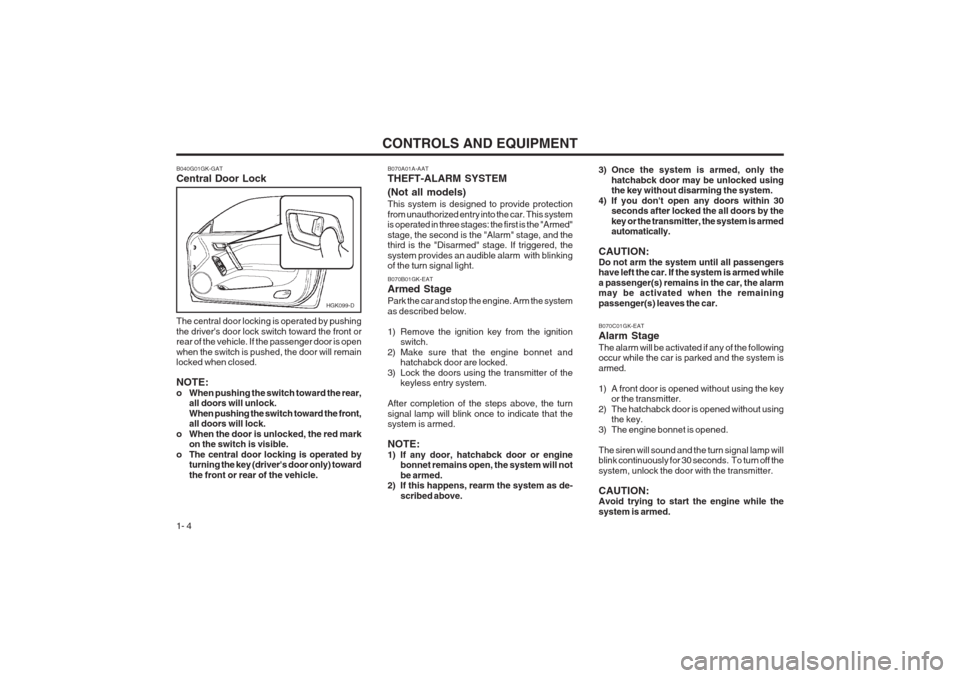
B040G01GK-GAT Central Door Lock The central door locking is operated by pushing the driver's door lock switch toward the front or rear of the vehicle. If the passenger door is open when the switch is pushed, the door will remain locked when closed. NOTE:
o When pushing the switch toward the rear, all doors will unlock.When pushing the switch toward the front, all doors will lock.
o When the door is unlocked, the red mark on the switch is visible.
o The central door locking is operated by turning the key (driver's door only) toward the front or rear of the vehicle. B070A01A-AAT THEFT-ALARM SYSTEM (Not all models) This system is designed to provide protection from unauthorized entry into the car. This system is operated in three stages: the first is the "Armed" stage, the second is the "Alarm" stage, and the third is the "Disarmed" stage. If triggered, the system provides an audible alarm with blinking of the turn signal light.
B070C01GK-EAT Alarm Stage The alarm will be activated if any of the following occur while the car is parked and the system is armed.
1) A front door is opened without using the keyor the transmitter.
2) The hatchabck door is opened without using the key.
3) The engine bonnet is opened.The siren will sound and the turn signal lamp will blink continuously for 30 seconds. To turn off the system, unlock the door with the transmitter. CAUTION: Avoid trying to start the engine while the system is armed.
B070B01GK-EAT Armed Stage Park the car and stop the engine. Arm the system as described below.
1) Remove the ignition key from the ignition
switch.
2) Make sure that the engine bonnet and hatchabck door are locked.
3) Lock the doors using the transmitter of the keyless entry system.
After completion of the steps above, the turn signal lamp will blink once to indicate that the system is armed. NOTE:
1) If any door, hatchabck door or engine bonnet remains open, the system will notbe armed.
2) If this happens, rearm the system as de-
scribed above. 3) Once the system is armed, only the
hatchabck door may be unlocked using the key without disarming the system.
4) If you don't open any doors within 30 seconds after locked the all doors by the key or the transmitter, the system is armed automatically.
CAUTION: Do not arm the system until all passengers have left the car. If the system is armed while a passenger(s) remains in the car, the alarm may be activated when the remaining passenger(s) leaves the car.
Page 13 of 140
CONTROLS AND EQUIPMENT1- 5
HGK102-D
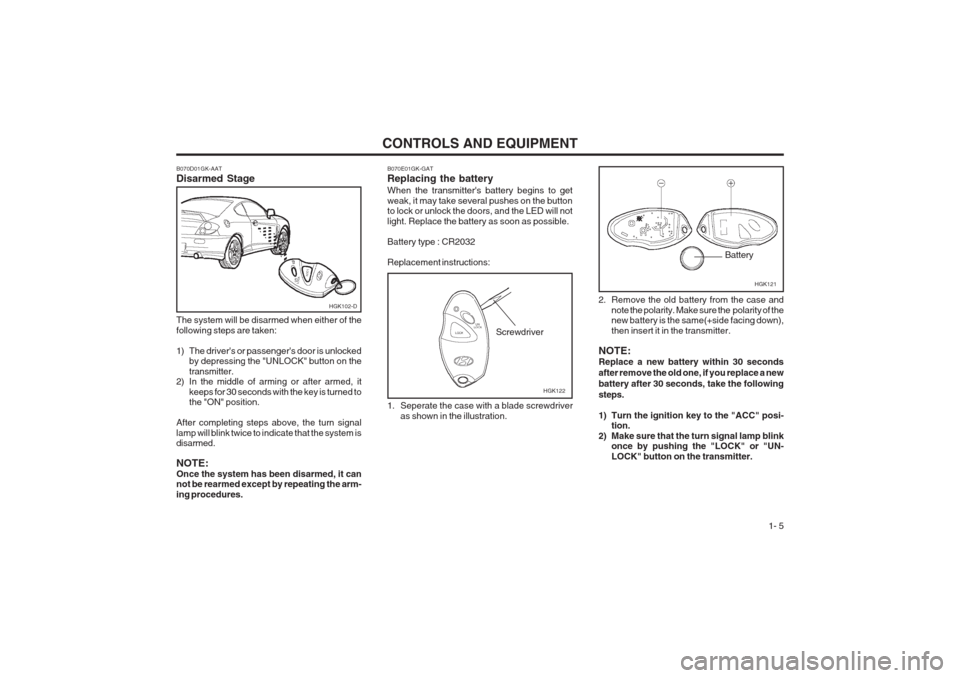
B070E01GK-GAT Replacing the battery When the transmitter's battery begins to get weak, it may take several pushes on the button to lock or unlock the doors, and the LED will not light. Replace the battery as soon as possible. Battery type : CR2032Replacement instructions:
1. Seperate the case with a blade screwdriveras shown in the illustration.
B070D01GK-AAT Disarmed Stage The system will be disarmed when either of the following steps are taken:
1) The driver's or passenger's door is unlocked
by depressing the "UNLOCK" button on the transmitter.
2) In the middle of arming or after armed, it
keeps for 30 seconds with the key is turned to the "ON" position.
After completing steps above, the turn signal lamp will blink twice to indicate that the system is disarmed. NOTE: Once the system has been disarmed, it can not be rearmed except by repeating the arm- ing procedures.
HGK122
Screwdriver 2. Remove the old battery from the case and
note the polarity. Make sure the polarity of the new battery is the same(+side facing down), then insert it in the transmitter.
NOTE: Replace a new battery within 30 seconds after remove the old one, if you replace a newbattery after 30 seconds, take the followingsteps.
1) Turn the ignition key to the "ACC" posi- tion.
2) Make sure that the turn signal lamp blink once by pushing the "LOCK" or "UN- LOCK" button on the transmitter.
HGK121
Battery
Page 14 of 140
CONTROLS AND EQUIPMENT
1- 6
B050A01GK-AAT DOOR WINDOWS Power window (Not all models)
HGK096-D(1)
HGK097-D
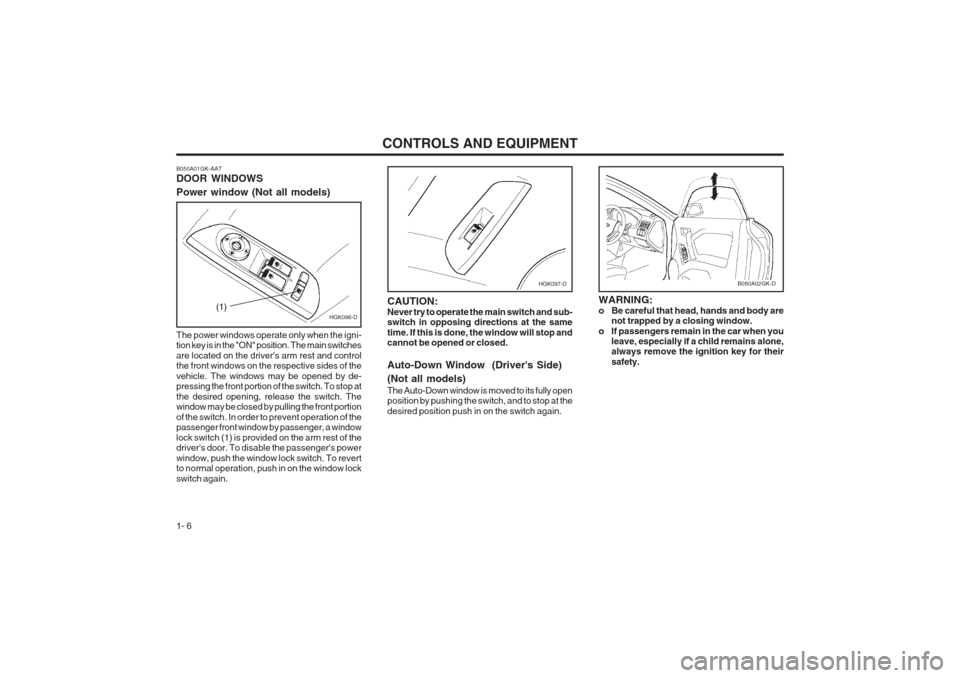
The power windows operate only when the igni- tion key is in the "ON" position. The main switches are located on the driver's arm rest and control the front windows on the respective sides of the vehicle. The windows may be opened by de- pressing the front portion of the switch. To stop at the desired opening, release the switch. The window may be closed by pulling the front portion of the switch. In order to prevent operation of the passenger front window by passenger, a window lock switch (1) is provided on the arm rest of the driver's door. To disable the passenger's power window, push the window lock switch. To revert to normal operation, push in on the window lock switch again.
CAUTION:Never try to operate the main switch and sub- switch in opposing directions at the same time. If this is done, the window will stop and cannot be opened or closed. Auto-Down Window (Driver's Side) (Not all models) The Auto-Down window is moved to its fully open position by pushing the switch, and to stop at the desired position push in on the switch again.
B050A02GK-D
WARNING:
o Be careful that head, hands and body are
not trapped by a closing window.
o If passengers remain in the car when you leave, especially if a child remains alone, always remove the ignition key for their safety.
Page 19 of 140
CONTROLS AND EQUIPMENT1- 11
SB090F1-E Seat Belt Occupancy The seat belts are designed to be used by one seat occupant only. The use of a seat belt by more than one person increases the levels of injury which may be sustained in the event of an accident. SE090G1-E Do Not Lie Down To ensure that the maximum level of protection may be afforded by the seat belt system, all passengers should be sitting in an upright posi- tion throughout the journey. The seat belt will be unable to afford maximum protection if the front seats are at or near the fully reclined position. SB090H1-E CARE OF SEAT BELTS Seat belt assemblies must never be disassembled or modified in any way. In addition, care should be exercised to ensure that the belt assemblies do not become damaged by being trapped in seat mechanisms, door shuts etc. SB090I-E Periodic Inspection It is recommended that all seat belts be inspected periodically for wear or damage of any kind. Parts of the system that are damaged should be replaced as soon as possible. Under no circum- stances must any part of the seat belt assem- blies be dismantled or repaired.
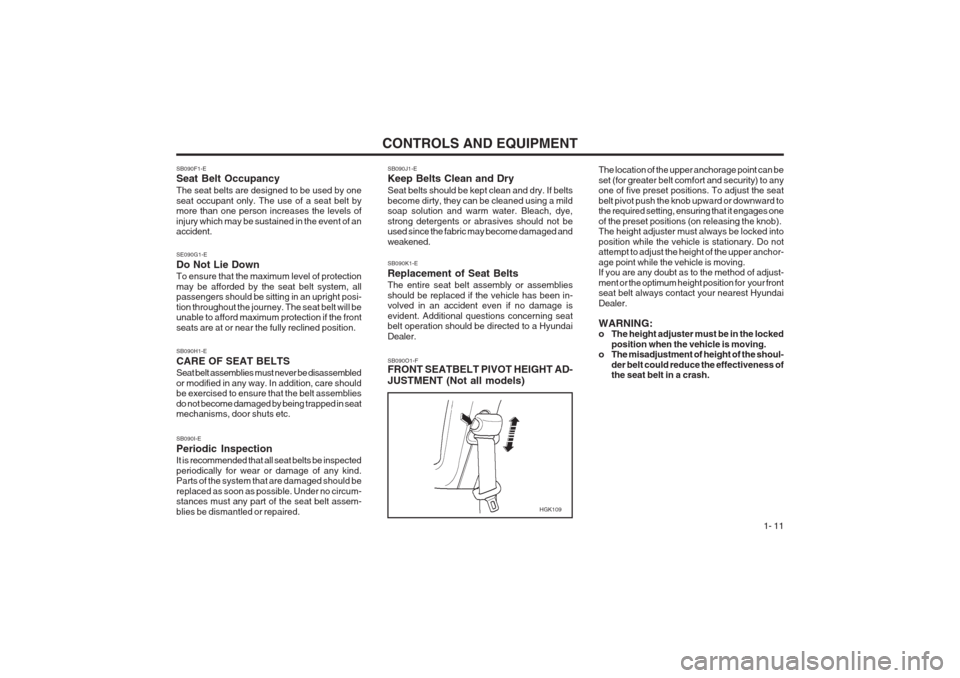
SB090J1-E Keep Belts Clean and Dry Seat belts should be kept clean and dry. If belts become dirty, they can be cleaned using a mild soap solution and warm water. Bleach, dye, strong detergents or abrasives should not be used since the fabric may become damaged and weakened. SB090K1-E Replacement of Seat Belts The entire seat belt assembly or assemblies should be replaced if the vehicle has been in- volved in an accident even if no damage is evident. Additional questions concerning seat belt operation should be directed to a Hyundai Dealer. SB090O1-F FRONT SEATBELT PIVOT HEIGHT AD- JUSTMENT (Not all models)
The location of the upper anchorage point can be set (for greater belt comfort and security) to any one of five preset positions. To adjust the seat belt pivot push the knob upward or downward to the required setting, ensuring that it engages one of the preset positions (on releasing the knob). The height adjuster must always be locked into position while the vehicle is stationary. Do not attempt to adjust the height of the upper anchor- age point while the vehicle is moving. If you are any doubt as to the method of adjust- ment or the optimum height position for your front seat belt always contact your nearest Hyundai Dealer. WARNING:
o The height adjuster must be in the locked
position when the vehicle is moving.
o The misadjustment of height of the shoul-
der belt could reduce the effectiveness ofthe seat belt in a crash.
HGK109
Page 22 of 140
CONTROLS AND EQUIPMENT
1- 14
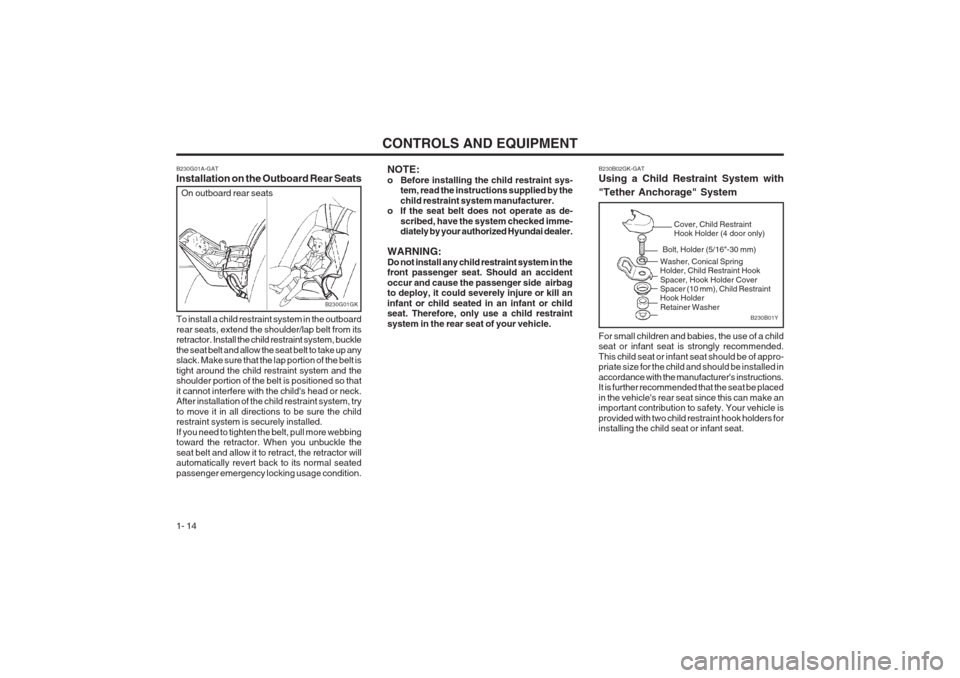
B230G01A-GAT Installation on the Outboard Rear Seats
B230G01GK
On outboard rear seats
To install a child restraint system in the outboard rear seats, extend the shoulder/lap belt from its retractor. Install the child restraint system, buckle the seat belt and allow the seat belt to take up any slack. Make sure that the lap portion of the belt is tight around the child restraint system and the shoulder portion of the belt is positioned so that it cannot interfere with the child's head or neck. After installation of the child restraint system, try to move it in all directions to be sure the child restraint system is securely installed. If you need to tighten the belt, pull more webbing toward the retractor. When you unbuckle the seat belt and allow it to retract, the retractor will automatically revert back to its normal seated passenger emergency locking usage condition. NOTE:
o Before installing the child restraint sys-
tem, read the instructions supplied by thechild restraint system manufacturer.
o If the seat belt does not operate as de-
scribed, have the system checked imme- diately by your authorized Hyundai dealer.
WARNING: Do not install any child restraint system in the front passenger seat. Should an accident occur and cause the passenger side airbag to deploy, it could severely injure or kill an infant or child seated in an infant or child seat. Therefore, only use a child restraint system in the rear seat of your vehicle. B230B02GK-GAT Using a Child Restraint System with "Tether Anchorage" System For small children and babies, the use of a child seat or infant seat is strongly recommended. This child seat or infant seat should be of appro- priate size for the child and should be installed in accordance with the manufacturer's instructions. It is further recommended that the seat be placed in the vehicle's rear seat since this can make an important contribution to safety. Your vehicle is provided with two child restraint hook holders for installing the child seat or infant seat.
B230B01Y
Cover, Child Restraint Hook Holder (4 door only)
Bolt, Holder (5/16"-30 mm)
Washer, Conical SpringHolder, Child Restraint Hook Spacer, Hook Holder Cover Spacer (10 mm), Child RestraintHook Holder Retainer Washer
Page 30 of 140
CONTROLS AND EQUIPMENT
1- 22 WARNING:
o Extreme Hazard! Do not use a rearward
facing child restraint on a seat protectedby an airbag in front of it!
o Modification to SRS components or wir-ing,
including the addition of any kind of badges to the pad cover or modifications to the body structure, can adversely affect SRS performance and lead to possible injury.
o For cleaning the horn pad, use only a soft, dry cloth or one which has been moist- ened with plain water. Solvents or clean- ers could adversely affect the airbag cover and proper deployment of the system.
o No objects should be placed over or near
the airbag module on the steering wheel, because any such object could cause harm if the vehicle is in a crash severe enough to cause the airbag to inflate.
o If the airbag inflates, it must be replaced by an authorized Hyundai dealer.
o Do not tamper with or disconnect SRS wiring, or other components of the SRS system. Doing so could result in injury, due to accidental firing of the airbag or by rendering the SRS inoperative.
o If components of the airbag system must
be discarded, or if the vehicle must be scrapped, certain safety precautions must be observed. Your Hyundai dealer knows these precautions and can give you the necessary information. Failure to follow these precautions and procedures could increase the risk of personal injury.
WARNING:
o For best protection from the side airbag
system and to avoid being injured by thedeploying side airbag, both front seat oc- cupants should sit in an upright position with the seat belt properly fastened. The driver's hands should be placed on the steering wheel at the 9:00 and 3:00 o'clock positions. The passenger's arms and hands should be placed in their laps.
o Do not use any accessory seat covers.
o Use of seat covers could prevent or re- duce the effectiveness of the system.
o Do not install any accessories on the side or near the side airbag.
o Do not use excessive force on the side of the seat.
o Do not place any objects over the airbag or between the airbag and yourself.
o Do not place any objects (an umbrella, bag, etc.) between the front door and thefront seat. Such objects may become dan- gerous projectiles and cause injury if the supplemental side air bag inflates.
o To prevent unexpected deployment of the
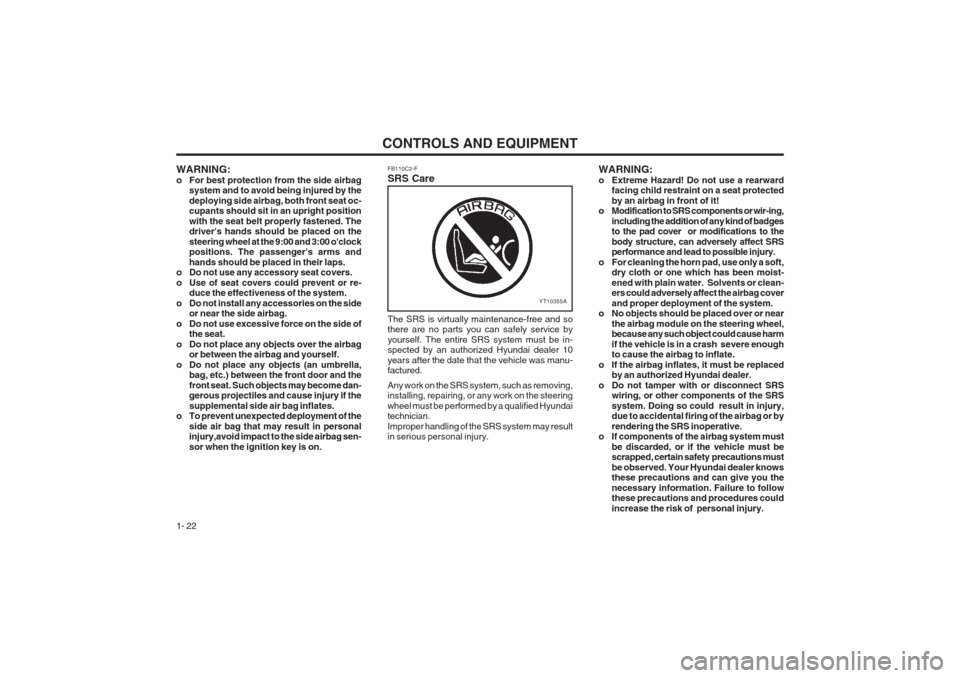
side air bag that may result in personal injury,avoid impact to the side airbag sen- sor when the ignition key is on. FB110C2-F SRS Care
YT10355A
The SRS is virtually maintenance-free and so there are no parts you can safely service by yourself. The entire SRS system must be in- spected by an authorized Hyundai dealer 10 years after the date that the vehicle was manu- factured. Any work on the SRS system, such as removing, installing, repairing, or any work on the steering wheel must be performed by a qualified Hyundai technician. Improper handling of the SRS system may result in serious personal injury.
Page 33 of 140
CONTROLS AND EQUIPMENT1- 25
HGK026B
1
234 5 67 8
910 1112 13 14
151617 18 1920 21
2
2223
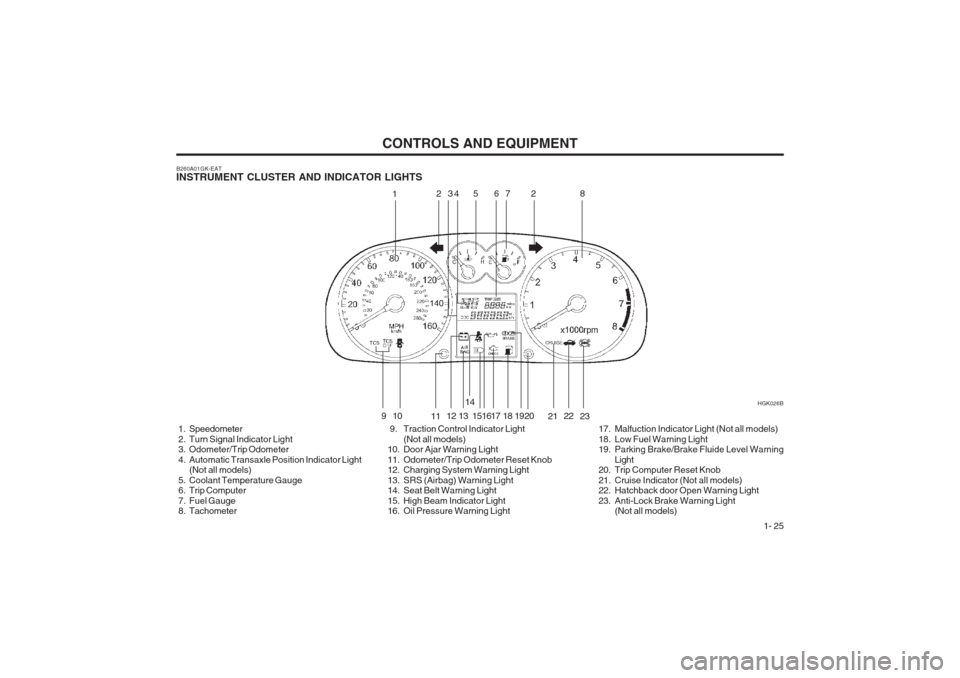
B260A01GK-EAT INSTRUMENT CLUSTER AND INDICATOR LIGHTS
1. Speedometer
2. Turn Signal Indicator Light
3. Odometer/Trip Odometer
4. Automatic Transaxle Position Indicator Light (Not all models)
5. Coolant Temperature Gauge
6. Trip Computer
7. Fuel Gauge
8. Tachometer 9. Traction Control Indicator Light
(Not all models)
10. Door Ajar Warning Light
11. Odometer/Trip Odometer Reset Knob
12. Charging System Warning Light
13. SRS (Airbag) Warning Light
14. Seat Belt Warning Light
15. High Beam Indicator Light
16. Oil Pressure Warning Light 17. Malfuction Indicator Light (Not all models)
18. Low Fuel Warning Light
19. Parking Brake/Brake Fluide Level Warning
Light
20. Trip Computer Reset Knob
21. Cruise Indicator (Not all models)
22. Hatchback door Open Warning Light
23. Anti-Lock Brake Warning Light (Not all models)
Page 48 of 140
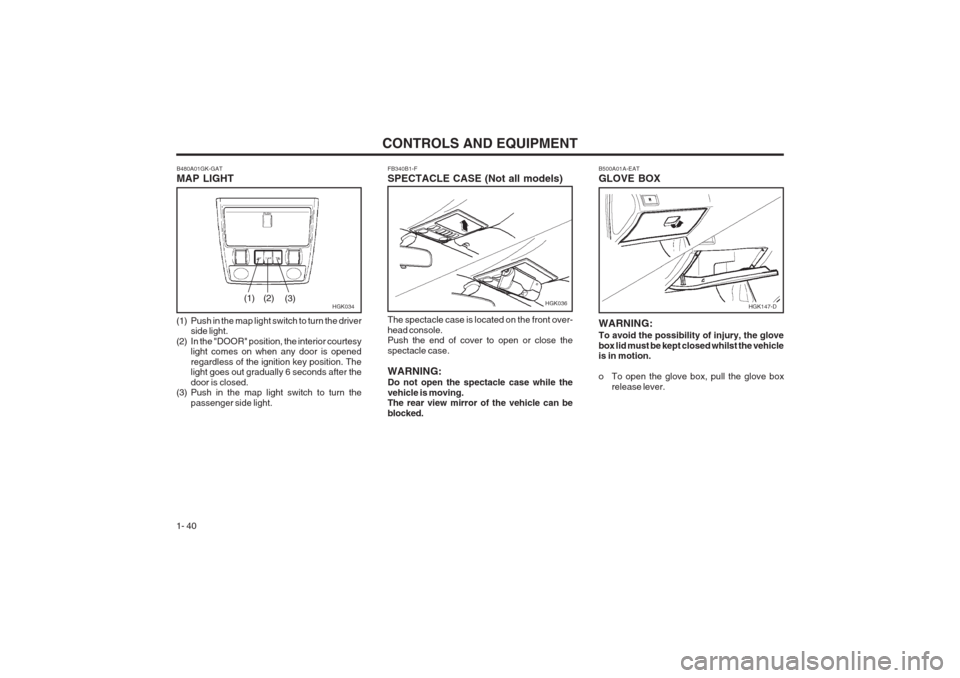
CONTROLS AND EQUIPMENT
1- 40 FB340B1-F SPECTACLE CASE (Not all models) The spectacle case is located on the front over- head console. Push the end of cover to open or close the spectacle case. WARNING: Do not open the spectacle case while the vehicle is moving. The rear view mirror of the vehicle can be blocked.
B480A01GK-GAT MAP LIGHT
HGK034
(1) Push in the map light switch to turn the driver side light.
(2) In the "DOOR" position, the interior courtesy light comes on when any door is opened regardless of the ignition key position. The light goes out gradually 6 seconds after the door is closed.
(3) Push in the map light switch to turn the
passenger side light.(1) (2) (3)HGK036
B500A01A-EAT GLOVE BOX
WARNING: To avoid the possibility of injury, the glove box lid must be kept closed whilst the vehicle is in motion.
o To open the glove box, pull the glove box
release lever.
HGK147-D