ESP Hyundai Coupe 2004 Owner's Guide
[x] Cancel search | Manufacturer: HYUNDAI, Model Year: 2004, Model line: Coupe, Model: Hyundai Coupe 2004Pages: 389, PDF Size: 10.22 MB
Page 172 of 389
Responsibilty For Maintenance
It is the responsibility of the vehicle owner/driver to ensure that all routine mainte- nance services are undertaken in line with the recommendations specified in Section 5 of this manual. In addition, in order to ensure continued validity of the new vehiclewarranty and safe operation of the vehicle, non scheduled maintenance/running repairs should be undertaken at the earliest available opportunity. Under severe operating conditions, more frequent maintenance is required. Detailsof the maintenance schedule for such conditions are also given in section 5. It is recommended that all maintenance operations and repairs are entrusted to a franchised Hyundai dealer to ensure that the latest repair methods, specializedtooling and genuine Hyundai parts are used to ensure the continued reliability and safety of the vehicle.
SA020A1-E
Page 174 of 389
SA040A1-ESA050A1-E
TWO WAY RADIO INSTALLATION
This vehicle is fitted with electronically controlled fuel injection or other micro processor controlled equipment. It is possible for incorrectly installed two way radio equipment including mobiletelephones to adversely affect these systems. Before radio equipment of this kind is installed, please contact your Hyundai dealer for recommendation regarding the suitability of the particular radio equipmentconcerned and the recommended method of installation and equipment location. Incorrectly installed or unsuitable equipment which gives rise to incorrect functioning of or damage to electronic vehicle components will not fall within the scope of thevehicle manufacturers warranty.
CAUTION: MODIFICATIONS TO ORIGINAL VEHICLE SPECIFICATION
Modification to the original vehicle specification may invalidate the manufacturers warranty and may adversely affect the safety and durability of the vehicle. Components which are subject to modification or are added to the original vehiclespecification without the express approval of the manufacturer and result in conse- quential loss or damage are not covered by the vehicle manufacturers warranty.!
Page 179 of 389
CAUTION:
When installing a container of liquid air freshener inside the vehicle, do not place it near the instrument cluster nor on the instrument panel surface. If there is any leakage from the air freshener onto these areas (Instrument cluster, instrument panel or air ventilator), it may damage these parts. If the liquid from the air freshener does leak onto these areas, wash themwith water immediately.!
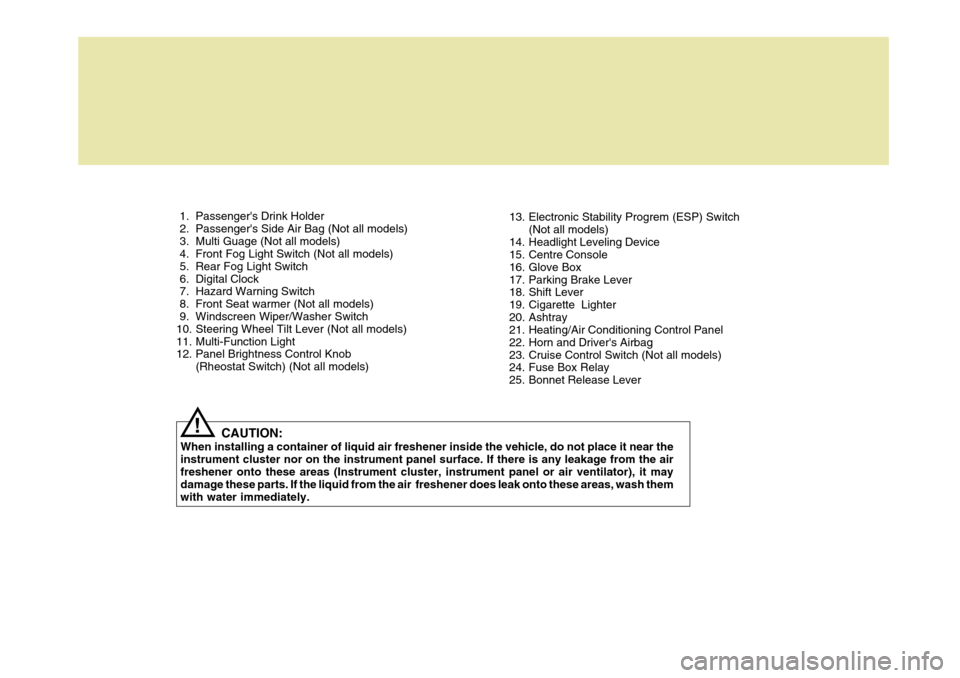
1. Passenger's Drink Holder
2. Passenger's Side Air Bag (Not all models)
3. Multi Guage (Not all models)
4. Front Fog Light Switch (Not all models)
5. Rear Fog Light Switch
6. Digital Clock
7. Hazard Warning Switch
8. Front Seat warmer (Not all models)
9. Windscreen Wiper/Washer Switch
10. Steering Wheel Tilt Lever (Not all models)
11. Multi-Function Light
12. Panel Brightness Control Knob
(Rheostat Switch) (Not all models) 13. Electronic Stability Progrem (ESP) Switch
(Not all models)
14. Headlight Leveling Device
15. Centre Console
16. Glove Box
17. Parking Brake Lever
18. Shift Lever
19. Cigarette Lighter
20. Ashtray
21. Heating/Air Conditioning Control Panel
22. Horn and Driver's Airbag
23. Cruise Control Switch (Not all models)
24. Fuse Box Relay
25. Bonnet Release Lever
Page 180 of 389

YOUR VEHICLE AT A GLANCE
B255A01GK-EAT INDICATOR SYMBOLS ON THE INSTRUMENT PANEL * More detailed explanations of these items will be found beginning on page 1-40.
Malfunction Indicator Light (Not all models)
SRS (Airbag) Service Reminder Indicator (SRI)(Not all models)
Hatchback Door Open Warning Light
Low Fuel Level Warning Light
Door Ajar Warning Light (Not all models)
ABS Service Reminder Indicator (Not all models)
Turn Signal Indicator Lights
High Beam Indicator Light Low Oil Pressure Warning Light Parking Brake/Brake Fluid Level Warning Light Charging System Warning Light
Cruise Indicator (Not all models)
Seat Belt Warning Light
CRUISE SET Indicator Light (Not all models)
Electronic Stability Program (ESP) Indicator Light (Not all models)
Immobiliser Warning Light
Page 182 of 389
1CONTROLS AND EQUIPMENT
2FUEL RECOMMENDATIONS
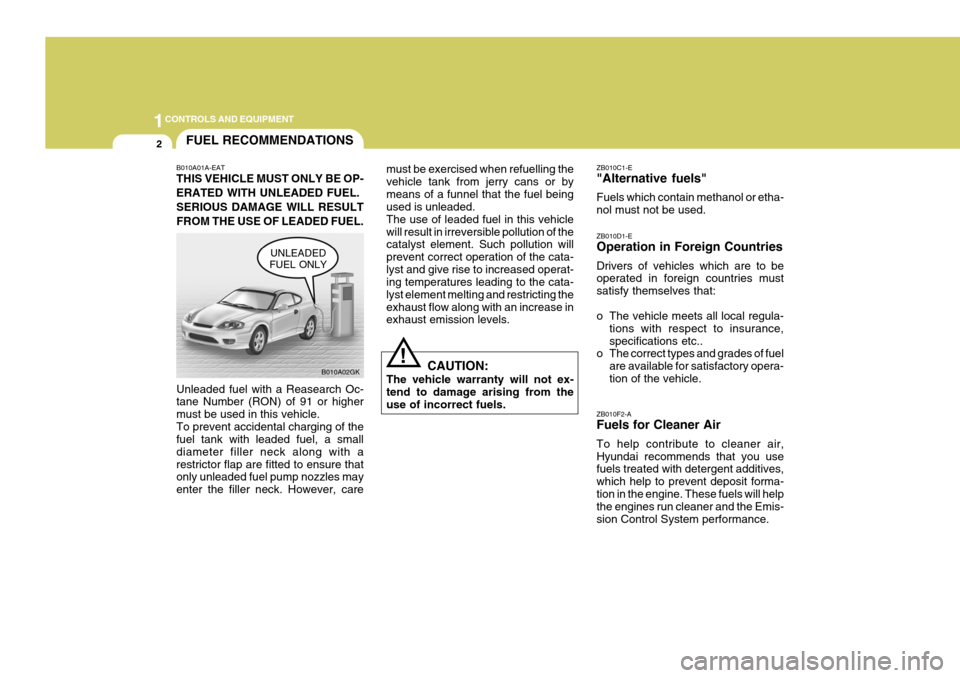
B010A01A-EAT THIS VEHICLE MUST ONLY BE OP- ERATED WITH UNLEADED FUEL.SERIOUS DAMAGE WILL RESULTFROM THE USE OF LEADED FUEL. Unleaded fuel with a Reasearch Oc- tane Number (RON) of 91 or higher must be used in this vehicle.To prevent accidental charging of the fuel tank with leaded fuel, a small diameter filler neck along with arestrictor flap are fitted to ensure that only unleaded fuel pump nozzles may enter the filler neck. However, care must be exercised when refuelling thevehicle tank from jerry cans or bymeans of a funnel that the fuel being used is unleaded. The use of leaded fuel in this vehiclewill result in irreversible pollution of the catalyst element. Such pollution will prevent correct operation of the cata-lyst and give rise to increased operat- ing temperatures leading to the cata- lyst element melting and restricting theexhaust flow along with an increase in exhaust emission levels.
!
B010A02GK
UNLEADED
FUEL ONLY
CAUTION:
The vehicle warranty will not ex- tend to damage arising from theuse of incorrect fuels. ZB010C1-E "Alternative fuels" Fuels which contain methanol or etha- nol must not be used. ZB010F2-A Fuels for Cleaner Air To help contribute to cleaner air, Hyundai recommends that you use fuels treated with detergent additives, which help to prevent deposit forma-tion in the engine. These fuels will help the engines run cleaner and the Emis- sion Control System performance.
ZB010D1-E Operation in Foreign Countries Drivers of vehicles which are to be operated in foreign countries must satisfy themselves that:
o The vehicle meets all local regula-
tions with respect to insurance, specifications etc..
o The correct types and grades of fuel
are available for satisfactory opera-tion of the vehicle.
Page 191 of 389
1
CONTROLS AND EQUIPMENT
11
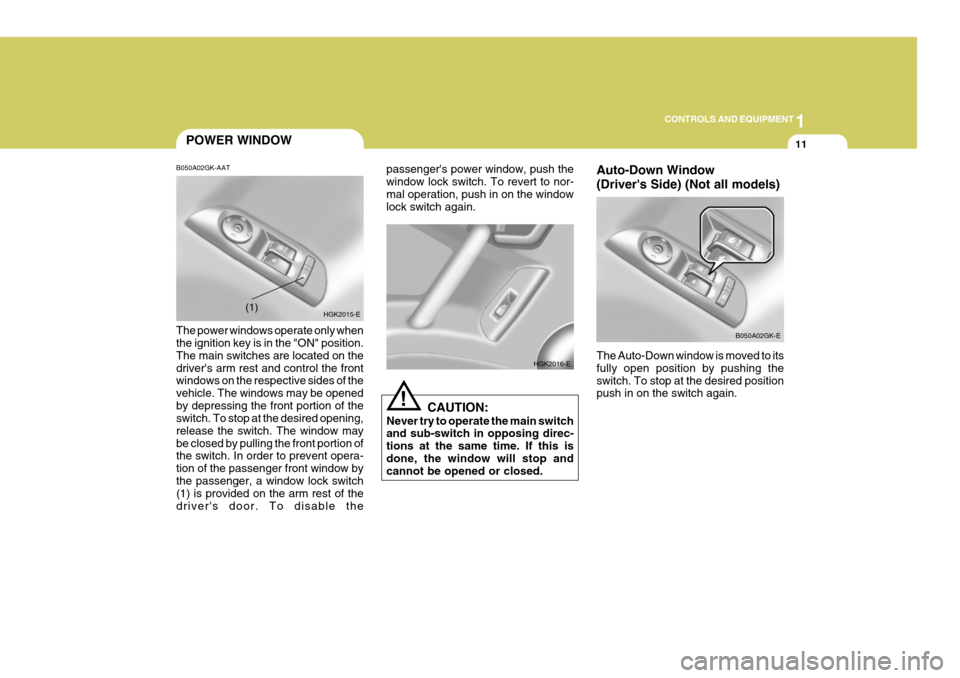
Auto-Down Window (Driver's Side) (Not all models) The Auto-Down window is moved to its fully open position by pushing theswitch. To stop at the desired position push in on the switch again. B050A02GK-E
POWER WINDOW
!
B050A02GK-AAT The power windows operate only when the ignition key is in the "ON" position. The main switches are located on thedriver's arm rest and control the front windows on the respective sides of the vehicle. The windows may be openedby depressing the front portion of the switch. To stop at the desired opening, release the switch. The window maybe closed by pulling the front portion of the switch. In order to prevent opera- tion of the passenger front window bythe passenger, a window lock switch (1) is provided on the arm rest of the driver's door. To disable the passenger's power window, push thewindow lock switch. To revert to nor-mal operation, push in on the window lock switch again.
CAUTION:
Never try to operate the main switchand sub-switch in opposing direc- tions at the same time. If this isdone, the window will stop and cannot be opened or closed.
HGK2015-E
(1)
HGK2016-E
Page 206 of 389
1CONTROLS AND EQUIPMENT
26
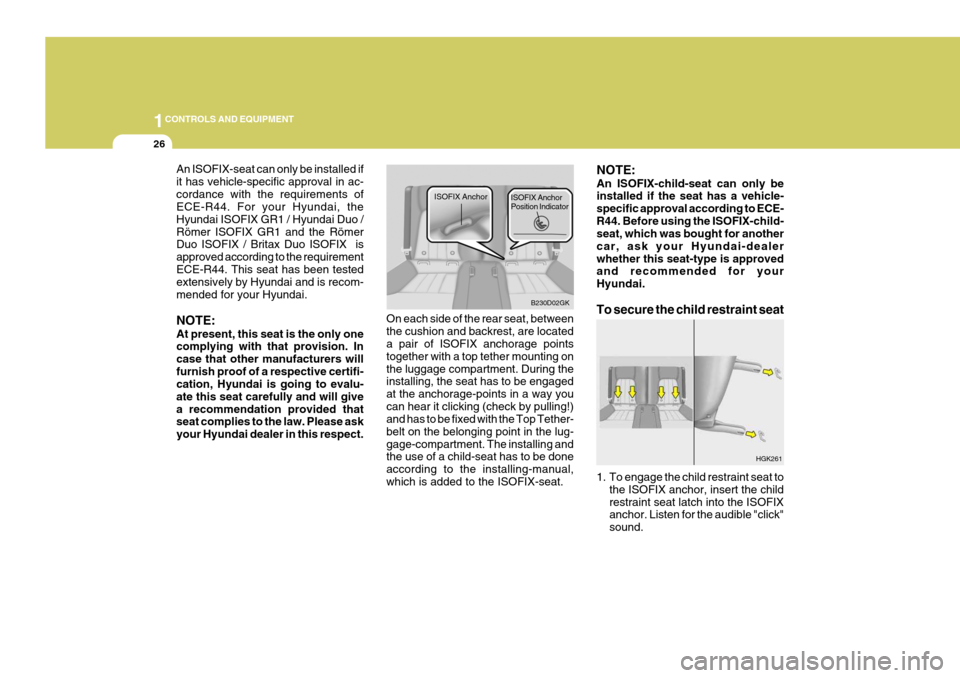
On each side of the rear seat, between the cushion and backrest, are located a pair of ISOFIX anchorage points together with a top tether mounting onthe luggage compartment. During the installing, the seat has to be engaged at the anchorage-points in a way youcan hear it clicking (check by pulling!) and has to be fixed with the Top Tether- belt on the belonging point in the lug-gage-compartment. The installing and the use of a child-seat has to be done according to the installing-manual,which is added to the ISOFIX-seat. NOTE: An ISOFIX-child-seat can only be installed if the seat has a vehicle- specific approval according to ECE-R44. Before using the ISOFIX-child- seat, which was bought for another car, ask your Hyundai-dealerwhether this seat-type is approved and recommended for your Hyundai. To secure the child restraint seat
1. To engage the child restraint seat to
the ISOFIX anchor, insert the child restraint seat latch into the ISOFIX anchor. Listen for the audible "click" sound.
B230D02GK
ISOFIX Anchor
ISOFIX Anchor Position Indicator
HGK261
An ISOFIX-seat can only be installed if it has vehicle-specific approval in ac-cordance with the requirements of ECE-R44. For your Hyundai, the Hyundai ISOFIX GR1 / Hyundai Duo /Römer ISOFIX GR1 and the Römer Duo ISOFIX / Britax Duo ISOFIX is approved according to the requirementECE-R44. This seat has been tested extensively by Hyundai and is recom- mended for your Hyundai. NOTE: At present, this seat is the only one complying with that provision. In case that other manufacturers willfurnish proof of a respective certifi- cation, Hyundai is going to evalu- ate this seat carefully and will givea recommendation provided that seat complies to the law. Please ask your Hyundai dealer in this respect.
Page 219 of 389

1
CONTROLS AND EQUIPMENT
39
1. Speedometer
2. Turn Signal Indicator Light
3. Odometer/Trip Odometer
4. Automatic Transaxle Position Indicator Light (Not all models)
5. Coolant Temperature Gauge
6. Trip Computer
7. Fuel Gauge
8. Tachometer
9. Electronic Stability Program (ESP) Indicator Light (Not all models)
10.Immobiliser Warning Light
11.Odometer/Trip Odometer Reset Knob 12.Charging System Warning Light
13.SRS (Airbag) Warning Light
14.Seat Belt Warning Light
15.High Beam Indicator Light
16.Oil Pressure Warning Light
17.Malfuction Indicator Light (Not all models)
18.Low Fuel Warning Light
19.Parking Brake/Brake Fluide Level Warning Light
20.Trip Computer Reset Knob21.CRUISE Indicator Light (Not all models)
22.CRUISE SET Indicator Light (Not all models)
23.Hatchback door Open Warning Light
24.Door Ajar Warning Light
25.Anti-Lock Brake Warning Light (Not all models)
Page 223 of 389

1
CONTROLS AND EQUIPMENT
43
B260N01GK-EAT Malfunction Indicator Lamp
This lamp illuminates when there is a malfunction of an exhaust gas relatedcomponent, and the system is not functioning properly so that the ex- haust gas regulation values are notsatisfied. This lamp will also illuminate when the ignition key is turned to the "ON" position, and will go out afterengine starting. If it illuminates while driving, or does not illuminate when the ignition key is turned to the "ON"position, take your car to your nearest authorized Hyundai dealer and have the system checked.
B260E01HP-GAT Seat Belt Warning Light
The seat belt warning light blinks for about 6 seconds when the ignition key is turned from the "OFF" position to"ON" or "START".
B260Q01E-EAT Cruise Indicator (Not all models)
The cruise indicator light in the instru- ment cluster is illuminated when thecruise control main switch on the end of the barrel is pushed. The indicator light does not illuminatewhen the cruise control main switch is pushed a second time. Information about the use of cruisecontrol is beginning on page 1-48.B265C01LZ-EAT Electronic Stability Program Indicator Lights(Not all models)
The electronic stability program indi- cators change operation according to the ignition switch position and whetherthe system is in operation or not. They will illuminate when the ignition key is turned to the "ON" position, butshould go out after three seconds. If the ESP or ESP-OFF indicator stays on, take your car to your authorizedHyundai dealer and have the system checked. See section 2 for more infor- mation about the ESP.
B260R01E-EAT CRUISE SET Indicator
Light (Not all models)
The set indicator light in the instrument cluster is illuminated when the cruisecontrol switch is pushed downward to "SET (COAST)". The set indicator light does not illumi-nate when the control switch is in the "CANCEL" position. B260U01TB-EAT
Immobiliser Warning Light (Not all models)
This indicator light comes on for some seconds after the ignition key is turned to the "ON" position. At this time, youcan start the engine. The light goes out after the engine is running. In case this light goes out before you start theengine, you must turn to the "LOCK" position and restart the engine. In case
Page 228 of 389
1CONTROLS AND EQUIPMENT
48
NOTE:
o When the distance to empty is
less than 50 km, the symbol will always come on and the distanceto empty digits will indicate "--- " with flash until more fuel is added.
o The distance to empty can differ from the actual tripmeter ac-cording to driving conditions.
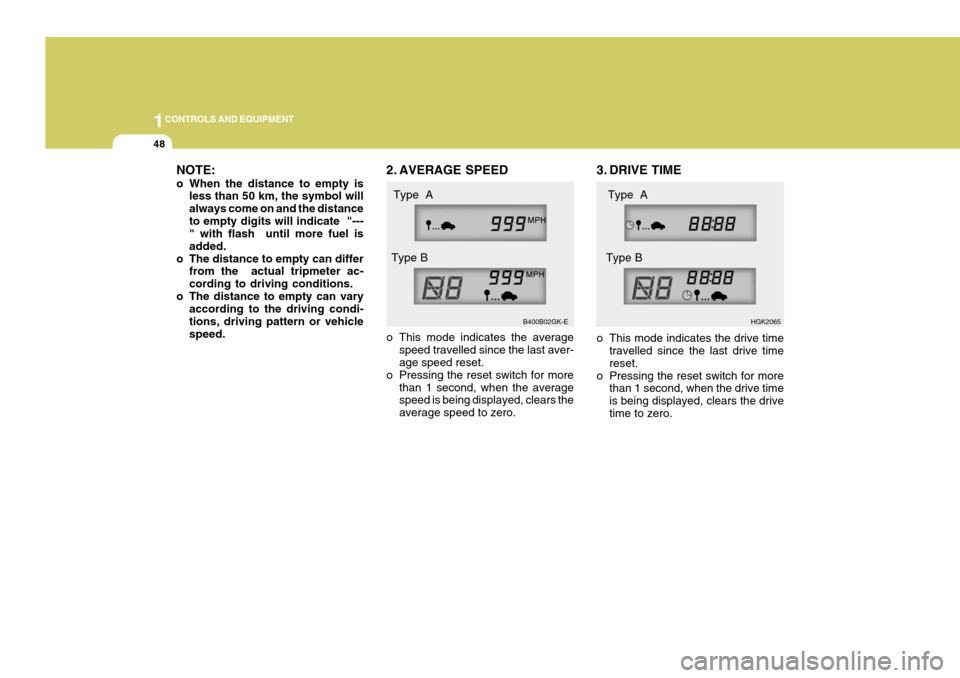
o The distance to empty can vary according to the driving condi-tions, driving pattern or vehiclespeed. 2. AVERAGE SPEED
o This mode indicates the average
speed travelled since the last aver- age speed reset.
o Pressing the reset switch for more than 1 second, when the averagespeed is being displayed, clears the average speed to zero. 3. DRIVE TIME
o This mode indicates the drive time
travelled since the last drive time reset.
o Pressing the reset switch for more than 1 second, when the drive timeis being displayed, clears the drivetime to zero.
B400B02GK-E
HGK2065
Type A
Type B Type A
Type B