glove box Hyundai Coupe 2007 User Guide
[x] Cancel search | Manufacturer: HYUNDAI, Model Year: 2007, Model line: Coupe, Model: Hyundai Coupe 2007Pages: 487, PDF Size: 12.96 MB
Page 190 of 487

5
VEHICLE MAINTENANCE REQUIREMENTS
3SCHEDULED MAINTENANCE REQUIREMENTS
F010F01A-GAT
A Few Tips
Whenever you have your Hyundai ser-
viced, keep copies of the service records in your glove box. This will help ensure that you can document that the required procedures have beenperformed to keep your warranties in effect. This is especially important when service is not performed by anauthorized Hyundai dealer. F020A02A-GAT Inspection should be performed any
time a malfunction is experienced or suspected. Receipts for all emission control system services should be re- tained to demonstrate compliance withconditions of the emissions system warranty.
For severe usage maintenance require-
ments, see page 5-7 of this section.
Page 217 of 487
6
DO-IT-YOURSELF MAINTENANCE
19CHANGING THE CLIMATE CONTROL AIR FILTER
G145A03GK-GAT
(In front of blower unit)(If installed)
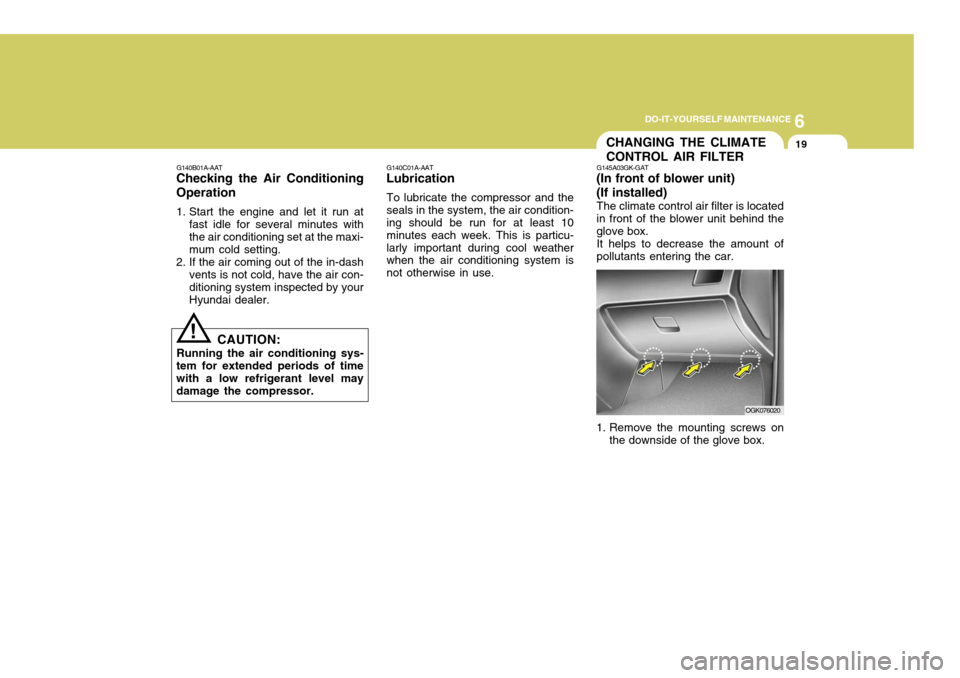
The climate control air filter is located in front of the blower unit behind the glove box.It helps to decrease the amount ofpollutants entering the car.
1. Remove the mounting screws on the downside of the glove box. OGK076020
G140C01A-AAT
Lubrication
To lubricate the compressor and theseals in the system, the air condition- ing should be run for at least 10 minutes each week. This is particu-larly important during cool weather when the air conditioning system is not otherwise in use.
!
G140B01A-AAT
Checking the Air Conditioning Operation
1. Start the engine and let it run at
fast idle for several minutes with the air conditioning set at the maxi- mum cold setting.
2. If the air coming out of the in-dash vents is not cold, have the air con-ditioning system inspected by yourHyundai dealer.
CAUTION:
Running the air conditioning sys-
tem for extended periods of timewith a low refrigerant level maydamage the compressor.
Page 218 of 487

6 DO-IT-YOURSELF MAINTENANCE
20
!
2. Open the glove box and remove the
mounting screws on the upside of the glove box. 4. Replace the climate control air filter
with a new one.
5. Installation is the reverse order of disassembly.
CAUTION:
Be sure to install the climate control
air filter in the direction of the arrowsign. Otherwise, it may cause noise or deterioration.
OGK076021HGK2114HGK2115
3. Remove the filter cover.
Page 232 of 487

6 DO-IT-YOURSELF MAINTENANCE
34
G270G01GK-AAT
Map Light
1. Remove the cover with a flat-blade
screwdriver.
2. Replace with a new bulb.
OGK076046
OGK076021
2. Open the glove box and remove the mounting screws on the upside of the glove box.
G270H01GK-GAT
Glove Box Illuminated Light
1. Remove the mounting screws on
the downside of the glove box. OGK076020
3. Remove the glove box by pulling
strongly.
CAUTION:
Be careful not to damage the glove box when pulling the glove box.
!
OGK076022
Page 233 of 487

6
DO-IT-YOURSELF MAINTENANCE
35
OGK076038
4. Disconnect the power cord.
5. Remove the glove box illuminated
light by pushing the clip.
6. Replace with a new bulb. G270E02A-GAT
Side Repeater (If Installed)
NOTE: It is recommended that the side
repeater bulb be replaced by an authorized Hyundai dealer.
Clip
Power Cord
Page 238 of 487

6 DO-IT-YOURSELF MAINTENANCE
40
DESCRIPTIONIG COIL
AMP
B/UP LAMP
A/BAG IND A/BAG
HTD MIR HAZARD
R/WIPER TAIL-RH
F/WIPER
RR DEFOG
STOP
TAIL-LH
A/CON ECU
CLUSTER
ROOM LP
P/WINDOW T/GATE
IGN
RR FOG
C/LIGHT S/ROOF
S/HTR ABS
AUDIO
PROTECTED COMPONENTS
Ignition coil(1.6l/2.7L), Electronic chrome mirror AMP Back-up lamp switch,Transaxle range switch,Cruise control module,Stop lamp switch Instrument cluster (A/BAG IND.) SRS control module Mirror defogger Hazard relay Rear wiper motor,Rear intermittent wiper relay Right tail lamps,Glove box lamp Front wiper motor,Front wiper relay Defogger relay Stop lamp switch,Burglar alarm horn relay,Folding/Unfolding relay Left tail lamps A/C control module, Blower relay ECM, Multi gauge unit, TCM, Vehicle speed sensor Instrument cluster (Power), Per-excitation resister, DRL Control module,Generator Room lamp,Clock,Audio,Data link connector,Multi gauge unit Power window relay Trunk lid switch AQS sensor,Head lamp relay,DRL Control module Rear fog lamp Cigarette lighter,Outside mirror switch Sunroof,Power door lock/Unlock relay Seat warmer ESP/ABS control module Audio,Digital clock
FUSERATING
20A 20A 10A 10A 15A 10A 10A 15A 10A 20A 30A 15A 10A 10A 10A 10A 10A 30A 15A 10A 10A 15A 15A 20A 10A 10A
Page 254 of 487
10
INDEX
3
Driving Economical driving .................................................. 2-16
Smooth corneri ng ..................................................... 2-17
Winter driving ........................................................... 2-17
E Electronic Stability Program (ESP) ............................2-13
Emissions Control Systems ........................................ 7-2 Engine Before starting the engine ........................................ 2-3
Changing the oil and filter ......................................... 6-6Compartment (1.6L, 2.0L, 2.7L) ................................ 6-2
Coolant ..................................................................... 6-9
Coolant temperature gauge ......................................1-50
If the engine overheats ............................................. 3-4
Number ..................................................................... 8-2
Oil ............................................................................. 6-6Oil consumption ........................................................ 6-8
Starting ..................................................................... 2-5
Engine Exhaust Can Be Dangerous ............................ 2-2
FFog Light .................................................................... 1-60
Front Seats Adjustable front seats .............................................. 1-13
Adjustable headrests ............................................... 1-14
Adjusting seat forward and rearward ........................ 1-13
Adjusting seatback angle ........................................ 1-14
Lumbar support control ............................................ 1-16
Seat cushion height adjustment .............................. 1-16Seat warmer
............................................................ 1-16
Fuel Capacity ................................................................... 9-2
Gauge ...................................................................... 1-50
Recommendations .................................................... 1-2
Fuel Filler Lid Remote release ....................................................... 1-74
Fuse Panel Description .............................................. 6-37
Fuses ......................................................................... 6-21
G
General Everyday Checks ..... ...................................... 6-5
Glove box ................................................................... 1-69
H Hazard Warning System ............................................. 1-61
Headlight Leveling Device S ystem .............................1-64
Heating and Air Conditioning Control Rotary type .............................................................. 1-84
Automatic type ........................................................ 1-93
High-mounted rear stoplight .. ......................................1-72
Hood Release ............................................................. 1-73
Horn ............................................................................ 1-78
I Ignition Switch ............................................................. 2-4
Immobilizer System ..................................................... 1-4
Instrument Cluster and Indicator Lights ...................... 1-42
Instrument Panel Light Control (Rheostat) .................. 1-62
Intermittent Wiper ....................................................... 1-59
Page 267 of 487

F9
CAUTION:
When installing a container of liquid air freshener inside the vehicle, do not place it near the instrument cluster nor on the instrument panel surface. If there is any leakage from the air freshener onto these areas (Instrument cluster, instrument panel or air ventilator), it may damage these parts. If the liquid from the air freshener does leak onto these areas, wash themwith water immediately.
!
1. Passenger's Air Bag (Not all models)
2. Rear Fog Light Switch
3. Outside Temperature Switch
4. Hazard Warning Switch
5. Digital Clock
6. Front Fog Light Switch
7. Windscreen Wiper/Washer Switch
8. Horn and Driver's Airbag
9. Ignition Switch
10. Multi-Function Light Switch
11. Glove Box
12. Cigar Lighter
13. Front Seat Warmer (Not all models)
14. Shift Lever
15. Parking Brake Lever
16. Ashtray
17. Heating/Air Conditioning Control Panel
18. Steering Wheel Tilt Lever
19. Bonnet Release Lever
20. Fuse and Relay Box
Page 301 of 487
1
CONTROLS AND EQUIPMENT
33
!
The purpose of the SRS is to provide the vehicle's driver or the front passen-ger with additional protection than that offered by the seat belt system alone, in case of a frontal impact of sufficientseverity. NOTE: Be sure to read information about the SRS on the labels provided onthe front side of the sun visor.
WARNING:
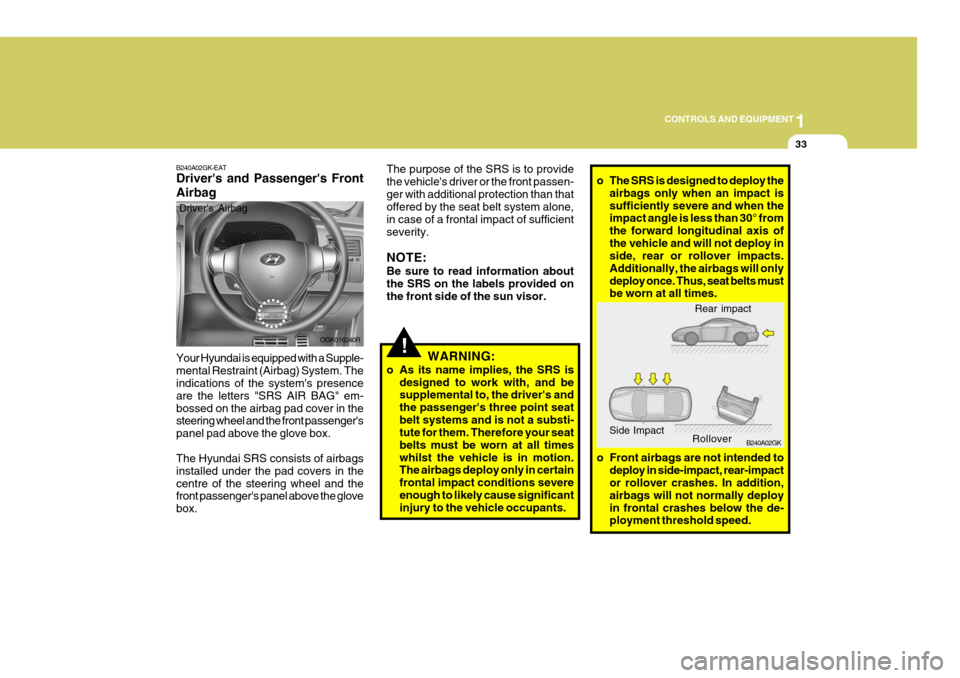
o As its name implies, the SRS is designed to work with, and be supplemental to, the driver's and the passenger's three point seatbelt systems and is not a substi- tute for them. Therefore your seat belts must be worn at all timeswhilst the vehicle is in motion. The airbags deploy only in certain frontal impact conditions severeenough to likely cause significant injury to the vehicle occupants.o The SRS is designed to deploy theairbags only when an impact is sufficiently severe and when the impact angle is less than 30° from the forward longitudinal axis ofthe vehicle and will not deploy in side, rear or rollover impacts. Additionally, the airbags will onlydeploy once. Thus, seat belts must be worn at all times.
o Front airbags are not intended to deploy in side-impact, rear-impactor rollover crashes. In addition, airbags will not normally deployin frontal crashes below the de- ployment threshold speed. Rear impact
B240A02GK
Side Impact
Rollover
B240A02GK-EAT Driver's and Passenger's Front Airbag Your Hyundai is equipped with a Supple- mental Restraint (Airbag) System. The indications of the system's presence are the letters "SRS AIR BAG" em-bossed on the airbag pad cover in the steering wheel and the front passenger's panel pad above the glove box. The Hyundai SRS consists of airbags installed under the pad covers in thecentre of the steering wheel and the front passenger's panel above the glove box.Driver's Airbag
OGK016240R
Page 302 of 487
1CONTROLS AND EQUIPMENT
34
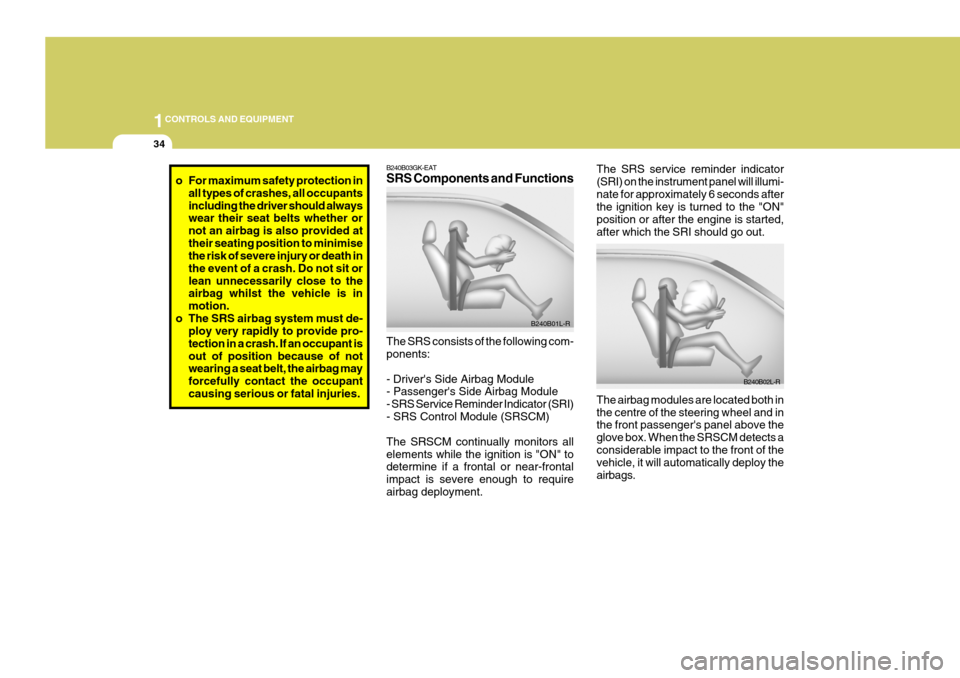
The SRS service reminder indicator (SRI) on the instrument panel will illumi-nate for approximately 6 seconds after the ignition key is turned to the "ON" position or after the engine is started,after which the SRI should go out. The airbag modules are located both in the centre of the steering wheel and in the front passenger's panel above the glove box. When the SRSCM detects aconsiderable impact to the front of the vehicle, it will automatically deploy the airbags. B240B02L-RB240B03GK-EAT SRS Components and Functions The SRS consists of the following com- ponents: - Driver's Side Airbag Module - Passenger's Side Airbag Module - SRS Service Reminder Indicator (SRI)- SRS Control Module (SRSCM) The SRSCM continually monitors all elements while the ignition is "ON" to determine if a frontal or near-frontal impact is severe enough to requireairbag deployment.B240B01L-R
o For maximum safety protection in
all types of crashes, all occupants including the driver should always wear their seat belts whether or not an airbag is also provided attheir seating position to minimise the risk of severe injury or death in the event of a crash. Do not sit orlean unnecessarily close to the airbag whilst the vehicle is in motion.
o The SRS airbag system must de- ploy very rapidly to provide pro-tection in a crash. If an occupant isout of position because of not wearing a seat belt, the airbag may forcefully contact the occupantcausing serious or fatal injuries.