turn signal Hyundai Coupe 2007 Owner's Guide
[x] Cancel search | Manufacturer: HYUNDAI, Model Year: 2007, Model line: Coupe, Model: Hyundai Coupe 2007Pages: 487, PDF Size: 12.96 MB
Page 276 of 487
1CONTROLS AND EQUIPMENT
8
!
B070B02GK-EAT Armed Stage Park the car and stop the engine. Arm the system as described below.
1) Remove the ignition key from the
ignition switch.
2) Make sure that the engine bonnet,
doors and hatchback door are closed.
3) Lock the doors using the transmitter
of the keyless entry system.
After completion of the steps above, the turn signal lamp will blink once toindicate that the system is armed. CAUTION:
Do not arm the system until all passengers have left the car. If the system is armed while apassenger(s) remains in the car, the alarm may be activated when the remaining passenger(s) leavesthe car. NOTE:
1) If any door, hatchback door or
engine bonnet remains open, the system will not be armed.
2) If this happens, rearm the system as described above.
3) Once the system is armed, only the hatchback door may be un- locked using the key without dis- arming the system.
ANTI-THEFT ALARM SYS- TEM
B070A01A-EAT (Not all models) This system is designed to provide protection from unauthorised entry intothe car. This system is operated in three stages: the first is the "Armed" stage, the second is the "Alarm" stage,and the third is the "Disarmed" stage. If triggered, the system provides an audible alarm with blinking of the turnsignal light.
NOTE:
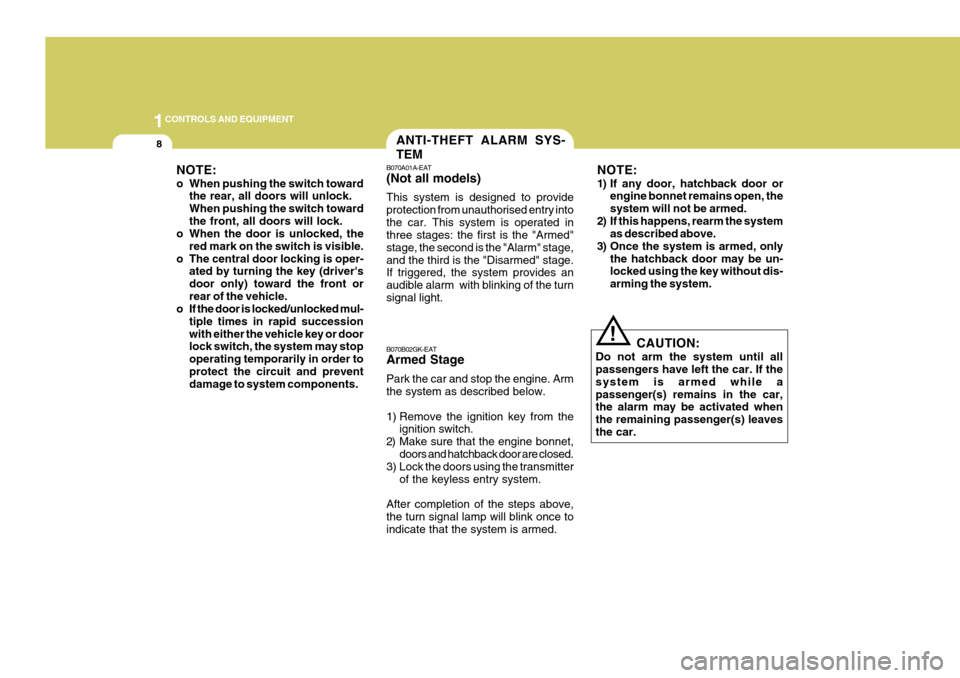
o When pushing the switch toward
the rear, all doors will unlock. When pushing the switch towardthe front, all doors will lock.
o When the door is unlocked, the
red mark on the switch is visible.
o The central door locking is oper- ated by turning the key (driver'sdoor only) toward the front orrear of the vehicle.
o If the door is locked/unlocked mul-
tiple times in rapid successionwith either the vehicle key or door lock switch, the system may stop operating temporarily in order toprotect the circuit and prevent damage to system components.
Page 277 of 487
1
CONTROLS AND EQUIPMENT
9
!
CAUTION:
Avoid trying to start the engine whilst the system is armed.
B070C02GK-EAT Alarm Stage The alarm will be activated if any of the following occur while the car is parkedand the system is armed.
1) A front door is unlocked and opened
without using the transmitter.
2) The hatchback door is opened with-
out using the key.
3) The engine bonnet is opened.The alarming horn will sound and the turn signal lights will blink continuously for approximately 27 seconds. To turn off the system, unlock the door with thetransmitter.
B070D04GK-EAT Disarmed Stage
UNLOCK
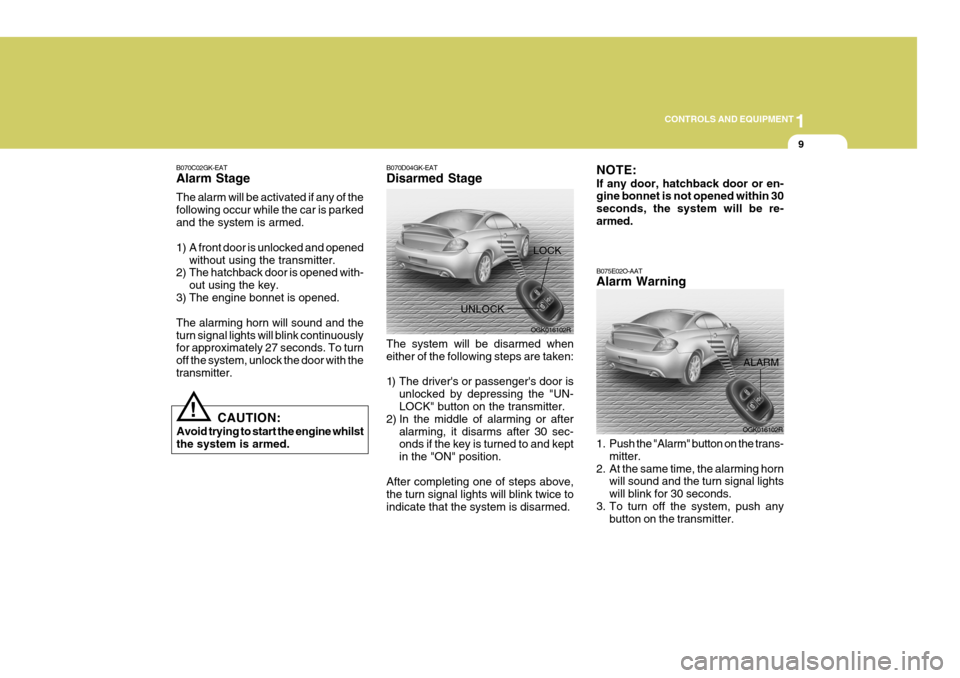
The system will be disarmed when either of the following steps are taken:
1) The driver's or passenger's door is unlocked by depressing the "UN- LOCK" button on the transmitter.
2) In the middle of alarming or after
alarming, it disarms after 30 sec-onds if the key is turned to and kept in the "ON" position.
After completing one of steps above,the turn signal lights will blink twice toindicate that the system is disarmed. OGK016102R
LOCK
B075E02O-AAT Alarm Warning
1. Push the "Alarm" button on the trans-mitter.
2. At the same time, the alarming horn will sound and the turn signal lights will blink for 30 seconds.
3. To turn off the system, push any button on the transmitter. OGK016102R
ALARMNOTE: If any door, hatchback door or en- gine bonnet is not opened within 30 seconds, the system will be re-armed.
Page 278 of 487
1CONTROLS AND EQUIPMENT
10
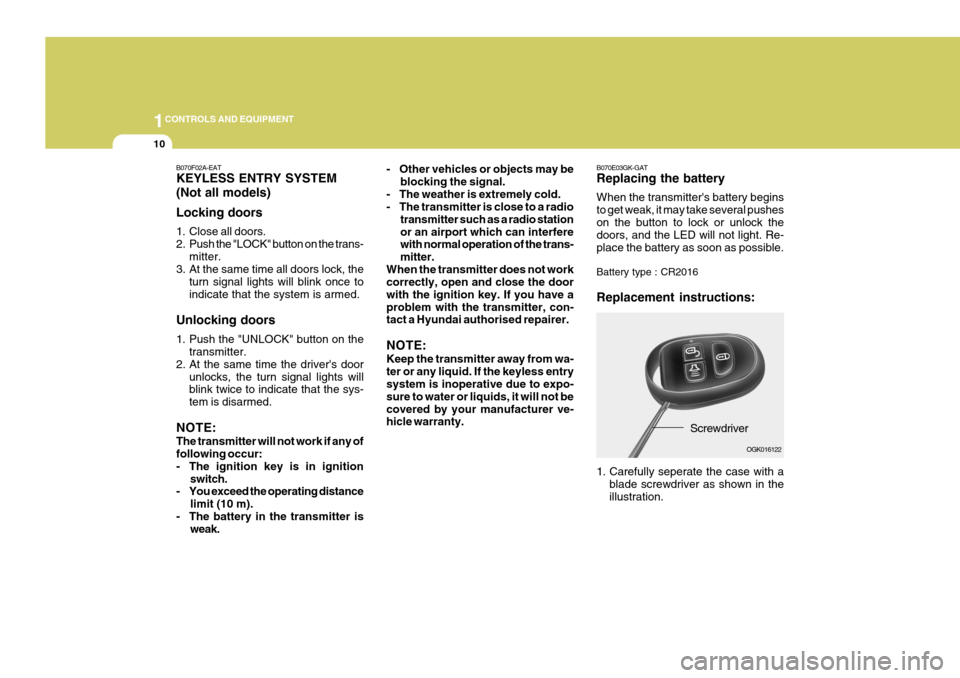
B070E03GK-GAT Replacing the battery When the transmitter's battery begins to get weak, it may take several pusheson the button to lock or unlock the doors, and the LED will not light. Re- place the battery as soon as possible. Battery type : CR2016 Replacement instructions:
Screwdriver
1. Carefully seperate the case with a blade screwdriver as shown in the illustration. OGK016122- Other vehicles or objects may be
blocking the signal.
- The weather is extremely cold.
- The transmitter is close to a radio transmitter such as a radio station or an airport which can interfere with normal operation of the trans- mitter.
When the transmitter does not work correctly, open and close the door with the ignition key. If you have aproblem with the transmitter, con- tact a Hyundai authorised repairer. NOTE: Keep the transmitter away from wa- ter or any liquid. If the keyless entry system is inoperative due to expo- sure to water or liquids, it will not becovered by your manufacturer ve- hicle warranty.
B070F02A-EAT KEYLESS ENTRY SYSTEM (Not all models) Locking doors
1. Close all doors.
2. Push the "LOCK" button on the trans-
mitter.
3. At the same time all doors lock, the
turn signal lights will blink once toindicate that the system is armed.
Unlocking doors
1. Push the "UNLOCK" button on the transmitter.
2. At the same time the driver's door
unlocks, the turn signal lights will blink twice to indicate that the sys- tem is disarmed.
NOTE: The transmitter will not work if any of following occur:
- The ignition key is in ignition switch.
- You exceed the operating distance
limit (10 m).
- The battery in the transmitter is weak.
Page 279 of 487
1
CONTROLS AND EQUIPMENT
11
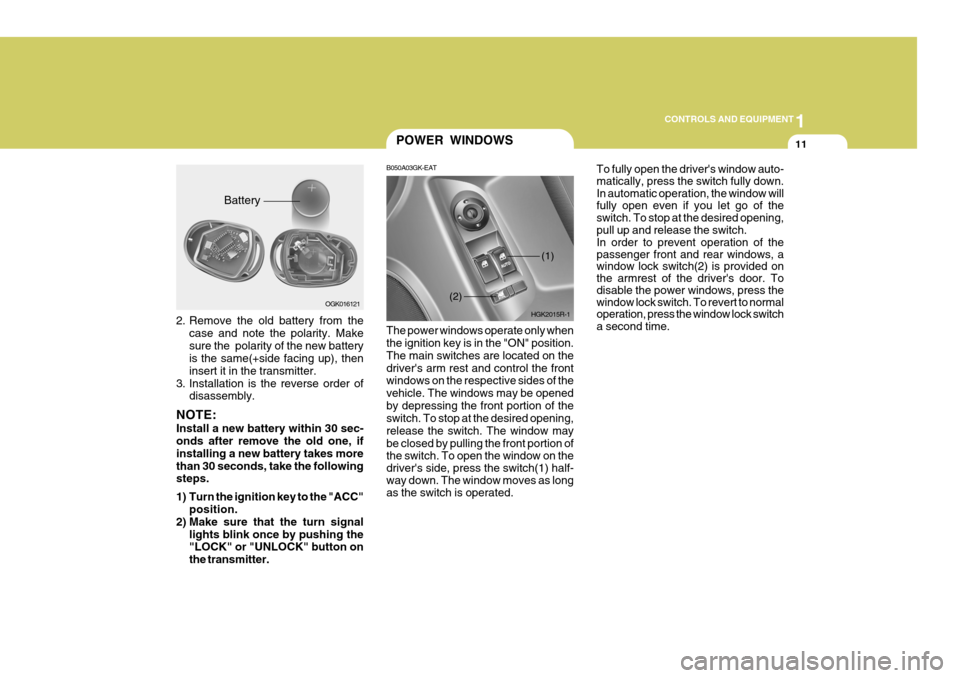
2. Remove the old battery from the
case and note the polarity. Make sure the polarity of the new battery is the same(+side facing up), then insert it in the transmitter.
3. Installation is the reverse order of disassembly.
NOTE: Install a new battery within 30 sec- onds after remove the old one, if installing a new battery takes morethan 30 seconds, take the following steps.
1) Turn the ignition key to the "ACC" position.
2) Make sure that the turn signal lights blink once by pushing the "LOCK" or "UNLOCK" button on the transmitter. Battery
OGK016121
POWER WINDOWS
B050A03GK-EAT The power windows operate only when the ignition key is in the "ON" position. The main switches are located on thedriver's arm rest and control the front windows on the respective sides of the vehicle. The windows may be openedby depressing the front portion of the switch. To stop at the desired opening, release the switch. The window maybe closed by pulling the front portion of
the switch. To open the window on the driver's side, press the switch(1) half- way down. The window moves as long as the switch is operated. To fully open the driver's window auto- matically, press the switch fully down.In automatic operation, the window willfully open even if you let go of theswitch. To stop at the desired opening, pull up and release the switch. In order to prevent operation of the passenger front and rear windows, a window lock switch(2) is provided on the armrest of the driver's door. To disable the power windows, press the window lock switch. To revert to normal operation, press the window lock switch a second time.
HGK2015R-1
(2)
(1)
Page 309 of 487

1
CONTROLS AND EQUIPMENT
41
1. Speedometer
2. Turn Signal Indicator Light
3. Odometer/Trip Odometer
4. Automatic Transaxle Position Indicator Light (Not all models)
5. Coolant Temperature Gauge
6. Trip Computer (Not all models)
7. Fuel Gauge
8. Tachometer
9. Electronic Stability Program (ESP) Indicator Light (Not all models)
10. Immobiliser Warning Light
11. Trip Odometer Reset Knob 12. Charging System Warning Light
13. SRS (Airbag) Warning Light
14. Seat Belt Warning Light
15. High Beam Indicator Light
16. Oil Pressure Warning Light
17. Malfuction Indicator Light (MIL) (Not all models)
18. Low Fuel Warning Light
19. Parking Brake/Brake Fluide Level Warning Light
20. Trip Computer Reset Knob21.CRUISE Indicator Light (Not all models)
22. CRUISE SET Indicator Light (Not all models)
23. Hatchback Door Open Warning Light
24. Door Open (Ajar) Warning Light
25. ABS Service Reminder Indicator Light (Not all models)
Page 310 of 487
1CONTROLS AND EQUIPMENT
42WARNING AND INDICATOR LIGHTS
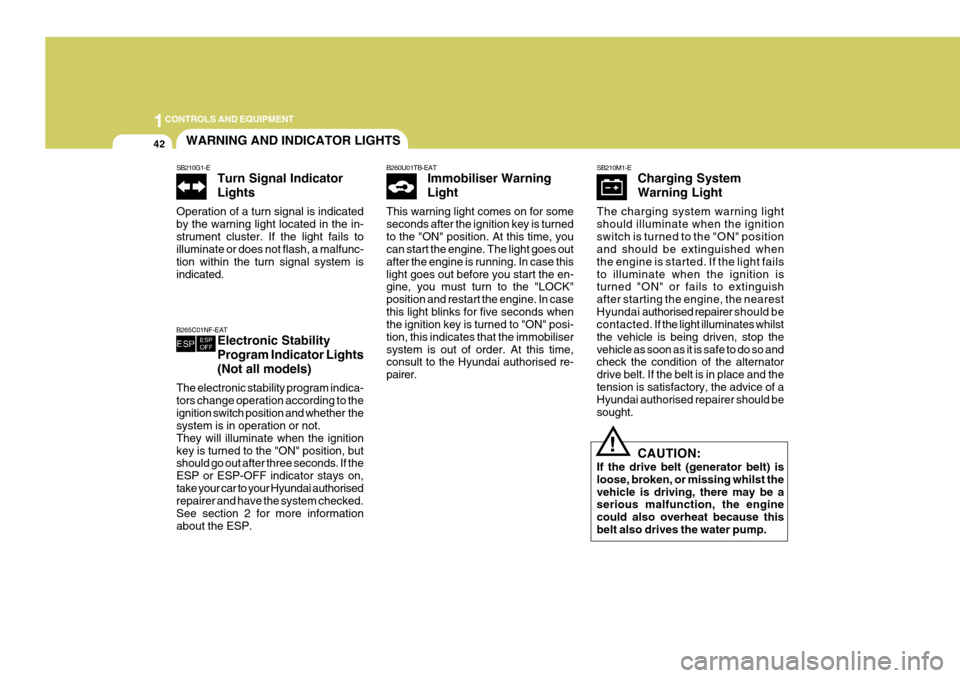
SB210G1-E Turn Signal Indicator Lights
Operation of a turn signal is indicated by the warning light located in the in-strument cluster. If the light fails to illuminate or does not flash, a malfunc- tion within the turn signal system isindicated.
B265C01NF-EAT Electronic Stability Program Indicator Lights(Not all models)
The electronic stability program indica- tors change operation according to theignition switch position and whether the system is in operation or not. They will illuminate when the ignitionkey is turned to the "ON" position, but should go out after three seconds. If the ESP or ESP-OFF indicator stays on,take your car to your Hyundai authorised repairer and have the system checked. See section 2 for more informationabout the ESP.
B260U01TB-EAT Immobiliser Warning Light
This warning light comes on for some seconds after the ignition key is turnedto the "ON" position. At this time, you can start the engine. The light goes out after the engine is running. In case thislight goes out before you start the en- gine, you must turn to the "LOCK" position and restart the engine. In casethis light blinks for five seconds when the ignition key is turned to "ON" posi- tion, this indicates that the immobilisersystem is out of order. At this time, consult to the Hyundai authorised re- pairer.SB210M1-E Charging System Warning Light
The charging system warning light should illuminate when the ignitionswitch is turned to the "ON" position and should be extinguished when the engine is started. If the light failsto illuminate when the ignition is turned "ON" or fails to extinguish after starting the engine, the nearestHyundai authorised repairer should be
contacted. If the light illuminates whilst
the vehicle is being driven, stop thevehicle as soon as it is safe to do so and check the condition of the alternator drive belt. If the belt is in place and thetension is satisfactory, the advice of a Hyundai authorised repairer should be sought.
CAUTION:
If the drive belt (generator belt) is loose, broken, or missing whilst thevehicle is driving, there may be a serious malfunction, the engine could also overheat because thisbelt also drives the water pump.!
Page 320 of 487
1CONTROLS AND EQUIPMENT
52
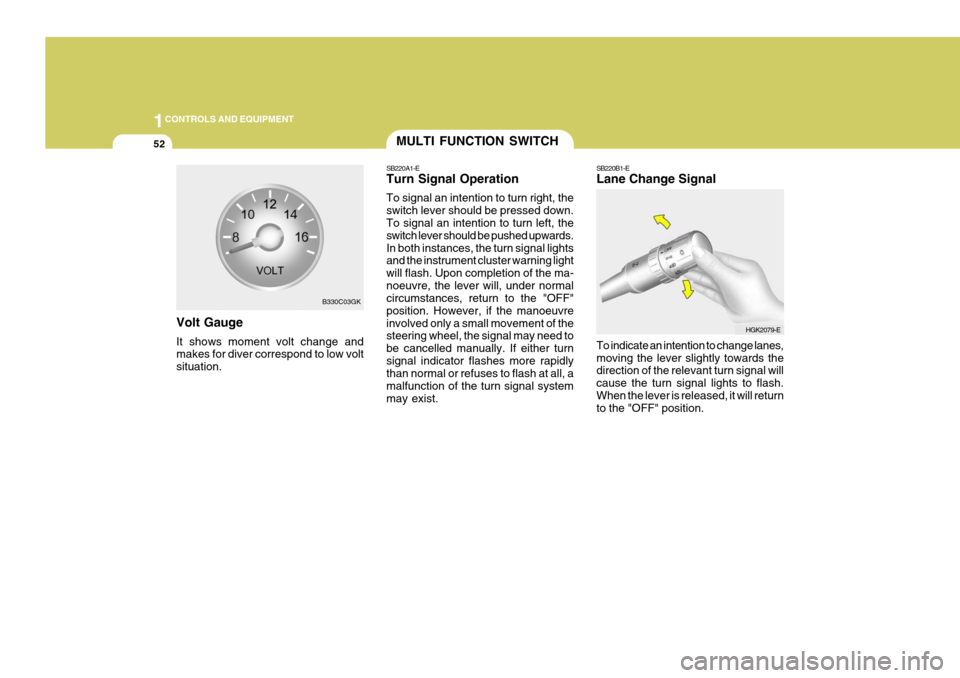
Volt Gauge It shows moment volt change and makes for diver correspond to low volt situation.
B330C03GK
MULTI FUNCTION SWITCH
SB220A1-E Turn Signal Operation To signal an intention to turn right, the switch lever should be pressed down. To signal an intention to turn left, the switch lever should be pushed upwards.In both instances, the turn signal lights and the instrument cluster warning light will flash. Upon completion of the ma-noeuvre, the lever will, under normal circumstances, return to the "OFF" position. However, if the manoeuvreinvolved only a small movement of the steering wheel, the signal may need to be cancelled manually. If either turnsignal indicator flashes more rapidly than normal or refuses to flash at all, a malfunction of the turn signal systemmay exist. SB220B1-E Lane Change Signal To indicate an intention to change lanes, moving the lever slightly towards the direction of the relevant turn signal will cause the turn signal lights to flash.When the lever is released, it will return to the "OFF" position.
HGK2079-E
Page 321 of 487
1
CONTROLS AND EQUIPMENT
53
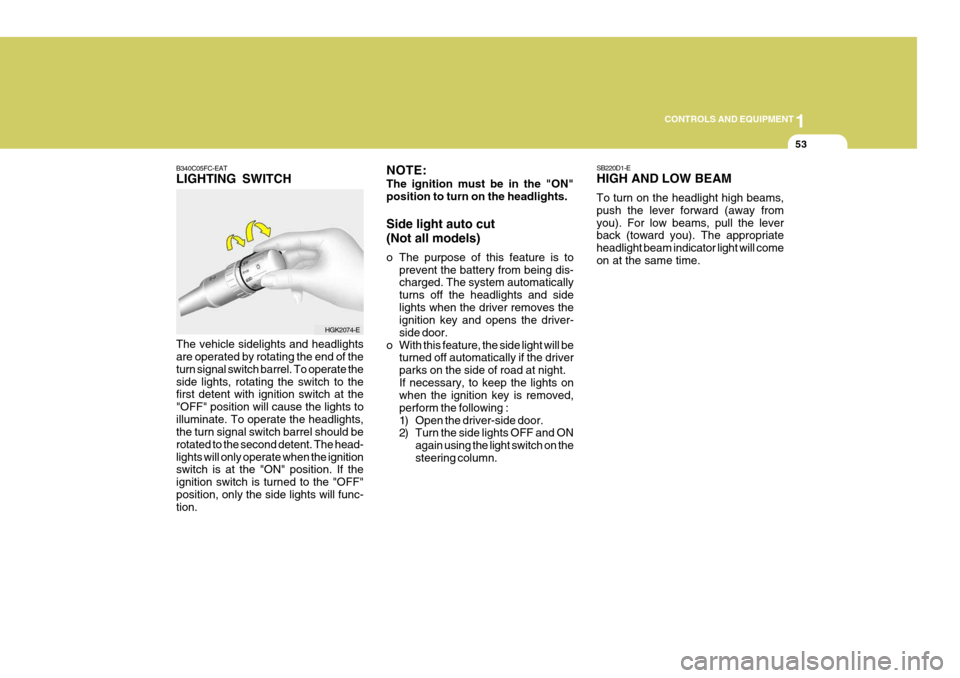
B340C05FC-EAT LIGHTING SWITCH The vehicle sidelights and headlights are operated by rotating the end of the turn signal switch barrel. To operate theside lights, rotating the switch to the first detent with ignition switch at the "OFF" position will cause the lights toilluminate. To operate the headlights, the turn signal switch barrel should be rotated to the second detent. The head-lights will only operate when the ignition switch is at the "ON" position. If the ignition switch is turned to the "OFF"position, only the side lights will func- tion.
HGK2074-E SB220D1-E HIGH AND LOW BEAM To turn on the headlight high beams, push the lever forward (away fromyou). For low beams, pull the lever back (toward you). The appropriate headlight beam indicator light will comeon at the same time.
NOTE: The ignition must be in the "ON" position to turn on the headlights. Side light auto cut (Not all models)
o The purpose of this feature is to
prevent the battery from being dis- charged. The system automatically turns off the headlights and sidelights when the driver removes the ignition key and opens the driver- side door.
o With this feature, the side light will be turned off automatically if the driverparks on the side of road at night.If necessary, to keep the lights on when the ignition key is removed, perform the following :
1) Open the driver-side door.
2) Turn the side lights OFF and ON
again using the light switch on the steering column.
Page 322 of 487
1CONTROLS AND EQUIPMENT
54
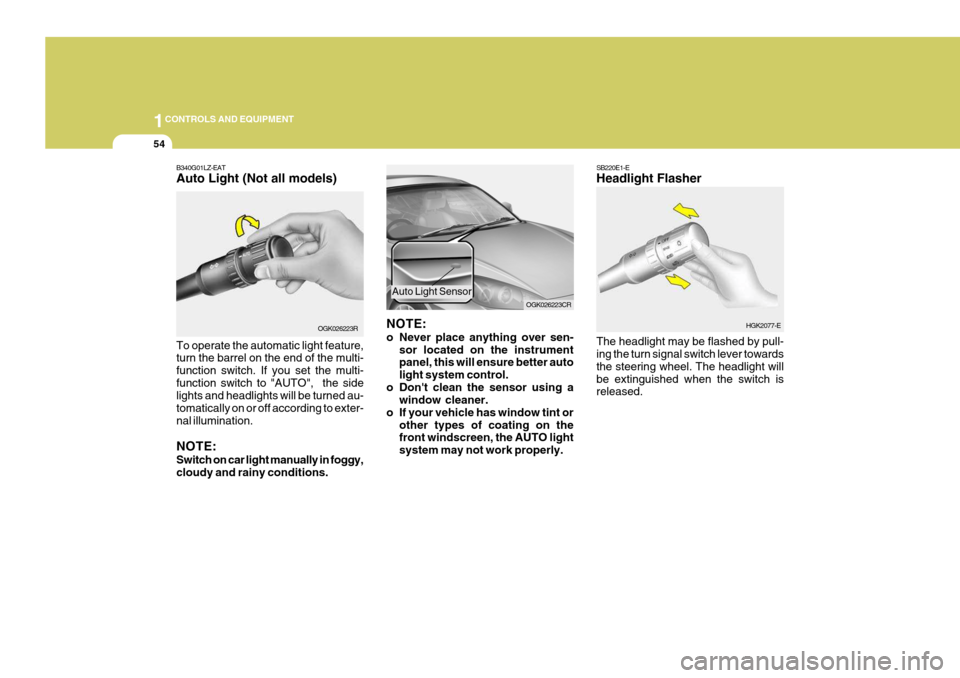
B340G01LZ-EAT Auto Light (Not all models) To operate the automatic light feature, turn the barrel on the end of the multi- function switch. If you set the multi-function switch to "AUTO", the side lights and headlights will be turned au- tomatically on or off according to exter-nal illumination. NOTE: Switch on car light manually in foggy, cloudy and rainy conditions. OGK026223R
NOTE:
o Never place anything over sen-
sor located on the instrument panel, this will ensure better auto light system control.
o Don't clean the sensor using a window cleaner.
o If your vehicle has window tint or other types of coating on the front windscreen, the AUTO light system may not work properly. OGK026223CR
Auto Light Sensor
SB220E1-E Headlight Flasher The headlight may be flashed by pull- ing the turn signal switch lever towards the steering wheel. The headlight willbe extinguished when the switch is released.
HGK2077-E
Page 327 of 487
1
CONTROLS AND EQUIPMENT
59HAZARD WARNING SYS- TEM
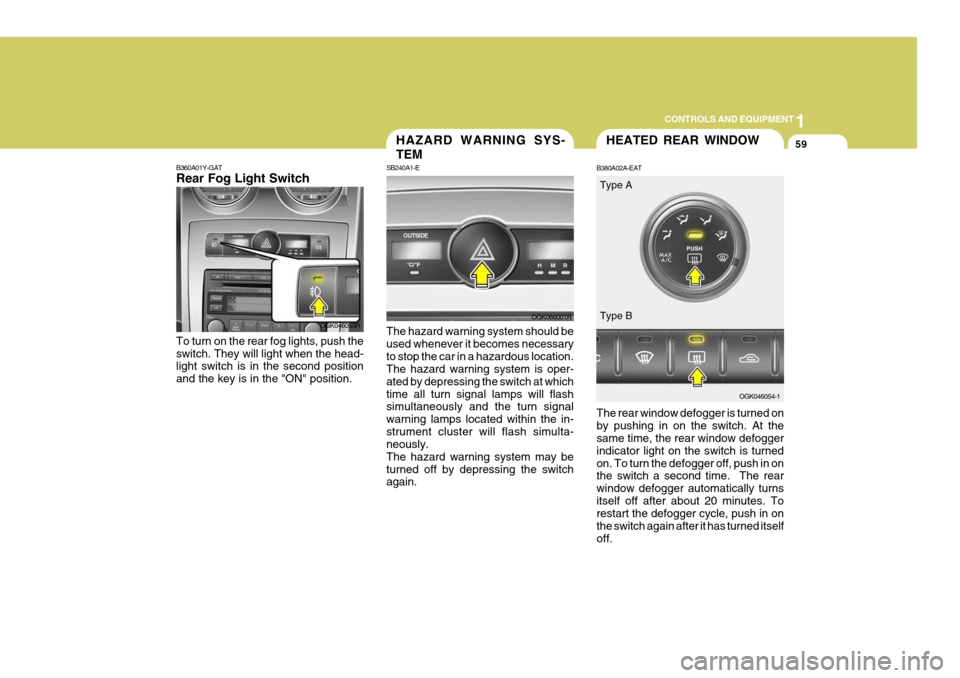
SB240A1-E The hazard warning system should be used whenever it becomes necessaryto stop the car in a hazardous location. The hazard warning system is oper- ated by depressing the switch at whichtime all turn signal lamps will flash simultaneously and the turn signal warning lamps located within the in-strument cluster will flash simulta- neously. The hazard warning system may beturned off by depressing the switch again.
OGK066001R
HEATED REAR WINDOW
B380A02A-EAT The rear window defogger is turned on by pushing in on the switch. At the same time, the rear window defogger indicator light on the switch is turnedon. To turn the defogger off, push in on the switch a second time. The rear window defogger automatically turnsitself off after about 20 minutes. To restart the defogger cycle, push in on the switch again after it has turned itselfoff. OGK046054-1
OGK046053R
B360A01Y-GAT Rear Fog Light Switch To turn on the rear fog lights, push the switch. They will light when the head- light switch is in the second position and the key is in the "ON" position. Type A Type B