change time HYUNDAI COUPE 2012 Owners Manual
[x] Cancel search | Manufacturer: HYUNDAI, Model Year: 2012, Model line: COUPE, Model: HYUNDAI COUPE 2012Pages: 391, PDF Size: 6.88 MB
Page 1 of 391
OWNER'S MANUAL
Operation
Maintenance
Specifications
All information in this Owner's Manual is current at the time of publication.
However, Hyundai reserves the right to make changes at any time so that
our policy of continual product improvement may be carried out.
This manual applies to all Hyundai models and includes descriptions and
explanations of optional as well as standard equipment. As a result, you
may find material in this manual that does not apply to your specific vehi-
cle.
procarmanuals.com
Page 24 of 391
35
Safety features of your vehicle
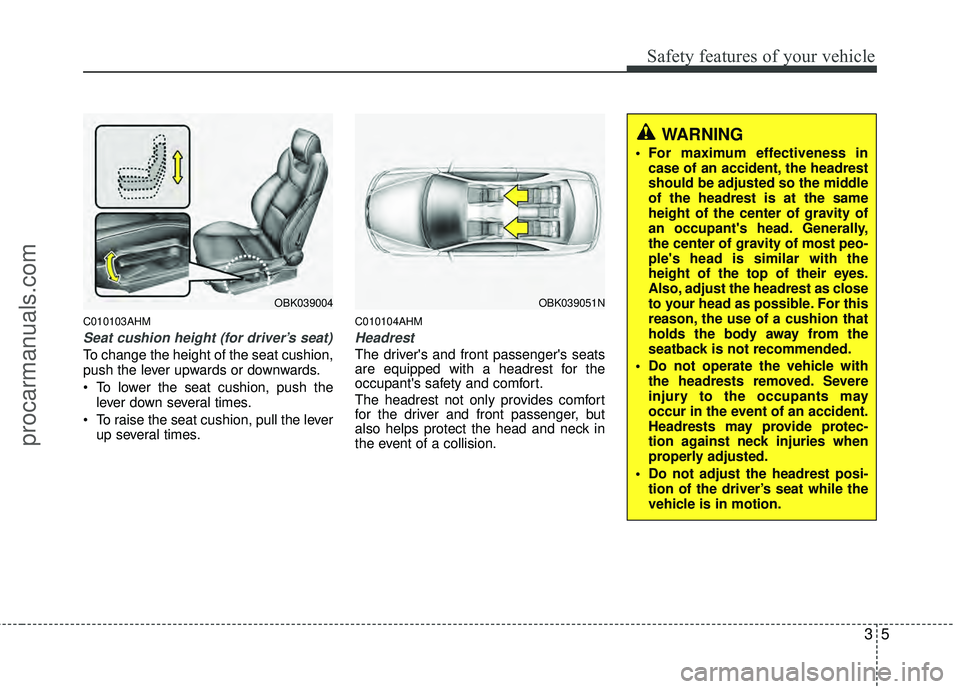
C010103AHM
Seat cushion height (for driver’s seat)
To change the height of the seat cushion,
push the lever upwards or downwards.
• To lower the seat cushion, push thelever down several times.
To raise the seat cushion, pull the lever up several times.
C010104AHM
Headrest
The driver's and front passenger's seats
are equipped with a headrest for the
occupant's safety and comfort.
The headrest not only provides comfort
for the driver and front passenger, but
also helps protect the head and neck in
the event of a collision.
OBK039004OBK039051N
WARNING
For maximum effectiveness incase of an accident, the headrest
should be adjusted so the middle
of the headrest is at the same
height of the center of gravity of
an occupant's head. Generally,
the center of gravity of most peo-
ple's head is similar with the
height of the top of their eyes.
Also, adjust the headrest as close
to your head as possible. For this
reason, the use of a cushion that
holds the body away from the
seatback is not recommended.
Do not operate the vehicle with the headrests removed. Severe
injury to the occupants may
occur in the event of an accident.
Headrests may provide protec-
tion against neck injuries when
properly adjusted.
Do not adjust the headrest posi- tion of the driver’s seat while the
vehicle is in motion.
procarmanuals.com
Page 84 of 391
47
Features of your vehicle
D040102BBK-EU
Unlocking
Pressing the button of the driver’s out-
side door handle with all doors closed
and locked, unlocks the driver’s door. The
hazard warning lights blink and the
chime sounds twice to indicate that the
driver’s door is unlocked. All doors are
unlocked if the button is pressed once
more within 4 seconds. The hazard warn-
ing lights will blink and the chime will
sound twice to indicate that all doors are
unlocked.
Pressing the button of the front passen-
ger’s outside door handle with all doors
closed and locked, unlocks all doors. The
hazard warning lights blink and the
chime sounds once to indicate that all
doors are unlocked. The button will only
operate when the smart key is within
28~40 in. (0.7~1 m) from the outside
door handle.
When the smart key is recognized in the
area of 28~40 in. (0.7~1 m) from the front
outside door handle, other people can
also open the doors without possession
of the smart key.The unlock mode is changed alter-
nately by pressing the lock button and
unlock button on the smart key at the
same time for 4 seconds or more. The
hazard warning lights will blink four
times to indicate that the mode con-
version is completed.
D040104ABH
Start-up
You can start the engine without inserting
the key. For detailed information refer to
the “Engine start/stop button” in section
5.
D040300AEN-EU
Smart key precautions
✽ ✽
NOTICE
• If, for some reason, you happen to lose
your smart key, you will not be able to
start the engine. Tow the vehicle, if
necessary, and contact an authorized
HYUNDAI dealer.
• A maximum of 2 smart keys can be registered to a single vehicle. If you
lose a smart key, you should immedi-
ately take the vehicle and key to your
authorized HYUNDAI dealer to pro-
tect it from potential theft.
• The smart key will not work if any of following occur:
- The smart key is close to a radiotransmitter such as a radio station or
an airport which can interfere with
normal operation of the smart key.
- You keep the smart key near a mobile two-way radio system or a
cellular phone.
- Another vehicle’s smart key is being operated close to your vehicle.
When the smart key does not work
correctly, open and close the door with
the mechanical key. If you have a
problem with the smart key, contact
an authorized HYUNDAI dealer.
procarmanuals.com
Page 87 of 391
Features of your vehicle
10
4
Remote keyless entry system
operations
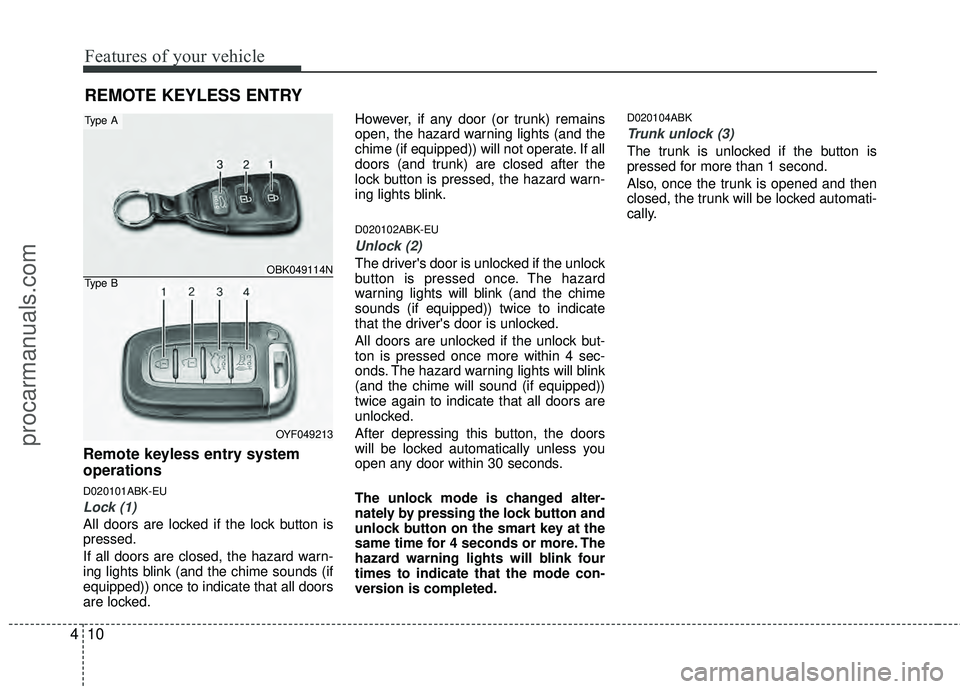
D020101ABK-EU
Lock (1)
All doors are locked if the lock button is
pressed.
If all doors are closed, the hazard warn-
ing lights blink (and the chime sounds (if
equipped)) once to indicate that all doors
are locked. However, if any door (or trunk) remains
open, the hazard warning lights (and the
chime (if equipped)) will not operate. If all
doors (and trunk) are closed after the
lock button is pressed, the hazard warn-
ing lights blink.
D020102ABK-EU
Unlock (2)
The driver's door is unlocked if the unlock
button is pressed once. The hazard
warning lights will blink (and the chime
sounds (if equipped)) twice to indicate
that the driver's door is unlocked.
All doors are unlocked if the unlock but-
ton is pressed once more within 4 sec-
onds. The hazard warning lights will blink
(and the chime will sound (if equipped))
twice again to indicate that all doors are
unlocked.
After depressing this button, the doors
will be locked automatically unless you
open any door within 30 seconds.
The unlock mode is changed alter-
nately by pressing the lock button and
unlock button on the smart key at the
same time for 4 seconds or more. The
hazard warning lights will blink four
times to indicate that the mode con-
version is completed.
D020104ABK
Trunk unlock (3)
The trunk is unlocked if the button is
pressed for more than 1 second.
Also, once the trunk is opened and then
closed, the trunk will be locked automati-
cally.
REMOTE KEYLESS ENTRY
OBK049114N
OYF049213
Type A
Type B
procarmanuals.com
Page 116 of 391
439
Features of your vehicle
Erasing HomeLink®buttons
Individual buttons cannot be erased.
However, to erase all three programmed
buttons:
1. Press and hold the two outer HomeLink
®buttons until the indicator
light begins to flash-after 20 seconds.
2. Release both buttons. Do not hold for longer than 30 seconds.
The Integrated HomeLink
®Wireless
Control System is now in the training
(learn) mode and can be programmed at
any time following the appropriate steps
in the Programming sections above. FCC ID: NZLZTVHL3
IC: 4112A-ZTVHL3
This device complies with Part 15 of
the FCC Rules.
Operation is subject to the following two
conditions:
1. this device may not cause harmful
interference, and
2. This device must accept any interfer- ence received, including interference
that may cause undesired operation.
NVS
®is a registered trademark and Z-
Nav™ is a trademark of the Gentex
Corporation, Zeeland, Michigan.
HomeLink
®is a registered trademark
owned by Johnson Controls,
Incorporated, Milwaukee, Wisconsin.
D140200AUN-EU
Outside rearview mirror
Be sure to adjust mirror angles before
driving.
Your vehicle is equipped with both left-
hand and right-hand outside rearview
mirrors. The mirrors can be adjusted
remotely with the remote switch. The mir-
ror heads can be folded back to prevent
damage during an automatic car wash or
when passing in a narrow street.
WARNING
The transceiver has been tested
and complies with FCC and
Industry Canada rules. Changes or
modifications not expressly
approved by the party responsible
for compliance could void the
user's authority to operate the
device.
WARNING - Rearview mir-
rors
The right outside rearview mirror is convex. Objects seen in the
mirror are closer than they
appear.
Use your interior rearview mirror or direct observation to deter-
mine the actual distance of fol-
lowing vehicles when changing
lanes.
procarmanuals.com
Page 154 of 391
477
Features of your vehicle
Air conditioning system operation tips
If the vehicle has been parked in directsunlight during hot weather, open the
windows for a short time to let the hot
air inside the vehicle escape.
To help reduce moisture inside of the windows on rainy or humid days,
decrease the humidity inside the vehi-
cle by operating the air conditioning
system.
During air conditioning system opera- tion, you may occasionally notice a
slight change in engine speed as the
air conditioning compressor cycles.
This is a normal system operation
characteristic.
Use the air conditioning system every month, even if only for a few minutes,
to ensure maximum system perform-
ance. When using the air conditioning sys-
tem, you may notice clear water drip-
ping (or even puddling) on the ground
under the passenger side of the vehi-
cle. This is a normal system operation
characteristic.
Operating the air conditioning system in the recirculated air position provides
maximum cooling, however, continual
operation in this mode may cause the
air inside the vehicle to become stale.
During cooling operation, you may occasionally notice a misty air flow
because of rapid cooling and humid air
intake. This is a normal system opera-
tion characteristic.
D230300BEN
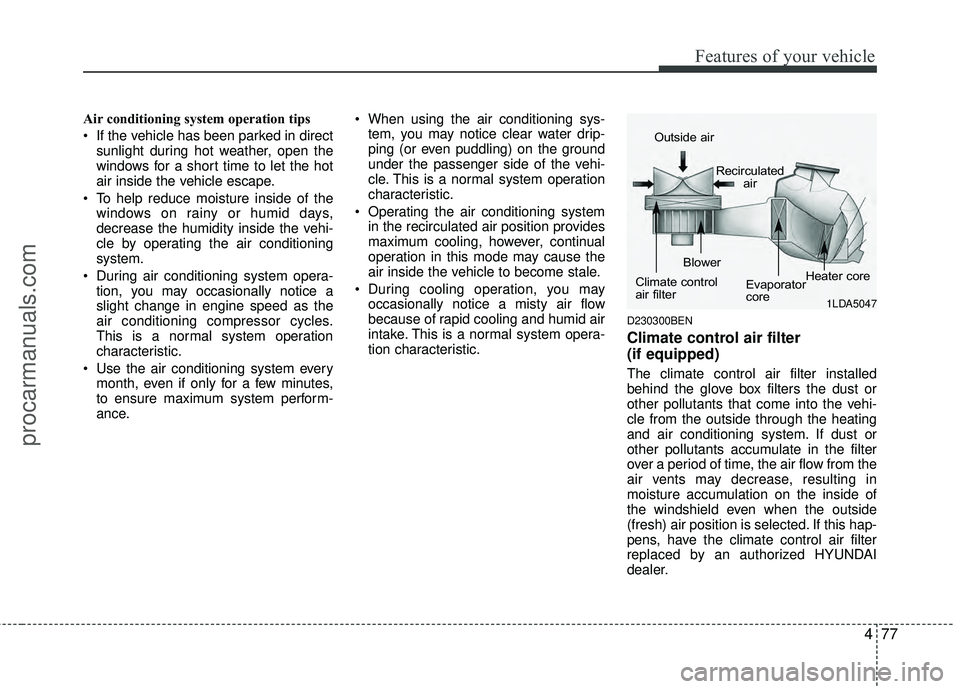
Climate control air filter
(if equipped)
The climate control air filter installed
behind the glove box filters the dust or
other pollutants that come into the vehi-
cle from the outside through the heating
and air conditioning system. If dust or
other pollutants accumulate in the filter
over a period of time, the air flow from the
air vents may decrease, resulting in
moisture accumulation on the inside of
the windshield even when the outside
(fresh) air position is selected. If this hap-
pens, have the climate control air filter
replaced by an authorized HYUNDAI
dealer.
1LDA5047
Outside air
Recirculatedair
Climate control
air filter Blower
Evaporator
coreHeater core
procarmanuals.com
Page 163 of 391
Features of your vehicle
86
4
D230503AEN
Air conditioning (if equipped)
All HYUNDAI Air Conditioning Systems
are filled with environmentally friendly
R-134a refrigerant which does not dam-
age the ozone layer.
1. Start the engine. Push the air condi-
tioning button.
2. Set the mode to the position.
3. Set the air intake control to the outside air or recirculated air position.
4. Adjust the fan speed control and tem- perature control to maintain maximum
comfort.
✽ ✽NOTICE
• When using the air conditioning sys-
tem, monitor the temperature gauge
closely while driving up hills or in
heavy traffic when outside tempera-
tures are high. Air conditioning sys-
tem operation may cause engine over-
heating. Continue to use the blower
fan but turn the air conditioning sys-
tem off if the temperature gauge indi-
cates engine overheating.
• When opening the windows in humid weather air conditioning may create
water droplets inside the vehicle.
Since excessive water droplets may
cause damage to electrical equipment,
air conditioning should only be run
with the windows closed.
Air conditioning system operation tips
If the vehicle has been parked in direct
sunlight during hot weather, open the
windows for a short time to let the hot
air inside the vehicle escape.
To help reduce moisture inside of the windows on rainy or humid days,
decrease the humidity inside the vehi-
cle by operating the air conditioning
system.
During air conditioning system opera- tion, you may occasionally notice a
slight change in engine speed as the
air conditioning compressor cycles.
This is a normal system operation
characteristic.
Use the air conditioning system every month, even if only for a few minutes,
to ensure maximum system perform-
ance.
procarmanuals.com
Page 164 of 391
487
Features of your vehicle
When using the air conditioning sys-tem, you may notice clear water drip-
ping (or even puddling) on the ground
under the passenger side of the vehi-
cle. This is a normal system operation
characteristic.
Operating the air conditioning system in the recirculated air position provides
maximum cooling, however, continual
operation in this mode may cause the
air inside the vehicle to become stale.
During cooling operation, you may occasionally notice a misty air flow
because of rapid cooling and humid air
intake. This is a normal system opera-
tion characteristics.
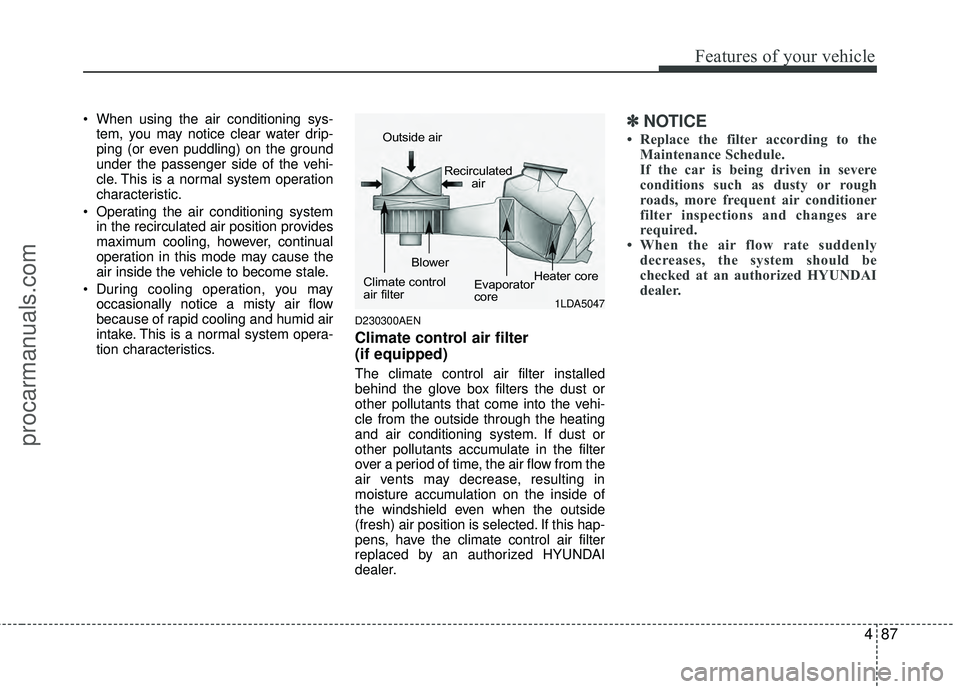
D230300AEN
Climate control air filter
(if equipped)
The climate control air filter installed
behind the glove box filters the dust or
other pollutants that come into the vehi-
cle from the outside through the heating
and air conditioning system. If dust or
other pollutants accumulate in the filter
over a period of time, the air flow from the
air vents may decrease, resulting in
moisture accumulation on the inside of
the windshield even when the outside
(fresh) air position is selected. If this hap-
pens, have the climate control air filter
replaced by an authorized HYUNDAI
dealer.
✽ ✽ NOTICE
• Replace the filter according to the
Maintenance Schedule.
If the car is being driven in severe
conditions such as dusty or rough
roads, more frequent air conditioner
filter inspections and changes are
required.
• When the air flow rate suddenly decreases, the system should be
checked at an authorized HYUNDAI
dealer.
1LDA5047
Outside air
Recirculatedair
Climate control
air filter Blower
Evaporator
coreHeater core
procarmanuals.com
Page 173 of 391
Features of your vehicle
96
4
D280600AEN
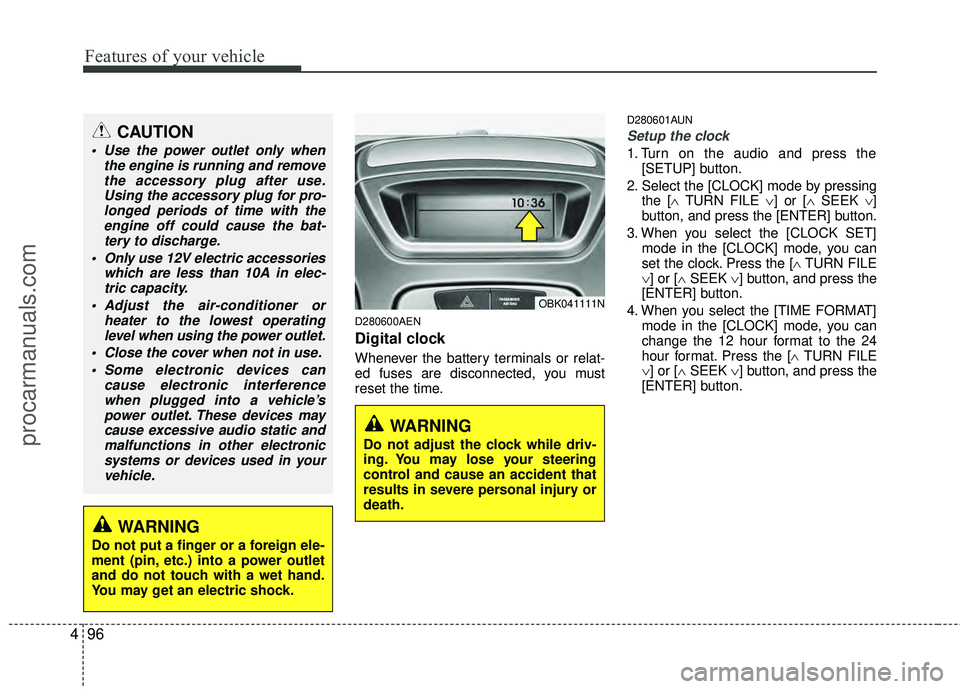
Digital clock
Whenever the battery terminals or relat-
ed fuses are disconnected, you must
reset the time.
D280601AUN
Setup the clock
1. Turn on the audio and press the
[SETUP] button.
2. Select the [CLOCK] mode by pressing the [∧ TURN FILE ∨] or [∧ SEEK ∨]
button, and press the [ENTER] button.
3. When you select the [CLOCK SET] mode in the [CLOCK] mode, you can
set the clock. Press the [∧ TURN FILE
∨] or [∧ SEEK ∨] button, and press the
[ENTER] button.
4. When you select the [TIME FORMAT] mode in the [CLOCK] mode, you can
change the 12 hour format to the 24
hour format. Press the [∧ TURN FILE
∨] or [∧ SEEK ∨] button, and press the
[ENTER] button.
OBK041111N
CAUTION
Use the power outlet only when the engine is running and removethe accessory plug after use.Using the accessory plug for pro-longed periods of time with the engine off could cause the bat-tery to discharge.
Only use 12V electric accessories which are less than 10A in elec-tric capacity.
Adjust the air-conditioner or heater to the lowest operatinglevel when using the power outlet.
Close the cover when not in use. Some electronic devices can cause electronic interferencewhen plugged into a vehicle’spower outlet. These devices maycause excessive audio static andmalfunctions in other electronicsystems or devices used in yourvehicle.
WARNING
Do not adjust the clock while driv-
ing. You may lose your steering
control and cause an accident that
results in severe personal injury or
death.
WARNING
Do not put a finger or a foreign ele-
ment (pin, etc.) into a power outlet
and do not touch with a wet hand.
You may get an electric shock.
procarmanuals.com
Page 183 of 391
Features of your vehicle
106
4
Using RADIO, SET UP, VOLUME
CONTROL
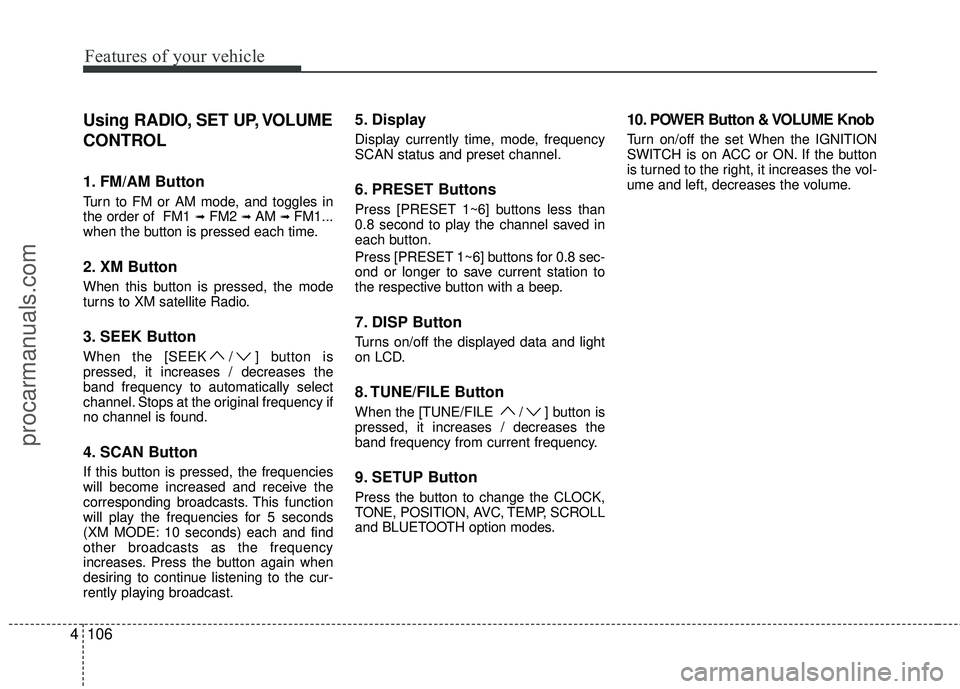
1. FM/AM Button
Turn to FM or AM mode, and toggles in
the order of FM1 ➟FM2 ➟ AM ➟ FM1...
when the button is pressed each time.
2. XM Button
When this button is pressed, the mode
turns to XM satellite Radio.
3. SEEK Button
When the [SEEK / ] button is
pressed, it increases / decreases the
band frequency to automatically select
channel. Stops at the original frequency if
no channel is found.
4. SCAN Button
If this button is pressed, the frequencies
will become increased and receive the
corresponding broadcasts. This function
will play the frequencies for 5 seconds
(XM MODE: 10 seconds) each and find
other broadcasts as the frequency
increases. Press the button again when
desiring to continue listening to the cur-
rently playing broadcast.
5. Display
Display currently time, mode, frequency
SCAN status and preset channel.
6. PRESET Buttons
Press [PRESET 1~6] buttons less than
0.8 second to play the channel saved in
each button.
Press [PRESET 1~6] buttons for 0.8 sec-
ond or longer to save current station to
the respective button with a beep.
7. DISP Button
Turns on/off the displayed data and light
on LCD.
8. TUNE/FILE Button
When the [TUNE/FILE / ] button is
pressed, it increases / decreases the
band frequency from current frequency.
9. SETUP Button
Press the button to change the CLOCK,
TONE, POSITION, AVC, TEMP, SCROLL
and BLUETOOTH option modes.
10. POWER Button & VOLUME Knob
Turn on/off the set When the IGNITION
SWITCH is on ACC or ON. If the button
is turned to the right, it increases the vol-
ume and left, decreases the volume.
procarmanuals.com