brake light Hyundai Creta 2018 Owner's Manual
[x] Cancel search | Manufacturer: HYUNDAI, Model Year: 2018, Model line: Creta, Model: Hyundai Creta 2018Pages: 472, PDF Size: 11.87 MB
Page 15 of 472
1-4
Your vehicle at a glance
I IN
NT
TE
ER
RI
IO
OR
R
O
OV
VE
ER
RV
VI
IE
EW
W
(
(I
I)
)
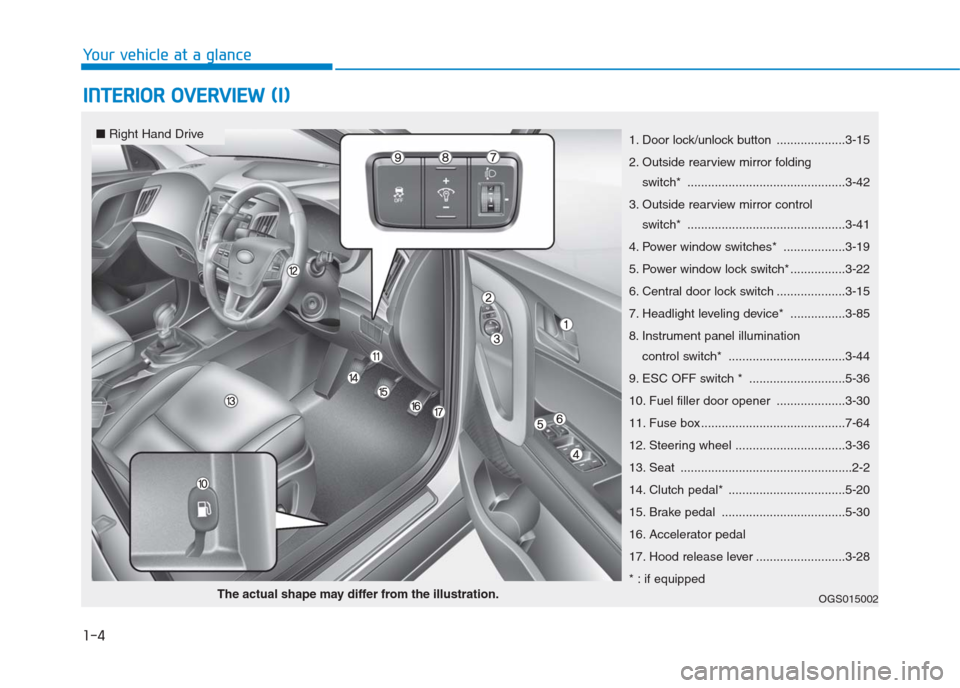
1. Door lock/unlock button ....................3-15
2. Outside rearview mirror folding
switch* ..............................................3-42
3. Outside rearview mirror control
switch* ..............................................3-41
4. Power window switches* ..................3-19
5. Power window lock switch* ................3-22
6. Central door lock switch ....................3-15
7. Headlight leveling device* ................3-85
8. Instrument panel illumination
control switch* ..................................3-44
9. ESC OFF switch * ............................5-36
10. Fuel filler door opener ....................3-30
11. Fuse box ..........................................7-64
12. Steering wheel ................................3-36
13. Seat ..................................................2-2
14. Clutch pedal* ..................................5-20
15. Brake pedal ....................................5-30
16. Accelerator pedal
17. Hood release lever ..........................3-28
* : if equipped
OGS015002The actual shape may differ from the illustration.
■Right Hand Drive
Page 16 of 472
1-5
Your vehicle at a glance
I IN
NT
TE
ER
RI
IO
OR
R
O
OV
VE
ER
RV
VI
IE
EW
W
(
(I
II
I)
)
1
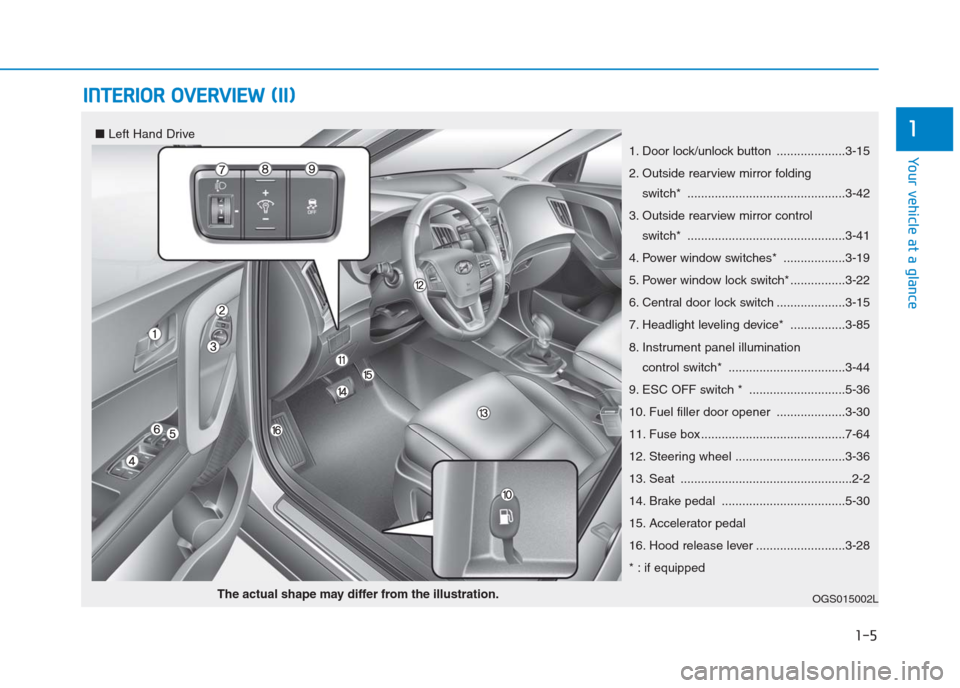
1. Door lock/unlock button ....................3-15
2. Outside rearview mirror folding
switch* ..............................................3-42
3. Outside rearview mirror control
switch* ..............................................3-41
4. Power window switches* ..................3-19
5. Power window lock switch* ................3-22
6. Central door lock switch ....................3-15
7. Headlight leveling device* ................3-85
8. Instrument panel illumination
control switch* ..................................3-44
9. ESC OFF switch * ............................5-36
10. Fuel filler door opener ....................3-30
11. Fuse box ..........................................7-64
12. Steering wheel ................................3-36
13. Seat ..................................................2-2
14. Brake pedal ....................................5-30
15. Accelerator pedal
16. Hood release lever ..........................3-28
* : if equipped
OGS015002LThe actual shape may differ from the illustration.
■Left Hand Drive
Page 113 of 472
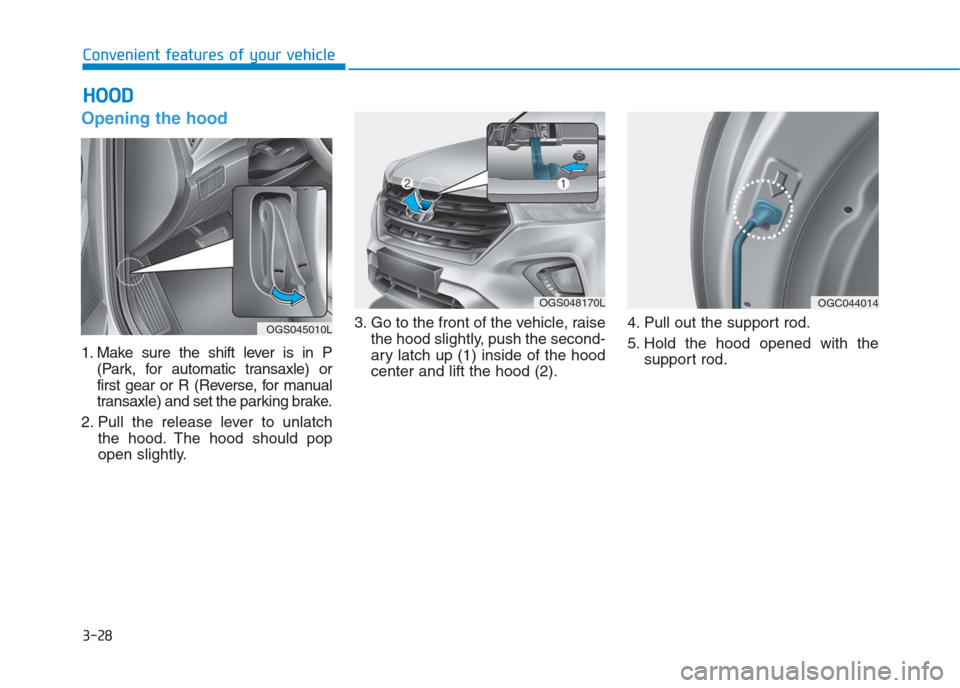
Opening the hood
1. Make sure the shift lever is in P
(Park, for automatic transaxle) or
first gear or R (Reverse, for manual
transaxle) and set the parking brake.
2. Pull the release lever to unlatch
the hood. The hood should pop
open slightly.3. Go to the front of the vehicle, raise
the hood slightly, push the second-
ary latch up (1) inside of the hood
center and lift the hood (2).4. Pull out the support rod.
5. Hold the hood opened with the
support rod.
H HO
OO
OD
D
3-28
Convenient features of your vehicle
OGS048170L
OGS045010L
OGC044014
Page 117 of 472
3-32
Convenient features of your vehicle
Information
• Make sure to refuel your vehicle
according to the "Fuel Requirements"
suggested in the introduction chapter.
• Do not spill fuel on the exterior sur-
faces of the vehicle. Any type of fuel
spilled on painted surfaces may
damage the paint.
If the fuel filler cap requires
replacement, use only a genuine
HYUNDAI cap or the equivalent
specified for your vehicle. An
incorrect fuel filler cap can result
in a serious malfunction of the
fuel system or emission control
system.
NOTICE
i(Continued)
When refueling, always move
the shift lever to the P (Park)
position (for automatic
transaxle) or first gear or R
(Reverse, for manual
transaxle), set the parking
brake, and place the ignition
switch to the LOCK/OFF posi-
tion. Sparks produced by
electrical components related
to the engine can ignite fuel
vapors causing a fire.
Do not use matches or a
lighter and do not smoke or
leave a lit cigarette in your
vehicle while at a gas station,
especially during refueling.
Do not over-fill or top-off your
vehicle tank, which can cause
gasoline spillage.
(Continued)
(Continued)
If a fire breaks out during refu-
eling, leave the vicinity of the
vehicle, and immediately con-
tact the manager of the gas
station and then contact the
local fire department. Follow
any safety instructions they
provide.
If pressurized fuel sprays out,
it can cover your clothes or
skin and thus subject you to
the risk of fire and burns.
Always remove the fuel cap
carefully and slowly. If the cap
is venting fuel or if you hear a
hissing sound, wait until the
condition stops before com-
pletely removing the cap.
Always check that the fuel cap
is installed securely to pre-
vent fuel spillage in the event
of an accident.
Page 135 of 472
3-50
Convenient features of your vehicle
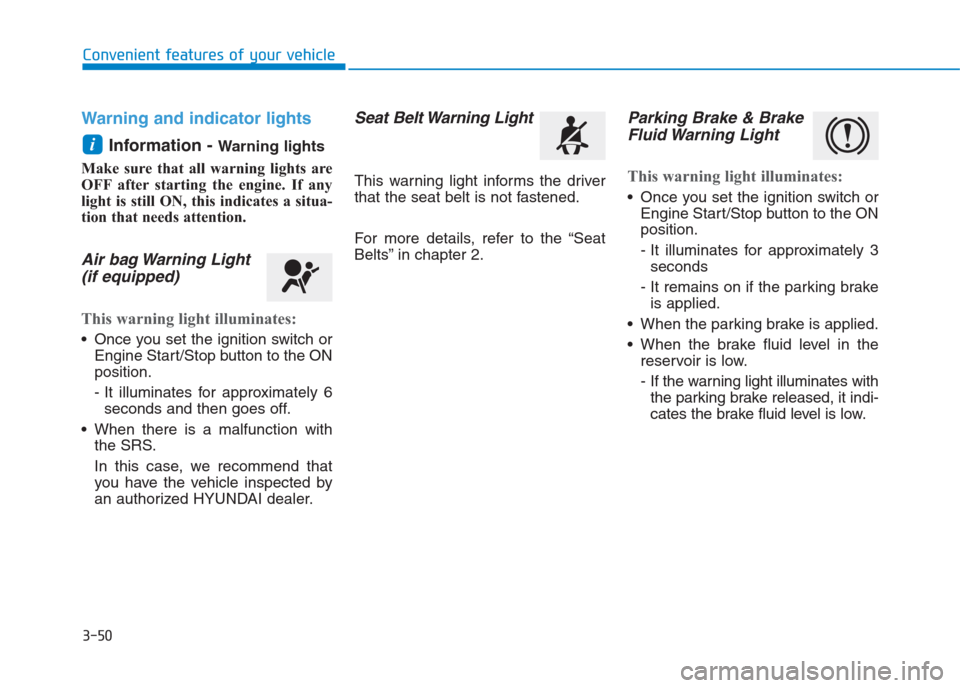
Warning and indicator lights
Information -
Warning lights
Make sure that all warning lights are
OFF after starting the engine. If any
light is still ON, this indicates a situa-
tion that needs attention.
Air bag Warning Light
(if equipped)
This warning light illuminates:
Once you set the ignition switch or
Engine Start/Stop button to the ON
position.
- It illuminates for approximately 6
seconds and then goes off.
When there is a malfunction with
the SRS.
In this case, we recommend that
you have the vehicle inspected by
an authorized HYUNDAI dealer.
Seat Belt Warning Light
This warning light informs the driver
that the seat belt is not fastened.
For more details, refer to the “Seat
Belts” in chapter 2.
Parking Brake & Brake
Fluid Warning Light
This warning light illuminates:
Once you set the ignition switch or
Engine Start/Stop button to the ON
position.
- It illuminates for approximately 3
seconds
- It remains on if the parking brake
is applied.
When the parking brake is applied.
When the brake fluid level in the
reservoir is low.
- If the warning light illuminates with
the parking brake released, it indi-
cates the brake fluid level is low.
i
Page 136 of 472
3-51
Convenient features of your vehicle
3
If the brake fluid level in the reser-
voir is low:
1. Drive carefully to the nearest safe
location and stop your vehicle.
2. With the engine stopped, check
the brake fluid level immediately
and add fluid as required (For
more details, refer to “Brake Fluid”
in chapter 7). After adding brake
fluid, check all brake components
for fluid leaks. If a brake fluid leak
is found, or if the warning light
remains on, or if the brakes do not
operate properly, do not drive the
vehicle. We recommend you to
have the vehicle inspected by an
authorized HYUNDAI dealer.
Dual-diagonal braking system
Your vehicle is equipped with dual-
diagonal braking systems. This
means you still have braking on two
wheels even if one of the dual sys-
tems should fail.
With only one of the dual systems
working, more than normal pedal
travel and greater pedal pressure is
required to stop the vehicle.
Also, the vehicle will not stop in as
short a distance with only a portion
of the brake system working.
If the brakes fail while you are driv-
ing, shift to a lower gear for addition-
al engine braking and stop the vehi-
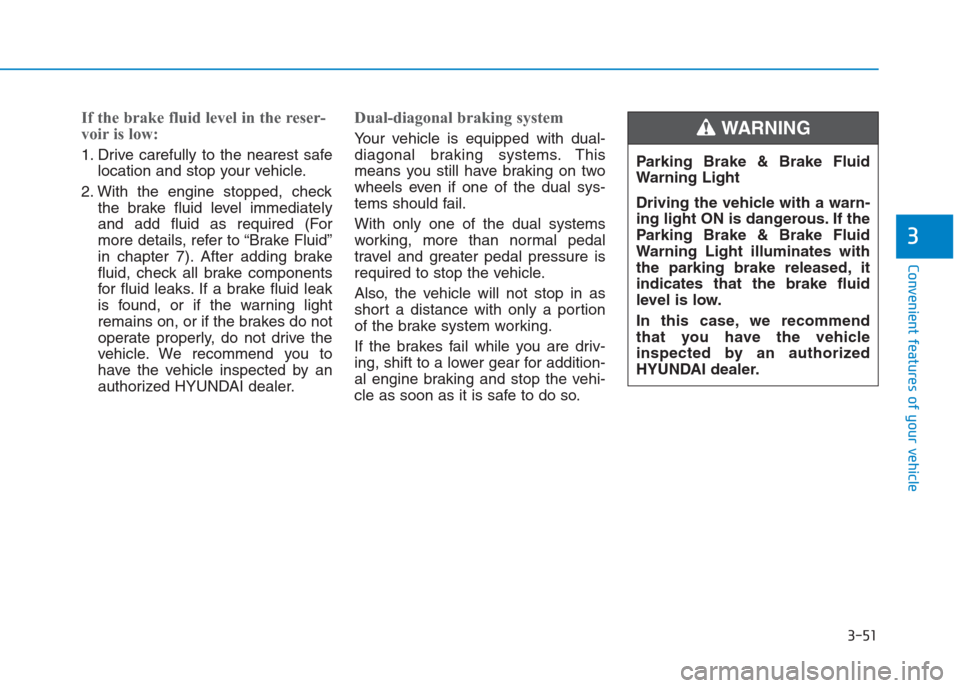
cle as soon as it is safe to do so.Parking Brake & Brake Fluid
Warning Light
Driving the vehicle with a warn-
ing light ON is dangerous. If the
Parking Brake & Brake Fluid
Warning Light illuminates with
the parking brake released, it
indicates that the brake fluid
level is low.
In this case, we recommend
that you have the vehicle
inspected by an authorized
HYUNDAI dealer.WARNING
Page 137 of 472
3-52
Convenient features of your vehicle
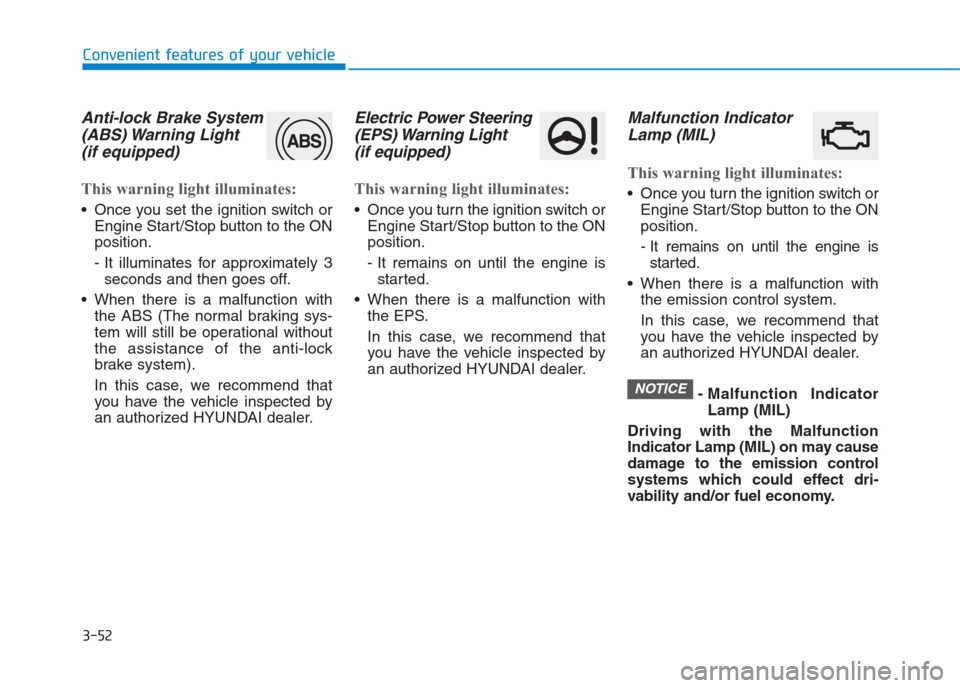
Anti-lock Brake System
(ABS) Warning Light
(if equipped)
This warning light illuminates:
Once you set the ignition switch or
Engine Start/Stop button to the ON
position.
- It illuminates for approximately 3
seconds and then goes off.
When there is a malfunction with
the ABS (The normal braking sys-
tem will still be operational without
the assistance of the anti-lock
brake system).
In this case, we recommend that
you have the vehicle inspected by
an authorized HYUNDAI dealer.
Electric Power Steering
(EPS) Warning Light
(if equipped)
This warning light illuminates:
Once you turn the ignition switch or
Engine Start/Stop button to the ON
position.
- It remains on until the engine is
started.
When there is a malfunction with
the EPS.
In this case, we recommend that
you have the vehicle inspected by
an authorized HYUNDAI dealer.
Malfunction Indicator
Lamp (MIL)
This warning light illuminates:
Once you turn the ignition switch or
Engine Start/Stop button to the ON
position.
- It remains on until the engine is
started.
When there is a malfunction with
the emission control system.
In this case, we recommend that
you have the vehicle inspected by
an authorized HYUNDAI dealer.
- Malfunction Indicator
Lamp (MIL)
Driving with the Malfunction
Indicator Lamp (MIL) on may cause
damage to the emission control
systems which could effect dri-
vability and/or fuel economy.
NOTICE
Page 141 of 472
3-56
Convenient features of your vehicle
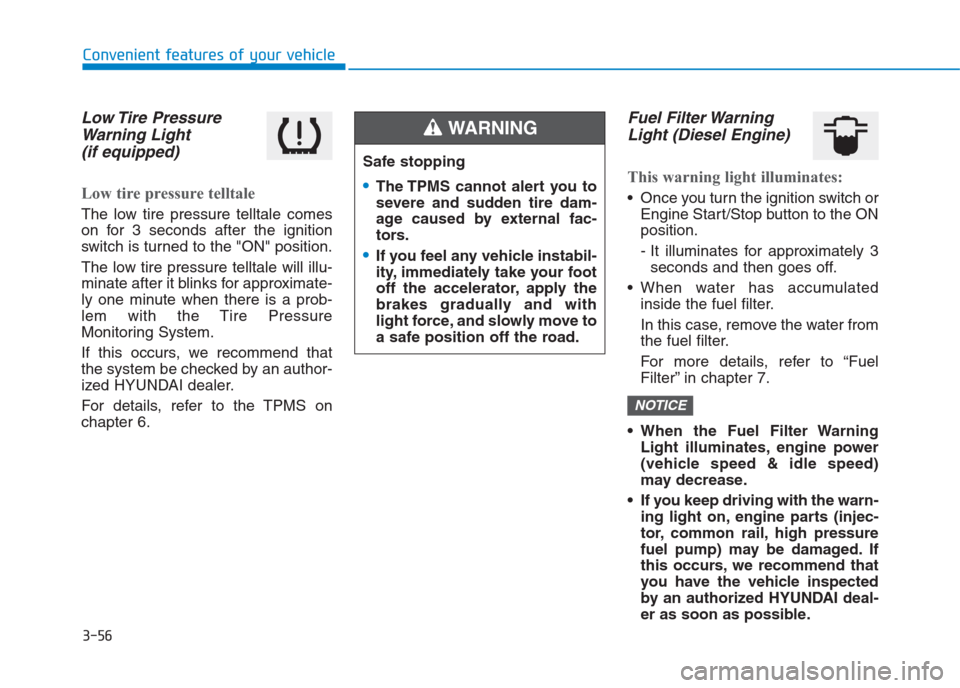
Low Tire Pressure
Warning Light
(if equipped)
Low tire pressure telltale
The low tire pressure telltale comes
on for 3 seconds after the ignition
switch is turned to the "ON" position.
The low tire pressure telltale will illu-
minate after it blinks for approximate-
ly one minute when there is a prob-
lem with the Tire Pressure
Monitoring System.
If this occurs, we recommend that
the system be checked by an author-
ized HYUNDAI dealer.
For details, refer to the TPMS on
chapter 6.
Fuel Filter Warning
Light (Diesel Engine)
This warning light illuminates:
Once you turn the ignition switch or
Engine Start/Stop button to the ON
position.
- It illuminates for approximately 3
seconds and then goes off.
When water has accumulated
inside the fuel filter.
In this case, remove the water from
the fuel filter.
For more details, refer to “Fuel
Filter” in chapter 7.
When the Fuel Filter Warning
Light illuminates, engine power
(vehicle speed & idle speed)
may decrease.
If you keep driving with the warn-
ing light on, engine parts (injec-
tor, common rail, high pressure
fuel pump) may be damaged. If
this occurs, we recommend that
you have the vehicle inspected
by an authorized HYUNDAI deal-
er as soon as possible.
NOTICE
Safe stopping
The TPMS cannot alert you to
severe and sudden tire dam-
age caused by external fac-
tors.
If you feel any vehicle instabil-
ity, immediately take your foot
off the accelerator, apply the
brakes gradually and with
light force, and slowly move to
a safe position off the road.
WARNING
Page 283 of 472
5-8
Driving your vehicle
Information
• Do not wait for the engine to warm
up while the vehicle remains station-
ary.
Start driving at moderate engine
speeds. (Steep accelerating and
decelerating should be avoided.)
• Always start the vehicle with your
foot on the brake pedal. Do not
depress the accelerator while start-
ing the vehicle. Do not race the
engine while warming it up.
Starting the diesel engine
To start the diesel engine when the
engine is cold, it has to be pre-heat-
ed before starting the engine and
then have to be warmed up before
starting to drive.
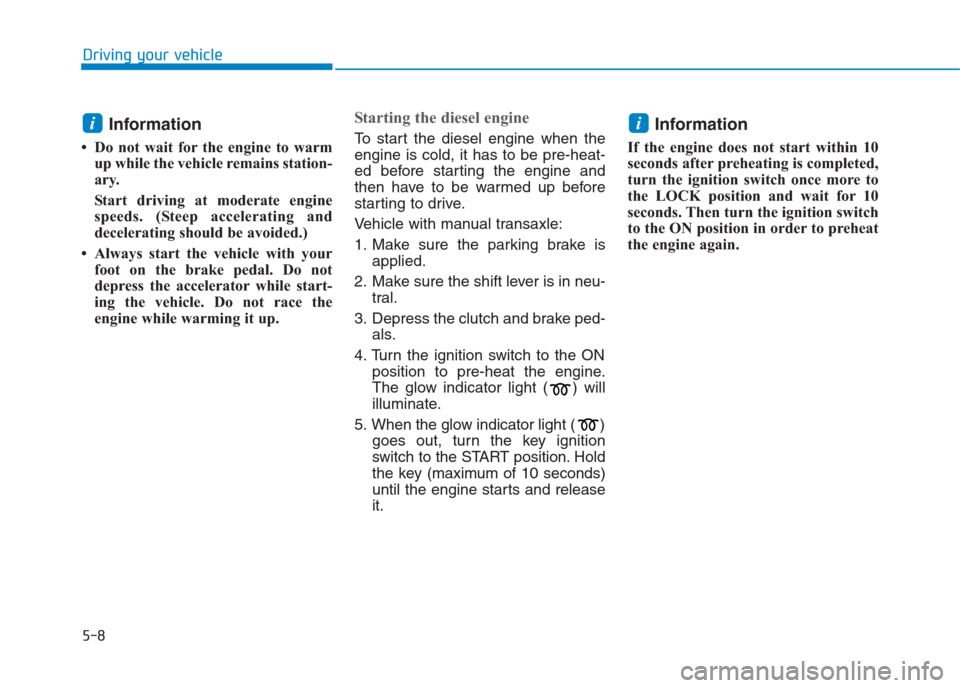
Vehicle with manual transaxle:
1. Make sure the parking brake is
applied.
2. Make sure the shift lever is in neu-
tral.
3. Depress the clutch and brake ped-
als.
4. Turn the ignition switch to the ON
position to pre-heat the engine.
The glow indicator light ( ) will
illuminate.
5. When the glow indicator light ( )
goes out, turn the key ignition
switch to the START position. Hold
the key (maximum of 10 seconds)
until the engine starts and release
it.Information
If the engine does not start within 10
seconds after preheating is completed,
turn the ignition switch once more to
the LOCK position and wait for 10
seconds. Then turn the ignition switch
to the ON position in order to preheat
the engine again.
ii
Page 287 of 472
5-12
Driving your vehicle
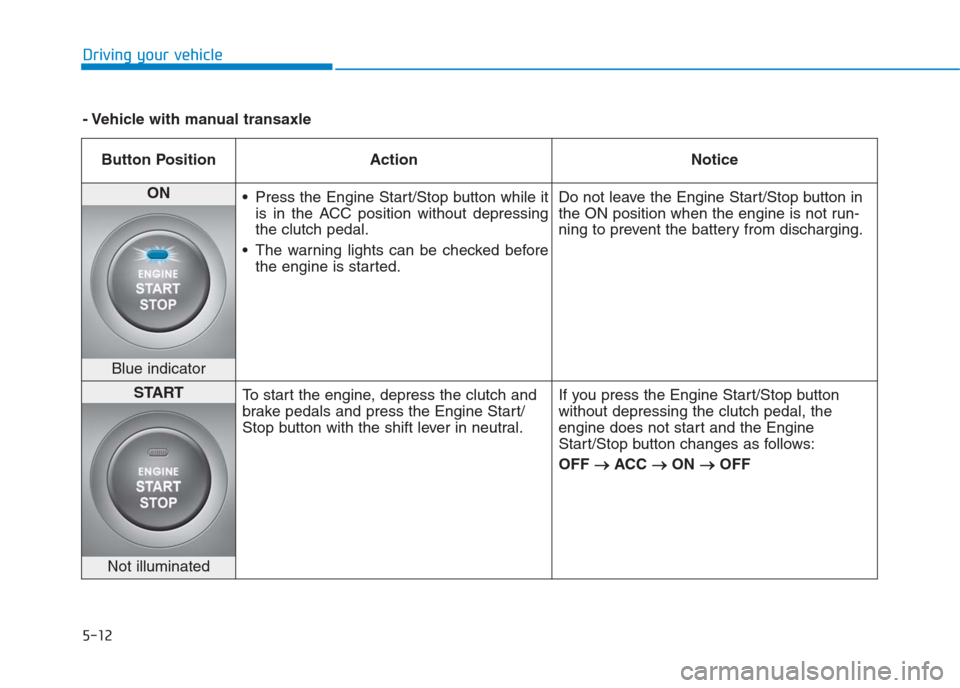
Button Position Action Notice
ON
Press the Engine Start/Stop button while it
is in the ACC position without depressing
the clutch pedal.
The warning lights can be checked before
the engine is started.Do not leave the Engine Start/Stop button in
the ON position when the engine is not run-
ning to prevent the battery from discharging.
Blue indicator
START
To start the engine, depress the clutch and
brake pedals and press the Engine Start/
Stop button with the shift lever in neutral.If you press the Engine Start/Stop button
without depressing the clutch pedal, the
engine does not start and the Engine
Start/Stop button changes as follows:
OFF → →
ACC → →
ON → →
OFF
Not illuminated
- Vehicle with manual transaxle