load capacity Hyundai Elantra 2005 Owner's Manual
[x] Cancel search | Manufacturer: HYUNDAI, Model Year: 2005, Model line: Elantra, Model: Hyundai Elantra 2005Pages: 256, PDF Size: 10.4 MB
Page 121 of 256
1FEATURES OF YOUR HYUNDAI
110
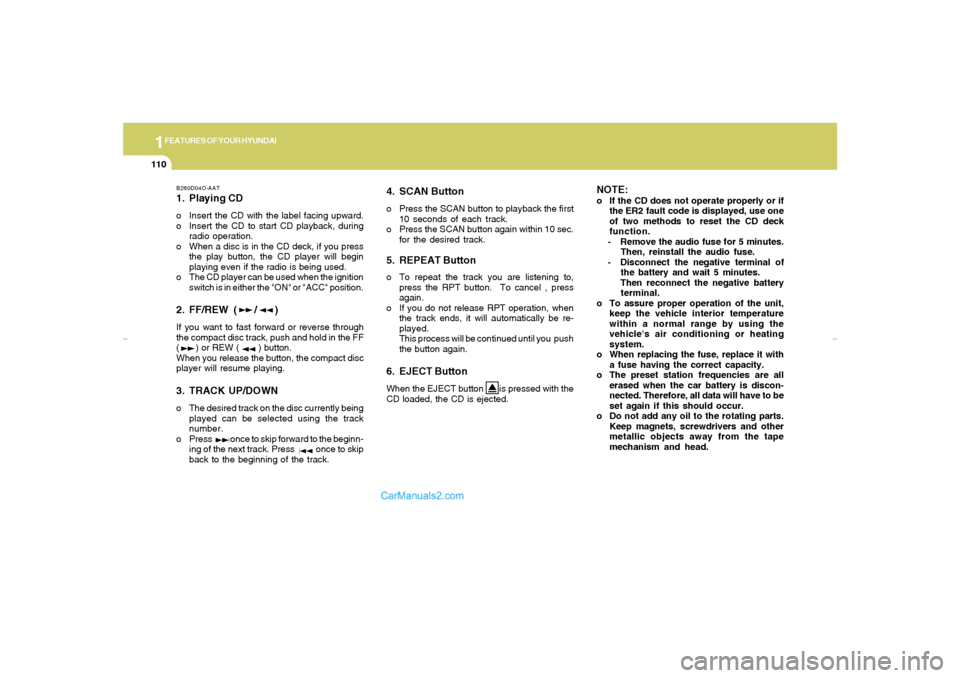
B260D04O-AAT1. Playing CDo Insert the CD with the label facing upward.
o Insert the CD to start CD playback, during
radio operation.
o When a disc is in the CD deck, if you press
the play button, the CD player will begin
playing even if the radio is being used.
o The CD player can be used when the ignition
switch is in either the "ON" or "ACC" position.2. FF/REW ( / )If you want to fast forward or reverse through
the compact disc track, push and hold in the FF
( ) or REW ( ) button.
When you release the button, the compact disc
player will resume playing.3. TRACK UP/DOWNo The desired track on the disc currently being
played can be selected using the track
number.
o Press once to skip forward to the beginn-
ing of the next track. Press once to skip
back to the beginning of the track.
4. SCAN Buttono Press the SCAN button to playback the first
10 seconds of each track.
o Press the SCAN button again within 10 sec.
for the desired track.5. REPEAT Buttono To repeat the track you are listening to,
press the RPT button. To cancel , press
again.
o If you do not release RPT operation, when
the track ends, it will automatically be re-
played.
This process will be continued until you push
the button again.6. EJECT ButtonWhen the EJECT button is pressed with the
CD loaded, the CD is ejected.
NOTE:o If the CD does not operate properly or if
the ER2 fault code is displayed, use one
of two methods to reset the CD deck
function.
- Remove the audio fuse for 5 minutes.
Then, reinstall the audio fuse.
- Disconnect the negative terminal of
the battery and wait 5 minutes.
Then reconnect the negative battery
terminal.
o To assure proper operation of the unit,
keep the vehicle interior temperature
within a normal range by using the
vehicle's air conditioning or heating
system.
o When replacing the fuse, replace it with
a fuse having the correct capacity.
o The preset station frequencies are all
erased when the car battery is discon-
nected. Therefore, all data will have to be
set again if this should occur.
o Do not add any oil to the rotating parts.
Keep magnets, screwdrivers and other
metallic objects away from the tape
mechanism and head.
xdflhma-1b.p652/5/2008, 2:06 PM 110
Page 132 of 256
1
FEATURES OF YOUR HYUNDAI
121
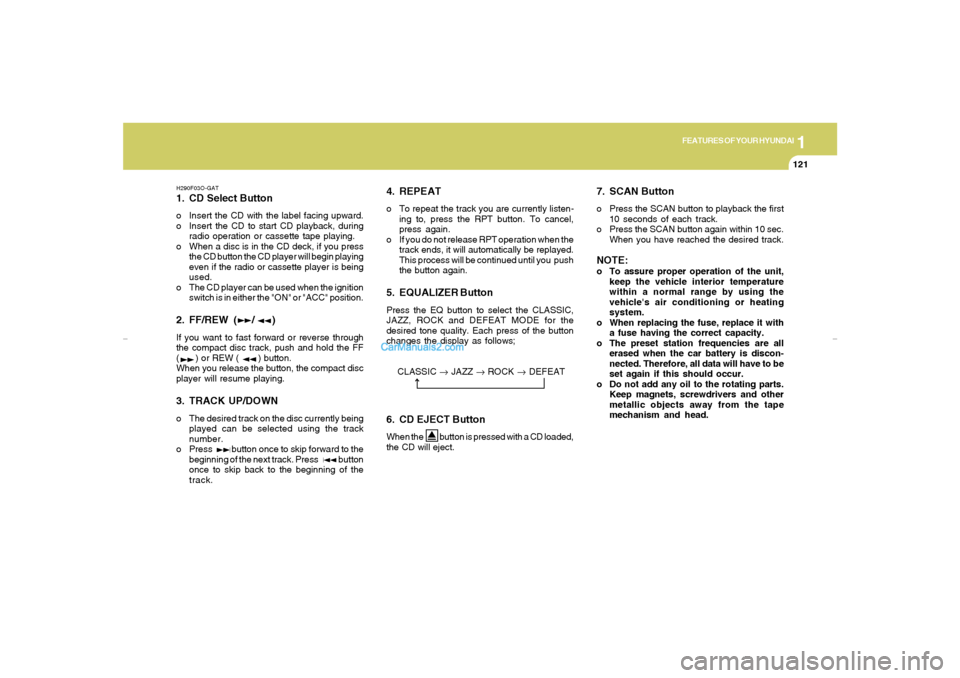
H290F03O-GAT1. CD Select Buttono Insert the CD with the label facing upward.
o Insert the CD to start CD playback, during
radio operation or cassette tape playing.
o When a disc is in the CD deck, if you press
the CD button the CD player will begin playing
even if the radio or cassette player is being
used.
o The CD player can be used when the ignition
switch is in either the "ON" or "ACC" position.2. FF/REW ( / )If you want to fast forward or reverse through
the compact disc track, push and hold the FF
( ) or REW ( ) button.
When you release the button, the compact disc
player will resume playing.3. TRACK UP/DOWNo The desired track on the disc currently being
played can be selected using the track
number.
o Press button once to skip forward to the
beginning of the next track. Press button
once to skip back to the beginning of the
track.
4. REPEATo To repeat the track you are currently listen-
ing to, press the RPT button. To cancel,
press again.
o If you do not release RPT operation when the
track ends, it will automatically be replayed.
This process will be continued until you push
the button again.5. EQUALIZER ButtonPress the EQ button to select the CLASSIC,
JAZZ, ROCK and DEFEAT MODE for the
desired tone quality. Each press of the button
changes the display as follows;
7. SCAN Buttono Press the SCAN button to playback the first
10 seconds of each track.
o Press the SCAN button again within 10 sec.
When you have reached the desired track.NOTE:o To assure proper operation of the unit,
keep the vehicle interior temperature
within a normal range by using the
vehicle's air conditioning or heating
system.
o When replacing the fuse, replace it with
a fuse having the correct capacity.
o The preset station frequencies are all
erased when the car battery is discon-
nected. Therefore, all data will have to be
set again if this should occur.
o Do not add any oil to the rotating parts.
Keep magnets, screwdrivers and other
metallic objects away from the tape
mechanism and head.
6. CD EJECT ButtonWhen the button is pressed with a CD loaded,
the CD will eject.CLASSIC → JAZZ → ROCK → DEFEAT
xdflhma-1b.p652/5/2008, 2:07 PM 121
Page 161 of 256
2
DRIVING YOUR HYUNDAI
20
!
8. When parking your car and trailer, especially
on a hill, be sure to follow all the normal
precautions. Turn your front wheel into the
curb, set the parking brake firmly, and put the
transaxle in 1st or Reverse (manual) or Park
(automatic). In addition, place wheel chocks
at each of the trailer's tires.
9. If the trailer has electric brakes, start your
vehicle and trailer moving, and then apply the
trailer brake controller by hand to be sure the
brakes are working. This lets you check
your electrical connection at the same time.
10. During your trip, occasionally check to be
sure that the load is secure, and that the
lights and any trailer brakes are still work-
ing.
11. Avoid jerky starts, sudden acceleration or
sudden stops.
12. Avoid sharp turns and rapid lane changes.
13. Avoid holding the brake pedal down too long
or too frequently. This could cause the
brakes to overheat, resulting in reduced
braking efficiency.
14. When going down a hill, shift into a lower
gear and use the engine braking effect.
When ascending a long grade, downshift
the transaxle to a lower gear and reduce
speed to reduce chances of engine over-
loading and/or overheating.
CAUTION:
If overheating should occur when towing,
(the temperature gauge reads near the red
zone), taking the following actions may
reduce or eliminate the problem.
1. Turn off the air conditioner.
2. Reduce highway speed.
3. Select a lower gear when going uphill.
4. While in stop and go traffic, place the
gear selector in park or neutral and idle
the engine at a higher speed. 15. If you have to stop while going uphill, do not
hold the vehicle in place by pressing on the
accelerator. This can cause the automatic
transaxle to overheat. Use the parking
brake or footbrake.NOTE:When towing check transaxle fluid more
frequently.
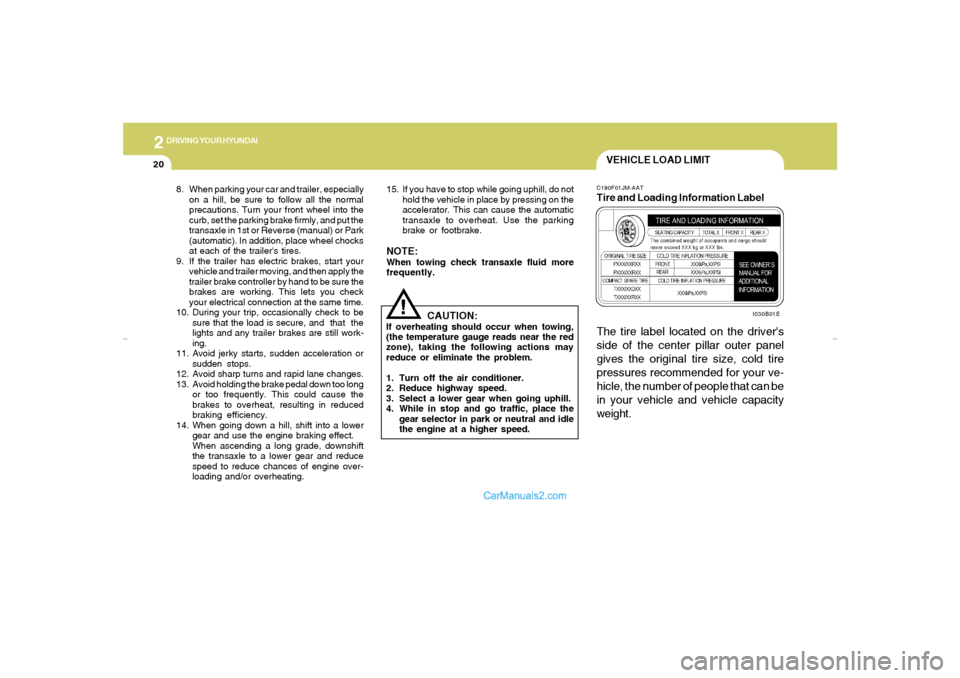
VEHICLE LOAD LIMITC190F01JM-AATTire and Loading Information Label
I030B01E
The tire label located on the driver's
side of the center pillar outer panel
gives the original tire size, cold tire
pressures recommended for your ve-
hicle, the number of people that can be
in your vehicle and vehicle capacity
weight.
xdflhma-2.p652/5/2008, 2:08 PM 20
Page 162 of 256
DRIVING YOUR HYUNDAI
212
Steps for Determining Correct Load
Limit
(1)Locate the statement "The combined
weight of occupants and cargo should
never exceed XXX pounds'' on your
vehicle's placard.
(2)Determine the combined weight of
the driver and passengers that will be
riding in your vehicle.
(3)Subtract the combined weight of the
driver and passengers from XXX
kilograms or XXX pounds.
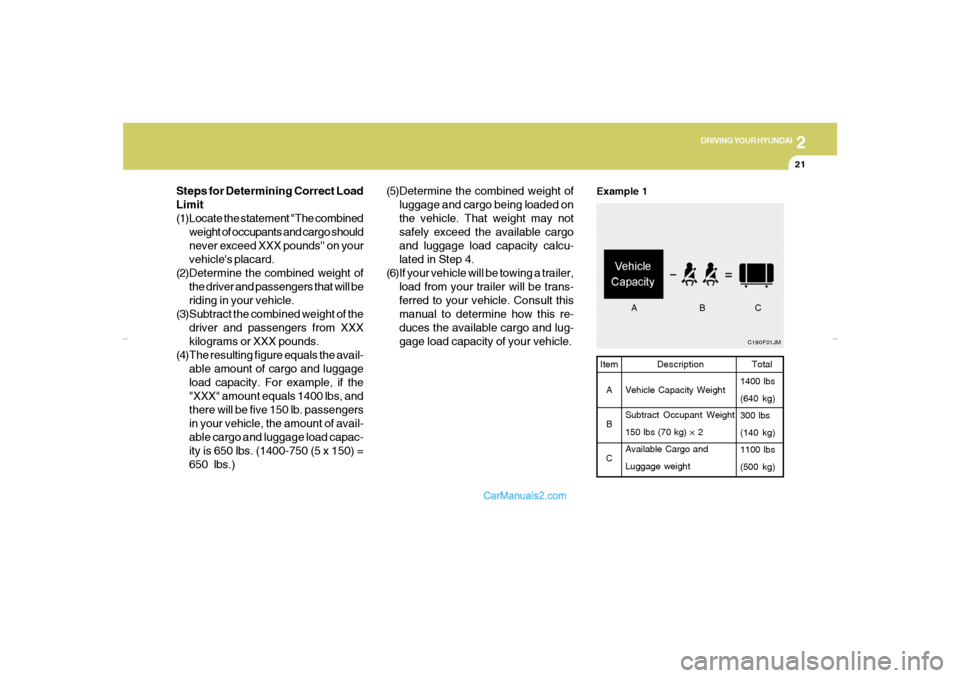
(4)The resulting figure equals the avail-
able amount of cargo and luggage
load capacity. For example, if the
"XXX" amount equals 1400 lbs, and
there will be five 150 lb. passengers
in your vehicle, the amount of avail-
able cargo and luggage load capac-
ity is 650 lbs. (1400-750 (5 x 150) =
650 lbs.)
C190F01JMTotal
1400 lbs
(640 kg)
300 lbs
(140 kg)
1100 lbs
(500 kg)
Example 1Item
A
B
CDescription
Vehicle Capacity Weight
Subtract Occupant Weight
150 lbs (70 kg) × 2
Available Cargo and
Luggage weight
(5)Determine the combined weight of
luggage and cargo being loaded on
the vehicle. That weight may not
safely exceed the available cargo
and luggage load capacity calcu-
lated in Step 4.
(6)If your vehicle will be towing a trailer,
load from your trailer will be trans-
ferred to your vehicle. Consult this
manual to determine how this re-
duces the available cargo and lug-
gage load capacity of your vehicle.
ABC
xdflhma-2.p652/5/2008, 2:08 PM 21
Page 163 of 256
2
DRIVING YOUR HYUNDAI
22
C190F02JM
C190F03JM
Total
1400 lbs
(640 kg)
860 lbs
(390 kg)
540 lbs
(250 kg)
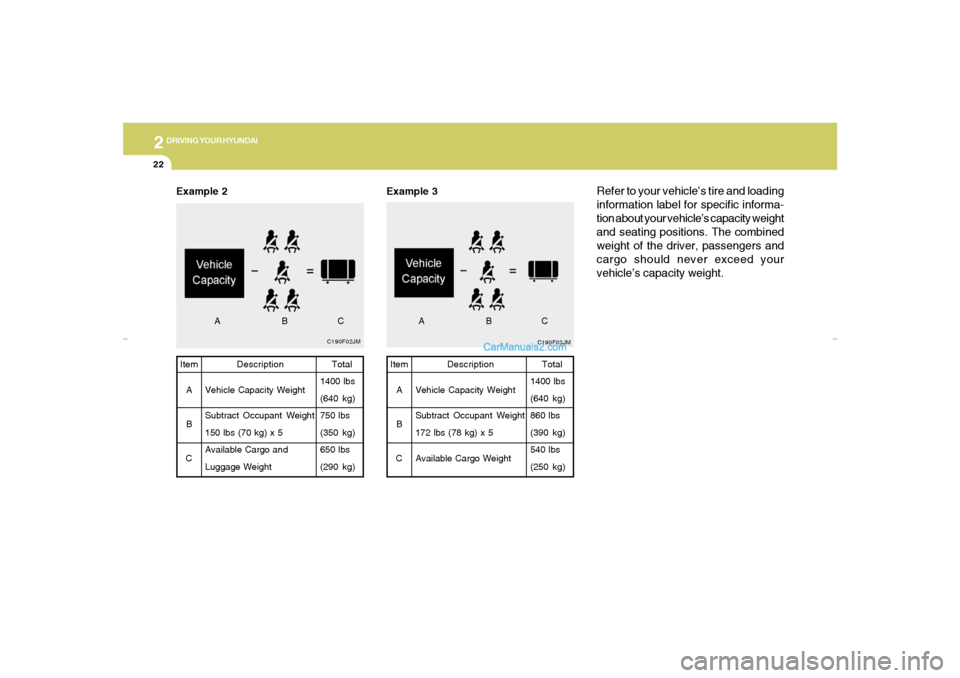
Example 2
Item
A
B
CDescription
Vehicle Capacity Weight
Subtract Occupant Weight
172 lbs (78 kg) x 5
Available Cargo Weight
Total
1400 lbs
(640 kg)
750 lbs
(350 kg)
650 lbs
(290 kg) Item
A
B
CDescription
Vehicle Capacity Weight
Subtract Occupant Weight
150 lbs (70 kg) x 5
Available Cargo and
Luggage Weight
Example 3
Refer to your vehicle’s tire and loading
information label for specific informa-
tion about your vehicle’s capacity weight
and seating positions. The combined
weight of the driver, passengers and
cargo should never exceed your
vehicle’s capacity weight.
ABC
ABC
xdflhma-2.p652/5/2008, 2:08 PM 22
Page 164 of 256
DRIVING YOUR HYUNDAI
232
!
This label also tells you the maximum
weights that can be supported by the
front and rear axles, called Gross Axle
Weight Rating (GAWR). To find out the
actual loads on your front and rear
axles, you need to go to a weigh station
and weigh your vehicle. Your dealer can
help you with this. Be sure to spread out
your load equally on the left and right
sides of the centerline.NOTE:
o Overloading your vehicle may
cause damage. Repairs would not
be covered by your warranty. Do
not overload your vehicle.
o Using heavier suspension com-
ponents to get added durability
might not change your weight rat-
ings. Ask your dealer to help you
load your vehicle the right way.
The label will help you decide how much
cargo and installed equipment your
vehicle can carry.
If you carry items inside your vehicle –
like suitcases, tools, packages, or any-
thing else – they move as fast as the
vehicle goes. If you have to stop or turn
quickly, or if there is a crash, the items
will keep going and can cause an injury
if they strike the driver or a passenger. WARNING:
o Never exceed the GVWR for your
vehicle or the GAWR for either the
front or rear axle.
o Do not load your vehicle any
heavier than the GVWR or either
the maximum front or rear GAWR.
If you do, parts on your vehicle
can break, and it can change the
way your vehicle handles. This
could cause you to lose control
and crash. Also, overloading can
shorten the life of your vehicle.
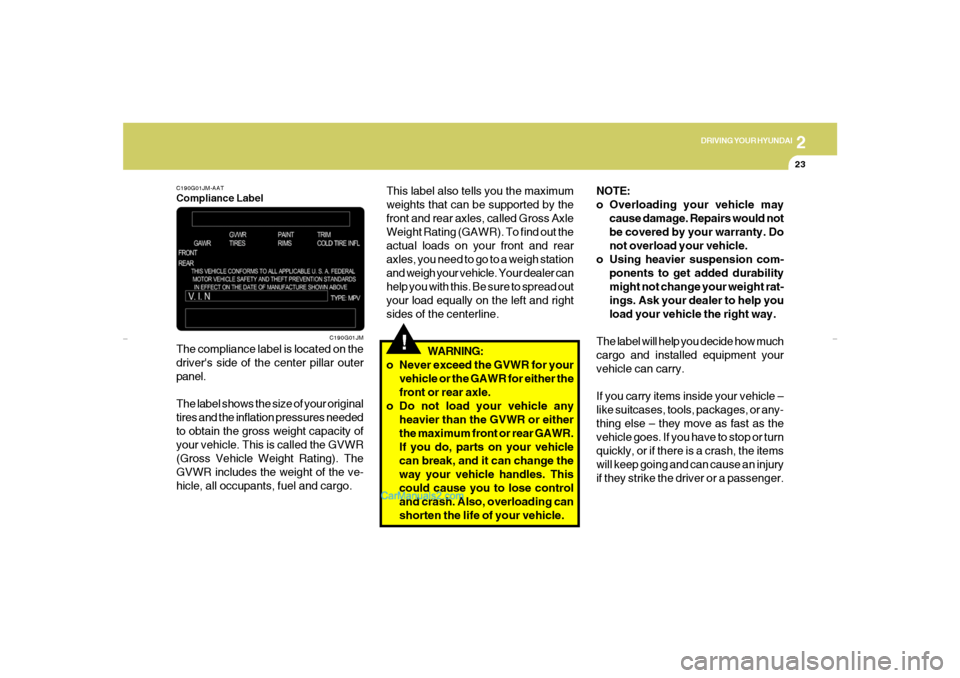
C190G01JM-AATCompliance LabelThe compliance label is located on the
driver's side of the center pillar outer
panel.
The label shows the size of your original
tires and the inflation pressures needed
to obtain the gross weight capacity of
your vehicle. This is called the GVWR
(Gross Vehicle Weight Rating). The
GVWR includes the weight of the ve-
hicle, all occupants, fuel and cargo.
C190G01JM
xdflhma-2.p652/5/2008, 2:08 PM 23
Page 238 of 256
8
CONSUMER INFORMATION, REPORTING SAFETY DEFECTS & BINDING ARBITRATION OF WARRANTY CLAIMS
7
Sidewall: The portion of a tire between
the tread and the bead.
Speed Rating: An alphanumeric code
assigned to a tire indicating the maxi-
mum speed at which a tire can operate.
Traction: The friction between the tire
and the road surface. The amount of
grip provided.
Tread: The portion of a tire that comes
into contact with the road.
Treadwear Indicators: Narrow bands,
sometimes called "wear bars," that show
across the tread of a tire when only 2/32
inch of tread remains.
UTQGS: Uniform Tire Quality Grading
Standards, a tire information system
that provides consumers with ratings
for a tire's traction, temperature and
treadwear. Ratings are determined by
tire manufacturers using government
testing procedures. The ratings are
molded into the sidewall of the tire.Vehicle Capacity Weight: The number
of designated seating positions multi-
plied by 150 lbs. (68 kg) plus the rated
cargo and luggage load.
Vehicle Maximum Load on the Tire:
Load on an individual tire due to curb
and accessory weight plus maximum
occupant and cargo weight.
Vehicle Normal Load on the Tire:
That load on an individual tire that is
determined by distributing to each axle
its share of the carb weight, accessory
weight, and normal occupant weight
and dividing by 2.
Vehicle Placard: A label permanently
attached to a vehicle showing the origi-
nal equipment tire size and recom-
mended inflation pressure.
I040B01JM-AATALL SEASON TIRES
Hyundai specifies all season tires on
some models to provide good perfor-
mance for use all year round, including
snowy and icy road conditions. All sea-
son tires are identified by ALL SEASON
and/or M+S (Mud and Snow) on the tire
sidewall. Snow tires have better snow
traction than all season tires an may be
more appropriate in some areas.I040C01JM-AATSUMMER TIRES
Hyundai specifies summer tires on some
models to provide superior performance
on dry roads. Summer tire performance
is substantially reduced in snow and
ice. Summer tires do not have the tire
traction rating M+S (Mud and Snow) on
the tire side wall. If you plan to operate
your vehicle in snowy or icy conditions.
Hyundai recommends the use of snow
tires or all season tires on all four wheels.
xdflhma-8.p652/5/2008, 2:17 PM 7
Page 239 of 256
8
CONSUMER INFORMATION, REPORTING SAFETY DEFECTS & BINDING ARBITRATION OF WARRANTY CLAIMS8
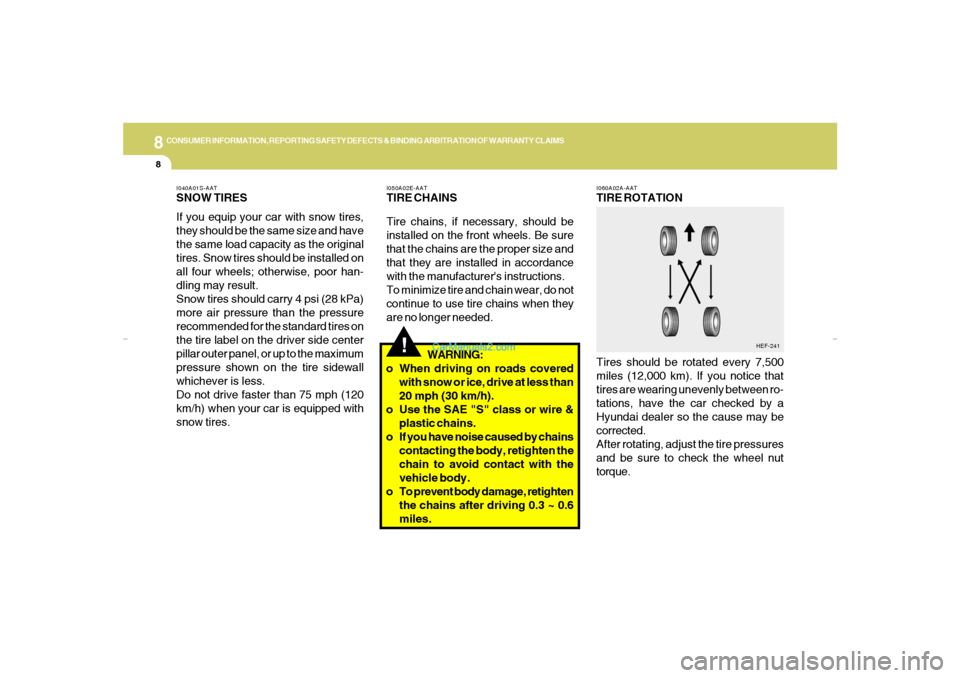
I060A02A-AATTIRE ROTATION
Tires should be rotated every 7,500
miles (12,000 km). If you notice that
tires are wearing unevenly between ro-
tations, have the car checked by a
Hyundai dealer so the cause may be
corrected.
After rotating, adjust the tire pressures
and be sure to check the wheel nut
torque.
HEF-241
!
I050A02E-AATTIRE CHAINS
Tire chains, if necessary, should be
installed on the front wheels. Be sure
that the chains are the proper size and
that they are installed in accordance
with the manufacturer's instructions.
To minimize tire and chain wear, do not
continue to use tire chains when they
are no longer needed.
WARNING:
o When driving on roads covered
with snow or ice, drive at less than
20 mph (30 km/h).
o Use the SAE "S" class or wire &
plastic chains.
o If you have noise caused by chains
contacting the body, retighten the
chain to avoid contact with the
vehicle body.
o To prevent body damage, retighten
the chains after driving 0.3 ~ 0.6
miles.
I040A01S-AATSNOW TIRES
If you equip your car with snow tires,
they should be the same size and have
the same load capacity as the original
tires. Snow tires should be installed on
all four wheels; otherwise, poor han-
dling may result.
Snow tires should carry 4 psi (28 kPa)
more air pressure than the pressure
recommended for the standard tires on
the tire label on the driver side center
pillar outer panel, or up to the maximum
pressure shown on the tire sidewall
whichever is less.
Do not drive faster than 75 mph (120
km/h) when your car is equipped with
snow tires.
xdflhma-8.p652/5/2008, 2:17 PM 8