ECO mode Hyundai Elantra 2010 Owner's Manual
[x] Cancel search | Manufacturer: HYUNDAI, Model Year: 2010, Model line: Elantra, Model: Hyundai Elantra 2010Pages: 348, PDF Size: 5.78 MB
Page 33 of 348
Safety features of your vehicle
16
3
When the seat belt is fully extended from
the retractor to allow the installation of a
child restraint system, the seat belt oper-
ation changes to allow the belt to retract,
but not to extend (Automatic Locking
Retractor Type). Refer to “Using a child
restraint system” in this section.
✽ ✽
NOTICE
Although the combination retractor
provides the same level of protection for
seated passengers in either emergency
or automatic locking modes, it is recom-
mended that seated passengers use the
emergency locking feature for improved
convenience. The automatic locking
function is intended to facilitate child
restraint installation. To convert from
the automatic locking feature to the
emergency locking operation mode,
allow the unbuckled seat belt to fully
retract.
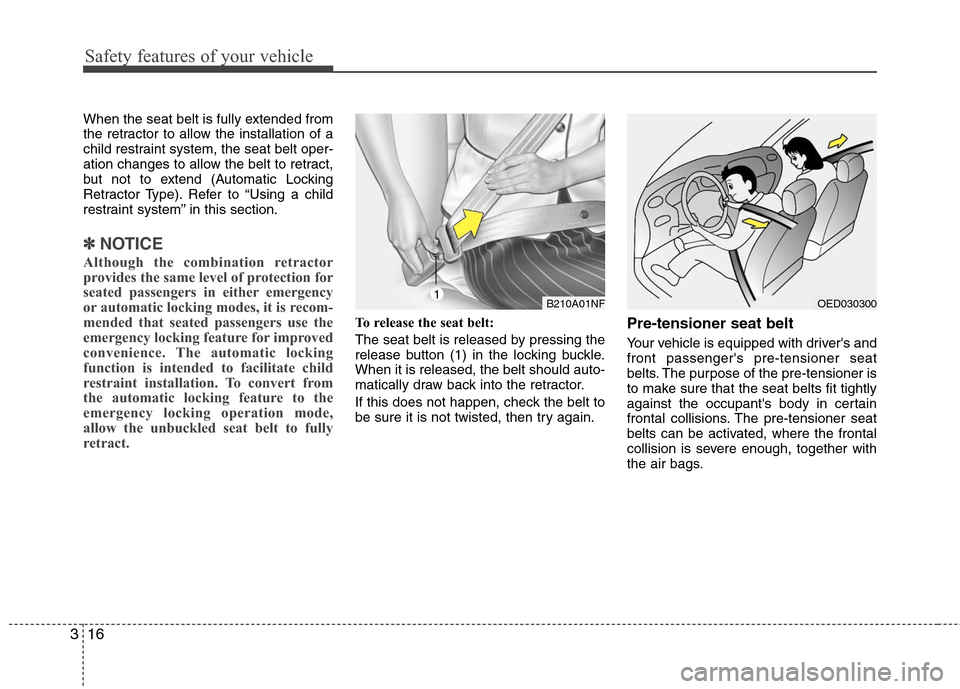
To release the seat belt:
The seat belt is released by pressing the
release button (1) in the locking buckle.
When it is released, the belt should auto-
matically draw back into the retractor.
If this does not happen, check the belt to
be sure it is not twisted, then try again.Pre-tensioner seat belt
Your vehicle is equipped with driver's and
front passenger's pre-tensioner seat
belts. The purpose of the pre-tensioner is
to make sure that the seat belts fit tightly
against the occupant's body in certain
frontal collisions. The pre-tensioner seat
belts can be activated, where the frontal
collision is severe enough, together with
the air bags.
B210A01NF1
OED030300
Page 104 of 348
431
Features of your vehicle
Retain the original transmitter for future
programming procedures (i.e., new vehi-
cle purchase). It is also suggested that
upon the sale of the vehicle, the pro-
grammed HomeLink buttons be erased
for security purposes (follow step 1 in the
“Programming” portion of this text).
Programming
Your vehicle may require the ignition
switch to be turned to the ACC position
for programming and/or operation of
HomeLink. It is also recommended that a
new battery be replaced in the hand-held
transmitter of the device being pro-
grammed to HomeLink for quicker train-
ing and accurate transmission of the
radio-frequency.
Follow these steps to train your
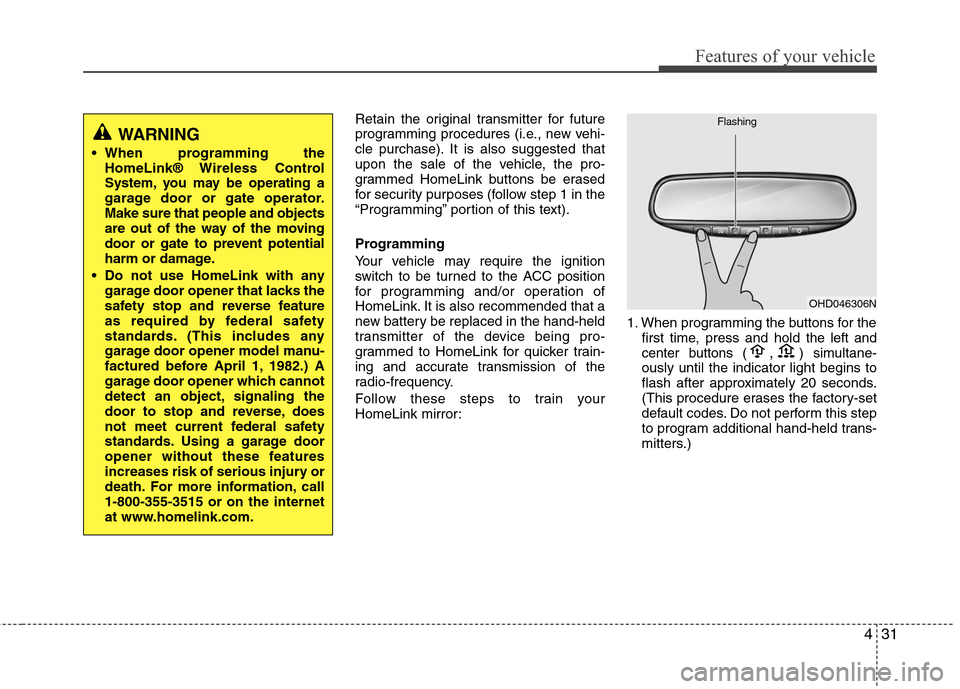
HomeLink mirror:1. When programming the buttons for the
first time, press and hold
the left and
center buttons (,)simultane-
ously until the indicator light begins to
flash after approximately 20 seconds.
(This procedure erases the factory-set
default codes. Do not perform this step
to program additional hand-held trans-
mitters.)
WARNING
When programming the HomeLink® Wireless Control
System, you may be operating a
garage door or gate operator.
Make sure that people and objects
are out of the way of the moving
door or gate to prevent potential
harm or damage.
Do not use HomeLink with any garage door opener that lacks the
safety stop and reverse feature
as required by federal safety
standards. (This includes any
garage door opener model manu-
factured before April 1, 1982.) A
garage door opener which cannot
detect an object, signaling the
door to stop and reverse, does
not meet current federal safety
standards. Using a garage door
opener without these features
increases risk of serious injury or
death. For more information, call
1-800-355-3515 or on the internet
at www.homelink.com.
OHD046306N
Flashing
Page 106 of 348
433
Features of your vehicle
Operating HomeLink
To operate, simply press the pro-
grammed HomeLink button. Activation
will now occur for the trained product
(garage door, security system, entry door
lock, estate gate, or home or office light-
ing). For convenience, the hand-held
transmitter of the device may also be
used at any time. The HomeLink
Wireless Controls System (once pro-
grammed) or the original hand-held
transmitter may be used to activate the
device (e.g. garage door, entry door lock,
etc.). In the event that there are still pro-
gramming difficulties, contact HomeLink
at 1-800-355-3515 or on the internet at
www.homelink.com.Erasing programmed HomeLink but-
tons
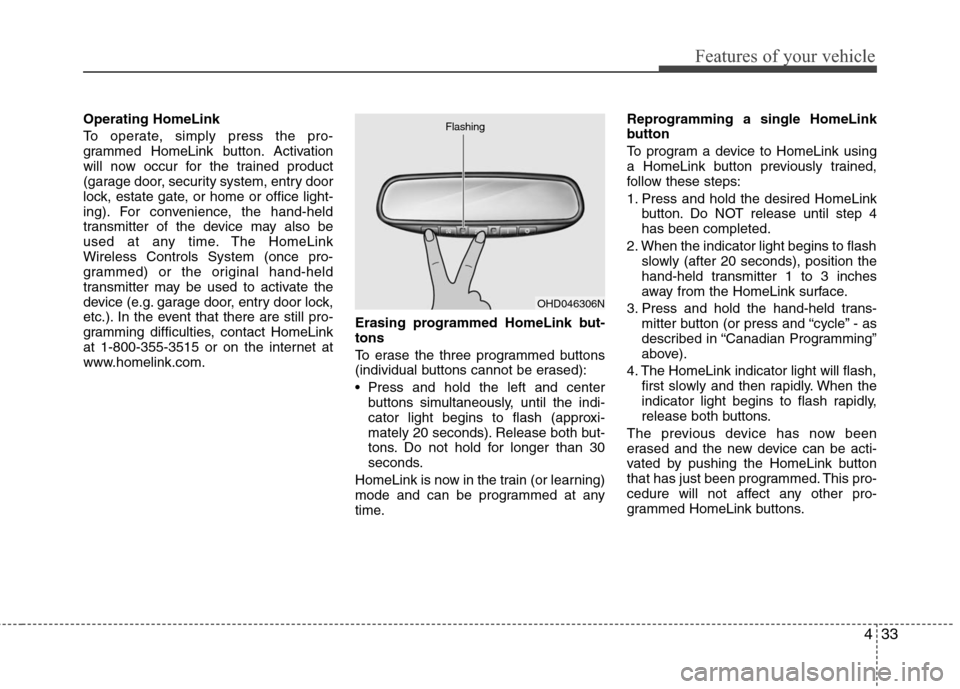
To erase the three programmed buttons
(individual buttons cannot be erased):
Press and hold the left and center
buttons simultaneously, until the indi-
cator light begins to flash (approxi-
mately 20 seconds). Release both but-
tons. Do not hold for longer than 30
seconds.
HomeLink is now in the train (or learning)
mode and can be programmed at any
time. Reprogramming a single HomeLink
button
To program a device to HomeLink using
a HomeLink button previously trained,
follow these steps:
1. Press and hold the desired HomeLink
button. Do NOT release until step 4
has been completed.
2. When the indicator light begins to flash slowly (after 20 seconds), position the
hand-held transmitter 1 to 3 inches
away from the HomeLink surface.
3. Press and hold the hand-held trans- mitter button (or press and “cycle” - as
described in “Canadian Programming”
above).
4. The HomeLink indicator light will flash, first slowly and then rapidly. When the
indicator light begins to flash rapidly,
release both buttons.
The previous device has now been
erased and the new device can be acti-
vated by pushing the HomeLink button
that has just been programmed. This pro-
cedure will not affect any other pro-
grammed HomeLink buttons.
OHD046306N
Flashing
Page 114 of 348
441
Features of your vehicle
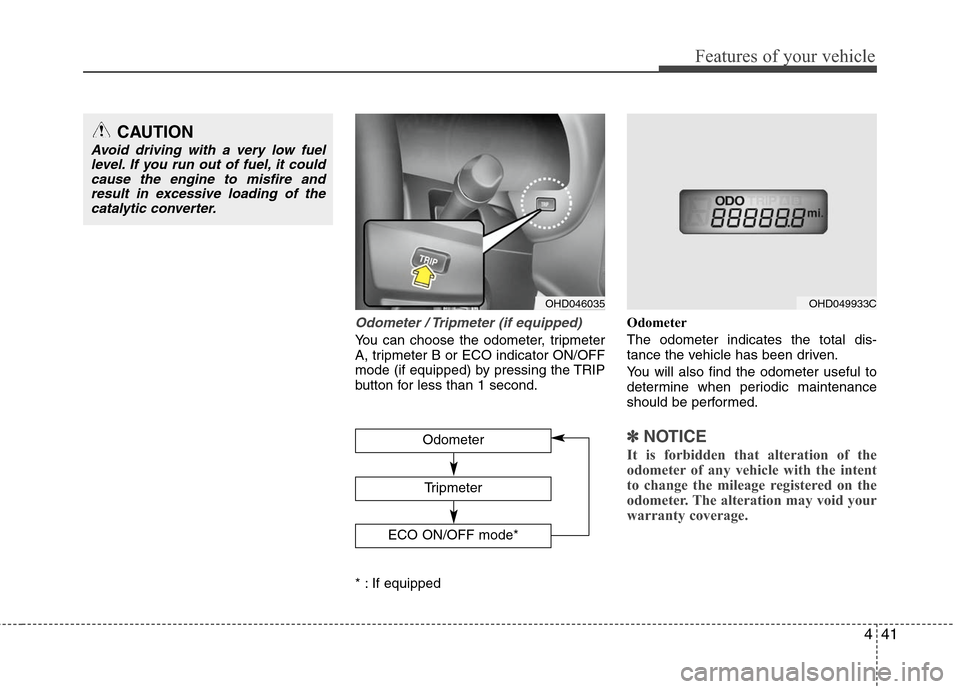
Odometer / Tripmeter (if equipped)
You can choose the odometer, tripmeter
A, tripmeter B or ECO indicator ON/OFF
mode (if equipped) by pressing the TRIP
button for less than 1 second.
* : If equippedOdometer
The odometer indicates the total dis-
tance the vehicle has been driven.
You will also find the odometer useful to
determine when periodic maintenance
should be performed.
✽ ✽
NOTICE
It is forbidden that alteration of the
odometer of any vehicle with the intent
to change the mileage registered on the
odometer. The alteration may void your
warranty coverage.
OHD046035
CAUTION
Avoid driving with a very low fuel
level. If you run out of fuel, it couldcause the engine to misfire andresult in excessive loading of thecatalytic converter.
Odometer
Tripmeter
ECO ON/OFF mode*
OHD049933C
Page 115 of 348
Features of your vehicle
42
4
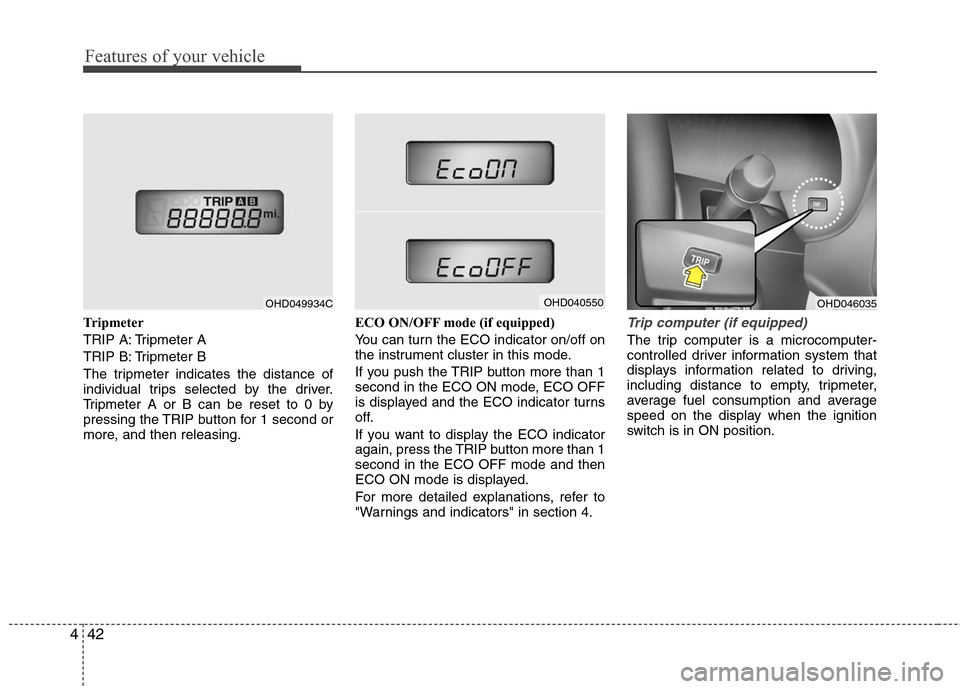
Tripmeter
TRIP A: Tripmeter A
TRIP B: Tripmeter B
The tripmeter indicates the distance of
individual trips selected by the driver.
Tripmeter A or B can be reset to 0 by
pressing the TRIP button for 1 second or
more, and then releasing. ECO ON/OFF mode (if equipped)
You can turn the ECO indicator on/off on
the instrument cluster in this mode.
If you push the TRIP button more than 1
second in the ECO ON mode, ECO OFF
is displayed and the ECO indicator turns
off.
If you want to display the ECO indicator
again, press the TRIP button more than 1
second in the ECO OFF mode and then
ECO ON mode is displayed.
For more detailed explanations, refer to
"Warnings and indicators" in section 4.Trip computer (if equipped)
The trip computer is a microcomputer-
controlled driver information system that
displays information related to driving,
including distance to empty, tripmeter,
average fuel consumption and average
speed on the display when the ignition
switch is in ON position.
OHD049934C
OHD046035
OHD040550
Page 116 of 348
443
Features of your vehicle
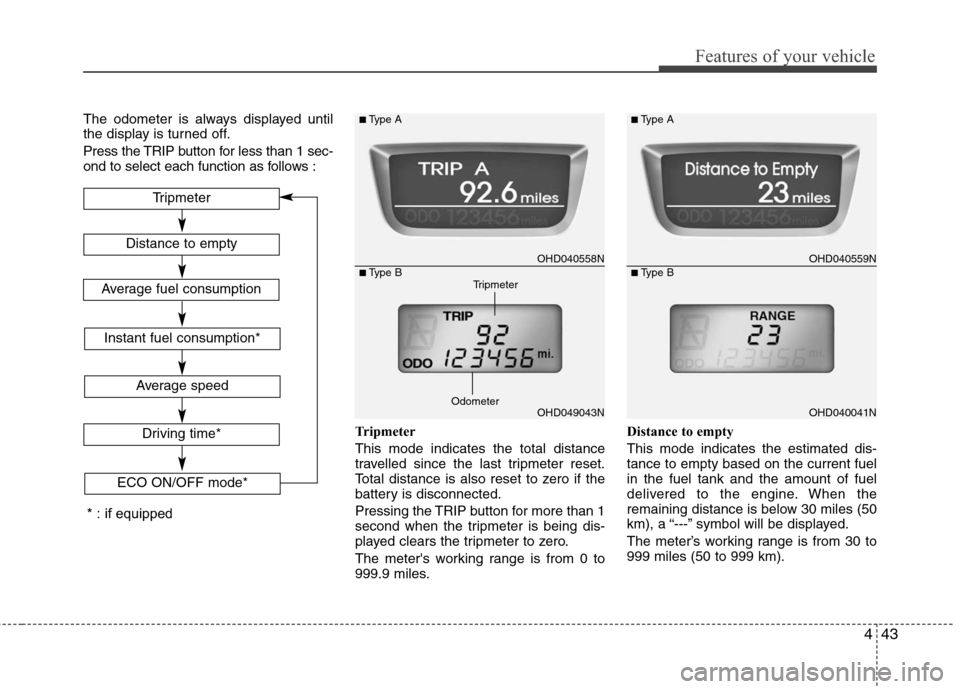
The odometer is always displayed until
the display is turned off.
Press the TRIP button for less than 1 sec-
ond to select each function as follows :Tripmeter
This mode indicates the total distance
travelled since the last tripmeter reset.
Total distance is also reset to zero if the
battery is disconnected.
Pressing the TRIP button for more than 1
second when the tripmeter is being dis-
played clears the tripmeter to zero.
The meter's working range is from 0 to
999.9 miles.Distance to empty
This mode indicates the estimated dis-
tance to empty based on the current fuel
in the fuel tank and the amount of fuel
delivered to the engine. When the
remaining distance is below 30 miles (50
km), a “---” symbol will be displayed.
The meter’s working range is from 30 to
999 miles (50 to 999 km).
Distance to empty
Instant fuel consumption*
Average speed
Driving time*
ECO ON/OFF mode*
Tripmeter
Average fuel consumption
* : if equipped
OHD040558N
OHD049043N
■Type A
■Type B
OHD040559N
OHD040041N
■Type A
■Type BTripmeter
Odometer
Page 117 of 348
Features of your vehicle
44
4
✽
✽
NOTICE
• If the vehicle is not on level ground or
the battery power has been interrupt-
ed, the “Distance to empty” function
may not operate correctly.
The trip computer may not register
additional fuel if less than 1.6 gallons
(6 liters) of fuel are added to the vehi-
cle.
• The fuel consumption and distance to empty values may vary significantly
based on driving conditions, driving
habits, and condition of the vehicle.
• The distance to empty value is an esti- mate of the available driving distance.
This value may differ from the actual
driving distance available.
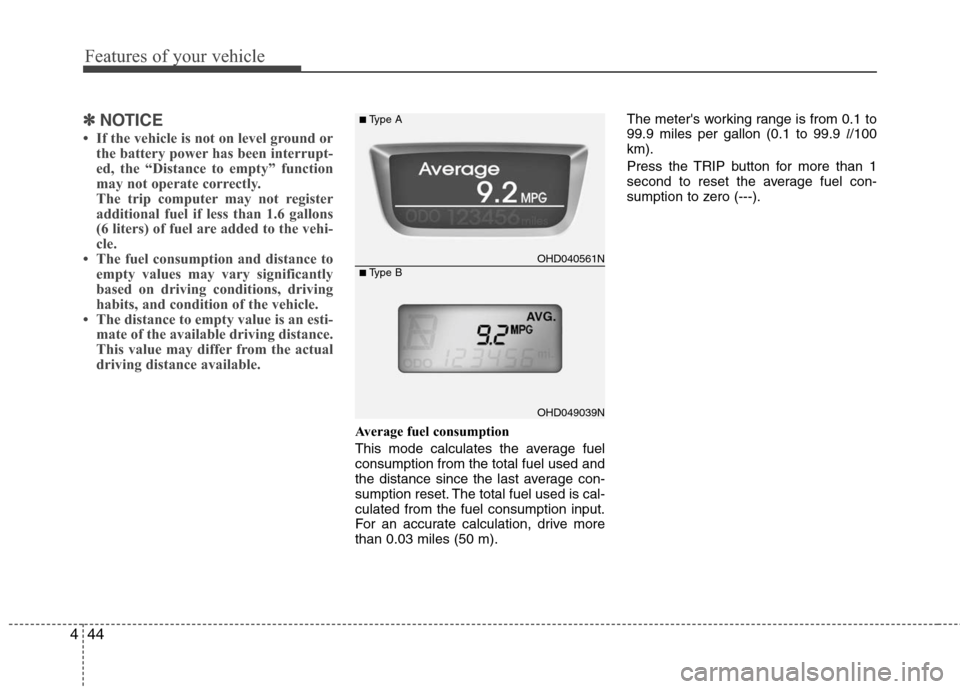
Average fuel consumption
This mode calculates the average fuel
consumption from the total fuel used and
the distance since the last average con-
sumption reset. The total fuel used is cal-
culated from the fuel consumption input.
For an accurate calculation, drive more
than 0.03 miles (50 m). The meter's working range is from 0.1 to
99.9 miles per gallon (0.1 to 99.9
l/100
km).
Press the TRIP button for more than 1
second to reset the average fuel con-
sumption to zero (---).
OHD040561N
OHD049039N
■Type A
■Type B
Page 118 of 348
445
Features of your vehicle
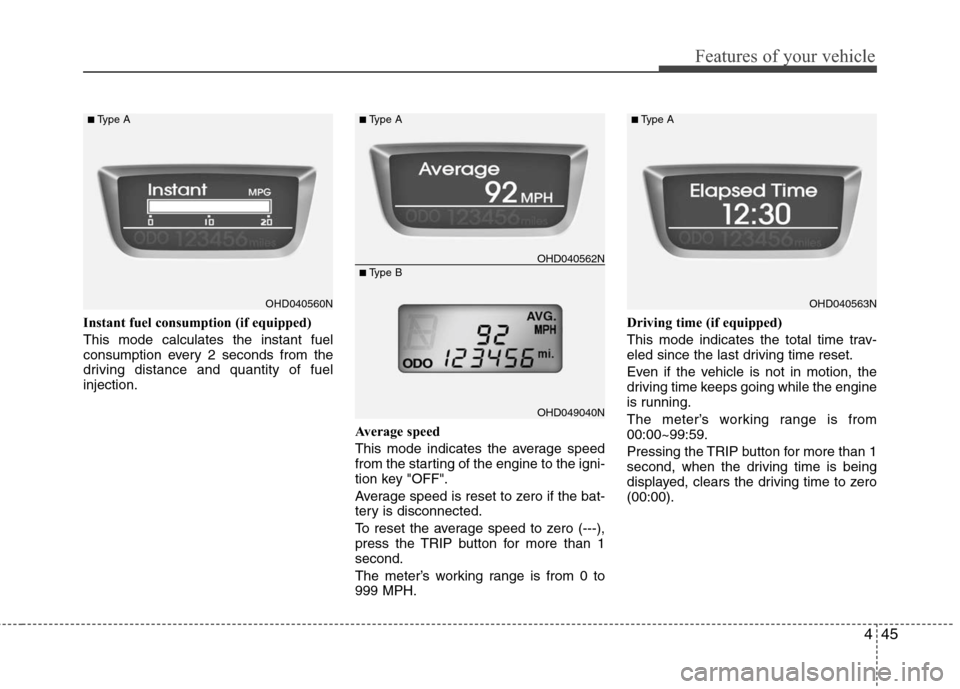
Instant fuel consumption (if equipped)
This mode calculates the instant fuel
consumption every 2 seconds from the
driving distance and quantity of fuel
injection.Average speed
This mode indicates the average speed
from the starting of the engine to the igni-
tion key "OFF".
Average speed is reset to zero if the bat-
tery is disconnected.
To reset the average speed to zero (---),
press the TRIP button for more than 1
second.
The meter’s working range is from 0 to
999 MPH.Driving time (if equipped)
This mode indicates the total time trav-
eled since the last driving time reset.
Even if the vehicle is not in motion, the
driving time keeps going while the engine
is running.
The meter’s working range is from
00:00~99:59.
Pressing the TRIP button for more than 1
second, when the driving time is being
displayed, clears the driving time to zero
(00:00).
OHD040560N
OHD040563N
■Type A
OHD040562N
OHD049040N
■Type A
■Type B
■Type A
Page 119 of 348
Features of your vehicle
46
4
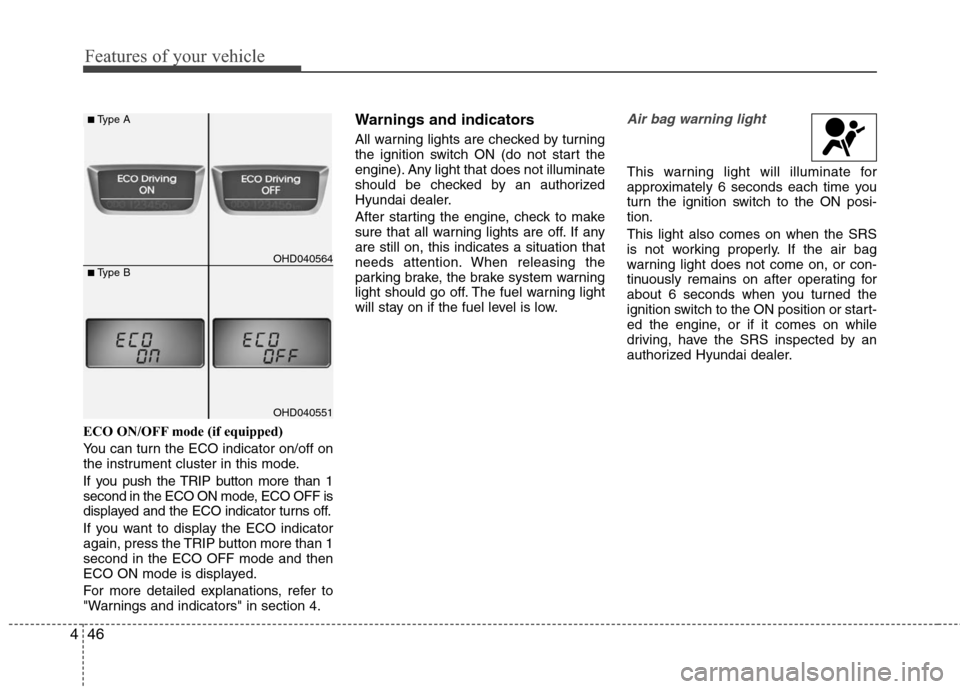
ECO ON/OFF mode (if equipped)
You can turn the ECO indicator on/off on
the instrument cluster in this mode.
If you push the TRIP button more than 1
second in the ECO ON mode, ECO OFF is
displayed and the ECO indicator turns off.
If you want to display the ECO indicator
again, press the TRIP button more than 1
second in the ECO OFF mode and then
ECO ON mode is displayed.
For more detailed explanations, refer to
"Warnings and indicators" in section 4.
Warnings and indicators
All warning lights are checked by turning
the ignition switch ON (do not start the
engine). Any light that does not illuminate
should be checked by an authorized
Hyundai dealer.
After starting the engine, check to make
sure that all warning lights are off. If any
are still on, this indicates a situation that
needs attention. When releasing the
parking brake, the brake system warning
light should go off. The fuel warning light
will stay on if the fuel level is low.
Air bag warning light
This warning light will illuminate for
approximately 6 seconds each time you
turn the ignition switch to the ON posi-
tion.
This light also comes on when the SRS
is not working properly. If the air bag
warning light does not come on, or con-
tinuously remains on after operating for
about 6 seconds when you turned the
ignition switch to the ON position or start-
ed the engine, or if it comes on while
driving, have the SRS inspected by an
authorized Hyundai dealer.
OHD040564
■Type A
■Type B
OHD040551
Page 125 of 348
Features of your vehicle
52
4
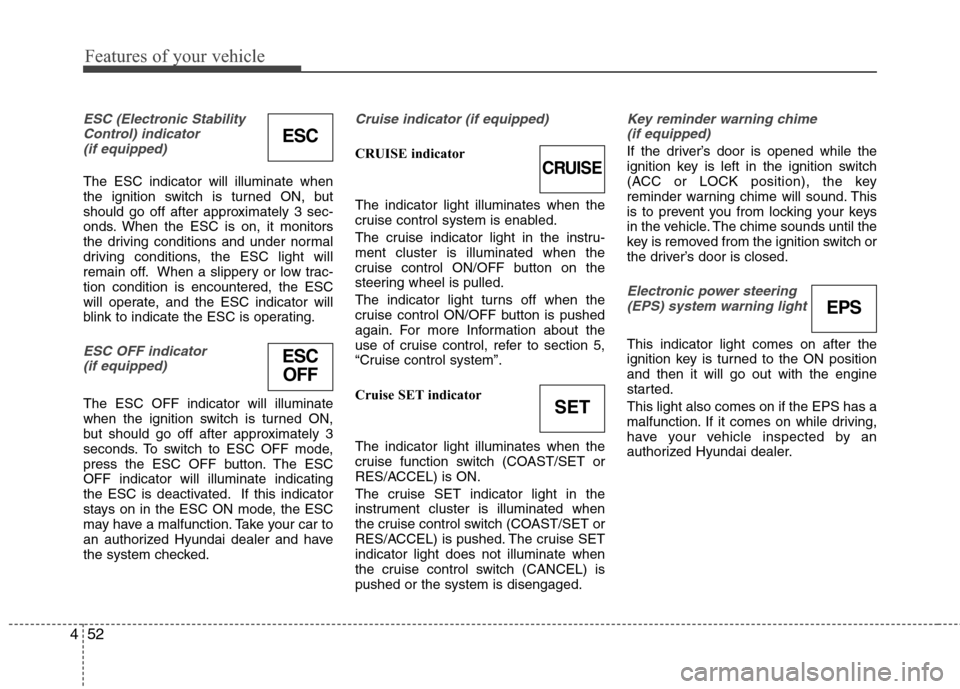
ESC (Electronic Stability
Control) indicator(if equipped)
The ESC indicator will illuminate when
the ignition switch is turned ON, but
should go off after approximately 3 sec-
onds. When the ESC is on, it monitors
the driving conditions and under normal
driving conditions, the ESC light will
remain off. When a slippery or low trac-
tion condition is encountered, the ESC
will operate, and the ESC indicator will
blink to indicate the ESC is operating.
ESC OFF indicator (if equipped)
The ESC OFF indicator will illuminate
when the ignition switch is turned ON,
but should go off after approximately 3
seconds. To switch to ESC OFF mode,
press the ESC OFF button. The ESC
OFF indicator will illuminate indicating
the ESC is deactivated. If this indicator
stays on in the ESC ON mode, the ESC
may have a malfunction. Take your car to
an authorized Hyundai dealer and have
the system checked.
Cruise indicator (if equipped)
CRUISE indicator
The indicator light illuminates when the
cruise control system is enabled.
The cruise indicator light in the instru-
ment cluster is illuminated when the
cruise control ON/OFF button on the
steering wheel is pulled.
The indicator light turns off when the
cruise control ON/OFF button is pushed
again. For more Information about the
use of cruise control, refer to section 5,
“Cruise control system”.
Cruise SET indicator
The indicator light illuminates when the
cruise function switch (COAST/SET or
RES/ACCEL) is ON.
The cruise SET indicator light in the
instrument cluster is illuminated when
the cruise control switch (COAST/SET or
RES/ACCEL) is pushed. The cruise SET
indicator light does not illuminate when
the cruise control switch (CANCEL) is
pushed or the system is disengaged.
Key reminder warning chime
(if equipped)
If the driver’s door is opened while the
ignition key is left in the ignition switch
(ACC or LOCK position), the key
reminder warning chime will sound. This
is to prevent you from locking your keys
in the vehicle. The chime sounds until the
key is removed from the ignition switch or
the driver’s door is closed.
Electronic power steering (EPS) system warning light
This indicator light comes on after the
ignition key is turned to the ON position
and then it will go out with the engine
started.
This light also comes on if the EPS has a
malfunction. If it comes on while driving,
have your vehicle inspected by an
authorized Hyundai dealer.
ESC
CRUISE
ESCOFF
SET
EPS