bulb Hyundai Elantra 2014 Owner's Manual
[x] Cancel search | Manufacturer: HYUNDAI, Model Year: 2014, Model line: Elantra, Model: Hyundai Elantra 2014Pages: 668, PDF Size: 35.58 MB
Page 7 of 668
1
2
3
4
5
6
7
8I
IntroductionHow to use this manual / Fuel requirements / Vehicle break-in process / Vehicle data collection and eventdata recorders
Your vehicle at a glance
Exterior overview / Interior overview / Instrument panel overview / Engi\
ne compartment
Safety features of your vehicle
Seats / Seat belts / Child restraint system / Air bag
Features of your vehicleKeys / Door locks / Trunk / Windows / Hood / Fuel filler lid / Sunroof / Steering wheel / Mirrors /
Instrument cluster / Lighting / Wipers & Washers / Climate control system / Audio system / Etc.
Driving your vehicleBefore driving / Engine start/stop button / Transaxle / Brake system / Cruise control system /
Active ECO system / Winter driving / Vehicle load limit / Etc.
What to do in an emergencyRoad warning / Emergency while driving / Emergency starting / Engine overheat / TPMS / Flat tire / Towing / Etc.
MaintenanceEngine compartment / Maintenance service / Engine oil / Engine coolant /\
Brake fluid / Washer fluid /
Parking brake / Air cleaner / Wiper blades / Battery / Tire and wheels / Fuses / Light bulbs / Etc.
Specifications, Consumer information and Reporting safety defects
Index
table of contents
UD(FL) HMA foreword.qxp 6/23/2014 2:59 PM Page 7
Page 162 of 668
Features of your vehicle
76
4
One-touch lane change function
To activate an one-touch lane
change function, move the turn sig-
nal lever slightly and then release it.
The lane change signals will blink 3
times.
✽ ✽
NOTICE
If the turn signal indicator stays on
and does not flash, or if it flashes
abnormally, a bulb may be burned
out or have a poor electrical connec-
tion in the circuit. The bulb may
require replacement.
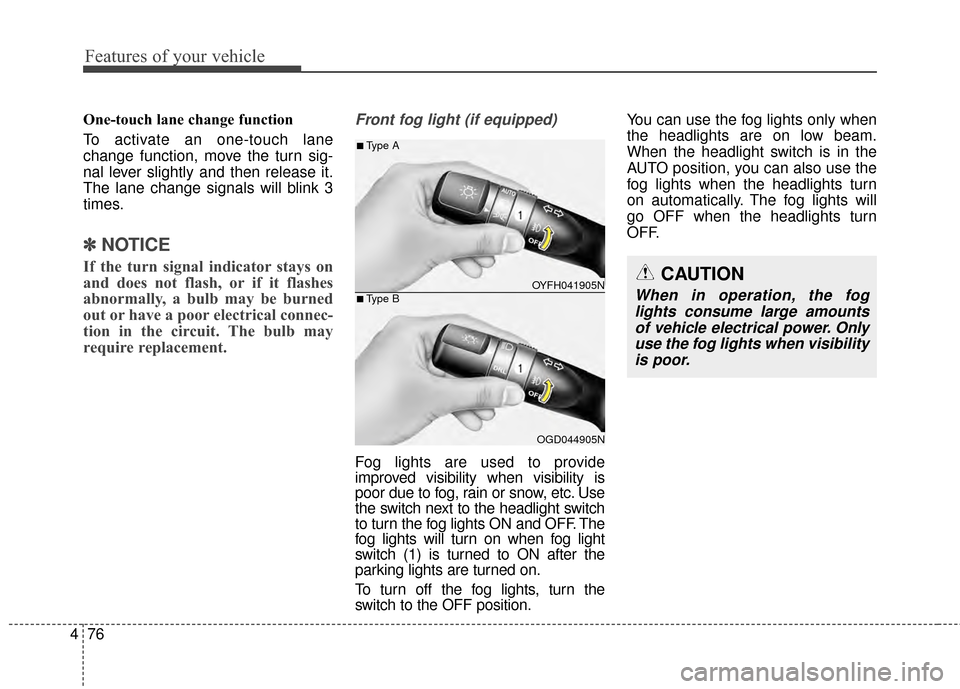
Front fog light (if equipped)
Fog lights are used to provide
improved visibility when visibility is
poor due to fog, rain or snow, etc. Use
the switch next to the headlight switch
to turn the fog lights ON and OFF. The
fog lights will turn on when fog light
switch (1) is turned to ON after the
parking lights are turned on.
To turn off the fog lights, turn the
switch to the OFF position. You can use the fog lights only when
the headlights are on low beam.
When the headlight switch is in the
AUTO position, you can also use the
fog lights when the headlights turn
on automatically. The fog lights will
go OFF when the headlights turn
OFF.
CAUTION
When in operation, the fog
lights consume large amountsof vehicle electrical power. Onlyuse the fog lights when visibilityis poor.OYFH041905N
OGD044905N
■Type A
■Type B
Page 550 of 668
Fuses . . . . . . . . . . . . . . . . . . . . . . . . . . . . . . . . . . . . \
7-63
• Instrument panel fuse replacement . . . . . . . . . . . . . . 7-64
• Memory fuse . . . . . . . . . . . . . . . . . . . . . . . . . . . . . . . . 7-65
• Engine compartment panel fuse replacement . . . . . 7-66
• Fuse/relay panel description. . . . . . . . . . . . . . . . . . . . 7-68
Light bulbs . . . . . . . . . . . . . . . . . . . . . . . . . . . . . . . 7-76
• Headlight, parking light, turn signal light, side marker and front fog light bulb
replacement. . . . . . . . . . . . . . . . . . . . . . . . . . . . . . . . 7-76
• Side repeater light replacement . . . . . . . . . . . . . . . . . 7-80
• Rear combination light bulb replacement . . . . . . . . 7-81
• High mounted stop light replacement . . . . . . . . . . . . 7-84
• License plate light bulb replacement. . . . . . . . . . . . . 7-85
• Interior light bulb replacement . . . . . . . . . . . . . . . . . 7-85
Appearance care . . . . . . . . . . . . . . . . . . . . . . . . . . . 7-87
• Exterior care . . . . . . . . . . . . . . . . . . . . . . . . . . . . . . . . 7-87
• Interior care . . . . . . . . . . . . . . . . . . . . . . . . . . . . . . . . . 7-92
Emission control system . . . . . . . . . . . . . . . . . . . . 7-94
• Crankcase emission control system . . . . . . . . . . . . . . 7-94
• Evaporative emission control system including onboard refueling vapor recovery (ORVR). . . . . . 7-94
• Exhaust emission control system . . . . . . . . . . . . . . . . 7-95
California perchlorate notice . . . . . . . . . . . . . . . . 7-98
7
Page 624 of 668
Maintenance
76
7
LIGHT BULBS
Consult an authorized HYUNDAI
dealer to replace most vehicle light
bulbs. It is difficult to replace vehicle
light bulbs because other parts of the
vehicle must be removed before you
can get to the bulb. This is especially
true for removing the headlight
assembly to get to the bulb(s).
Removing/installing the headlight
assembly can result in damage to
the vehicle.
✽ ✽
NOTICE
After heavy driving, rain or wash-
ing, headlight and taillight lenses
could appear frosty. This condition
is caused by the temperature differ-
ence between the lamp inside and
the outside temperature. This is sim-
ilar to the condensation on your win-
dows inside your vehicle during the
rain and doesn’t indicate a problem
with your vehicle. If the water leaks
into the lamp bulb circuitry, have
your vehicle checked by an author-
ized HYUNDAI dealer.
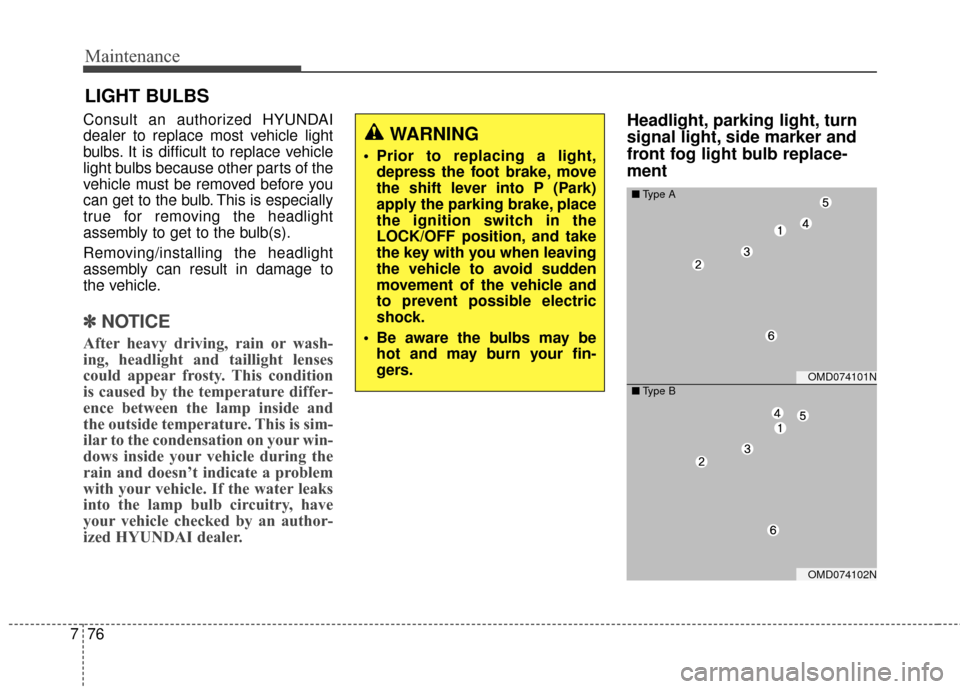
Headlight, parking light, turn
signal light, side marker and
front fog light bulb replace-
ment WARNING
Prior to replacing a light,
depress the foot brake, move
the shift lever into P (Park)
apply the parking brake, place
the ignition switch in the
LOCK/OFF position, and take
the key with you when leaving
the vehicle to avoid sudden
movement of the vehicle and
to prevent possible electric
shock.
Be aware the bulbs may be hot and may burn your fin-
gers.
OMD074101N
■ Type A
OMD074102N
■Type B
Page 625 of 668
777
Maintenance
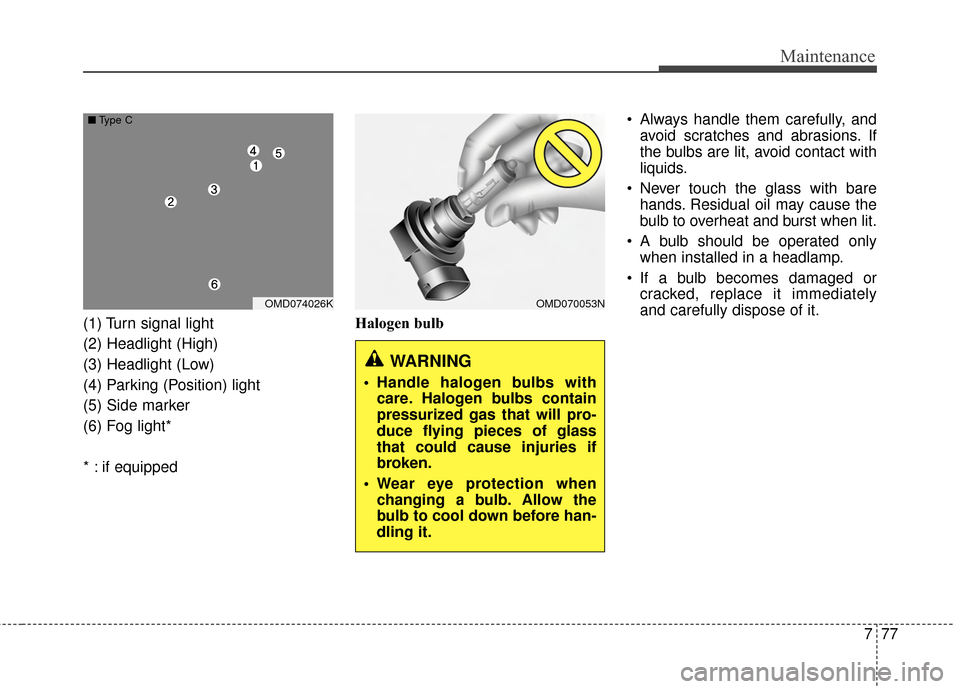
(1) Turn signal light
(2) Headlight (High)
(3) Headlight (Low)
(4) Parking (Position) light
(5) Side marker
(6) Fog light*
* : if equippedHalogen bulb Always handle them carefully, and
avoid scratches and abrasions. If
the bulbs are lit, avoid contact with
liquids.
Never touch the glass with bare hands. Residual oil may cause the
bulb to overheat and burst when lit.
A bulb should be operated only when installed in a headlamp.
If a bulb becomes damaged or cracked, replace it immediately
and carefully dispose of it.
OMD070053N
WARNING
Handle halogen bulbs withcare. Halogen bulbs contain
pressurized gas that will pro-
duce flying pieces of glass
that could cause injuries if
broken.
Wear eye protection when changing a bulb. Allow the
bulb to cool down before han-
dling it.
OMD074026K
■ Type C
Page 626 of 668
Maintenance
78
7
1. Open the hood.
2. Disconnect the negative battery
cable.
3. Loosen the screws with a screw- driver.
4. Pull the headlight assembly out to the front of the vehicle.
5. Disconnect the power connec- tor(s) from the back of the head-
light assembly.
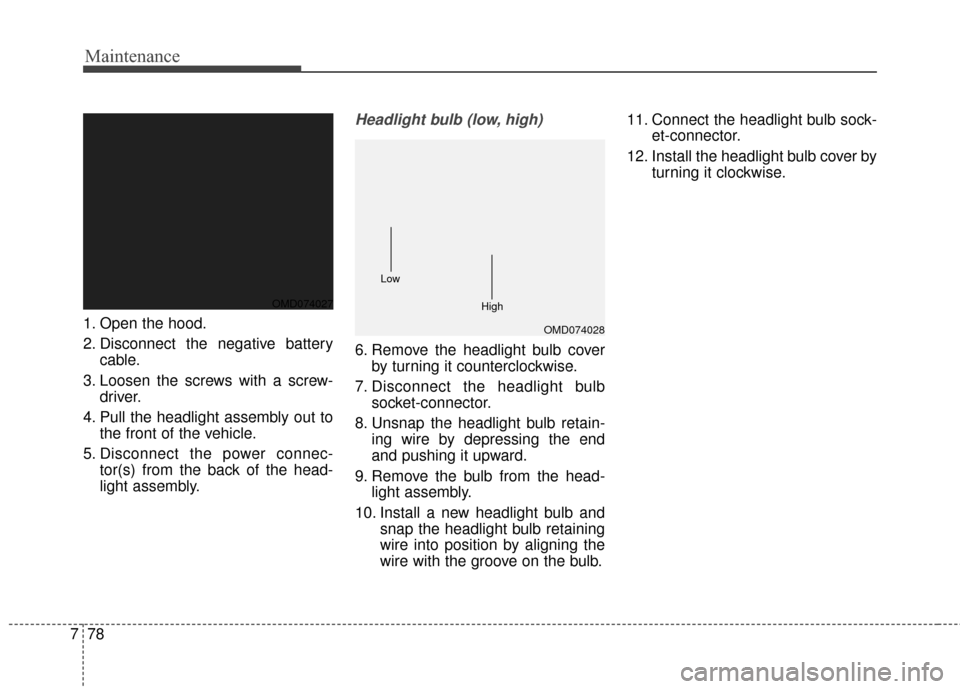
Headlight bulb (low, high)
6. Remove the headlight bulb coverby turning it counterclockwise.
7. Disconnect the headlight bulb socket-connector.
8. Unsnap the headlight bulb retain- ing wire by depressing the end
and pushing it upward.
9. Remove the bulb from the head- light assembly.
10. Install a new headlight bulb and snap the headlight bulb retaining
wire into position by aligning the
wire with the groove on the bulb. 11. Connect the headlight bulb sock-
et-connector.
12. Install the headlight bulb cover by turning it clockwise.
OMD074028
Low
HighOMD074027
Page 627 of 668
779
Maintenance
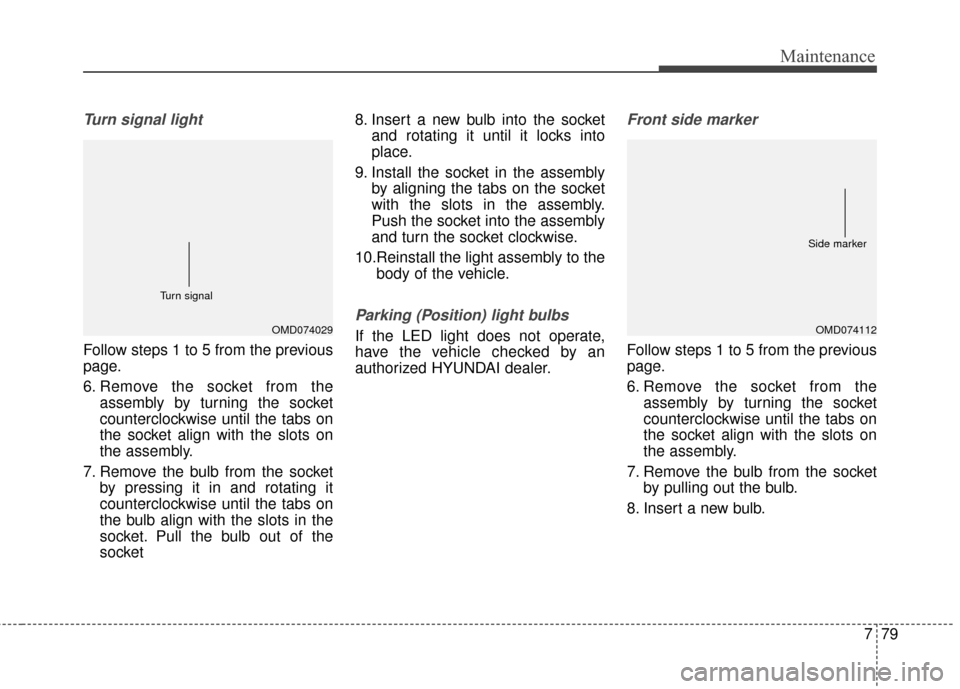
Turn signal light
Follow steps 1 to 5 from the previous
page.
6. Remove the socket from theassembly by turning the socket
counterclockwise until the tabs on
the socket align with the slots on
the assembly.
7. Remove the bulb from the socket by pressing it in and rotating it
counterclockwise until the tabs on
the bulb align with the slots in the
socket. Pull the bulb out of the
socket 8. Insert a new bulb into the socket
and rotating it until it locks into
place.
9. Install the socket in the assembly by aligning the tabs on the socket
with the slots in the assembly.
Push the socket into the assembly
and turn the socket clockwise.
10.Reinstall the light assembly to the body of the vehicle.
Parking (Position) light bulbs
If the LED light does not operate,
have the vehicle checked by an
authorized HYUNDAI dealer.
Front side marker
Follow steps 1 to 5 from the previous
page.
6. Remove the socket from theassembly by turning the socket
counterclockwise until the tabs on
the socket align with the slots on
the assembly.
7. Remove the bulb from the socket by pulling out the bulb.
8. Insert a new bulb.
OMD074029
Turn signalOMD074112
Side marker
Page 628 of 668
Maintenance
80
7
9. Install the socket in the assembly
by aligning the tabs on the socket
with the slots in the assembly.
Push the socket into the assembly
and turn the socket clockwise.
10. Reinstall the light assembly to the body of the vehicle.Fog light bulbs
1. Remove the front bumper undercover.
2. Reach your hand into the back of the front bumper.
3. Disconnect the power connector from the socket.
4. Remove the bulb-socket from the housing by turning the socket
counter clockwise until the tabs on
the socket align with the slots on
the housing.
5. Install the new bulb-socket into the housing by aligning the tabs on
the socket with the slots in the
housing. Push the socket into the
housing and turn the socket clock-
wise.
6. Connect the power connector to the socket.
7. Reinstall the front bumper under cover.
Side repeater light replace-
ment
If the LED light does not operate,
have the vehicle checked by an
authorized HYUNDAI dealer.
OMD070030
Page 629 of 668
781
Maintenance
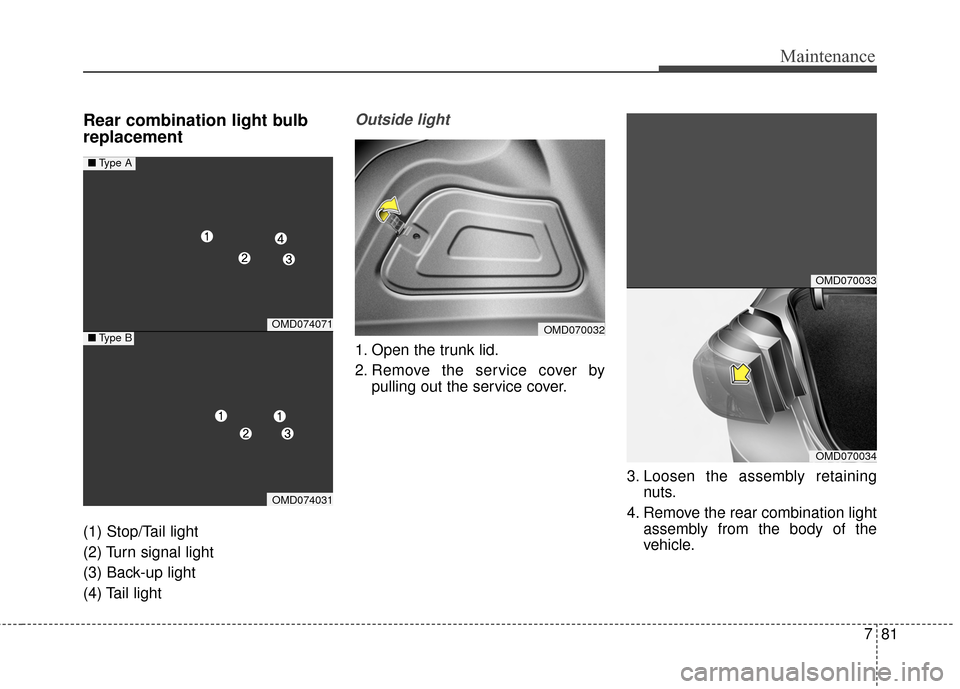
Rear combination light bulb
replacement
(1) Stop/Tail light
(2) Turn signal light
(3) Back-up light
(4) Tail light
Outside light
1. Open the trunk lid.
2. Remove the service cover bypulling out the service cover.
3. Loosen the assembly retainingnuts.
4. Remove the rear combination light assembly from the body of the
vehicle.
OMD074071
OMD074031
■Type A
■Type BOMD070032
OMD070033
OMD070034
Page 630 of 668
Maintenance
82
7
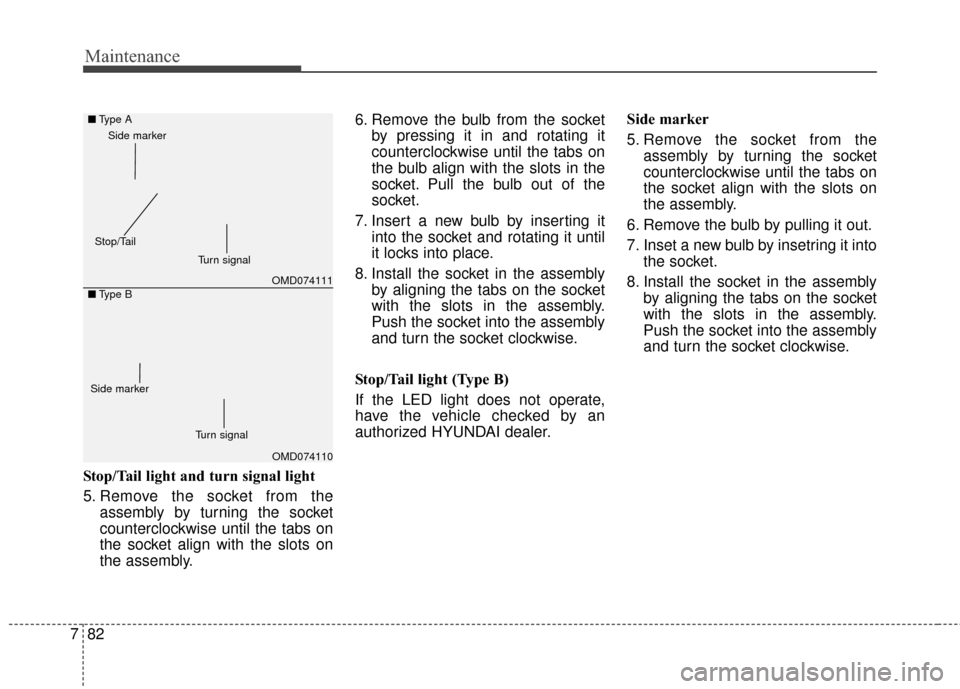
Stop/Tail light and turn signal light
5. Remove the socket from the
assembly by turning the socket
counterclockwise until the tabs on
the socket align with the slots on
the assembly. 6. Remove the bulb from the socket
by pressing it in and rotating it
counterclockwise until the tabs on
the bulb align with the slots in the
socket. Pull the bulb out of the
socket.
7. Insert a new bulb by inserting it into the socket and rotating it until
it locks into place.
8. Install the socket in the assembly by aligning the tabs on the socket
with the slots in the assembly.
Push the socket into the assembly
and turn the socket clockwise.
Stop/Tail light (Type B)
If the LED light does not operate,
have the vehicle checked by an
authorized HYUNDAI dealer. Side marker
5. Remove the socket from the
assembly by turning the socket
counterclockwise until the tabs on
the socket align with the slots on
the assembly.
6. Remove the bulb by pulling it out.
7. Inset a new bulb by insetring it into the socket.
8. Install the socket in the assembly by aligning the tabs on the socket
with the slots in the assembly.
Push the socket into the assembly
and turn the socket clockwise.
OMD074111
OMD074110
■
Type A
■ Type B
Turn signal
Side marker
Stop/Tail
Turn signal
Side marker