fuse Hyundai Elantra 2015 Owner's Manual - RHD (UK. Australia)
[x] Cancel search | Manufacturer: HYUNDAI, Model Year: 2015, Model line: Elantra, Model: Hyundai Elantra 2015Pages: 498, PDF Size: 9.45 MB
Page 16 of 498
Your vehicle at a glance
4 2
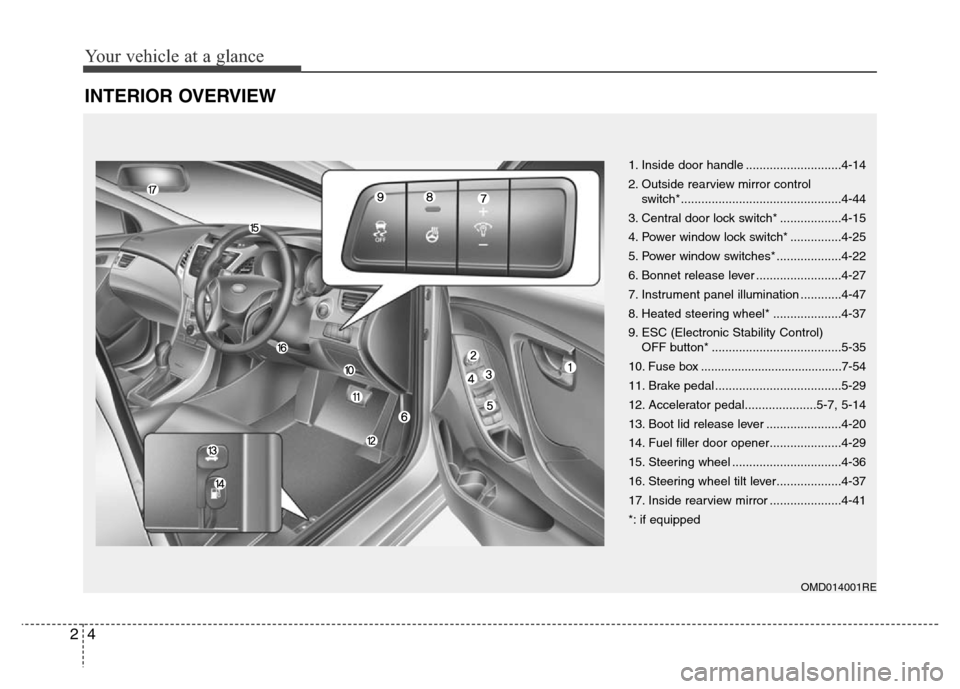
INTERIOR OVERVIEW
OMD014001RE
1. Inside door handle ............................4-14
2. Outside rearview mirror control
switch*...............................................4-44
3. Central door lock switch* ..................4-15
4. Power window lock switch* ...............4-25
5. Power window switches* ...................4-22
6. Bonnet release lever .........................4-27
7. Instrument panel illumination ............4-47
8. Heated steering wheel* ....................4-37
9. ESC (Electronic Stability Control)
OFF button* ......................................5-35
10. Fuse box ..........................................7-54
11. Brake pedal .....................................5-29
12. Accelerator pedal.....................5-7, 5-14
13. Boot lid release lever ......................4-20
14. Fuel filler door opener.....................4-29
15. Steering wheel ................................4-36
16. Steering wheel tilt lever...................4-37
17. Inside rearview mirror .....................4-41
*: if equipped
Page 18 of 498
Your vehicle at a glance
6 2
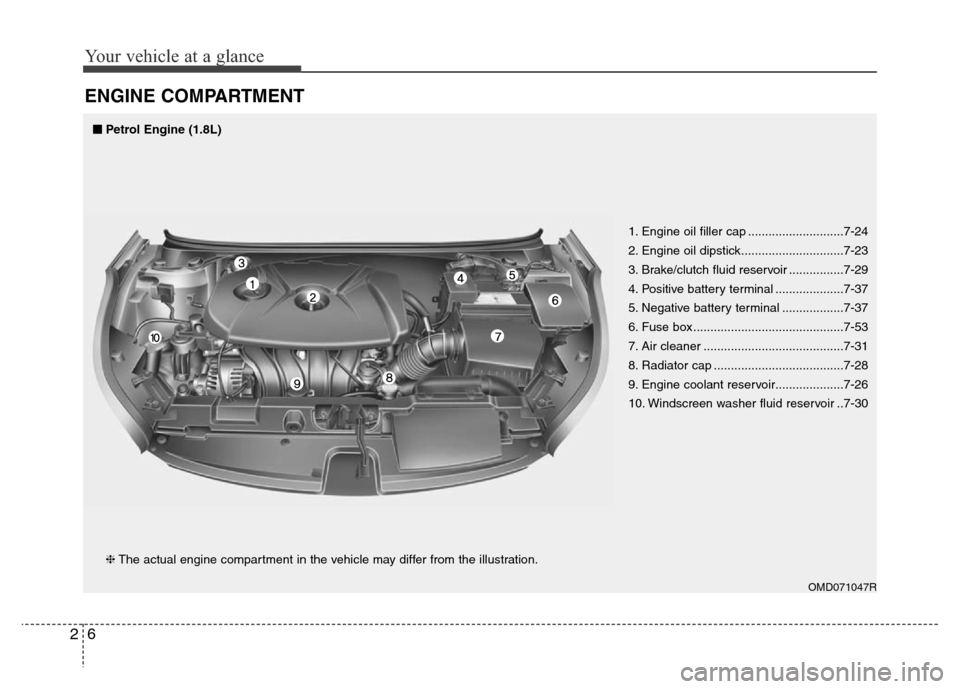
ENGINE COMPARTMENT
OMD071047R
❈The actual engine compartment in the vehicle may differ from the illustration.1. Engine oil filler cap ............................7-24
2. Engine oil dipstick..............................7-23
3. Brake/clutch fluid reservoir ................7-29
4. Positive battery terminal ....................7-37
5. Negative battery terminal ..................7-37
6. Fuse box ............................................7-53
7. Air cleaner .........................................7-31
8. Radiator cap ......................................7-28
9. Engine coolant reservoir....................7-26
10. Windscreen washer fluid reservoir ..7-30
■■Petrol Engine (1.8L)
Page 67 of 498
349
Safety features of your vehicle
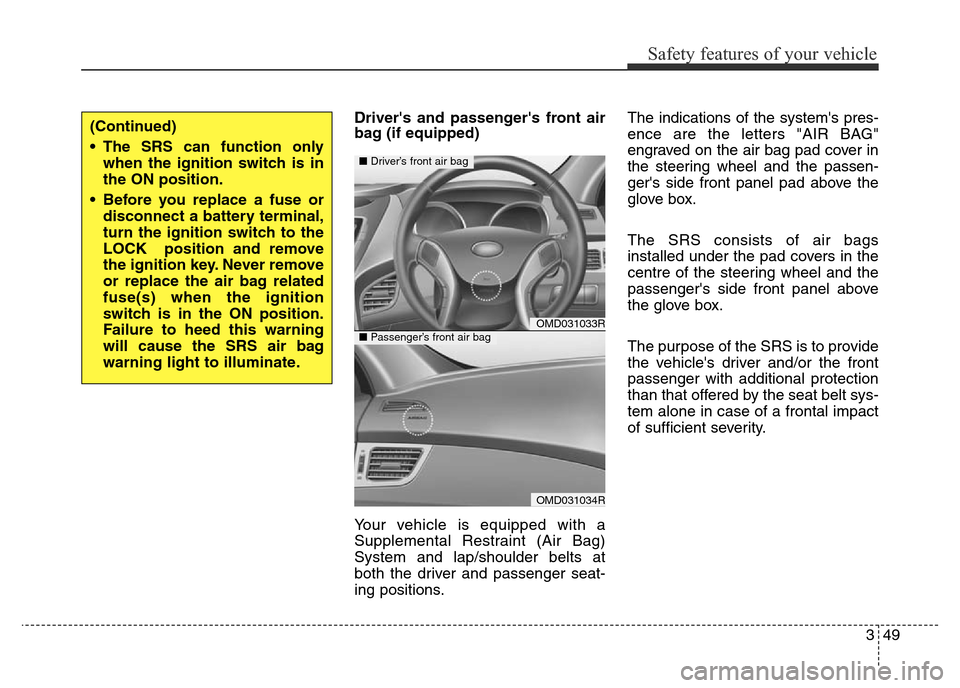
Driver's and passenger's front air
bag (if equipped)
Your vehicle is equipped with a
Supplemental Restraint (Air Bag)
System and lap/shoulder belts at
both the driver and passenger seat-
ing positions.The indications of the system's pres-
ence are the letters "AIR BAG"
engraved on the air bag pad cover in
the steering wheel and the passen-
ger's side front panel pad above the
glove box.
The SRS consists of air bags
installed under the pad covers in the
centre of the steering wheel and the
passenger's side front panel above
the glove box.
The purpose of the SRS is to provide
the vehicle's driver and/or the front
passenger with additional protection
than that offered by the seat belt sys-
tem alone in case of a frontal impact
of sufficient severity.
OMD031033R
OMD031034R
■Driver’s front air bag
■Passenger’s front air bag
(Continued)
• The SRS can function only
when the ignition switch is in
the ON position.
• Before you replace a fuse or
disconnect a battery terminal,
turn the ignition switch to the
LOCK position and remove
the ignition key. Never remove
or replace the air bag related
fuse(s) when the ignition
switch is in the ON position.
Failure to heed this warning
will cause the SRS air bag
warning light to illuminate.
Page 106 of 498
Features of your vehicle
26 4
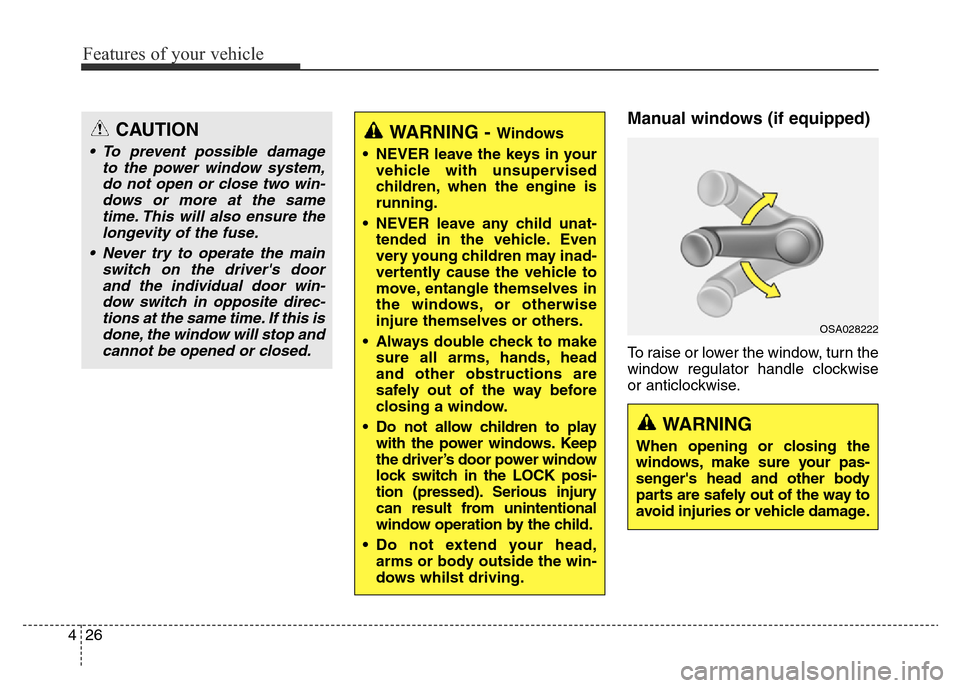
Manual windows (if equipped)
To raise or lower the window, turn the
window regulator handle clockwise
or anticlockwise.
WARNING - Windows
• NEVER leave the keys in your
vehicle with unsupervised
children, when the engine is
running.
• NEVER leave any child unat-
tended in the vehicle. Even
very young children may inad-
vertently cause the vehicle to
move, entangle themselves in
the windows, or otherwise
injure themselves or others.
• Always double check to make
sure all arms, hands, head
and other obstructions are
safely out of the way before
closing a window.
• Do not allow children to play
with the power windows. Keep
the driver’s door power window
lock switch in the LOCK posi-
tion (pressed). Serious injury
can result from unintentional
window operation by the child.
• Do not extend your head,
arms or body outside the win-
dows whilst driving.CAUTION
• To prevent possible damage
to the power window system,
do not open or close two win-
dows or more at the same
time. This will also ensure the
longevity of the fuse.
• Never try to operate the main
switch on the driver's door
and the individual door win-
dow switch in opposite direc-
tions at the same time. If this is
done, the window will stop and
cannot be opened or closed.
WARNING
When opening or closing the
windows, make sure your pas-
senger's head and other body
parts are safely out of the way to
avoid injuries or vehicle damage.
OSA028222
Page 114 of 498
Features of your vehicle
34 4
✽NOTICE
After washing the vehicle or after a
rain, be sure to wipe off the water on
the sunroof before operating the
sunroof.
Sunshade
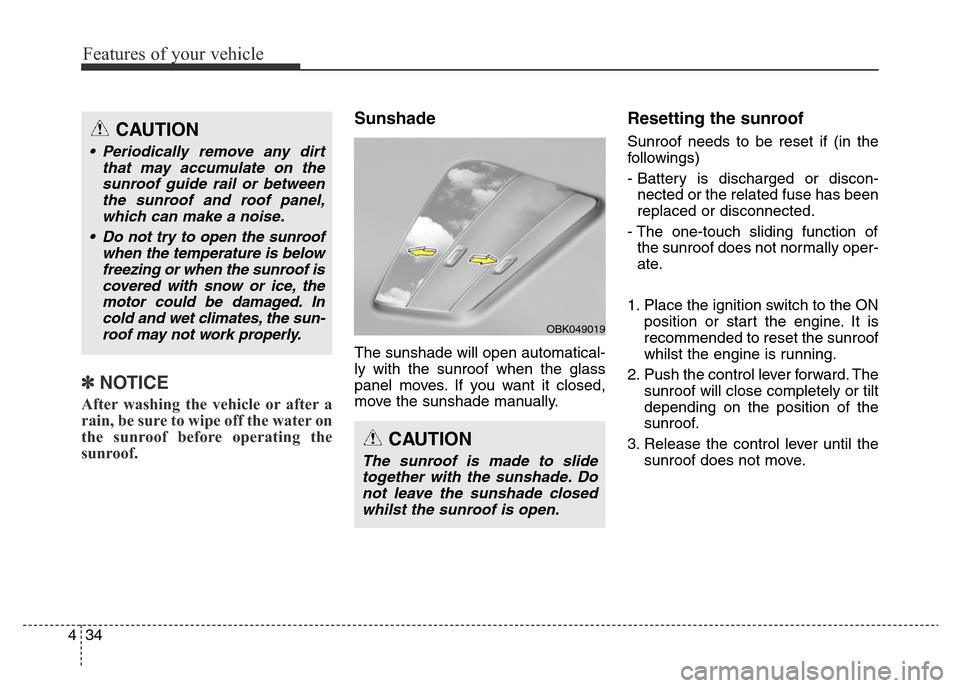
The sunshade will open automatical-
ly with the sunroof when the glass
panel moves. If you want it closed,
move the sunshade manually.
Resetting the sunroof
Sunroof needs to be reset if (in the
followings)
- Battery is discharged or discon-
nected or the related fuse has been
replaced or disconnected.
- The one-touch sliding function of
the sunroof does not normally oper-
ate.
1. Place the ignition switch to the ON
position or start the engine. It is
recommended to reset the sunroof
whilst the engine is running.
2. Push the control lever forward. The
sunroof will close completely or tilt
depending on the position of the
sunroof.
3. Release the control lever until the
sunroof does not move.
CAUTION
The sunroof is made to slide
together with the sunshade. Do
not leave the sunshade closed
whilst the sunroof is open.
OBK049019
CAUTION
• Periodically remove any dirt
that may accumulate on the
sunroof guide rail or between
the sunroof and roof panel,
which can make a noise.
• Do not try to open the sunroof
when the temperature is below
freezing or when the sunroof is
covered with snow or ice, the
motor could be damaged. In
cold and wet climates, the sun-
roof may not work properly.
Page 115 of 498
435
Features of your vehicle
4. Push the control lever forward
about 10 seconds.
- When the sunroof is in the closed
position :
The glass will tilt and slightly
move up and down.
- When the sunroof is in the tilt
position:
The glass will slightly move up
and down.
Do not release the lever until the
operation is completed.
If you release the lever during opera-
tion, try again from step 2.5. Within 3 seconds, push the control
lever forward until the sunroof
operates as follows:
Tilt down →Slide Open →Slide
Close.
Do not release the lever until the
operation is completed.
If you release the lever during opera-
tion, try again from step 2.
6. Release the sunroof control lever
after all operation has completed.
(The sunroof system has been
reset.)✽NOTICE
• If the sunroof does not reset when
the vehicle battery is disconnected
or discharged, or related fuse is
blown, the sunroof may not oper-
ate normally.
• For more detailed information, we
recommend that you contact an
authorised HYUNDAI dealer.
Page 143 of 498
463
Features of your vehicle
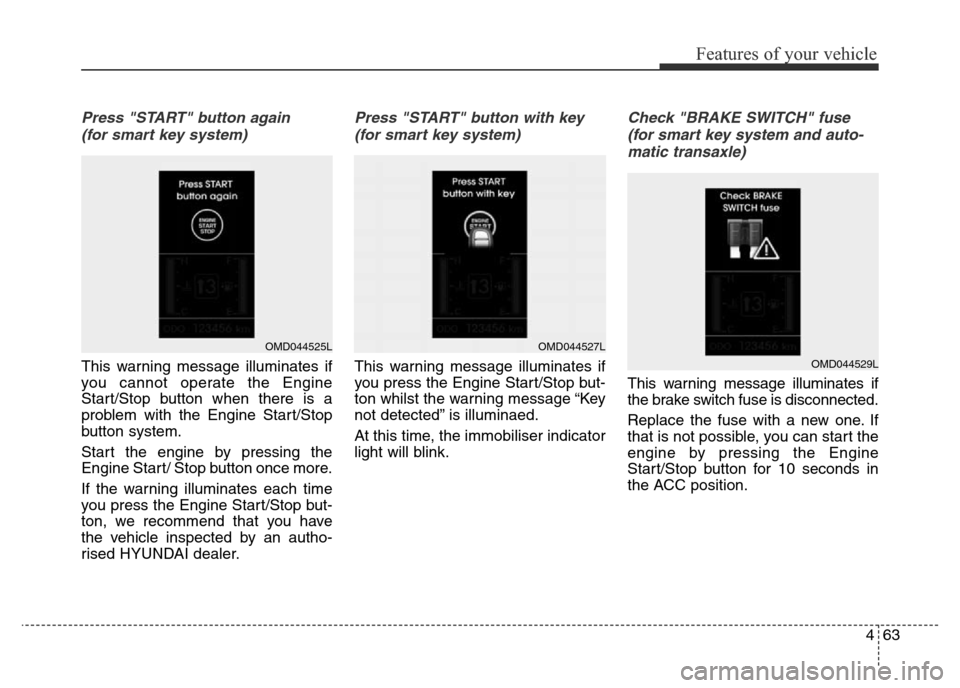
Press "START" button again
(for smart key system)
This warning message illuminates if
you cannot operate the Engine
Start/Stop button when there is a
problem with the Engine Start/Stop
button system.
Start the engine by pressing the
Engine Start/ Stop button once more.
If the warning illuminates each time
you press the Engine Start/Stop but-
ton, we recommend that you have
the vehicle inspected by an autho-
rised HYUNDAI dealer.
Press "START" button with key
(for smart key system)
This warning message illuminates if
you press the Engine Start/Stop but-
ton whilst the warning message “Key
not detected” is illuminaed.
At this time, the immobiliser indicator
light will blink.
Check "BRAKE SWITCH" fuse
(for smart key system and auto-
matic transaxle)
This warning message illuminates if
the brake switch fuse is disconnected.
Replace the fuse with a new one. If
that is not possible, you can start the
engine by pressing the Engine
Start/Stop button for 10 seconds in
the ACC position.
OMD044525LOMD044527L
OMD044529L
Page 145 of 498
465
Features of your vehicle
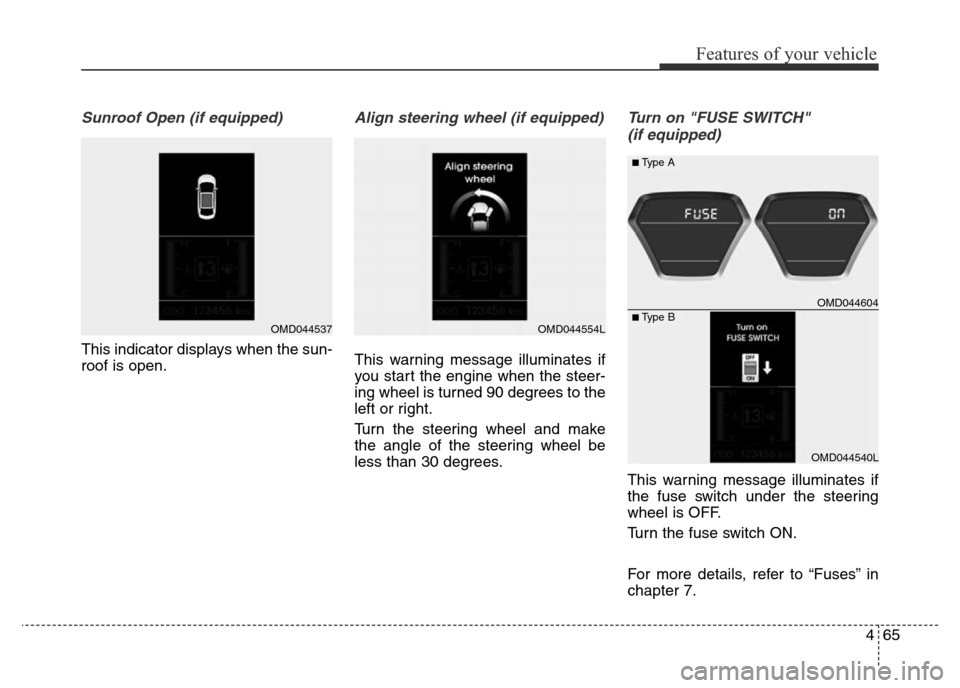
Sunroof Open (if equipped)
This indicator displays when the sun-
roof is open.
Align steering wheel (if equipped)
This warning message illuminates if
you start the engine when the steer-
ing wheel is turned 90 degrees to the
left or right.
Turn the steering wheel and make
the angle of the steering wheel be
less than 30 degrees.
Turn on "FUSE SWITCH"
(if equipped)
This warning message illuminates if
the fuse switch under the steering
wheel is OFF.
Turn the fuse switch ON.
For more details, refer to “Fuses” in
chapter 7.
OMD044537OMD044554L
OMD044604
OMD044540L
■Type A
■Type B
Page 201 of 498
4121
Features of your vehicle
INTERIOR FEATURES
LCD monitor (Clock and out-
side temperature) (if equipped)
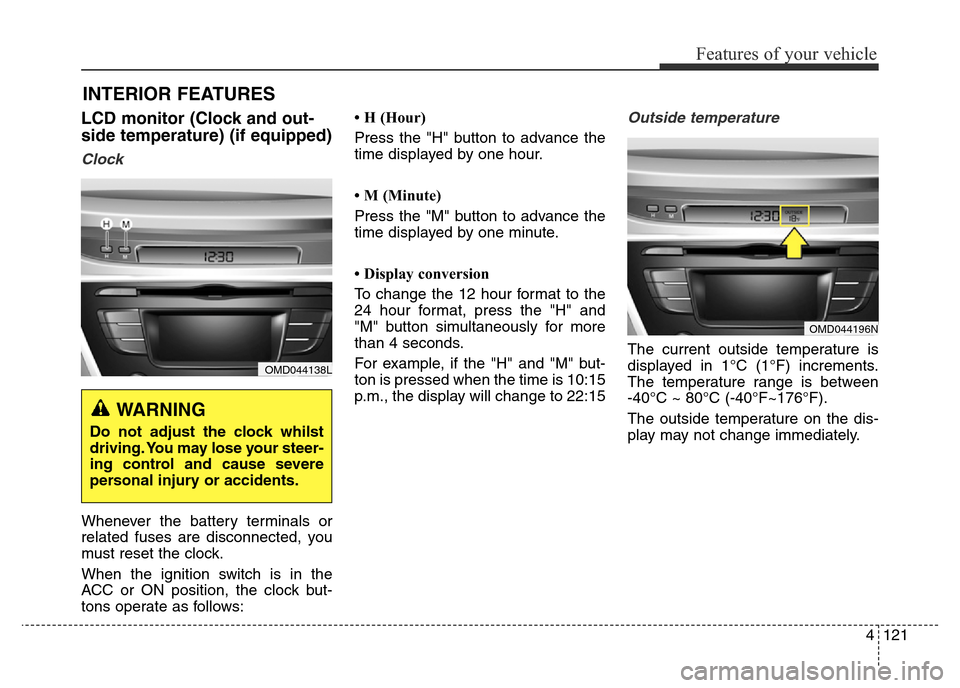
Clock
Whenever the battery terminals or
related fuses are disconnected, you
must reset the clock.
When the ignition switch is in the
ACC or ON position, the clock but-
tons operate as follows:• H (Hour)
Press the "H" button to advance the
time displayed by one hour.
• M (Minute)
Press the "M" button to advance the
time displayed by one minute.
• Display conversion
To change the 12 hour format to the
24 hour format, press the "H" and
"M" button simultaneously for more
than 4 seconds.
For example, if the "H" and "M" but-
ton is pressed when the time is 10:15
p.m., the display will change to 22:15
Outside temperature
The current outside temperature is
displayed in 1°C (1°F) increments.
The temperature range is between
-40°C ~ 80°C (-40°F~176°F).
The outside temperature on the dis-
play may not change immediately.
OMD044138L
WARNING
Do not adjust the clock whilst
driving. You may lose your steer-
ing control and cause severe
personal injury or accidents.
OMD044196N
Page 205 of 498
4125
Features of your vehicle
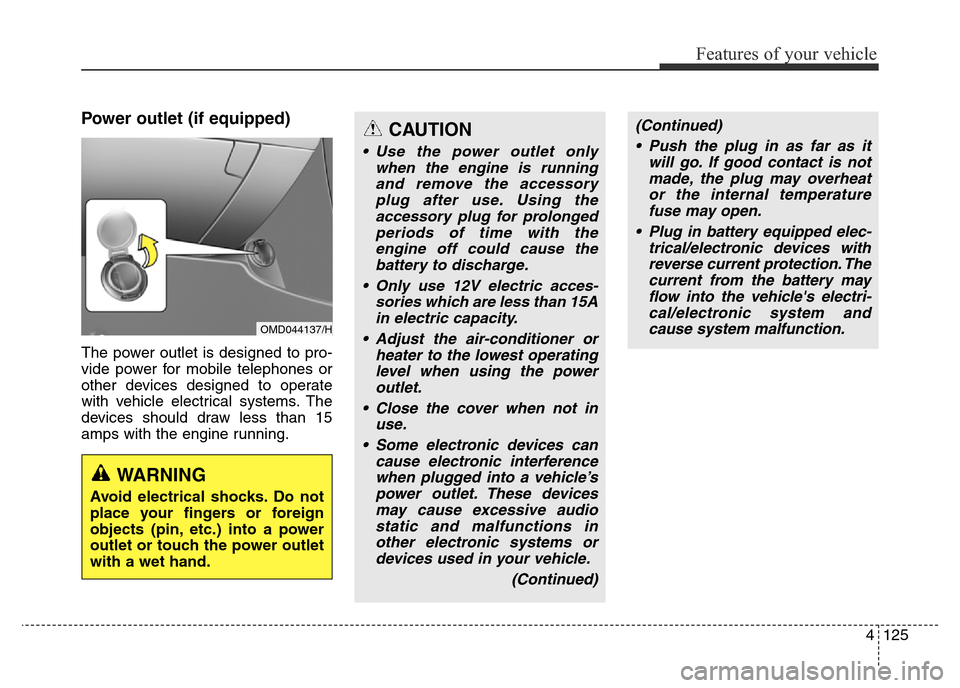
Power outlet (if equipped)
The power outlet is designed to pro-
vide power for mobile telephones or
other devices designed to operate
with vehicle electrical systems. The
devices should draw less than 15
amps with the engine running.
OMD044137/H
CAUTION
• Use the power outlet only
when the engine is running
and remove the accessory
plug after use. Using the
accessory plug for prolonged
periods of time with the
engine off could cause the
battery to discharge.
• Only use 12V electric acces-
sories which are less than 15A
in electric capacity.
• Adjust the air-conditioner or
heater to the lowest operating
level when using the power
outlet.
• Close the cover when not in
use.
• Some electronic devices can
cause electronic interference
when plugged into a vehicle’s
power outlet. These devices
may cause excessive audio
static and malfunctions in
other electronic systems or
devices used in your vehicle.
(Continued)
WARNING
Avoid electrical shocks. Do not
place your fingers or foreign
objects (pin, etc.) into a power
outlet or touch the power outlet
with a wet hand.
(Continued)
• Push the plug in as far as it
will go. If good contact is not
made, the plug may overheat
or the internal temperature
fuse may open.
• Plug in battery equipped elec-
trical/electronic devices with
reverse current protection. The
current from the battery may
flow into the vehicle's electri-
cal/electronic system and
cause system malfunction.