radiator Hyundai Elantra 2017 Owner's Manual - RHD (UK. Australia)
[x] Cancel search | Manufacturer: HYUNDAI, Model Year: 2017, Model line: Elantra, Model: Hyundai Elantra 2017Pages: 571, PDF Size: 65.66 MB
Page 27 of 571
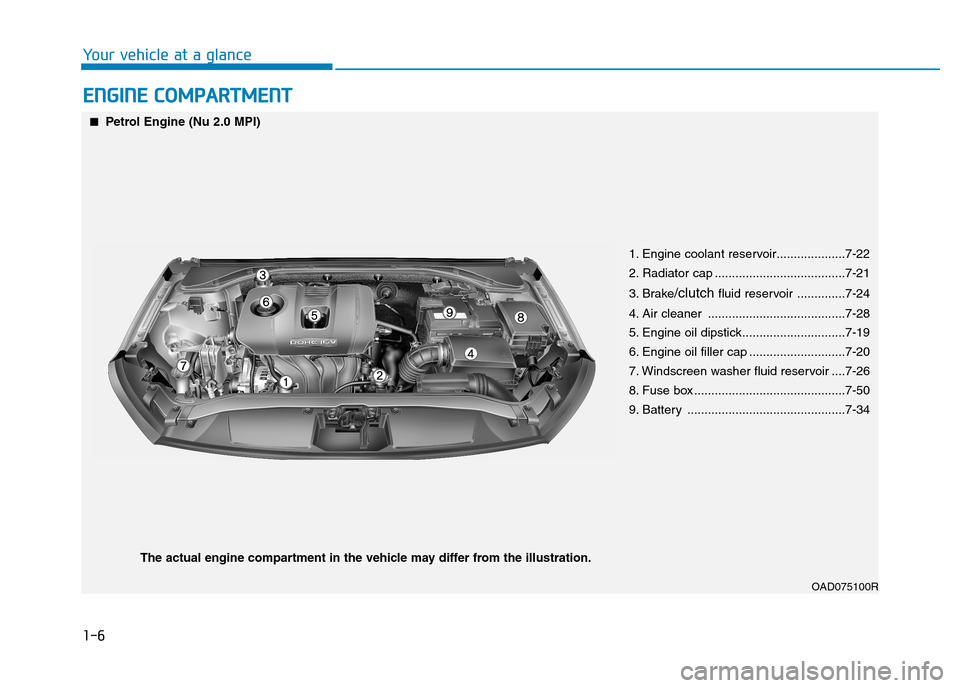
EENNGGIINNEE CCOOMMPPAARRTTMMEENNTT
1-6
Yo u r v e h i c l e a t a g l a n c e
OAD075100R
■■Petrol Engine (Nu 2.0 MPI)
1. Engine coolant reservoir....................7-22
2. Radiator cap ......................................7-21
3. Brake/clutchfluid reservoir ..............7-24
4. Air cleaner ........................................7-28
5. Engine oil dipstick..............................7-19
6. Engine oil filler cap ............................7-20
7. Windscreen washer fluid reservoir ....7-26
8. Fuse box ............................................7-50
9. Battery ..............................................7-34
The actual engine compartment in the vehicle may differ from the illustration.
Page 120 of 571
3-28
Convenient features of your vehicle
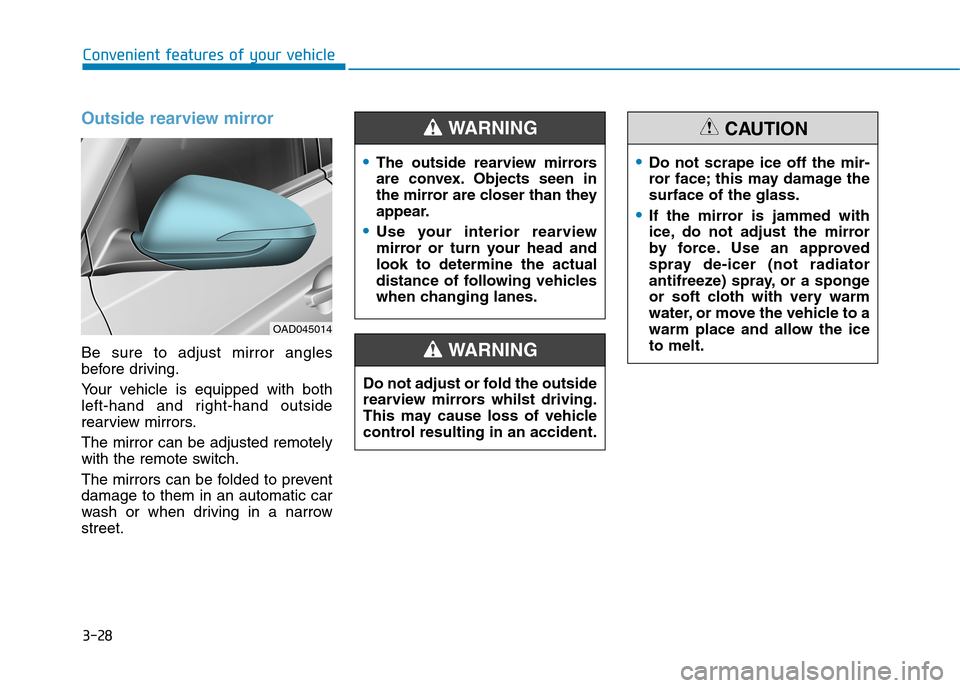
Outside rearview mirror
Be sure to adjust mirror angles
before driving.
Yo u r v e h i c l e i s e q u i p p e d w i t h b o t h
left-hand and right-hand outside
rearview mirrors.
The mirror can be adjusted remotely
with the remote switch.
The mirrors can be folded to prevent
damage to them in an automatic car
wash or when driving in a narrow
street.
Do not adjust or fold the outside
rearview mirrors whilst driving.
This may cause loss of vehicle
control resulting in an accident.
WA R N I N G
•Do not scrape ice off the mir-
ror face; this may damage the
surface of the glass.
•If the mirror is jammed with
ice, do not adjust the mirror
by force. Use an approved
spray de-icer (not radiator
antifreeze) spray, or a sponge
or soft cloth with very warm
water, or move the vehicle to a
warm place and allow the ice
to melt.
CAUTION
OAD045014
•The outside rearview mirrors
are convex. Objects seen in
the mirror are closer than they
appear.
•Use your interior rearview
mirror or turn your head and
look to determine the actual
distance of following vehicles
when changing lanes.
WA R N I N G
Page 139 of 571
3-47
Convenient features of your vehicle
3
Fuel filler door
Opening the fuel filler door
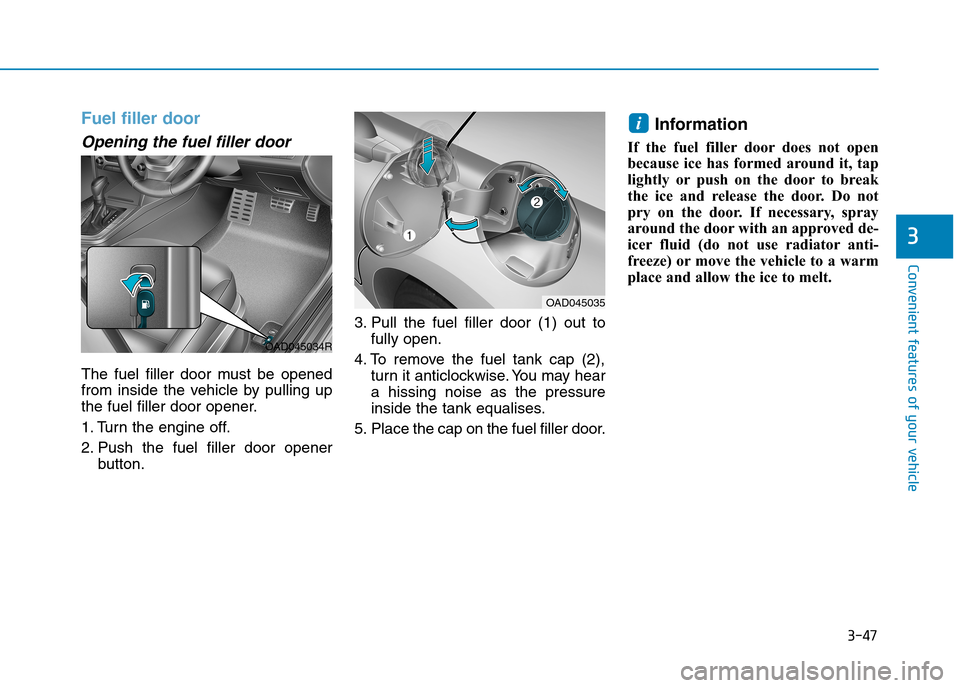
The fuel filler door must be opened
from inside the vehicle by pulling up
the fuel filler door opener.
1. Turn the engine off.
2. Push the fuel filler door opener
button.
3. Pull the fuel filler door (1) out to
fully open.
4. To remove the fuel tank cap (2),
turn it anticlockwise. You may hear
a hissing noise as the pressure
inside the tank equalises.
5. Place the cap on the fuel filler door.
Information
If the fuel filler door does not open
because ice has formed around it, tap
lightly or push on the door to break
the ice and release the door. Do not
pry on the door. If necessary, spray
around the door with an approved de-
icer fluid (do not use radiator anti-
freeze) or move the vehicle to a warm
place and allow the ice to melt.
i
OAD045035
OAD045034R
Page 146 of 571
3-54
Convenient features of your vehicle
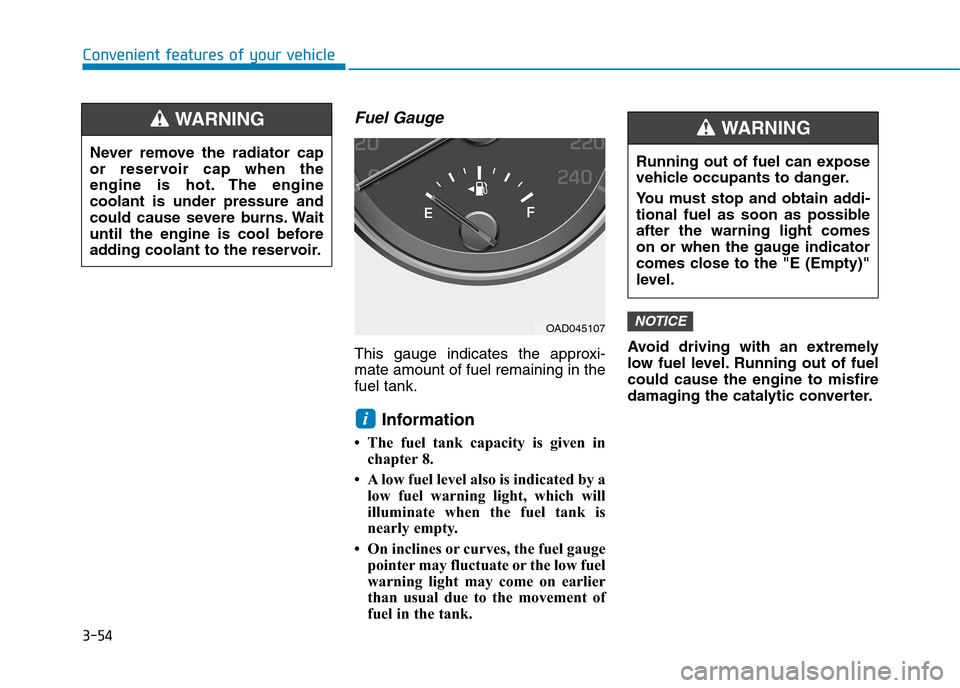
Fuel Gauge
This gauge indicates the approxi-
mate amount of fuel remaining in the
fuel tank.
Information
• The fuel tank capacity is given in
chapter 8.
• A low fuel level also is indicated by a
low fuel warning light, which will
illuminate when the fuel tank is
nearly empty.
• On inclines or curves, the fuel gauge
pointer may fluctuate or the low fuel
warning light may come on earlier
than usual due to the movement of
fuel in the tank.
Avoid driving with an extremely
low fuel level. Running out of fuel
could cause the engine to misfire
damaging the catalytic converter.
NOTICE
i
Never remove the radiator cap
or reservoir cap when the
engine is hot. The engine
coolant is under pressure and
could cause severe burns. Wait
until the engine is cool before
adding coolant to the reservoir.
WA R N I N G
OAD045107
Running out of fuel can expose
vehicle occupants to danger.
Yo u m u s t s t o p a n d o b t a i n a d d i -
tional fuel as soon as possible
after the warning light comes
on or when the gauge indicator
comes close to the "E (Empty)"
level.
WA R N I N G
Page 452 of 571
6-8
What to do in an emergency
If your temperature gauge indicates
overheating, you experience a loss
of power, or hear loud pinging or
knocking, the engine may be over-
heating. If this happens, you should:
1. Pull off the road and stop as soon
as it is safe to do so.
2. Place the shift lever in P (Park, for
automatic transmission vehicle) or
neutral (for manual transmission
vehicle) and set the parking brake.
If the air conditioning is ON, turn it
OFF.
3. If engine coolant is running out
under the vehicle or steam is com-
ing out from the bonnet, stop the
engine. Do not open the bonnet
until the coolant has stopped run-
ning or the steaming has stopped.
If there is no visible loss of engine
coolant and no steam, leave the
engine running and check to be
sure the engine cooling fan is
operating. If the fan is not running,
turn the engine off.
4. Check for coolant leaking from the
radiator, hoses or under the vehi-
cle. (If the air conditioning had been
in use, it is normal for cold water to
be draining from it when you stop.)
5. If engine coolant is leaking out, stop
the engine immediately and we rec-
ommend that you call an authorised
HYUNDAI dealer for assistance.
IIFF TTHHEE EENNGGIINNEE OOVVEERRHHEEAATTSS
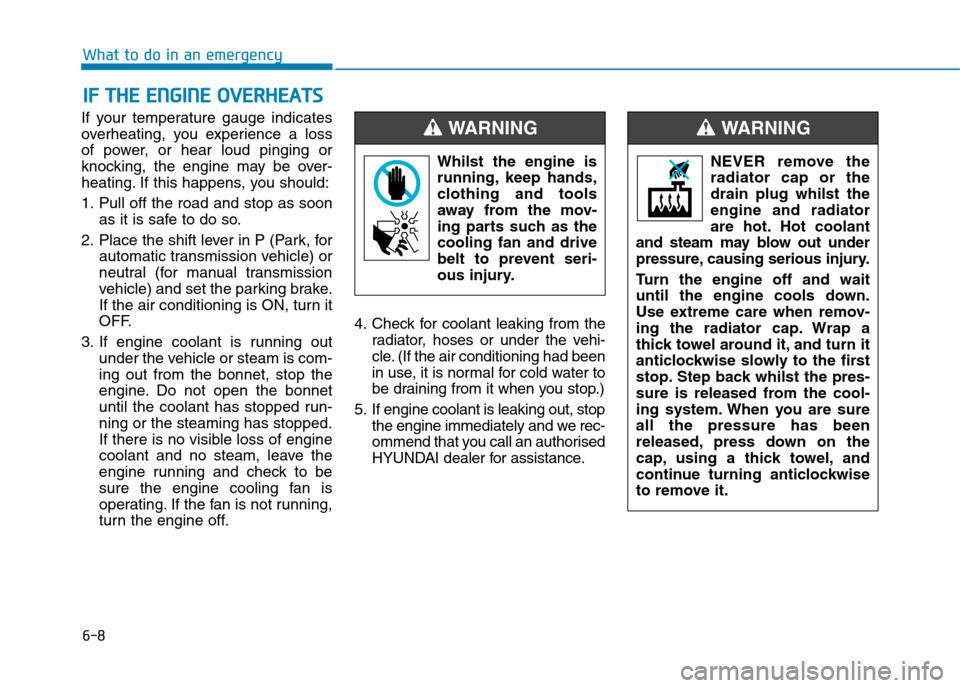
Whilst the engine is
running, keep hands,
clothing and tools
away from the mov-
ing parts such as the
cooling fan and drive
belt to prevent seri-
ous injury.
WA R N I N G
NEVER remove the
radiator cap or the
drain plug whilst the
engine and radiator
are hot. Hot coolant
and steam may blow out under
pressure, causing serious injury.
Tu r n t h e e n g i n e o f f a n d w a i t
until the engine cools down.
Use extreme care when remov-
ing the radiator cap. Wrap a
thick towel around it, and turn it
anticlockwise slowly to the first
stop. Step back whilst the pres-
sure is released from the cool-
ing system. When you are sure
all the pressure has been
released, press down on the
cap, using a thick towel, and
continue turning anticlockwise
to remove it.
WA R N I N G
Page 473 of 571
7-3
7
Maintenance
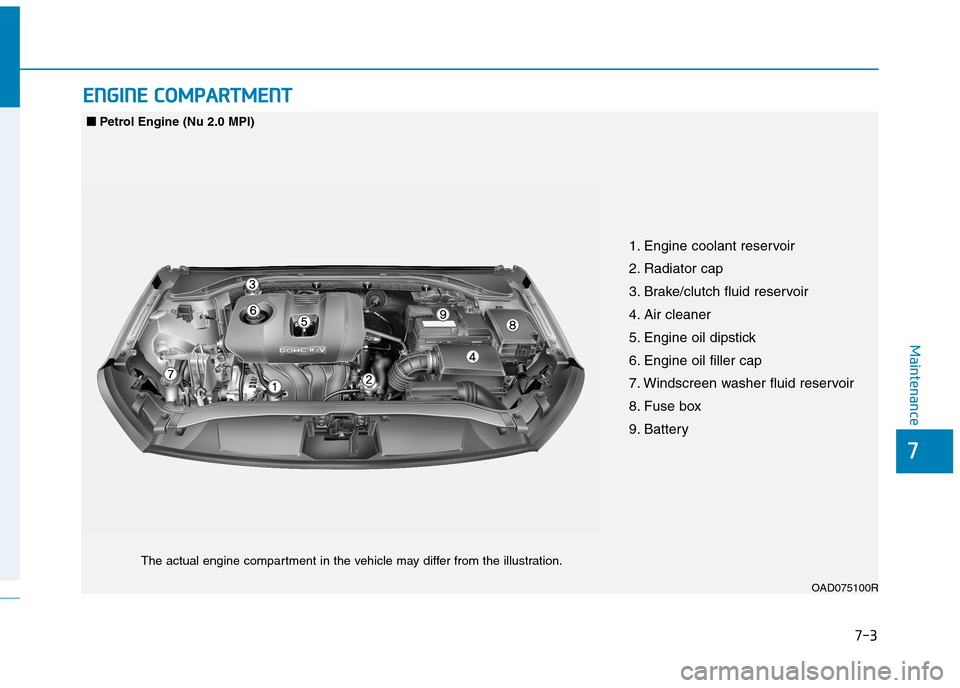
EENNGGIINNEE CCOOMMPPAARRTTMMEENNTT
OAD075100R
■■Petrol Engine (Nu 2.0 MPI)
The actual engine compartment in the vehicle may differ from the illustration.
1. Engine coolant reservoir
2. Radiator cap
3. Brake/clutch fluid reservoir
4. Air cleaner
5. Engine oil dipstick
6. Engine oil filler cap
7. Windscreen washer fluid reservoir
8. Fuse box
9. Battery
Page 477 of 571
7-7
7
Maintenance
At least twice a year:
(i.e. every Spring and Autumn)
•Check radiator, heater and air condi-
tioning hoses for leaks or damage.
•Check windscreen washer spray
and wiper operation. Clean wiper
blades with a clean cloth damp-
ened with washer fluid.
•Check headlamp alignment.
•Check muffler, exhaust pipes,
shields and clamps.
•Check the seat belts for wear and
function.
At least once a year:
•Clean body and door drain holes.
•Lubricate door hinges and bonnet
hinges.
•Lubricate door and bonnet locks
and latches.
•Lubricate door rubber weather
strips.
•Lubricate door checker.
•Check the air conditioning system.
•Inspect and lubricate automatic
transmission linkage and controls.
•Clean the battery and terminals.
•Check the brake fluid level.
Page 486 of 571
7-16
Maintenance
Air cleaner filter
We recommend that the air cleaner
filter be replaced by an authorised
HYUNDAI dealer.
Spark plugs
Make sure to install new spark plugs
of the correct heat range.
Cooling system
Check the cooling system parts,
such as radiator, coolant reservoir,
hoses and connections for leakage
and damage. Replace any damaged
parts.
Engine coolant
The coolant should be changed at
the intervals specified in the mainte-
nance schedule.
Automatic transmission fluid
Automatic transmission fluid should
not be checked under normal usage
conditions.
We recommend that the automatic
transmission fluid be changed by an
authorised HYUNDAI dealer accord-
ing to the maintenance schedule.
Information
Automatic transmission fluid colour is
basically red. As the vehicle is driven,
the automatic transmission fluid will
begin to look darker.
This is a normal condition. It does not
need to be replaced based on the
colour change.
The use of a non-specified fluid
could result in transmission mal-
function and failure.
Use only specified automatic
transmission fluid. (Refer to
“Recommended lubricants and
capacities” in section 8.)
NOTICE
i
Do not disconnect and inspect
spark plugs when the engine is
hot. You may burn yourself.
WA R N I N G
Page 489 of 571
7-19
7
Maintenance
EENNGGIINNEE OOIILL
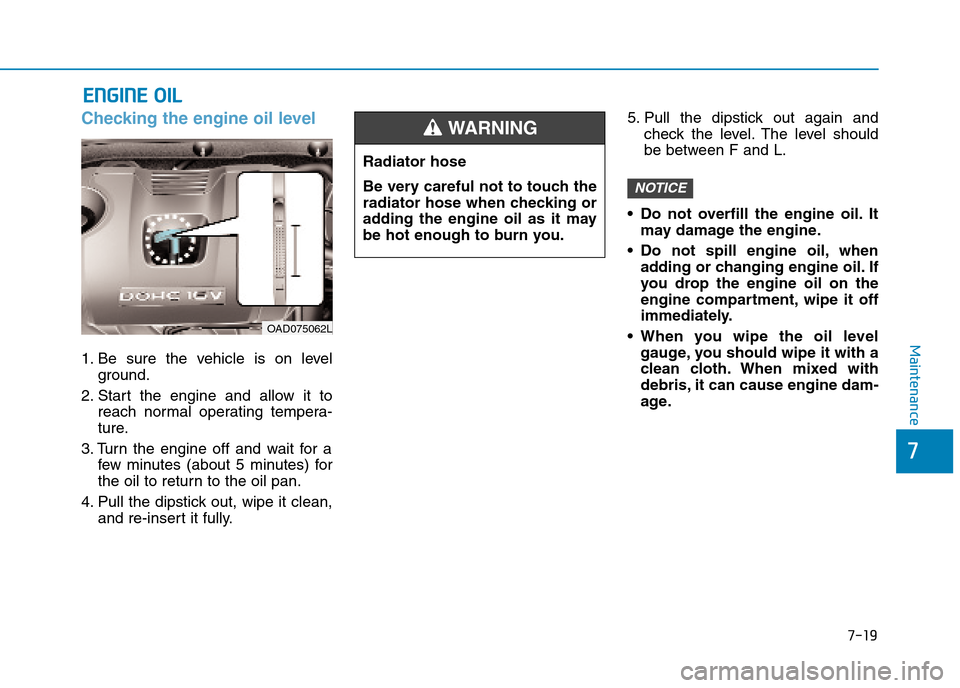
Checking the engine oil level
1. Be sure the vehicle is on level
ground.
2. Start the engine and allow it to
reach normal operating tempera-
ture.
3. Turn the engine off and wait for a
few minutes (about 5 minutes) for
the oil to return to the oil pan.
4. Pull the dipstick out, wipe it clean,
and re-insert it fully.
5. Pull the dipstick out again and
check the level. The level should
be between F and L.
•Do not overfill the engine oil.It
may damage the engine.
•Do not spill engine oil, when
adding or changing engine oil. If
you drop the engine oil on the
engine compartment, wipe it off
immediately.
•When you wipe the oil level
gauge, you should wipe it with a
clean cloth. When mixed with
debris, it can cause engine dam-
age.
NOTICE
Radiator hose
Be very careful not to touch the
radiator hose when checking or
adding the engine oil as it may
be hot enough to burn you.
WA R N I N G
OAD075062L
Page 491 of 571
7-21
7
Maintenance
EENNGGIINNEE CCOOOOLLAANNTT
OAD075009
The high-pressure cooling system
has a reservoir filled with year-round
antifreeze coolant. The reservoir is
filled at the factory.
Check the antifreeze protection and
coolant concentration level at least
once a year, at the beginning of the
winter season, and before travelling
to a colder climate.
•When the engine overheats from
low engine coolant, suddenly
adding engine coolant may
cause cracks in the engine. To
prevent damage, add engine
coolant slowly in small quanti-
ties.
•Do not drive with no engine
coolant. It may cause water pump
failure and engine seizure, etc.
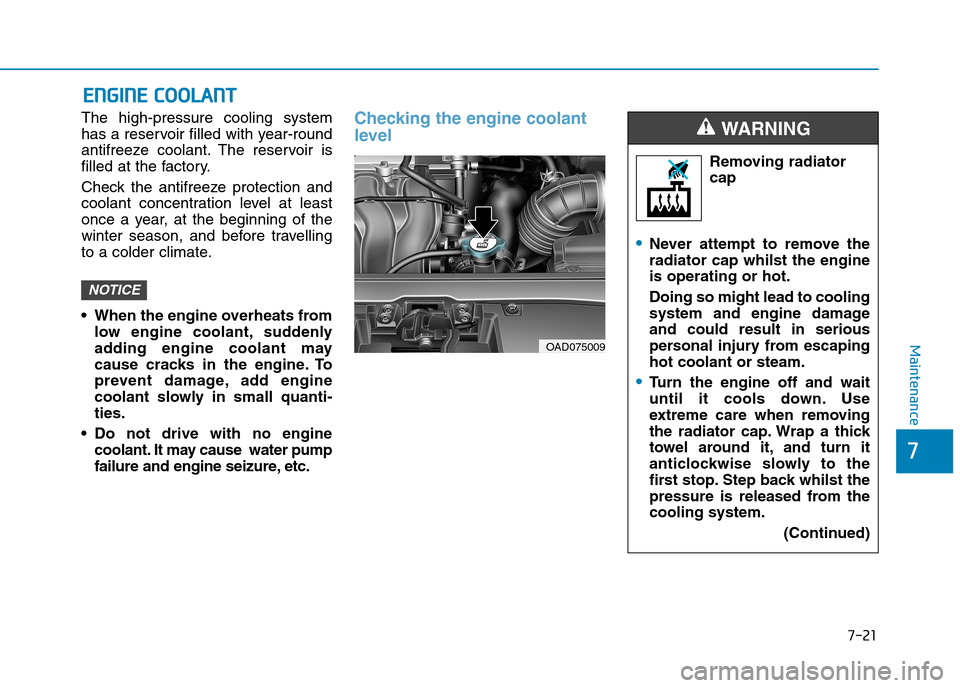
Checking the engine coolant
level
NOTICE
Removing radiator
cap
•Never attempt to remove the
radiator cap whilst the engine
is operating or hot.
Doing so might lead to cooling
system and engine damage
and could result in serious
personal injury from escaping
hot coolant or steam.
•Tu r n t h e e n g i n e o f f a n d w a i t
until it cools down. Use
extreme care when removing
the radiator cap. Wrap a thick
towel around it, and turn it
anticlockwise slowly to the
first stop. Step back whilst the
pressure is released from the
cooling system.
(Continued)
WA R N I N G