hook Hyundai Elantra 2019 Owner's Manual
[x] Cancel search | Manufacturer: HYUNDAI, Model Year: 2019, Model line: Elantra, Model: Hyundai Elantra 2019Pages: 535, PDF Size: 16.83 MB
Page 51 of 535
2-34
Safety system of your vehicle
Selecting a Child Restraint
System (CRS)
When selecting a CRS for your child,
always:
Make sure the CRS has a labelcertifying that it meets applicable
Federal Motor Vehicle Safety
Standards (FMVSS 213).
Select a child restraint based on your child’s height and weight. The
required label or the instructions
for use typically provide this infor-
mation.
Select a child restraint that fits the vehicle seating position where it
will be used.
Read and comply with the warn- ings and instructions for installation
and use provided with the child
restraint system.
Child restraint system types
There are three main types of child
restraint systems: rearward-facing
seats, forward-facing seats, and
booster seats. They are classified
according to the child's age, height
and weight.
Rearward-facing child seats
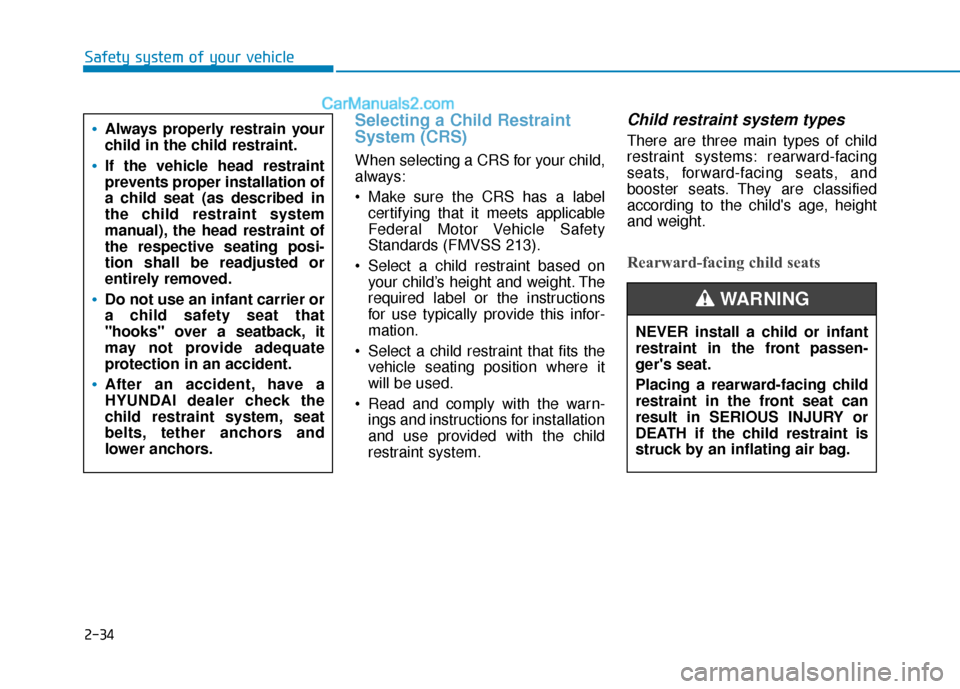
Always properly restrain your
child in the child restraint.
If the vehicle head restraint
prevents proper installation of
a child seat (as described in
the child restraint system
manual), the head restraint of
the respective seating posi-
tion shall be readjusted or
entirely removed.
Do not use an infant carrier or
a child safety seat that
"hooks" over a seatback, it
may not provide adequate
protection in an accident.
After an accident, have a
HYUNDAI dealer check the
child restraint system, seat
belts, tether anchors and
lower anchors.
NEVER install a child or infant
restraint in the front passen-
ger's seat.
Placing a rearward-facing child
restraint in the front seat can
result in SERIOUS INJURY or
DEATH if the child restraint is
struck by an inflating air bag.
WARNING
Page 56 of 535
2-39
Safety system of your vehicle
2
The recommended weight for the
LATCH system is under 65 lb (30
kg).
How to determine an appropriate
child restraint weight:
Child weight + Child restraint
weight < 65 lb (30kg)
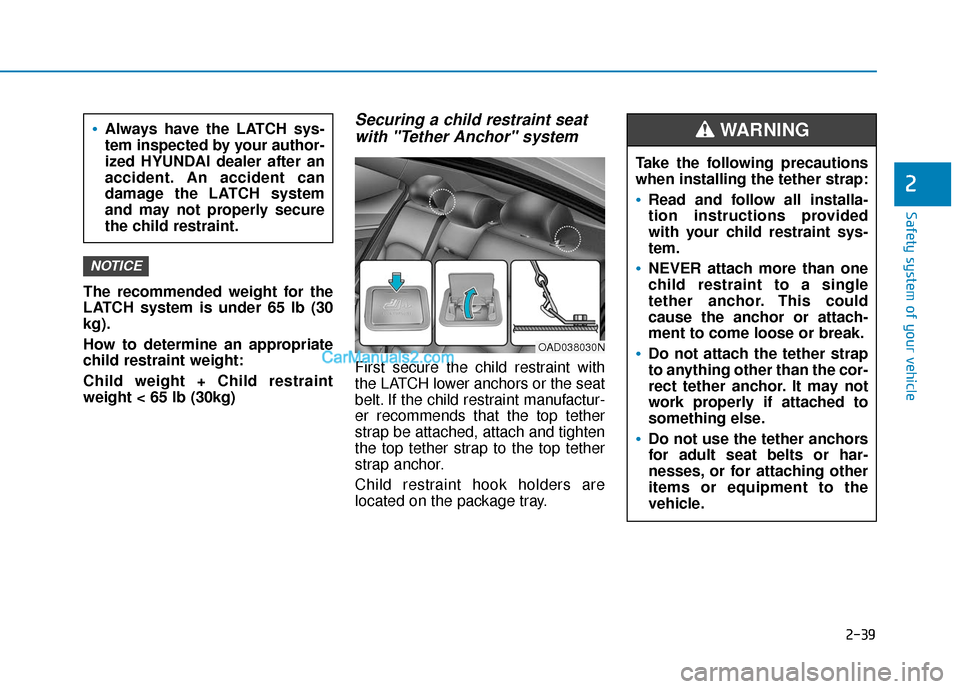
Securing a child restraint seatwith "Tether Anchor" system
First secure the child restraint with
the LATCH lower anchors or the seat
belt. If the child restraint manufactur-
er recommends that the top tether
strap be attached, attach and tighten
the top tether strap to the top tether
strap anchor.
Child restraint hook holders are
located on the package tray.
NOTICE
OAD038030N
Take the following precautions
when installing the tether strap:
Read and follow all installa-
tion instructions provided
with your child restraint sys-
tem.
NEVER attach more than one
child restraint to a single
tether anchor. This could
cause the anchor or attach-
ment to come loose or break.
Do not attach the tether strap
to anything other than the cor-
rect tether anchor. It may not
work properly if attached to
something else.
Do not use the tether anchors
for adult seat belts or har-
nesses, or for attaching other
items or equipment to the
vehicle.
WARNING Always have the LATCH sys-
tem inspected by your author-
ized HYUNDAI dealer after an
accident. An accident can
damage the LATCH system
and may not properly secure
the child restraint.
Page 57 of 535
2-40
Safety system of your vehicle
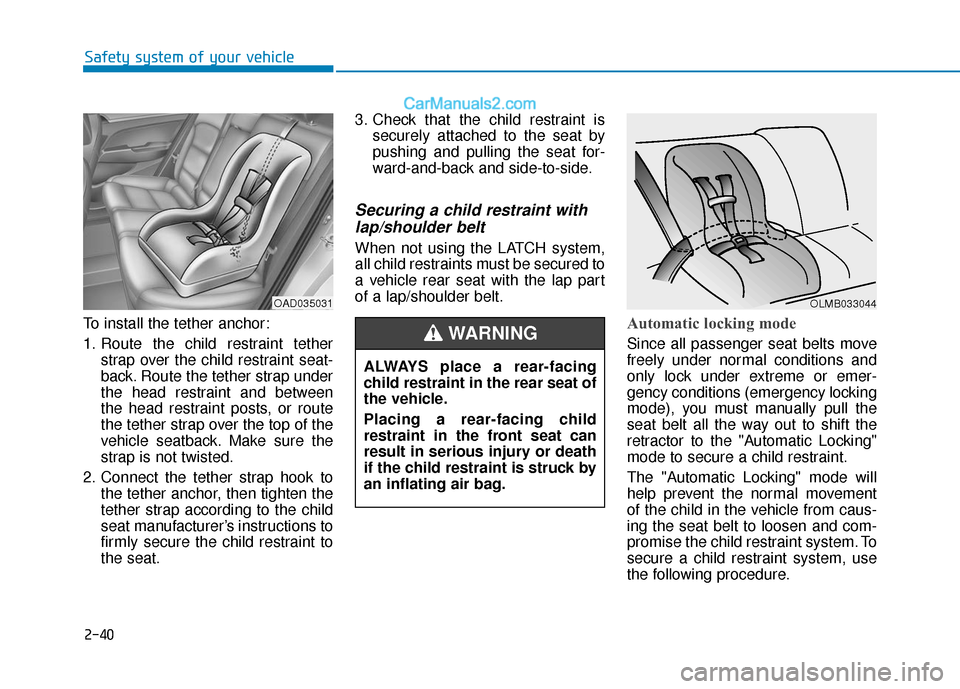
To install the tether anchor:
1. Route the child restraint tether strap over the child restraint seat-
back. Route the tether strap under
the head restraint and between
the head restraint posts, or route
the tether strap over the top of the
vehicle seatback. Make sure the
strap is not twisted.
2. Connect the tether strap hook to the tether anchor, then tighten the
tether strap according to the child
seat manufacturer’s instructions to
firmly secure the child restraint to
the seat. 3. Check that the child restraint is
securely attached to the seat by
pushing and pulling the seat for-
ward-and-back and side-to-side.
Securing a child restraint withlap/shoulder belt
When not using the LATCH system,
all child restraints must be secured to
a vehicle rear seat with the lap part
of a lap/shoulder belt.
Automatic locking mode
Since all passenger seat belts move
freely under normal conditions and
only lock under extreme or emer-
gency conditions (emergency locking
mode), you must manually pull the
seat belt all the way out to shift the
retractor to the "Automatic Locking"
mode to secure a child restraint.
The "Automatic Locking" mode will
help prevent the normal movement
of the child in the vehicle from caus-
ing the seat belt to loosen and com-
promise the child restraint system. To
secure a child restraint system, use
the following procedure.
OAD035031
ALWAYS place a rear-facing
child restraint in the rear seat of
the vehicle.
Placing a rear-facing child
restraint in the front seat can
result in serious injury or death
if the child restraint is struck by
an inflating air bag.
WARNING
OLMB033044
Page 383 of 535
What to do in an emergency
6
Hazard Warning Flasher .......................................6-2
In Case of an Emergency While Driving.............6-3
If the Engine Stalls While Driving .................................6-3
If the Engine Stalls at a Crossroad or Crossing ........6-3
If you Have a Flat Tire While Driving ..........................6-3
If the Engine Will not Start ..................................6-4
If the Engine Doesn't Turn Over or
Turns Over Slowly .............................................................6-4
If the Engine Turns Over Normally but
Doesn't Start ......................................................................6-\
4
Jump Starting ..........................................................6-4
If the Engine Overheats........................................6-7
Tire Pressure Monitoring System (TPMS).........6-9
Check Tire Pressure .........................................................6-9
Tire Pressure Monitoring System ...............................6-10
Low Tire Pressure Telltale ............................................6-11
Low Tire Pressure LCD Display with
Position Indicator ............................................................6-11
TPMS Malfunction Indicator ........................................6-12
Changing a Tire with TPMS..........................................6-13
If You Have a Flat Tire........................................6-15
With Spare Tire................................................................6-15
With Tire Mobility Kit (TMK) - Type A ......................6-22
With Tire Mobility Kit (TMK) - Type B ......................6-29
Towing ...................................................................6-36
Towing Service .................................................................6-36
Dinghy Towing .................................................................6-37
Removable Towing Hook ...............................................6-38
Emergency Towing..........................................................6-38
Page 420 of 535
6-38
What to do in an emergency
Removable Towing Hook
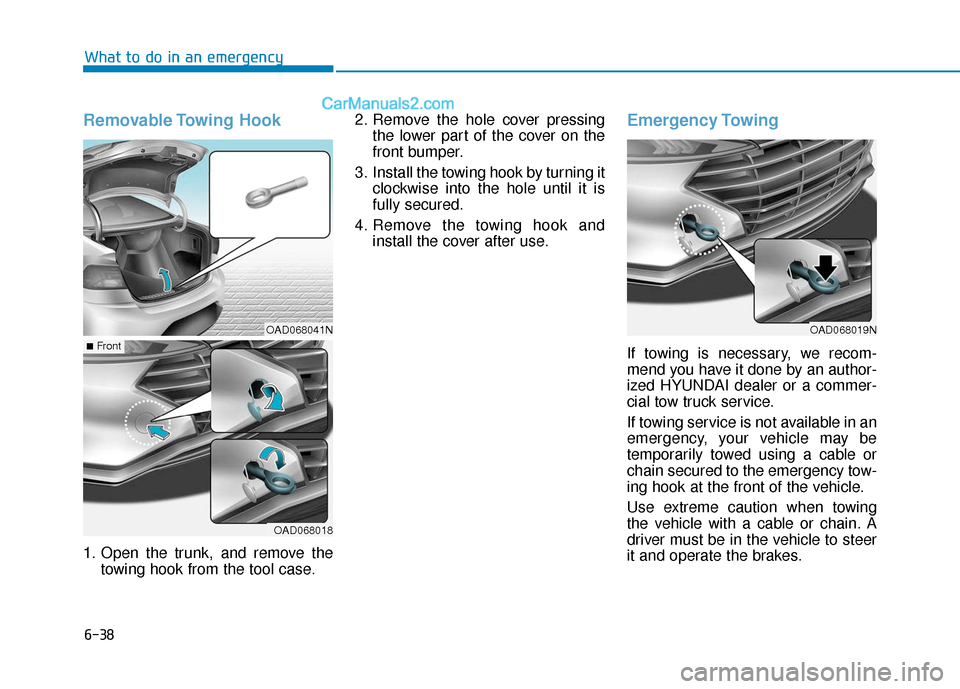
1. Open the trunk, and remove thetowing hook from the tool case. 2. Remove the hole cover pressing
the lower part of the cover on the
front bumper.
3. Install the towing hook by turning it clockwise into the hole until it is
fully secured.
4. Remove the towing hook and install the cover after use.
Emergency Towing
If towing is necessary, we recom-
mend you have it done by an author-
ized HYUNDAI dealer or a commer-
cial tow truck service.
If towing service is not available in an
emergency, your vehicle may be
temporarily towed using a cable or
chain secured to the emergency tow-
ing hook at the front of the vehicle.
Use extreme caution when towing
the vehicle with a cable or chain. A
driver must be in the vehicle to steer
it and operate the brakes.
OAD068041N
OAD068018
■Front
OAD068019N
Page 421 of 535
6-39
What to do in an emergency
6
Towing in this manner may be done
only on hard-surfaced roads for a
short distance and at low speeds.
Also, the wheels, axles, power train,
steering and brakes must all be in
good condition.Always follow these emergency tow-
ing precautions:
Place the ignition switch in the
ACC position so the steering
wheel is not locked. (if equipped)
Place the shift lever in N (Neutral).
Release the parking brake.
Depress the brake pedal with more force than normal since you will
have reduced braking perform-
ance.
More steering effort will be required because the power steer-
ing system will be disabled.
Use a vehicle heavier than your own to tow your vehicle.
The drivers of both vehicles should communicate with each other fre-
quently.
Before emergency towing, check that the hook is not broken or dam-
aged.
Fasten the towing cable or chain securely to the hook.
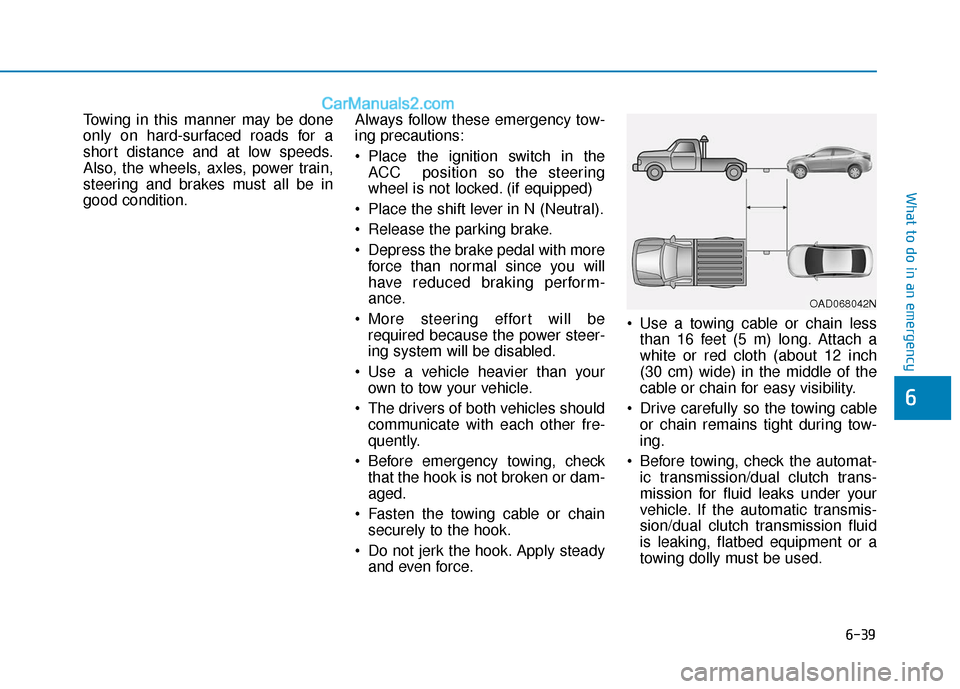
Do not jerk the hook. Apply steady and even force. Use a towing cable or chain less
than 16 feet (5 m) long. Attach a
white or red cloth (about 12 inch
(30 cm) wide) in the middle of the
cable or chain for easy visibility.
Drive carefully so the towing cable or chain remains tight during tow-
ing.
Before towing, check the automat- ic transmission/dual clutch trans-
mission for fluid leaks under your
vehicle. If the automatic transmis-
sion/dual clutch transmission fluid
is leaking, flatbed equipment or a
towing dolly must be used.
OAD068042N
Page 422 of 535
6-40
What to do in an emergencyTo avoid damage to your vehicle
and vehicle components when
towing:
Always pull straight ahead
when using the towing hooks.
Do not pull from the side or at
a vertical angle.
Do not use the towing hooks to
pull a vehicle out of mud, sand
or other conditions from which
the vehicle cannot be driven
out under its own power.
Limit the vehicle speed to
10 mph (15 km/h) and drive
less than 1 mile (1.5 km) when
towing to avoid serious dam-
age to the automatic transmis-
sion/dual clutch transmission.
CAUTION
Page 459 of 535
7-37
7
Maintenance
By jump starting
After a jump start from a good bat-
tery, drive the vehicle for 20-30 min-
utes before it is shutoff. The vehicle
may not restart if you shut it off
before the battery had a chance to
adequately recharge. See "Jump
Starting" in chapter 6 for more infor-
mation on jump starting procedures.
Information
An inappropriately disposedbattery can be harmful to
the environment and human
health.
Dispose the battery according to your
local law(s) or regulation.
Reset Features
The following items may need to be
reset after the battery has been dis-
charged or the battery has been dis-
connected.
Power Windows
Trip Computer
Climate Control System
Clock
Audio System
Sunroof
i
Watch the battery during
charging, and stop or reduce
the charging rate if the battery
cells begin boiling violently.
The negative battery cable
must be removed first and
installed last when the battery
is disconnected. Disconnect
the battery charger in the fol-
lowing order:
(1) Turn off the battery charg- er main switch.
(2) Unhook the negative
clamp from the negative
battery terminal.
(3) Unhook the positive clamp from the positive battery
terminal.
Always use a genuine
HYUNDAI approved battery
when you replace the battery.
Page 532 of 535

I-10
Range ........................................................................\
......3-58
Rear center seatbelt .........................................................2-29
Rear Cross-Traffic Collision Warning (RCCW) system ........................................................................\
..5-64
Rear seats Armrest .......................................................................2\
-14
Folding the rear seat ...................................................2-12
Rear view monitor.......................................................\
..3-112
Recommended cold tire inflation pressures ...................7-39
Recommended lubricants and capacities ..........................8-7 Recommended SAE viscosity number .........................8-9
Remote key .......................................................................3\
-3 Battery replacement......................................................3-6
Removable towing hook .................................................6-38
Replacement light bulb ...................................................7-64
Reverse parking aid function ..........................................3-33
Rocking the vehicle ......................................................5-134
Room lamp....................................................................3-10\
6
Rotation (Tire) ................................................................7-41
Safe Exit Assist (SEA) system .......................................3-16
Safety messages ................................................................F-6
Scheduled maintenance services.......................................7-7 Seat belt warning light ....................................................2-22
Seat belts ........................................................................\
.2-21
3-point system with convertible locking retractor (Rear passenger's side) ............................................2-25
3-point system with emergency locking retractor (Driver's side) ..........................................................2-24
Additional seat belt safety precautions ......................2-30
Care of seat belts ........................................................2-32
Do not lie down ..........................................................2-32
Height adjustment ......................................................2-25
Keep belts clean and dry ............................................2-32
One person per belt ....................................................2-32
Periodic inspection .....................................................2-32
Pre-tensioner seat belt ................................................2-27
Rear center seatbelt ....................................................2-29
Seat belt restraint system............................................2-24
Seat belt safety precautions ........................................2-21
Seat belt use and children...........................................2-3\
0
Seat belt use during pregnancy ..................................2-30
Seat belt warning light ...............................................2-22
Transporting an injured person ..................................2-32
When to replace seat belts..........................................2-32
Seat warmers ...................................................................2-19
Seatback pocket ..............................................................2-12
Index
R
S