open Hyundai Elantra 2020 Owner's Guide
[x] Cancel search | Manufacturer: HYUNDAI, Model Year: 2020, Model line: Elantra, Model: Hyundai Elantra 2020Pages: 535, PDF Size: 16.8 MB
Page 109 of 535
3-25
Convenient features of your vehicle
3
Automatic-Dimming Night Vision
Safety™ (NVS®) Mirror
(if equipped)
The NVS®Mirror automatically
reduces glare by monitoring light lev-
els in the front and the rear of the
vehicle. Any object that obstructs
either light sensor will degrade the
automatic dimming control feature.
For more information regarding
NVS
®mirrors and other applica-
tions, please refer to the Gentex
website:
www.gentex.com Your mirror will automatically dim
upon detecting glare from the vehi-
cles traveling behind you. The auto-
dimming function can be controlled
by pressing the Dimming ON/OFF
button:
1. Pressing and holding the button
for 3 seconds turns the auto-dim-
ming function OFF which is indi-
cated by the green Status
Indicator LED turning off.
2. Pressing and holding the button for 3 seconds again turns the auto-
dimming function ON which is indi-
cated by the green Status Indicator
LED turning on.
The mirror defaults to the ON posi-
tion each time the vehicle is started.
Integrated HomeLink®Wireless
Control System
The HomeLink®Wireless Control
System can replace up to three
hand-held radio-frequency (RF)
transmitters with a single built-in
device. This innovative feature will
learn the radio frequency codes of
most current transmitters to operate
devices such as gate operators,
garage door openers, entry door
locks, security systems, even home
lighting. Both standard and rolling
code-equipped transmitters can be
programmed by following the out-
lined procedures.
Additional HomeLink
®information
can be found at: www.homelink.com
or by calling 1-800-355-3515.
Retain the original transmitter of the
RF device you are programming for
use in other vehicles as well as for
future HomeLink
®programming. It is
also suggested that upon the sale of
the vehicle, the programmed
HomeLink
®buttons be erased for
security purposes.
Page 110 of 535
3-26
Convenient features of your vehicle
Programming HomeLink®
Please note the following:
When programming a garage dooropener, it is advised to park the
vehicle outside of the garage.
It is recommended that a new bat- tery be placed in the hand-held
transmitter of the device being pro-
grammed to HomeLink
®for quicker
training and accurate transmission
of the radio-frequency signal.
Some vehicles may require the ignition switch to be placed in the
ACC (or "Accessories") position for
programming and/or operation of
HomeLink
®.
In the event that there are still pro- gramming difficulties or questions
after following the programming
steps listed below, contact
HomeLink
®at: www.homelink.com
or by calling 1-800-355-3515.
Programming
To program most devices, follow
these instructions:
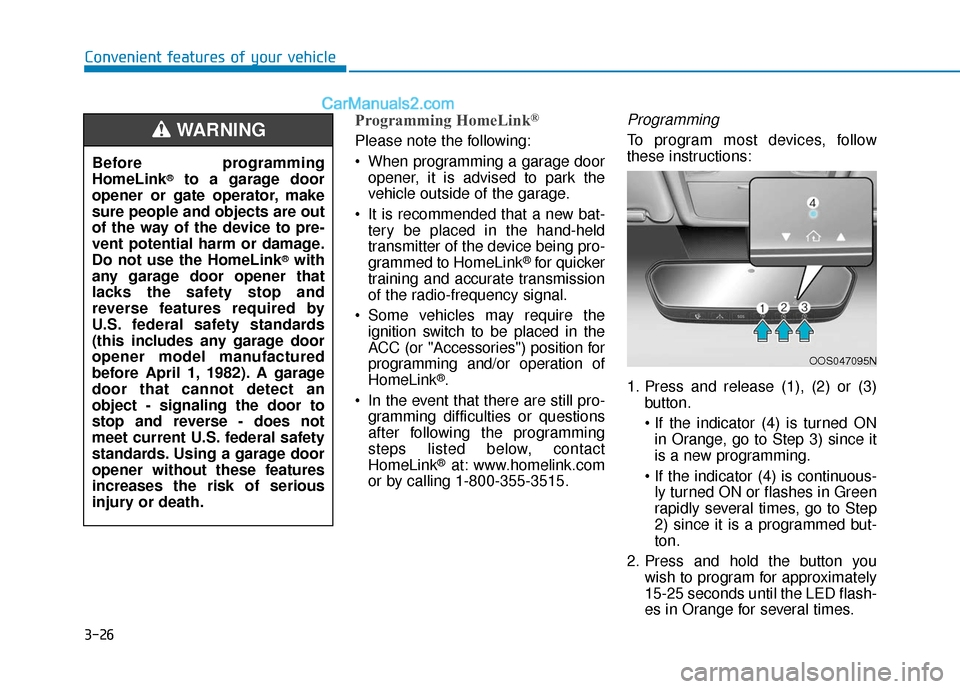
1. Press and release (1), (2) or (3) button.
in Orange, go to Step 3) since it
is a new programming.
ly turned ON or flashes in Green
rapidly several times, go to Step
2) since it is a programmed but-
ton.
2. Press and hold the button you wish to program for approximately
15-25 seconds until the LED flash-
es in Orange for several times.
Before programming
HomeLink
®to a garage door
opener or gate operator, make
sure people and objects are out
of the way of the device to pre-
vent potential harm or damage.
Do not use the HomeLink
®with
any garage door opener that
lacks the safety stop and
reverse features required by
U.S. federal safety standards
(this includes any garage door
opener model manufactured
before April 1, 1982). A garage
door that cannot detect an
object - signaling the door to
stop and reverse - does not
meet current U.S. federal safety
standards. Using a garage door
opener without these features
increases the risk of serious
injury or death.
WARNING
OOS047095N
Page 111 of 535
3-27
Convenient features of your vehicle
3
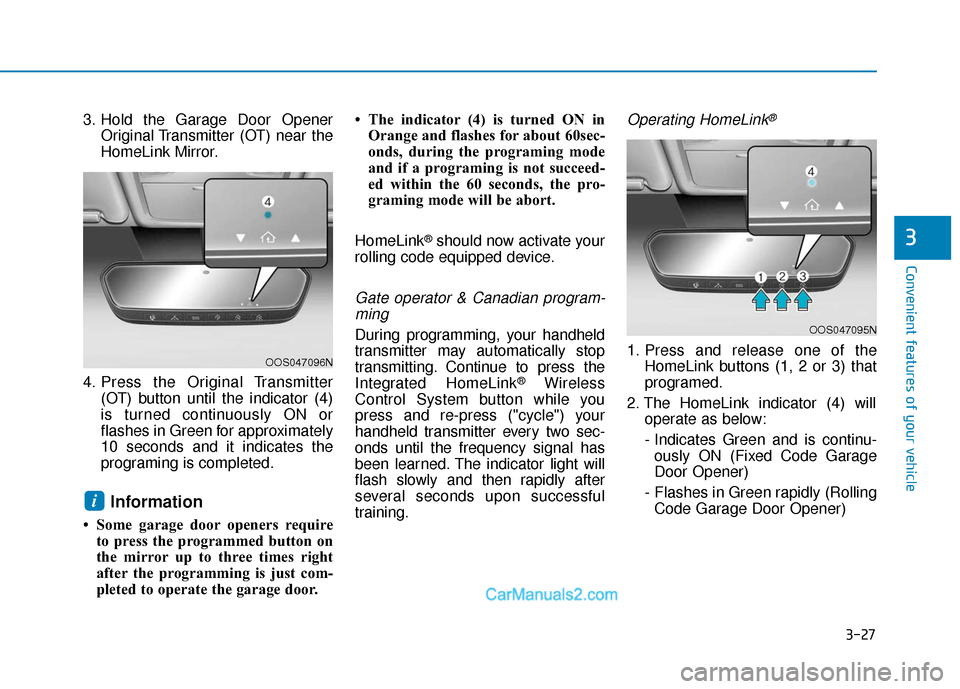
3. Hold the Garage Door OpenerOriginal Transmitter (OT) near the
HomeLink Mirror.
4. Press the Original Transmitter (OT) button until the indicator (4)
is turned continuously ON or
flashes in Green for approximately
10 seconds and it indicates the
programing is completed.
Information
• Some garage door openers requireto press the programmed button on
the mirror up to three times right
after the programming is just com-
pleted to operate the garage door. • The indicator (4) is turned ON in
Orange and flashes for about 60sec-
onds, during the programing mode
and if a programing is not succeed-
ed within the 60 seconds, the pro-
graming mode will be abort.
HomeLink
®should now activate your
rolling code equipped device.
Gate operator & Canadian program- ming
During programming, your handheld
transmitter may automatically stop
transmitting. Continue to press the
Integrated HomeLink
®Wireless
Control System button while you
press and re-press ("cycle") your
handheld transmitter every two sec-
onds until the frequency signal has
been learned. The indicator light will
flash slowly and then rapidly after
several seconds upon successful
training.
Operating HomeLink®
1. Press and release one of the HomeLink buttons (1, 2 or 3) that
programed.
2. The HomeLink indicator (4) will operate as below:
- Indicates Green and is continu- ously ON (Fixed Code Garage
Door Opener)
- Flashes in Green rapidly (Rolling Code Garage Door Opener)
i
OOS047096N
OOS047095N
Page 113 of 535

3-29
Convenient features of your vehicle
3
4. Once the garage door is stopped,press and release the "Learn" or
"Smart" button on the Garage door
opener within 1 minute from the
time of pressing the programed
HomeLink button on mirror.
5. If the both indicator (4) and (6) are flashing rapidly for about 5 sec-
onds, the two way synchronization
is completed.
Information
Some newer garage door openers pro-
vide two-way communication syn-
chronizing when programming the
original transmitter (OT).
Operating Two Way Communication
1. Press and release (1), (2) or (3)button. 2. The indicator (4) and (6) operates
as below:
- If the indicator (4) flashes in Orange, it indicates that the
garage door is "closing".
- If the indicator (4) is ON continu- ously in Green, it indicates that
the garage door is "closed".
- If the indicator (6) flashes in Orange, it indicates that the
garage door is "Opening".
- If the indicator (6) is ON continu- ously in Green, it indicates that
the garage door is "Opened".
i
OOS047411N
OOS047099N
OOS047412N
Page 114 of 535

3-30
Convenient features of your vehicle- If the indicator (4) or (6) does notturn to Green, it indicates that the
last status of garage door was
not received properly. The
HomeLink mirror tries to receive
the last known status of the
garage door for a few seconds.
Recalling Garage Door Status
Homelink mirror with two way com-
munication provides a way to view
the last stored message from the
garage door opener. In order to recall
the last known status of the last acti-
vated device, press the buttons "1
and 2" OR "2 and 3" simultaneously.
If the indicator (4) is ON continu- ously in Green, it indicates that the
last activated device was "closed"
properly.
If the indicator (6) is ON continu- ously in Green, it indicates that the
last activated device was "open"
properly.
Information
Two way communication range dis-
tance between "vehicle" and "garage
door opener" is 100m.
The range may be reduced or
increased a little due to obstacle con-
ditions around the garage door open-
er, such as houses or trees.
Side View Mirrors
Be sure to adjust mirror angles
before driving.
Your vehicle is equipped with both
left-hand and right-hand side view
mirrors. The mirrors can be adjusted
remotely with the remote switch. The
mirror heads can be folded to pre-
vent damage during an automatic
car wash or when passing through a
narrow street.
The right side view mirror is convex.
Objects seen in the mirror are closer
than they appear.
i
OAD045014
Page 118 of 535

3-34
Convenient features of your vehicle
W
WI
IN
N D
DO
O W
W S
S
OAD045020N
(1) Driver’s door power window
switch
(2) Front passenger’s door power window switch
(3) Rear door (left) power window switch
(4) Rear door (right) power window switch
(5) Window opening and closing
(6) Automatic power window
(7) Power window lock switch
Page 119 of 535
3-35
Convenient features of your vehicle
3
Power Windows
The ignition switch must be in the ON
position to be able to raise or lower
the windows. Each door has a Power
Window switch to control that door's
window. The driver has a Power
Window Lock switch which can block
the operation of passenger windows.
The power windows will operate for
approximately 30 seconds after the
ignition switch is placed in the ACC
or LOCK/OFF position. However, if
the front doors are opened, the
Power Windows cannot be operated
even within the 30 second period.
Information
• In cold and wet climates, power win-dows may not work properly due to
freezing conditions.
• While driving with the rear win- dows down or with the sunroof (if
equipped) opened (or partially
opened), your vehicle may demon-
strate a wind buffeting or pulsation
noise. This noise is normal and can
be reduced or eliminated by taking
the following actions. If the noise
occurs with one or both of the rear
windows down, partially lower both
front windows approximately 1 inch
(2.5 cm). If you experience the noise
with the sunroof open, slightly close
the sunroof.
Window opening and closing
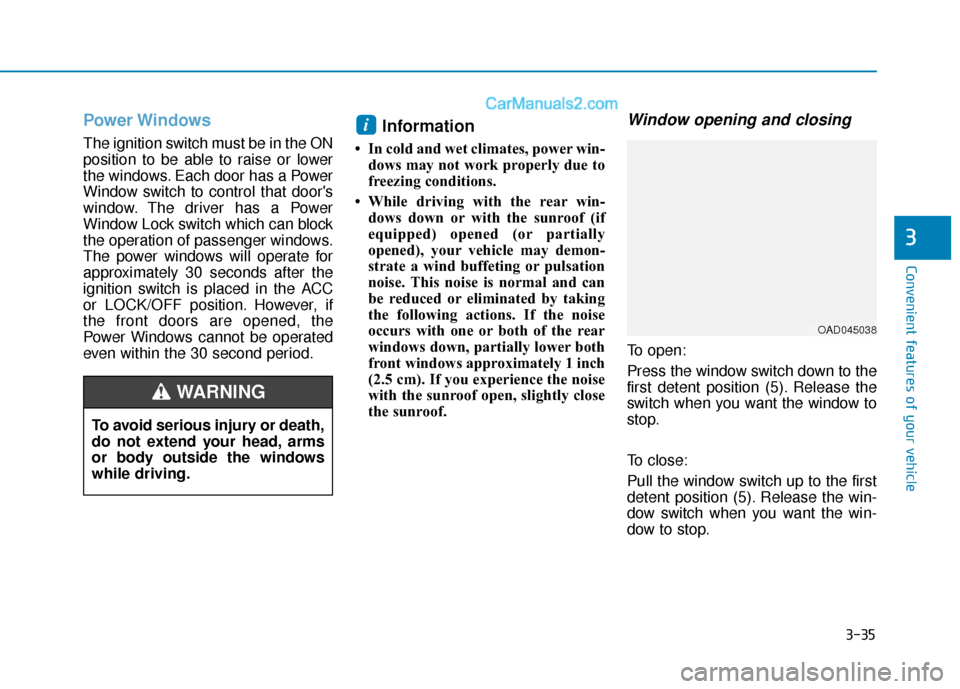
To open:
Press the window switch down to the
first detent position (5). Release the
switch when you want the window to
stop.
To close:
Pull the window switch up to the first
detent position (5). Release the win-
dow switch when you want the win-
dow to stop.
i
To avoid serious injury or death,
do not extend your head, arms
or body outside the windows
while driving.
WARNING
OAD045038
Page 122 of 535

3-38
Convenient features of your vehicle
Power window lock switch
The driver can disable the power
window switches on the rear passen-
ger doors by pressing the power win-
dow lock switch.
When the power window lock switch
is pressed:
The rear passenger control will notbe able to operate the rear pas-
senger power window
Note that the front passenger con- trol is still able to operate the front
passenger window, and that the
driver master control can still oper-
ate all the power windows. To prevent possible damage to
the power window system, do
not open or close two windows
or more at the same time. This
will also ensure the longevity of
the fuse.
Never try to operate the main switch on the driver's door and
the individual door window
switch in opposite directions at
the same time. If this is done, the
window will stop and cannot be
opened or closed.
NOTICE
Do not allow children to play
with the power windows. Keep
the driver's door power window
lock switch in the LOCK posi-
tion. Serious injury or death can
result from unintentional win-
dow operation by a child.
WARNING
OAD045021N
Page 123 of 535
3-39
Convenient features of your vehicle
3
S
SU
U N
NR
RO
O O
OF
F
(
( I
IF
F
E
E Q
Q U
UI
IP
P P
PE
ED
D )
)
If your vehicle is equipped with a
sunroof, you can slide or tilt your
sunroof with the sunroof control
switch located on the overhead con-
sole.
The sunroof can only be opened,
closed, or tilted when the ignition
switch is in the ON position.
Information
• In cold and wet climates, the sun-
roof may not work properly due to
freezing conditions.
• After the vehicle is washed or in a rainstorm, be sure to wipe off any
water that is on the sunroof before
operating it. Do not continue to move the
sunroof control lever after the
sunroof is fully opened, closed,
or tilted. Damage to the motor or
system components could
occur.
Make sure the sunroof is closed fully when leaving your vehicle.
If the sunroof is left open, rain or
snow may wet the interior of the
vehicle. Also, leaving the sun-
roof open when the vehicle is
unattended may invite theft.
NOTICE
i
OAD045022
Never adjust the sunroof or
sunshade while driving. This
could result in loss of control
and an accident that may
cause death, serious injury, or
property damage.
Make sure heads, hands, arms
or any other body parts or
objects are out of the way
before operating the sunroof.
Do not extend your head,
arms or body outside the sun-
roof while driving, to avoid
serious injury.
Do not leave the engine run-
ning and the key in your vehi-
cle with unsupervised chil-
dren. Unattended children
could operate the sunroof,
which could result in serious
injury.
Do not sit on the top of the
vehicle. It may cause injury or
vehicle damage.
WARNING
Page 124 of 535

3-40
Convenient features of your vehicle
Sunroof opening and closing
To open:
Press the sunroof control lever back-
ward to the first detent position.
Release the switch when you want
the sunroof to stop.
To close:
Press the sunroof control lever for-
ward to the first detent position.
Release the switch when you want
the sunroof to stop.
Sliding the sunroof
Pressing the sunroof control lever
backward or forward momentarily to
the second detent position complete-
ly opens or closes the sunroof even
when the switch is released. To stop
the sunroof at the desired position
while the sunroof is in operation,
press the sunroof control lever back-
ward or forward and release the
switch.
Information
To minimize wind noise while driving,
it is recommended that you drive with
the sunroof slightly closed (stop the
sunroof about 2 inch (5 cm) before the
maximum slide open position).
Tilting the sunroof
Tilt the sunroof open:
Push the sunroof control lever
upward until the sunroof moves to
the desired position.
To close the sunroof:
Push the sunroof control lever for-
ward until the sunroof moves to the
desired position.
iOAD045023OAD045024