sensor Hyundai Elantra 2020 Workshop Manual
[x] Cancel search | Manufacturer: HYUNDAI, Model Year: 2020, Model line: Elantra, Model: Hyundai Elantra 2020Pages: 535, PDF Size: 16.8 MB
Page 411 of 535
6-29
What to do in an emergency
6
Information
When reinstalling the repaired or
replaced tire and wheel on the vehicle,
tighten the wheel lug nut to 11~13
kgf·m (79~94 lbf·ft).
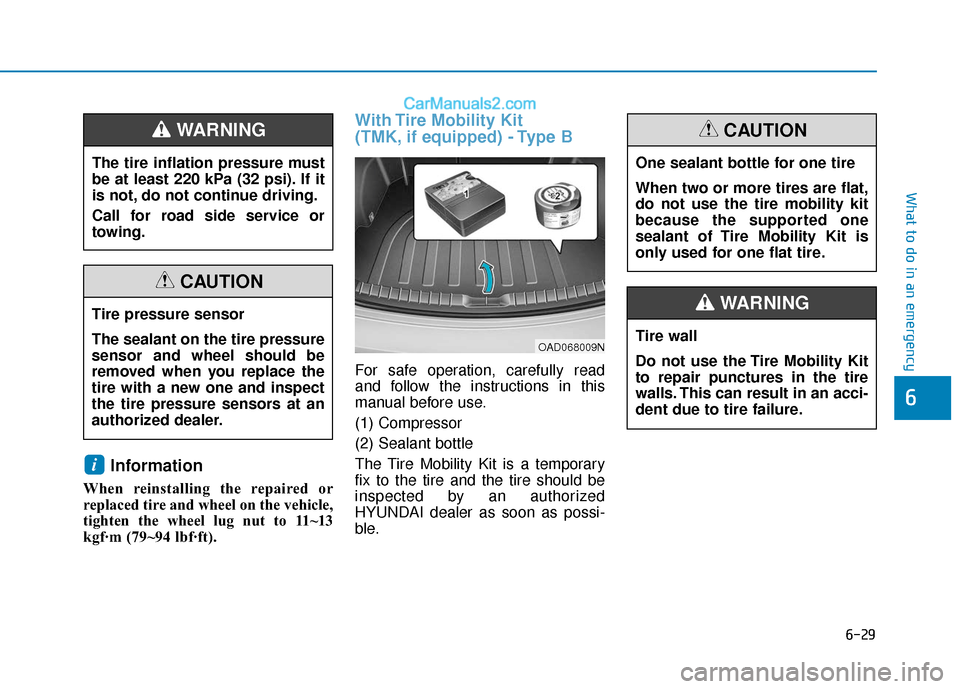
With Tire Mobility Kit
(TMK, if equipped) - Type B
For safe operation, carefully read
and follow the instructions in this
manual before use.
(1) Compressor
(2) Sealant bottle
The Tire Mobility Kit is a temporary
fix to the tire and the tire should be
inspected by an authorized
HYUNDAI dealer as soon as possi-
ble.
i
The tire inflation pressure must
be at least 220 kPa (32 psi). If it
is not, do not continue driving.
Call for road side service or
towing.
WARNING
Tire pressure sensor
The sealant on the tire pressure
sensor and wheel should be
removed when you replace the
tire with a new one and inspect
the tire pressure sensors at an
authorized dealer.
CAUTION
OAD068009N
One sealant bottle for one tire
When two or more tires are flat,
do not use the tire mobility kit
because the supported one
sealant of Tire Mobility Kit is
only used for one flat tire.
CAUTION
Tire wall
Do not use the Tire Mobility Kit
to repair punctures in the tire
walls. This can result in an acci-
dent due to tire failure.
WARNING
Page 416 of 535
6-34
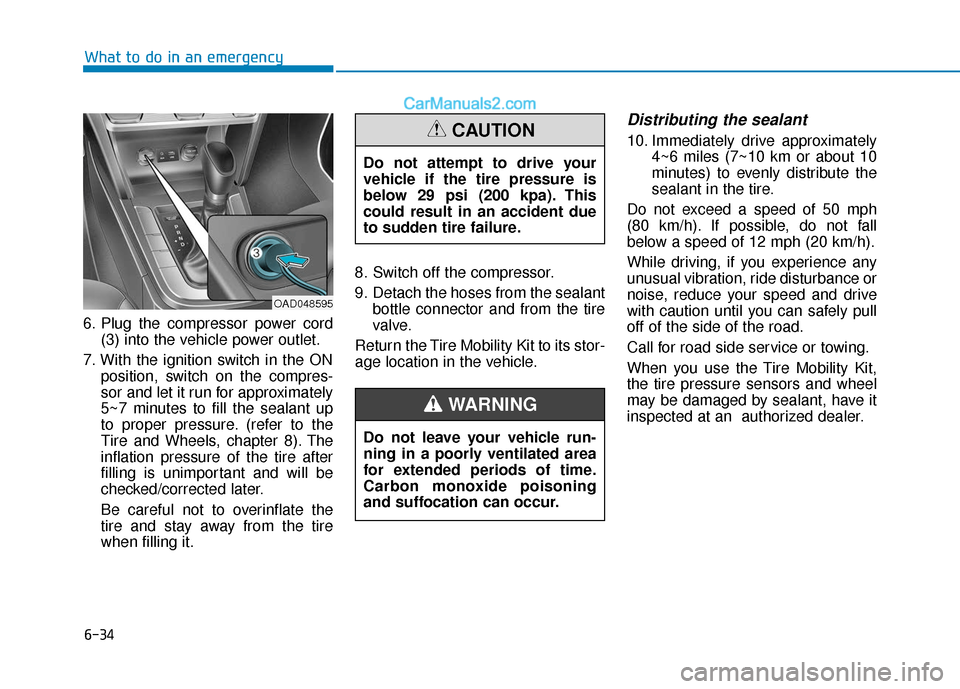
6. Plug the compressor power cord(3) into the vehicle power outlet.
7. With the ignition switch in the ON position, switch on the compres-
sor and let it run for approximately
5~7 minutes to fill the sealant up
to proper pressure. (refer to the
Tire and Wheels, chapter 8). The
inflation pressure of the tire after
filling is unimportant and will be
checked/corrected later.
Be careful not to overinflate the
tire and stay away from the tire
when filling it. 8. Switch off the compressor.
9. Detach the hoses from the sealant
bottle connector and from the tire
valve.
Return the Tire Mobility Kit to its stor-
age location in the vehicle.
Distributing the sealant
10. Immediately drive approximately 4~6 miles (7~10 km or about 10
minutes) to evenly distribute the
sealant in the tire.
Do not exceed a speed of 50 mph
(80 km/h). If possible, do not fall
below a speed of 12 mph (20 km/h).
While driving, if you experience any
unusual vibration, ride disturbance or
noise, reduce your speed and drive
with caution until you can safely pull
off of the side of the road.
Call for road side service or towing.
When you use the Tire Mobility Kit,
the tire pressure sensors and wheel
may be damaged by sealant, have it
inspected at an authorized dealer.
What to do in an emergency
OAD048595
Do not attempt to drive your
vehicle if the tire pressure is
below 29 psi (200 kpa). This
could result in an accident due
to sudden tire failure.
CAUTION
Do not leave your vehicle run-
ning in a poorly ventilated area
for extended periods of time.
Carbon monoxide poisoning
and suffocation can occur.
WARNING
Page 417 of 535
6-35
What to do in an emergency
Checking the tire inflation pres-sure
1. After driving approximately
4~6 miles (7~10 km or about
10 minutes), stop at a safe loca-
tion.
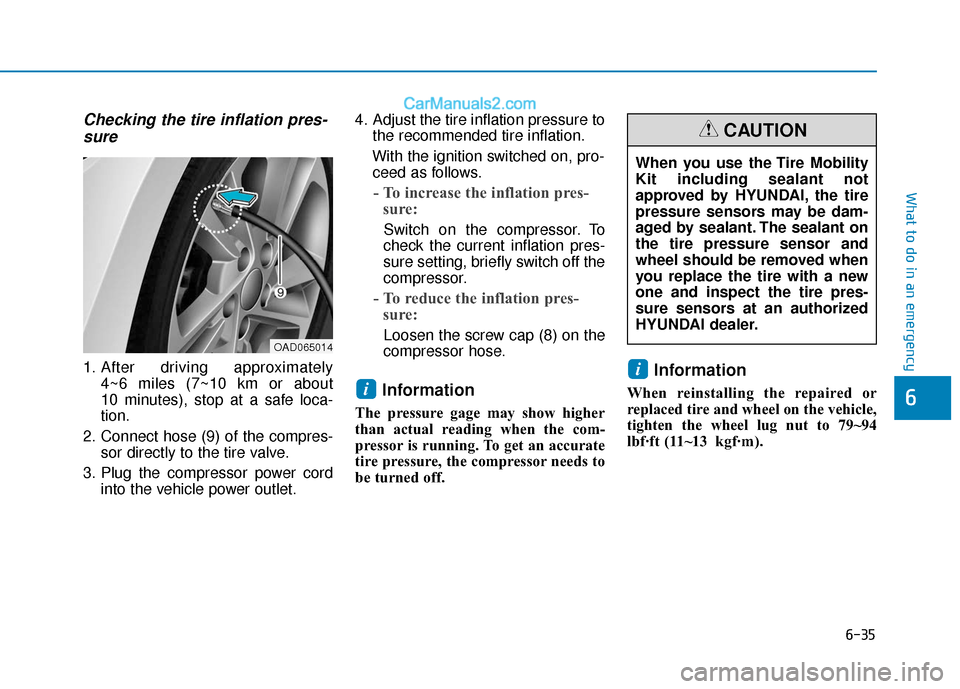
2. Connect hose (9) of the compres- sor directly to the tire valve.
3. Plug the compressor power cord into the vehicle power outlet. 4. Adjust the tire inflation pressure to
the recommended tire inflation.
With the ignition switched on, pro- ceed as follows.
- To increase the inflation pres- sure:
Switch on the compressor. To
check the current inflation pres-
sure setting, briefly switch off the
compressor.
- To reduce the inflation pres- sure:
Loosen the screw cap (8) on the
compressor hose.
Information
The pressure gage may show higher
than actual reading when the com-
pressor is running. To get an accurate
tire pressure, the compressor needs to
be turned off.
Information
When reinstalling the repaired or
replaced tire and wheel on the vehicle,
tighten the wheel lug nut to 79~94
lbf·ft (1 1~13kgf·m).
i
i6
OAD065014
When you use the Tire Mobility
Kit including sealant not
approved by HYUNDAI, the tire
pressure sensors may be dam-
aged by sealant. The sealant on
the tire pressure sensor and
wheel should be removed when
you replace the tire with a new
one and inspect the tire pres-
sure sensors at an authorized
HYUNDAI dealer.
CAUTION
Page 419 of 535
6-37
What to do in an emergency
6
When towing your vehicle in an
emergency without wheel dollies:
1. Place the ignition switch in theACC position.
2. Place the shift lever in N (Neutral).
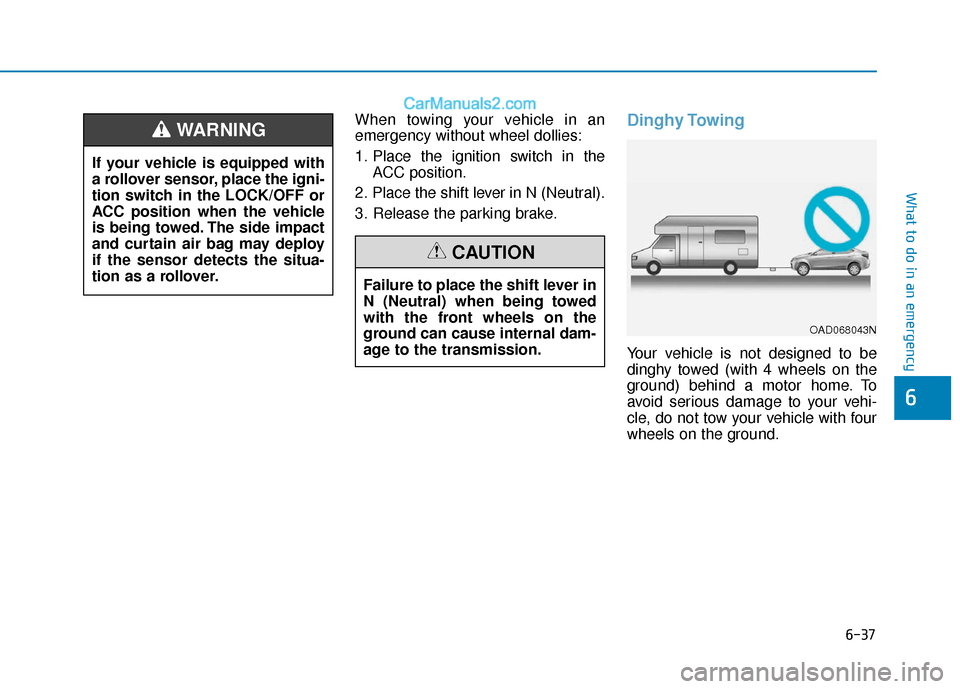
3. Release the parking brake.Dinghy Towing
Your vehicle is not designed to be
dinghy towed (with 4 wheels on the
ground) behind a motor home. To
avoid serious damage to your vehi-
cle, do not tow your vehicle with four
wheels on the ground.
If your vehicle is equipped with
a rollover sensor, place the igni-
tion switch in the LOCK/OFF or
ACC position when the vehicle
is being towed. The side impact
and curtain air bag may deploy
if the sensor detects the situa-
tion as a rollover.
WARNING
Failure to place the shift lever in
N (Neutral) when being towed
with the front wheels on the
ground can cause internal dam-
age to the transmission.
CAUTION
OAD068043N
Page 452 of 535
7-30
Maintenance
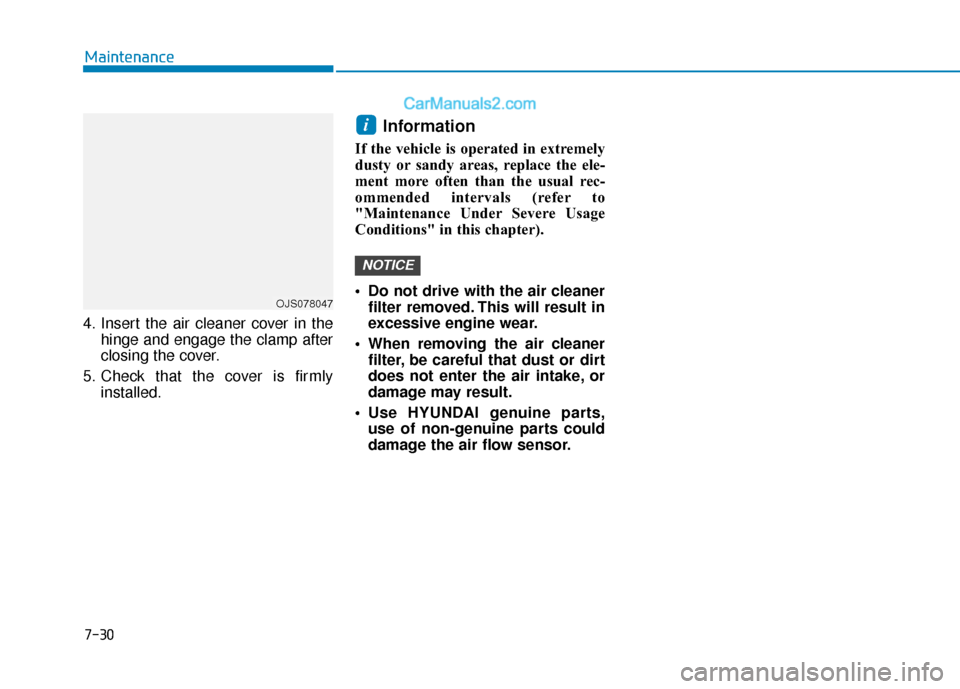
4. Insert the air cleaner cover in the hinge and engage the clamp after
closing the cover.
5. Check that the cover is firmly installed.
Information
If the vehicle is operated in extremely
dusty or sandy areas, replace the ele-
ment more often than the usual rec-
ommended intervals (refer to
"Maintenance Under Severe Usage
Conditions" in this chapter).
Do not drive with the air cleanerfilter removed. This will result in
excessive engine wear.
When removing the air cleaner filter, be careful that dust or dirt
does not enter the air intake, or
damage may result.
Use HYUNDAI genuine parts, use of non-genuine parts could
damage the air flow sensor.
NOTICE
i
OJS078047
Page 482 of 535
7-60
Maintenance
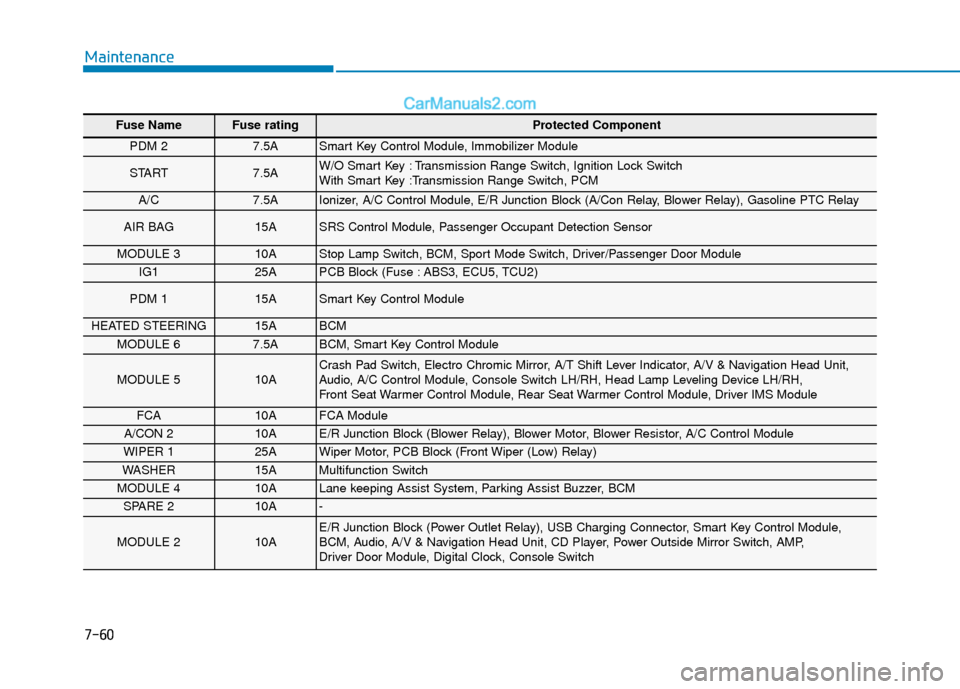
Fuse Name Fuse rating Protected Component
PDM 2 7.5A Smart Key Control Module, Immobilizer Module
START 7.5A W/O Smart Key : Transmission Range Switch, Ignition Lock Switch
With Smart Key :Transmission Range Switch, PCM
A/C7.5A Ionizer, A/C Control Module, E/R Junction Block (A/Con Relay, Blower Relay), Gasoline PTC Relay
AIR BAG 15A SRS Control Module, Passenger Occupant Detection Sensor
MODULE 3 10A Stop Lamp Switch, BCM, Sport Mode Switch, Driver/Passenger Door Module
IG1 25A PCB Block (Fuse : ABS3, ECU5, TCU2)
PDM 1 15A Smart Key Control Module
HEATED STEERING 15A BCM
MODULE 6 7.5A BCM, Smart Key Control Module
MODULE 5 10A Crash Pad Switch, Electro Chromic Mirror, A/T Shift Lever Indicator, A/V & Navigation Head Unit,
Audio, A/C Control Module, Console Switch LH/RH, Head Lamp Leveling Device LH/RH,
Front Seat Warmer Control Module, Rear Seat Warmer Control Module, Driver IMS Module
FCA10A FCA Module
A/CON 2 10A E/R Junction Block (Blower Relay), Blower Motor, Blower Resistor, A/C Control Module
WIPER 1 25A Wiper Motor, PCB Block (Front Wiper (Low) Relay)
WASHER 15A Multifunction Switch
MODULE 4 10A Lane keeping Assist System, Parking Assist Buzzer, BCM
SPARE 2 10A -
MODULE 2 10A E/R Junction Block (Power Outlet Relay), USB Charging Connector, Smart Key Control Module,
BCM, Audio, A/V & Navigation Head Unit, CD Player, Power Outside Mirror Switch, AMP,
Driver Door Module, Digital Clock, Console Switch
Page 485 of 535
7-63
7
Maintenance
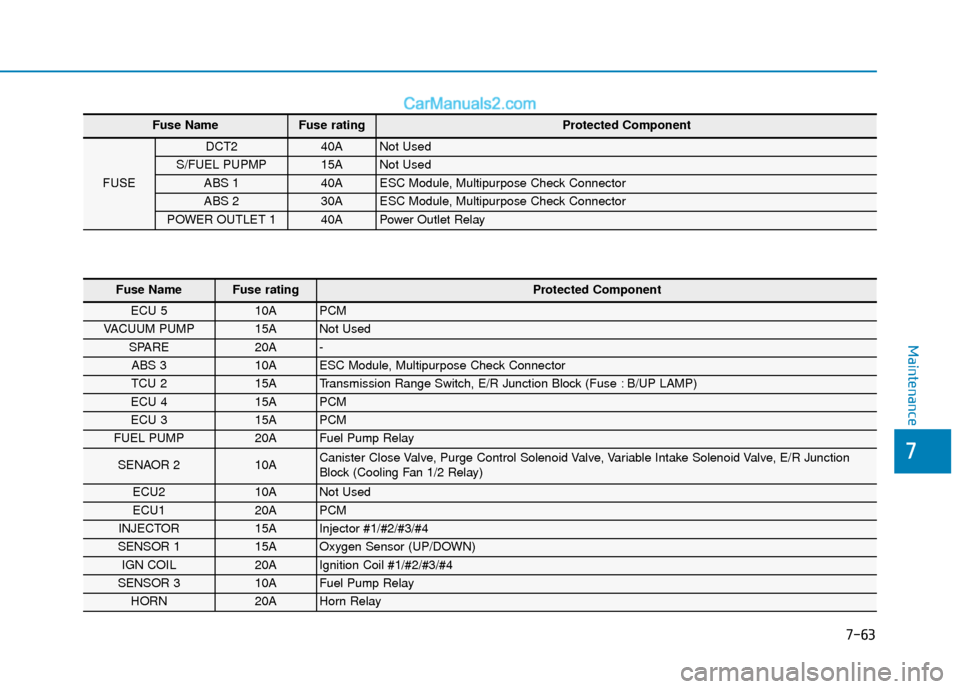
Fuse NameFuse rating Protected Component
FUSE
DCT2 40A Not Used
S/FUEL PUPMP 15A Not Used
ABS 1 40A ESC Module, Multipurpose Check Connector
ABS 2 30A ESC Module, Multipurpose Check Connector
POWER OUTLET 1 40A Power Outlet Relay
Fuse Name Fuse rating Protected Component
ECU 5 10A PCM
VACUUM PUMP 15A Not Used
SPARE 20A -
ABS 3 10A ESC Module, Multipurpose Check Connector
TCU 2 15A Transmission Range Switch, E/R Junction Block (Fuse : B/UP LAMP)
ECU 4 15A PCM
ECU 3 15A PCM
FUEL PUMP 20A Fuel Pump Relay
SENAOR 2 10A Canister Close Valve, Purge Control Solenoid Valve, Variable Intake Solenoid Valve, E/R Junction
Block (Cooling Fan 1/2 Relay)
ECU2 10A Not Used
ECU1 20A PCM
INJECTOR 15A Injector #1/#2/#3/#4
SENSOR 1 15A Oxygen Sensor (UP/DOWN)
IGN COIL 20A Ignition Coil #1/#2/#3/#4
SENSOR 3 10A Fuel Pump Relay
HORN 20A Horn Relay
Page 497 of 535
7-75
7
Maintenance
A
AP
PP
PE
EA
A R
RA
A N
N C
CE
E
C
C A
A R
RE
E
Exterior Care
Exterior general caution
It is very important to follow the label
directions when using any chemical
cleaner or polish. Read all warning
and caution statements that appear
on the label.
High-pressure washing
When using high-pressure wash-
ers, make sure to maintain suffi-
cient distance from the vehicle.
Insufficient clearance or excessive
pressure can lead to component
damage or water penetration.
Do not spray the camera, sensors or its surrounding area directly with
a high pressure washer. Shock
applied from high pressure water
may cause the device to not oper-
ate normally.
Do not bring the nozzle tip close to boots (rubber or plastic covers)or
connectors as they may be dam-
aged if they come into contact with
high pressure water.
Do not use any high-pressure noz- zles, which induce either one-direct
water stream or water swirling.
Protecting your vehicle’s finish
Washing
To help protect your vehicle’s finish
from rust and deterioration, wash it
thoroughly and frequently at least
once a month with lukewarm or cold
water.
If you use your vehicle for off-road
driving, you should wash it after each
off-road trip. Pay special attention to
the removal of any accumulation of
salt, dirt, mud, and other foreign
materials. Make sure the drain holes
in the lower edges of the doors and
rocker panels are kept clear and
clean.
Insects, tar, tree sap, bird droppings,
industrial pollution and similar
deposits can damage your vehicle’s
finish if not removed immediately.
Even prompt washing with plain
water may not completely remove all
these deposits. A mild soap, safe for
use on painted surfaces, should be
used.
After washing, rinse the vehicle thor-
oughly with lukewarm or cold water.
Do not allow soap to dry on the fin-
ish. Do not use strong soap, chemi-
cal detergents or hot water, and
do not wash the vehicle in direct
sunlight or when the body of the
vehicle is warm.
Be careful when washing the side windows of your vehicle.
Especially, with high-pressure
water, water may leak through
the windows and wet the interi-
or.
To prevent damage to the plastic parts, do not clean with chemi-
cal solvents or strong deter-
gents.
NOTICE
After washing the vehicle, test
the brakes while driving slowly
to see if they have been affected
by water before getting on the
road. If braking performance is
impaired, dry the brakes by
applying them lightly while
maintaining a slow forward
speed.
WARNING
Page 524 of 535
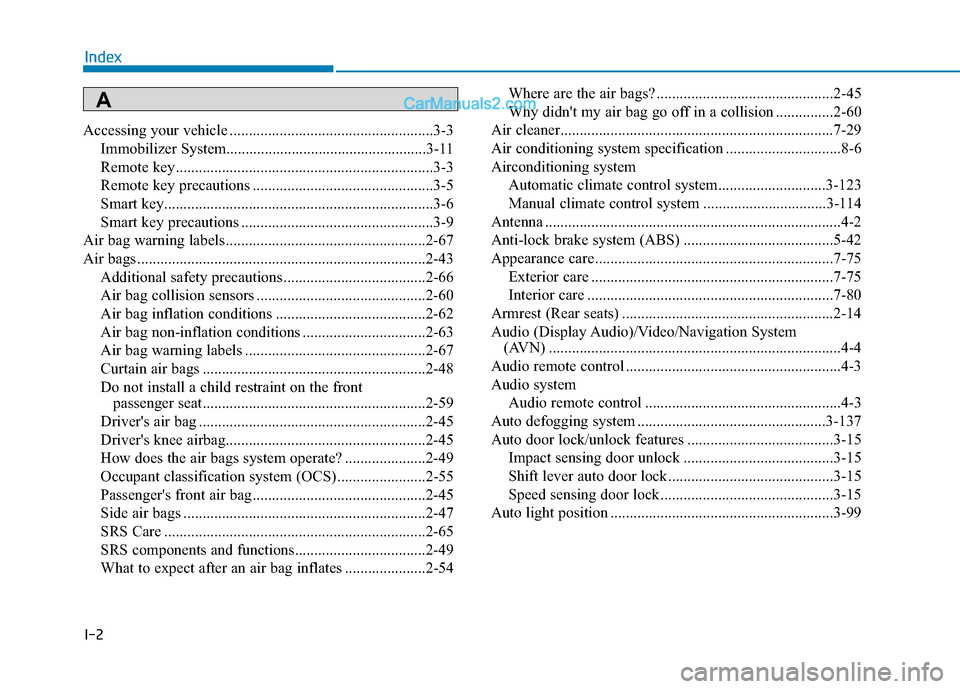
I-2
Accessing your vehicle .....................................................3-3Immobilizer System....................................................3-\
11
Remote key...................................................................3-3
Remote key precautions ...............................................3-5
Smart key......................................................................3-\
6
Smart key precautions ..................................................3-9
Air bag warning labels ....................................................2-67
Air bags ........................................................................\
...2-43 Additional safety precautions .....................................2-66
Air bag collision sensors ............................................2-60
Air bag inflation conditions .......................................2-62
Air bag non-inflation conditions ................................2-63
Air bag warning labels ...............................................2-67
Curtain air bags ..........................................................2-48
Do not install a child restraint on the front passenger seat..........................................................2-59
Driver's air bag ...........................................................2-45
Driver's knee airbag....................................................2-45
How does the air bags system operate? .....................2-49
Occupant classification system (OCS) .......................2-55
Passenger's front air bag.............................................2-45
Side air bags ...............................................................2-47
SRS Care ....................................................................2-65\
SRS components and functions..................................2-49
What to expect after an air bag inflates .....................2-54 Where are the air bags? ..............................................2-45
Why didn't my air bag go off in a collision ...............2-60
Air cleaner.......................................................................7\
-29
Air conditioning system specification ..............................8-6
Airconditioning system Automatic climate control system............................3-123
Manual climate control system ................................3-114
Antenna ........................................................................\
.....4-2
Anti-lock brake system (ABS) .......................................5-42
Appearance care..............................................................7-75 Exterior care ...............................................................7-75
Interior care ................................................................7-80
Armrest (Rear seats) .......................................................2-14
Audio (Display Audio)/Video/Navigation System (AVN) ........................................................................\
....4-4
Audio remote control ........................................................4-3
Audio system Audio remote control ...................................................4-3
Auto defogging system .................................................3-137
Auto door lock/unlock features ......................................3-15 Impact sensing door unlock .......................................3-15
Shift lever auto door lock ...........................................3-15
Speed sensing door lock .............................................3-15
Auto light position ..........................................................3-99
Index
A