instrument panel HYUNDAI ELANTRA 2021 User Guide
[x] Cancel search | Manufacturer: HYUNDAI, Model Year: 2021, Model line: ELANTRA, Model: HYUNDAI ELANTRA 2021Pages: 570, PDF Size: 52.21 MB
Page 85 of 570
3-54
OCN7030056
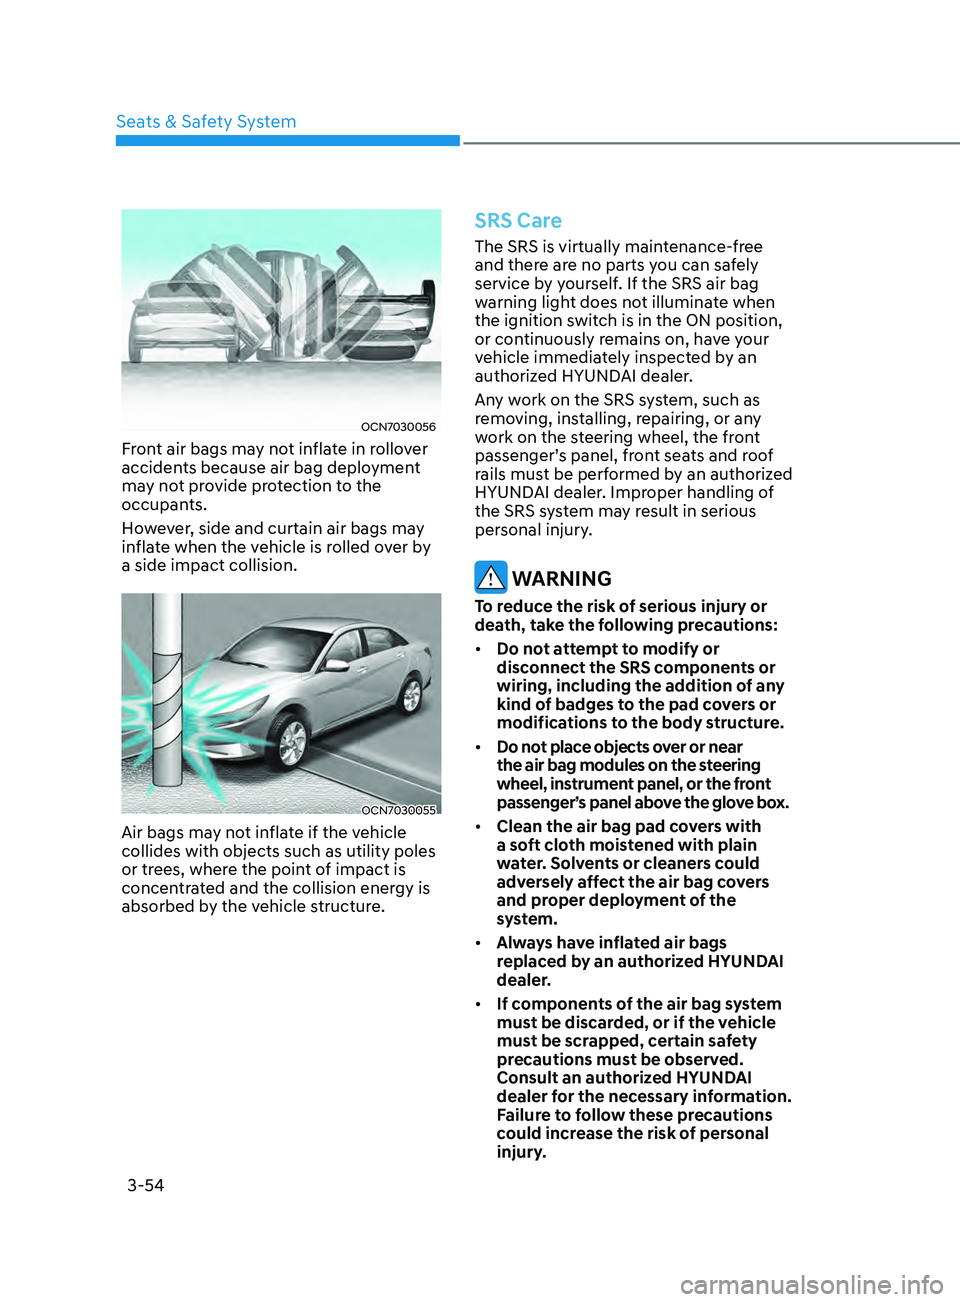
Front air bags may not inflate in rollover
accidents because air bag deployment
may not provide protection to the
occupants.
However, side and curtain air bags may
inflate when the vehicle is rolled over by
a side impact collision.
OCN7030055
Air bags may not inflate if the vehicle
collides with objects such as utility poles
or trees, where the point of impact is
concentrated and the collision energy is
absorbed by the vehicle structure.
SRS Care
The SRS is virtually maintenance-free
and there are no parts you can safely
service by yourself. If the SRS air bag
warning light does not illuminate when
the ignition switch is in the ON position,
or continuously remains on, have your
vehicle immediately inspected by an
authorized HYUNDAI dealer.
Any work on the SRS system, such as
removing, installing, repairing, or any
work on the steering wheel, the front
passenger’s panel, front seats and roof
rails must be performed by an authorized
HYUNDAI dealer. Improper handling of
the SRS system may result in serious
personal injury.
WARNING
To reduce the risk of serious injury or
death, take the following precautions:
• Do not attempt to modify or
disconnect the SRS components or
wiring, including the addition of any
kind of badges to the pad covers or
modifications to the body structure.
• Do not place objects over or near
the air bag modules on the steering
wheel, instrument panel, or the front
passenger’s panel above the glove box.
• Clean the air bag pad covers with
a soft cloth moistened with plain
water. Solvents or cleaners could
adversely affect the air bag covers
and proper deployment of the
system.
• Always have inflated air bags
replaced by an authorized HYUNDAI
dealer.
• If components of the air bag system
must be discarded, or if the vehicle
must be scrapped, certain safety
precautions must be observed.
Consult an authorized HYUNDAI
dealer for the necessary information.
Failure to follow these precautions
could increase the risk of personal
injury.
Seats & Safety System
Page 91 of 570

04
4-5
Instrument Cluster Control
Adjusting instrument cluster
illumination
OCN7040081N
When the vehicle's parking lamps or
headlamps are on, press the illumination
control button to adjust the brightness of
the instrument panel illumination.
When pressing the illumination control
button, the interior switch illumination
intensity is also adjustable.
• The brightness of the instrument
panel illumination is displayed.
• If the brightness reaches the
maximum or minimum level, a chime
will sound.
WARNING
Never adjust the instrument cluster
while driving. Doing so could lead to
driver distraction which may cause an
accident and lead to vehicle damage,
serious injury, or death.
Gauges and Meters
Speedometer
OCN7040004LOCN7040005N
„„Type A „„Type B
The speedometer indicates the speed of
the vehicle and is calibrated in miles per
hour (MPH) and/or kilometers per hour
(km/h).
Tachometer
OCN7040006OCN7040007
„„Type A„„Type B
The tachometer indicates the
approximate number of engine
revolutions per minute (RPM).
Use the tachometer to select the correct
shift points and to prevent lugging and/
or over-revving the engine.
NOTICE
Do not operate the engine within the
tachometer's RED ZONE. This may
cause severe engine damage.
Page 204 of 570
Convenient Features5-68
exterior lights
Lighting control
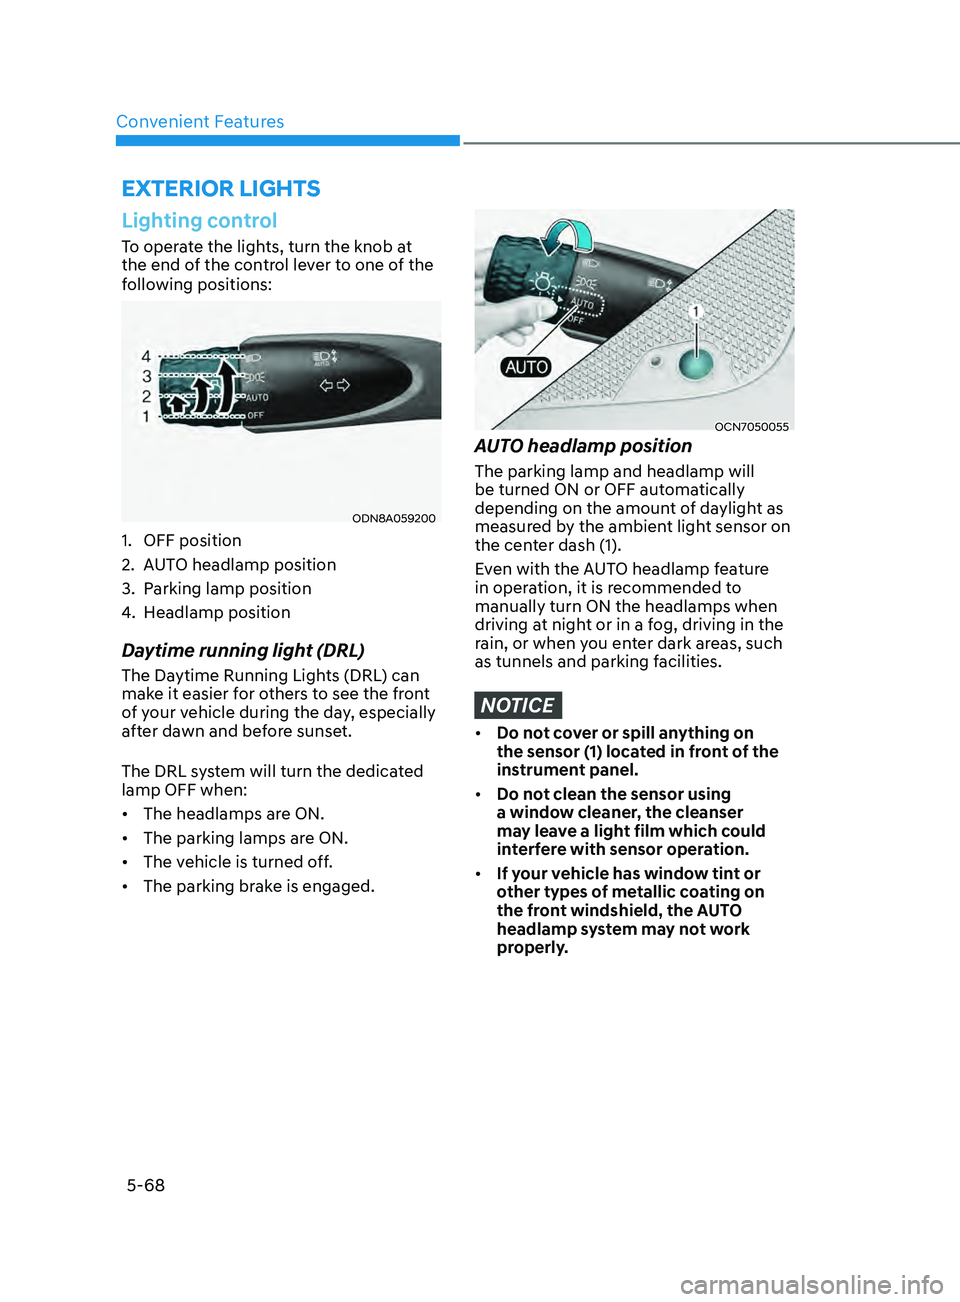
To operate the lights, turn the knob at
the end of the control lever to one of the
following positions:
ODN8A059200
1. OFF position
2.
AUT
O headlamp position
3.
Parking lamp position
4.
Headlamp position
Daytime running light (DRL)
The Daytime Running Lights (DRL) can
make it easier for others to see the front
of your vehicle during the day, especially
after dawn and before sunset.
The DRL system will turn the dedicated
lamp OFF when:
• The headlamps are ON.
• The parking lamps are ON.
• The vehicle is turned off.
• The parking brake is engaged.
OCN7050055
AUTO headlamp position
The parking lamp and headlamp will
be turned ON or OFF automatically
depending on the amount of daylight as
measured by the ambient light sensor on
the center dash (1).
Even with the AUTO headlamp feature
in operation, it is recommended to
manually turn ON the headlamps when
driving at night or in a fog, driving in the
rain, or when you enter dark areas, such
as tunnels and parking facilities.
NOTICE
• Do not cover or spill anything on
the sensor (1) located in front of the
instrument panel.
• Do not clean the sensor using
a window cleaner, the cleanser
may leave a light film which could
interfere with sensor operation.
• If your vehicle has window tint or
other types of metallic coating on
the front windshield, the AUTO
headlamp system may not work
properly.
Page 205 of 570
05
5-69
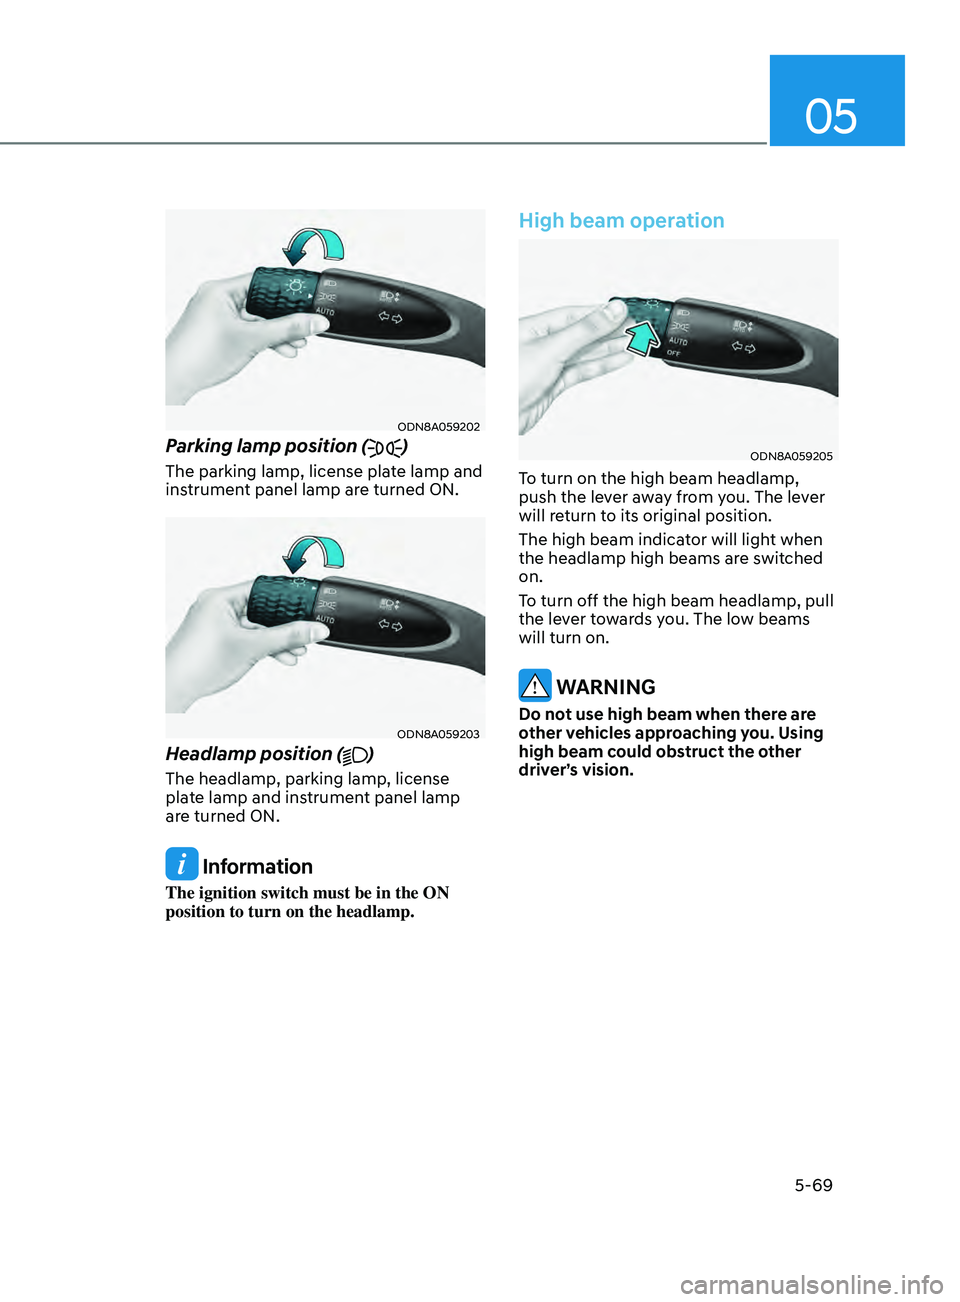
ODN8A059202
Parking lamp position ()
The parking lamp, license plate lamp and
instrument panel lamp are turned ON.
ODN8A059203
Headlamp position ()
The headlamp, parking lamp, license
plate lamp and instrument panel lamp
are turned ON.
Information
The ignition switch must be in the ON
position to turn on the headlamp.
High beam operation
ODN8A059205
To turn on the high beam headlamp,
push the lever away from you. The lever
will return to its original position.
The high beam indicator will light when
the headlamp high beams are switched
on.
To turn off the high beam headlamp, pull
the lever towards you. The low beams
will turn on.
WARNING
Do not use high beam when there are
other vehicles approaching you. Using
high beam could obstruct the other
driver’s vision.
Page 221 of 570
05
5-85
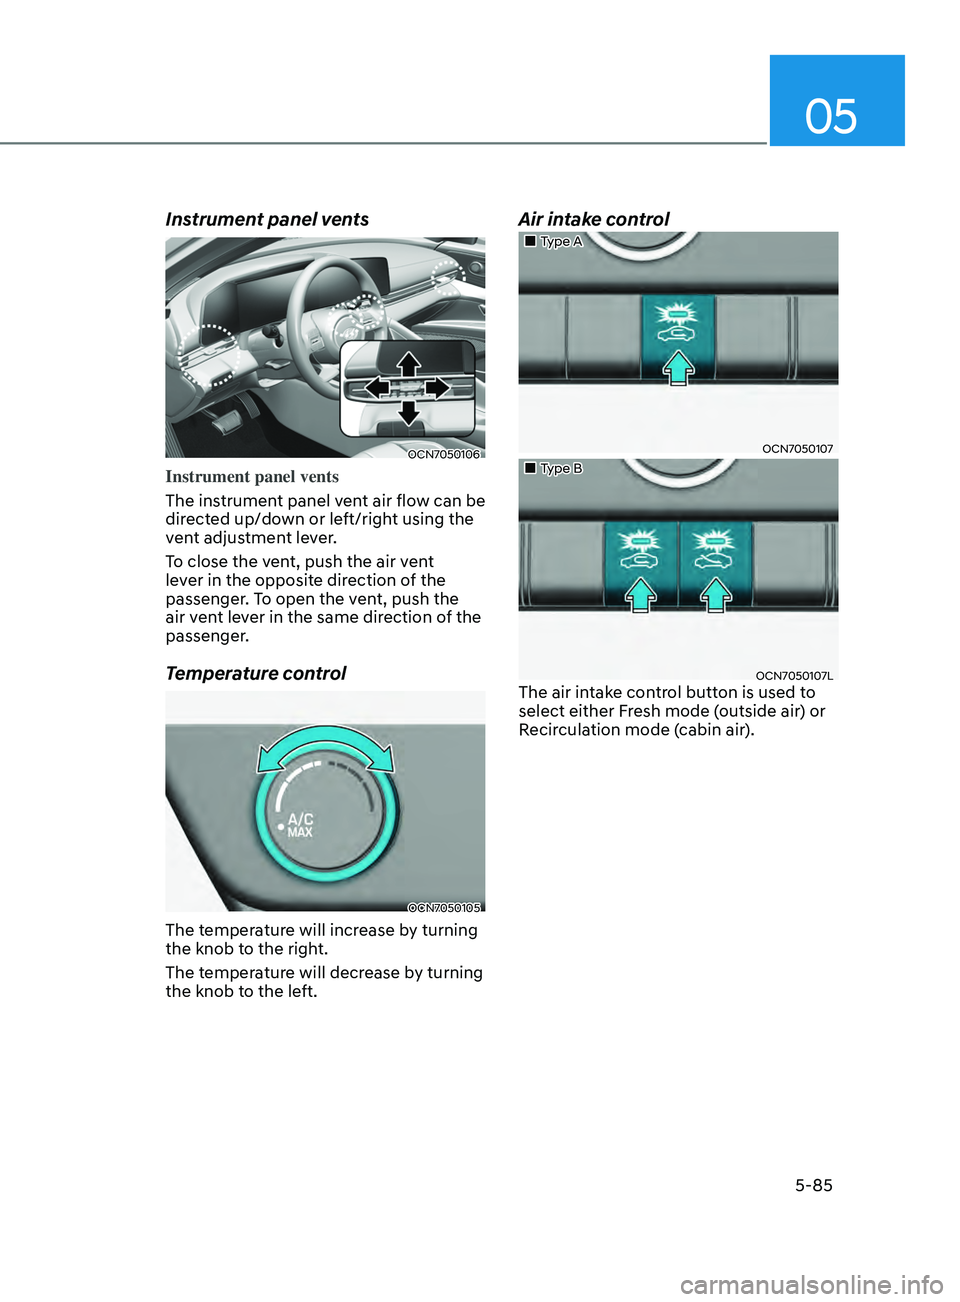
Instrument panel vents
OCN7050106
Instrument panel vents
The instrument panel vent air flow can be
directed up/down or left/right using the
vent adjustment lever.
To close the vent, push the air vent
lever in the opposite direction of the
passenger. To open the vent, push the
air vent lever in the same direction of the
passenger.
Temperature control
OCN7050105
The temperature will increase by turning
the knob to the right.
The temperature will decrease by turning
the knob to the left.
Air intake control
„„Type A
OCN7050107
„„Type B
OCN7050107LThe air intake control button is used to
select either Fresh mode (outside air) or
Recirculation mode (cabin air).
Page 233 of 570

05
5-97
OCN7050116
Defrost-Level (A, D)
Most of the air flow is directed to the
windshield with a small amount of air
directed to the side window defrosters.
OCN7050106
Instrument panel vents
The instrument panel vent air flow can be
directed up/down or left/right using the
vent adjustment lever.
To close the vent, push the air vent
lever in the opposite direction of the
passenger. To open the vent, push the
air vent lever in the same direction of the
passenger.
Temperature control
„„Driver’s seat„„Passenger’s seat
OCN7050114
The temperature will increase by turning
the knob to the right.
The temperature will decrease by turning
the knob to the left.
The temperature will increase or
decrease by 1°F (0.5°C) for each
incremental location. When set to the
lowest temperature setting, the air
conditioning will operate continuously.
Page 244 of 570
Convenient Features
5-108
DefrosterNOTICE
To prevent damage to the conductors
bonded to the inside surface of the rear
window, never use sharp instruments or
window cleaners containing abrasives
to clean the window.
Information
If you want to defrost and defog the
front windshield, refer to “Windshield
Defrosting and Defogging” in this chapter.
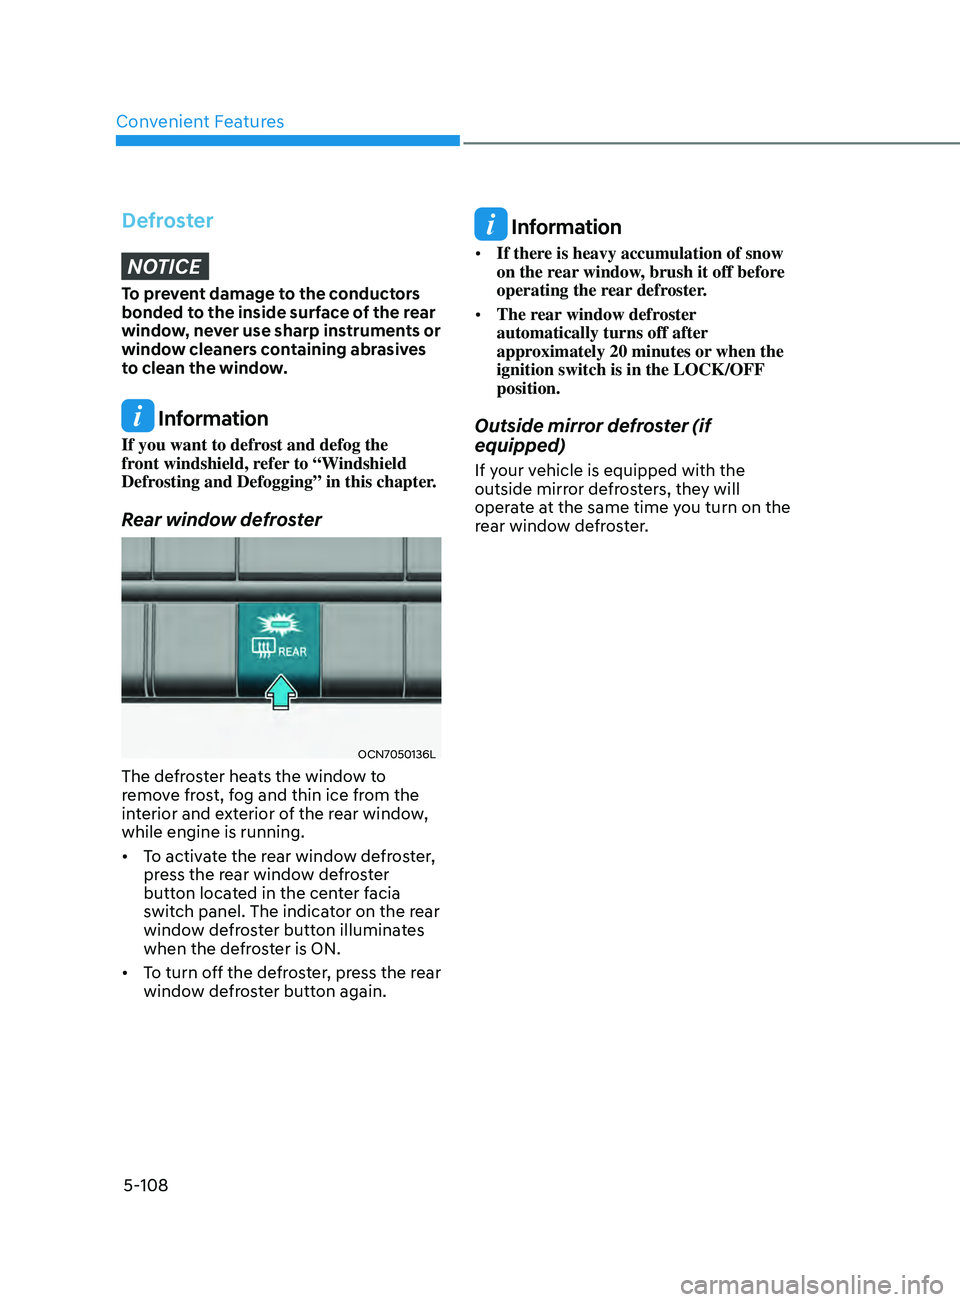
Rear window defroster
OCN7050136L
The defroster heats the window to
remove frost, fog and thin ice from the
interior and exterior of the rear window,
while engine is running.
• To activate the rear window defroster,
press the rear window defroster
button located in the center facia
switch panel. The indicator on the rear
window defroster button illuminates
when the defroster is ON.
• To turn off the defroster, press the rear
window defroster button again.
Information
• If there is heavy accumulation of snow
on the rear window, brush it off before
operating the rear defroster.
• The rear window defroster
automatically turns off after
approximately 20 minutes or when the
ignition switch is in the LOCK/OFF
position.
Outside mirror defroster (if
equipped)
If your vehicle is equipped with the
outside mirror defrosters, they will
operate at the same time you turn on the
rear window defroster.
Page 262 of 570

06
6-3
Winter Driving ........................................................................\
.....................6-46Snow or Icy Conditions ........................................................................\
.................. 6-46
Winter Precautions ........................................................................\
......................... 6-47
Vehicle load limit........................................................................\
................. 6-49Tire Loading Information Label ........................................................................\
..... 6-50
Trailer Towing ........................................................................\
....................... 6-54
WARNING
Carbon monoxide (CO) gas is toxic. Breathing CO can cause unconsciousness and
death.
Engine exhaust contains carbon monoxide which cannot be seen or smelled.
Do not inhale engine exhaust.
If at any time you smell engine exhaust inside the vehicle, open the windows
immediately. Exposure to CO can cause unconsciousness and death by asphyxiation.
Be sure the exhaust system does not leak.
The exhaust system should be checked whenever the vehicle is raised to change the
oil or for any other purpose. If you hear a change in the sound of the exhaust or if you
drive over something that strikes the underneath side of the vehicle, have the exhaust
system checked as soon as possible by an authorized HYUNDAI dealer.
Do not run the engine in an enclosed area.
Letting the engine idle in your garage, even with the garage door open, is a hazardous
practice. Run the engine only long enough to start the engine and to move the vehicle
out of the garage.
Avoid idling the engine for prolonged periods with people inside the vehicle.
If it is necessary to idle the engine for a prolonged period with people inside the
vehicle, be sure to do so only in an open area with the air intake set at "Fresh" and fan
control set to high so fresh air is drawn into the interior.
Keep the air intakes clear.
To assure proper operation of the ventilation system, keep the ventilation air intakes
located in front of the windshield clear of snow, ice, leaves, or other obstructions.
If you must drive with the trunk open:
Close all windows.
Open instrument panel air vents.
Set the air intake control at "Fresh", the air flow control at "Floor" or "Face", and the fan
control set to high.
WARNING
CALIFORNIA PROPOSITION 65 WARNING
Engine exhaust and a wide variety of automobile components including
components found in the interior furnishings in a vehicle, contain or emit harmful
chemicals known to the State of California to cause cancer and birth defects and
reproductive harm. In addition, certain fluids contained in vehicles and certain
products of components contain or emit chemicals known to the State of California
to cause cancer and birth defects or other reproductive harm.
Page 263 of 570
6-4
Before Entering the Vehicle
• Be sure all windows, outside mirror(s),
and outside lights are clean and
unobstructed.
• Remove frost, snow, or ice.
• Visually check the tires for uneven
wear and damage.
• Check under the vehicle for any sign
of leaks.
• Be sure there are no obstacles behind
you if you intend to back up.
Before Starting
• Make sure the hood, the trunk, and
the doors are securely closed and
locked.
• Adjust the position of the seat and
steering wheel.
• Adjust the inside and side view
mirrors.
• Verify all the lights work.
• Fasten your seatbelt. Check that
all passengers have fastened their
seatbelts.
• Check the gauges and indicators
in the instrument panel and the
messages on the instrument display
when the ignition switch is in the ON
position.
• Check that any items you are carrying
are stored properly or fastened down
securely.
WARNING
To reduce the risk of SERIOUS INJURY or
DEATH, take the following precautions:
• ALWAYS wear your seat belt. All
passengers must be properly belted
whenever the vehicle is moving.
For more information, refer to "Seat
Belts" in chapter 3.
• Always drive defensively. Assume
other drivers or pedestrians may be
careless and make mistakes.
• Stay focused on the task of driving.
Driver distraction can cause
accidents.
• Leave plenty of space between you
and the vehicle in front of you.
WARNING
NEVER drink alcohol or take drugs and
drive.
Drinking alcohol or taking drugs and
driving is dangerous and may result in
an accident and SERIOUS INJURY or
DEATH.
Drunk driving is the number one
contributor to the highway death
toll each year. Even a small amount
of alcohol will affect your reflexes,
perceptions and judgment. Just
one drink can reduce your ability to
respond to changing conditions and
emergencies and your reaction time
gets worse with each additional drink.
Driving while under the influence
of drugs is as dangerous or more
dangerous than driving under the
influence of alcohol.
You are much more likely to have a
serious accident if you drink or take
drugs and drive. If you are drinking or
taking drugs, don't drive. Do not ride
with a driver who has been drinking
or taking drugs. Choose a designated
driver or call a taxi.
Before Driving
While Driving
Page 344 of 570
07
7-31
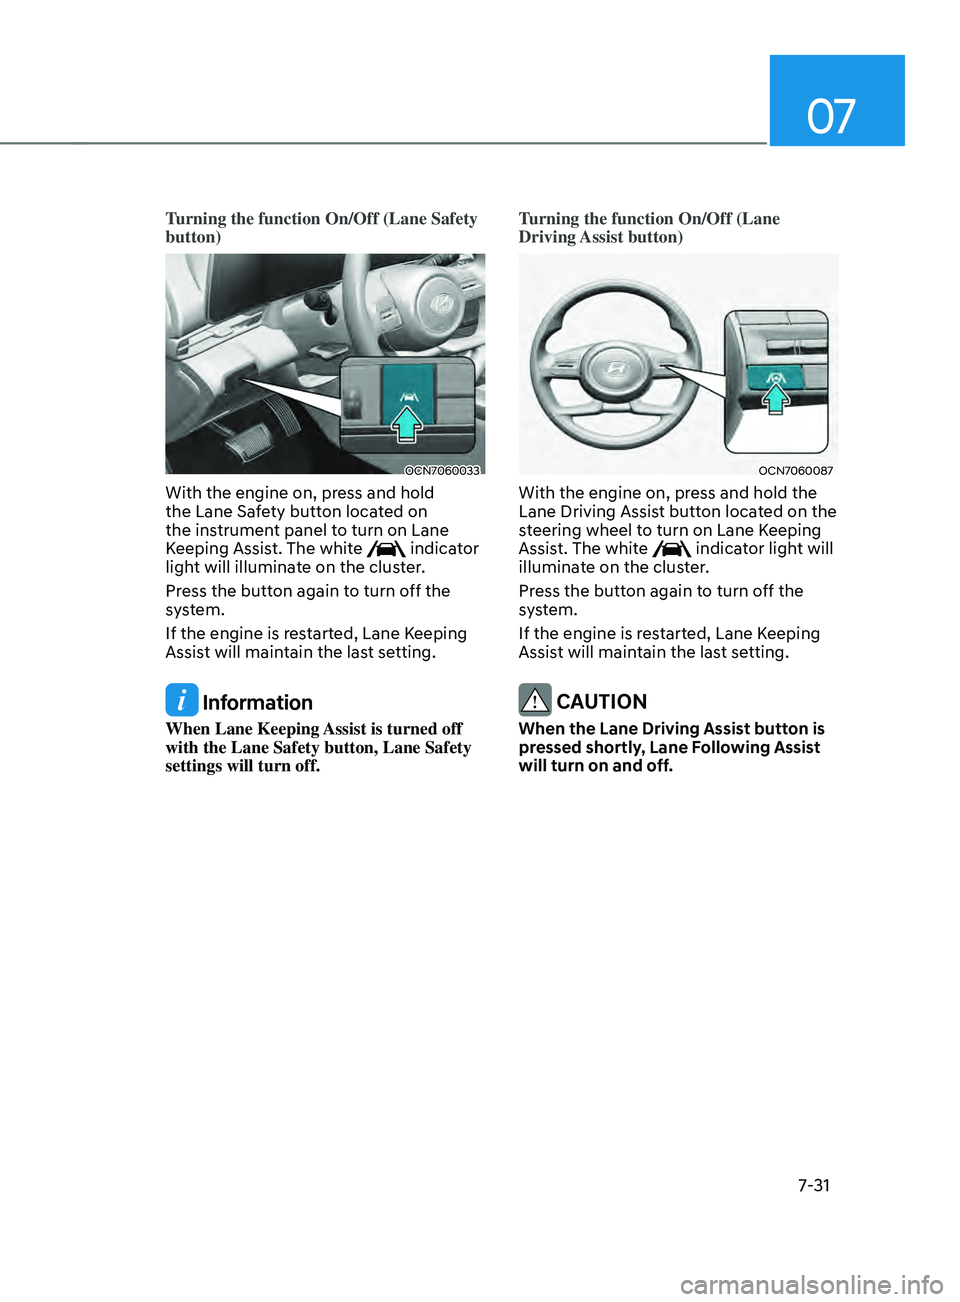
Turning the function On/Off (Lane Safety
button)
OCN7060033
With the engine on, press and hold
the Lane Safety button located on
the instrument panel to turn on Lane
Keeping Assist. The white
indicator
light will illuminate on the cluster.
Press the button again to turn off the
system.
If the engine is restarted, Lane Keeping
Assist will maintain the last setting.
Information
When Lane Keeping Assist is turned off
with the Lane Safety button, Lane Safety
settings will turn off. Turning the function On/Off (Lane
Driving Assist button)
OCN7060087
With the engine on, press and hold the
Lane Driving Assist button located on the
steering wheel to turn on Lane Keeping
Assist. The white
indicator light will
illuminate on the cluster.
Press the button again to turn off the
system.
If the engine is restarted, Lane Keeping
Assist will maintain the last setting.
CAUTION
When the Lane Driving Assist button is
pressed shortly, Lane Following Assist
will turn on and off.