tow Hyundai Elantra Coupe 2014 Owner's Manual
[x] Cancel search | Manufacturer: HYUNDAI, Model Year: 2014, Model line: Elantra Coupe, Model: Hyundai Elantra Coupe 2014Pages: 550, PDF Size: 45.11 MB
Page 7 of 550
1
2
3
4
5
6
7
8
I
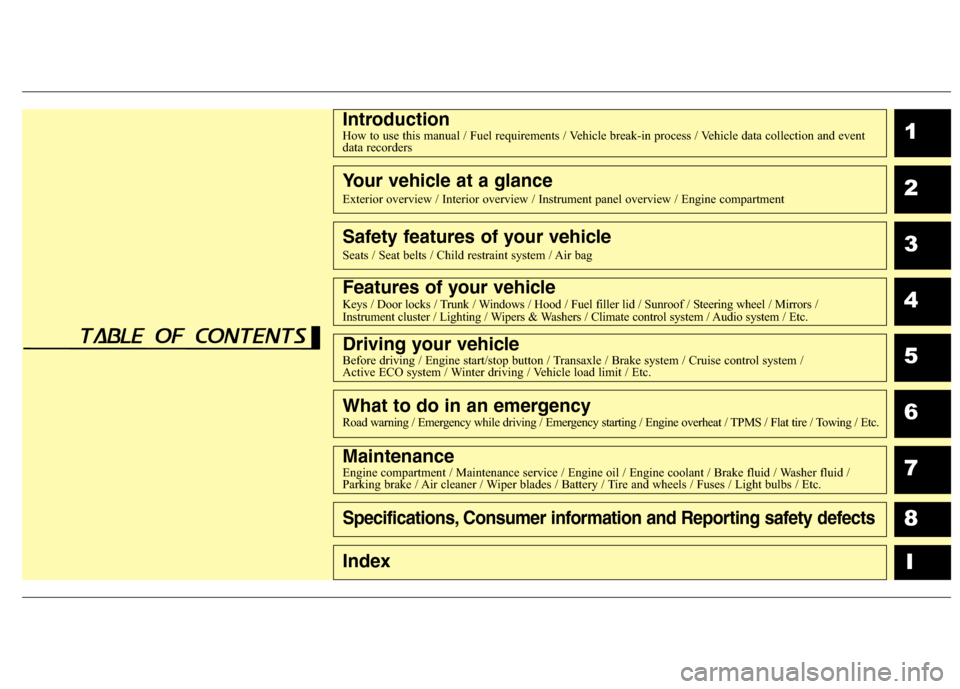
IntroductionHow to use this manual / Fuel requirements / Vehicle break-in process / Vehicle data collection and event
data recorders
Your vehicle at a glance
Exterior overview / Interior overview / Instrument panel overview / Engine compartment
Safety features of your vehicle
Seats / Seat belts / Child restraint system / Air bag
Features of your vehicleKeys / Door locks / Trunk / Windows / Hood / Fuel filler lid / Sunroof / Steering wheel / Mirrors /
Instrument cluster / Lighting / Wipers & Washers / Climate control system / Audio system / Etc.
Driving your vehicleBefore driving / Engine start/stop button / Transaxle / Brake system / Cruise control system /
Active ECO system / Winter driving / Vehicle load limit / Etc.
What to do in an emergencyRoad warning / Emergency while driving / Emergency starting / Engine overheat / TPMS / Flat tire / Towing / Etc.
MaintenanceEngine compartment / Maintenance service / Engine oil / Engine coolant / Brake fluid / Washer fluid /
Parking brake / Air cleaner / Wiper blades / Battery / Tire and wheels / Fuses / Light bulbs / Etc.
Specifications, Consumer information and Reporting safety defects
Index
table of contents
Page 15 of 550
Your vehicle at a glance
2 2
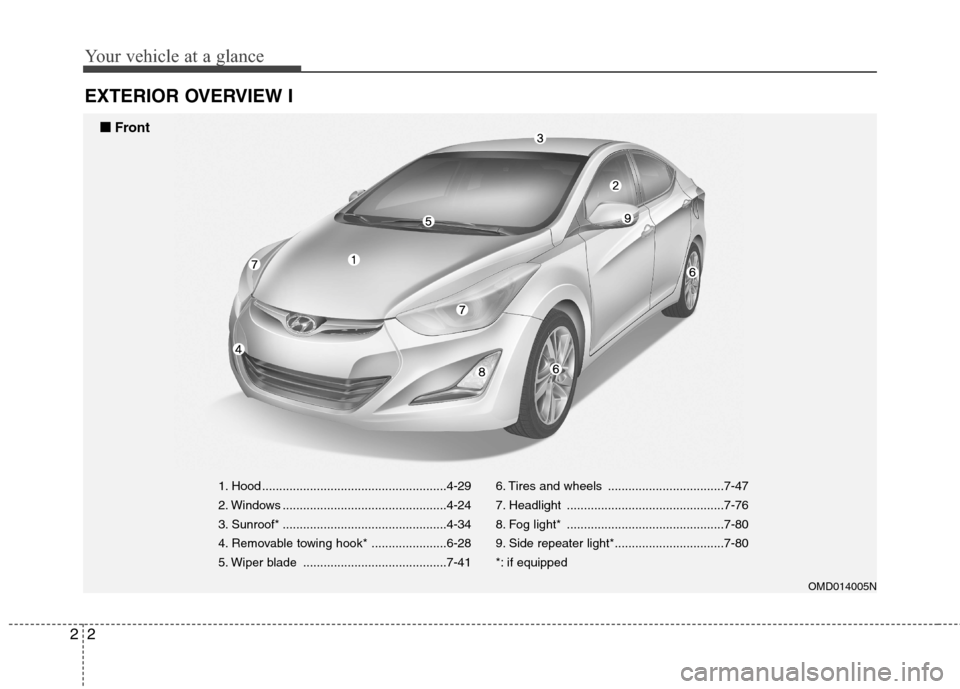
EXTERIOR OVERVIEW I
1. Hood ......................................................4-29
2. Windows ................................................4-24
3. Sunroof* ................................................4-34
4. Removable towing hook* ......................6-28
5. Wiper blade ..........................................7-416. Tires and wheels ..................................7-47
7. Headlight ..............................................7-76
8. Fog light* ..............................................7-80
9. Side repeater light*................................7-80
*: if equipped
OMD014005N
■ ■
Front
Page 32 of 550
Safety features of your vehicle
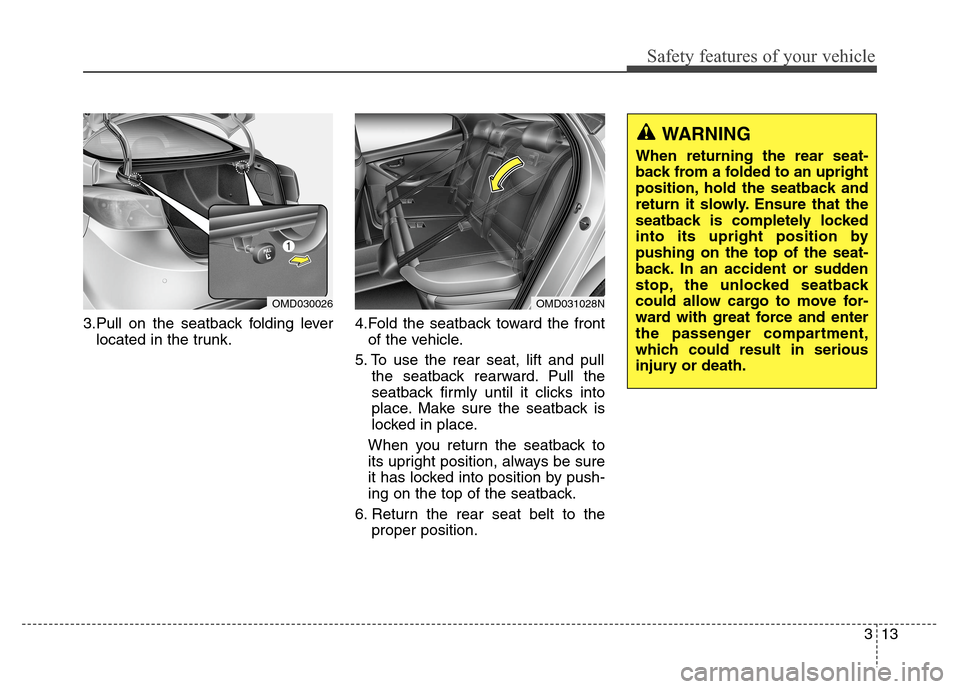
313 3.Pull on the seatback folding lever
located in the trunk.4.Fold the seatback toward the front
of the vehicle.
5. To use the rear seat, lift and pull
the seatback rearward. Pull the
seatback firmly until it clicks into
place. Make sure the seatback is
locked in place.
When you return the seatback to
its upright position, always be sure
it has locked into position by push-
ing on the top of the seatback.
6. Return the rear seat belt to the
proper position.
OMD031028NOMD030026
WARNING
When returning the rear seat-
back from a folded to an upright
position, hold the seatback and
return it slowly. Ensure that the
seatback is completely locked
into its upright position by
pushing on the top of the seat-
back. In an accident or sudden
stop, the unlocked seatback
could allow cargo to move for-
ward with great force and enter
the passenger compartment,
which could result in serious
injury or death.
Page 63 of 550
Safety features of your vehicle
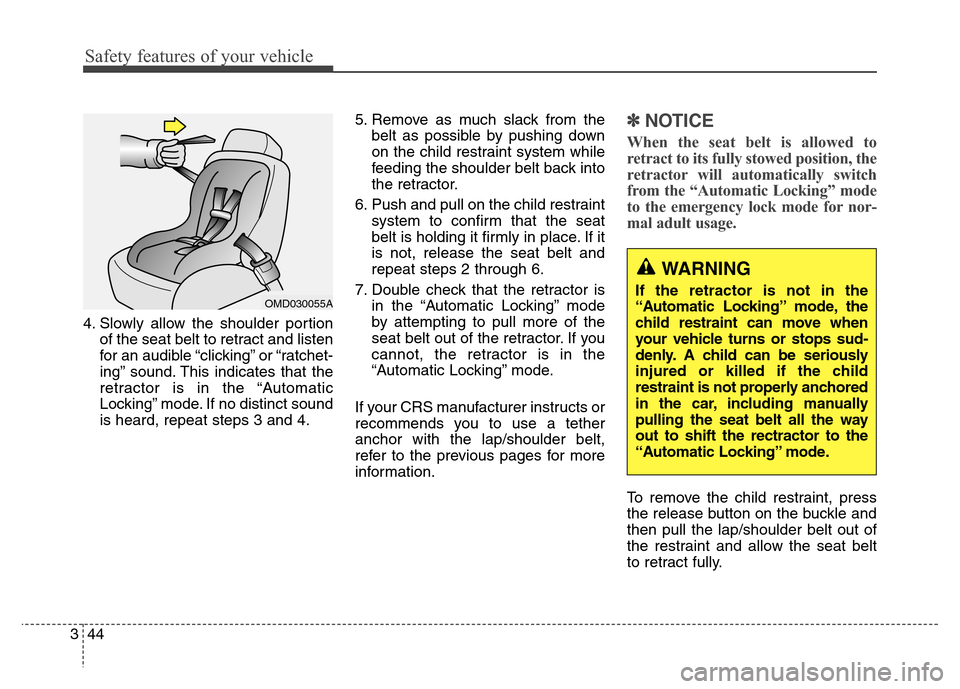
44 34. Slowly allow the shoulder portion
of the seat belt to retract and listen
for an audible “clicking” or “ratchet-
ing” sound. This indicates that the
retractor is in the “Automatic
Locking” mode. If no distinct sound
is heard, repeat steps 3 and 4.5. Remove as much slack from the
belt as possible by pushing down
on the child restraint system while
feeding the shoulder belt back into
the retractor.
6. Push and pull on the child restraint
system to confirm that the seat
belt is holding it firmly in place. If it
is not, release the seat belt and
repeat steps 2 through 6.
7. Double check that the retractor is
in the “Automatic Locking” mode
by attempting to pull more of the
seat belt out of the retractor. If you
cannot, the retractor is in the
“Automatic Locking” mode.
If your CRS manufacturer instructs or
recommends you to use a tether
anchor with the lap/shoulder belt,
refer to the previous pages for more
information.
✽ ✽
NOTICE
When the seat belt is allowed to
retract to its fully stowed position, the
retractor will automatically switch
from the “Automatic Locking” mode
to the emergency lock mode for nor-
mal adult usage.
To remove the child restraint, press
the release button on the buckle and
then pull the lap/shoulder belt out of
the restraint and allow the seat belt
to retract fully.
OMD030055A
WARNING
If the retractor is not in the
“Automatic Locking” mode, the
child restraint can move when
your vehicle turns or stops sud-
denly. A child can be seriously
injured or killed if the child
restraint is not properly anchored
in the car, including manually
pulling the seat belt all the way
out to shift the rectractor to the
“Automatic Locking” mode.
Page 75 of 550
Safety features of your vehicle
56 3
Main components of the
Occupant Classification System
A detection device located within
the front passenger seat.
Electronic system to determine
whether the passenger air bag
should be activated or deactivated.
An indicator light located on the
instrument panel which illuminates
the words "PASSENGER AIR BAG
OFF" indicating the front passen-
ger air bag system is deactivated.
The instrument panel air bag indi-
cator light is interconnected with
the OCS.Front passenger seat adult occu-
pants who are properly seated and
wearing the seat belt properly,
should not cause the passenger air
bag to be automatically turned OFF.
However, if the occupant does not sit
in the seat properly (for example, by
not sitting upright, by sitting on the
edge of the seat, or by otherwise
being out of position), this could
cause the sensor to turn the air bag
OFF.
You will find the "PASSENGER AIR
BAG OFF" indicator on the center
facia panel. This system detects the
conditions 1-4 in the following table
and activates or deactivates the front
passenger air bag based on these
conditions.
Always be sure that you and all vehi-
cle occupants are seated properly
and wearing the seat belt properly for
the most effective protection by the
air bag and the seat belt.The OCS may not function properly if
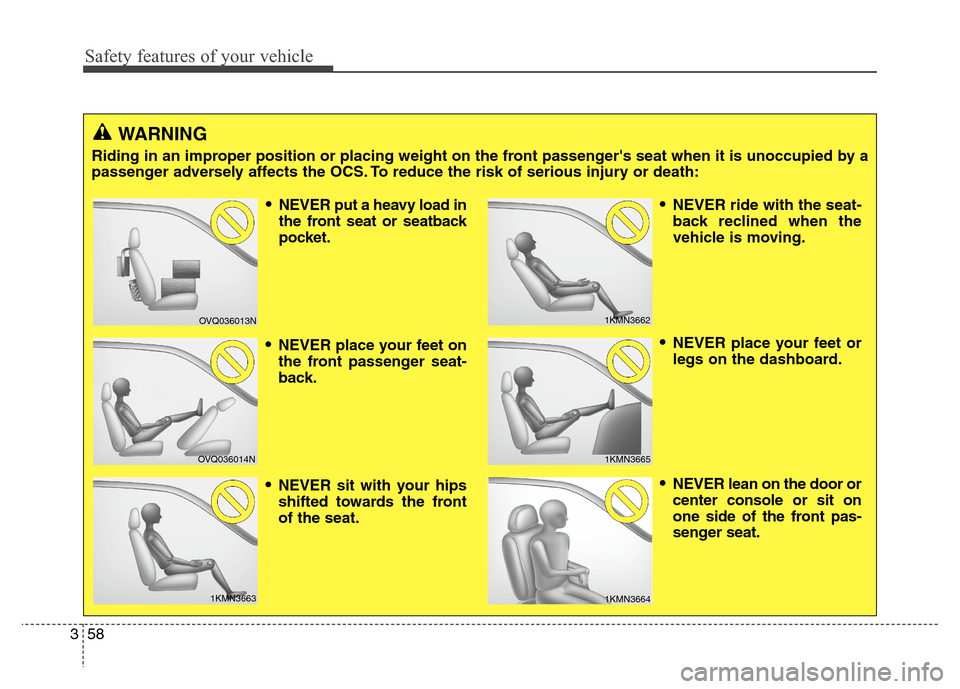
the passenger takes actions which
can affect the classification system.
These include:
Failing to sit in an upright position.
Leaning against the door or center
console.
Sitting towards the sides of the
front of the seat.
Putting their legs on the dashboard
or resting them on other locations
which reduce the passenger
weight on the front seat.
Wearing the seat belt improperly.
Reclining the seatback.
Page 77 of 550
Safety features of your vehicle
58 3
WARNING
Riding in an improper position or placing weight on the front passenger's seat when it is unoccupied by a
passenger adversely affects the OCS. To reduce the risk of serious injury or death:
OVQ036013N
OVQ036014N
1KMN3663
1KMN3662
1KMN3664
NEVER put a heavy load in
the front seat or seatback
pocket.
NEVER place your feet on
the front passenger seat-
back.
NEVER sit with your hips
shifted towards the front
of the seat.
NEVER ride with the seat-
back reclined when the
vehicle is moving.
NEVER place your feet or
legs on the dashboard.
NEVER lean on the door or
center console or sit on
one side of the front pas-
senger seat.
1KMN3665
Page 96 of 550
Features of your vehicle
10 4
Start-up
You can start the engine without
inserting the key. For detailed infor-
mation refer to the Engine Start/Stop
button in chapter 5.
Mechanical key
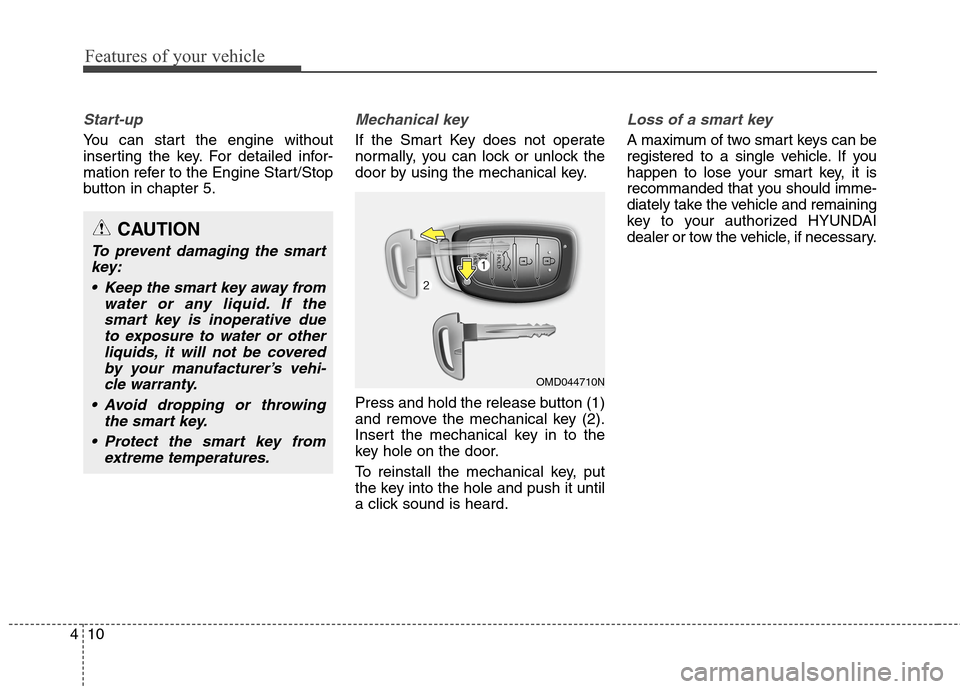
If the Smart Key does not operate
normally, you can lock or unlock the
door by using the mechanical key.
Press and hold the release button (1)
and remove the mechanical key (2).
Insert the mechanical key in to the
key hole on the door.
To reinstall the mechanical key, put
the key into the hole and push it until
a click sound is heard.
Loss of a smart key
A maximum of two smart keys can be
registered to a single vehicle. If you
happen to lose your smart key, it is
recommanded that you should imme-
diately take the vehicle and remaining
key to your authorized HYUNDAI
dealer or tow the vehicle, if necessary.
OMD044710N
CAUTION
To prevent damaging the smart
key:
Keep the smart key away from
water or any liquid. If the
smart key is inoperative due
to exposure to water or other
liquids, it will not be covered
by your manufacturer’s vehi-
cle warranty.
Avoid dropping or throwing
the smart key.
Protect the smart key from
extreme temperatures.
Page 100 of 550
Features of your vehicle
14 4
Operating door locks from
outside the vehicle
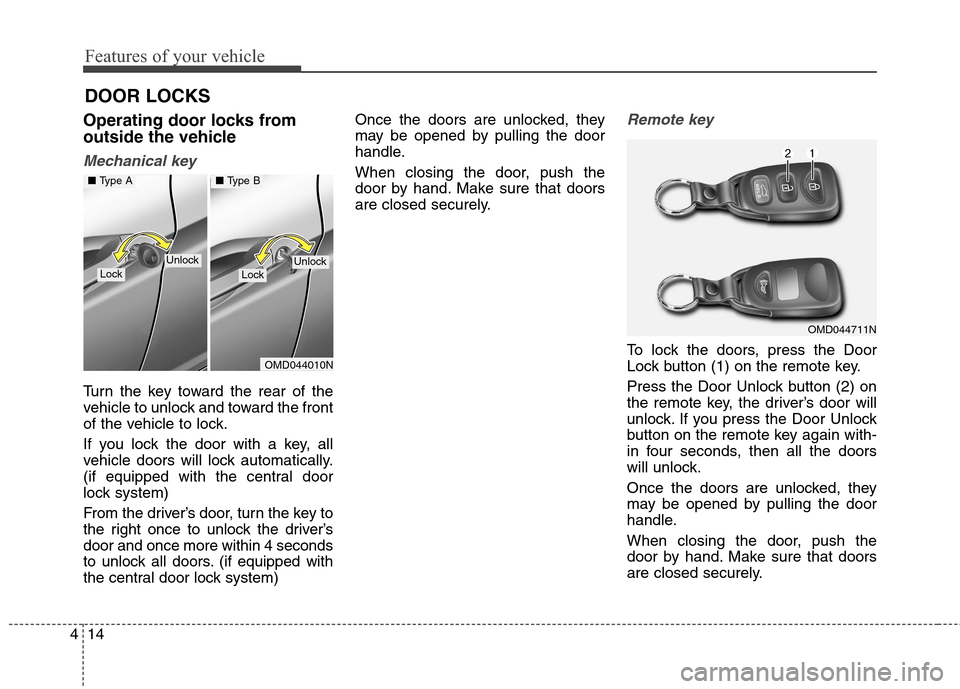
Mechanical key
Turn the key toward the rear of the
vehicle to unlock and toward the front
of the vehicle to lock.
If you lock the door with a key, all
vehicle doors will lock automatically.
(if equipped with the central door
lock system)
From the driver’s door, turn the key to
the right once to unlock the driver’s
door and once more within 4 seconds
to unlock all doors. (if equipped with
the central door lock system)Once the doors are unlocked, they
may be opened by pulling the door
handle.
When closing the door, push the
door by hand. Make sure that doors
are closed securely.
Remote key
To lock the doors, press the Door
Lock button (1) on the remote key.
Press the Door Unlock button (2) on
the remote key, the driver’s door will
unlock. If you press the Door Unlock
button on the remote key again with-
in four seconds, then all the doors
will unlock.
Once the doors are unlocked, they
may be opened by pulling the door
handle.
When closing the door, push the
door by hand. Make sure that doors
are closed securely.
DOOR LOCKS
OMD044711N
OMD044010N
LockLockUnlockUnlock
■ Type A■ Type B
Page 125 of 550
439
Features of your vehicle
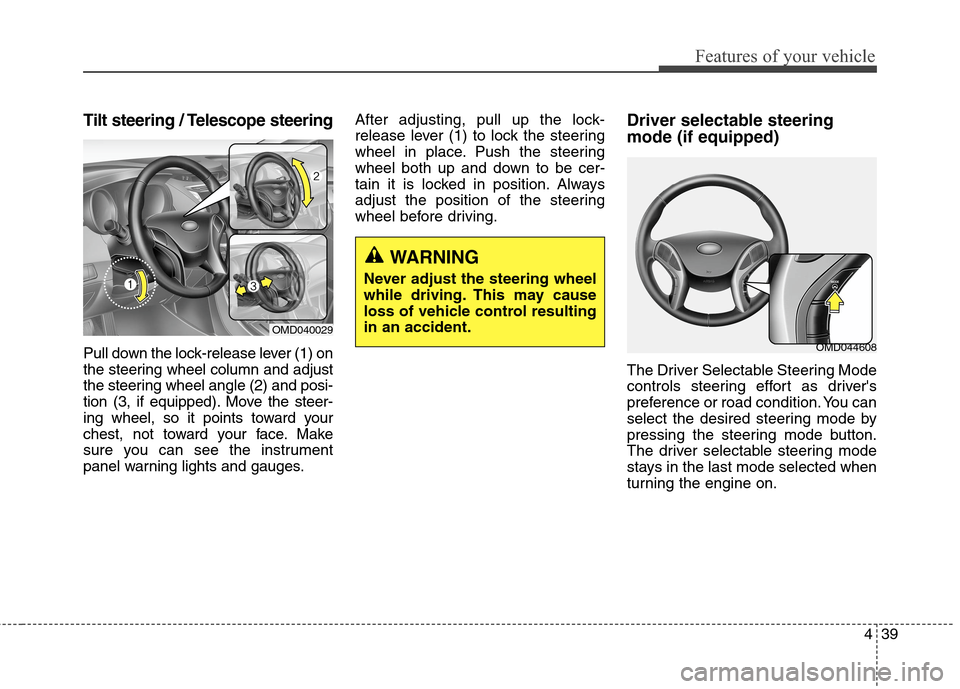
Tilt steering / Telescope steering
Pull down the lock-release lever (1) on
the steering wheel column and adjust
the steering wheel angle (2) and posi-
tion (3, if equipped). Move the steer-
ing wheel, so it points toward your
chest, not toward your face. Make
sure you can see the instrument
panel warning lights and gauges.After adjusting, pull up the lock-
release lever (1) to lock the steering
wheel in place. Push the steering
wheel both up and down to be cer-
tain it is locked in position. Always
adjust the position of the steering
wheel before driving.
Driver selectable steering
mode (if equipped)
The Driver Selectable Steering Mode
controls steering effort as driver's
preference or road condition. You can
select the desired steering mode by
pressing the steering mode button.
The driver selectable steering mode
stays in the last mode selected when
turning the engine on.
WARNING
Never adjust the steering wheel
while driving. This may cause
loss of vehicle control resulting
in an accident.
OMD040029
OMD044608
Page 128 of 550
Features of your vehicle
42 4
Inside rearview mirror
Before you start driving, adjust the
rearview mirror to the center on the
view through the rear window.
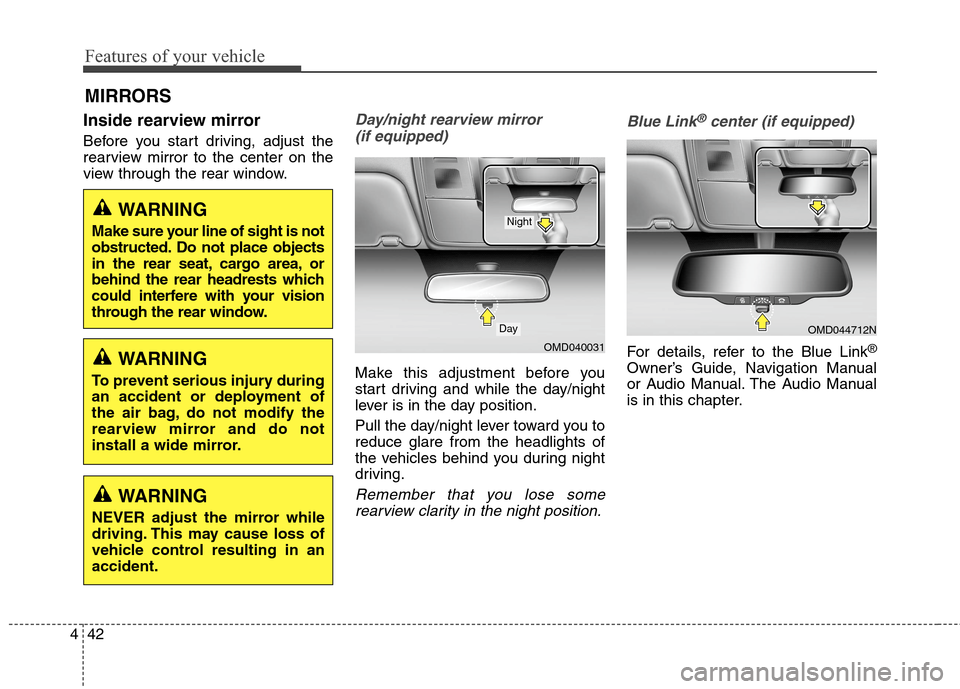
Day/night rearview mirror
(if equipped)
Make this adjustment before you
start driving and while the day/night
lever is in the day position.
Pull the day/night lever toward you to
reduce glare from the headlights of
the vehicles behind you during night
driving.
Remember that you lose some
rearview clarity in the night position.Blue Link
®center (if equipped)
For details, refer to the Blue Link®
Owner’s Guide, Navigation Manual
or Audio Manual. The Audio Manual
is in this chapter.
MIRRORS
WARNING
Make sure your line of sight is not
obstructed. Do not place objects
in the rear seat, cargo area, or
behind the rear headrests which
could interfere with your vision
through the rear window.
WARNING
To prevent serious injury during
an accident or deployment of
the air bag, do not modify the
rearview mirror and do not
install a wide mirror.
WARNING
NEVER adjust the mirror while
driving. This may cause loss of
vehicle control resulting in an
accident.
OMD040031
Day
Night
OMD044712N