window Hyundai Elantra GT 2013 User Guide
[x] Cancel search | Manufacturer: HYUNDAI, Model Year: 2013, Model line: Elantra GT, Model: Hyundai Elantra GT 2013Pages: 476, PDF Size: 31.71 MB
Page 111 of 476
Features of your vehicle
26 4
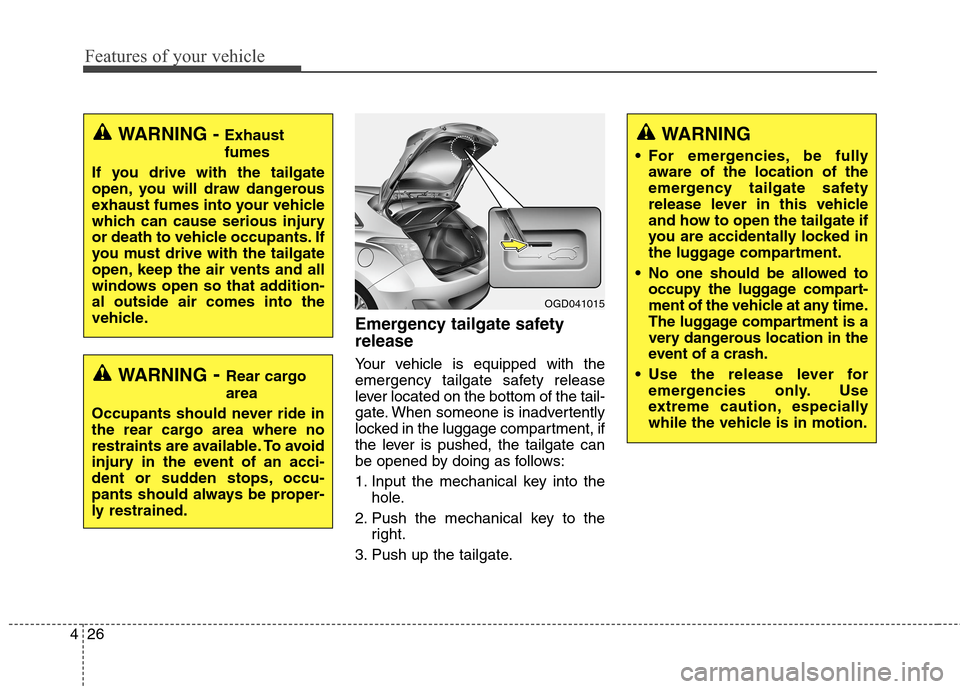
Emergency tailgate safety
release
Your vehicle is equipped with the
emergency tailgate safety release
lever located on the bottom of the tail-
gate. When someone is inadvertently
locked in the luggage compartment, if
the lever is pushed, the tailgate can
be opened by doing as follows:
1. Input the mechanical key into the
hole.
2. Push the mechanical key to the
right.
3. Push up the tailgate.
WARNING
For emergencies, be fully
aware of the location of the
emergency tailgate safety
release lever in this vehicle
and how to open the tailgate if
you are accidentally locked in
the luggage compartment.
No one should be allowed to
occupy the luggage compart-
ment of the vehicle at any time.
The luggage compartment is a
very dangerous location in the
event of a crash.
Use the release lever for
emergencies only. Use
extreme caution, especially
while the vehicle is in motion.
OGD041015
WARNING- Rear cargo
area
Occupants should never ride in
the rear cargo area where no
restraints are available. To avoid
injury in the event of an acci-
dent or sudden stops, occu-
pants should always be proper-
ly restrained.
WARNING - Exhaust
fumes
If you drive with the tailgate
open, you will draw dangerous
exhaust fumes into your vehicle
which can cause serious injury
or death to vehicle occupants. If
you must drive with the tailgate
open, keep the air vents and all
windows open so that addition-
al outside air comes into the
vehicle.
Page 112 of 476
427
Features of your vehicle
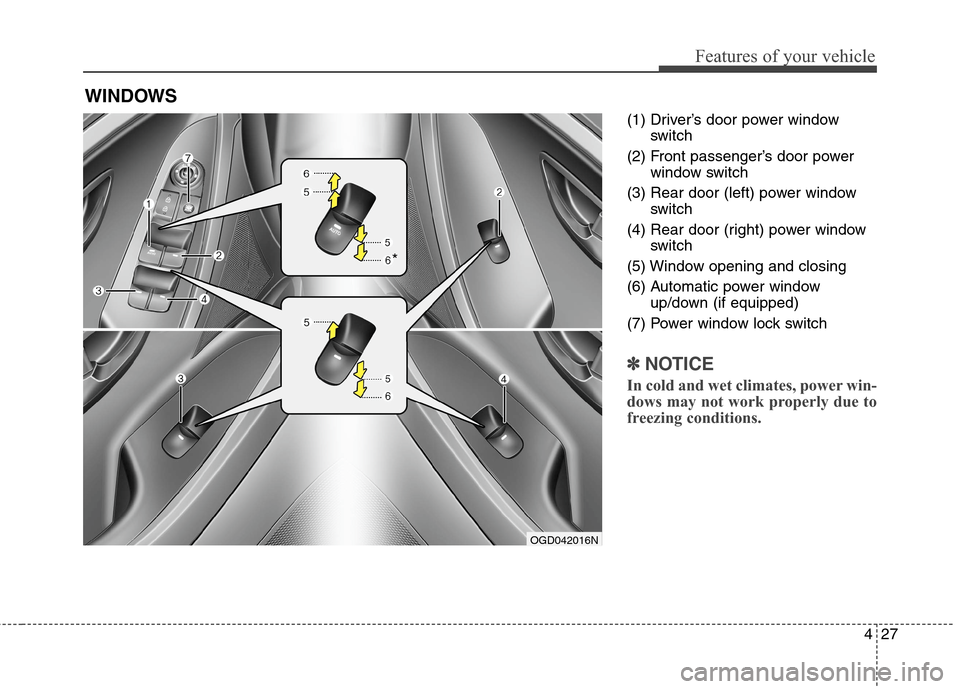
(1) Driver’s door power window
switch
(2) Front passenger’s door power
window switch
(3) Rear door (left) power window
switch
(4) Rear door (right) power window
switch
(5) Window opening and closing
(6) Automatic power window
up/down (if equipped)
(7) Power window lock switch
✽ ✽
NOTICE
In cold and wet climates, power win-
dows may not work properly due to
freezing conditions.
WINDOWS
OGD042016N
*
Page 113 of 476
Features of your vehicle
28 4
Power windows
The ignition switch must be in the ON
position for power windows to operate.
Each door has a power window
switch that controls that door's win-
dow. The driver has a power window
lock switch which can block the oper-
ation of passenger windows. The dri-
ver’s door has a master power win-
dow switch that controls all the win-
dows in the vehicle. The power win-
dows can be operated for approxi-
mately 30 seconds after the ignition
key is removed or turned to the ACC
or LOCK position. However, if the
front doors open, the power windows
cannot be operated within the 30
second period.
✽ ✽
NOTICE
While driving with the rear windows
down or with the sunroof (if
equipped) in an open (or partially
open) position, your vehicle may
demonstrate a wind buffeting or
pulsation noise. This noise is a nor-
mal occurrence and can be reduced
or eliminated by taking the follow-
ing actions. If the noise occurs with
one or both of the rear windows
down, partially lower both front
windows approximately one inch. If
you experience the noise with the
sunroof open, slightly reduce the
size of the sunroof opening.
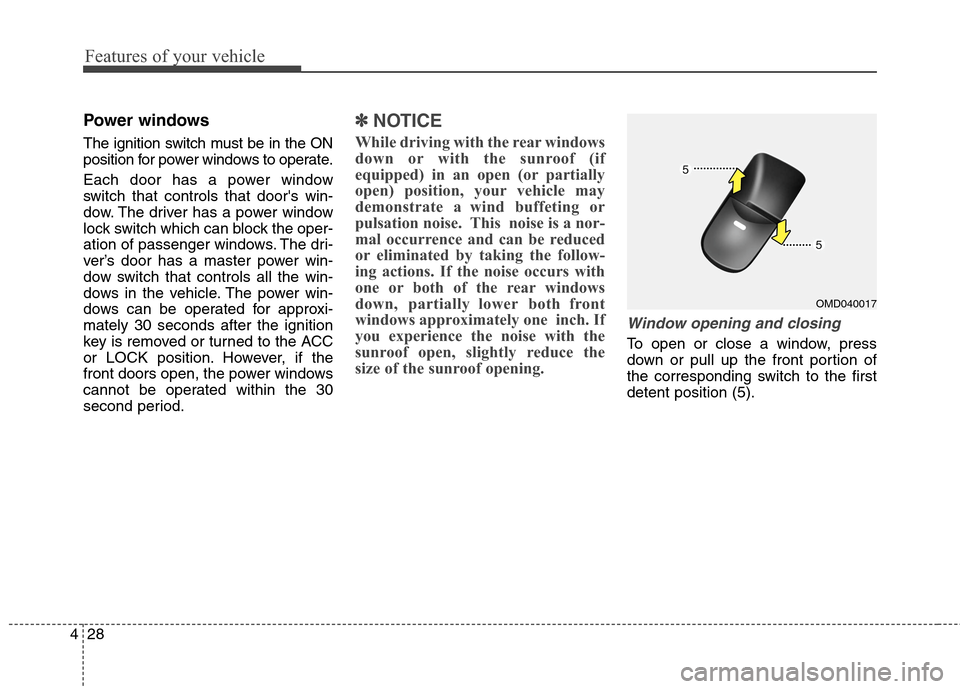
Window opening and closing
To open or close a window, press
down or pull up the front portion of
the corresponding switch to the first
detent position (5).
OMD040017
Page 114 of 476
429
Features of your vehicle
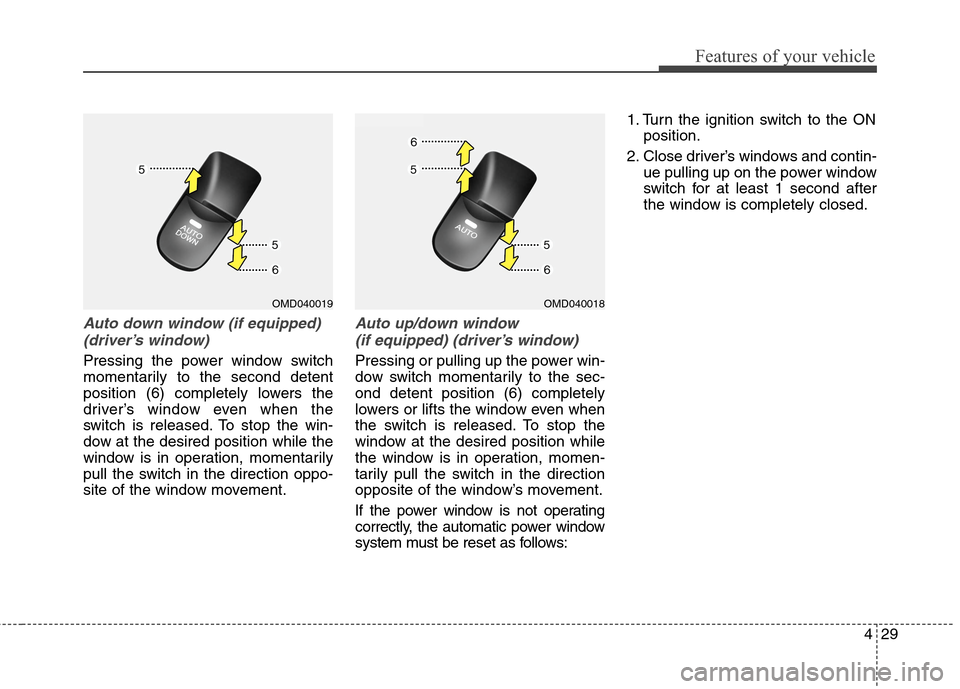
Auto down window (if equipped)
(driver’s window)
Pressing the power window switch
momentarily to the second detent
position (6) completely lowers the
driver’s window even when the
switch is released. To stop the win-
dow at the desired position while the
window is in operation, momentarily
pull the switch in the direction oppo-
site of the window movement.
Auto up/down window
(if equipped) (driver’s window)
Pressing or pulling up the power win-
dow switch momentarily to the sec-
ond detent position (6) completely
lowers or lifts the window even when
the switch is released. To stop the
window at the desired position while
the window is in operation, momen-
tarily pull the switch in the direction
opposite of the window’s movement.
If the power window is not operating
correctly, the automatic power window
system must be reset as follows:1. Turn the ignition switch to the ON
position.
2. Close driver’s windows and contin-
ue pulling up on the power window
switch for at least 1 second after
the window is completely closed.
OMD040019OMD040018
Page 115 of 476
Features of your vehicle
30 4
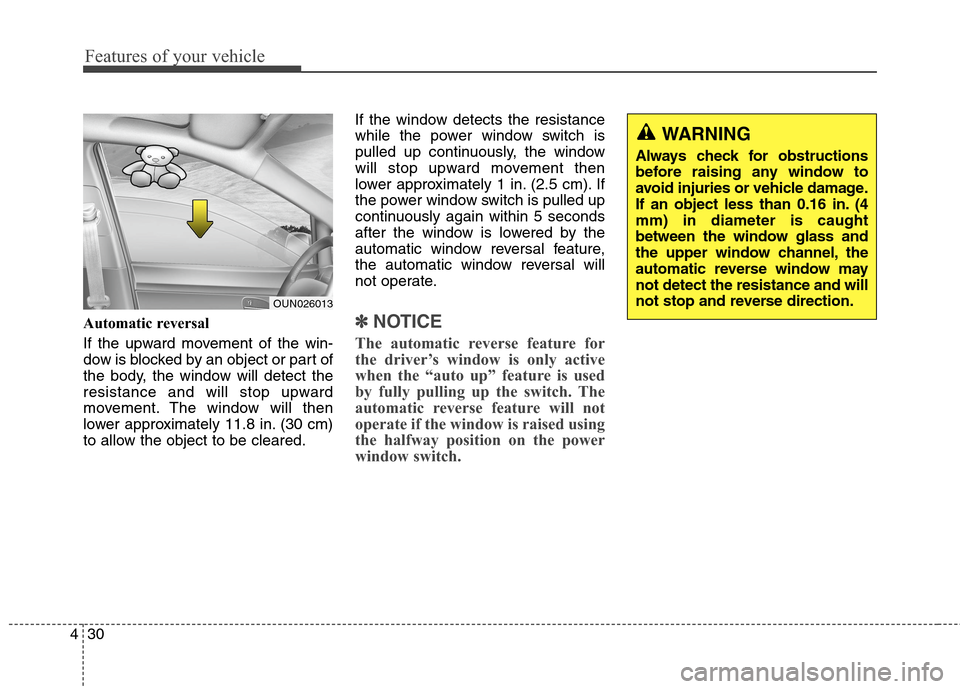
Automatic reversal
If the upward movement of the win-
dow is blocked by an object or part of
the body, the window will detect the
resistance and will stop upward
movement. The window will then
lower approximately 11.8 in. (30 cm)
to allow the object to be cleared.If the window detects the resistance
while the power window switch is
pulled up continuously, the window
will stop upward movement then
lower approximately 1 in. (2.5 cm). If
the power window switch is pulled up
continuously again within 5 seconds
after the window is lowered by the
automatic window reversal feature,
the automatic window reversal will
not operate.✽ ✽
NOTICE
The automatic reverse feature for
the driver’s window is only active
when the “auto up” feature is used
by fully pulling up the switch. The
automatic reverse feature will not
operate if the window is raised using
the halfway position on the power
window switch.
WARNING
Always check for obstructions
before raising any window to
avoid injuries or vehicle damage.
If an object less than 0.16 in. (4
mm) in diameter is caught
between the window glass and
the upper window channel, the
automatic reverse window may
not detect the resistance and will
not stop and reverse direction.
OUN026013
Page 116 of 476
431
Features of your vehicle
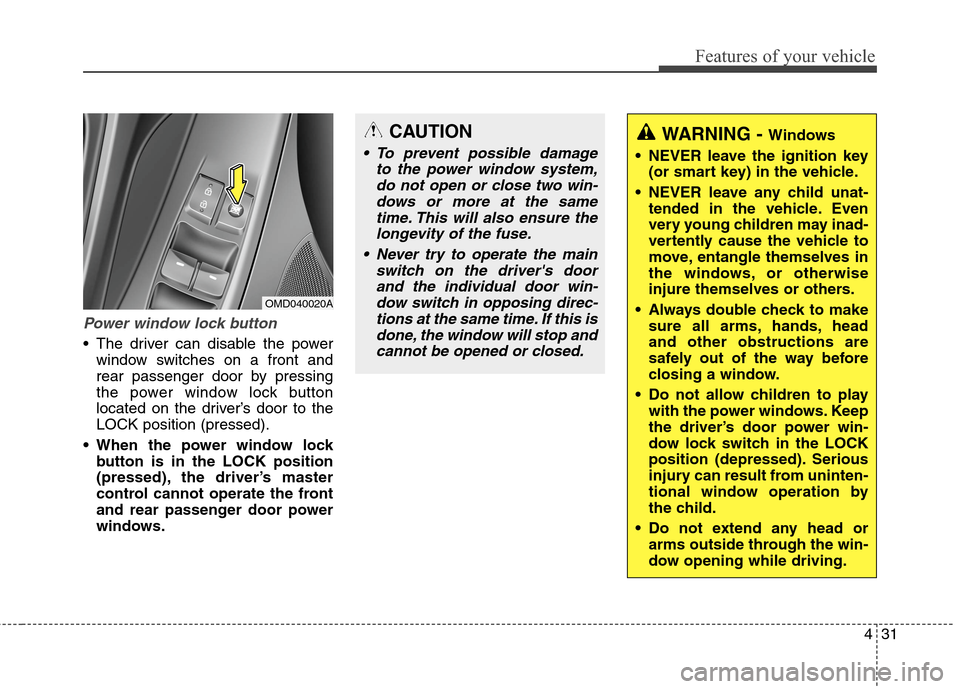
Power window lock button
The driver can disable the power
window switches on a front and
rear passenger door by pressing
the power window lock button
located on the driver’s door to the
LOCK position (pressed).
When the power window lock
button is in the LOCK position
(pressed), the driver’s master
control cannot operate the front
and rear passenger door power
windows.
OMD040020A
CAUTION
To prevent possible damage
to the power window system,
do not open or close two win-
dows or more at the same
time. This will also ensure the
longevity of the fuse.
Never try to operate the main
switch on the driver's door
and the individual door win-
dow switch in opposing direc-
tions at the same time. If this is
done, the window will stop and
cannot be opened or closed.
WARNING - Windows
NEVER leave the ignition key
(or smart key) in the vehicle.
NEVER leave any child unat-
tended in the vehicle. Even
very young children may inad-
vertently cause the vehicle to
move, entangle themselves in
the windows, or otherwise
injure themselves or others.
Always double check to make
sure all arms, hands, head
and other obstructions are
safely out of the way before
closing a window.
Do not allow children to play
with the power windows. Keep
the driver’s door power win-
dow lock switch in the LOCK
position (depressed). Serious
injury can result from uninten-
tional window operation by
the child.
Do not extend any head or
arms outside through the win-
dow opening while driving.
Page 133 of 476
Features of your vehicle
48 4
Inside rearview mirror
Adjust the rearview mirror so that the
center view through the rear window
is seen. Make this adjustment before
you start driving.
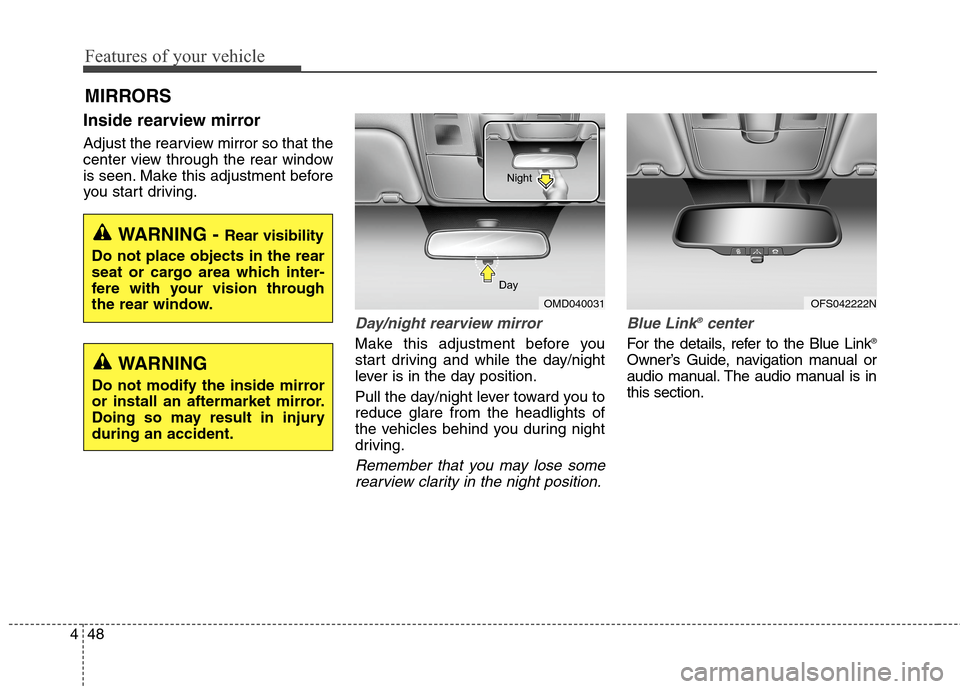
Day/night rearview mirror
Make this adjustment before you
start driving and while the day/night
lever is in the day position.
Pull the day/night lever toward you to
reduce glare from the headlights of
the vehicles behind you during night
driving.
Remember that you may lose some
rearview clarity in the night position.Blue Link
®center
For the details, refer to the Blue Link®
Owner’s Guide, navigation manual or
audio manual. The audio manual is in
this section.
MIRRORS
WARNING - Rear visibility
Do not place objects in the rear
seat or cargo area which inter-
fere with your vision through
the rear window.
OMD040031 DayNight
WARNING
Do not modify the inside mirror
or install an aftermarket mirror.
Doing so may result in injury
during an accident.
OFS042222N
Page 171 of 476
Features of your vehicle
86 4
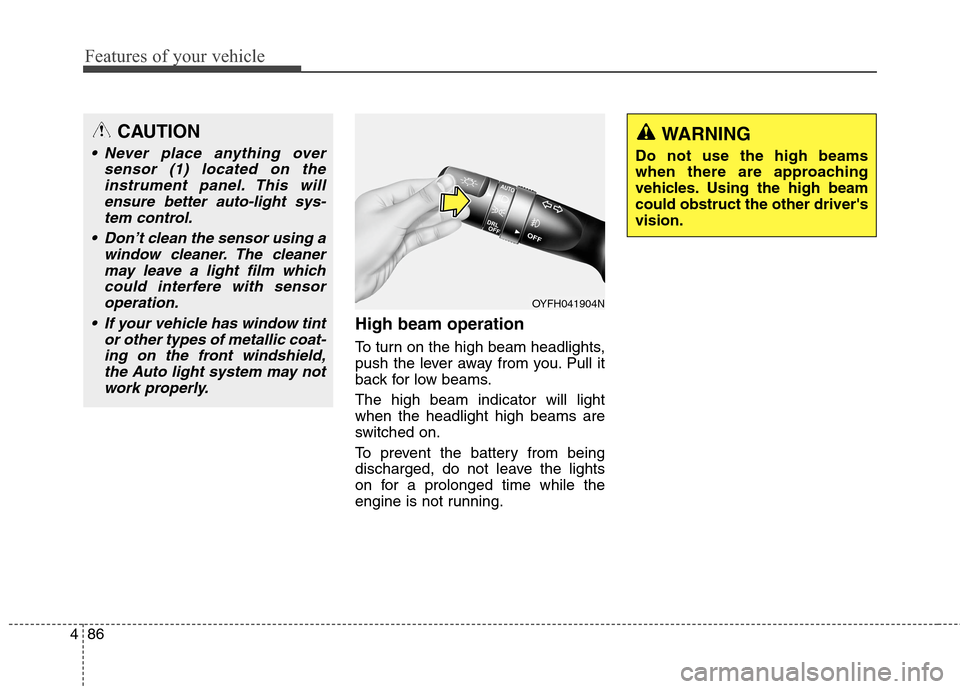
High beam operation
To turn on the high beam headlights,
push the lever away from you. Pull it
back for low beams.
The high beam indicator will light
when the headlight high beams are
switched on.
To prevent the battery from being
discharged, do not leave the lights
on for a prolonged time while the
engine is not running.
WARNING
Do not use the high beams
when there are approaching
vehicles. Using the high beam
could obstruct the other driver's
vision.
OYFH041904N
CAUTION
Never place anything over
sensor (1) located on the
instrument panel. This will
ensure better auto-light sys-
tem control.
Don’t clean the sensor using a
window cleaner. The cleaner
may leave a light film which
could interfere with sensor
operation.
If your vehicle has window tint
or other types of metallic coat-
ing on the front windshield,
the Auto light system may not
work properly.
Page 174 of 476
489
Features of your vehicle
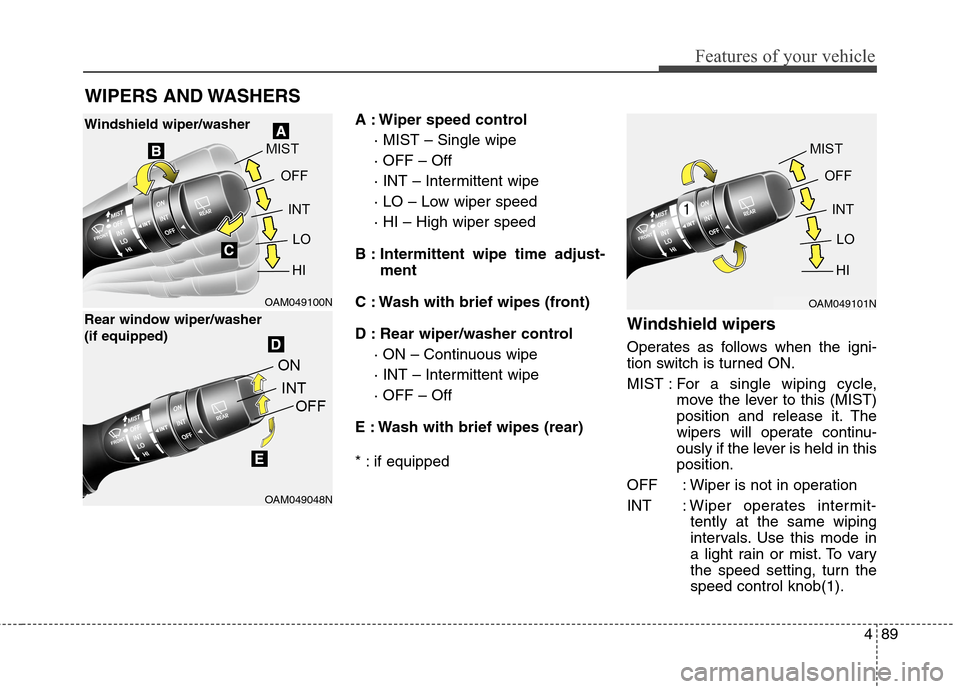
A : Wiper speed control
· MIST – Single wipe
· OFF – Off
· INT – Intermittent wipe
· LO – Low wiper speed
· HI – High wiper speed
B : Intermittent wipe time adjust-
ment
C : Wash with brief wipes (front)
D : Rear wiper/washer control
· ON – Continuous wipe
· INT – Intermittent wipe
· OFF – Off
E : Wash with brief wipes (rear)
* : if equipped
Windshield wipers
Operates as follows when the igni-
tion switch is turned ON.
MIST : For a single wiping cycle,
move the lever to this (MIST)
position and release it. The
wipers will operate continu-
ously if the lever is held in this
position.
OFF : Wiper is not in operation
INT : Wiper operates intermit-
tently at the same wiping
intervals. Use this mode in
a light rain or mist. To vary
the speed setting, turn the
speed control knob(1).
WIPERS AND WASHERS
OAM049100N
OAM049048N
Windshield wiper/washer
Rear window wiper/washer
(if equipped)
OAM049101N
Page 176 of 476
491
Features of your vehicle
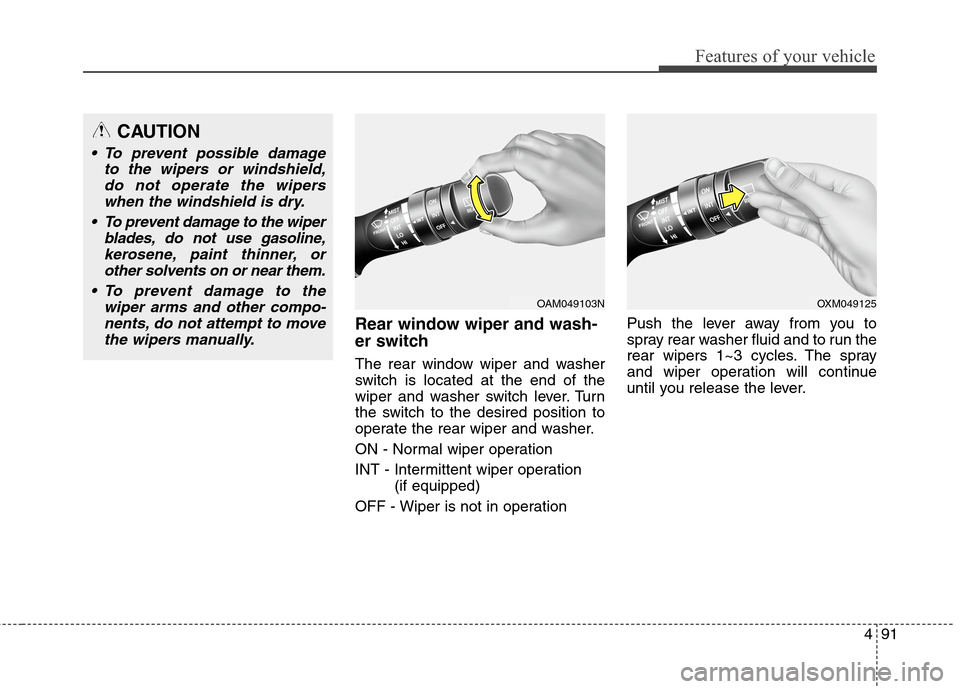
Rear window wiper and wash-
er switch
The rear window wiper and washer
switch is located at the end of the
wiper and washer switch lever. Turn
the switch to the desired position to
operate the rear wiper and washer.
ON - Normal wiper operation
INT - Intermittent wiper operation
(if equipped)
OFF - Wiper is not in operationPush the lever away from you to
spray rear washer fluid and to run the
rear wipers 1~3 cycles. The spray
and wiper operation will continue
until you release the lever.
CAUTION
To prevent possible damage
to the wipers or windshield,
do not operate the wipers
when the windshield is dry.
To prevent damage to the wiper
blades, do not use gasoline,
kerosene, paint thinner, or
other solvents on or near them.
To prevent damage to the
wiper arms and other compo-
nents, do not attempt to move
the wipers manually.
OAM049103NOXM049125