battery Hyundai Elantra GT 2016 Owner's Guide
[x] Cancel search | Manufacturer: HYUNDAI, Model Year: 2016, Model line: Elantra GT, Model: Hyundai Elantra GT 2016Pages: 546, PDF Size: 14.04 MB
Page 202 of 546
4115
Features of your vehicle
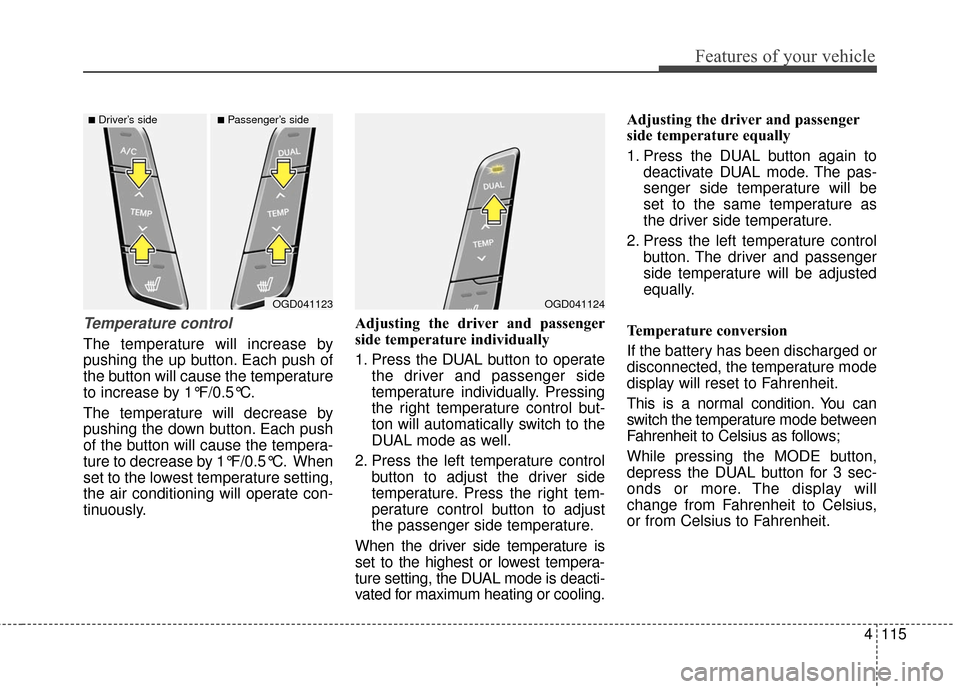
Temperature control
The temperature will increase by
pushing the up button. Each push of
the button will cause the temperature
to increase by 1°F/0.5°C.
The temperature will decrease by
pushing the down button. Each push
of the button will cause the tempera-
ture to decrease by 1°F/0.5°C. When
set to the lowest temperature setting,
the air conditioning will operate con-
tinuously.Adjusting the driver and passenger
side temperature individually
1. Press the DUAL button to operate
the driver and passenger side
temperature individually. Pressing
the right temperature control but-
ton will automatically switch to the
DUAL mode as well.
2. Press the left temperature control button to adjust the driver side
temperature. Press the right tem-
perature control button to adjust
the passenger side temperature.
When the driver side temperature is
set to the highest or lowest tempera-
ture setting, the DUAL mode is deacti-
vated for maximum heating or cooling. Adjusting the driver and passenger
side temperature equally
1. Press the DUAL button again to
deactivate DUAL mode. The pas-
senger side temperature will be
set to the same temperature as
the driver side temperature.
2. Press the left temperature control button. The driver and passenger
side temperature will be adjusted
equally.
Temperature conversion
If the battery has been discharged or
disconnected, the temperature mode
display will reset to Fahrenheit.
This is a normal condition. You can
switch the temperature mode between
Fahrenheit to Celsius as follows;
While pressing the MODE button,
depress the DUAL button for 3 sec-
onds or more. The display will
change from Fahrenheit to Celsius,
or from Celsius to Fahrenheit.
OGD041124OGD041123
■Driver’s side■Passenger’s side
Page 207 of 546
Features of your vehicle
120
4
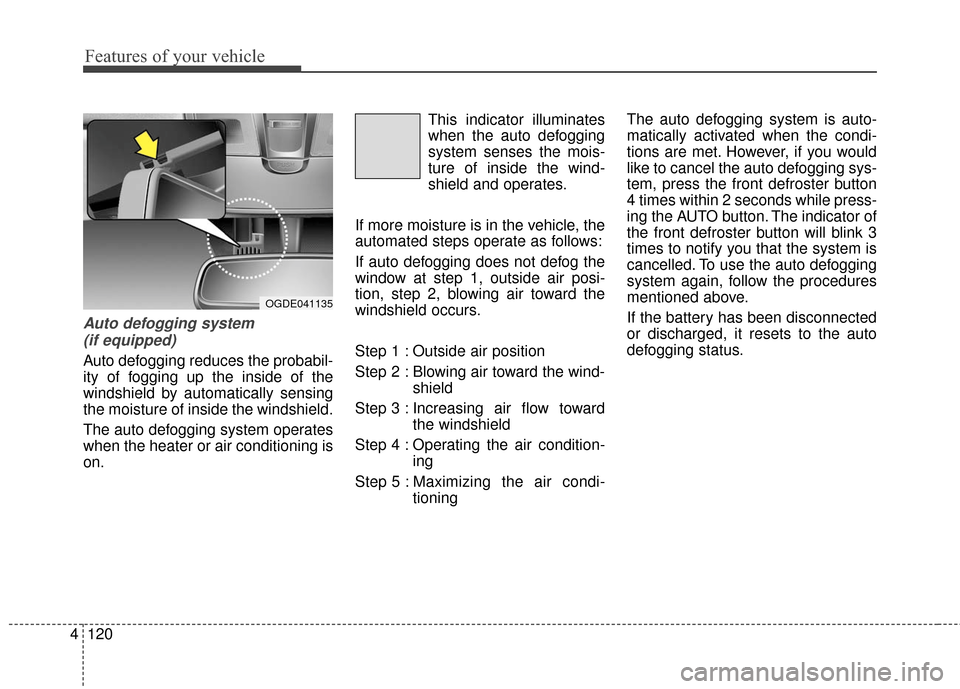
Auto defogging system
(if equipped)
Auto defogging reduces the probabil-
ity of fogging up the inside of the
windshield by automatically sensing
the moisture of inside the windshield.
The auto defogging system operates
when the heater or air conditioning is
on. This indicator illuminates
when the auto defogging
system senses the mois-
ture of inside the wind-
shield and operates.
If more moisture is in the vehicle, the
automated steps operate as follows:
If auto defogging does not defog the
window at step 1, outside air posi-
tion, step 2, blowing air toward the
windshield occurs.
Step 1 : Outside air position
Step 2 : Blowing air toward the wind- shield
Step 3 : Increasing air flow toward the windshield
Step 4 : Operating the air condition- ing
Step 5 : Maxim izing the air condi-
tioning The auto defogging system is auto-
matically activated when the condi-
tions are met. However, if you would
like to cancel the auto defogging sys-
tem, press the front defroster button
4 times within 2 seconds while press-
ing the AUTO button. The indicator of
the front defroster button will blink 3
times to notify you that the system is
cancelled. To use the auto defogging
system again, follow the procedures
mentioned above.
If the battery has been disconnected
or discharged, it resets to the auto
defogging status.
OGDE041135
Page 214 of 546
4127
Features of your vehicle
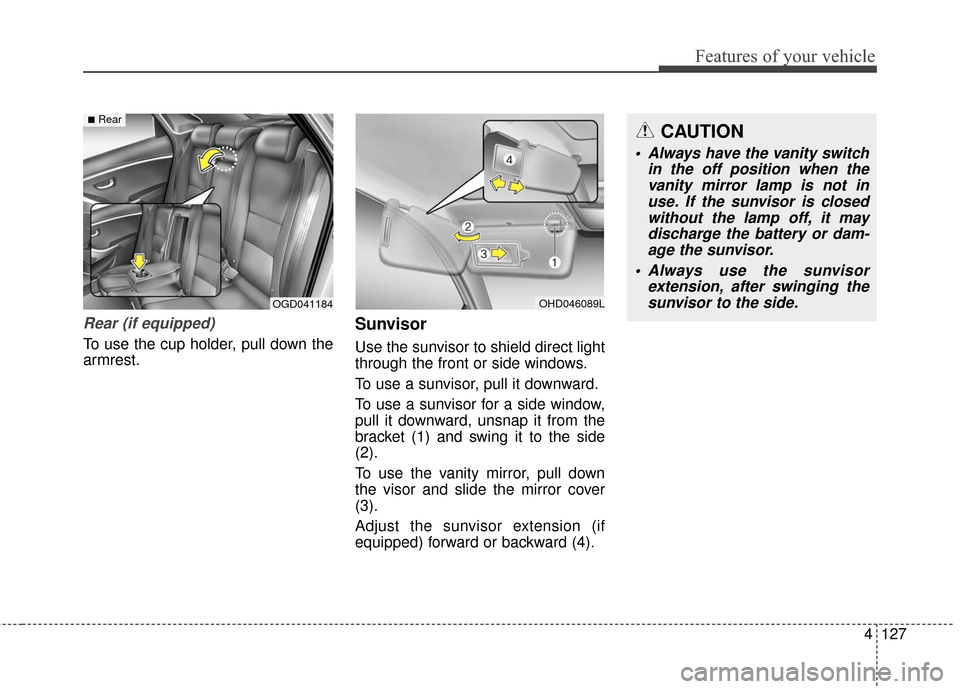
Rear (if equipped)
To use the cup holder, pull down the
armrest.
Sunvisor
Use the sunvisor to shield direct light
through the front or side windows.
To use a sunvisor, pull it downward.
To use a sunvisor for a side window,
pull it downward, unsnap it from the
bracket (1) and swing it to the side
(2).
To use the vanity mirror, pull down
the visor and slide the mirror cover
(3).
Adjust the sunvisor extension (if
equipped) forward or backward (4).
OHD046089LOGD041184
■RearCAUTION
Always have the vanity switchin the off position when thevanity mirror lamp is not inuse. If the sunvisor is closedwithout the lamp off, it maydischarge the battery or dam-age the sunvisor.
Always use the sunvisor extension, after swinging thesunvisor to the side.
Page 215 of 546
Features of your vehicle
128
4
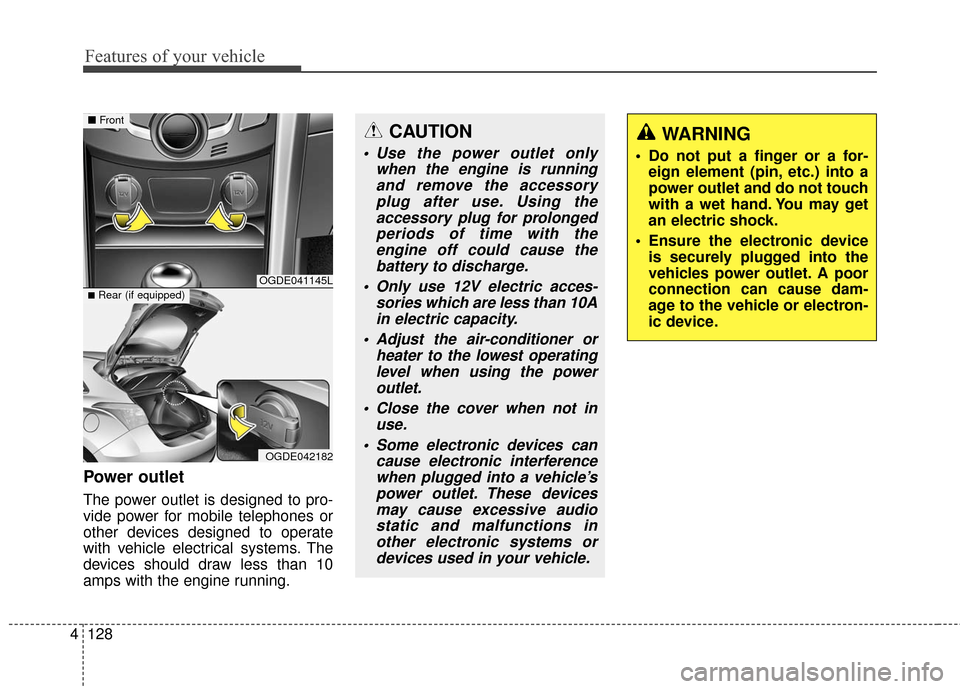
Power outlet
The power outlet is designed to pro-
vide power for mobile telephones or
other devices designed to operate
with vehicle electrical systems. The
devices should draw less than 10
amps with the engine running.
CAUTION
Use the power outlet only
when the engine is runningand remove the accessoryplug after use. Using theaccessory plug for prolongedperiods of time with theengine off could cause thebattery to discharge.
Only use 12V electric acces- sories which are less than 10Ain electric capacity.
Adjust the air-conditioner or heater to the lowest operatinglevel when using the poweroutlet.
Close the cover when not in use.
Some electronic devices can cause electronic interferencewhen plugged into a vehicle’spower outlet. These devicesmay cause excessive audiostatic and malfunctions inother electronic systems ordevices used in your vehicle.
WARNING
Do not put a finger or a for- eign element (pin, etc.) into a
power outlet and do not touch
with a wet hand. You may get
an electric shock.
Ensure the electronic device is securely plugged into the
vehicles power outlet. A poor
connection can cause dam-
age to the vehicle or electron-
ic device.
OGDE041145L
OGDE042182
■ Front
■Rear (if equipped)
Page 228 of 546
4141
Features of your vehicle
WARNING
• Do not stare at the screenwhile driving. Staring at the
screen for prolonged periods
of time could lead to traffic
accidents.
Do not disassemble, assem- ble, or modify the audio sys-
tem. Such acts could result in
accidents, fire, or electric
shock.
Using the phone while driving may lead to a lack of attention
of traffic conditions and
increase the likelihood of
accidents. Use the phone
feature after parking the vehi-
cle.
Heed caution not to spill water or introduce foreign objects
into the device. Such acts
could lead to smoke, fire, or
product malfunction.
(Continued)
(Continued)
Please refrain from use if thescreen is blank or no sound
can be heard as these signs
may indicate product mal-
function. Continued use in
such conditions could lead to
accidents(fires, electric
shock) or product malfunc-
tions.
Do not touch the antenna dur- ing thunder or lightening as
such acts may lead to light-
ning induced electric shock.
Do not stop or park in park- ing-restricted areas to operate
the product. Such acts could
lead to traffic accidents.
Use the system with the vehi- cle ignition turned on.
Prolonged use with the igni-
tion turned off could result in
battery discharge.CAUTION
Operating the device while driving could lead to acci-dents due to a lack of atten-tion to external surroundings.First park the vehicle beforeoperating the device.
Adjust the volume to levels that allow the driver to hearsounds from outside of thevehicle. Driving in a statewhere external sounds cannotbe heard may lead to acci-dents.
Pay attention to the volume setting when turning thedevice on. A sudden output ofextreme volume upon turningthe device on could lead tohearing impairment. (Adjustthe volume to a suitable levelsbefore turning off the device.)
(Continued)
Page 229 of 546
Features of your vehicle
142
4
(Continued)
Turn on the car ignition before using this device. Do not oper-ate the audio system for longperiods of time with the igni-tion turned off as such opera-tions may lead to battery dis-charge.
Do not subject the device to severe shock or impact. Directpressure onto the front side ofthe monitor may cause dam-age to the LCD or touchscreen.
When cleaning the device, make sure to turn off thedevice and use a dry andsmooth cloth. Never usetough materials, chemicalcloths, or solvents (alcohol,benzene, thinners, etc.) assuch materials may damagethe device panel or causecolor/quality deterioration.
(Continued)(Continued) Do not place beverages close to the audio system. Spillingbeverages may lead to systemmalfunction.
In case of product malfunc- tion, please contact your placeof purchase or After Servicecenter.
Placing the audio system within an electromagneticenvironment may result innoise interference.
Prevent caustic solutions such as perfume and cosmet-ic oil from contacting thedashboard because they maycause damage or discol-oration.
Page 232 of 546
4145
Features of your vehicle
✽
✽NOTICE - USING THE
iPod®DEVICE
• iPhone®is a registered trade
mark of Apple inc.
• Some iPod
®models may not
support communication proto-
col and files may not play prop-
erly.
Supported iPod
®models:
- iPhone®3GS/4
- iPod®touch 1st~4th generation
- iPod®nano 1st~6th generation
- iPod®classic
• The order of search or playback of songs in the iPod
®can be dif-
ferent from the order searched
in the audio system.
• If the iPod
®is disabled due to its
own malfunction, reset the
iPod
®. (Reset: Refer to iPod®
manual)
• An iPod®may not operate nor-
mally on low battery.
(Continued) (Continued)
• Some iPod®devices, such as the
iPhone®, can be connected
through the Bluetooth® Wireless
Technology interface. The
device must have audio
Bluetooth
®Wireless Technology
capability (such as for stereo
headphone Bluetooth
®Wireless
Technology).
The device can play, but it will
not be controlled by the audio
system.
• To use iPod
®features within the
audio, use the cable provided
upon purchasing an iPod
®
device.
• Skipping or improper operation may occur depending on the
characteristics of your iPod
®/
iPhone®device.
• If your iPhone®is connected to
both the Bluetooth®Wireless
Technology and USB, the sound
may not be properly played. In
your iPhone
®, select the Dock
connector or Bluetooth®
Wireless Technology to change
the sound output (source).
(Continued)(Continued)
• When connecting iPod®with the
iPod®Power Cable, insert the
connector to the multimedia
socket completely. If not insert-
ed completely, communications
between iPod
®and audio may
be interrupted.
• When adjusting the sound effects of the iPod
®and the
audio system, the sound effects
of both devices will overlap and
might reduce or distort the
quality of the sound.
• Deactivate (turn off) the equal- izer function of an iPod
®when
adjusting the audio system’s
volume, and turn off the equal-
izer of the audio system when
using the equalizer of an iPod
®.
• When not using iPod®with car
audio, detach the iPod®cable
from iPod®. Otherwise, iPod®
may remain in accessory mode,
and may not work properly.
Page 234 of 546
4147
Features of your vehicle
✽
✽NOTICE - WHEN CON-
NECTING A
Bluetooth®
PHONE
• Before connecting the head unit
with the mobile phone, check to
see that the mobile phone supports
Bluetooth
®features.
• Even if the phone supports Bluetooth
®, the phone will not be
found during device searches if the
phone has been set to hidden state
or the Bluetooth
®power is turned
off. Disable the hidden state or
turn on the Bluetooth
®power
prior to searching/connecting with
the Head unit.
• Bluetooth phone is automatically connected when the ignition on.
• If you do not want automatic con- nection with your Bluetooth
®
device, turn off the Bluetooth®fea-
ture within your mobile phone.
• The Handsfree call volume and quality may differ depending on
the mobile phone. (Continued)(Continued)
• Park the vehicle when connecting
the head unit with the mobile
phone.
• Bluetooth
®connection may
become intermittently disconnect-
ed in some mobile phones. Follow
these steps to try again.
1. Within the mobile phone, turn the Bluetooth
®function off/on
and try again.
2. Turn the mobile phone power Off/On and try again.
3. Completely remove the mobile phone battery, reboot, and then
again.
4. Reboot the Audio System and try again.
5. Delete all paired devices, pair and try again.
Page 351 of 546
Driving your vehicle
65
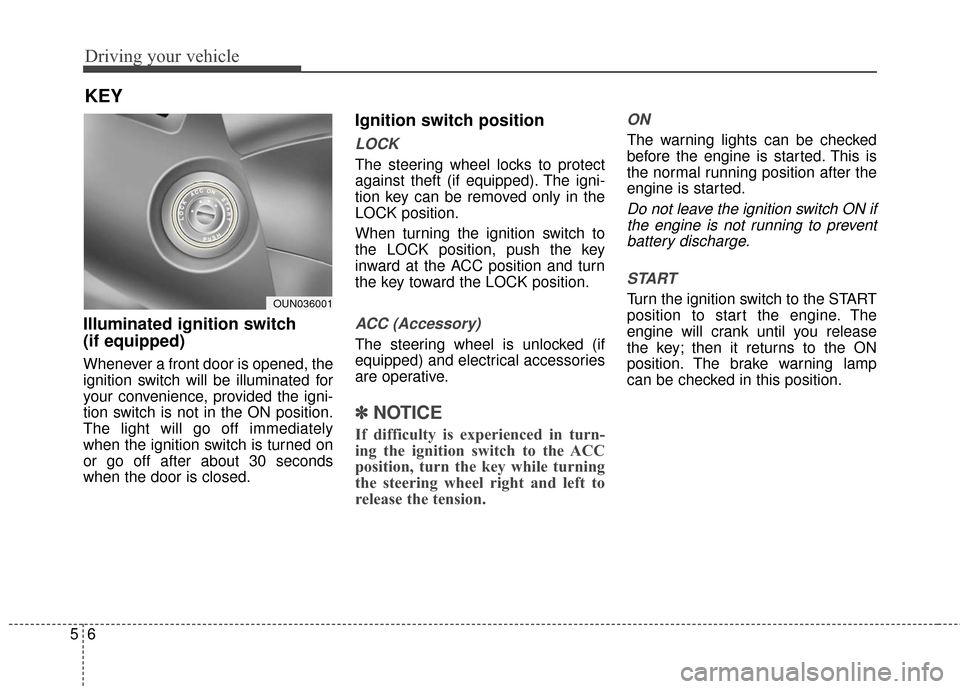
Illuminated ignition switch
(if equipped)
Whenever a front door is opened, the
ignition switch will be illuminated for
your convenience, provided the igni-
tion switch is not in the ON position.
The light will go off immediately
when the ignition switch is turned on
or go off after about 30 seconds
when the door is closed.
Ignition switch position
LOCK
The steering wheel locks to protect
against theft (if equipped). The igni-
tion key can be removed only in the
LOCK position.
When turning the ignition switch to
the LOCK position, push the key
inward at the ACC position and turn
the key toward the LOCK position.
ACC (Accessory)
The steering wheel is unlocked (if
equipped) and electrical accessories
are operative.
✽ ✽NOTICE
If difficulty is experienced in turn-
ing the ignition switch to the ACC
position, turn the key while turning
the steering wheel right and left to
release the tension.
ON
The warning lights can be checked
before the engine is started. This is
the normal running position after the
engine is started.
Do not leave the ignition switch ON if
the engine is not running to preventbattery discharge.
START
Turn the ignition switch to the START
position to start the engine. The
engine will crank until you release
the key; then it returns to the ON
position. The brake warning lamp
can be checked in this position.
KEY
OUN036001
Page 355 of 546
Driving your vehicle
10
5
ACC(Accessory)
• with manual transaxle
Press the engine start/stop button
when the button is in the OFF posi-
tion without depressing the clutch
pedal.
• with automatic transaxle
Press the engine start/stop button
when the button is in the OFF posi-
tion without depressing the brake
pedal.
If you leave the engine start/stop but-
ton in the ACC position for more than
1 hour, the button is turned off auto-
matically to prevent the battery from
discharging.
ON
• with manual transaxle
Press the engine start/stop button
when the button is in the ACC posi-
tion without depressing the clutch
pedal.
• with automatic transaxle
Press the engine start/stop button
when the button is in the ACC posi-
tion without depressing the brake
pedal.
The warning lights can be checked
before the engine is started. Do not
leave the button in the ON position if
the engine is not running to prevent
the battery from discharging.
START
• with manual transaxle
To start the engine, depress the
clutch pedal and brake pedal, then
press the engine start/stop button
with the shift lever in the N(Neutral)
position.
• with automatic transaxle
To start the engine, depress the brake
pedal and press the engine start/stop
button with the shift lever in the
P(Park) or the N (Neutral) position.
✽ ✽
NOTICE
• If you press the engine start/stop
button without depressing the
clutch pedal on manual transaxle
vehicles or without depressing the
brake pedal on automatic
transaxle vehicles, the engine will
not start and the engine start/stop
button changes as follows:
OFF → →
ACC →
→
ON →
→
OFF
• If you leave the engine start/stop button in the ACC or the ON posi-
tion for a long time, the battery
may be discharged.