fuel cap HYUNDAI ELANTRA HYBRID 2022 Owners Manual
[x] Cancel search | Manufacturer: HYUNDAI, Model Year: 2022, Model line: ELANTRA HYBRID, Model: HYUNDAI ELANTRA HYBRID 2022Pages: 529, PDF Size: 38.79 MB
Page 8 of 529
01
1-5
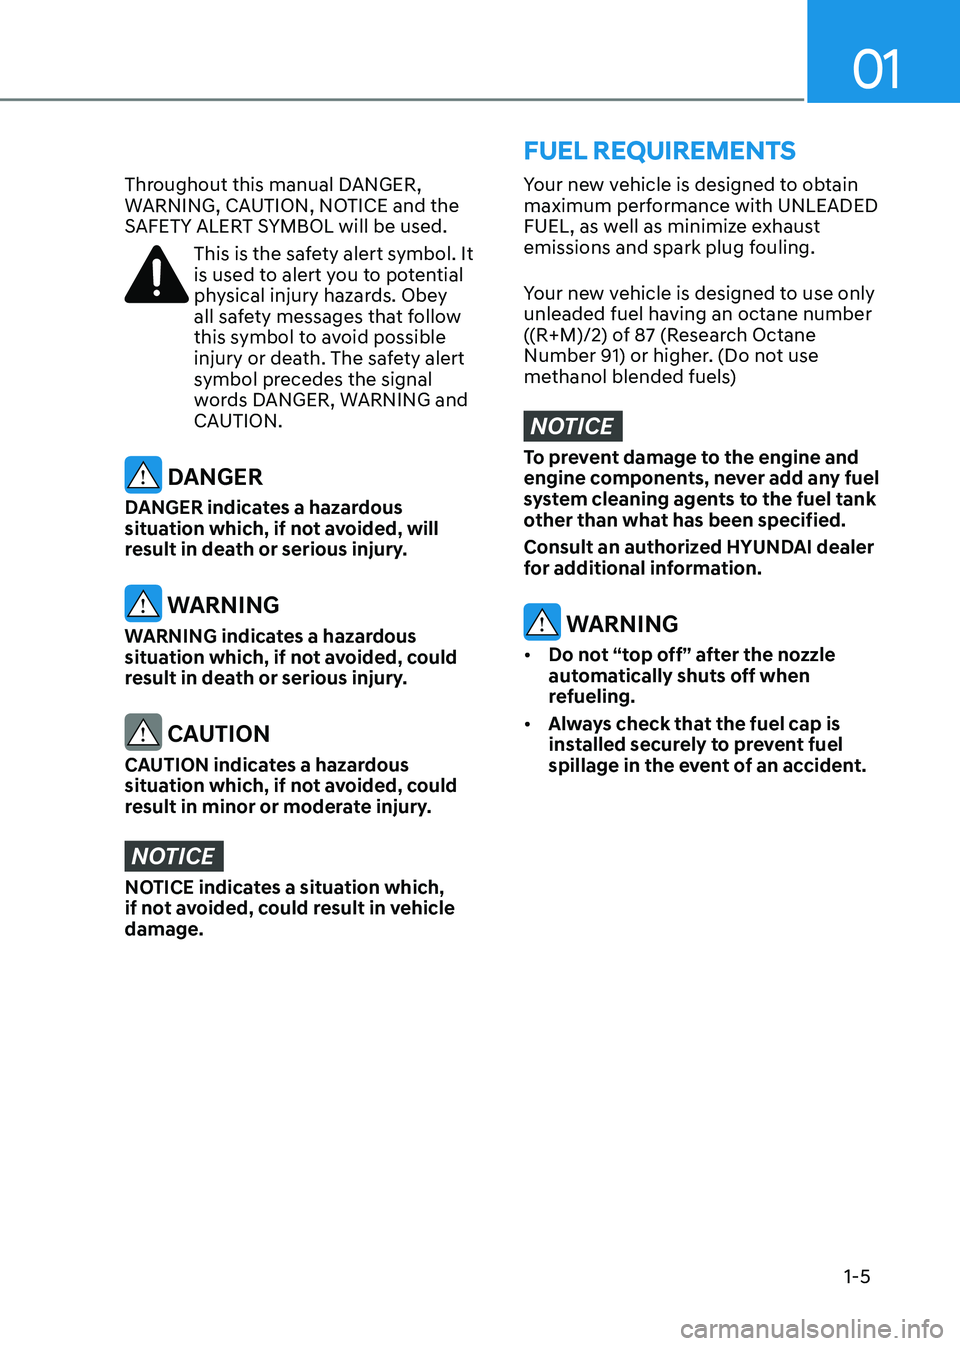
Your new vehicle is designed to obtain
maximum performance with UNLEADED
FUEL, as well as minimize exhaust
emissions and spark plug fouling.
Your new vehicle is designed to use only
unleaded fuel having an octane number
((R+M)/2) of 87 (Research Octane
Number 91) or higher. (Do not use
methanol blended fuels)
NOTICE
To prevent damage to the engine and
engine components, never add any fuel
system cleaning agents to the fuel tank
other than what has been specified.
Consult an authorized HYUNDAI dealer
for additional information.
WARNING
• Do not “top off” after the nozzle
automatically shuts off when
refueling.
• Always check that the fuel cap is
installed securely to prevent fuel
spillage in the event of an accident.
fuel requIreMents
Throughout this manual DANGER,
WARNING, CAUTION, NOTICE and the
SAFETY ALERT SYMBOL will be used.
This is the safety alert symbol. It
is used to alert you to potential
physical injury hazards. Obey
all safety messages that follow
this symbol to avoid possible
injury or death. The safety alert
symbol precedes the signal
words DANGER, WARNING and
CAUTION.
DANGER
DANGER indicates a hazardous
situation which, if not avoided, will
result in death or serious injury.
WARNING
WARNING indicates a hazardous
situation which, if not avoided, could
result in death or serious injury.
CAUTION
CAUTION indicates a hazardous
situation which, if not avoided, could
result in minor or moderate injury.
NOTICE
NOTICE indicates a situation which,
if not avoided, could result in vehicle damage.
Page 27 of 529
Foreword
1-24
WARNING
If a fire occurs: • If a small scale fire occurs, use a fire
extinguisher (ABC, BC) that is meant
for electrical fires.
If it is impossible to extinguish
the fire in the early stage, remain
a safe distance from the vehicle
and immediately call your local
fire emergency responders. Also,
advise them that a hybrid vehicle is
involved.
If the fire spreads to the high voltage
battery, large amount of water is
needed to put out the fire.
Using small amount of water or
fire extinguishers not meant for
electrical fires could cause serious
injury or death from electrical
shocks.
• Upon witnessing any sparks, gases,
flames, or fuel leakage of your
vehicle, immediately call emergency
services or contact an authorized
HYUNDAI dealer. Also, advise them
that a hybrid vehicle is involved.
WARNING
When a submersion in water occurs:
When your vehicle is flooded in water, a
high-voltage battery may cause shock
or fires. Thus, turn the hybrid system
OFF, take the key in your possession and
escape to a safe place. Never attempt
physical contact with your flooded
vehicle.
Immediately contact an authorized
HYUNDAI dealer and advise them that a
hybrid vehicle is involved.
When the Hybrid Vehicle Shuts Off
When the high voltage battery or 12 volt
battery is discharged, or when the fuel
tank is empty, the hybrid system may
not operate while driving. When the
Hybrid system does not operate, do the
following:
1. Gradually reduce the vehicle speed. Pull over your vehicle off the road in a
safe area.
2. Make sure the shift button is in P (Park).
3. Turn ON the hazard warning flashers.
4. Turn OFF the vehicle, and try to
start the hybrid system again, while
depressing the brake pedal and
turning on the ignition switch.
5. When the hybrid system still does not operate, refer to “If the 12 Volt Battery
Is Discharged” section in chapter 8.
Before jump-starting the vehicle,
check the fuel level and the exact
procedure to jump start. For further
details, refer to “If the 12 Volt Battery
Is Discharged” section in chapter
8. When the fuel level is low, do not
attempt to drive the vehicle only with
the battery power. The high voltage
battery may be discharged, and the
hybrid system will turn OFF.
Page 38 of 529
02
2-11
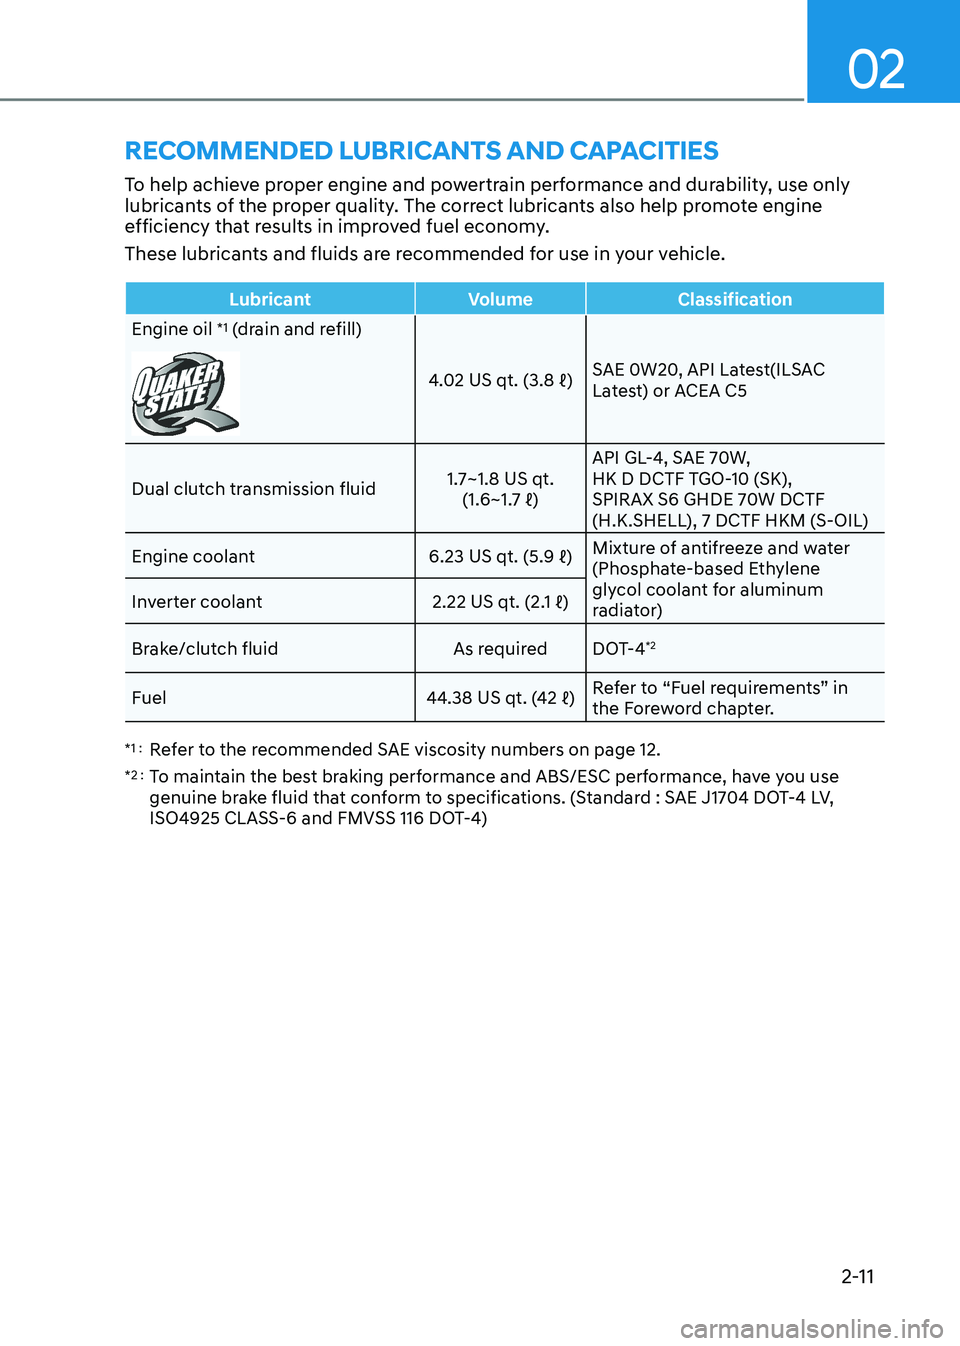
rECommEnDED luBriCants anD CaPaCitiEs
To help achieve proper engine and powertrain performance and durability, use only
lubricants of the proper quality. The correct lubricants also help promote engine
efficiency that results in improved fuel economy.
These lubricants and fluids are recommended for use in your vehicle.
Lubricant Volume Classification
Engine oil *1
(drain and refill)
4.02 US qt. (3.8 ℓ) SAE 0W20, API Latest(ILSAC
Latest) or ACEA C5
Dual clutch transmission fluid 1.7~1.8 US qt.
(1.6~1.7 ℓ) API GL-4, SAE 70W,
HK D DCTF TGO-10 (SK),
SPIRAX S6 GHDE 70W DCTF
(H.K.SHELL), 7 DCTF HKM (S-OIL)
Engine coolant 6.23 US qt. (5.9 ℓ)Mixture of antifreeze and water
(Phosphate-based Ethylene
glycol coolant for aluminum
radiator)
Inverter coolant
2.22 US qt. (2.1 ℓ)
Brake/clutch fluid As required DOT-4 *2
Fuel 44.38 US qt. (42 ℓ)Refer to “Fuel requirements” in
the Foreword chapter.
*1 : Refer to the recommended SAE viscosity numbers on page 12.
*2 : To maintain the best braking performance and ABS/ESC performance, have you use
genuine brake fluid that conform to specifications. (Standard : SAE J1704 DOT-4 LV,
ISO4925 CLASS-6 and FMVSS 116 DOT-4)
Page 105 of 529
04
4 -7
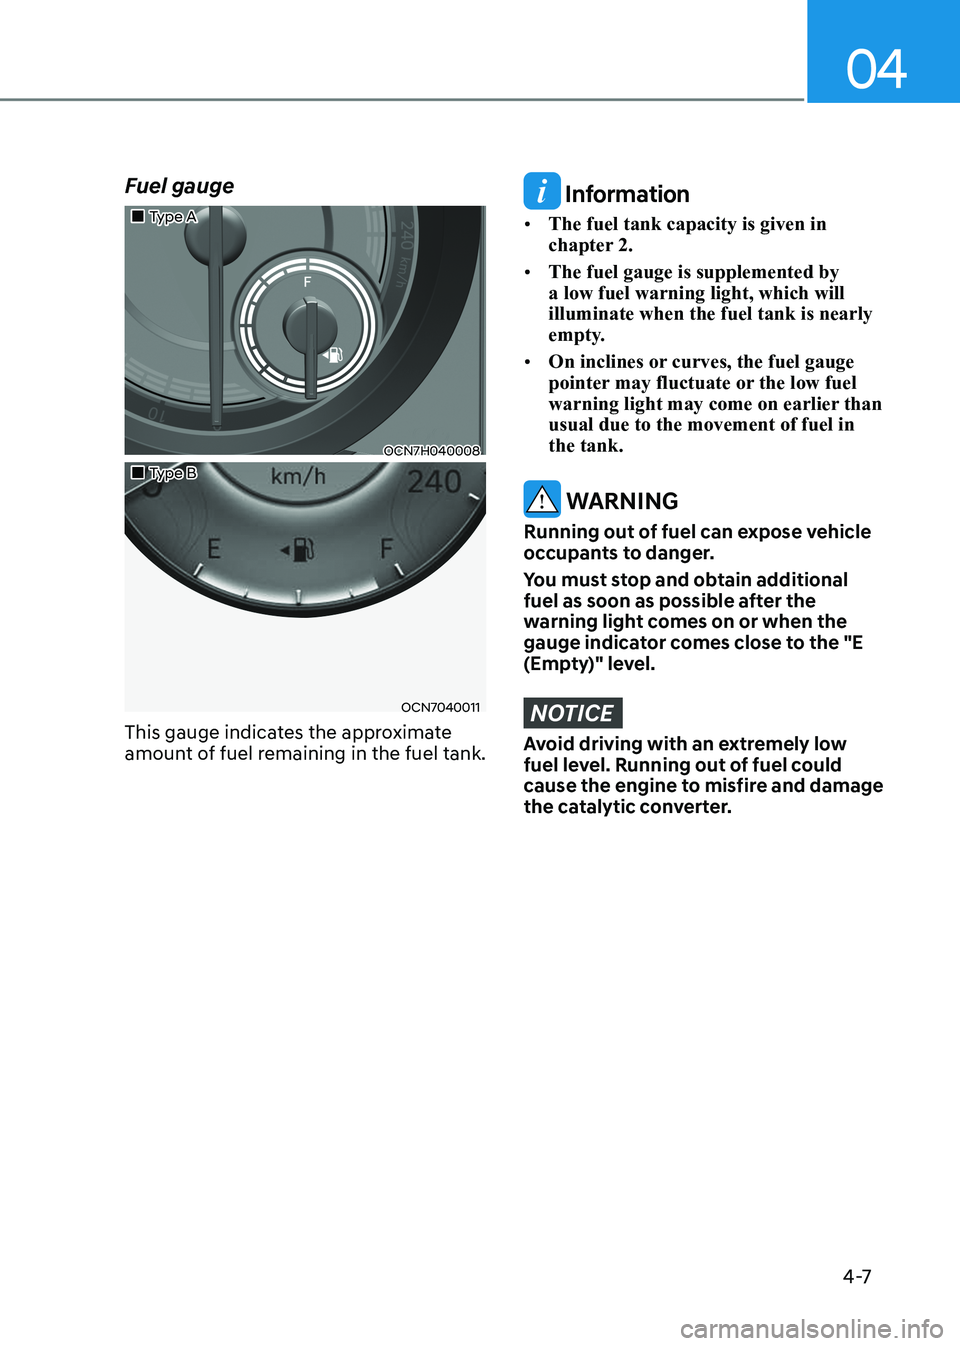
Fuel gauge
„„Type A
OCN7H040008
„„Type B
OCN7040011
This gauge indicates the approximate
amount of fuel remaining in the fuel tank.
Information
• The fuel tank capacity is given in
chapter 2.
• The fuel gauge is supplemented by a low fuel warning light, which will illuminate when the fuel tank is nearly
empty.
• On inclines or curves, the fuel gauge
pointer may fluctuate or the low fuel
warning light may come on earlier than usual due to the movement of fuel in the tank.
WARNING
Running out of fuel can expose vehicle
occupants to danger.
You must stop and obtain additional
fuel as soon as possible after the
warning light comes on or when the
gauge indicator comes close to the "E
(Empty)" level.
NOTICE
Avoid driving with an extremely low
fuel level. Running out of fuel could
cause the engine to misfire and damage
the catalytic converter.
Page 201 of 529
Convenient Features
5-54
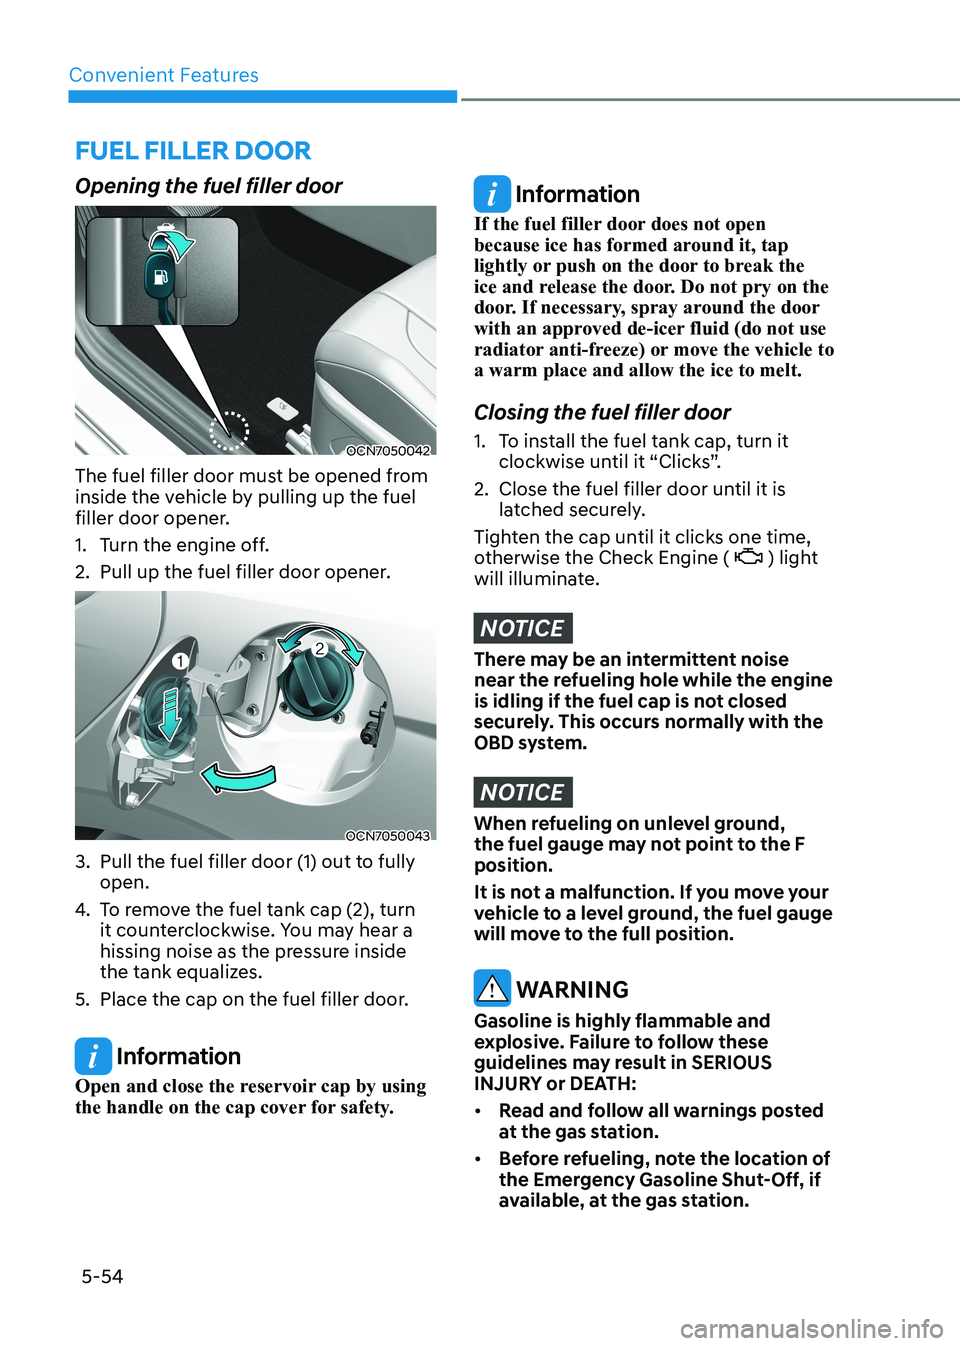
Opening the fuel filler door
OCN7050042
The fuel filler door must be opened from
inside the vehicle by pulling up the fuel
filler door opener.
1. Turn the engine off.
2. Pull up the fuel filler door opener.
OCN7050043
3. Pull the fuel filler door (1) out to fully open.
4. To remove the fuel tank cap (2), turn
it counterclockwise. You may hear a
hissing noise as the pressure inside
the tank equalizes.
5. Place the cap on the fuel filler door.
Information
Open and close the reservoir cap by using
the handle on the cap cover for safety.
Information
If the fuel filler door does not open
because ice has formed around it, tap
lightly or push on the door to break the
ice and release the door. Do not pry on the
door. If necessary, spray around the door
with an approved de-icer fluid (do not use
radiator anti-freeze) or move the vehicle to a warm place and allow the ice to melt. Closing the fuel filler door
1. To install the fuel tank cap, turn it clockwise until it “Clicks”.
2. Close the fuel filler door until it is latched securely.
Tighten the cap until it clicks one time,
otherwise the Check Engine (
) light
will illuminate.
NOTICE
There may be an intermittent noise
near the refueling hole while the engine
is idling if the fuel cap is not closed
securely. This occurs normally with the
OBD system.
NOTICE
When refueling on unlevel ground,
the fuel gauge may not point to the F position.
It is not a malfunction. If you move your
vehicle to a level ground, the fuel gauge
will move to the full position.
WARNING
Gasoline is highly flammable and
explosive. Failure to follow these
guidelines may result in SERIOUS
INJURY or DEATH: • Read and follow all warnings posted
at the gas station.
• Before refueling, note the location of
the Emergency Gasoline Shut-Off, if
available, at the gas station.
Fuel Filler Door
Page 202 of 529
05
5-55
•
Before touching the fuel nozzle, you
should eliminate the potential build-
up of static electricity by touching
a metal part of the vehicle, a safe
distance away from the fuel filler
neck, nozzle, or other gas source,
with your bare hand.
• Do not use cellular phones while
refueling. Electric current and/or
electronic interference from cellular
phones can potentially ignite fuel
vapors and cause a fire.
• Do not get back into a vehicle
once you have begun refueling.
You can generate a build-up of
static electricity by touching,
rubbing or sliding against any item
or fabric capable of producing
static electricity. Static electricity
discharge can ignite fuel vapors
causing a fire. If you must re-enter
the vehicle, you should once again
eliminate potentially dangerous
static electricity discharge by
touching a metal part of the vehicle,
away from the fuel filler neck, nozzle
or other gasoline source, with your
bare hand.
• When refueling, always move the
shift lever to the P (Park) position,
set the parking brake, and place the
ignition switch to the LOCK/OFF position.
Sparks produced by electrical
components related to the engine
can ignite fuel vapors causing a fire.
• When using an approved portable
fuel container, be sure to place the
container on the ground prior to
refueling. Static electricity discharge
from the container can ignite fuel
vapors causing a fire. Once refueling
has begun, contact between your
bare hand and the vehicle should
be maintained until the filling is
complete.
• Use only approved portable plastic
fuel containers designed to carry and
store gasoline.
• Do not use matches or a lighter and
do not smoke or leave a lit cigarette
in your vehicle while at a gas station,
especially during refueling.
• Do not over-fill or top-off your
vehicle tank, which can cause gasoline spillage.
• If a fire breaks out during refueling,
leave the vicinity of the vehicle, and
immediately contact the manager
of the gas station and then contact
the local fire department. Follow any
safety instructions they provide.
• If pressurized fuel sprays out, it can
cover your clothes or skin and thus
subject you to the risk of fire and
burns. Always remove the fuel cap
carefully and slowly. If the cap is
venting fuel or if you hear a hissing
sound, wait until the condition stops
before completely removing the cap.
• Always check that the fuel cap is
installed securely to prevent fuel
spillage in the event of an accident.
Information
Make sure to refuel your vehicle according
to the “Fuel Requirements” suggested in
the Introduction chapter.
NOTICE
• Do not spill fuel on the exterior
surfaces of the vehicle. Any type of
fuel spilled on painted surfaces may
damage the paint.
• If the fuel filler cap requires
replacement, use only a genuine
HYUNDAI cap or the equivalent
specified for your vehicle. An
incorrect fuel filler cap can result
in a serious malfunction of the fuel
system or emission control system.
Page 293 of 529
Driving your vehicle
6-48
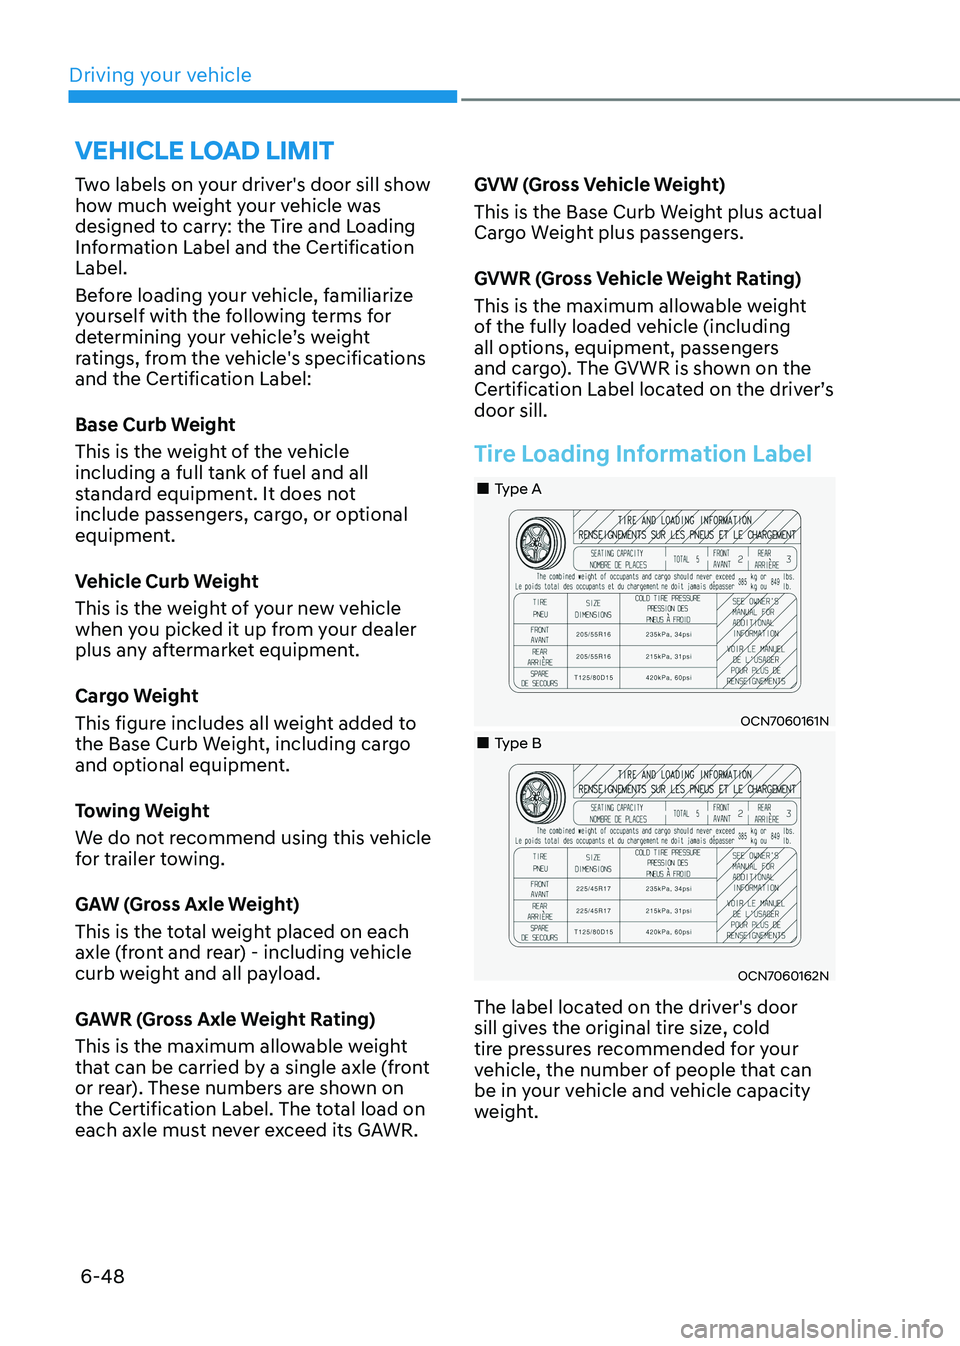
Two labels on your driver's door sill show
how much weight your vehicle was
designed to carry: the Tire and Loading
Information Label and the Certification Label.
Before loading your vehicle, familiarize
yourself with the following terms for
determining your vehicle’s weight
ratings, from the vehicle's specifications
and the Certification Label:
Base Curb Weight
This is the weight of the vehicle
including a full tank of fuel and all
standard equipment. It does not
include passengers, cargo, or optional
equipment.
Vehicle Curb Weight
This is the weight of your new vehicle
when you picked it up from your dealer
plus any aftermarket equipment.
Cargo Weight
This figure includes all weight added to
the Base Curb Weight, including cargo
and optional equipment.
Towing Weight
We do not recommend using this vehicle
for trailer towing.
GAW (Gross Axle Weight)
This is the total weight placed on each
axle (front and rear) - including vehicle
curb weight and all payload.
GAWR (Gross Axle Weight Rating)
This is the maximum allowable weight
that can be carried by a single axle (front
or rear). These numbers are shown on
the Certification Label. The total load on
each axle must never exceed its GAWR.
GVW (Gross Vehicle Weight)
This is the Base Curb Weight plus actual
Cargo Weight plus passengers.
GVWR (Gross Vehicle Weight Rating)
This is the maximum allowable weight
of the fully loaded vehicle (including
all options, equipment, passengers
and cargo). The GVWR is shown on the
Certification Label located on the driver’s door sill.
Tire Loading Information Label
•„Type A
OCN7060161N
•„Type B
OCN7060162N
The label located on the driver's door
sill gives the original tire size, cold
tire pressures recommended for your
vehicle, the number of people that can
be in your vehicle and vehicle capacity
weight.
vehicle loaD limit
Page 296 of 529
06
6-51
Certification label
The certification label is located on the
driver’s door sill at the center pillar and
shows the maximum allowable weight of
the fully loaded vehicle. This is called the
GVWR (Gross Vehicle Weight Rating). The
GVWR includes the weight of the vehicle,
all occupants, fuel and cargo.
This label also tells you the maximum
weight that can be supported by the
front and rear axles, called Gross Axle
Weight Rating (GAWR).
The total weight of the vehicle, including
all occupants, accessories, cargo, and
trailer tongue load must not exceed the
Gross Vehicle Weight Rating (GVWR) or
the Gross Axle Weight Rating (GAWR).
To find out the actual loads on your front
and rear axles, you need to go to a weigh
station and weigh your vehicle. Be sure
to spread out your load equally on both
sides of the centerline.
WARNING
Overloading • Never exceed the GVWR for your
vehicle, the GAWR for either the front
or rear axle and vehicle capacity
weight. Exceeding these ratings
can affect your vehicle’s handling
and braking ability, and cause an
accident.
• Do not overload your vehicle.
Overloading your vehicle can cause
heat buildup in your vehicle’s tires
and possible tire failure, increased
stopping distances and poor vehicle
handling-all of which may result in a
crash.
NOTICE
Overloading your vehicle may cause
damage. Repairs would not be covered
by your warranty. Do not overload your
vehicle.
WARNING
If you carry items inside your vehicle
(for example, suitcases, tools, packages,
or anything else), they are moving as
fast as the vehicle. If you have to stop
or turn quickly, or if there is a crash, the
items will keep going and can cause
an injury if they strike the driver or a
passenger. • Put items in the cargo area of your
vehicle. Try to spread the weight
evenly.
• Do not stack items, like suitcases,
inside the vehicle above the tops of
the seats.
• Do not leave an unsecured child
restraint in your vehicle.
• When you carry something inside the
vehicle, secure it.
Page 459 of 529
Maintenance
9-10
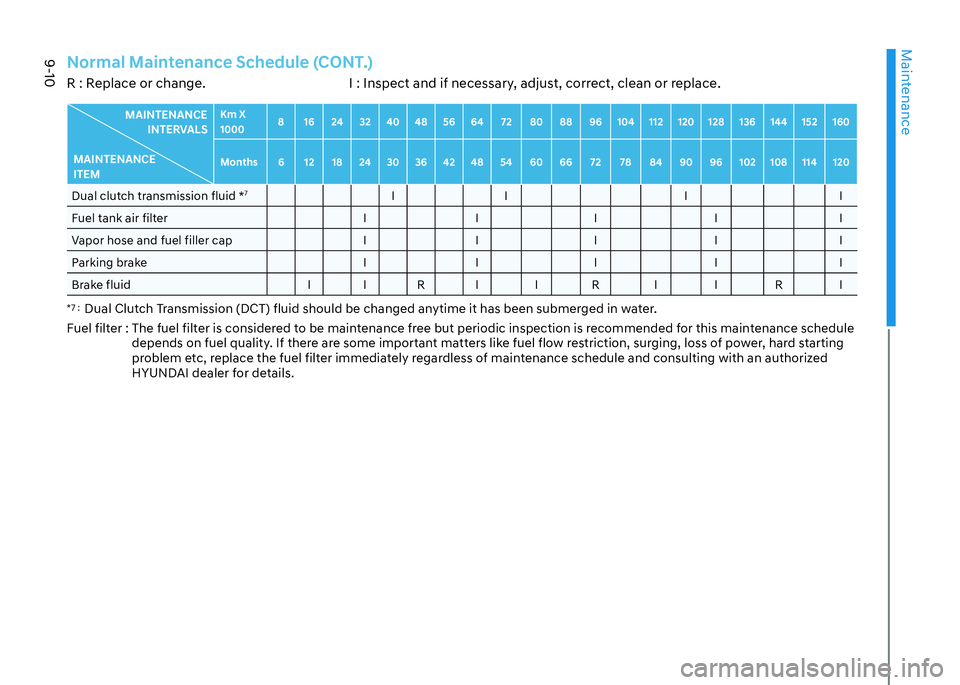
Normal Maintenance Schedule (CONT.)R : Replace or change. I : Inspect and if necessary, adjust, correct, clean or replace.
MAINTENANCE INTERVALS
MAINTENANCE ITEM Km X 1000
8 16 24 32 40 48 56 64 72 80 88 96 104 112 120 128 136 144 152 160
Months 6 12 18 24 30 36 42 48 54 60 66 72 78 84 90 96 102 108 114 120
Dual clutch transmission fluid * 7
II I I
Fuel tank air filter I I I I I
Vapor hose and fuel filler cap I I I I I
Parking brake I I I I I
Brake fluid I I R I I R I I R I
*7 : Dual Clutch Transmission (DCT) fluid should be changed anytime it has been submerged in water.
Fuel filter : The fuel filter is considered to be maintenance free but periodic inspection is recommended for this maintenance schedule
depends on fuel quality. If there are some important matters like fuel flow restriction, surging, loss of power, hard starting
problem etc, replace the fuel filter immediately regardless of maintenance schedule and consulting with an authorized
HYUNDAI dealer for details.
Page 460 of 529
09
9-11
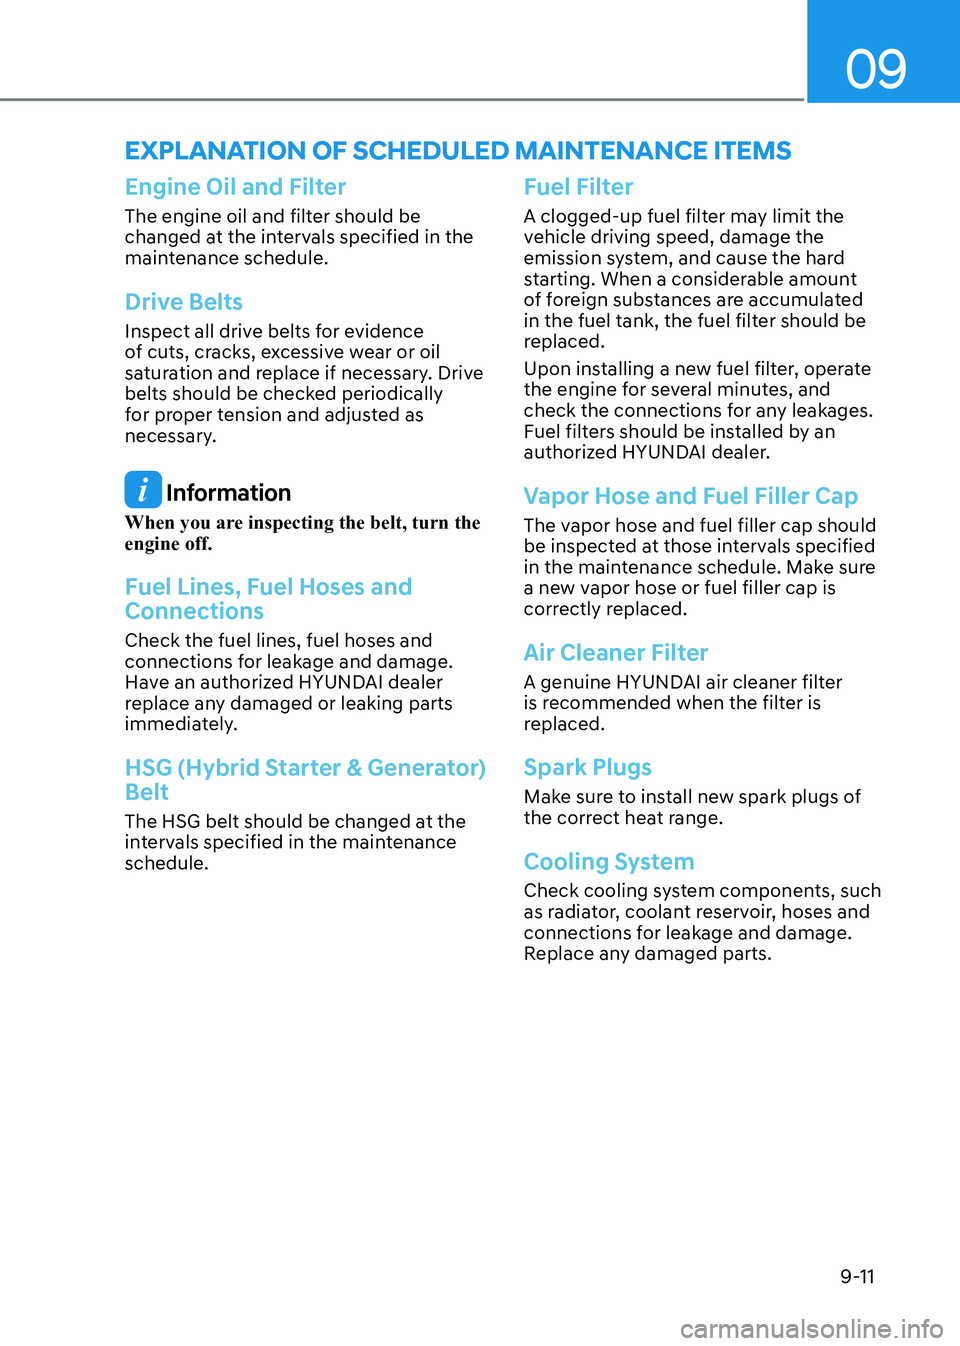
Engine Oil and Filter
The engine oil and filter should be
changed at the intervals specified in the
maintenance schedule.
Drive Belts
Inspect all drive belts for evidence
of cuts, cracks, excessive wear or oil
saturation and replace if necessary. Drive
belts should be checked periodically
for proper tension and adjusted as
necessary.
Information
When you are inspecting the belt, turn the engine off.
Fuel Lines, Fuel Hoses and Connections
Check the fuel lines, fuel hoses and
connections for leakage and damage.
Have an authorized HYUNDAI dealer
replace any damaged or leaking parts
immediately.
HSG (Hybrid Starter & Generator) Belt
The HSG belt should be changed at the
intervals specified in the maintenance schedule.
Fuel Filter
A clogged-up fuel filter may limit the
vehicle driving speed, damage the
emission system, and cause the hard
starting. When a considerable amount
of foreign substances are accumulated
in the fuel tank, the fuel filter should be
replaced.
Upon installing a new fuel filter, operate
the engine for several minutes, and
check the connections for any leakages.
Fuel filters should be installed by an
authorized HYUNDAI dealer.
Vapor Hose and Fuel Filler Cap
The vapor hose and fuel filler cap should
be inspected at those intervals specified
in the maintenance schedule. Make sure
a new vapor hose or fuel filler cap is
correctly replaced.
Air Cleaner Filter
A genuine HYUNDAI air cleaner filter
is recommended when the filter is
replaced.
Spark Plugs
Make sure to install new spark plugs of
the correct heat range.
Cooling System
Check cooling system components, such
as radiator, coolant reservoir, hoses and
connections for leakage and damage.
Replace any damaged parts.
EXPLANATION OF SCHEDULED MAINTENANCE ITEMS