air condition HYUNDAI ELANTRA SE 2017 User Guide
[x] Cancel search | Manufacturer: HYUNDAI, Model Year: 2017, Model line: ELANTRA SE, Model: HYUNDAI ELANTRA SE 2017Pages: 586, PDF Size: 15.29 MB
Page 96 of 586
Trip Computer .......................................................3-98
Conventional Cluster.......................................................3\
-98
Supervision Cluster .......................................................3-102
Light .....................................................................3-1\
07
Exterior Lights ...............................................................3-107
Interior Lights ................................................................3-115
Welcome System ...........................................................3-117
Wipers and Washers..........................................3-119
Windshield Wipers ........................................................3-119
Windshield Washers .....................................................3-120
Driver Assist System .........................................3-121
Rear View Camera ........................................................3-121
Defroster .............................................................3-122
Rear Window Defroster ..............................................3-122
Manual Climate Control System.......................3-123
Heating and Air Conditioning .....................................3-124
System Operation .........................................................3-129
System Maintenance....................................................3-131
Automatic Climate Control System ..................3-133
Automatic Heating and Air Conditioning.................3-134
Manual Heating and Air Conditioning......................3-135
System Operation .........................................................3-141
System Maintenance....................................................3-143
Windshield Defrosting and Defogging ............3-145
Auto Defogging System ..............................................3-148
Climate Control Additional Features...................3-149
Automatic Ventilation ...................................................3-149
Sunroof Inside Air Recirculation ...............................3-149
Storage Compartment .......................................3-150
Center Console Storage ..............................................3-150
Sliding Armrest ..............................................................3-150
Glove Box ........................................................................\
3-151
Sunglass Holder.............................................................3-151
Multi box ........................................................................\
.3-152
3
Page 105 of 586
3-11
Convenient features of your vehicle
3
Smart key precautions
The smart key will not work if any of
the following occur:
The smart key is close to a radiotransmitter such as a radio station
or an airport which can interfere
with normal operation of the trans-
mitter.
The smart key is near a mobile two way radio system or a cellular
phone.
Another vehicle’s smart key is being operated close to your vehicle.
When the smart key does not work
correctly, open and close the door
with the mechanical key. If you have
a problem with the smart key, contact
an authorized HYUNDAI dealer. If the smart key is in close proximity
to your mobile phone, the signal
could be blocked by your mobile
phones normal operational signals.
This is especially important when the
phone is active such as making and
receiving calls, text messaging,
and/or sending/receiving emails.
Avoid placing the smart key and your
mobile phone in the same pants or
jacket pocket and always try to main-
tain an adequate distance between
the two devices.Information
This device complies with Part 15 of
the FCC rules.
Operation is subject to the following
three conditions:
1. This device may not cause harmful
interference, and
2. This device must accept any inter- ference received, including interfer-
ence that may cause undesired
operation.
3. Changes or modifications not expressly approved by the party
responsible for compliance could
void the user’s authority to operate
the device.
i
Keep the smart key away from
electromagnetic materials that
blocks electromagnetic waves
to the key surface.
CAUTION
Page 122 of 586
3-28
Convenient features of your vehicle
To adjust the Zone setting:
1. Determine the desired Zone Number based upon your current
location on the Zone Map.
2. Press and hold the button for 6 seconds, the current Zone
Number will appear on the display.
3. Pressing and holding the button again will cause the numbers to
increment (Note: they will repeat
…13, 14, 15, 1, 2, …). Releasing
the button when the desired Zone
Number appears on the display
will set the new Zone.
4. Within about 5 seconds the com- pass will start displaying a com-
pass heading again.
There are some conditions that can
cause changes to the vehicle mag-
nets, such as installing a ski rack or
a CB antenna. Body repair work on
the vehicle can also cause changes
to the vehicle’s magnetic field. In
these situations, the compass will
need to be re-calibrated to quickly
correct these changes. If you need to recalibrate the com-
pass:
1. Press and hold the button for
more than 9 seconds. When the
compass memory is cleared a "C"
will appear in the display.
2. Drive the vehicle in 2 complete cir- cles at less than 5 mph (8 km/h).
Integrated HomeLink®Wireless
Control System
The HomeLink®Wireless Control
System can replace up to three
hand-held radio-frequency (RF)
transmitters with a single built-in
device. This innovative feature will
learn the radio frequency codes of
most current transmitters to operate
devices such as gate operators,
garage door openers, entry door
locks, security systems, even home
lighting. Both standard and rolling
code-equipped transmitters can be
programmed by following the out-
lined procedures.
Additional HomeLink
®information
can be found at: www.homelink.com
or by calling 1-800-355-3515.
Retain the original transmitter of the
RF device you are programming for
use in other vehicles as well as for
future HomeLink
®programming. It is
also suggested that upon the sale of
the vehicle, the programmed
HomeLink
®buttons be erased for
security purposes.
Page 129 of 586
3-35
Convenient features of your vehicle
3
To adjust the Zone setting:
1. Determine the desired ZoneNumber based upon your current
location on the Zone Map.
2. Press and hold the button for more than 3 but less than 6 sec-
onds, the current Zone Number
will appear on the display.
3. Pressing and holding the button again will cause the numbers to
increment (Note: they will repeat
…13, 14, 15, 1, 2, …). Releasing
the button when the desired Zone
Number appears on the display
will set the new Zone.
4. Within about 5 seconds the com- pass will start displaying a com-
pass heading again. There are some conditions that can
cause changes to the vehicle mag-
nets, such as installing a ski rack or
a CB antenna. Body repair work on
the vehicle can also cause changes
to the vehicle’s magnetic field. In
these situations, the compass will
need to be re-calibrated to quickly
correct these changes.
If you need to recalibrate the com-
pass:
1. Press and hold the button for
more than 6 seconds. When the
compass memory is cleared a "C"
will appear in the display.
2. Drive the vehicle in 2 complete cir- cles at less than 5 mph (8 km/h).
Page 205 of 586
3-111
Convenient features of your vehicle
3
The high beam switches to low beam
in the below conditions.
- When the Smart High Beam is off.
- When the light switch is not in theAUTO position.
- When the headlamp is detected from the on-coming vehicle.
- When the tail lamp is detected from the front vehicle.
- When the surrounding is bright enough high beams are not need-
ed.
- When streetlights or other lights are detected.
- When vehicle speed is below 15 mph (24 km/h).
Warning light and message
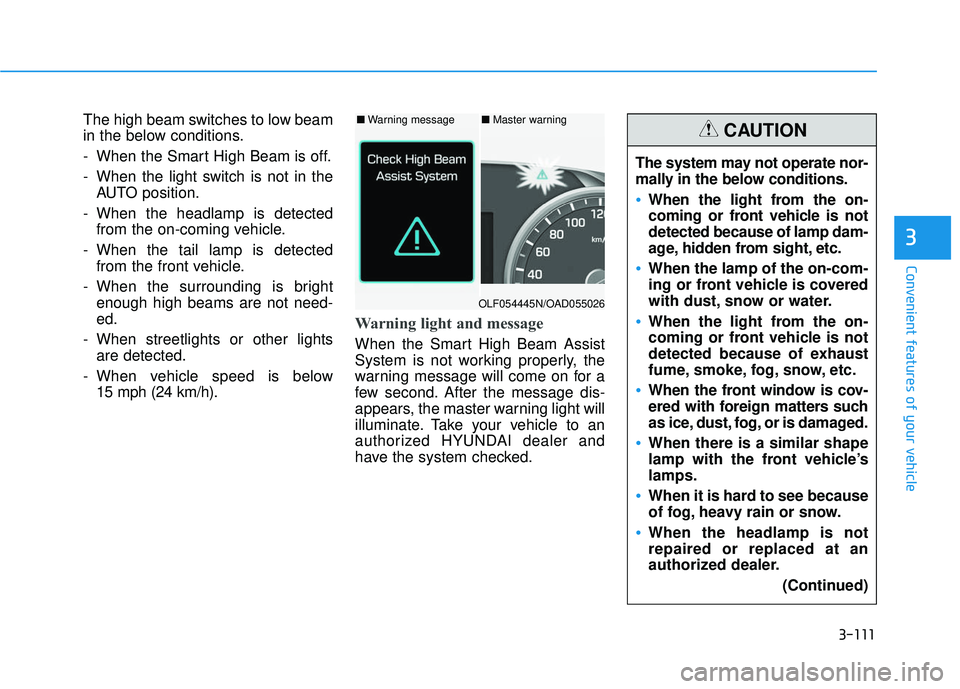
When the Smart High Beam Assist
System is not working properly, the
warning message will come on for a
few second. After the message dis-
appears, the master warning light will
illuminate. Take your vehicle to an
authorized HYUNDAI dealer and
have the system checked. The system may not operate nor-
mally in the below conditions.
When the light from the on-
coming or front vehicle is not
detected because of lamp dam-
age, hidden from sight, etc.
When the lamp of the on-com-
ing or front vehicle is covered
with dust, snow or water.
When the light from the on-
coming or front vehicle is not
detected because of exhaust
fume, smoke, fog, snow, etc.
When the front window is cov-
ered with foreign matters such
as ice, dust, fog, or is damaged.
When there is a similar shape
lamp with the front vehicle’s
lamps.
When it is hard to see because
of fog, heavy rain or snow.
When the headlamp is not
repaired or replaced at an
authorized dealer.
(Continued)
CAUTION■Warning message■ Master warning
OLF054445N/OAD055026
Page 217 of 586
3-123
Convenient features of your vehicle
3
M
MA
AN
N U
U A
AL
L
C
C L
LI
IM
M A
AT
TE
E
C
C O
O N
NT
TR
R O
O L
L
S
S Y
Y S
ST
T E
EM
M
(
( I
IF
F
E
E Q
Q U
UI
IP
P P
PE
ED
D )
)
OAD045300/OAD045300N
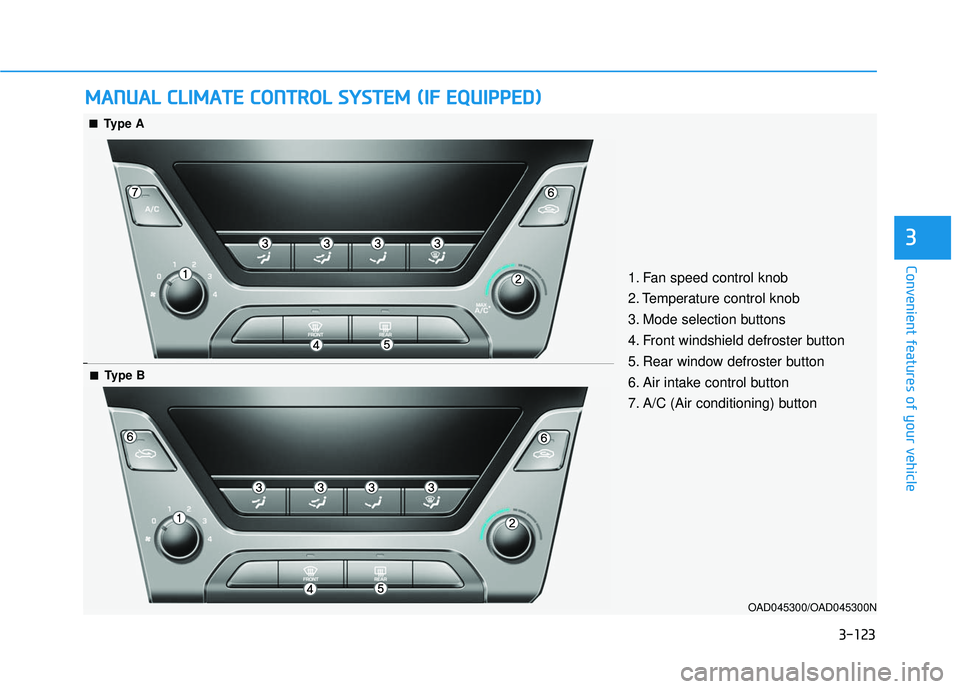
1. Fan speed control knob
2. Temperature control knob
3. Mode selection buttons
4. Front windshield defroster button
5. Rear window defroster button
6. Air intake control button
7. A/C (Air conditioning) button
■ ■Type A
■
■Type B
Page 218 of 586
3-124
Convenient features of your vehicle
Heating and Air Conditioning
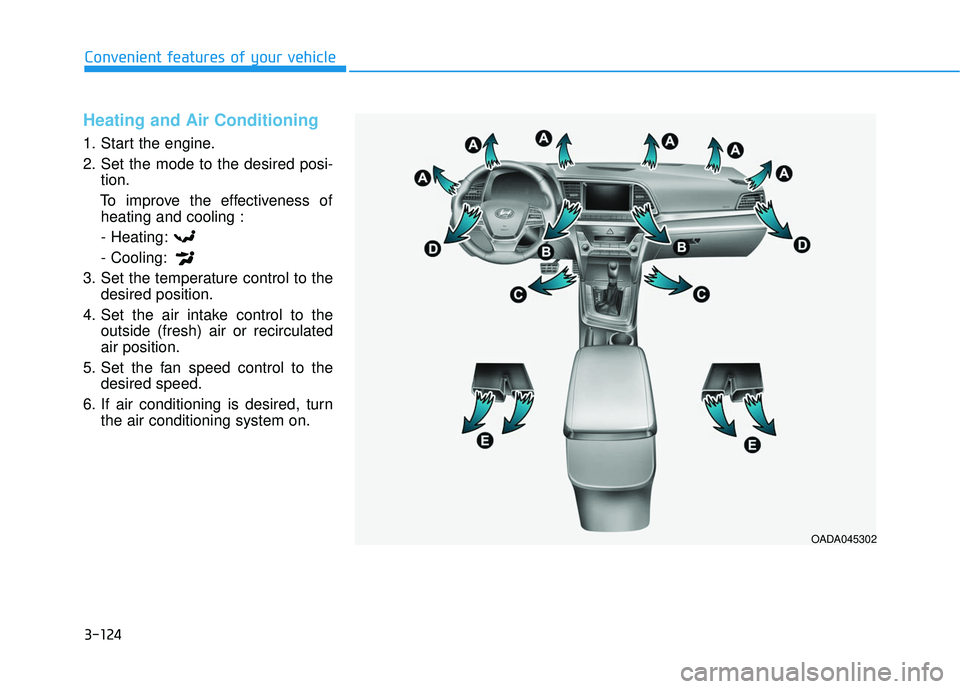
1. Start the engine.
2. Set the mode to the desired posi-tion.
To improve the effectiveness of heating and cooling :
- Heating:
- Cooling:
3. Set the temperature control to the desired position.
4. Set the air intake control to the outside (fresh) air or recirculated
air position.
5. Set the fan speed control to the desired speed.
6. If air conditioning is desired, turn the air conditioning system on.
OADA045302
Page 220 of 586
3-126
Convenient features of your vehicle
MAX A/C-Level (B, D) (if equipped)
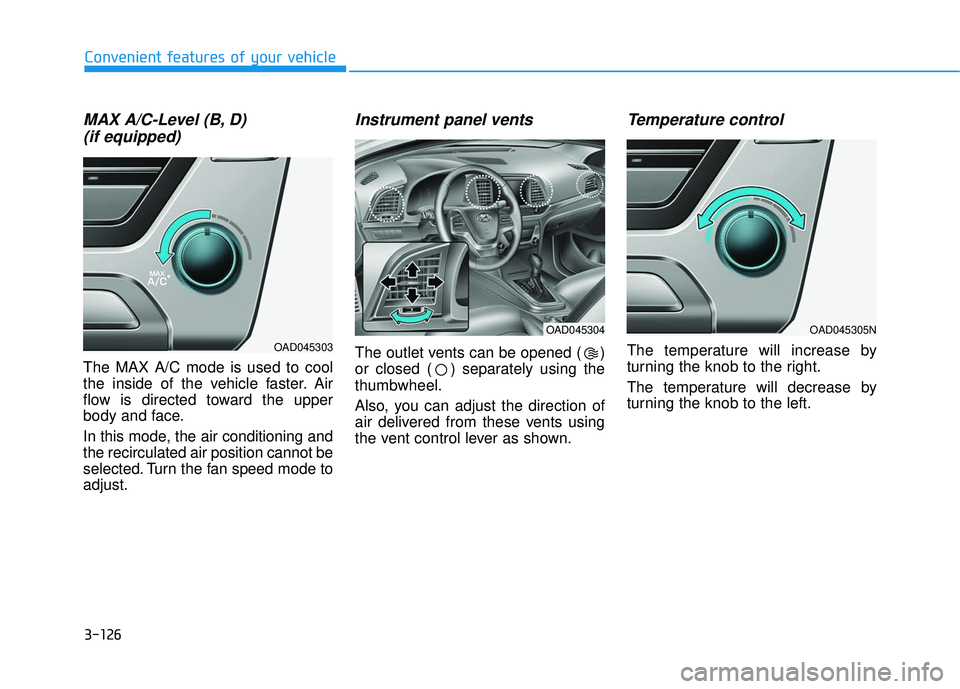
The MAX A/C mode is used to cool
the inside of the vehicle faster. Air
flow is directed toward the upper
body and face.
In this mode, the air conditioning and
the recirculated air position cannot be
selected. Turn the fan speed mode to
adjust.
Instrument panel vents
The outlet vents can be opened ( )
or closed ( ) separately using the
thumbwheel.
Also, you can adjust the direction of
air delivered from these vents using
the vent control lever as shown.
Temperature control
The temperature will increase by
turning the knob to the right.
The temperature will decrease by
turning the knob to the left.
OAD045305N
OAD045303
OAD045304
Page 221 of 586
3-127
Convenient features of your vehicle
3
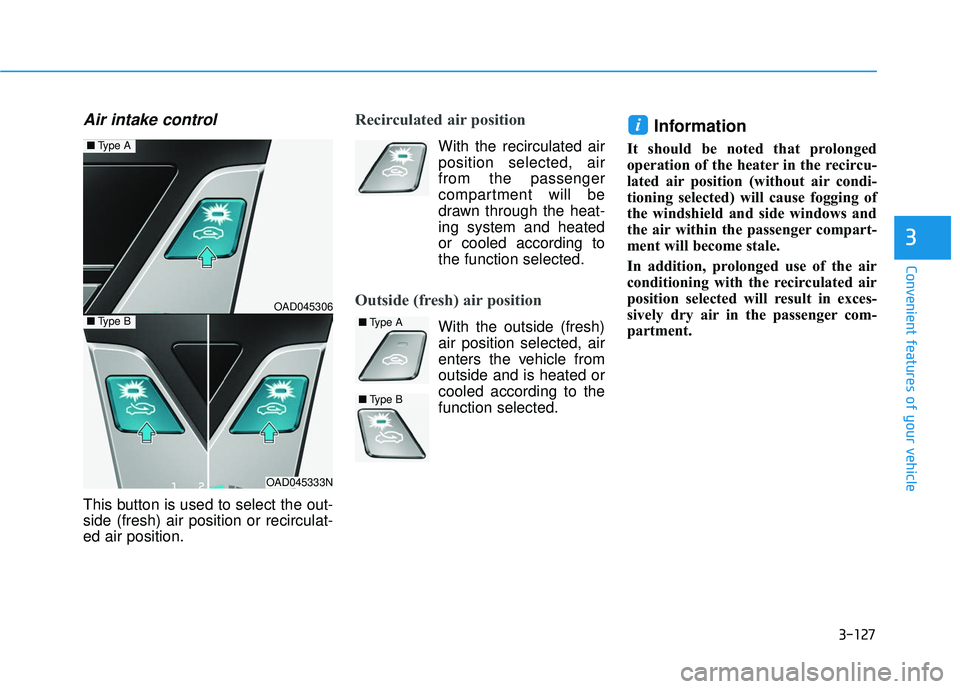
Air intake control
This button is used to select the out-
side (fresh) air position or recirculat-
ed air position.
Recirculated air position
With the recirculated air
position selected, air
from the passenger
compartment will be
drawn through the heat-
ing system and heated
or cooled according to
the function selected.
Outside (fresh) air position
With the outside (fresh)air position selected, air
enters the vehicle from
outside and is heated or
cooled according to the
function selected.
Information
It should be noted that prolonged
operation of the heater in the recircu-
lated air position (without air condi-
tioning selected) will cause fogging of
the windshield and side windows and
the air within the passenger compart-
ment will become stale.
In addition, prolonged use of the air
conditioning with the recirculated air
position selected will result in exces-
sively dry air in the passenger com-
partment.
i
OAD045306
OAD045333N
■ Type A
■Type B■Type A
■Type B
Page 222 of 586
3-128
Convenient features of your vehicle
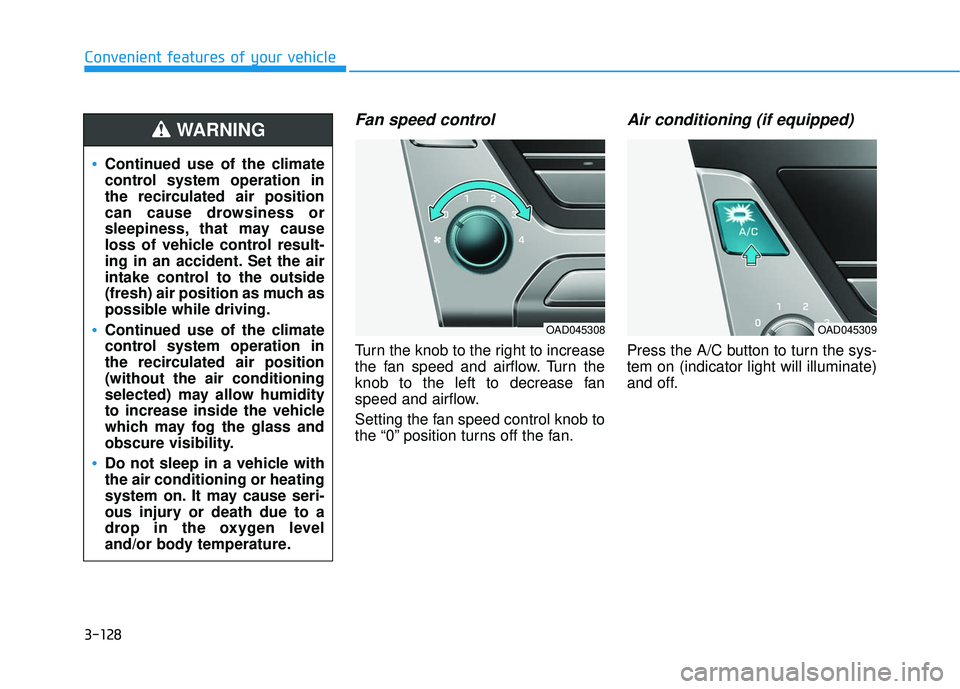
Fan speed control
Turn the knob to the right to increase
the fan speed and airflow. Turn the
knob to the left to decrease fan
speed and airflow.
Setting the fan speed control knob to
the “0” position turns off the fan.
Air conditioning (if equipped)
Press the A/C button to turn the sys-
tem on (indicator light will illuminate)
and off.
Continued use of the climate
control system operation in
the recirculated air position
can cause drowsiness or
sleepiness, that may cause
loss of vehicle control result-
ing in an accident. Set the air
intake control to the outside
(fresh) air position as much as
possible while driving.
Continued use of the climate
control system operation in
the recirculated air position
(without the air conditioning
selected) may allow humidity
to increase inside the vehicle
which may fog the glass and
obscure visibility.
Do not sleep in a vehicle with
the air conditioning or heating
system on. It may cause seri-
ous injury or death due to a
drop in the oxygen level
and/or body temperature.
WARNING
OAD045308OAD045309