mirror HYUNDAI ELANTRA SE 2017 User Guide
[x] Cancel search | Manufacturer: HYUNDAI, Model Year: 2017, Model line: ELANTRA SE, Model: HYUNDAI ELANTRA SE 2017Pages: 586, PDF Size: 15.29 MB
Page 127 of 586

3-33
Convenient features of your vehicle
3
(1) Channel 1 button
(2) Channel 2 button
(3) Status indicator LED
(4) Channel 3 button
(5) Rear light sensor
(6) Dimming ON/OFF button
(7) Compass control button
(8) Compass display
Automatic-Dimming Night Vision
Safety™ (NVS®) Mirror
(if equipped)
The NVS®Mirror automatically
reduces glare by monitoring light lev-
els in the front and the rear of the
vehicle. Any object that obstructs
either light sensor will degrade the
automatic dimming control feature.
For more information regarding
NVS
®mirrors and other applica-
tions, please refer to the Gentex
website:
www.gentex.com The auto-dimming function can be
controlled by pressing the ON/OFF
button:
1. Pressing the button turns the auto-
dimming function OFF which is
indicated by the green Status
Indicator LED turning off.
2. Pressing the button again turns the auto-dimming function ON
which is indicated by the green
Status Indicator LED turning on.
The mirror defaults to the ON posi-
tion each time the vehicle is started.
Z-Nav™ Compass Display
The NVS™ Mirror in your vehicle is
also equipped with a Z-Nav™
Compass that shows the vehicle
Compass heading in the Display
Window using the 8 basic cardinal
headings (N, NE, E, SE, etc.).
OAD045046N
Page 134 of 586
3-40
Convenient features of your vehicle
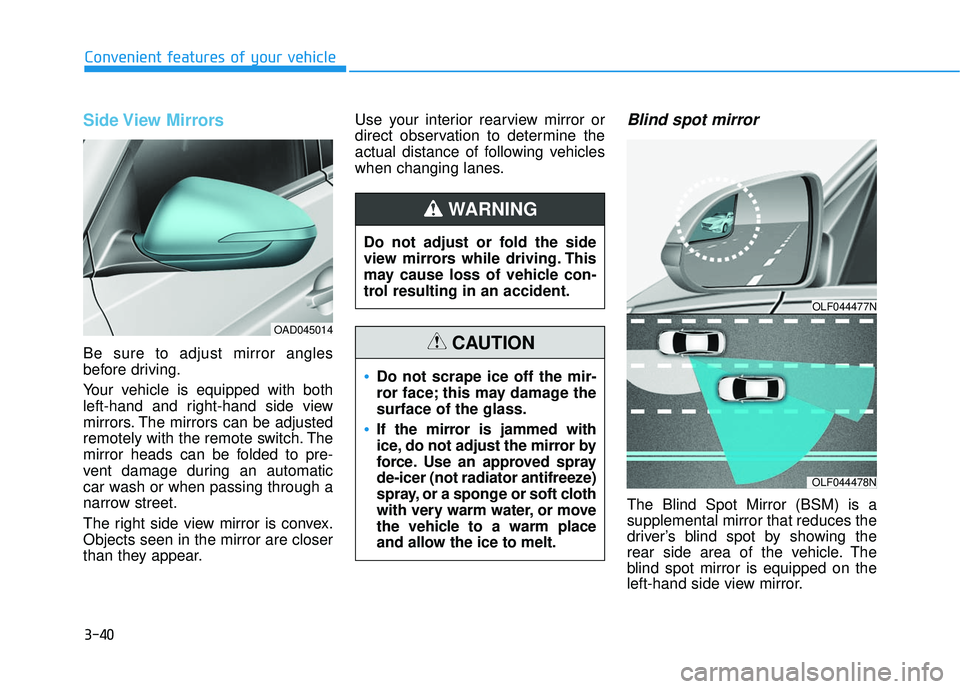
Side View Mirrors
Be sure to adjust mirror angles
before driving.
Your vehicle is equipped with both
left-hand and right-hand side view
mirrors. The mirrors can be adjusted
remotely with the remote switch. The
mirror heads can be folded to pre-
vent damage during an automatic
car wash or when passing through a
narrow street.
The right side view mirror is convex.
Objects seen in the mirror are closer
than they appear.Use your interior rearview mirror or
direct observation to determine the
actual distance of following vehicles
when changing lanes.
Blind spot mirror
The Blind Spot Mirror (BSM) is a
supplemental mirror that reduces the
driver’s blind spot by showing the
rear side area of the vehicle. The
blind spot mirror is equipped on the
left-hand side view mirror.
OLF044477N
OLF044478N
OAD045014
Do not adjust or fold the side
view mirrors while driving. This
may cause loss of vehicle con-
trol resulting in an accident.
WARNING
Do not scrape ice off the mir-
ror face; this may damage the
surface of the glass.
If the mirror is jammed with
ice, do not adjust the mirror by
force. Use an approved spray
de-icer (not radiator antifreeze)
spray, or a sponge or soft cloth
with very warm water, or move
the vehicle to a warm place
and allow the ice to melt.
CAUTION
Page 135 of 586
3-41
Convenient features of your vehicle
3
Do not clean the mirror with harsh
abrasives, fuel or other petroleum
based cleaning products.
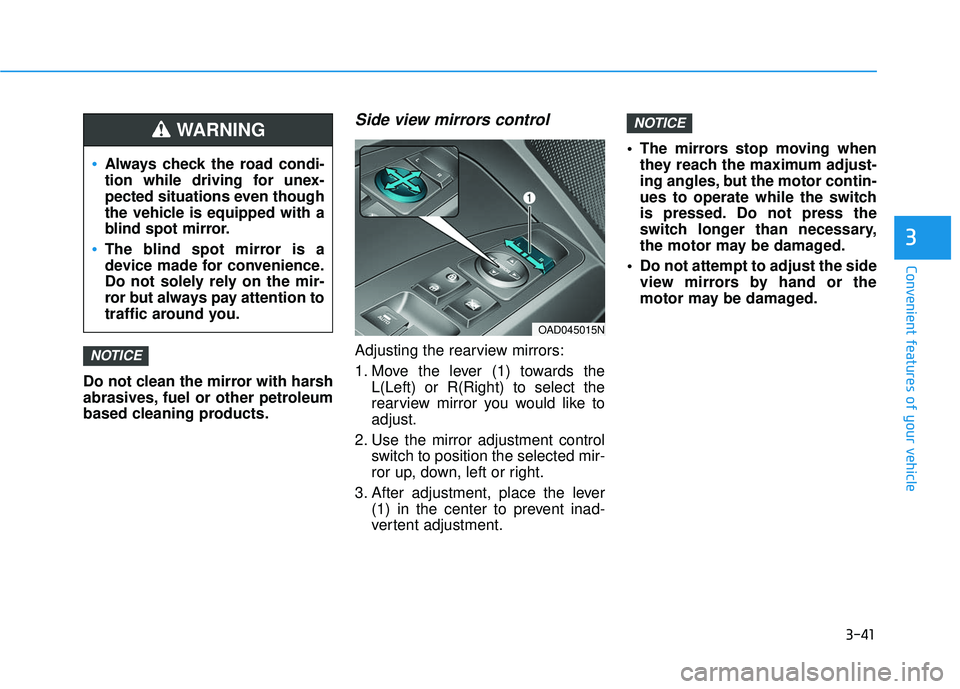
Side view mirrors control
Adjusting the rearview mirrors:
1. Move the lever (1) towards theL(Left) or R(Right) to select the
rearview mirror you would like to
adjust.
2. Use the mirror adjustment control switch to position the selected mir-
ror up, down, left or right.
3. After adjustment, place the lever (1) in the center to prevent inad-
vertent adjustment. The mirrors stop moving when
they reach the maximum adjust-
ing angles, but the motor contin-
ues to operate while the switch
is pressed. Do not press the
switch longer than necessary,
the motor may be damaged.
Do not attempt to adjust the side view mirrors by hand or the
motor may be damaged.
NOTICE
NOTICE
Always check the road condi-
tion while driving for unex-
pected situations even though
the vehicle is equipped with a
blind spot mirror.
The blind spot mirror is a
device made for convenience.
Do not solely rely on the mir-
ror but always pay attention to
traffic around you.
WARNING
OAD045015N
Page 136 of 586

3-42
Convenient features of your vehicle
Folding the side view mirrors
To fold the side view mirrors, grasp
the housing of the mirror and then
fold it toward the rear of the vehicle.
Reverse Parking Aid Function
(if equipped)
When you move the shift lever to the
R (Reverse) position, the side view
mirror(s) will rotate downwards to aid
with driving in reverse. The position
of the side view mirror switch (1)
determines whether or not the mir-
rors will move:
Left/Right :When either the L (Left) or
R (Right) switch is select-
ed, both side view mirrors
will move.
Neutral : When neither switch is select- ed, the side view mirrors will
not move. The side view mirrors will automati-
cally revert to their original positions if
any of the following occur:
The ignition switch is placed to
either the LOCK/OFF position or
the ACC position.
The shift lever is moved to any position except R (Reverse).
The remote control side view mir- ror switch is not selected.
OAD045016
OADA045461
Page 206 of 586
3-112
Convenient features of your vehicle
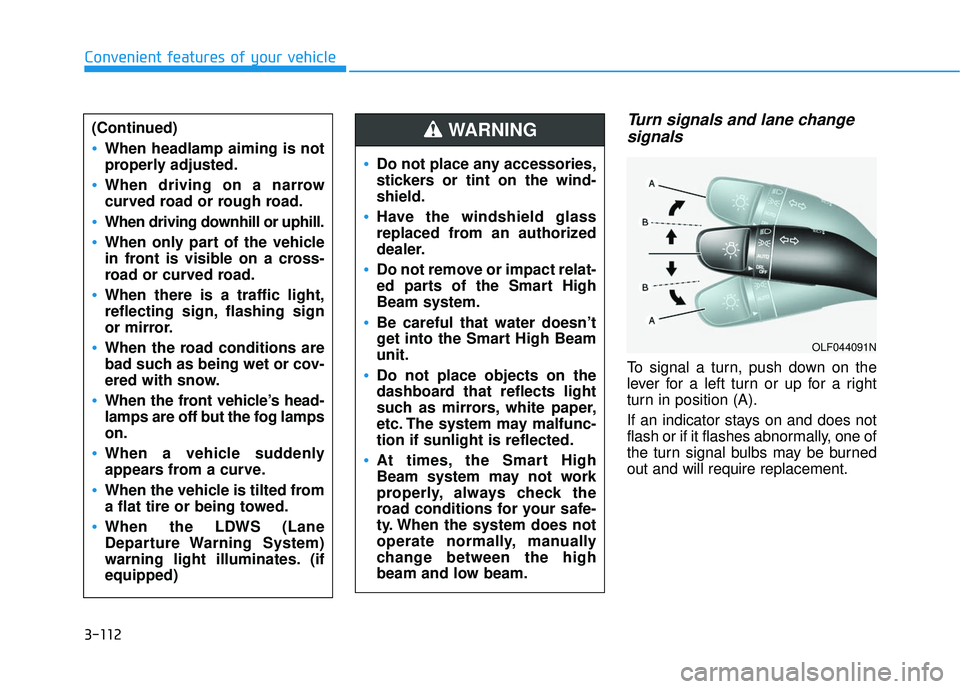
Turn signals and lane changesignals
To signal a turn, push down on the
lever for a left turn or up for a right
turn in position (A).
If an indicator stays on and does not
flash or if it flashes abnormally, one of
the turn signal bulbs may be burned
out and will require replacement.
(Continued)
When headlamp aiming is not
properly adjusted.
When driving on a narrow
curved road or rough road.
When driving downhill or uphill.
When only part of the vehicle
in front is visible on a cross-
road or curved road.
When there is a traffic light,
reflecting sign, flashing sign
or mirror.
When the road conditions are
bad such as being wet or cov-
ered with snow.
When the front vehicle’s head-
lamps are off but the fog lamps
on.
When a vehicle suddenly
appears from a curve.
When the vehicle is tilted from
a flat tire or being towed.
When the LDWS (Lane
Departure Warning System)
warning light illuminates. (if
equipped)
OLF044091N
Do not place any accessories,
stickers or tint on the wind-
shield.
Have the windshield glass
replaced from an authorized
dealer.
Do not remove or impact relat-
ed parts of the Smart High
Beam system.
Be careful that water doesn’t
get into the Smart High Beam
unit.
Do not place objects on the
dashboard that reflects light
such as mirrors, white paper,
etc. The system may malfunc-
tion if sunlight is reflected.
At times, the Smart High
Beam system may not work
properly, always check the
road conditions for your safe-
ty. When the system does not
operate normally, manually
change between the high
beam and low beam.
WARNING
Page 211 of 586
3-117
Convenient features of your vehicle
3
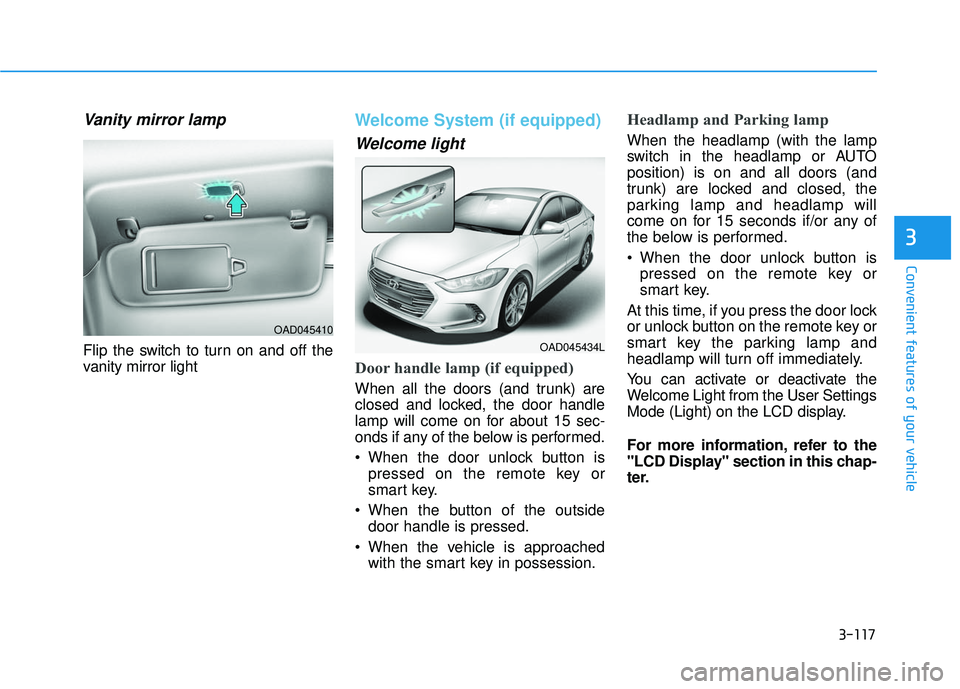
Vanity mirror lamp
Flip the switch to turn on and off the
vanity mirror light
Welcome System (if equipped)
Welcome light
Door handle lamp (if equipped)
When all the doors (and trunk) are
closed and locked, the door handle
lamp will come on for about 15 sec-
onds if any of the below is performed.
When the door unlock button ispressed on the remote key or
smart key.
When the button of the outside door handle is pressed.
When the vehicle is approached with the smart key in possession.
Headlamp and Parking lamp
When the headlamp (with the lamp
switch in the headlamp or AUTO
position) is on and all doors (and
trunk) are locked and closed, the
parking lamp and headlamp will
come on for 15 seconds if/or any of
the below is performed.
When the door unlock button ispressed on the remote key or
smart key.
At this time, if you press the door lock
or unlock button on the remote key or
smart key the parking lamp and
headlamp will turn off immediately.
You can activate or deactivate the
Welcome Light from the User Settings
Mode (Light) on the LCD display.
For more information, refer to the
"LCD Display" section in this chap-
ter.
OAD045410
OAD045434L
Page 216 of 586
3-122
Convenient features of your vehicle
D
DE
EF
FR
R O
O S
ST
T E
ER
R
To prevent damage to the conduc-
tors bonded to the inside surface
of the rear window, never use
sharp instruments or window
cleaners containing abrasives to
clean the window.
If you want to defrost and defog
the front windshield, refer to the
"Windshield Defrosting and
Defogging" section in this chapter.
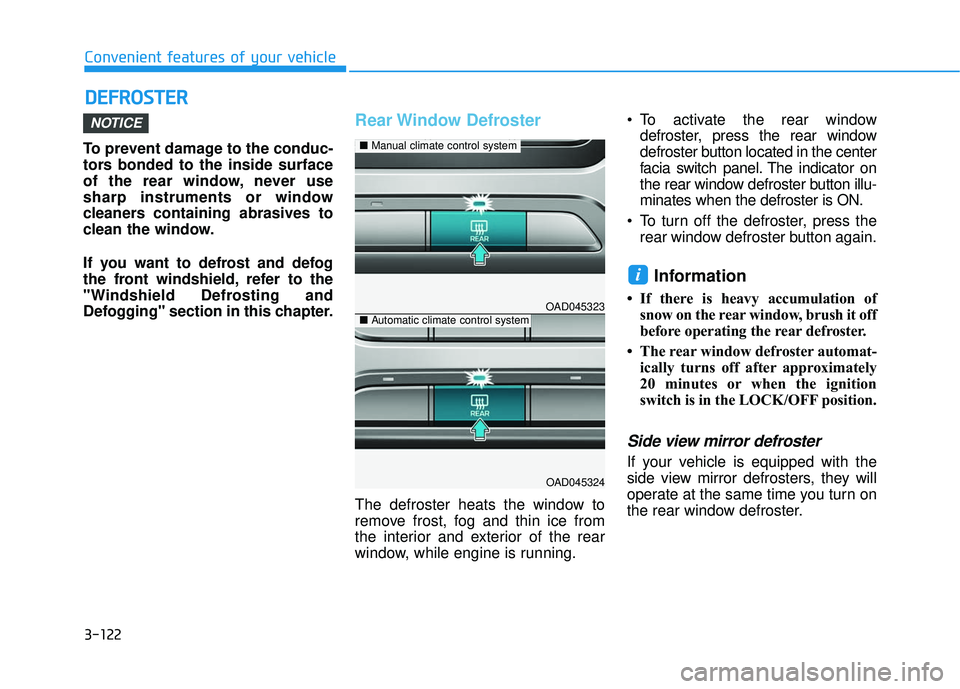
Rear Window Defroster
The defroster heats the window to
remove frost, fog and thin ice from
the interior and exterior of the rear
window, while engine is running. To activate the rear window
defroster, press the rear window
defroster button located in the center
facia switch panel. The indicator on
the rear window defroster button illu-
minates when the defroster is ON.
To turn off the defroster, press the rear window defroster button again.
Information
• If there is heavy accumulation ofsnow on the rear window, brush it off
before operating the rear defroster.
• The rear window defroster automat- ically turns off after approximately
20 minutes or when the ignition
switch is in the LOCK/OFF position.
Side view mirror defroster
If your vehicle is equipped with the
side view mirror defrosters, they will
operate at the same time you turn on
the rear window defroster.
i
NOTICE
OAD045323
OAD045324
■ Manual climate control system
■Automatic climate control system
Page 239 of 586
3-145
Convenient features of your vehicle
3
W
WI
IN
N D
DS
SH
H I
IE
E L
LD
D
D
D E
EF
FR
R O
O S
ST
T I
IN
N G
G
A
A N
N D
D
D
D E
EF
FO
O G
GG
GI
IN
N G
G
For maximum defrosting, set the
temperature control to the extreme
right/hot position and the fan speed
control to the highest speed.
If warm air to the floor is desired while defrosting or defogging, set the
mode to the floor-defrost position.
Before driving, clear all snow and ice from the windshield, rear win-
dow, side view mirrors, and all side
windows.
Clear all snow and ice from the hood and air inlet in the cowl grill to
improve heater and defroster effi-
ciency and to reduce the probability
of fogging up the inside of the wind-
shield.
If the engine temperature is still
cold after starting, then a brief
engine warm up period may be
required for the vented air flow to
become warm or hot.Manual Climate Control System
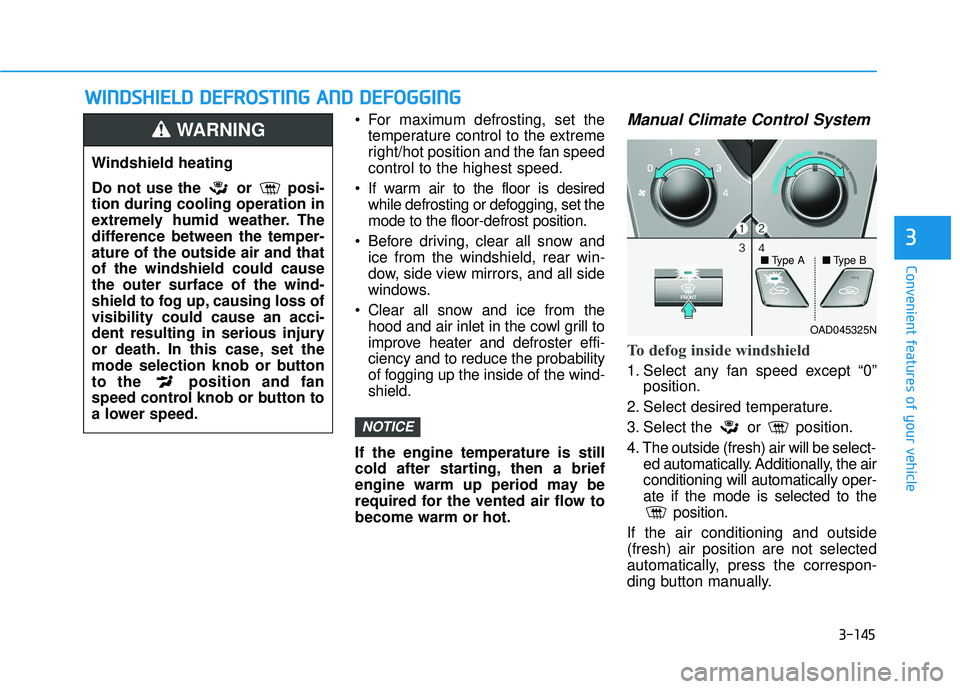
To defog inside windshield
1. Select any fan speed except “0” position.
2. Select desired temperature.
3. Select the or position.
4. The outside (fresh) air will be select- ed automatically. Additionally, the air
conditioning will automatically oper-
ate if the mode is selected to the position.
If the air conditioning and outside
(fresh) air position are not selected
automatically, press the correspon-
ding button manually.
NOTICE
Windshield heating
Do not use the or posi-
tion during cooling operation in
extremely humid weather. The
difference between the temper-
ature of the outside air and that
of the windshield could cause
the outer surface of the wind-
shield to fog up, causing loss of
visibility could cause an acci-
dent resulting in serious injury
or death. In this case, set the
mode selection knob or button
to the position and fan
speed control knob or button to
a lower speed.
WARNING
OAD045325N
■
Type A ■Type B
Page 245 of 586
3-151
Convenient features of your vehicle
3
Do not keep objects except
sunglasses inside the sun-
glass holder. Such objects can
be thrown from the holder in
the event of a sudden stop or
an accident, possibly injuring
the passengers in the vehicle.
Do not open the sunglass
holder while the vehicle is
moving. The rear view mirror
of the vehicle can be blocked
by an open sunglass holder.
Do not put the glasses forcibly
into a sunglass holder. It may
cause personal injury if you
try to open it forcibly when the
glasses are jammed in holder.
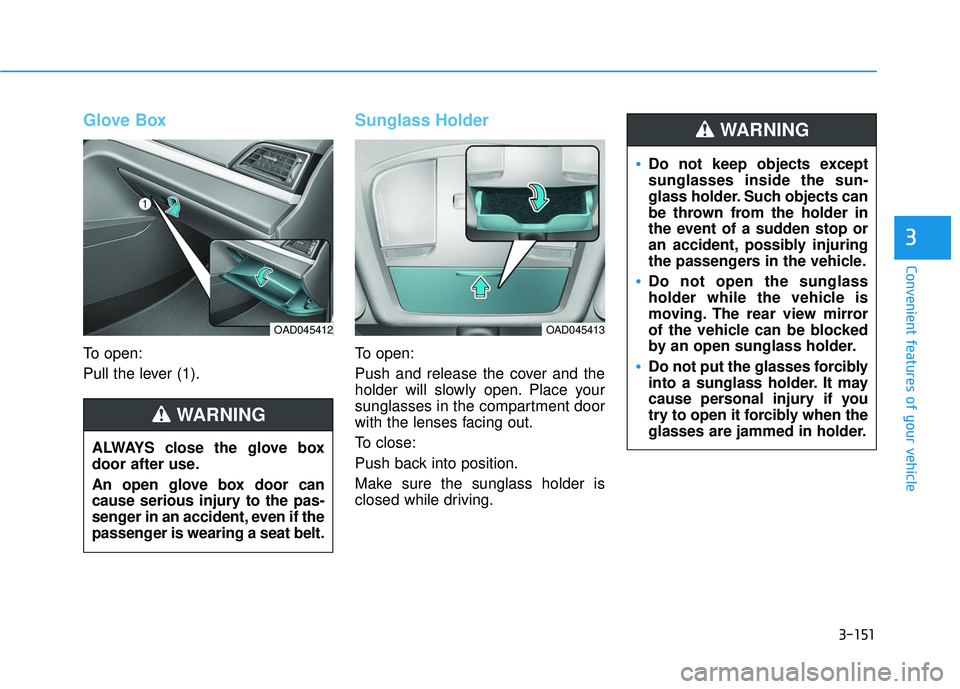
WARNING Glove Box
To open:
Pull the lever (1).
Sunglass Holder
To open:
Push and release the cover and the
holder will slowly open. Place your
sunglasses in the compartment door
with the lenses facing out.
To close:
Push back into position.
Make sure the sunglass holder is
closed while driving.
OAD045412
ALWAYS close the glove box
door after use.
An open glove box door can
cause serious injury to the pas-
senger in an accident, even if the
passenger is wearing a seat belt.
WARNING
OAD045413
Page 248 of 586
3-154
Convenient features of your vehicle
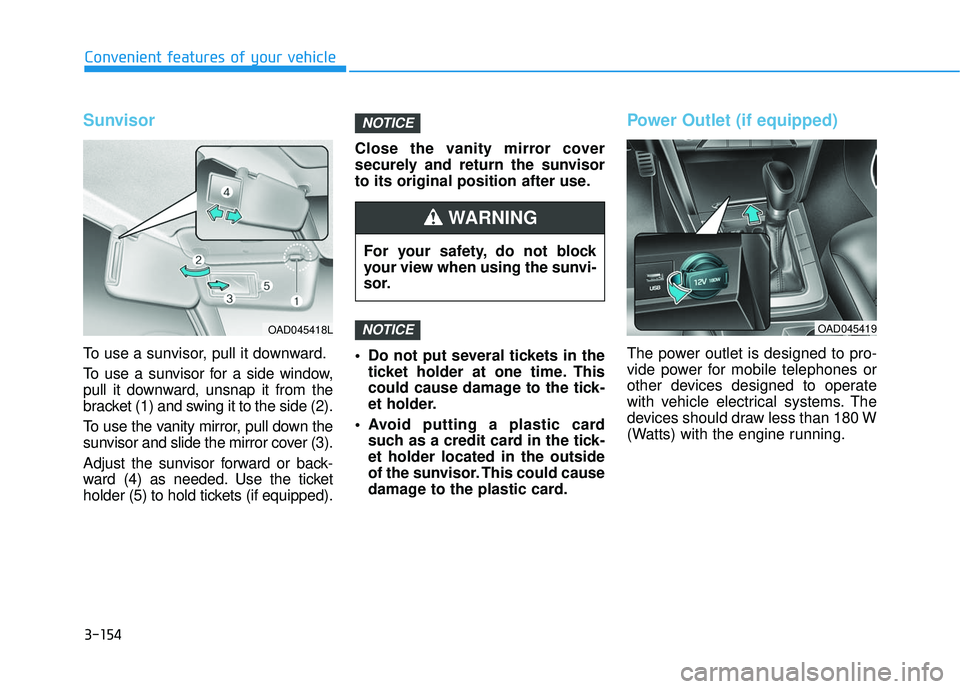
Sunvisor
To use a sunvisor, pull it downward.
To use a sunvisor for a side window,
pull it downward, unsnap it from the
bracket (1) and swing it to the side (2).
To use the vanity mirror, pull down the
sunvisor and slide the mirror cover (3).
Adjust the sunvisor forward or back-
ward (4) as needed. Use the ticket
holder (5) to hold tickets (if equipped).Close the vanity mirror cover
securely and return the sunvisor
to its original position after use.
Do not put several tickets in the
ticket holder at one time. This
could cause damage to the tick-
et holder.
Avoid putting a plastic card such as a credit card in the tick-
et holder located in the outside
of the sunvisor. This could cause
damage to the plastic card.
Power Outlet (if equipped)
The power outlet is designed to pro-
vide power for mobile telephones or
other devices designed to operate
with vehicle electrical systems. The
devices should draw less than 180 W
(Watts) with the engine running.
NOTICE
NOTICE
For your safety, do not block
your view when using the sunvi-
sor.
WARNING
OAD045419OAD045418L