charging HYUNDAI ELANTRA SE 2017 Owners Manual
[x] Cancel search | Manufacturer: HYUNDAI, Model Year: 2017, Model line: ELANTRA SE, Model: HYUNDAI ELANTRA SE 2017Pages: 586, PDF Size: 15.29 MB
Page 18 of 586
F18
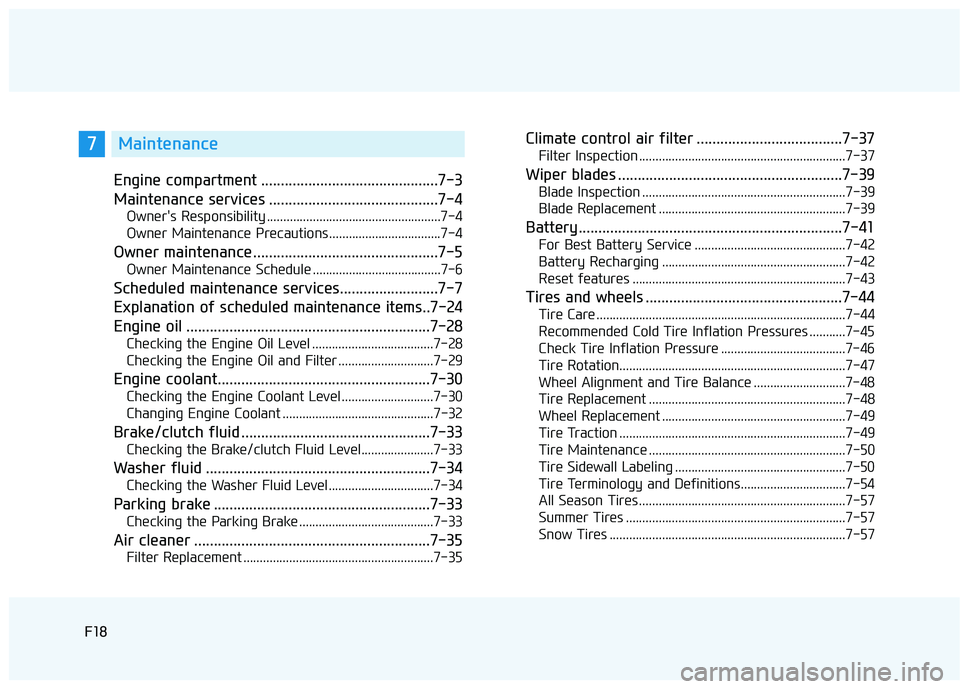
Engine compartment .............................................7-3
Maintenance services ...........................................7-4
Owner's Responsibility .....................................................7-4
Owner Maintenance Precautions..................................7-4
Owner maintenance ...............................................7-5
Owner Maintenance Schedule .......................................7-6
Scheduled maintenance services.........................7-7
Explanation of scheduled maintenance items..7-24
Engine oil ..............................................................7-28
Checking the Engine Oil Level .....................................7-28
Checking the Engine Oil and Filter .............................7-29
Engine coolant......................................................7-30
Checking the Engine Coolant Level ............................7-30
Changing Engine Coolant ..............................................7-32
Brake/clutch fluid ................................................7-33
Checking the Brake/clutch Fluid Level......................7-33
Washer fluid .........................................................7-34
Checking the Washer Fluid Level................................7-34
Parking brake .......................................................7-33
Checking the Parking Brake .........................................7-33
Air cleaner ............................................................7-35
Filter Replacement ..........................................................7-35
Climate control air filter .....................................7-37
Filter Inspection ...............................................................7-37
Wiper blades .........................................................7-39
Blade Inspection ..............................................................7-39
Blade Replacement .........................................................7-39
Battery...................................................................7-41
For Best Battery Service ..............................................7-42
Battery Recharging ........................................................7-42
Reset features .................................................................7-43
Tires and wheels ..................................................7-44
Tire Care ........................................................................\
....7-44
Recommended Cold Tire Inflation Pressures ...........7-45
Check Tire Inflation Pressure ......................................7-46
Tire Rotation...................................................................\
..7-47
Wheel Alignment and Tire Balance ............................7-48
Tire Replacement ............................................................7-48
Wheel Replacement ........................................................7-49
Tire Traction .....................................................................7-4\
9
Tire Maintenance ............................................................7-50
Tire Sidewall Labeling ....................................................7-50
Tire Terminology and Definitions................................7-54
All Season Tires ...............................................................7-57
Summer Tires ...................................................................7-57
Snow Tires ........................................................................\
7-57
F18
7Maintenance
Page 83 of 586
2-58
Safety system of your vehicle
Always be sure that you and all vehi-
cle occupants are seated properly
and wearing the seat belt properly for
the most effective protection by the
air bag and the seat belt.
The OCS may not function properly if
the passenger takes actions which
can affect the classification system.
These include:
Failing to sit in an upright position.
Leaning against the door or center console.
Sitting towards the sides of the front of the seat.
Putting their legs on the dashboard or resting them on other locations
which reduce the passenger
weight on the front seat.
Wearing the seat belt improperly.
Reclining the seatback.
Wearing a thick cloth like ski wear or hip protection wear.
Putting an additional thick cushion on the seat.
Putting electrical devices (e.g. notebook, satellite radio) on the
seat with inverter charging.
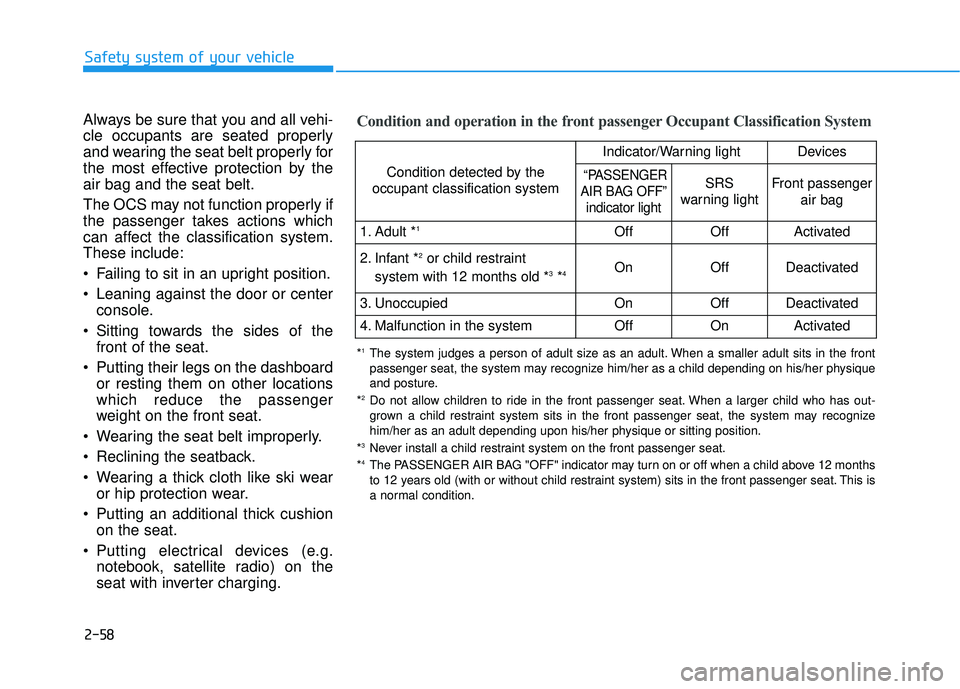
Condition and operation in the front passenger Occupant Classification System
Condition detected by the
occupant classification system
Indicator/Warning lightDevices
“PASSENGER
AIR BAG OFF” indicator lightSRS
warning lightFront passenger
air bag
1. Adult *1OffOffActivated
2. Infant *2or child restraint
system with 12 months old *3*4 OnOffDeactivated
3. Unoccupied OnOffDeactivated
4. Malfunction in the systemOffOnActivated
*1The system judges a person of adult size as an adult. When a smaller adult sits in the front
passenger seat, the system may recognize him/her as a child depending on his/her physique
and posture.
*
2Do not allow children to ride in the front passenger seat. When a larger child who has out- grown a child restraint system sits in the front passenger seat, the system may recognize
him/her as an adult depending upon his/her physique or sitting position.
*
3Never install a child restraint system on the front passenger seat.
*4The PASSENGER AIR BAG "OFF" indicator may turn on or off when a child above 12 months
to 12 years old (with or without child restraint system) sits in the front passenger seat. This is
a normal condition.
Page 167 of 586
3-73
Convenient features of your vehicle
3
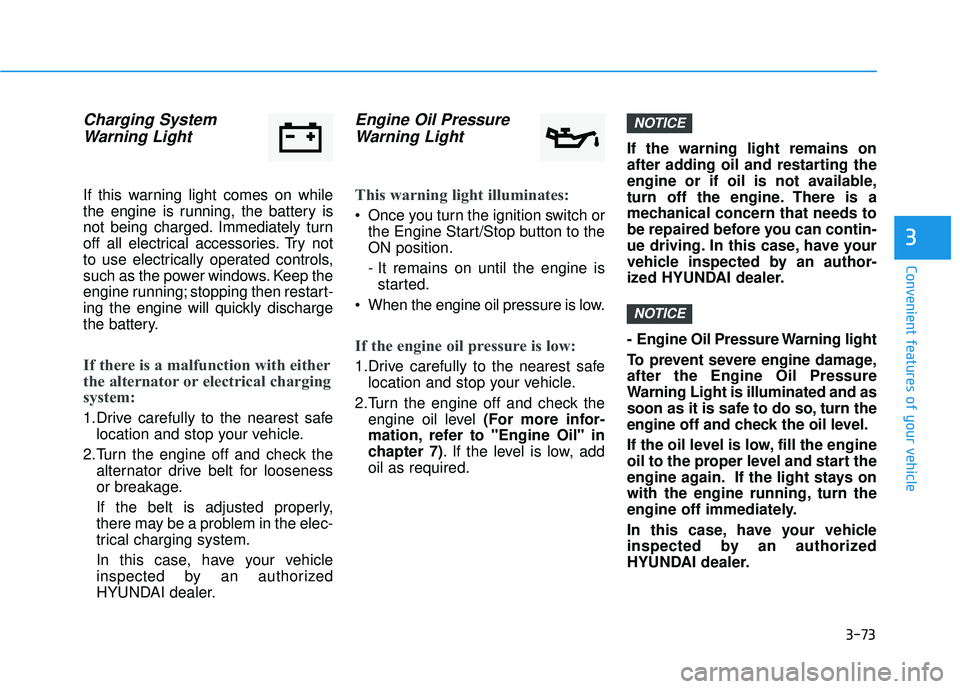
Charging SystemWarning Light
If this warning light comes on while
the engine is running, the battery is
not being charged. Immediately turn
off all electrical accessories. Try not
to use electrically operated controls,
such as the power windows. Keep the
engine running; stopping then restart-
ing the engine will quickly discharge
the battery.
If there is a malfunction with either
the alternator or electrical charging
system:
1.Drive carefully to the nearest safe
location and stop your vehicle.
2.Turn the engine off and check the alternator drive belt for looseness
or breakage.
If the belt is adjusted properly,
there may be a problem in the elec-
trical charging system.
In this case, have your vehicle
inspected by an authorized
HYUNDAI dealer.
Engine Oil PressureWarning Light
This warning light illuminates:
Once you turn the ignition switch or
the Engine Start/Stop button to the
ON position.
- It remains on until the engine isstarted.
When the engine oil pressure is low.
If the engine oil pressure is low:
1.Drive carefully to the nearest safe location and stop your vehicle.
2.Turn the engine off and check the engine oil level (For more infor-
mation, refer to "Engine Oil" in
chapter 7). If the level is low, add
oil as required. If the warning light remains on
after adding oil and restarting the
engine or if oil is not available,
turn off the engine. There is a
mechanical concern that needs to
be repaired before you can contin-
ue driving. In this case, have your
vehicle inspected by an author-
ized HYUNDAI dealer.
- Engine Oil Pressure Warning light
To prevent severe engine damage,
after the Engine Oil Pressure
Warning Light is illuminated and as
soon as it is safe to do so, turn the
engine off and check the oil level.
If the oil level is low, fill the engine
oil to the proper level and start the
engine again. If the light stays on
with the engine running, turn the
engine off immediately.
In this case, have your vehicle
inspected by an authorized
HYUNDAI dealer.
NOTICE
NOTICE
Page 210 of 586
3-116
Convenient features of your vehicle
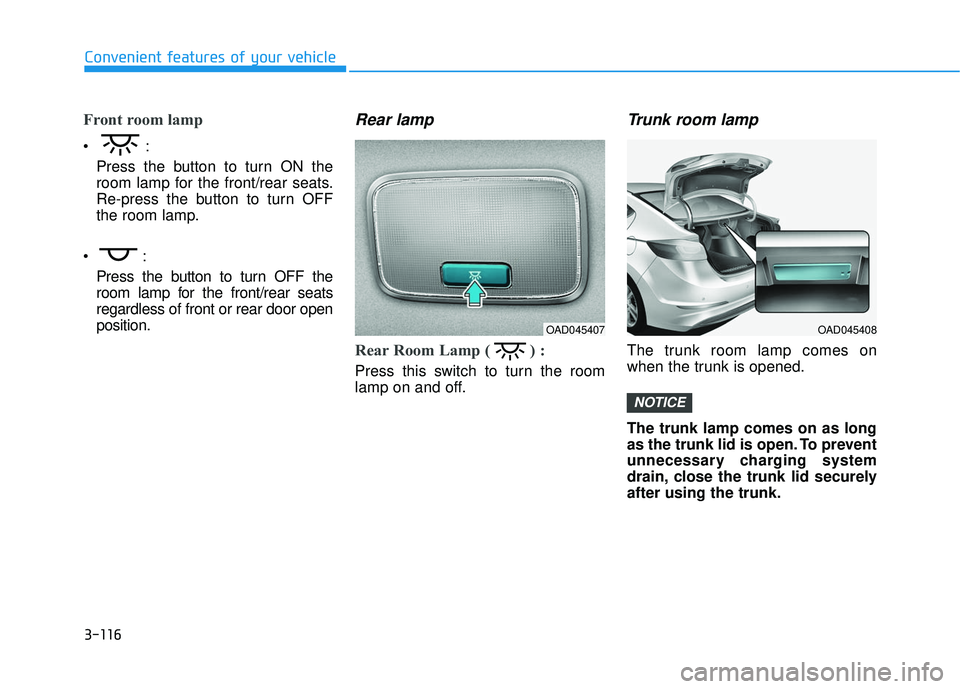
Front room lamp
Press the button to turn ON the
room lamp for the front/rear seats.
Re-press the button to turn OFF
the room lamp.
Press the button to turn OFF the
room lamp for the front/rear seats
regardless of front or rear door open
position.
Rear lamp
Rear Room Lamp ( ) :
Press this switch to turn the room
lamp on and off.
Trunk room lamp
The trunk room lamp comes on
when the trunk is opened.
The trunk lamp comes on as long
as the trunk lid is open. To prevent
unnecessary charging system
drain, close the trunk lid securely
after using the trunk.
NOTICE
OAD045408OAD045407
Page 250 of 586
3-156
Convenient features of your vehicle
USB Charger (if equipped)
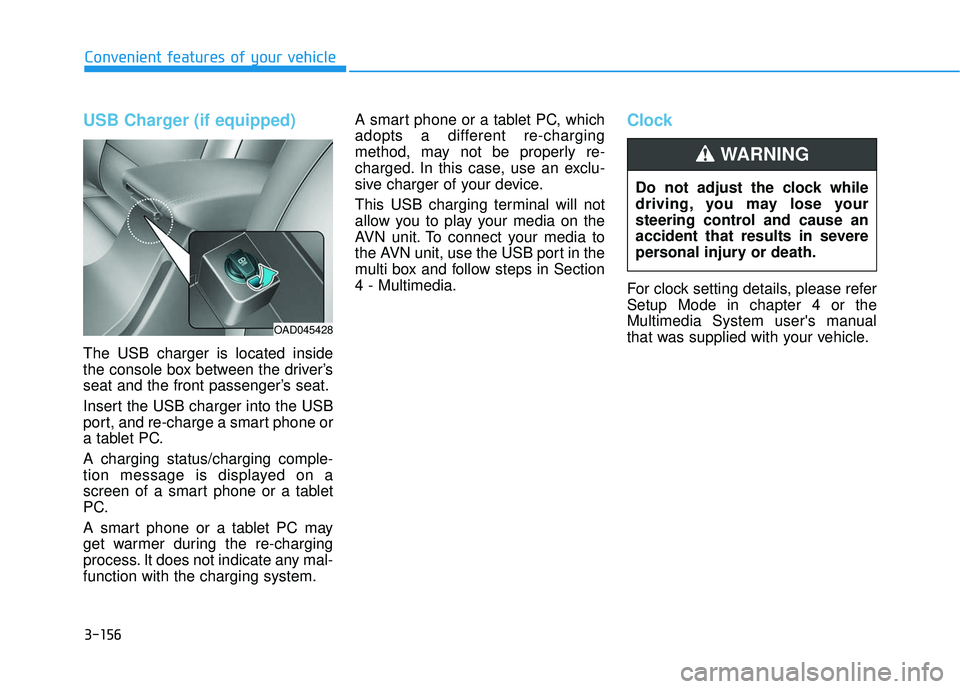
The USB charger is located inside
the console box between the driver’s
seat and the front passenger’s seat.
Insert the USB charger into the USB
port, and re-charge a smart phone or
a tablet PC.
A charging status/charging comple-
tion message is displayed on a
screen of a smart phone or a tablet
PC.
A smart phone or a tablet PC may
get warmer during the re-charging
process. It does not indicate any mal-
function with the charging system.A smart phone or a tablet PC, which
adopts a different re-charging
method, may not be properly re-
charged. In this case, use an exclu-
sive charger of your device.
This USB charging terminal will not
allow you to play your media on the
AVN unit. To connect your media to
the AVN unit, use the USB port in the
multi box and follow steps in Section
4 - Multimedia.
Clock
For clock setting details, please refer
Setup Mode in chapter 4 or the
Multimedia System user's manual
that was supplied with your vehicle.
Do not adjust the clock while
driving, you may lose your
steering control and cause an
accident that results in severe
personal injury or death.
WARNING
OAD045428
Page 264 of 586
(Continued)
• Some USB devices may not be sup- ported due to compatibility issues.
• Avoid contact between the USB con- nector with bodily parts or foreign
objects.
• Repeated connecting/disconnecting of USB devices within short periods
of time may result in product mal-
function.
• A strange noise may occur when dis- connecting the USB.
• Make sure to connect/disconnect external USB devices with the audio
power turned off.
• The amount of time required to rec- ognize the USB device may differ
depending on the type, size or file
formats stored in the USB. Such dif-
ferences in time are not indications
of malfunctions.
• The device only supports USB devices used to play music files.
• USB images and videos are not sup- ported.
(Continued)(Continued)
• Do not use the USB I/F to charge batteries or USB accessories that
generate heat. Such acts may lead to
worsened performance or damage
to the device.
• The device may not recognize the USB device if separately purchased
USB hubs and extension cables are
being used. Connect the USB direct-
ly with the multimedia terminal of
the vehicle.
• When using mass storage USB devices with separate logical drives,
only files saved to the root drive can
be played.
• Files may not properly operate if application programs are installed
to the USBs.
• The device may not operate normal- ly if MP3 Players, cellular phones,
digital cameras, or other electronic
devices (USB devices not recognized
as portable disk drives) are connect-
ed with the device.
(Continued)(Continued)
• Charging through the USB may not
work for some mobile devices.
• The device may not support normal operation when using a USB memo-
ry type besides (Metal Cover Type)
USB Memory.
• The device may not support normal operation when using formats such
as HDD Type, CF, or SD Memory.
• The device will not support files locked by DRM (Digital Rights
Management.)
• USB memory sticks used by con- necting an Adaptor (SD Type or CF
Type) may not be properly recog-
nized.
• The device may not operate proper- ly when using USB HDDs or USBs
subject to connection failures
caused by vehicle vibrations. (e.g. i-
stick type)
(Continued)
4-12
Multimedia System
Page 266 of 586
(Continued)
• If your iPhone
®is connected to both
the Bluetooth®Wireless Technology
and USB, the sound may not be
properly played. In your iPhone
®,
select the Dock c onnector or
Bluetooth
®Wireless Technology to
change the sound output (source).
• iPod mode cannot be operated when the iPod
®cannot be recognized due
to versions that do not support com-
munication protocols.
• For fifth generation iPod
®Nano
devices, the iPod®may not be recog-
nized when the battery level is low.
Please charge the iPod
®for use.
• Search/play orders shown within the iPod
®device may differ with the
orders shown within the audio sys-
tem.
• If the iPod
®malfunctions due to an
iPod®device defect, reset the iPod®
and try again. (To learn more, refer to
your iPod®manual)
(Continued) (Continued)
• Some iPod
®s may not sync with the
System depending on its version. If
the Media is removed before the
Media is recognized, then the sys-
tem may not properly restore the
previously operated mode. (iPad
®
charging is not supported.)
Information - Using the AUX
device
• If an external device connector is connected with the AUX terminal,
then AUX mode will automatically
operate. Once the connector is dis-
connected, the previous mode will
be restored.
• AUX mode can be used only when an external audio player (cam-
corder, in-car DVD player, etc.) has
been connected.
• The AUX volume can be controlled separately from other audio modes.
• Connecting a connector jack to the AUX terminal without an external
device will convert the system to
AUX mode, but only output noise.
When an external device is not
being used, also remove the connec-
tor jack.
• When the external device power is connected to the power jack, play-
ing the external device may output
noise. In such cases, disconnect the
power connection before use.
• Fully insert the AUX cable to the AUX jack upon use.i
4-14
Multimedia System
Page 280 of 586
4-28
Multimedia System
(Continued)
• An encrypted MP3 PLAYER is not recognizable.
• Depending on the condition of the external USB device, the connected
external USB device can be unrec-
ognizable.
• When the formatted byte/sector set- ting of External USB device is not
either 512BYTE or 2048BYTE, then
the device will not be recognized.
• Use only a USB device formatted to FAT 12/16/32.
• USB devices without USB I/F authentication may not be recogniz-
able.
• Make sure the USB connection ter- minal does not come in contact with
the human body or other objects.
• If you repeatedly connect or discon- nect the USB device in a short peri-
od of time, it may break the device.
(Continued)(Continued)
• You may hear a strange noise when
connecting or disconnecting a USB
device.
• If you disconnect the external USB device during playback in USB
mode, the external USB device can
be damaged or may malfunction.
Therefore, disconnect the external
USB device when the audio is
turned off or in another mode. (e.g,
Radio)
• Depending on the type and capacity of the external USB device or the
type of files stored in the device,
there is a difference in the time for
recognition the device.
• Do not use the USB device for pur- poses other than playing music files.
• Playing videos through the USB is not supported.
• Use of USB accessories such as rechargers or heaters using USB I/F
may lower performance or cause
trouble.
(Continued)(Continued)
• If you use devices such as a USB hub
purchased separately, the vehicle’s
audio system may not recognize the
USB device. In this case, connect the
USB device directly to the multime-
dia terminal of the vehicle.
• If the USB device is divided by logi- cal drives, only the music files on the
highest-priority drive are recog-
nized by car audio.
• Devices such as MP3 Player/ Cellular phone/Digital camera can
be unrecognizable by standard USB
I/F.
• Charging through the USB may not be supported in some mobile
devices.
• USB HDD or USB types liable to connection failures due to vehicle
vibrations are not supported. (i-stick
type)
• Some non-standard USB devices (METAL COVER TYPE USB) can
be unrecognizable.
(Continued)
Page 327 of 586
5-7
Driving your vehicle
5
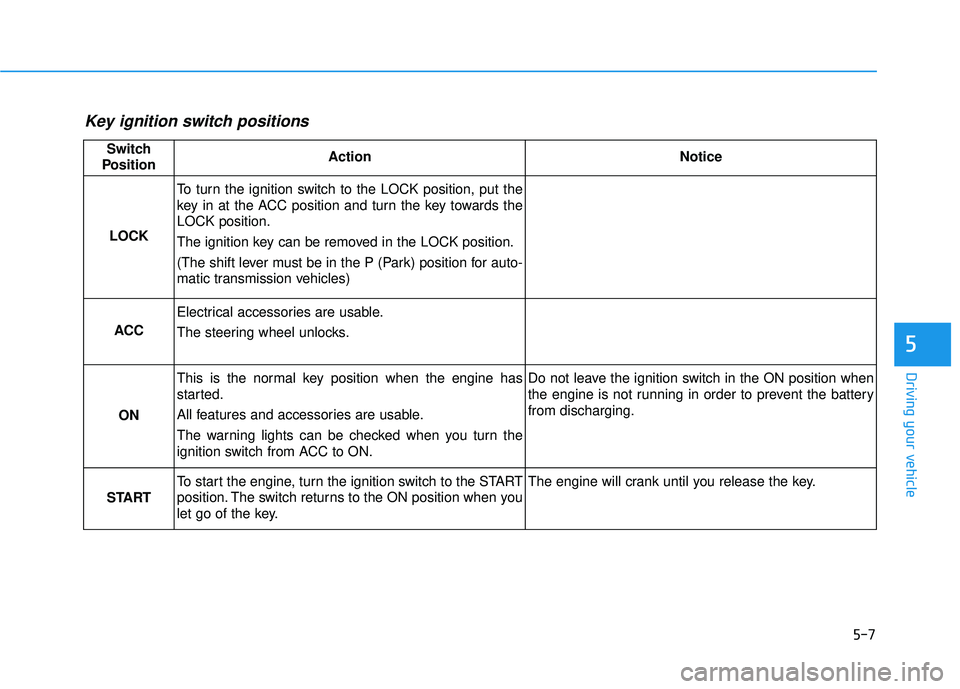
Key ignition switch positions
Switch
PositionActionNotice
LOCK
To turn the ignition switch to the LOCK position, put the
key in at the ACC position and turn the key towards the
LOCK position.
The ignition key can be removed in the LOCK position.
(The shift lever must be in the P (Park) position for auto-
matic transmission vehicles)
ACC
Electrical accessories are usable.
The steering wheel unlocks.
ON
This is the normal key position when the engine has
started.
All features and accessories are usable.
The warning lights can be checked when you turn the
ignition switch from ACC to ON.Do not leave the ignition switch in the ON position when
the engine is not running in order to prevent the battery
from discharging.
START
To start the engine, turn the ignition switch to the START
position. The switch returns to the ON position when you
let go of the key.The engine will crank until you release the key.
Page 330 of 586
5-10
Driving your vehicle
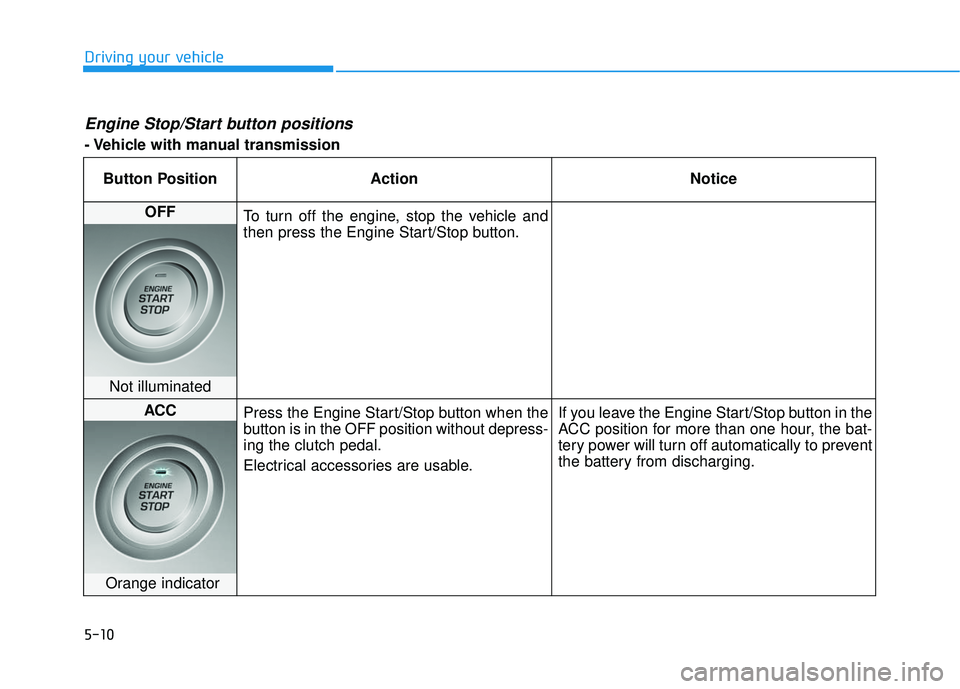
Engine Stop/Start button positions
- Vehicle with manual transmissionButton Position Action Notice
OFF To turn off the engine, stop the vehicle and
then press the Engine Start/Stop button.
Not illuminated
ACC Press the Engine Start/Stop button when the
button is in the OFF position without depress-
ing the clutch pedal.
Electrical accessories are usable. If you leave the Engine Start/Stop button in the
ACC position for more than one hour, the bat-
tery power will turn off automatically to prevent
the battery from discharging.
Orange indicator