radio HYUNDAI ELANTRA SE 2017 Owners Manual
[x] Cancel search | Manufacturer: HYUNDAI, Model Year: 2017, Model line: ELANTRA SE, Model: HYUNDAI ELANTRA SE 2017Pages: 586, PDF Size: 15.29 MB
Page 2 of 586
F2
Your HYUNDAI should not be modified in any way.
Such modifications may adversely affect the per-
formance, safety or durability of your HYUNDAI
and may, in addition, violate conditions of the limit-
ed warranties covering the vehicle. Certain modifi-
cations may also be in violation of regulations
established by the U.S. Department of
Transportation and other federal or state agencies.
Your vehicle is equipped with electronic fuel injec-
tion and other electronic components. It is possible
for an improperly installed/adjusted two-way radio
or cellular telephone to adversely affect electronic
systems. For this reason, we recommend that you
carefully follow the radio manufacturer’s instructions
or consult your HYUNDAI dealer for precautionary
measures or special instructions if you choose to
install one of these devices.
CAUTION: MODIFICATIONS TOYOUR HYUNDAI
TWO-WAY RADIO OR CELLULARTELEPHONE INSTALLATION
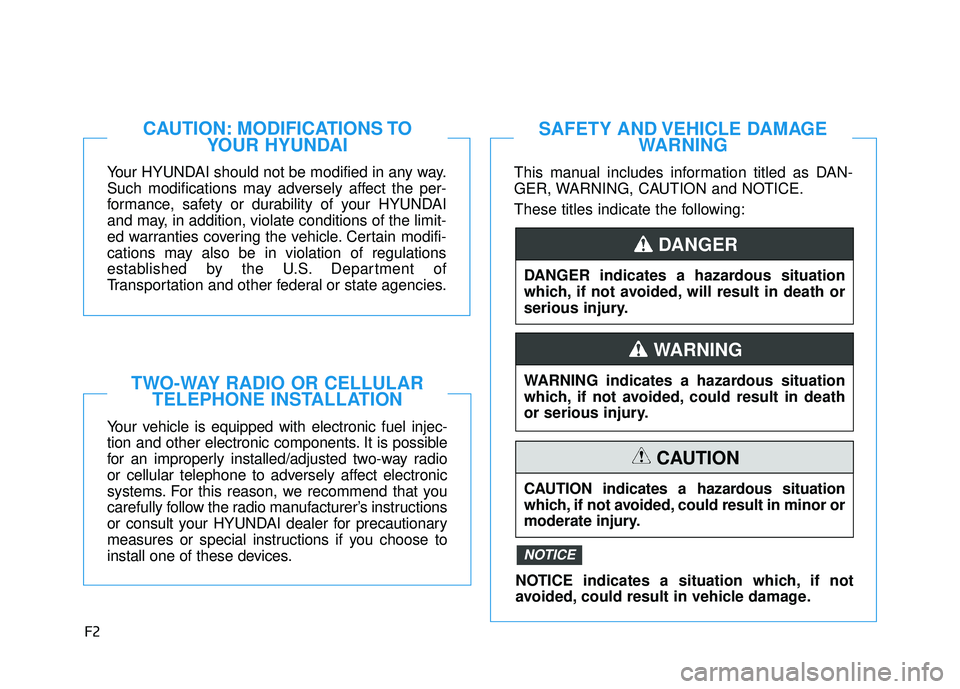
This manual includes information titled as DAN-
GER, WARNING, CAUTION and NOTICE.
These titles indicate the following:
SAFETY AND VEHICLE DAMAGE WARNING
DANGER indicates a hazardous situation
which, if not avoided, will result in death or
serious injury.
DANGER
WARNING indicates a hazardous situation
which, if not avoided, could result in death
or serious injury.
CAUTION indicates a hazardous situation
which, if not avoided, could result in minor or
moderate injury.
CAUTION
NOTICE indicates a situation which, if not
avoided, could result in vehicle damage.
NOTICE
WARNING
Page 15 of 586
F15F15
Multimedia system .................................................4-2
AUX, USB and iPod®port ...............................................4-2
Antenna ........................................................................\
.......4-2
Steering Wheel Audio Controls ......................................4-3
Bluetooth®Wireless Technology Hands-Free ...........4-4
Audio (Display Audio) / Video /
Navigation System (AVN).................................................4-4
How Vehicle Audio Works ...............................................4-5
Features of Your Vehicle.................................................4-7
Caring for CDs ....................................................................4-8
Audio (Without Touch Screen) ..........................4-17
Features of Your Audio .................................................4-18
Radio Mode.......................................................................4\
-34
SiriusXM Radio Mode.....................................................4-37
Media Mode......................................................................4-\
39
Phone Mode .....................................................................4-4\
5
Voice Recognition Mode ...............................................4-49
Setup Mode ......................................................................4-\
57
Declaration of conformity ..................................4-67
FCC ........................................................................\
..............4-67
Before Driving ........................................................5-4
Before Entering the Vehicle ...........................................5-4
Before Starting ..................................................................5-4
Ignition Switch ........................................................5-6
Key Ignition Switch ...........................................................5-6
Engine Start/Stop Button................................................5-9
Manual Transmission ...........................................5-16
Manual Transmission Operation ..................................5-16
Good Driving Practices ..................................................5-18
Automatic Transmission ......................................5-20
Automatic Transmission Operation .............................5-20
Good Driving Practices ..................................................5-25
Braking System ....................................................5-27
Power Brakes ...................................................................5-27
Disc Brakes Wear Indicator ..........................................5-28
Rear drum brakes ...........................................................5-28
Parking Brake...................................................................5-28
Anti-lock Brake System (ABS) ....................................5-30
Electronic Stability Control (ESC)................................5-33
Vehicle Stability Management (VSM).........................5-36
Hill-Start Assist Control (HAC) ....................................5-37
Good Braking Practices .................................................5-38
4Multimedia system5Driving your vehicle
Page 83 of 586
2-58
Safety system of your vehicle
Always be sure that you and all vehi-
cle occupants are seated properly
and wearing the seat belt properly for
the most effective protection by the
air bag and the seat belt.
The OCS may not function properly if
the passenger takes actions which
can affect the classification system.
These include:
Failing to sit in an upright position.
Leaning against the door or center console.
Sitting towards the sides of the front of the seat.
Putting their legs on the dashboard or resting them on other locations
which reduce the passenger
weight on the front seat.
Wearing the seat belt improperly.
Reclining the seatback.
Wearing a thick cloth like ski wear or hip protection wear.
Putting an additional thick cushion on the seat.
Putting electrical devices (e.g. notebook, satellite radio) on the
seat with inverter charging.
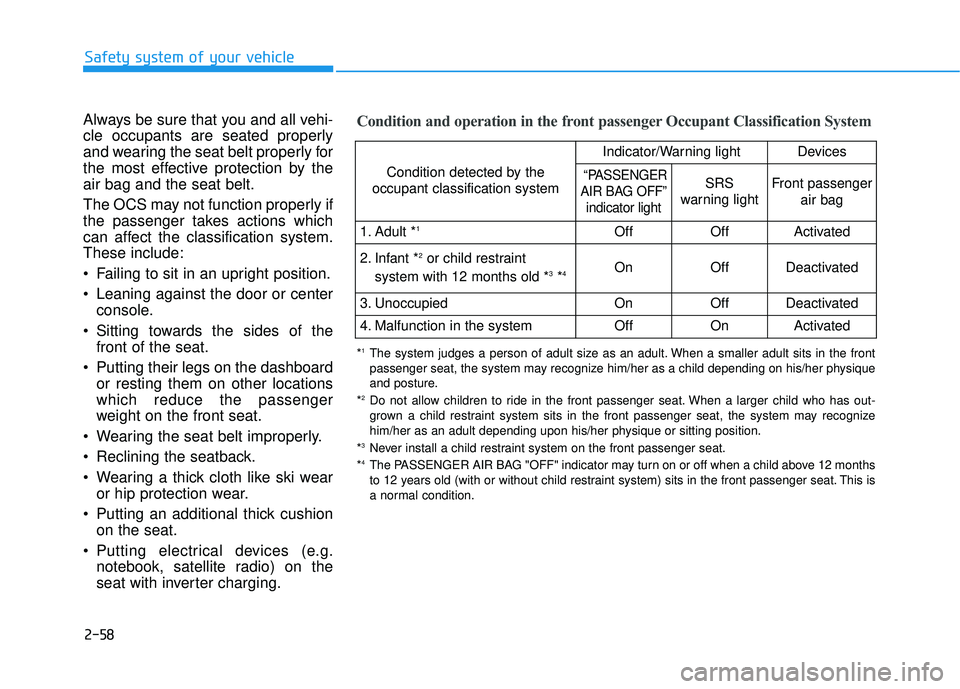
Condition and operation in the front passenger Occupant Classification System
Condition detected by the
occupant classification system
Indicator/Warning lightDevices
“PASSENGER
AIR BAG OFF” indicator lightSRS
warning lightFront passenger
air bag
1. Adult *1OffOffActivated
2. Infant *2or child restraint
system with 12 months old *3*4 OnOffDeactivated
3. Unoccupied OnOffDeactivated
4. Malfunction in the systemOffOnActivated
*1The system judges a person of adult size as an adult. When a smaller adult sits in the front
passenger seat, the system may recognize him/her as a child depending on his/her physique
and posture.
*
2Do not allow children to ride in the front passenger seat. When a larger child who has out- grown a child restraint system sits in the front passenger seat, the system may recognize
him/her as an adult depending upon his/her physique or sitting position.
*
3Never install a child restraint system on the front passenger seat.
*4The PASSENGER AIR BAG "OFF" indicator may turn on or off when a child above 12 months
to 12 years old (with or without child restraint system) sits in the front passenger seat. This is
a normal condition.
Page 85 of 586
2-60
Safety system of your vehicle
ODH035900K
ODH035901K
ODH035902K
ODH035903K
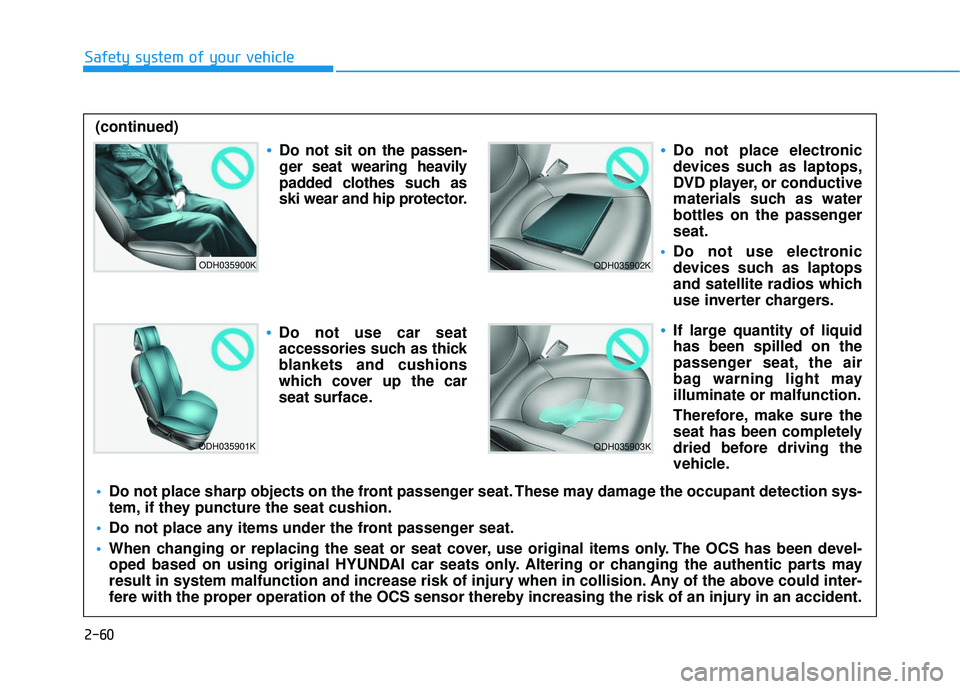
Do not sit on the passen-
ger seat wearing heavily
padded clothes such as
ski wear and hip protector.
Do not use car seat
accessories such as thick
blankets and cushions
which cover up the car
seat surface.
Do not place electronic
devices such as laptops,
DVD player, or conductive
materials such as water
bottles on the passenger
seat.
Do not use electronic
devices such as laptops
and satellite radios which
use inverter chargers.
If large quantity of liquid
has been spilled on the
passenger seat, the air
bag warning light may
illuminate or malfunction.
Therefore, make sure the
seat has been completely
dried before driving the
vehicle.
Do not place sharp objects on the front passenger seat. These may damage the occupant detection sys-
tem, if they puncture the seat cushion.
Do not place any items under the front passenger seat.
When changing or replacing the seat or seat cover, use original items only. The OCS has been devel-
oped based on using original HYUNDAI car seats only. Altering or changing the authentic parts may
result in system malfunction and increase risk of injury when in collision. Any of the above could inter-
fere with the proper operation of the OCS sensor thereby increasing the risk of an injury in an accident.
(continued)
Page 100 of 586
3-6
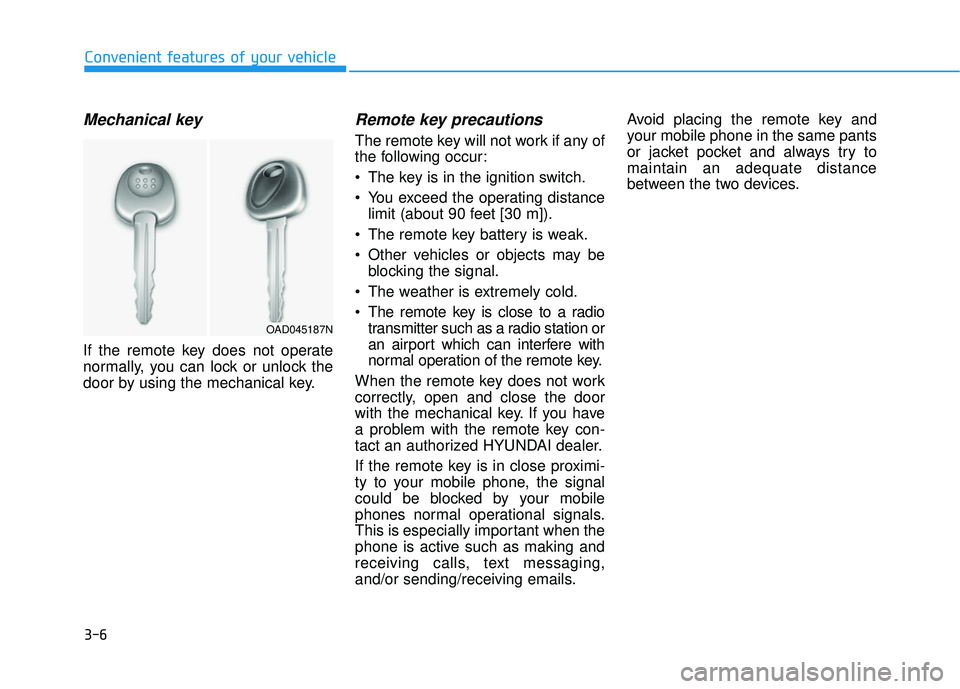
Mechanical key
If the remote key does not operate
normally, you can lock or unlock the
door by using the mechanical key.
Remote key precautions
The remote key will not work if any of
the following occur:
The key is in the ignition switch.
You exceed the operating distancelimit (about 90 feet [30 m]).
The remote key battery is weak.
Other vehicles or objects may be blocking the signal.
The weather is extremely cold.
The remote key is close to a radio transmitter such as a radio station or
an airport which can interfere with
normal operation of the remote key.
When the remote key does not work
correctly, open and close the door
with the mechanical key. If you have
a problem with the remote key con-
tact an authorized HYUNDAI dealer.
If the remote key is in close proximi-
ty to your mobile phone, the signal
could be blocked by your mobile
phones normal operational signals.
This is especially important when the
phone is active such as making and
receiving calls, text messaging,
and/or sending/receiving emails. Avoid placing the remote key and
your mobile phone in the same pants
or jacket pocket and always try to
maintain an adequate distance
between the two devices.
Convenient features of your vehicle
OAD045187N
Page 105 of 586
3-11
Convenient features of your vehicle
3
Smart key precautions
The smart key will not work if any of
the following occur:
The smart key is close to a radiotransmitter such as a radio station
or an airport which can interfere
with normal operation of the trans-
mitter.
The smart key is near a mobile two way radio system or a cellular
phone.
Another vehicle’s smart key is being operated close to your vehicle.
When the smart key does not work
correctly, open and close the door
with the mechanical key. If you have
a problem with the smart key, contact
an authorized HYUNDAI dealer. If the smart key is in close proximity
to your mobile phone, the signal
could be blocked by your mobile
phones normal operational signals.
This is especially important when the
phone is active such as making and
receiving calls, text messaging,
and/or sending/receiving emails.
Avoid placing the smart key and your
mobile phone in the same pants or
jacket pocket and always try to main-
tain an adequate distance between
the two devices.Information
This device complies with Part 15 of
the FCC rules.
Operation is subject to the following
three conditions:
1. This device may not cause harmful
interference, and
2. This device must accept any inter- ference received, including interfer-
ence that may cause undesired
operation.
3. Changes or modifications not expressly approved by the party
responsible for compliance could
void the user’s authority to operate
the device.
i
Keep the smart key away from
electromagnetic materials that
blocks electromagnetic waves
to the key surface.
CAUTION
Page 122 of 586
3-28
Convenient features of your vehicle
To adjust the Zone setting:
1. Determine the desired Zone Number based upon your current
location on the Zone Map.
2. Press and hold the button for 6 seconds, the current Zone
Number will appear on the display.
3. Pressing and holding the button again will cause the numbers to
increment (Note: they will repeat
…13, 14, 15, 1, 2, …). Releasing
the button when the desired Zone
Number appears on the display
will set the new Zone.
4. Within about 5 seconds the com- pass will start displaying a com-
pass heading again.
There are some conditions that can
cause changes to the vehicle mag-
nets, such as installing a ski rack or
a CB antenna. Body repair work on
the vehicle can also cause changes
to the vehicle’s magnetic field. In
these situations, the compass will
need to be re-calibrated to quickly
correct these changes. If you need to recalibrate the com-
pass:
1. Press and hold the button for
more than 9 seconds. When the
compass memory is cleared a "C"
will appear in the display.
2. Drive the vehicle in 2 complete cir- cles at less than 5 mph (8 km/h).
Integrated HomeLink®Wireless
Control System
The HomeLink®Wireless Control
System can replace up to three
hand-held radio-frequency (RF)
transmitters with a single built-in
device. This innovative feature will
learn the radio frequency codes of
most current transmitters to operate
devices such as gate operators,
garage door openers, entry door
locks, security systems, even home
lighting. Both standard and rolling
code-equipped transmitters can be
programmed by following the out-
lined procedures.
Additional HomeLink
®information
can be found at: www.homelink.com
or by calling 1-800-355-3515.
Retain the original transmitter of the
RF device you are programming for
use in other vehicles as well as for
future HomeLink
®programming. It is
also suggested that upon the sale of
the vehicle, the programmed
HomeLink
®buttons be erased for
security purposes.
Page 123 of 586
3-29
Convenient features of your vehicle
3
Programming HomeLink®
Please note the following:
When programming a garage dooropener, it is advised to park the
vehicle outside of the garage.
It is recommended that a new bat- tery be placed in the hand-held
transmitter of the device being pro-
grammed to HomeLink
®for quicker
training and accurate transmission
of the radio-frequency signal.
Some vehicles may require the ignition switch to be placed in the
ACC (or "Accessories") position for
programming and/or operation of
HomeLink
®.
In the event that there are still pro- gramming difficulties or questions
after following the programming
steps listed below, contact
HomeLink
®at: www.homelink.com
or by calling 1-800-355-3515.
Programming
To train most devices, follow these
instructions:
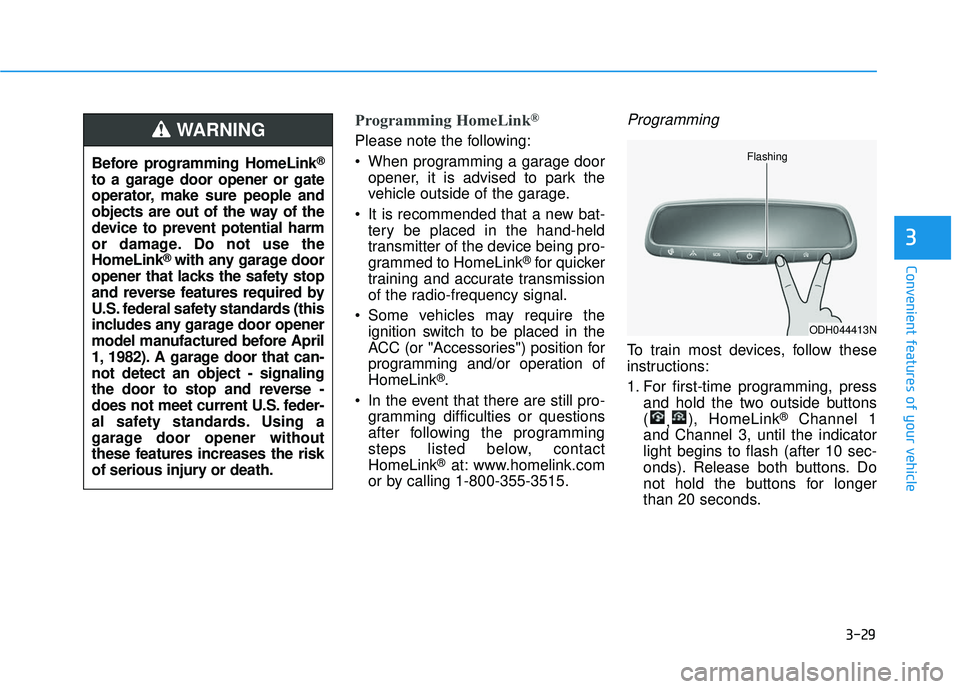
1. For first-time programming, press and hold the two outside buttons
( ,), HomeLink
®Channel 1
and Channel 3, until the indicator
light begins to flash (after 10 sec-
onds). Release both buttons. Do
not hold the buttons for longer
than 20 seconds.
ODH044413N
Flashing
Before programming HomeLink®
to a garage door opener or gate
operator, make sure people and
objects are out of the way of the
device to prevent potential harm
or damage. Do not use the
HomeLink
®with any garage door
opener that lacks the safety stop
and reverse features required by
U.S. federal safety standards (this
includes any garage door opener
model manufactured before April
1, 1982). A garage door that can-
not detect an object - signaling
the door to stop and reverse -
does not meet current U.S. feder-
al safety standards. Using a
garage door opener without
these features increases the risk
of serious injury or death.
WARNING
Page 130 of 586
3-36
Convenient features of your vehicle
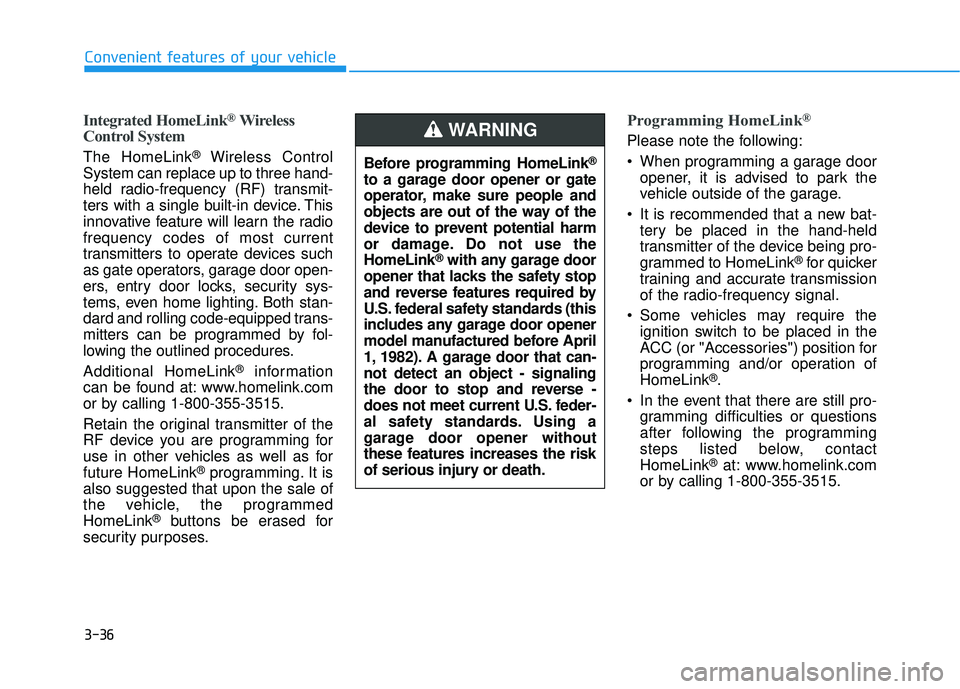
Integrated HomeLink®Wireless
Control System
The HomeLink®Wireless Control
System can replace up to three hand-
held radio-frequency (RF) transmit-
ters with a single built-in device. This
innovative feature will learn the radio
frequency codes of most current
transmitters to operate devices such
as gate operators, garage door open-
ers, entry door locks, security sys-
tems, even home lighting. Both stan-
dard and rolling code-equipped trans-
mitters can be programmed by fol-
lowing the outlined procedures.
Additional HomeLink
®information
can be found at: www.homelink.com
or by calling 1-800-355-3515.
Retain the original transmitter of the
RF device you are programming for
use in other vehicles as well as for
future HomeLink
®programming. It is
also suggested that upon the sale of
the vehicle, the programmed
HomeLink
®buttons be erased for
security purposes.
Programming HomeLink®
Please note the following:
When programming a garage door opener, it is advised to park the
vehicle outside of the garage.
It is recommended that a new bat- tery be placed in the hand-held
transmitter of the device being pro-
grammed to HomeLink
®for quicker
training and accurate transmission
of the radio-frequency signal.
Some vehicles may require the ignition switch to be placed in the
ACC (or "Accessories") position for
programming and/or operation of
HomeLink
®.
In the event that there are still pro- gramming difficulties or questions
after following the programming
steps listed below, contact
HomeLink
®at: www.homelink.com
or by calling 1-800-355-3515.
Before programming HomeLink
®
to a garage door opener or gate
operator, make sure people and
objects are out of the way of the
device to prevent potential harm
or damage. Do not use the
HomeLink
®with any garage door
opener that lacks the safety stop
and reverse features required by
U.S. federal safety standards (this
includes any garage door opener
model manufactured before April
1, 1982). A garage door that can-
not detect an object - signaling
the door to stop and reverse -
does not meet current U.S. feder-
al safety standards. Using a
garage door opener without
these features increases the risk
of serious injury or death.
WARNING
Page 152 of 586
3-58
Convenient features of your vehicle
Information
• The Smart Trunk function will notwork if any of the following occurs:
- The smart key is close to a radiotransmitter such as a radio station
or an airport which can interfere
with normal operation of the
transmitter.
- The smart key is near a mobile two way radio system or a cellular
phone.
- Another vehicle ’s smart key is being
operated close to your vehicle.
• The detecting range may decrease or increase when :
- One side of the tire is raised toreplace a tire or to inspect the vehi-
cle.
- The vehicle is parked on a slope or unpaved road, etc.
Fuel Filler Door
Opening the fuel filler door
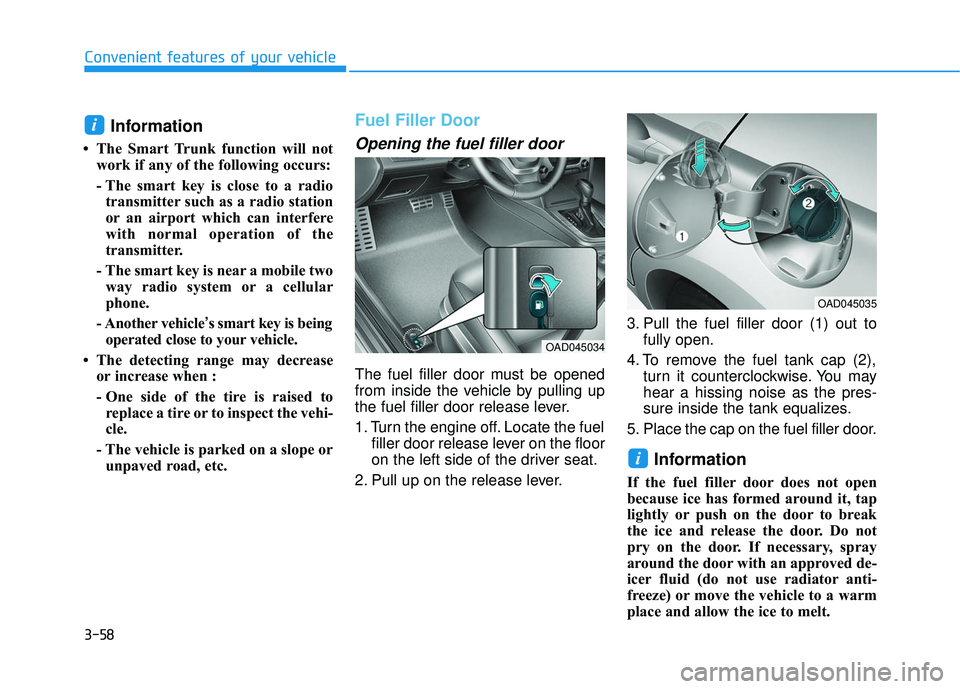
The fuel filler door must be opened
from inside the vehicle by pulling up
the fuel filler door release lever.
1. Turn the engine off. Locate the fuel filler door release lever on the floor
on the left side of the driver seat.
2. Pull up on the release lever. 3. Pull the fuel filler door (1) out to
fully open.
4. To remove the fuel tank cap (2), turn it counterclockwise. You may
hear a hissing noise as the pres-
sure inside the tank equalizes.
5. Place the cap on the fuel filler door.
Information
If the fuel filler door does not open
because ice has formed around it, tap
lightly or push on the door to break
the ice and release the door. Do not
pry on the door. If necessary, spray
around the door with an approved de-
icer fluid (do not use radiator anti-
freeze) or move the vehicle to a warm
place and allow the ice to melt.
i
i
OAD045035
OAD045034