mirror HYUNDAI ELANTRA SEL 2021 User Guide
[x] Cancel search | Manufacturer: HYUNDAI, Model Year: 2021, Model line: ELANTRA SEL, Model: HYUNDAI ELANTRA SEL 2021Pages: 570, PDF Size: 52.21 MB
Page 182 of 570
Convenient Features
5-46
Information
This device complies with Part 15 of the
FCC Rules.
Operation is subject to the following three
conditions:
1.
This device may not cause harmful
interfer
ence, and
2.
This device must accept any
interfer
ence received, including
interference that may cause undesired
operation.
3.
The transceiver has been tested
and complies with FCC and
Industry Canada rules. Changes or
modifications not expressly approved
by the party responsible for compliance
could void the user’s authority to
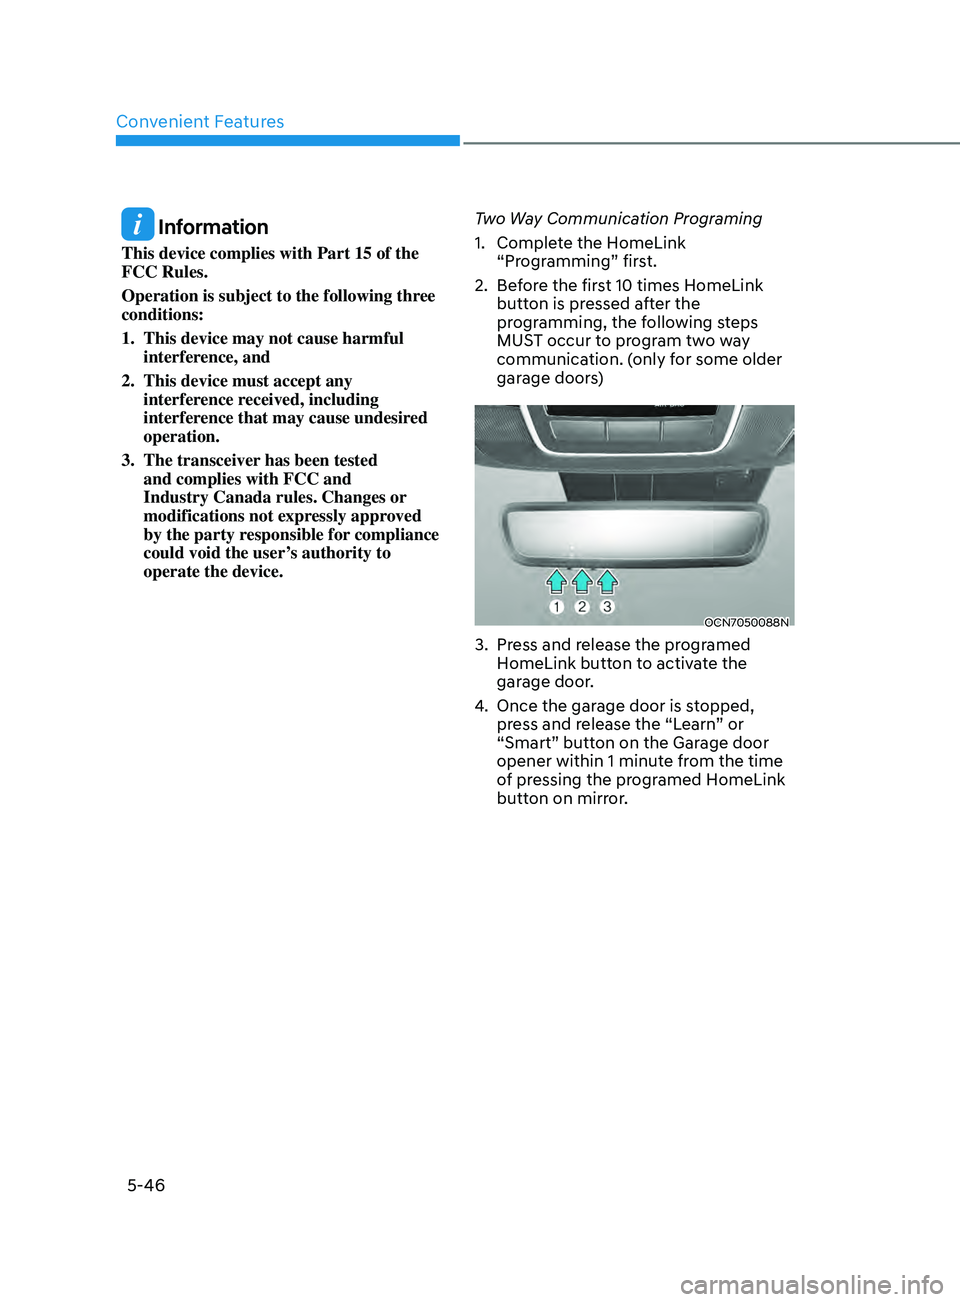
operate the device. Two Way Communication Programing
1. Complet
e the HomeLink
“Programming” first.
2.
Bef
ore the first 10 times HomeLink
button is pressed after the
programming, the following steps
MUST occur to program two way
communication. (only for some older
garage doors)
OCN7050088N
3. Press and release the programed
H omeLink button to activate the
garage door.
4.
Once the garage door is s
topped,
press and release the “Learn” or
“Smart” button on the Garage door
opener within 1 minute from the time
of pressing the programed HomeLink
button on mirror.
Page 184 of 570
Convenient Features
5-48
OCN7050089N
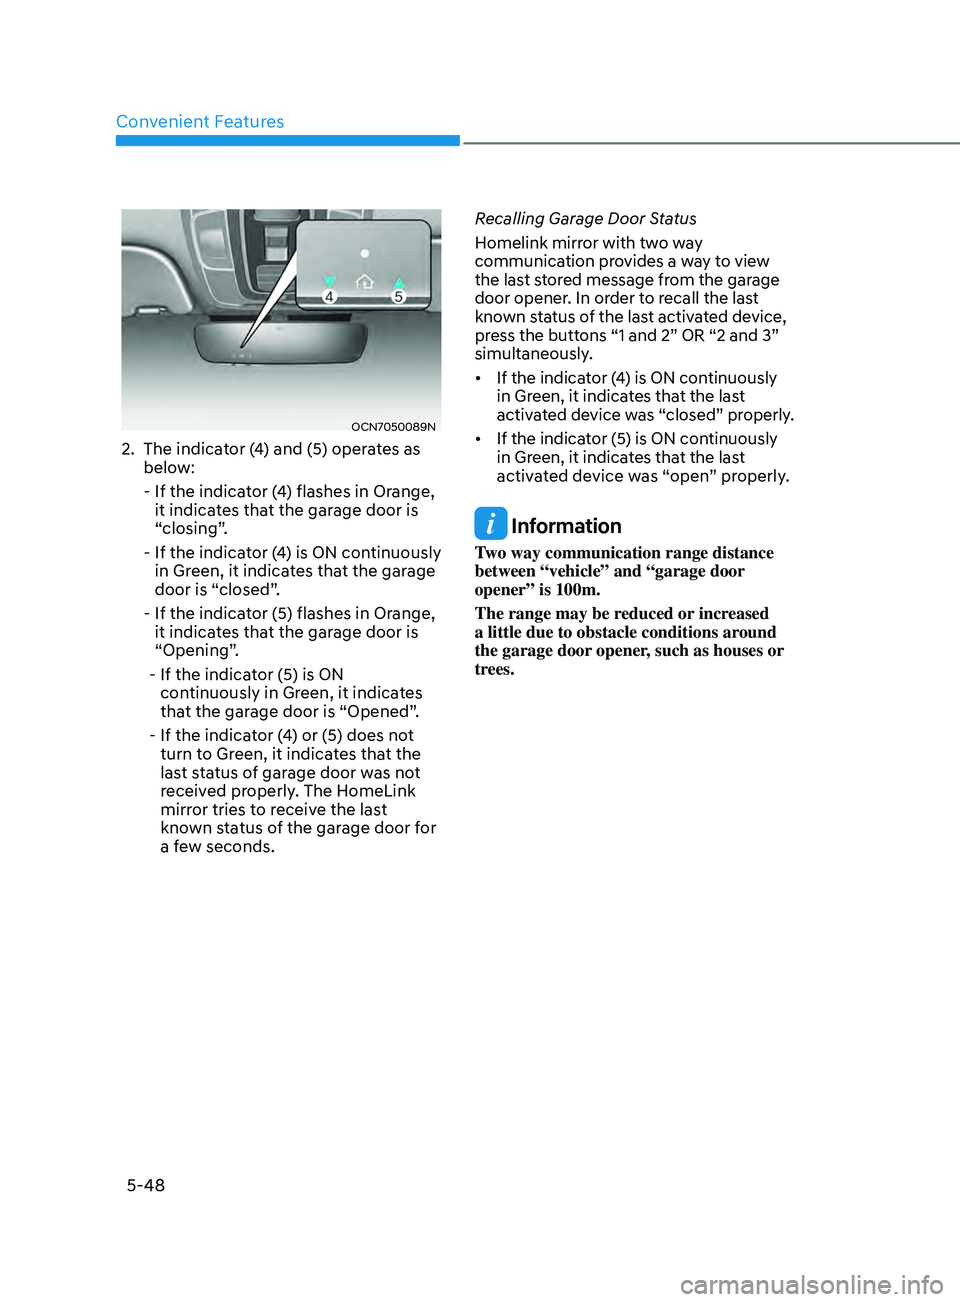
2. The indicator (4) and (5) operates as
below:
- If the indicat
or (4) flashes in Orange,
it indicates that the garage door is
“closing”.
- If the indicat
or (4) is ON continuously
in Green, it indicates that the garage
door is “closed”.
- If the indicat
or (5) flashes in Orange,
it indicates that the garage door is
“Opening”.
- If the indicat
or (5) is ON
continuously in Green, it indicates
that the garage door is “Opened”.
- If the indicat
or (4) or (5) does not
turn to Green, it indicates that the
last status of garage door was not
received properly. The HomeLink
mirror tries to receive the last
known status of the garage door for
a few seconds. Recalling Garage Door Status
Homelink mirror with two way
communication provides a way to view
the last stored message from the garage
door opener. In order to recall the last
known status of the last activated device,
press the buttons “1 and 2” OR “2 and 3”
simultaneously.
• If
the indica
tor
(
4)
is ON con
tinuously
in Green, it indica
tes that the last
activated device was “closed” properly.
• If the indica tor (5) is ON con tinuously in Green, it indica
tes that the last
activated device was “open” properly.
Information
Two way communication range distance
between “vehicle” and “garage door
opener” is 100m.
The range may be reduced or increased
a little due to obstacle conditions around
the garage door opener, such as houses or
trees.
Page 185 of 570
05
5-49
Side View Mirrors
OCN7050019
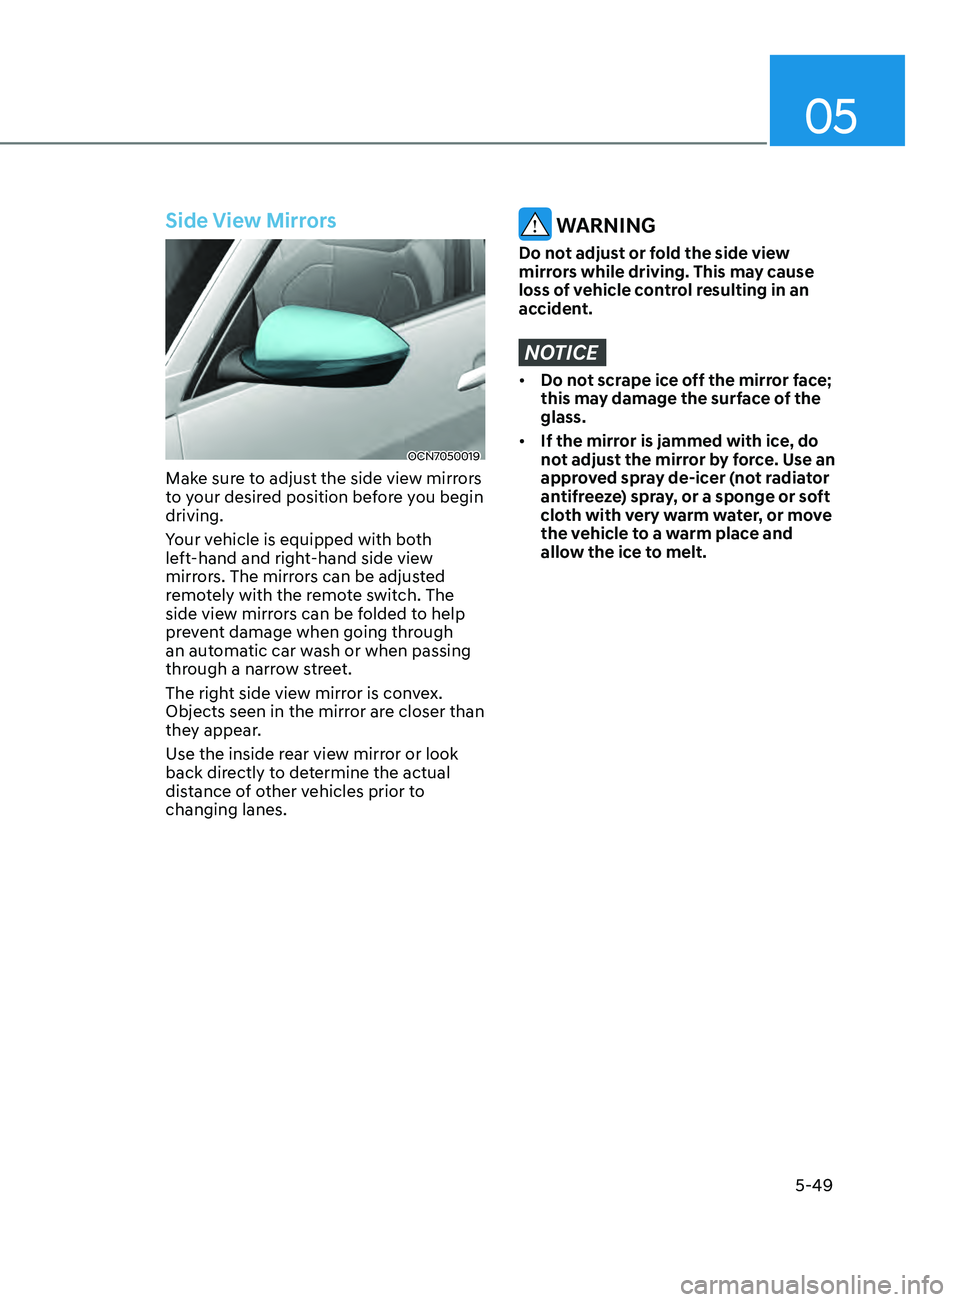
Make sure to adjust the side view mirrors
to your desired position before you begin
driving.
Your vehicle is equipped with both
left-hand and right-hand side view
mirrors. The mirrors can be adjusted
remotely with the remote switch. The
side view mirrors can be folded to help
prevent damage when going through
an automatic car wash or when passing
through a narrow street.
The right side view mirror is convex.
Objects seen in the mirror are closer than
they appear.
Use the inside rear view mirror or look
back directly to determine the actual
distance of other vehicles prior to
changing lanes.
WARNING
Do not adjust or fold the side view
mirrors while driving. This may cause
loss of vehicle control resulting in an
accident.
NOTICE
• Do not scrape ice off the mirror face;
this may damage the surface of the
glass.
• If the mirror is jammed with ice, do
not adjust the mirror by force. Use an
approved spray de-icer (not radiator
antifreeze) spray, or a sponge or soft
cloth with very warm water, or move
the vehicle to a warm place and
allow the ice to melt.
Page 186 of 570
Convenient Features
5-50
Side View Mirror Adjustment
OCN7050020
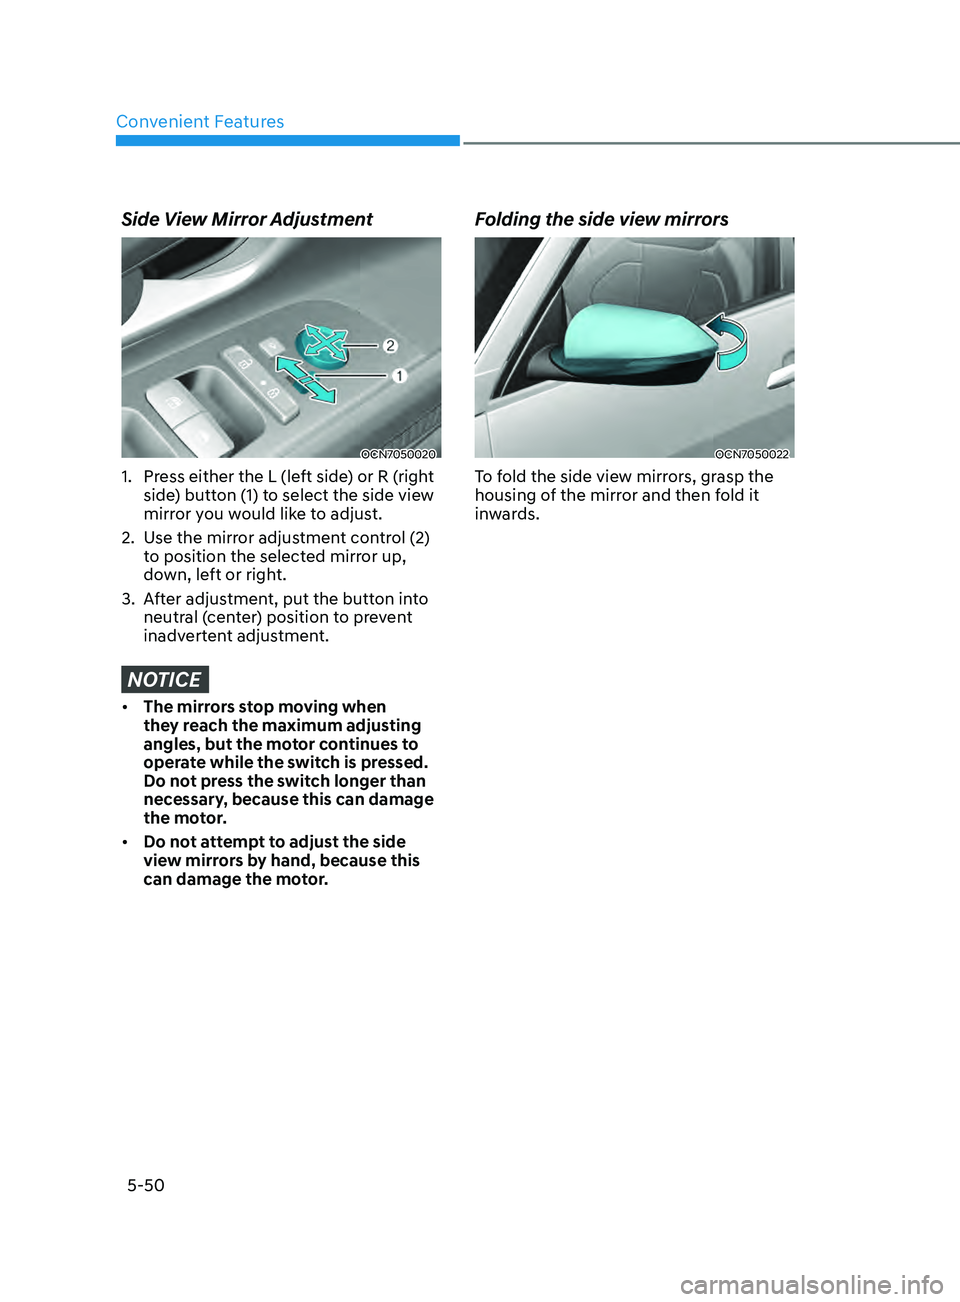
1. Press either the L (left side) or R (right
side) button (1) to select the side view
mirror you would like to adjust.
2.
Use the mirr
or adjustment control (2)
to position the selected mirror up,
down, left or right.
3.
Aft
er adjustment, put the button into
neutral (center) position to prevent
inadvertent adjustment.
NOTICE
• The mirrors stop moving when
they reach the maximum adjusting
angles, but the motor continues to
operate while the switch is pressed.
Do not press the switch longer than
necessary, because this can damage
the motor.
• Do not attempt to adjust the side
view mirrors by hand, because this
can damage the motor.
Folding the side view mirrors
OCN7050022
To fold the side view mirrors, grasp the
housing of the mirror and then fold it
inwards.
Page 210 of 570
Convenient Features5 -74
Limitations of the function
High Beam Assist may not work properly
in the following situations:
• Light from a vehicle is not detected
because of lamp damage, or because
it is hidden from sight, etc.
• Headlamp of a vehicle is covered with
dust, snow or water.
• A vehicle’s headlamps are off but the
fog lamps are on and etc.
• There is a lamp that has a similar
shape as a vehicle’s lamp.
• Headlamps have been damaged or
not repaired properly.
• Headlamps are not aimed properly.
• Driving on a narrow curved road,
rough road, uphill or downhill.
• Vehicle in front is partially visible on a
crossroad or curved road.
• There is a traffic light, reflecting sign,
flashing sign or mirror ahead.
• There is a temporary reflector or flash
ahead (construction area).
• The road conditions are bad such as
being wet, iced or covered with snow.
• A vehicle suddenly appears from a
curve.
• The vehicle is tilted from a flat tire or
is being towed.
• Light from a vehicle is not detected
because of exhaust fume, smoke, fog,
snow, etc.
For more details on the limitations
of the front view camera, refer to
“Forward Collision-Avoidance Assist
(FCA)” section in chapter 7. WARNING
• At times, High Beam Assist may not
work properly. It is the responsibility
of the driver for safe driving
practices and always check the road
conditions for your safety.
• When High Beam Assist does
not operate normally, change
the headlamp position manually
between high beam and low beam.
Page 213 of 570
05
5-77
Luggage compartment lamp
OCN7050059
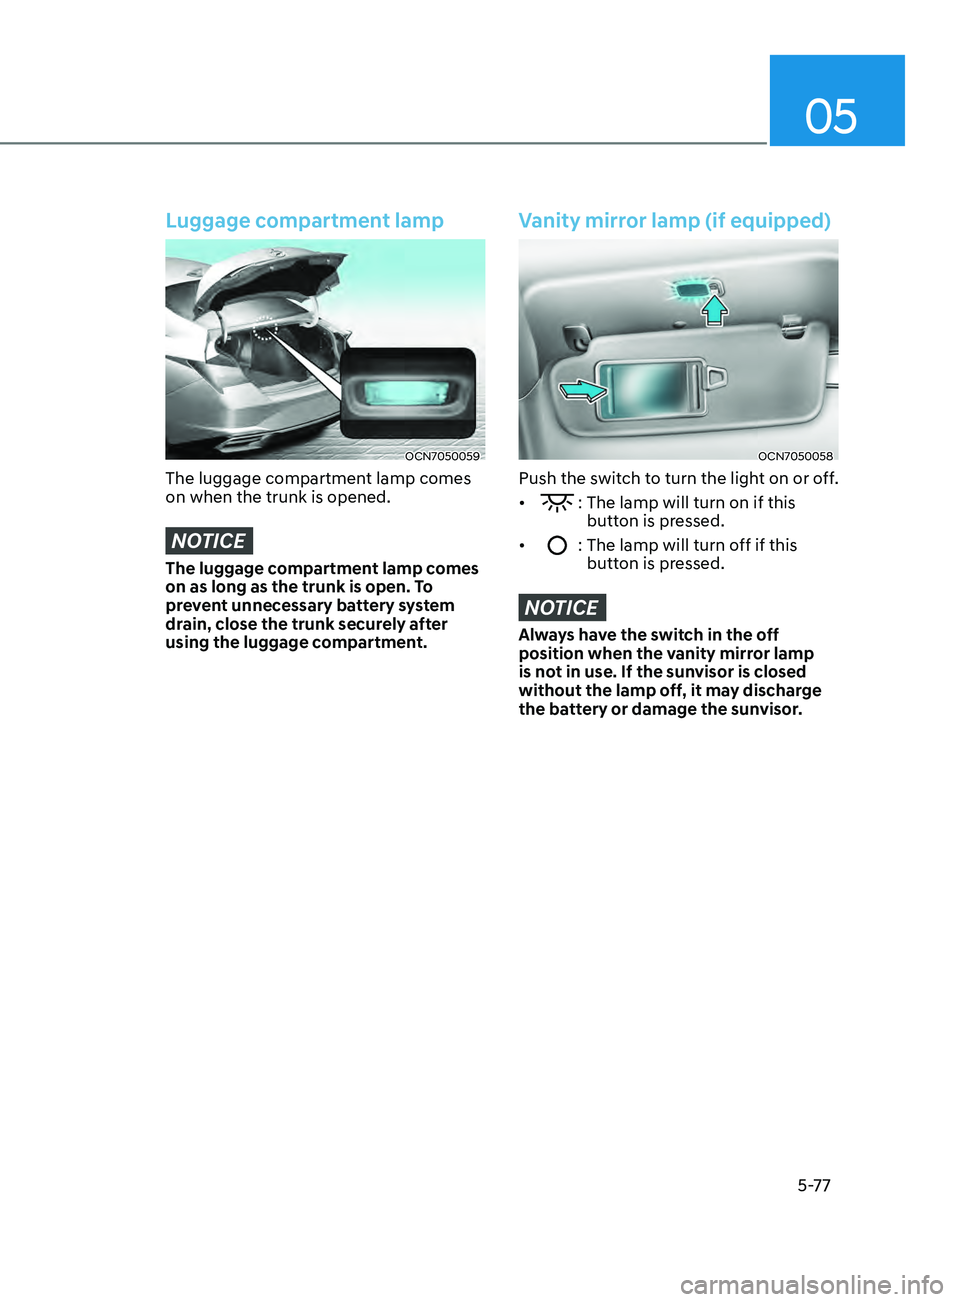
The luggage compartment lamp comes
on when the trunk is opened.
NOTICE
The luggage compartment lamp comes
on as long as the trunk is open. To
prevent unnecessary battery system
drain, close the trunk securely after
using the luggage compartment.
Vanity mirror lamp (if equipped)
OCN7050058
Push the switch to turn the light on or off.
•
: The lamp will turn on if this
button is pressed.
•
: The lamp will turn off if this
butt on is pressed.
NOTICE
Always have the switch in the off
position when the vanity mirror lamp
is not in use. If the sunvisor is closed
without the lamp off, it may discharge
the battery or damage the sunvisor.
Page 240 of 570
Convenient Features
5-104
WARNING
Windshield heating
Do not use the
or position
during cooling operation in extremely
humid weather. The difference between
the temperature of the outside air and
that of the windshield could cause the
outer surface of the windshield to fog
up, causing loss of visibility. In this case,
set the mode selection knob or button
to the
position and fan speed control
knob or button to lower speed.
• For maximum defrost performance,
set the temperature control knob
to the highest temperature setting
(rotated all the way to the right) and
the fan speed control to the highest
setting.
• If warm air to the floor is desired while
defrosting or defogging, set the mode
to the floor-defrost position.
• Before driving, clear all snow and ice
from the windshield, rear window,
side view mirrors, and all side
windows.
• Clear all snow and ice from the
hood and air inlet in the cowl grill
to improve heater and defroster
efficiency and to reduce the
probability of fogging up inside of the
windshield.
Manual climate control system
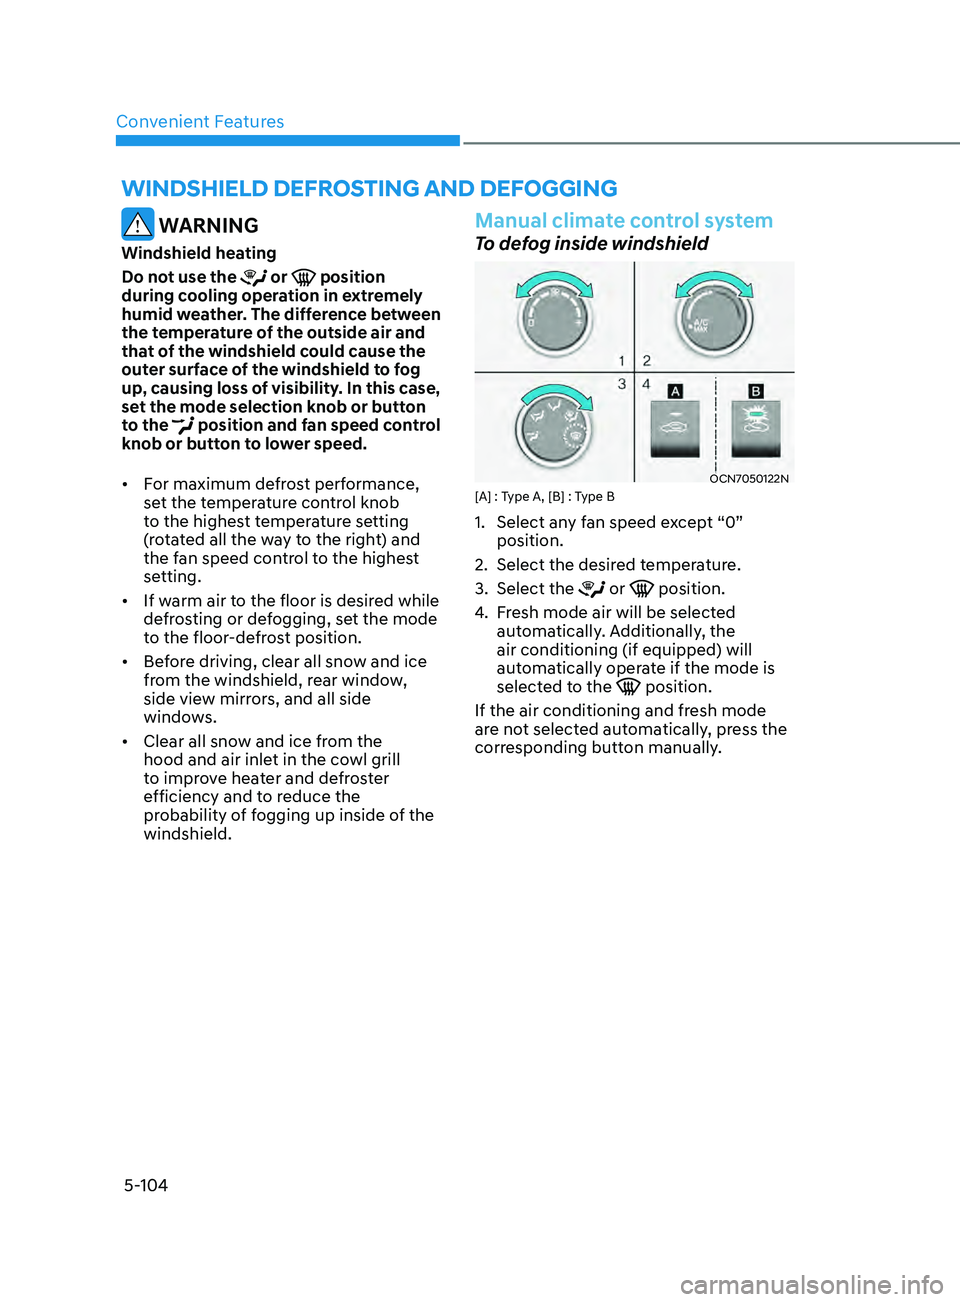
To defog inside windshield
OCN7050122N[A] : Type A, [B] : Type B
1. Select any f an speed except “0”
position.
2.
Select the desired t
emperature.
3.
Select the or position.
4.
Fr
esh mode air will be selected
automatically. Additionally, the
air conditioning (if equipped) will
automatically operate if the mode is
selected to the
position.
If the air conditioning and fresh mode
are not selected automatically, press the
corresponding button manually.
WinDshielD DeFr osting AnD DeFogging
Page 244 of 570
Convenient Features
5-108
DefrosterNOTICE
To prevent damage to the conductors
bonded to the inside surface of the rear
window, never use sharp instruments or
window cleaners containing abrasives
to clean the window.
Information
If you want to defrost and defog the
front windshield, refer to “Windshield
Defrosting and Defogging” in this chapter.
Rear window defroster
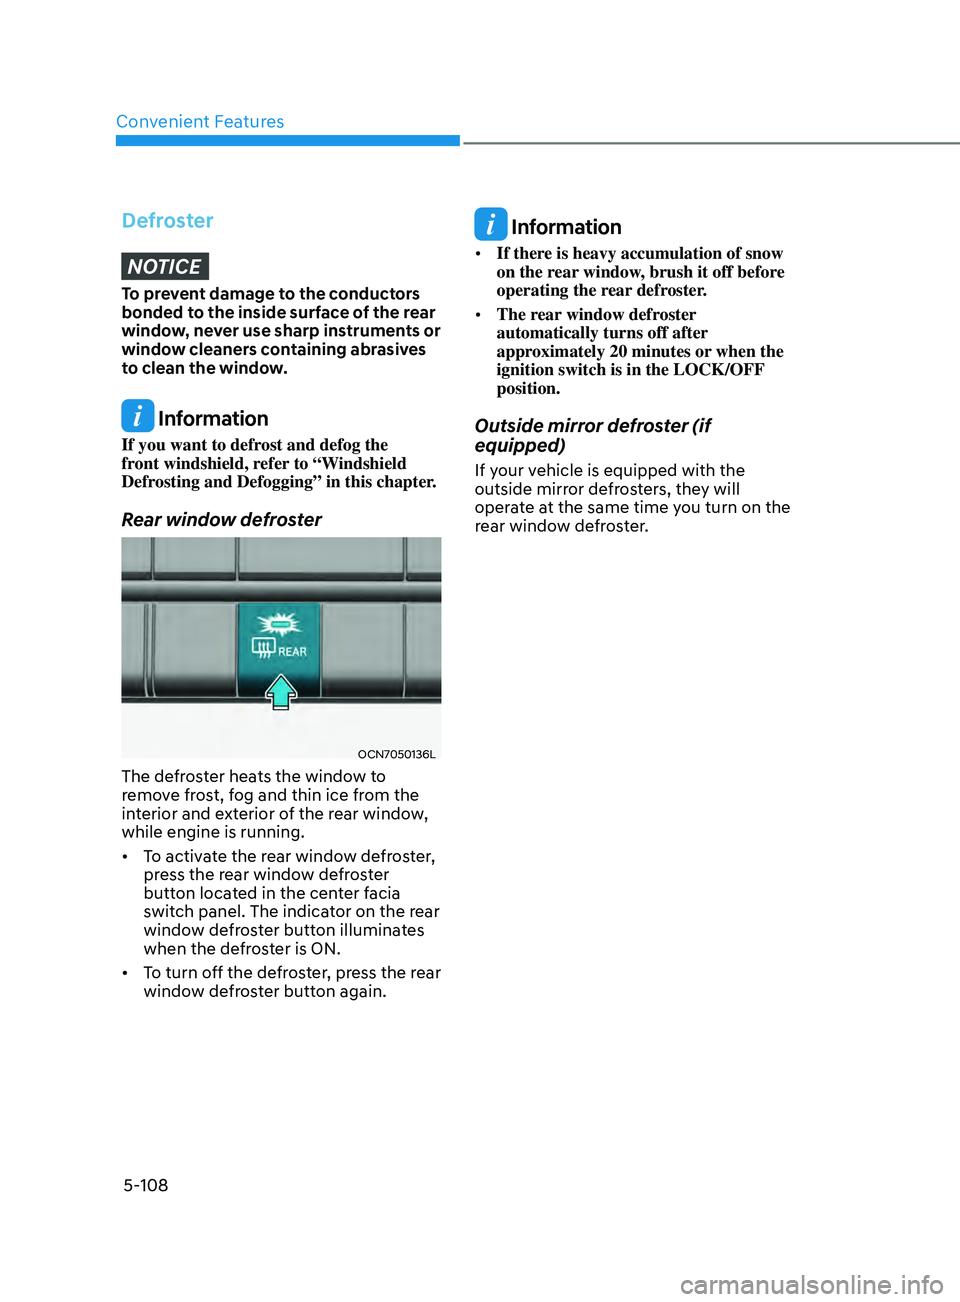
OCN7050136L
The defroster heats the window to
remove frost, fog and thin ice from the
interior and exterior of the rear window,
while engine is running.
• To activate the rear window defroster,
press the rear window defroster
button located in the center facia
switch panel. The indicator on the rear
window defroster button illuminates
when the defroster is ON.
• To turn off the defroster, press the rear
window defroster button again.
Information
• If there is heavy accumulation of snow
on the rear window, brush it off before
operating the rear defroster.
• The rear window defroster
automatically turns off after
approximately 20 minutes or when the
ignition switch is in the LOCK/OFF
position.
Outside mirror defroster (if
equipped)
If your vehicle is equipped with the
outside mirror defrosters, they will
operate at the same time you turn on the
rear window defroster.
Page 248 of 570
Convenient Features
5-112
Sunvisor
OIG046437
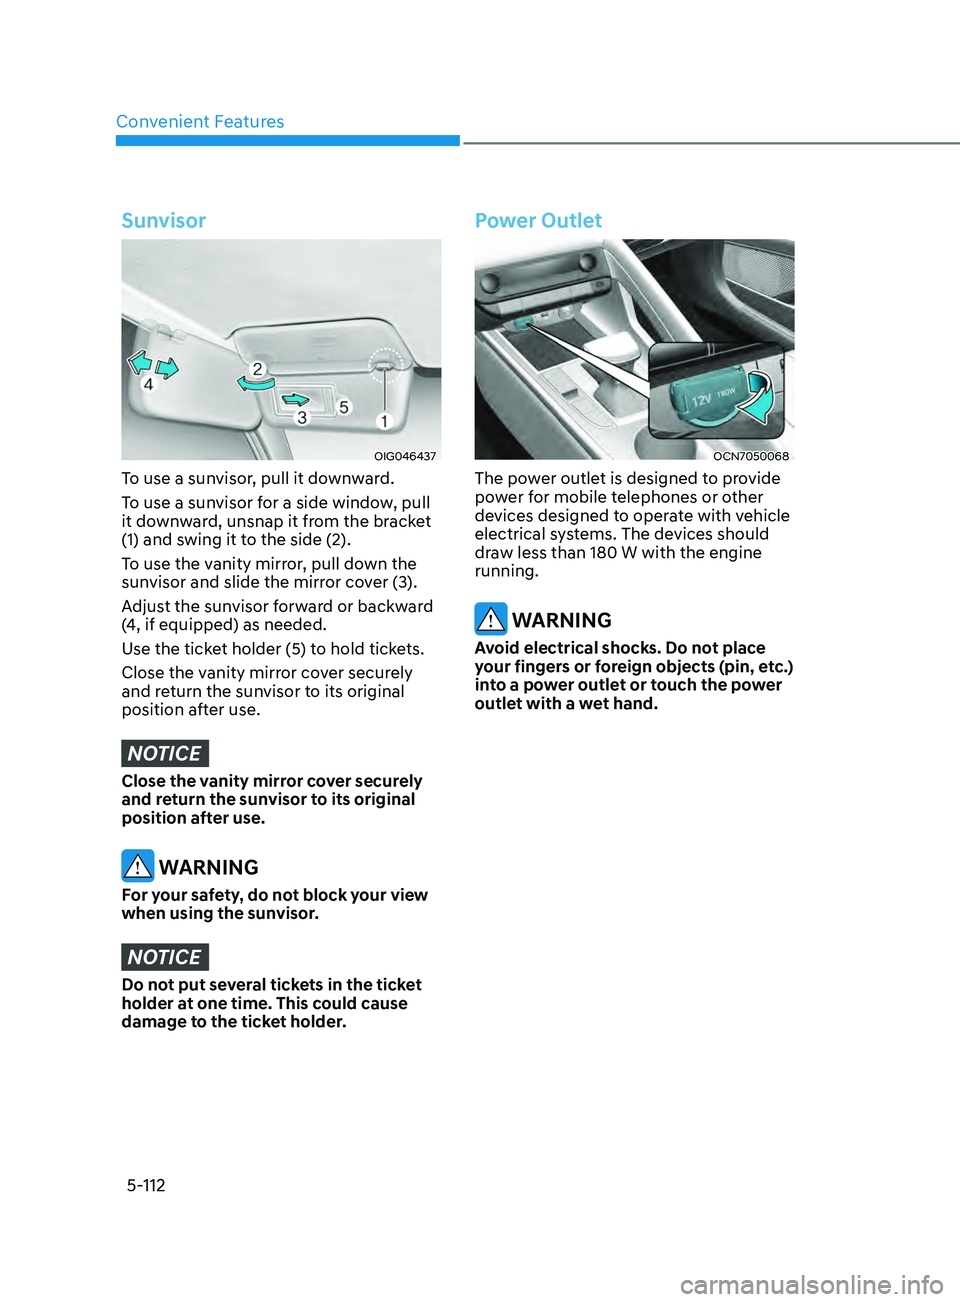
To use a sunvisor, pull it downward.
To use a sunvisor for a side window, pull
it downward, unsnap it from the bracket
(1) and swing it to the side (2).
To use the vanity mirror, pull down the
sunvisor and slide the mirror cover (3).
Adjust the sunvisor forward or backward
(4, if equipped) as needed.
Use the ticket holder (5) to hold tickets.
Close the vanity mirror cover securely
and return the sunvisor to its original
position after use.
NOTICE
Close the vanity mirror cover securely
and return the sunvisor to its original
position after use.
WARNING
For your safety, do not block your view
when using the sunvisor.
NOTICE
Do not put several tickets in the ticket
holder at one time. This could cause
damage to the ticket holder.
Power Outlet
OCN7050068
The power outlet is designed to provide
power for mobile telephones or other
devices designed to operate with vehicle
electrical systems. The devices should
draw less than 180 W with the engine
running.
WARNING
Avoid electrical shocks. Do not place
your fingers or foreign objects (pin, etc.)
into a power outlet or touch the power
outlet with a wet hand.
Page 263 of 570
6-4
Before Entering the Vehicle
• Be sure all windows, outside mirror(s),
and outside lights are clean and
unobstructed.
• Remove frost, snow, or ice.
• Visually check the tires for uneven
wear and damage.
• Check under the vehicle for any sign
of leaks.
• Be sure there are no obstacles behind
you if you intend to back up.
Before Starting
• Make sure the hood, the trunk, and
the doors are securely closed and
locked.
• Adjust the position of the seat and
steering wheel.
• Adjust the inside and side view
mirrors.
• Verify all the lights work.
• Fasten your seatbelt. Check that
all passengers have fastened their
seatbelts.
• Check the gauges and indicators
in the instrument panel and the
messages on the instrument display
when the ignition switch is in the ON
position.
• Check that any items you are carrying
are stored properly or fastened down
securely.
WARNING
To reduce the risk of SERIOUS INJURY or
DEATH, take the following precautions:
• ALWAYS wear your seat belt. All
passengers must be properly belted
whenever the vehicle is moving.
For more information, refer to "Seat
Belts" in chapter 3.
• Always drive defensively. Assume
other drivers or pedestrians may be
careless and make mistakes.
• Stay focused on the task of driving.
Driver distraction can cause
accidents.
• Leave plenty of space between you
and the vehicle in front of you.
WARNING
NEVER drink alcohol or take drugs and
drive.
Drinking alcohol or taking drugs and
driving is dangerous and may result in
an accident and SERIOUS INJURY or
DEATH.
Drunk driving is the number one
contributor to the highway death
toll each year. Even a small amount
of alcohol will affect your reflexes,
perceptions and judgment. Just
one drink can reduce your ability to
respond to changing conditions and
emergencies and your reaction time
gets worse with each additional drink.
Driving while under the influence
of drugs is as dangerous or more
dangerous than driving under the
influence of alcohol.
You are much more likely to have a
serious accident if you drink or take
drugs and drive. If you are drinking or
taking drugs, don't drive. Do not ride
with a driver who has been drinking
or taking drugs. Choose a designated
driver or call a taxi.
Before Driving
While Driving