HYUNDAI ELANTRA SPORT 2018 Owners Manual
Manufacturer: HYUNDAI, Model Year: 2018, Model line: ELANTRA SPORT, Model: HYUNDAI ELANTRA SPORT 2018Pages: 534, PDF Size: 51.51 MB
Page 491 of 534
7-66
Maintenance
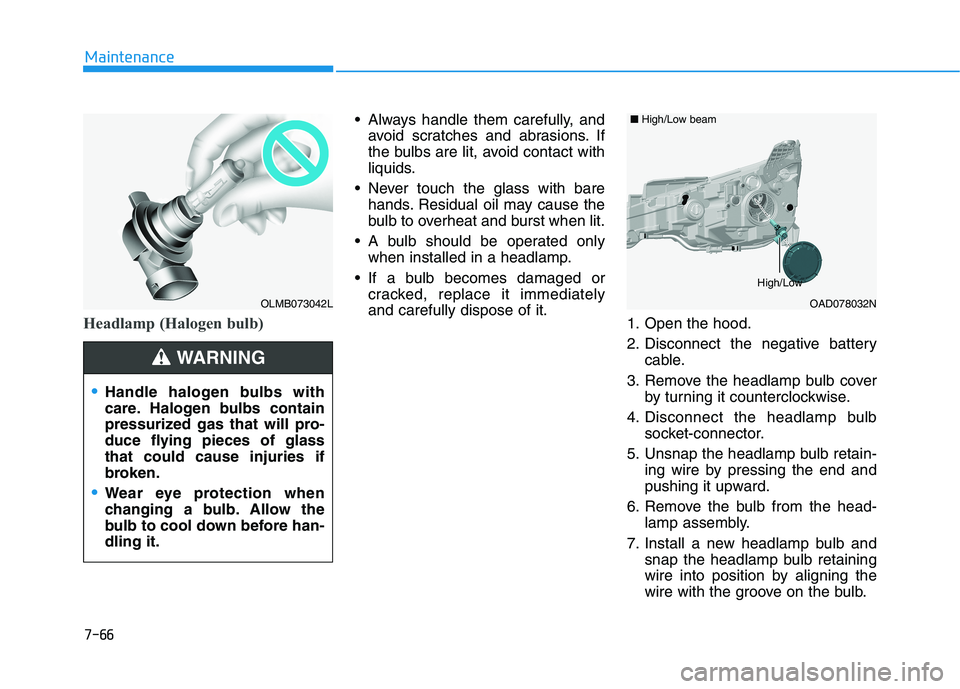
Headlamp (Halogen bulb)
Always handle them carefully, andavoid scratches and abrasions. If
the bulbs are lit, avoid contact with
liquids.
Never touch the glass with bare hands. Residual oil may cause the
bulb to overheat and burst when lit.
A bulb should be operated only when installed in a headlamp.
If a bulb becomes damaged or cracked, replace it immediatelyand carefully dispose of it. 1. Open the hood.
2. Disconnect the negative battery
cable.
3. Remove the headlamp bulb cover by turning it counterclockwise.
4. Disconnect the headlamp bulb socket-connector.
5. Unsnap the headlamp bulb retain- ing wire by pressing the end and
pushing it upward.
6. Remove the bulb from the head- lamp assembly.
7. Install a new headlamp bulb and snap the headlamp bulb retaining
wire into position by aligning the
wire with the groove on the bulb.
OLMB073042L
Handle halogen bulbs with
care. Halogen bulbs contain
pressurized gas that will pro-
duce flying pieces of glassthat could cause injuries if
broken.
Wear eye protection when
changing a bulb. Allow the
bulb to cool down before han-dling it.
WARNING
OAD078032N
■High/Low beam
High/Low
Page 492 of 534
7-67
7
Maintenance
8. Connect the headlamp bulb sock-et-connector.
9. Install the headlamp bulb cover by turning it clockwise.
Information
The headlamp aiming should be
adjusted after an accident or after the
headlamp assembly is reinstalled at an
authorized HYUNDAI dealer.
Parking lamp/Daytime running
lamp (LED type)
Your vehicle is equipped with LED
lamps. LED lamps do not have
replaceable bulbs. If the LED lamp
does not operate, have the vehicle
checked by an authorized HYUNDAI
dealer.
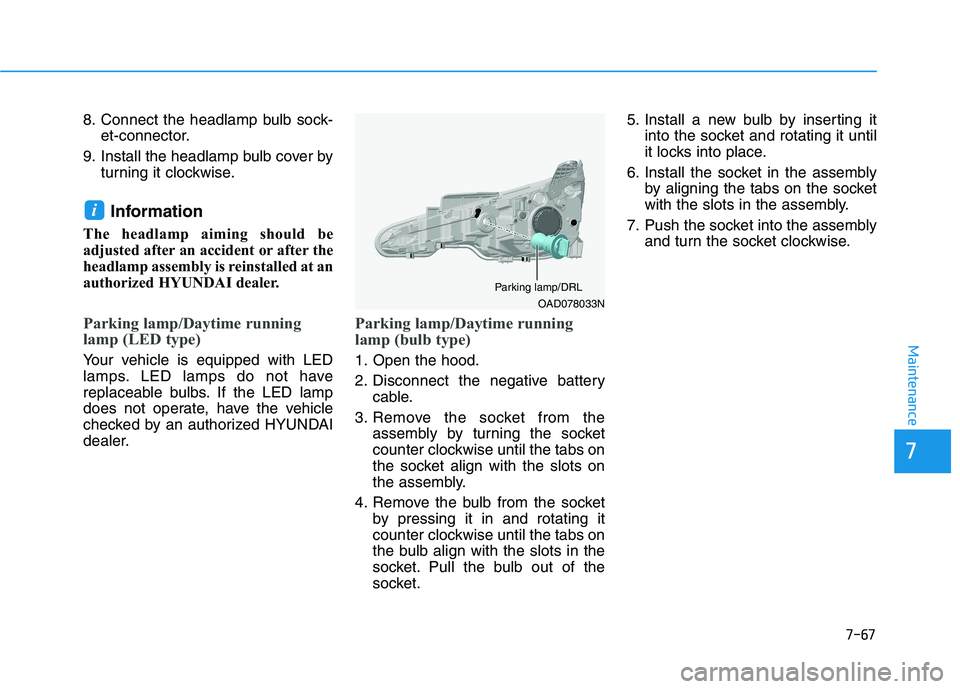
Parking lamp/Daytime running
lamp (bulb type)
1. Open the hood.
2. Disconnect the negative battery cable.
3. Remove the socket from the assembly by turning the socket
counter clockwise until the tabs on
the socket align with the slots on
the assembly.
4. Remove the bulb from the socket by pressing it in and rotating it
counter clockwise until the tabs on
the bulb align with the slots in the
socket. Pull the bulb out of the
socket. 5. Install a new bulb by inserting it
into the socket and rotating it until
it locks into place.
6. Install the socket in the assembly by aligning the tabs on the socket
with the slots in the assembly.
7. Push the socket into the assembly and turn the socket clockwise.
i
OAD078033N
Parking lamp/DRL
Page 493 of 534
7-68
Maintenance
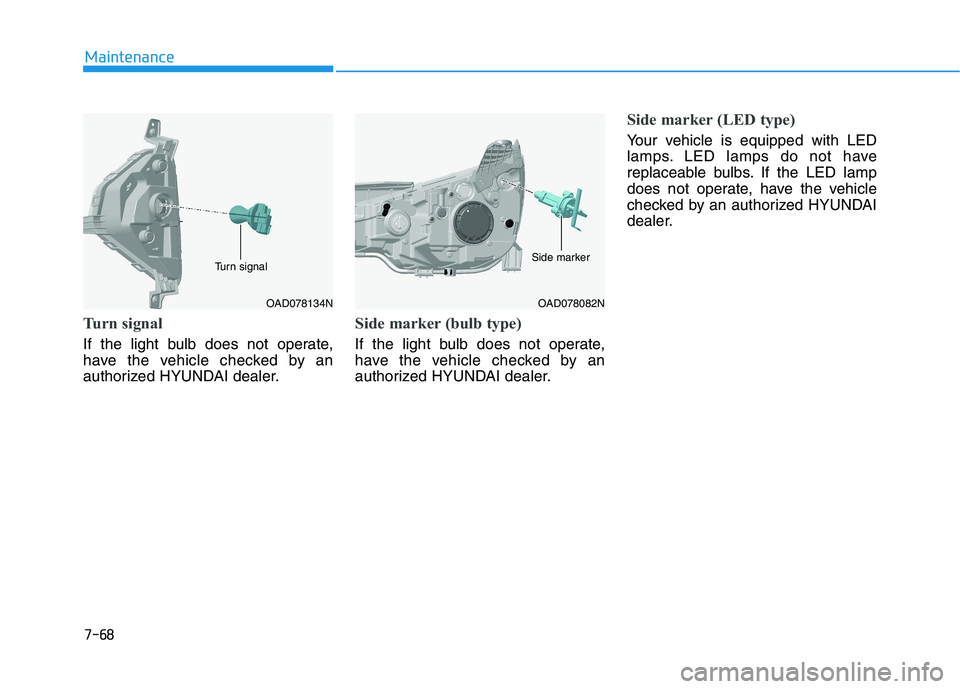
Turn signal
If the light bulb does not operate,
have the vehicle checked by an
authorized HYUNDAI dealer.
Side marker (bulb type)
If the light bulb does not operate,
have the vehicle checked by an
authorized HYUNDAI dealer.
Side marker (LED type)
Your vehicle is equipped with LED
lamps. LED lamps do not have
replaceable bulbs. If the LED lamp
does not operate, have the vehicle
checked by an authorized HYUNDAI
dealer.
OAD078134N
Turn signal
OAD078082N
Side marker
Page 494 of 534
7-69
7
Maintenance
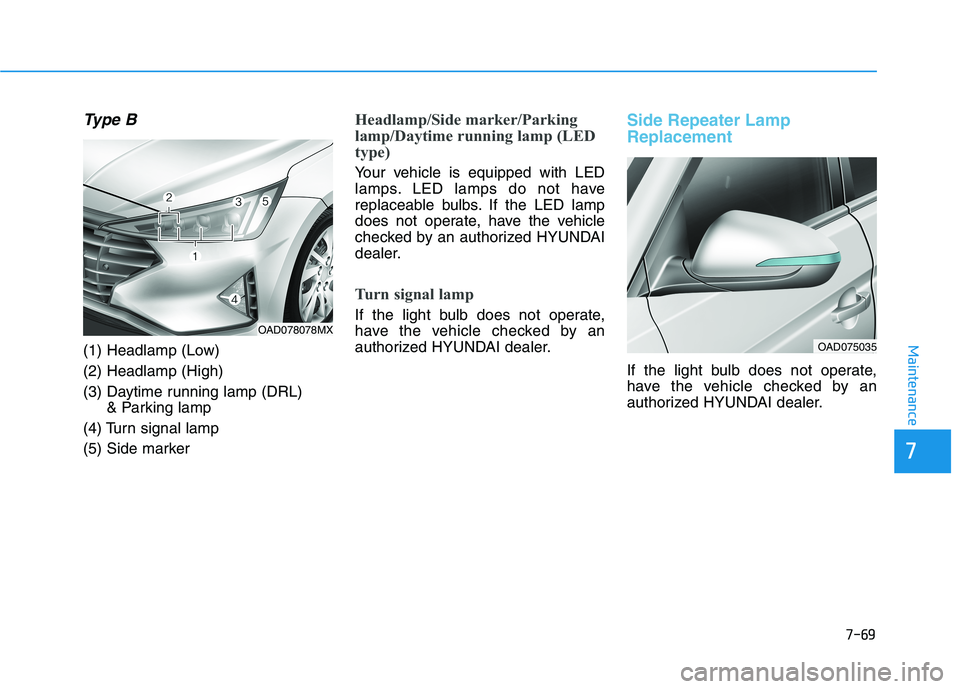
Type B
(1) Headlamp (Low) (2) Headlamp (High)
(3) Daytime running lamp (DRL) & Parking lamp
(4) Turn signal lamp
(5) Side marker
Headlamp/Side marker/Parking
lamp/Daytime running lamp (LED
type)
Your vehicle is equipped with LED
lamps. LED lamps do not have
replaceable bulbs. If the LED lamp
does not operate, have the vehicle
checked by an authorized HYUNDAI
dealer.
Turn signal lamp
If the light bulb does not operate,
have the vehicle checked by an
authorized HYUNDAI dealer.
Side Repeater Lamp Replacement
If the light bulb does not operate,
have the vehicle checked by an
authorized HYUNDAI dealer.
OAD078078MX
OAD075035
Page 495 of 534
7-70
Maintenance
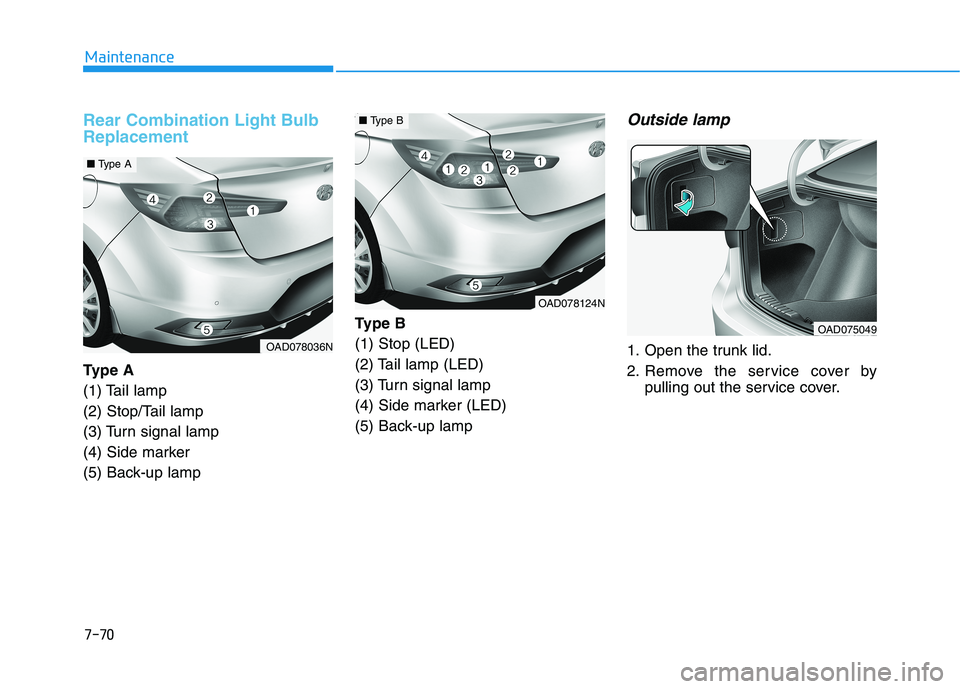
Rear Combination Light Bulb Replacement
Ty p e A
(1) Tail lamp
(2) Stop/Tail lamp
(3) Turn signal lamp
(4) Side marker
(5) Back-up lampType B(1) Stop (LED)
(2) Tail lamp (LED)
(3) Turn signal lamp
(4) Side marker (LED)
(5) Back-up lamp
Outside lamp
1. Open the trunk lid.
2. Remove the service cover by
pulling out the service cover.OAD078036N
■Type A
OAD078124N
■Type B
OAD075049
Page 496 of 534
7-71
7
Maintenance
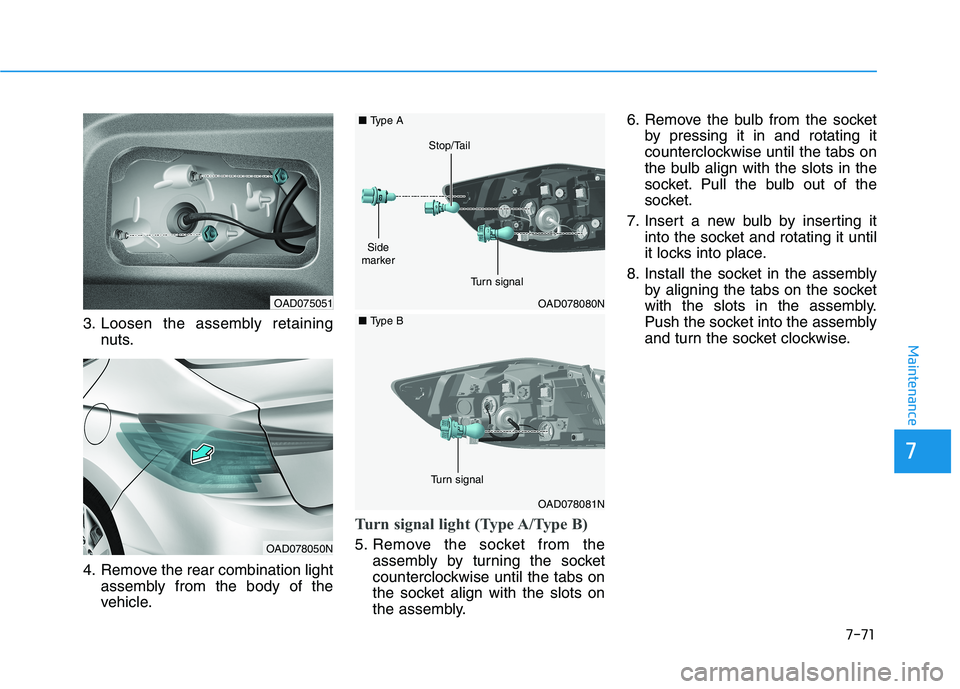
3. Loosen the assembly retainingnuts.
4. Remove the rear combination light assembly from the body of the
vehicle.
Turn signal light (Type A/Type B)
5. Remove the socket from theassembly by turning the socket
counterclockwise until the tabs on
the socket align with the slots on
the assembly. 6. Remove the bulb from the socket
by pressing it in and rotating it
counterclockwise until the tabs on
the bulb align with the slots in the
socket. Pull the bulb out of the
socket.
7. Insert a new bulb by inserting it into the socket and rotating it until
it locks into place.
8. Install the socket in the assembly by aligning the tabs on the socket
with the slots in the assembly.
Push the socket into the assembly
and turn the socket clockwise.
OAD075051
OAD078050N
OAD078080N
■Type A
OAD078081N
■Type B
Turn signal
Stop/Tail
Turn signal
Side
marker
Page 497 of 534
7-72
Maintenance
Stop/Tail light and Side marker
(Type A)
5. Remove the socket from theassembly by turning the socket
counterclockwise until the tabs on
the socket align with the slots on
the assembly.
6. Remove the bulb by pulling it out.
7. Inset a new bulb by insetring it into the socket.
8. Install the socket in the assembly by aligning the tabs on the socket
with the slots in the assembly.
Push the socket into the assembly
and turn the socket clockwise.
Stop/Tail light and Side marker
(Type B)
Your vehicle is equipped with LED
lamps. LED lamps do not have
replaceable bulbs. If the LED lamp
does not operate, have the vehicle
checked by an authorized HYUNDAI
dealer.
Inside lamp
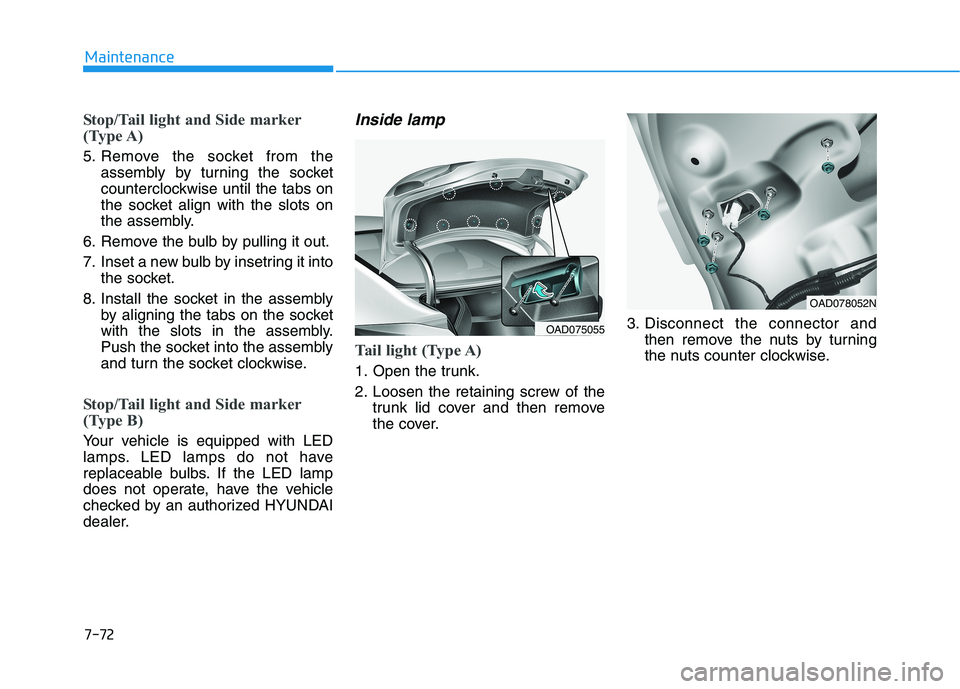
Tail light (Type A)
1. Open the trunk.
2. Loosen the retaining screw of thetrunk lid cover and then remove
the cover. 3. Disconnect the connector and
then remove the nuts by turning
the nuts counter clockwise.
OAD075055
OAD078052N
Page 498 of 534
7-73
7
Maintenance
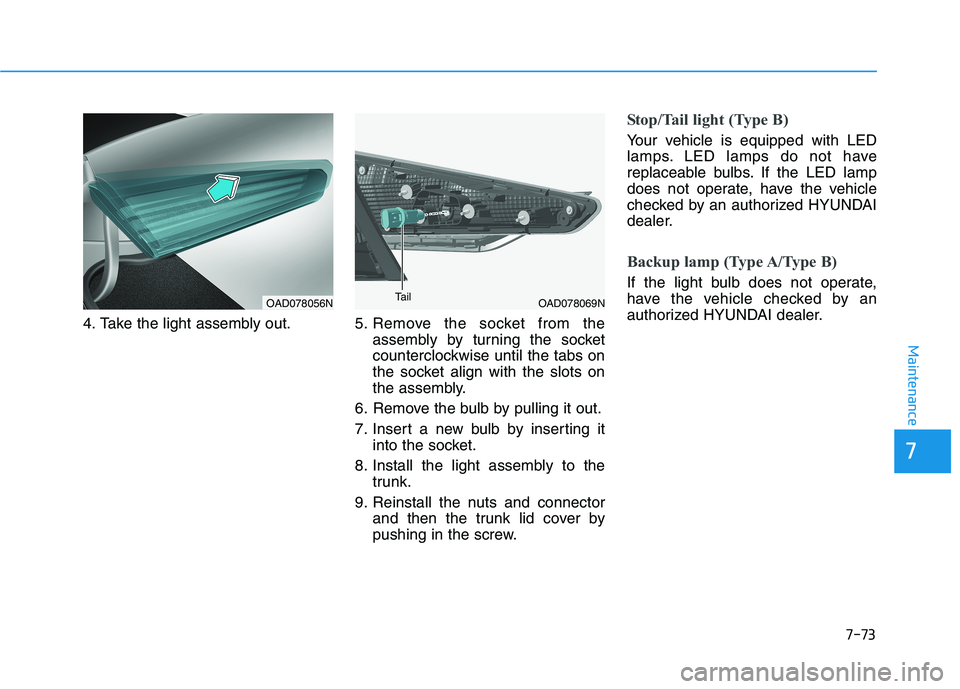
4. Take the light assembly out. 5.Remove the socket from the
assembly by turning the socket
counterclockwise until the tabs on
the socket align with the slots on
the assembly.
6. Remove the bulb by pulling it out.
7. Insert a new bulb by inserting it into the socket.
8. Install the light assembly to the trunk.
9. Reinstall the nuts and connector and then the trunk lid cover by
pushing in the screw.
Stop/Tail light (Type B)
Your vehicle is equipped with LED
lamps. LED lamps do not have
replaceable bulbs. If the LED lamp
does not operate, have the vehicle
checked by an authorized HYUNDAI
dealer.
Backup lamp (Type A/Type B)
If the light bulb does not operate,
have the vehicle checked by an
authorized HYUNDAI dealer.
OAD078056NOAD078069NTail
Page 499 of 534
7-74
Maintenance
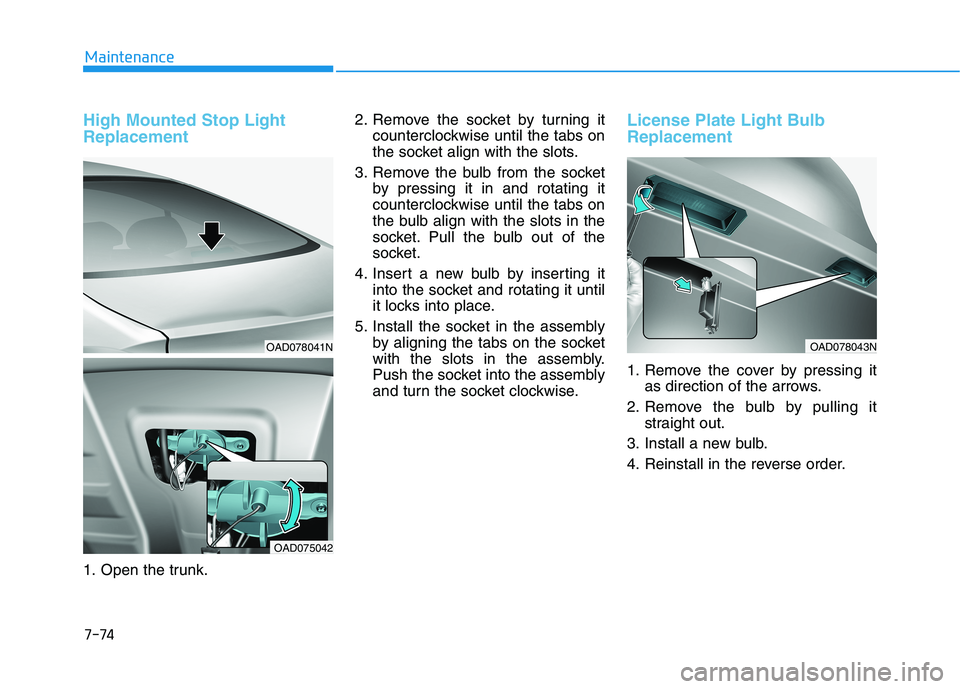
High Mounted Stop Light Replacement
1. Open the trunk.2. Remove the socket by turning it
counterclockwise until the tabs on
the socket align with the slots.
3. Remove the bulb from the socket by pressing it in and rotating it
counterclockwise until the tabs on
the bulb align with the slots in the
socket. Pull the bulb out of the
socket.
4. Insert a new bulb by inserting it into the socket and rotating it until
it locks into place.
5. Install the socket in the assembly by aligning the tabs on the socket
with the slots in the assembly.
Push the socket into the assembly
and turn the socket clockwise.
License Plate Light Bulb Replacement
1. Remove the cover by pressing itas direction of the arrows.
2. Remove the bulb by pulling it straight out.
3. Install a new bulb.
4. Reinstall in the reverse order.
OAD078043NOAD078041N
OAD075042
Page 500 of 534
7-75
7
Maintenance
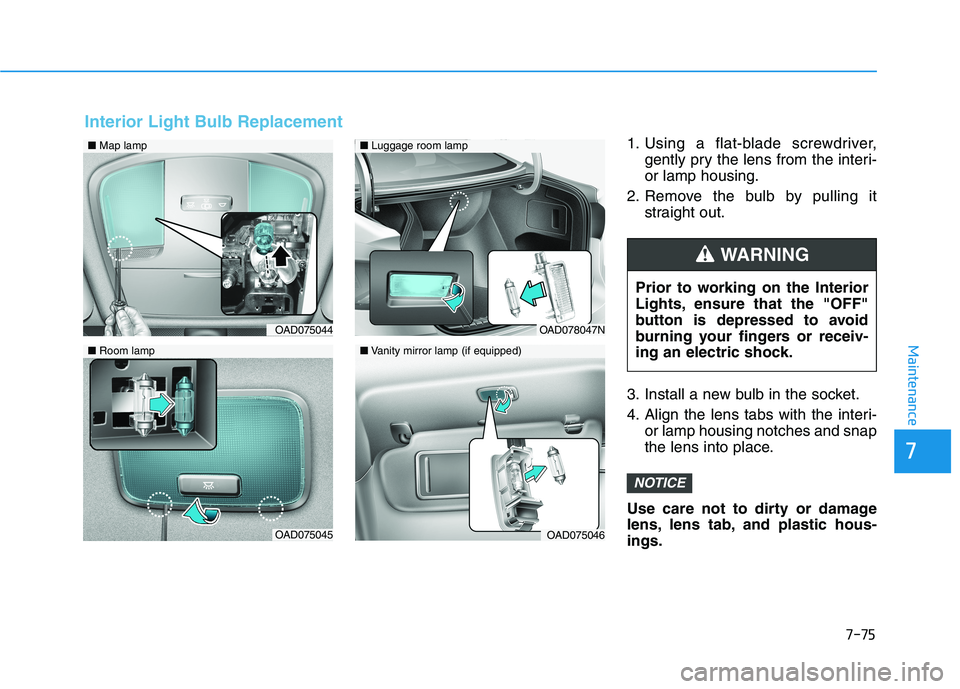
1. Using a flat-blade screwdriver,gently pry the lens from the interi- or lamp housing.
2. Remove the bulb by pulling it straight out.
3. Install a new bulb in the socket.
4. Align the lens tabs with the interi- or lamp housing notches and snap
the lens into place.
Use care not to dirty or damage
lens, lens tab, and plastic hous-ings.
NOTICE
■ Map lamp
OAD075044
OAD075045
■Luggage room lamp
■Vanity mirror lamp (if equipped)
OAD078047N
OAD075046
■ Room lamp
Interior Light Bulb Replacement
Prior to working on the Interior
Lights, ensure that the "OFF"
button is depressed to avoid
burning your fingers or receiv-
ing an electric shock.
WARNING