display HYUNDAI ELANTRA SPORT 2018 Owners Manual
[x] Cancel search | Manufacturer: HYUNDAI, Model Year: 2018, Model line: ELANTRA SPORT, Model: HYUNDAI ELANTRA SPORT 2018Pages: 534, PDF Size: 51.51 MB
Page 68 of 534
2-50
Safety system of your vehicle
9. Side impact sensors
10. Side pressure sensors
11. Driver's knee air bag module
12. Emergency Fastening DeviceSystem
13. Occupant classification system The SRSCM (Supplemental
Restraint System Control Module)
continually monitors all SRS compo-
nents while the ignition switch is in
the ON position to determine if a
crash impact is severe enough to
require air bag deployment or pre-
tensioner seat belt deployment.SRS warning light
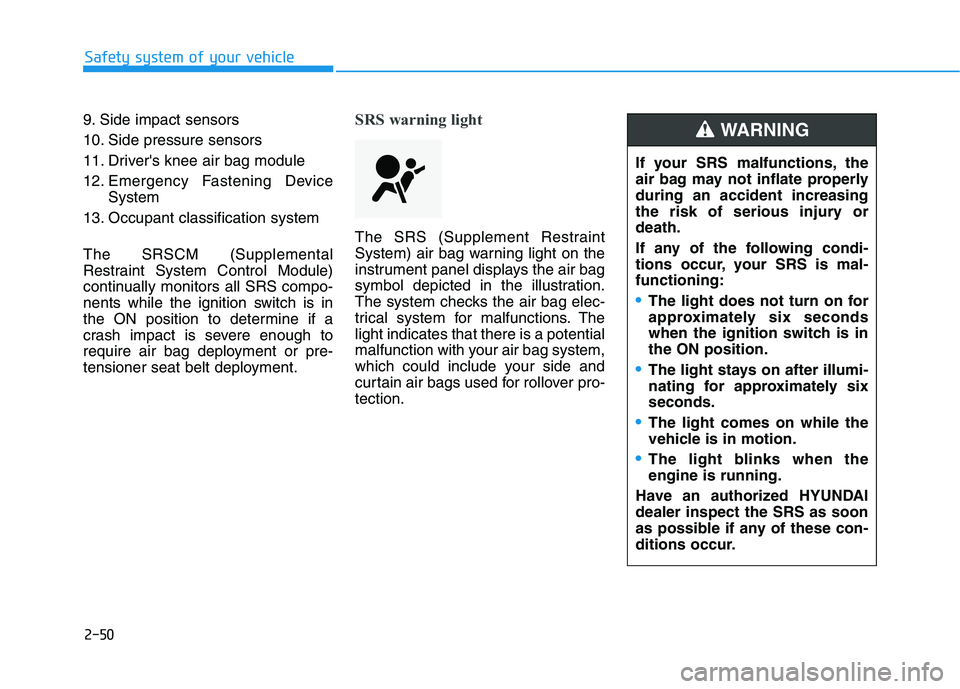
The SRS (Supplement Restraint
System) air bag warning light on the
instrument panel displays the air bag
symbol depicted in the illustration.
The system checks the air bag elec-
trical system for malfunctions. Thelight indicates that there is a potential
malfunction with your air bag system,
which could include your side and
curtain air bags used for rollover pro-tection.
If your SRS malfunctions, the
air bag may not inflate properlyduring an accident increasing
the risk of serious injury ordeath.
If any of the following condi-
tions occur, your SRS is mal-functioning:
The light does not turn on for
approximately six seconds
when the ignition switch is inthe ON position.
The light stays on after illumi-
nating for approximately sixseconds.
The light comes on while the
vehicle is in motion.
The light blinks when the engine is running.
Have an authorized HYUNDAIdealer inspect the SRS as soon
as possible if any of these con-
ditions occur.
WARNING
Page 86 of 534
Convenient features of your vehicle
Accessing Your Vehicle .........................................3-3Remote Key.........................................................................3-3
Smart Key ............................................................................3-6
Immobilizer System .........................................................3-11
Door Locks ............................................................3-14 Operating Door Locks from Outside the Vehicle ....3-14
Operating Door Locks from Inside the Vehicle .......3-15
Auto Door Lock/Unlock Features ...............................3-17
Child-Protector Rear Door locks ................................3-18
Safe Exit Assist (SEA) System .....................................3-18
Theft-Alarm System ............................................3-19
Driver Position Memory System ........................3-20 Storing Positions into Memory ....................................3-20
Recalling positions from memory ...............................3-21
Resetting the Driver's Seat Memory System...........3-21
Easy Access Function ....................................................3-22
Steering Wheel .....................................................3-23 Electric Power Steering (EPS) .....................................3-23
Tilt Steering/Telescopic Steering ................................3-23
Heated Steering Wheel ..................................................3-24
Horn ....................................................................................3-25
Mirrors ...................................................................3-26 Inside Rearview Mirror ..................................................3-26
Side View Mirrors ...........................................................3-33
Reverse Parking Aid Function......................................3-35 Windows ................................................................3-36
Power Windows ...............................................................3-37
Sunroof..................................................................3-41 Sunroof opening and closing .......................................3-42
Sliding the sunroof .........................................................3-42
Tilting the sunroof ..........................................................3-42
Sunshade ...........................................................................3-43
Resetting the sunroof ....................................................3-43
Sunroof Open Warning ..................................................3-44
Exterior Features .................................................3-45 Hood ...................................................................................3-45
Trunk ..................................................................................3-46
Smart Trunk ......................................................................3-49
Fuel Filler Door ................................................................3-52
Instrument Cluster ...............................................3-55 Instrument Cluster Control............................................3-57
Gauges ...............................................................................3-57
Transmission Shift Indicator .........................................3-62
Warning and Indicator lights ........................................3-63
LCD Display Messages ...................................................3-75
LCD Display (For Supervision Cluster) .............3-81 LCD Display Control ........................................................3-81
LCD Display Modes .........................................................3-82
User Settings Mode ........................................................3-84
3
Page 88 of 534
3-3
Convenient features of your vehicle
3
Remote Key (if equipped)
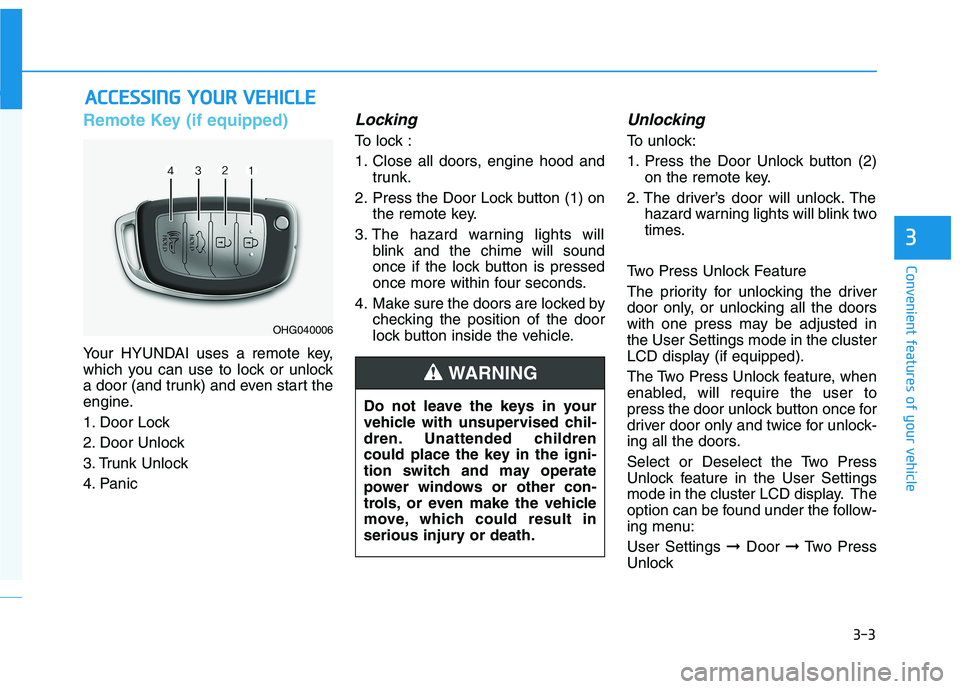
Your HYUNDAI uses a remote key,
which you can use to lock or unlock
a door (and trunk) and even start the
engine.
1. Door Lock
2. Door Unlock
3. Trunk Unlock
4. Panic
Locking
To lock :
1. Close all doors, engine hood andtrunk.
2. Press the Door Lock button (1) on the remote key.
3. The hazard warning lights will blink and the chime will sound
once if the lock button is pressed
once more within four seconds.
4. Make sure the doors are locked by checking the position of the door
lock button inside the vehicle.
Unlocking
To unlock:
1. Press the Door Unlock button (2)on the remote key.
2. The driver’s door will unlock. The hazard warning lights will blink two
times.
Two Press Unlock Feature
The priority for unlocking the driver
door only, or unlocking all the doors
with one press may be adjusted inthe User Settings mode in the cluster
LCD display (if equipped).
The Two Press Unlock feature, when
enabled, will require the user to
press the door unlock button once for
driver door only and twice for unlock-
ing all the doors.
Select or Deselect the Two Press
Unlock feature in the User Settings
mode in the cluster LCD display. The
option can be found under the follow-
ing menu: User Settings ➞Door ➞Two Press
Unlock
AA CCCCEE SSSSIINN GG YY OO UURR VV EEHH IICC LLEE
OHG040006
Do not leave the keys in your
vehicle with unsupervised chil-
dren. Unattended children
could place the key in the igni-
tion switch and may operate
power windows or other con-
trols, or even make the vehicle
move, which could result in
serious injury or death.
WARNING
Page 93 of 534
3-8
Convenient features of your vehicle
Two Press Unlock Feature
The priority for unlocking the driver
door only, or unlocking all the doors
with one press may be adjusted inthe User Settings mode in the cluster
LCD display (if equipped).
The Two Press Unlock feature, when
enabled, will require the user to
press the door unlock button once for
driver door only and twice for unlock-
ing all the doors.
Select or Deselect the Two Press
Unlock feature in the User Settings
mode in the cluster LCD display. The
option can be found under the follow-
ing menu: User Settings ➞Door ➞Two Press
Unlock
The Two Press Unlock feature can
also be enabled or disabled by
pressing the door lock and unlock
buttons simultaneously on the KeyFOB:
Press and hold both the Door Lock
button and the Door Unlock button
simultaneously until the hazard
warning lights blink. This will enable or disable the Two
Press Unlock feature. Repeat this
procedure to enable/disable themode again.
Information
The door handle button will only operate when the smart key is with-
in 0.7~1 m (28~40 inches) from the
outside door handle and other peo-
ple can also open the doors.
If you press the front passenger 's
outside door handle, while carrying
the Smart Key, all doors will unlock.
After unlocking the doors, the doors will lock automatically after 30 sec-
onds unless a door is opened.
Either the driver or front passenger door can be opened with the door
handle button when the smart key is
within this range.Trunk opening
To open:
1. Carry the smart key.
2. Either press the inside the trunk emblem or press and hold the
Trunk Unlock button (3) on the
smart key for more than one sec-ond.
The hazard warning lights will blink two times.
3. Once the trunk is opened and then closed, the trunk will lock
automatically.
Information
The trunk handle button will only
operate when the smart key is within
0.7 m (28 inches) from the trunk han-
dle.
Panic button
Press and hold the Panic button (4)
for more than one second. The horn
sounds and hazard warning lights
blink for about 30 seconds. To cancel
the panic mode, press any button on
the Smart Key.
i
i
Page 102 of 534

3-17
Convenient features of your vehicle
3
Auto Door Lock/
Unlock Features
Impact sensing door unlock
All doors will be automatically
unlocked when an impact causes the
air bags to deploy.
Speed sensing door lock
All doors will be automatically locked
when vehicle speed exceeds 15km/h (9 mph). All of the doors will be automatically
unlocked after the engine is turned
off.
Shift lever auto door lock
All doors will be automatically locked
when shifting the shift lever out of P
(Park) with the engine running.
You can activate or deactivate the
Auto Door Lock/Unlock features fromthe User Settings Mode on the LCD
display.
For more details, refer to the "LCD
Display" section in this chapter.
Always secure your vehicle.
Leaving your vehicle unlocked increases the potential risk to
you or others from someone
hiding in your vehicle.
To secure your vehicle, while
depressing the brake, move the
shift lever to the P (Park) posi-
tion, engage the parking brake,
and place the ignition switch in
the LOCK/OFF position, close
all windows, lock all doors, and
always take the key with you.
WARNING
Opening a door when some-
thing is approaching may cause
damage or injury. Be careful
when opening doors and watch
for vehicles, motorcycles, bicy-
cles or pedestrians approach-
ing the vehicle in the path of the
door.
CAUTION
If you stay in the vehicle for a long time while the weather is
very hot or cold, there are risks
of injuries or danger to life. Do
not lock the vehicle from theoutside when someone is in the
vehicle.
WARNING
Page 105 of 534
3-20
Convenient features of your vehicle
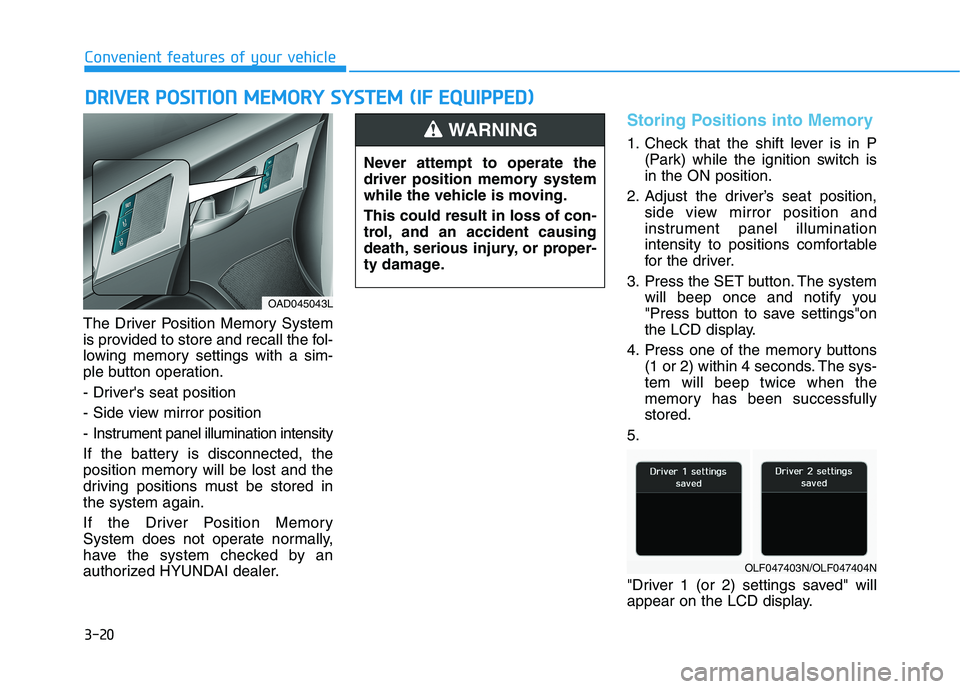
The Driver Position Memory System
is provided to store and recall the fol-
lowing memory settings with a sim-
ple button operation.
- Driver's seat position
- Side view mirror position
- Instrument panel illumination intensity
If the battery is disconnected, the
position memory will be lost and the
driving positions must be stored inthe system again.
If the Driver Position Memory
System does not operate normally,
have the system checked by an
authorized HYUNDAI dealer.
Storing Positions into Memory
1. Check that the shift lever is in P(Park) while the ignition switch is in the ON position.
2. Adjust the driver’s seat position, side view mirror position and
instrument panel illumination
intensity to positions comfortable
for the driver.
3. Press the SET button. The system will beep once and notify you
"Press button to save settings"on
the LCD display.
4. Press one of the memory buttons (1 or 2) within 4 seconds. The sys-tem will beep twice when the
memory has been successfullystored.
5.
"Driver 1 (or 2) settings saved" will
appear on the LCD display.
DD RRIIVV EERR PP OO SSIITT IIOO NN MM EEMM OORRYY SS YY SSTT EEMM (( IIFF EE QQ UUIIPP PPEEDD ))
OAD045043L Never attempt to operate the
driver position memory system
while the vehicle is moving. This could result in loss of con-
trol, and an accident causing
death, serious injury, or proper-
ty damage.
WARNING
OLF047403N/OLF047404N
Page 106 of 534
3-21
Convenient features of your vehicle
3
Recalling positions from mem-
ory
1. Check that the shift lever is in P(Park) while the ignition switch is in the ON position.
2. Press the desired memory button (1 or 2). The system will beep
once, and then the driver’s seat
position, side view mirror position
and instrument panel illuminationintensity will automatically adjust
to the stored positions.
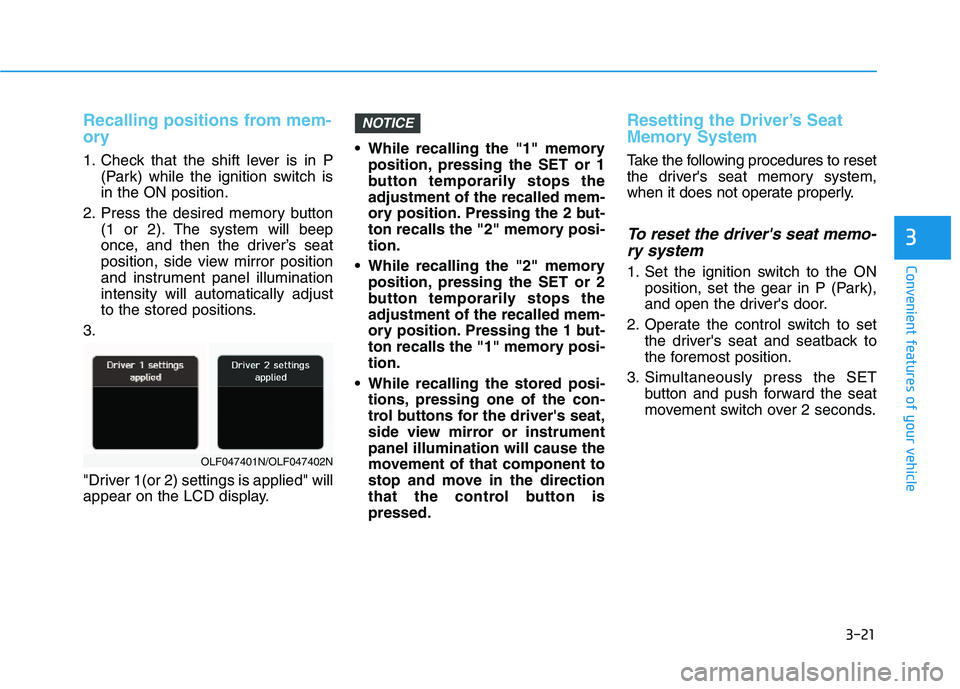
3.
"Driver 1(or 2) settings is applied" will
appear on the LCD display. While recalling the "1" memory
position, pressing the SET or 1
button temporarily stops theadjustment of the recalled mem-
ory position. Pressing the 2 but-
ton recalls the "2" memory posi-tion.
While recalling the "2" memory position, pressing the SET or 2
button temporarily stops theadjustment of the recalled mem-
ory position. Pressing the 1 but-
ton recalls the "1" memory posi-tion.
While recalling the stored posi- tions, pressing one of the con-
trol buttons for the driver's seat,
side view mirror or instrumentpanel illumination will cause the
movement of that component to
stop and move in the direction
that the control button ispressed.
Resetting the Driver’s Seat
Memory System
Take the following procedures to reset
the driver's seat memory system,
when it does not operate properly.
To reset the driver's seat memo-
ry system
1. Set the ignition switch to the ON position, set the gear in P (Park),
and open the driver's door.
2. Operate the control switch to set the driver's seat and seatback to
the foremost position.
3. Simultaneously press the SET button and push forward the seat
movement switch over 2 seconds.
NOTICE
OLF047401N/OLF047402N
Page 107 of 534
3-22
Convenient features of your vehicle
While resetting the driver's seatmemory system
1. It starts with the notification sound.
2. The driver's seat and seatback is adjusted to the rearward position with the notification sound.
3. The driver's seat and seatback is re-adjusted to the default position
(central position) with the notifica-tion sound.
However, in the following cases, theresetting procedure and the notifica-
tion sound may stop.
- The memory button is pressed.
- The control switch is operated.
- The gear is shifted out of P (Park).
- The driving speed exceeds 3 km/h (2 mph).
- The driver's door is closed. Reattempt to do the resetting
procedure again, when the reset-
ting procedure incompletelystops or the notification sounddo not stop.
Make sure that there is no obsta- cle around the driver's seat in
advance of resetting the driver's
seat memory system.
Easy Access Function
When exiting the vehicle the driver’s
seat will move rearward when the
engine is turned off and the shift
lever in P (Park).
When entering the vehicle the dri-
ver’s seat will move forward when the
ignition switch is placed to the ACCposition.
You can activate or deactivate the Easy Access Function from the User
Settings Mode on the LCD display.
For more details, refer to the "LCD
Display" section in this chapter.
NOTICE
Page 113 of 534
3-28
Convenient features of your vehicle
Automatic-Dimming Night Vision
Safety™ (NVS®
) Mirror
(if equipped)
The NVS ®
Mirror automatically
reduces glare by monitoring light lev- els in the front and the rear of the
vehicle. Any object that obstructs
either light sensor will degrade the
automatic dimming control feature.
For more information regarding NVS ®
mirrors and other applica-
tions, please refer to the Gentexwebsite:
www.gentex.com Your mirror will automatically dim
upon detecting glare from the vehi-
cles traveling behind you. The auto-dimming function can be controlled
by pressing the Dimming ON/OFF
button:
1. Pressing and holding the button
for 3 seconds turns the auto-dim- ming function OFF which is indi-
cated by the green Status
Indicator LED turning off.
2. Pressing and holding the button for 3 seconds again turns the auto-dimming function ON which is indi-
cated by the green Status Indicator
LED turning on.
The mirror defaults to the ON posi-
tion each time the vehicle is started.
Z-Nav™ Compass Display
The NVS™ Mirror in your vehicle is
also equipped with a Z-Nav™
Compass that shows the vehicle
Compass heading in the Display
Window using the 8 basic cardinalheadings (N, NE, E, SE, etc.).
Integrated HomeLink ®
Wireless
Control System
The HomeLink ®
Wireless Control
System can replace up to three
hand-held radio-frequency (RF)
transmitters with a single built-in
device. This innovative feature will
learn the radio frequency codes of
most current transmitters to operate
devices such as gate operators,
garage door openers, entry door
locks, security systems, even home
lighting. Both standard and rolling
code-equipped transmitters can be
programmed by following the out-
lined procedures. Additional HomeLink ®
information
can be found at: www.homelink.com
or by calling 1-800-355-3515.
Retain the original transmitter of the
RF device you are programming for
use in other vehicles as well as forfuture HomeLink ®
programming. It is
also suggested that upon the sale of
the vehicle, the programmedHomeLink ®
buttons be erased for
security purposes.
Page 129 of 534
3-44
Convenient features of your vehicle
Sunroof resetting procedure:
1. Place the ignition switch to the ONposition or start the engine. It is recommended to reset the sun-
roof while the engine is running.
2. Push the control lever forward. The sunroof will close completelyor tilt depending on the condition
of the sunroof.
3. Release the control lever when the sunroof stops moving.
4. Push the control lever forward about 10 seconds.
- When the sunroof is in the closed position :
The glass will tilt and slightly move up and down.
- When the sunroof is in the tilt position:
The glass will slightly move up and down.
Do not release the lever until the
operation is completed.
If you release the lever during opera-
tion, start the procedure again fromstep 2. 5. Within 3 seconds, push and hold
the control lever forward until the
sunroof operates as follows:
Tilt down �Slide Open �Slide
Close.
Do not release the lever until the
operation is completed.
If you release the lever during opera-
tion, start the procedure again fromstep 2.
6. Release the sunroof control lever after all steps have completed. (The sunroof system has beenreset.)
Information
If the sunroof is not reset when the vehicle battery is disconnected or
discharged, or the sunroof fuse is
blown, the sunroof may not operate
normally.
For more detailed information, we recommend that you contact an
authorized HYUNDAI dealer.Sunroof Open Warning (if equipped)
If the driver turns off the enginewhen the sunroof is not fully
closed, the warning chime will
sound for approximately 3 seconds
and the sunroof open warning will
appear on the LCD display.
If the driver turns off the engine and opens the door when the sun-roof is not fully closed, the open
sunroof warning will appear on the
LCD display until the door is closedor the sunroof is fully closed.
Close the sunroof securely when
leaving your vehicle.
i