clock Hyundai Elantra Touring 2012 Owner's Guide
[x] Cancel search | Manufacturer: HYUNDAI, Model Year: 2012, Model line: Elantra Touring, Model: Hyundai Elantra Touring 2012Pages: 402, PDF Size: 5.49 MB
Page 217 of 402
4141
Features of your vehicle
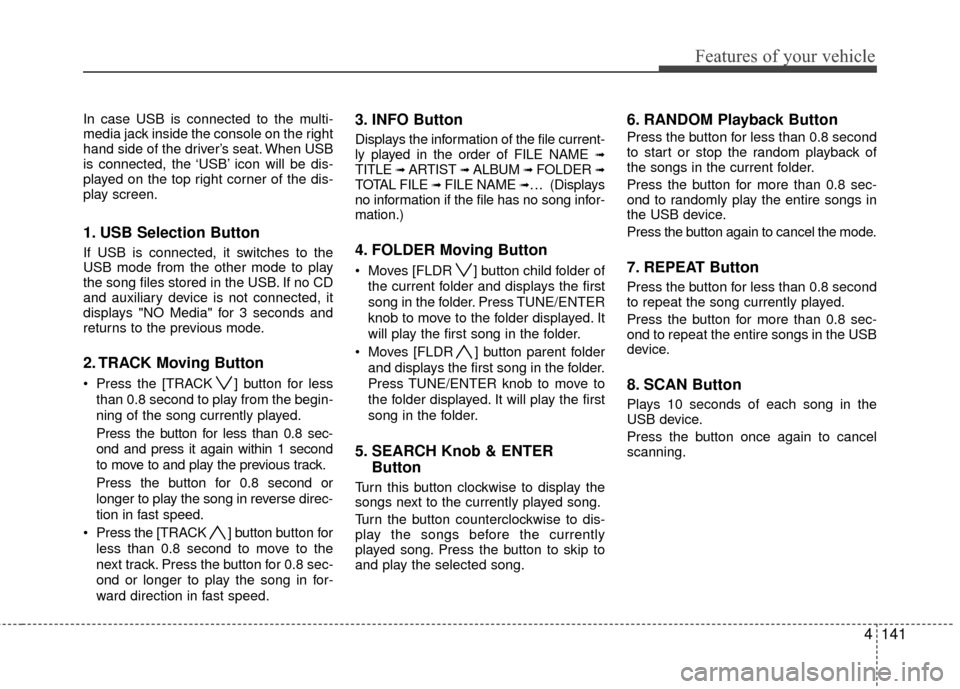
In case USB is connected to the multi-
media jack inside the console on the right
hand side of the driver’s seat. When USB
is connected, the ‘USB’ icon will be dis-
played on the top right corner of the dis-
play screen.
1. USB Selection Button
If USB is connected, it switches to the
USB mode from the other mode to play
the song files stored in the USB. If no CD
and auxiliary device is not connected, it
displays "NO Media" for 3 seconds and
returns to the previous mode.
2. TRACK Moving Button
Press the [TRACK ] button for lessthan 0.8 second to play from the begin-
ning of the song currently played.
Press the button for less than 0.8 sec-
ond and press it again within 1 second
to move to and play the previous track.
Press the button for 0.8 second or
longer to play the song in reverse direc-
tion in fast speed.
Press the [TRACK ] button button for less than 0.8 second to move to the
next track. Press the button for 0.8 sec-
ond or longer to play the song in for-
ward direction in fast speed.
3. INFO Button
Displays the information of the file current-
ly played in the order of FILE NAME ➟TITLE ➟ ARTIST ➟ ALBUM ➟ FOLDER ➟TOTAL FILE ➟ FILE NAME ➟… (Displays
no information if the file has no song infor-
mation.)
4. FOLDER Moving Button
Moves [FLDR ] button child folder of
the current folder and displays the first
song in the folder. Press TUNE/ENTER
knob to move to the folder displayed. It
will play the first song in the folder.
Moves [FLDR ] button parent folder and displays the first song in the folder.
Press TUNE/ENTER knob to move to
the folder displayed. It will play the first
song in the folder.
5. SEARCH Knob & ENTER Button
Turn this button clockwise to display the
songs next to the currently played song.
Turn the button counterclockwise to dis-
play the songs before the currently
played song. Press the button to skip to
and play the selected song.
6. RANDOM Playback Button
Press the button for less than 0.8 second
to start or stop the random playback of
the songs in the current folder.
Press the button for more than 0.8 sec-
ond to randomly play the entire songs in
the USB device.
Press the button again to cancel the mode.
7. REPEAT Button
Press the button for less than 0.8 second
to repeat the song currently played.
Press the button for more than 0.8 sec-
ond to repeat the entire songs in the USB
device.
8. SCAN Button
Plays 10 seconds of each song in the
USB device.
Press the button once again to cancel
scanning.
Page 221 of 402
4145
Features of your vehicle
In case the iPod exclusive cable is con-
nected to the multimedia jack inside the
console on the right hand side of the dri-
ver’s seat. When the iPod is connected,
the ‘iPod’ icon will be displayed on the top
right corner of the display screen.
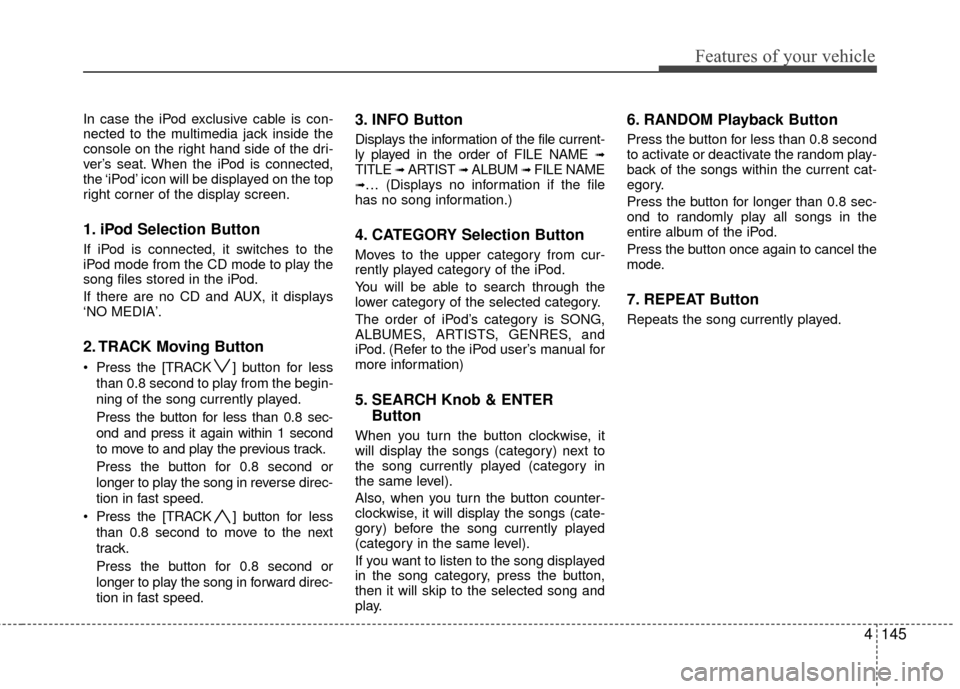
1. iPod Selection Button
If iPod is connected, it switches to the
iPod mode from the CD mode to play the
song files stored in the iPod.
If there are no CD and AUX, it displays
‘NO MEDIA’.
2. TRACK Moving Button
Press the [TRACK ] button for less
than 0.8 second to play from the begin-
ning of the song currently played.
Press the button for less than 0.8 sec-
ond and press it again within 1 second
to move to and play the previous track.
Press the button for 0.8 second or
longer to play the song in reverse direc-
tion in fast speed.
Press the [TRACK ] button for less
than 0.8 second to move to the next
track.
Press the button for 0.8 second or
longer to play the song in forward direc-
tion in fast speed.
3. INFO Button
Displays the information of the file current-
ly played in the order of FILE NAME ➟TITLE ➟ ARTIST ➟ ALBUM ➟ FILE NAME➟… (Displays no information if the file
has no song information.)
4. CATEGORY Selection Button
Moves to the upper category from cur-
rently played category of the iPod.
You will be able to search through the
lower category of the selected category.
The order of iPod’s category is SONG,
ALBUMES, ARTISTS, GENRES, and
iPod. (Refer to the iPod user’s manual for
more information)
5. SEARCH Knob & ENTER Button
When you turn the button clockwise, it
will display the songs (category) next to
the song currently played (category in
the same level).
Also, when you turn the button counter-
clockwise, it will display the songs (cate-
gory) before the song currently played
(category in the same level).
If you want to listen to the song displayed
in the song category, press the button,
then it will skip to the selected song and
play.
6. RANDOM Playback Button
Press the button for less than 0.8 second
to activate or deactivate the random play-
back of the songs within the current cat-
egory.
Press the button for longer than 0.8 sec-
ond to randomly play all songs in the
entire album of the iPod.
Press the button once again to cancel the
mode.
7. REPEAT Button
Repeats the song currently played.
Page 224 of 402
Features of your vehicle
148
4
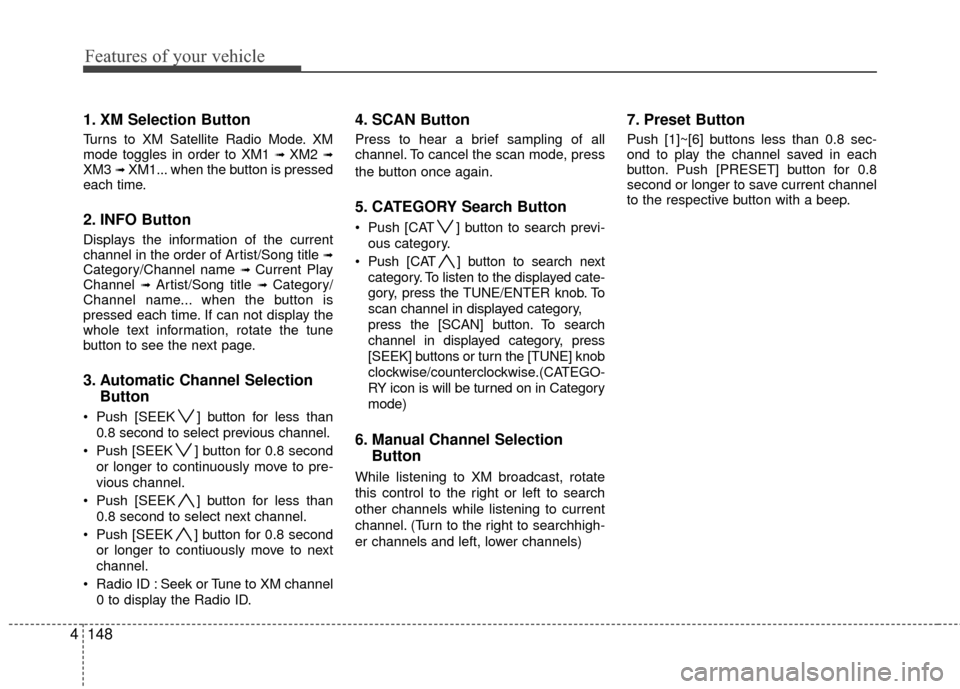
1. XM Selection Button
Turns to XM Satellite Radio Mode. XM
mode toggles in order to XM1 ➟ XM2 ➟XM3 ➟ XM1... when the button is pressed
each time.
2. INFO Button
Displays the information of the current
channel in the order of Artist/Song title ➟Category/Channel name ➟ Current Play
Channel ➟ Artist/Song title ➟ Category/
Channel name... when the button is
pressed each time. If can not display the
whole text information, rotate the tune
button to see the next page.
3. Automatic Channel Selection Button
Push [SEEK ] button for less than
0.8 second to select previous channel.
Push [SEEK ] button for 0.8 second or longer to continuously move to pre-
vious channel.
Push [SEEK ] button for less than 0.8 second to select next channel.
Push [SEEK ] button for 0.8 second or longer to contiuously move to next
channel.
Radio ID : Seek or Tune to XM channel 0 to display the Radio ID.
4. SCAN Button
Press to hear a brief sampling of all
channel. To cancel the scan mode, press
the button once again.
5. CATEGORY Search Button
Push [CAT ] button to search previ-ous category.
Push [CAT ] button to search next category. To listen to the displayed cate-
gory, press the TUNE/ENTER knob. To
scan channel in displayed category,
press the [SCAN] button. To search
channel in displayed category, press
[SEEK] buttons or turn the [TUNE] knob
clockwise/counterclockwise.(CATEGO-
RY icon is will be turned on in Category
mode)
6. Manual Channel Selection Button
While listening to XM broadcast, rotate
this control to the right or left to search
other channels while listening to current
channel. (Turn to the right to searchhigh-
er channels and left, lower channels)
7. Preset Button
Push [1]~[6] buttons less than 0.8 sec-
ond to play the channel saved in each
button. Push [PRESET] button for 0.8
second or longer to save current channel
to the respective button with a beep.
Page 225 of 402
4149
Features of your vehicle
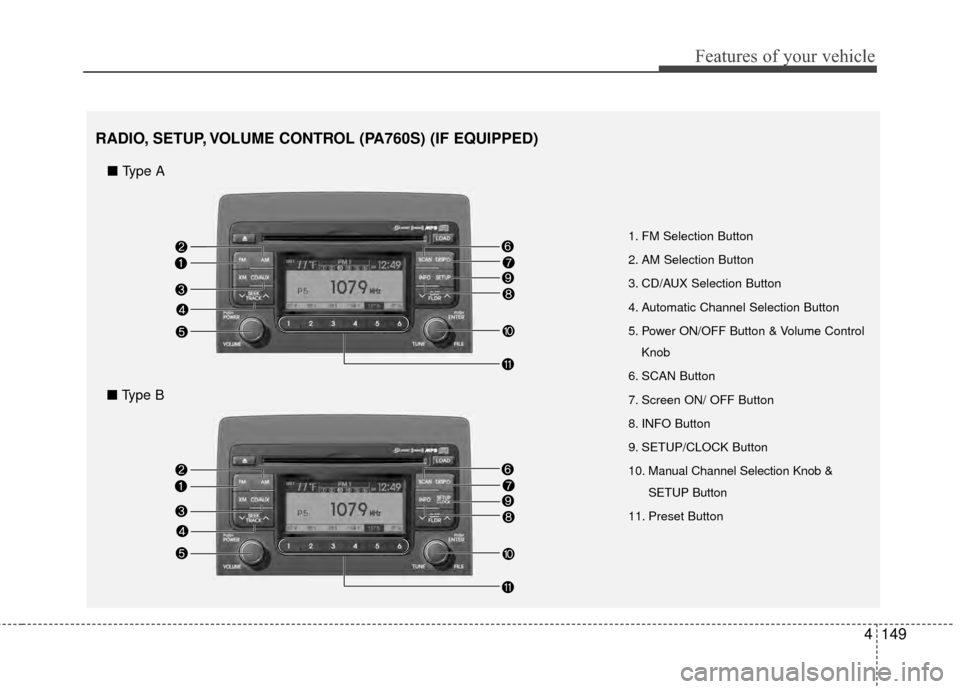
1. FM Selection Button
2. AM Selection Button
3. CD/AUX Selection Button
4. Automatic Channel Selection Button
5. Power ON/OFF Button & Volume ControlKnob
6. SCAN Button
7. Screen ON/ OFF Button
8. INFO Button
9. SETUP/CLOCK Button
10. Manual Channel Selection Knob & SETUP Button
11. Preset Button
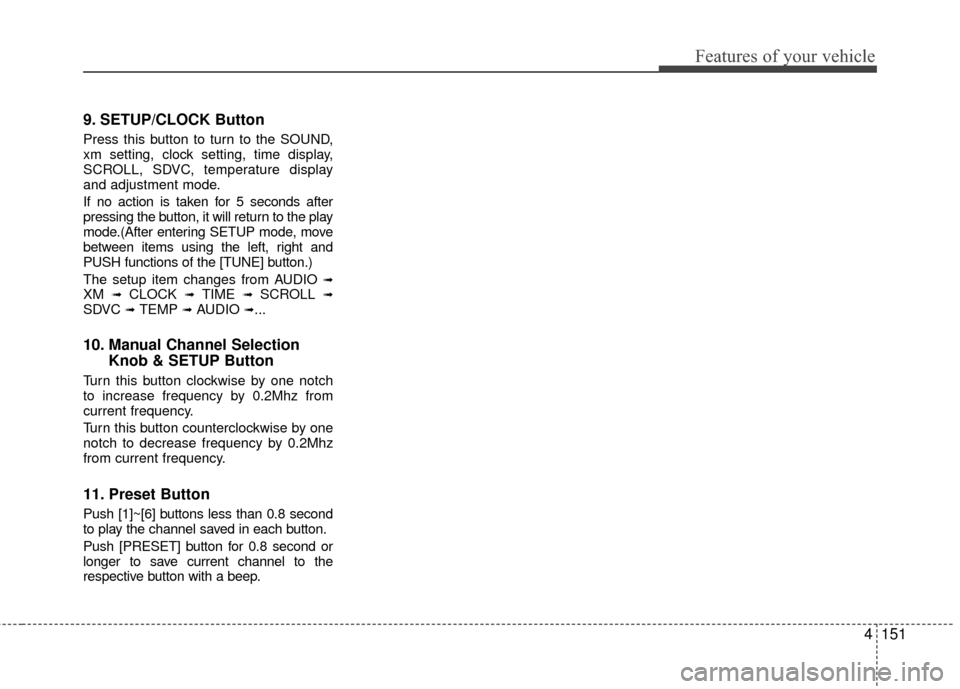
RADIO, SETUP, VOLUME CONTROL (PA760S) (IF EQUIPPED)
■ Type A
■ Type B
Page 227 of 402
4151
Features of your vehicle
9. SETUP/CLOCK Button
Press this button to turn to the SOUND,
xm setting, clock setting, time display,
SCROLL, SDVC, temperature display
and adjustment mode.
If no action is taken for 5 seconds after
pressing the button, it will return to the play
mode.(After entering SETUP mode, move
between items using the left, right and
PUSH functions of the [TUNE] button.)
The setup item changes from AUDIO
➟XM ➟ CLOCK ➟ TIME ➟ SCROLL ➟SDVC ➟ TEMP ➟ AUDIO ➟...
10. Manual Channel SelectionKnob & SETUP Button
Turn this button clockwise by one notch
to increase frequency by 0.2Mhz from
current frequency.
Turn this button counterclockwise by one
notch to decrease frequency by 0.2Mhz
from current frequency.
11. Preset Button
Push [1]~[6] buttons less than 0.8 second
to play the channel saved in each button.
Push [PRESET] button for 0.8 second or
longer to save current channel to the
respective button with a beep.
Page 229 of 402
4153
Features of your vehicle
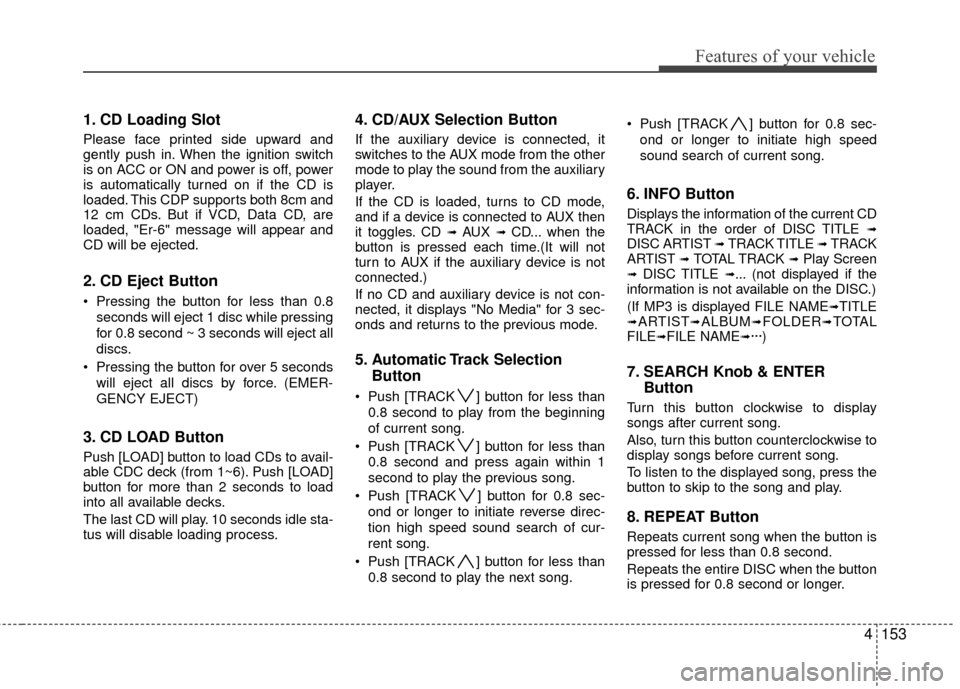
1. CD Loading Slot
Please face printed side upward and
gently push in. When the ignition switch
is on ACC or ON and power is off, power
is automatically turned on if the CD is
loaded. This CDP supports both 8cm and
12 cm CDs. But if VCD, Data CD, are
loaded, "Er-6" message will appear and
CD will be ejected.
2. CD Eject Button
Pressing the button for less than 0.8seconds will eject 1 disc while pressing
for 0.8 second ~ 3 seconds will eject all
discs.
Pressing the button for over 5 seconds will eject all discs by force. (EMER-
GENCY EJECT)
3. CD LOAD Button
Push [LOAD] button to load CDs to avail-
able CDC deck (from 1~6). Push [LOAD]
button for more than 2 seconds to load
into all available decks.
The last CD will play. 10 seconds idle sta-
tus will disable loading process.
4. CD/AUX Selection Button
If the auxiliary device is connected, it
switches to the AUX mode from the other
mode to play the sound from the auxiliary
player.
If the CD is loaded, turns to CD mode,
and if a device is connected to AUX then
it toggles. CD
➟ AUX ➟ CD... when the
button is pressed each time.(It will not
turn to AUX if the auxiliary device is not
connected.)
If no CD and auxiliary device is not con-
nected, it displays "No Media" for 3 sec-
onds and returns to the previous mode.
5. Automatic Track Selection Button
Push [TRACK ] button for less than
0.8 second to play from the beginning
of current song.
Push [TRACK ] button for less than 0.8 second and press again within 1
second to play the previous song.
Push [TRACK ] button for 0.8 sec- ond or longer to initiate reverse direc-
tion high speed sound search of cur-
rent song.
Push [TRACK ] button for less than 0.8 second to play the next song. Push [TRACK ] button for 0.8 sec-
ond or longer to initiate high speed
sound search of current song.
6. INFO Button
Displays the information of the current CD
TRACK in the order of DISC TITLE ➟DISC ARTIST ➟ TRACK TITLE ➟ TRACK
ARTIST ➟ TOTAL TRACK ➟Play Screen➟ DISC TITLE ➟... (not displayed if the
information is not available on the DISC.)
(If MP3 is displayed FILE NAME
➟TITLE➟ARTIST➟ALBUM➟FOLDER➟TOTAL
FILE➟FILE NAME➟···)
7. SEARCH Knob & ENTER Button
Turn this button clockwise to display
songs after current song.
Also, turn this button counterclockwise to
display songs before current song.
To listen to the displayed song, press the
button to skip to the song and play.
8. REPEAT Button
Repeats current song when the button is
pressed for less than 0.8 second.
Repeats the entire DISC when the button
is pressed for 0.8 second or longer.
Page 232 of 402
Features of your vehicle
156
4
In case USB is connected to the multi-
media jack inside the console on the right
hand side of the driver’s seat. When USB
is connected, the ‘USB’ icon will be dis-
played on the top right corner of the dis-
play screen.
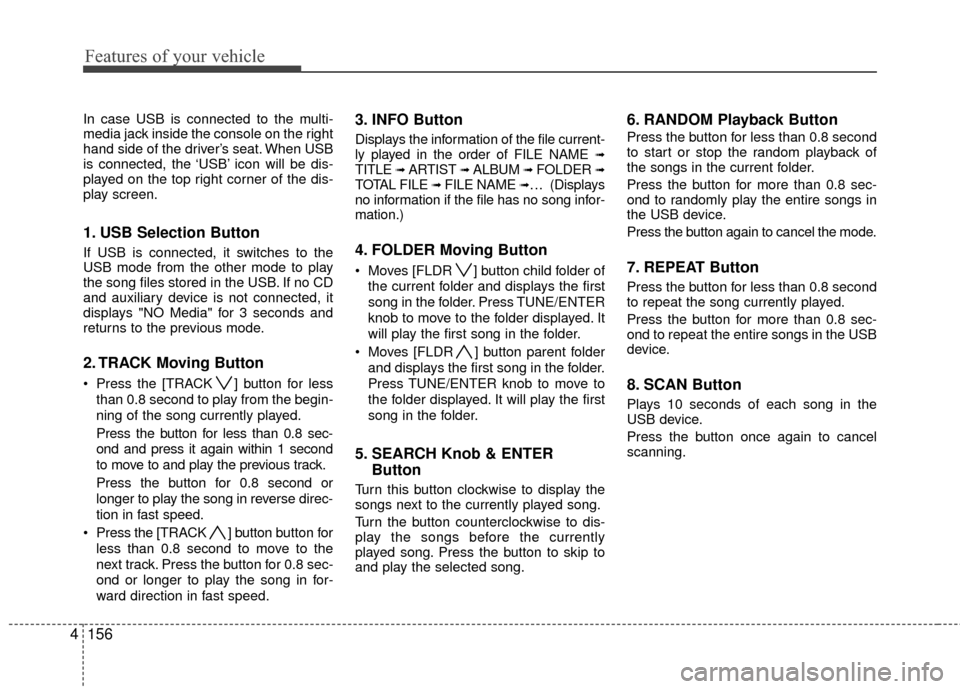
1. USB Selection Button
If USB is connected, it switches to the
USB mode from the other mode to play
the song files stored in the USB. If no CD
and auxiliary device is not connected, it
displays "NO Media" for 3 seconds and
returns to the previous mode.
2. TRACK Moving Button
Press the [TRACK ] button for less
than 0.8 second to play from the begin-
ning of the song currently played.
Press the button for less than 0.8 sec-
ond and press it again within 1 second
to move to and play the previous track.
Press the button for 0.8 second or
longer to play the song in reverse direc-
tion in fast speed.
Press the [TRACK ] button button for less than 0.8 second to move to the
next track. Press the button for 0.8 sec-
ond or longer to play the song in for-
ward direction in fast speed.
3. INFO Button
Displays the information of the file current-
ly played in the order of FILE NAME ➟TITLE ➟ ARTIST ➟ ALBUM ➟ FOLDER ➟TOTAL FILE ➟ FILE NAME ➟… (Displays
no information if the file has no song infor-
mation.)
4. FOLDER Moving Button
Moves [FLDR ] button child folder of
the current folder and displays the first
song in the folder. Press TUNE/ENTER
knob to move to the folder displayed. It
will play the first song in the folder.
Moves [FLDR ] button parent folder and displays the first song in the folder.
Press TUNE/ENTER knob to move to
the folder displayed. It will play the first
song in the folder.
5. SEARCH Knob & ENTER Button
Turn this button clockwise to display the
songs next to the currently played song.
Turn the button counterclockwise to dis-
play the songs before the currently
played song. Press the button to skip to
and play the selected song.
6. RANDOM Playback Button
Press the button for less than 0.8 second
to start or stop the random playback of
the songs in the current folder.
Press the button for more than 0.8 sec-
ond to randomly play the entire songs in
the USB device.
Press the button again to cancel the mode.
7. REPEAT Button
Press the button for less than 0.8 second
to repeat the song currently played.
Press the button for more than 0.8 sec-
ond to repeat the entire songs in the USB
device.
8. SCAN Button
Plays 10 seconds of each song in the
USB device.
Press the button once again to cancel
scanning.
Page 236 of 402
Features of your vehicle
160
4
In case the iPod exclusive cable is con-
nected to the multimedia jack inside the
console on the right hand side of the dri-
ver’s seat. When the iPod is connected,
the ‘iPod’ icon will be displayed on the top
right corner of the display screen.
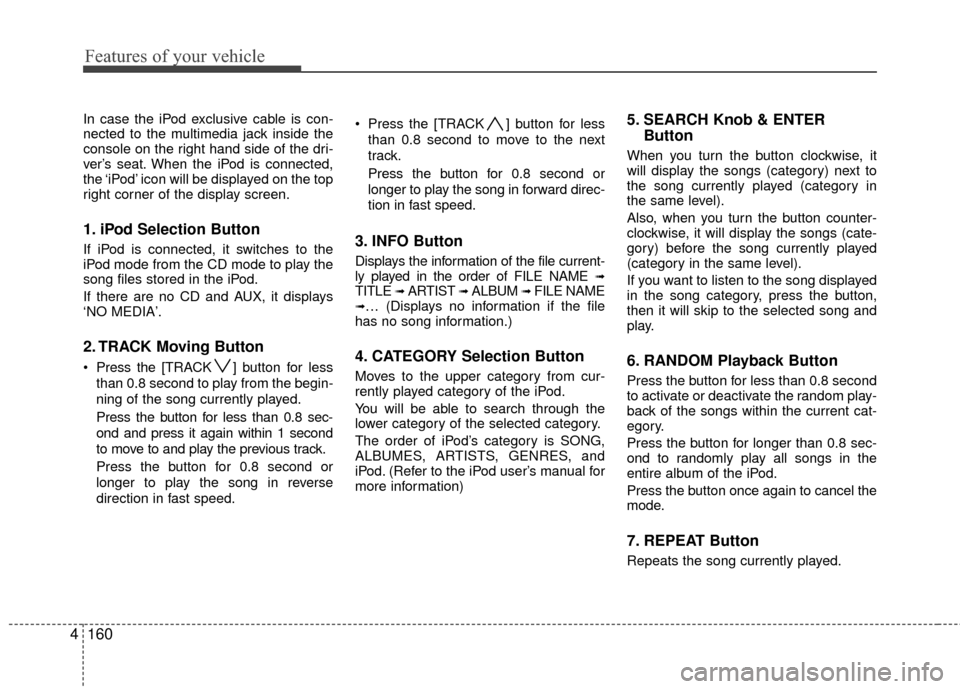
1. iPod Selection Button
If iPod is connected, it switches to the
iPod mode from the CD mode to play the
song files stored in the iPod.
If there are no CD and AUX, it displays
‘NO MEDIA’.
2. TRACK Moving Button
Press the [TRACK ] button for less
than 0.8 second to play from the begin-
ning of the song currently played.
Press the button for less than 0.8 sec-
ond and press it again within 1 second
to move to and play the previous track.
Press the button for 0.8 second or
longer to play the song in reverse
direction in fast speed. Press the [TRACK ] button for less
than 0.8 second to move to the next
track.
Press the button for 0.8 second or
longer to play the song in forward direc-
tion in fast speed.
3. INFO Button
Displays the information of the file current-
ly played in the order of FILE NAME ➟TITLE ➟ ARTIST ➟ ALBUM ➟ FILE NAME➟… (Displays no information if the file
has no song information.)
4. CATEGORY Selection Button
Moves to the upper category from cur-
rently played category of the iPod.
You will be able to search through the
lower category of the selected category.
The order of iPod’s category is SONG,
ALBUMES, ARTISTS, GENRES, and
iPod. (Refer to the iPod user’s manual for
more information)
5. SEARCH Knob & ENTER Button
When you turn the button clockwise, it
will display the songs (category) next to
the song currently played (category in
the same level).
Also, when you turn the button counter-
clockwise, it will display the songs (cate-
gory) before the song currently played
(category in the same level).
If you want to listen to the song displayed
in the song category, press the button,
then it will skip to the selected song and
play.
6. RANDOM Playback Button
Press the button for less than 0.8 second
to activate or deactivate the random play-
back of the songs within the current cat-
egory.
Press the button for longer than 0.8 sec-
ond to randomly play all songs in the
entire album of the iPod.
Press the button once again to cancel the
mode.
7. REPEAT Button
Repeats the song currently played.
Page 239 of 402
4163
Features of your vehicle
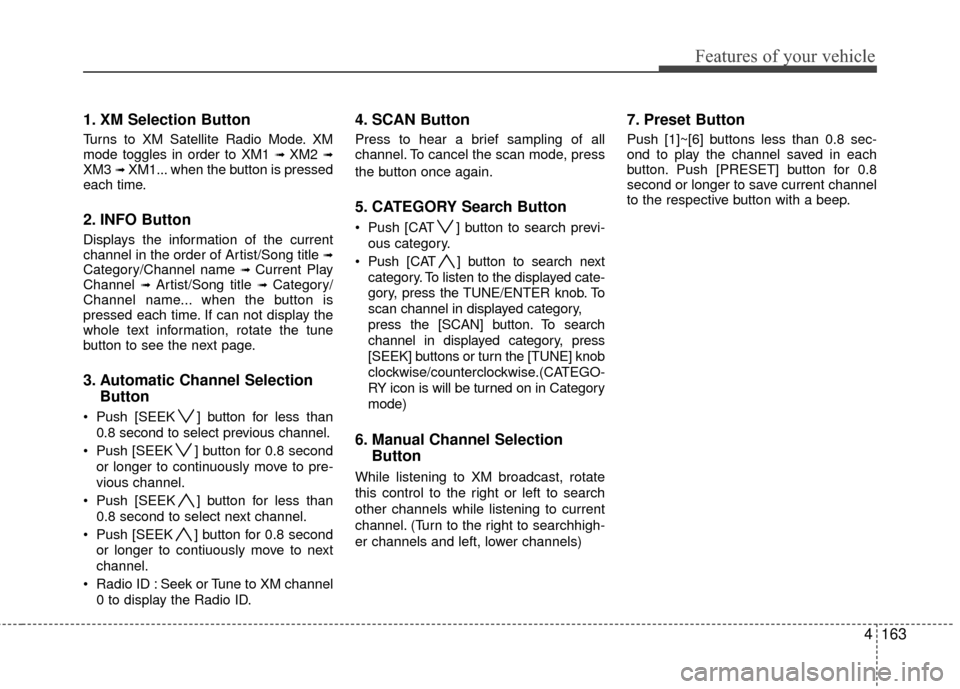
1. XM Selection Button
Turns to XM Satellite Radio Mode. XM
mode toggles in order to XM1 ➟ XM2 ➟XM3 ➟ XM1... when the button is pressed
each time.
2. INFO Button
Displays the information of the current
channel in the order of Artist/Song title ➟Category/Channel name ➟ Current Play
Channel ➟ Artist/Song title ➟ Category/
Channel name... when the button is
pressed each time. If can not display the
whole text information, rotate the tune
button to see the next page.
3. Automatic Channel Selection Button
Push [SEEK ] button for less than
0.8 second to select previous channel.
Push [SEEK ] button for 0.8 second or longer to continuously move to pre-
vious channel.
Push [SEEK ] button for less than 0.8 second to select next channel.
Push [SEEK ] button for 0.8 second or longer to contiuously move to next
channel.
Radio ID : Seek or Tune to XM channel 0 to display the Radio ID.
4. SCAN Button
Press to hear a brief sampling of all
channel. To cancel the scan mode, press
the button once again.
5. CATEGORY Search Button
Push [CAT ] button to search previ-ous category.
Push [CAT ] button to search next category. To listen to the displayed cate-
gory, press the TUNE/ENTER knob. To
scan channel in displayed category,
press the [SCAN] button. To search
channel in displayed category, press
[SEEK] buttons or turn the [TUNE] knob
clockwise/counterclockwise.(CATEGO-
RY icon is will be turned on in Category
mode)
6. Manual Channel Selection Button
While listening to XM broadcast, rotate
this control to the right or left to search
other channels while listening to current
channel. (Turn to the right to searchhigh-
er channels and left, lower channels)
7. Preset Button
Push [1]~[6] buttons less than 0.8 sec-
ond to play the channel saved in each
button. Push [PRESET] button for 0.8
second or longer to save current channel
to the respective button with a beep.
Page 304 of 402
613
What to do in an emergency
F070200AFD
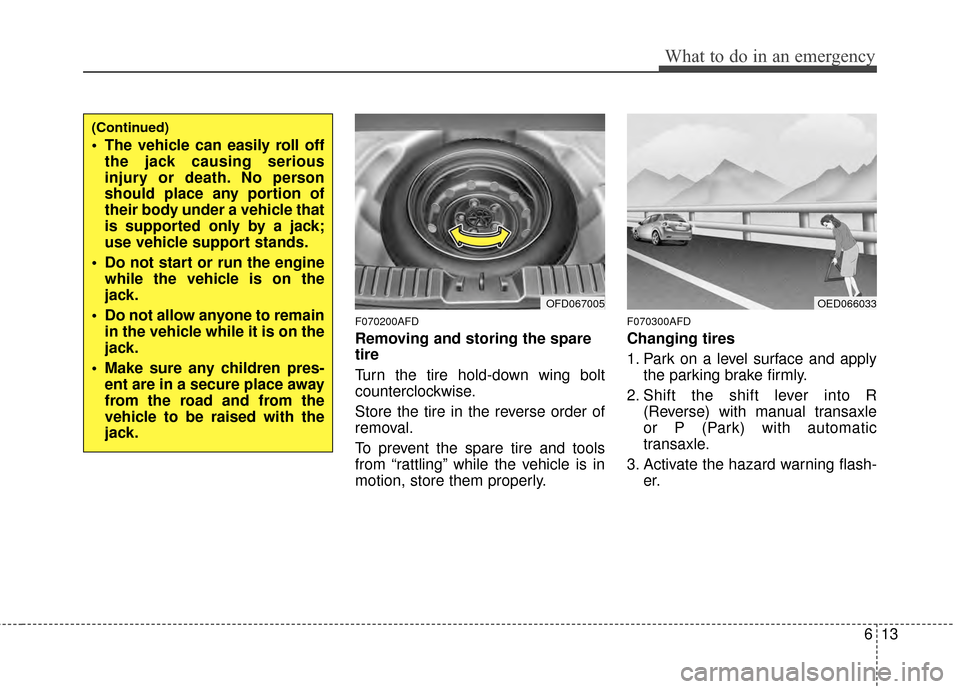
Removing and storing the spare
tire
Turn the tire hold-down wing bolt
counterclockwise.
Store the tire in the reverse order of
removal.
To prevent the spare tire and tools
from “rattling” while the vehicle is in
motion, store them properly.
F070300AFD
Changing tires
1. Park on a level surface and applythe parking brake firmly.
2. Shift the shift lever into R (Reverse) with manual transaxle
or P (Park) with automatic
transaxle.
3. Activate the hazard warning flash- er.
OFD067005
(Continued)
The vehicle can easily roll offthe jack causing serious
injury or death. No person
should place any portion of
their body under a vehicle that
is supported only by a jack;
use vehicle support stands.
Do not start or run the engine while the vehicle is on the
jack.
Do not allow anyone to remain in the vehicle while it is on the
jack.
Make sure any children pres- ent are in a secure place away
from the road and from the
vehicle to be raised with the
jack.
OED066033