sensor HYUNDAI ENTOURAGE 2007 User Guide
[x] Cancel search | Manufacturer: HYUNDAI, Model Year: 2007, Model line: ENTOURAGE, Model: HYUNDAI ENTOURAGE 2007Pages: 398, PDF Size: 8.03 MB
Page 115 of 398
399
Features of your vehicle
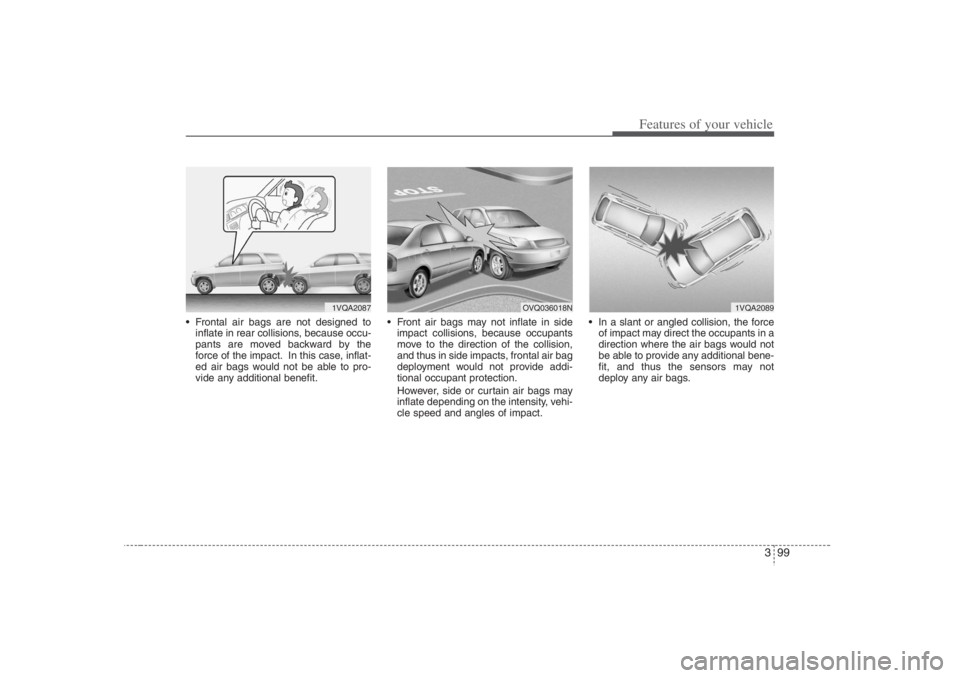
Frontal air bags are not designed to
inflate in rear collisions, because occu-
pants are moved backward by the
force of the impact. In this case, inflat-
ed air bags would not be able to pro-
vide any additional benefit. Front air bags may not inflate in side
impact collisions, because occupants
move to the direction of the collision,
and thus in side impacts, frontal air bag
deployment would not provide addi-
tional occupant protection.
However, side or curtain air bags may
inflate depending on the intensity, vehi-
cle speed and angles of impact. In a slant or angled collision, the force
of impact may direct the occupants in a
direction where the air bags would not
be able to provide any additional bene-
fit, and thus the sensors may not
deploy any air bags.
1VQA2087
1VQA2089
OVQ036018N
Page 116 of 398
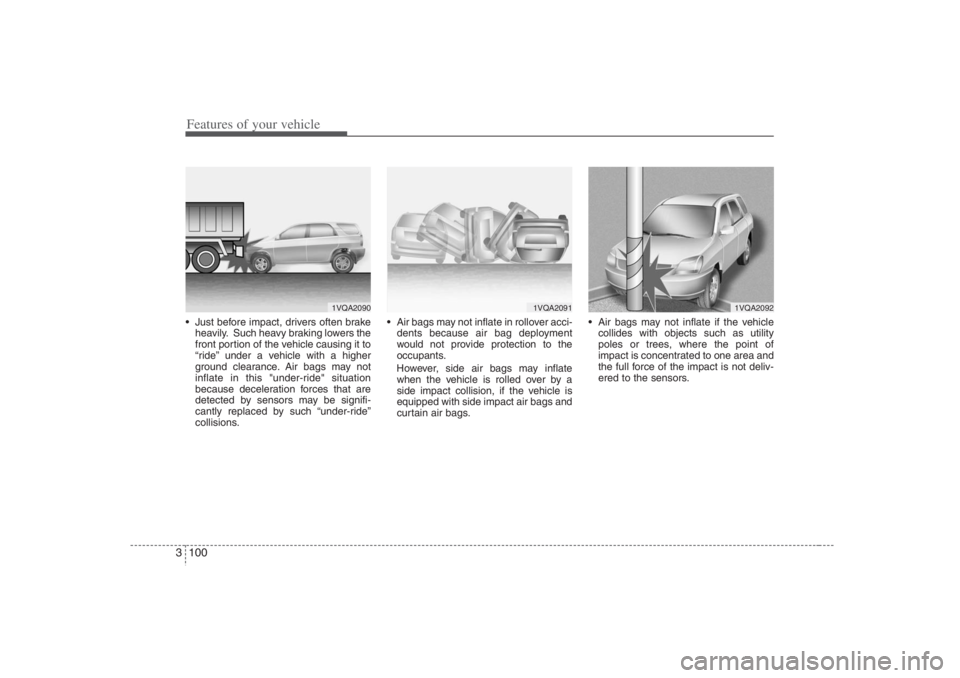
Features of your vehicle100 3 Just before impact, drivers often brake
heavily. Such heavy braking lowers the
front portion of the vehicle causing it to
“ride” under a vehicle with a higher
ground clearance. Air bags may not
inflate in this "under-ride" situation
because deceleration forces that are
detected by sensors may be signifi-
cantly replaced by such “under-ride”
collisions. Air bags may not inflate in rollover acci-
dents because air bag deployment
would not provide protection to the
occupants.
However, side air bags may inflate
when the vehicle is rolled over by a
side impact collision, if the vehicle is
equipped with side impact air bags and
curtain air bags. Air bags may not inflate if the vehicle
collides with objects such as utility
poles or trees, where the point of
impact is concentrated to one area and
the full force of the impact is not deliv-
ered to the sensors.
1VQA2090
1VQA2091
1VQA2092
Page 123 of 398
3 107
Features of your vehicle
Day/night rearview mirror Adjust the rearview mirror to center on
the view through the rear window. Make
this adjustment before you start driving.
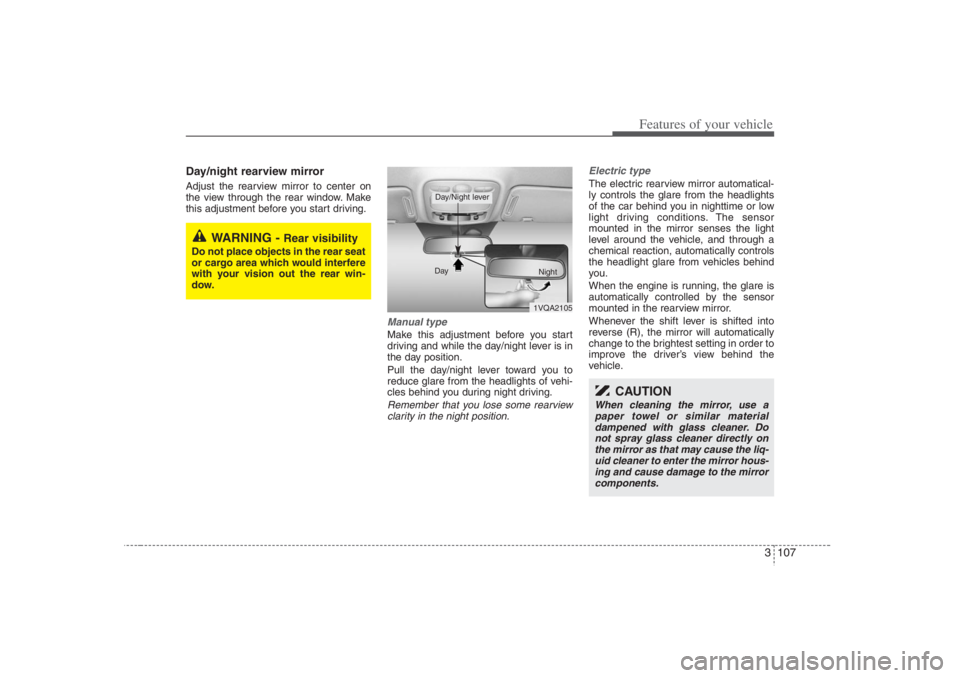
Manual type Make this adjustment before you start
driving and while the day/night lever is in
the day position.
Pull the day/night lever toward you to
reduce glare from the headlights of vehi-
cles behind you during night driving.Remember that you lose some rearview
clarity in the night position.Electric type
The electric rearview mirror automatical-
ly controls the glare from the headlights
of the car behind you in nighttime or low
light driving conditions. The sensor
mounted in the mirror senses the light
level around the vehicle, and through a
chemical reaction, automatically controls
the headlight glare from vehicles behind
you.
When the engine is running, the glare is
automatically controlled by the sensor
mounted in the rearview mirror.
Whenever the shift lever is shifted into
reverse (R), the mirror will automatically
change to the brightest setting in order to
improve the driver’s view behind the
vehicle.
WARNING -
Rear visibility
Do not place objects in the rear seat
or cargo area which would interfere
with your vision out the rear win-
dow.
1VQA2105 Day
Night
Day/Night lever
CAUTION
When cleaning the mirror, use a
paper towel or similar material
dampened with glass cleaner. Do
not spray glass cleaner directly on
the mirror as that may cause the liq-
uid cleaner to enter the mirror hous-
ing and cause damage to the mirror
components.
Page 146 of 398
Features of your vehicle130 3
CAUTION
Never place anything over sensor
(1) located on the instrument
panel, this will ensure better auto-
light system control.
Don’t clean the sensor using a
window cleaner, the cleanser may
leave a light film which could
interfere with sensor operation.
If your vehicle has window tint or
other types of coating on the
front windshield, the Auto light
system may not work properly.
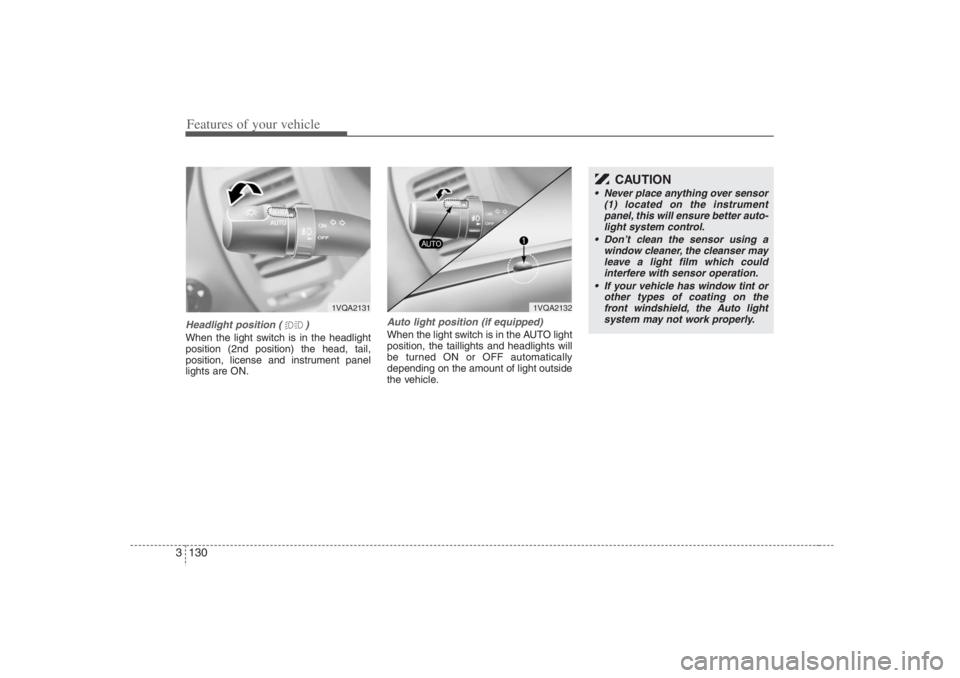
Headlight position ( )When the light switch is in the headlight
position (2nd position) the head, tail,
position, license and instrument panel
lights are ON.
Auto light position (if equipped)When the light switch is in the AUTO light
position, the taillights and headlights will
be turned ON or OFF automatically
depending on the amount of light outside
the vehicle.
1VQA2131
1VQA2132
Page 149 of 398
3 133
Features of your vehicle
LO : Normal wiper speed
HI : Fast wiper speed
MIST: For a single wiping cycle, push the
lever upward and release it with
the lever in the OFF position. The
wipers will operate continuously if
the lever is pushed upward and
held.✽ ✽
NOTICEIf there is heavy accumulation of snow
or ice on the windshield, defrost the
windshield for about 10 minutes, or
until the snow and/or ice is removed
before using the windshield wipers to
ensure proper operation.
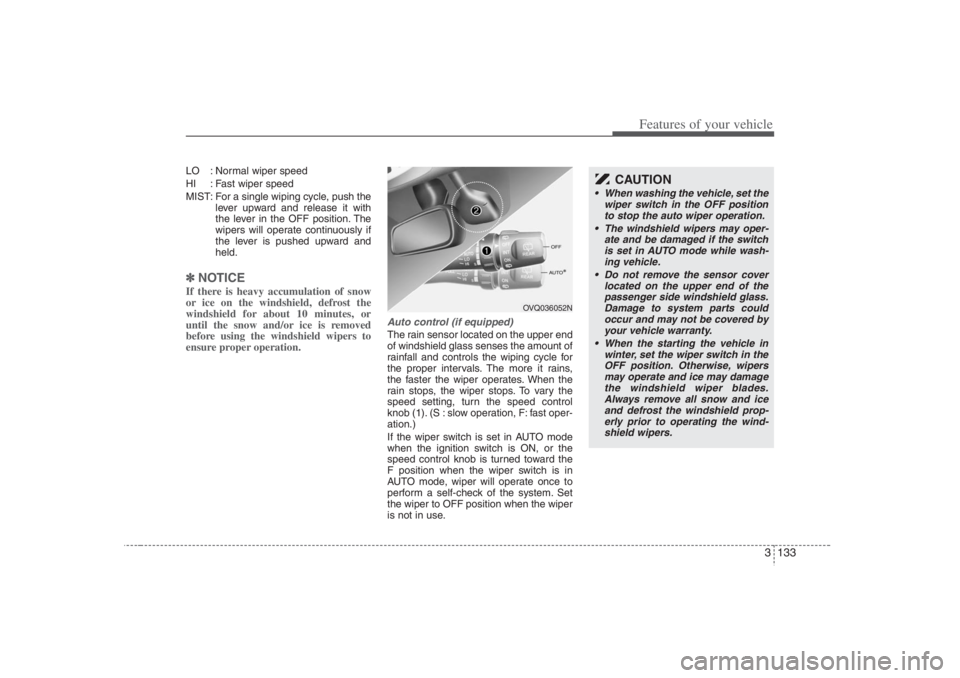
Auto control (if equipped)The rain sensor located on the upper end
of windshield glass senses the amount of
rainfall and controls the wiping cycle for
the proper intervals. The more it rains,
the faster the wiper operates. When the
rain stops, the wiper stops. To vary the
speed setting, turn the speed control
knob (1). (S : slow operation, F: fast oper-
ation.)
If the wiper switch is set in AUTO mode
when the ignition switch is ON, or the
speed control knob is turned toward the
F position when the wiper switch is in
AUTO mode, wiper will operate once to
perform a self-check of the system. Set
the wiper to OFF position when the wiper
is not in use.
OVQ036052N
CAUTION
When washing the vehicle, set the
wiper switch in the OFF position
to stop the auto wiper operation.
The windshield wipers may oper-
ate and be damaged if the switch
is set in AUTO mode while wash-
ing vehicle.
Do not remove the sensor cover
located on the upper end of the
passenger side windshield glass.
Damage to system parts could
occur and may not be covered by
your vehicle warranty.
When the starting the vehicle in
winter, set the wiper switch in the
OFF position. Otherwise, wipers
may operate and ice may damage
the windshield wiper blades.
Always remove all snow and ice
and defrost the windshield prop-
erly prior to operating the wind-
shield wipers.
Page 150 of 398
Features of your vehicle134 3
Variable intermittent wipersSet the lever to the INT/AUTO position
and choose the desired wiper interval by
turning the ring.One - touch wiper For a single wiping cycle, push the lever
upward and release it with the lever in the
OFF position.
The wipers will operate continuously if
the lever is pushed upward and held.
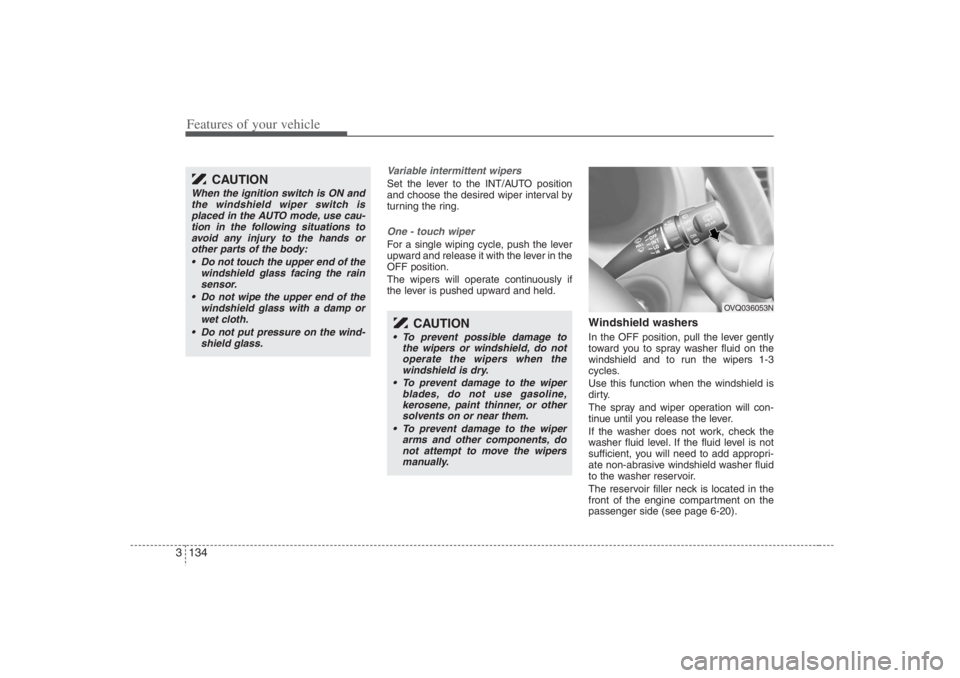
Windshield washers In the OFF position, pull the lever gently
toward you to spray washer fluid on the
windshield and to run the wipers 1-3
cycles.
Use this function when the windshield is
dirty.
The spray and wiper operation will con-
tinue until you release the lever.
If the washer does not work, check the
washer fluid level. If the fluid level is not
sufficient, you will need to add appropri-
ate non-abrasive windshield washer fluid
to the washer reservoir.
The reservoir filler neck is located in the
front of the engine compartment on the
passenger side (see page 6-20).
CAUTION
When the ignition switch is ON and
the windshield wiper switch is
placed in the AUTO mode, use cau-
tion in the following situations to
avoid any injury to the hands or
other parts of the body:
Do not touch the upper end of the
windshield glass facing the rain
sensor.
Do not wipe the upper end of the
windshield glass with a damp or
wet cloth.
Do not put pressure on the wind-
shield glass.
CAUTION
To prevent possible damage to
the wipers or windshield, do not
operate the wipers when the
windshield is dry.
To prevent damage to the wiper
blades, do not use gasoline,
kerosene, paint thinner, or other
solvents on or near them.
To prevent damage to the wiper
arms and other components, do
not attempt to move the wipers
manually.
OVQ036053N
Page 183 of 398
3 167
Features of your vehicle
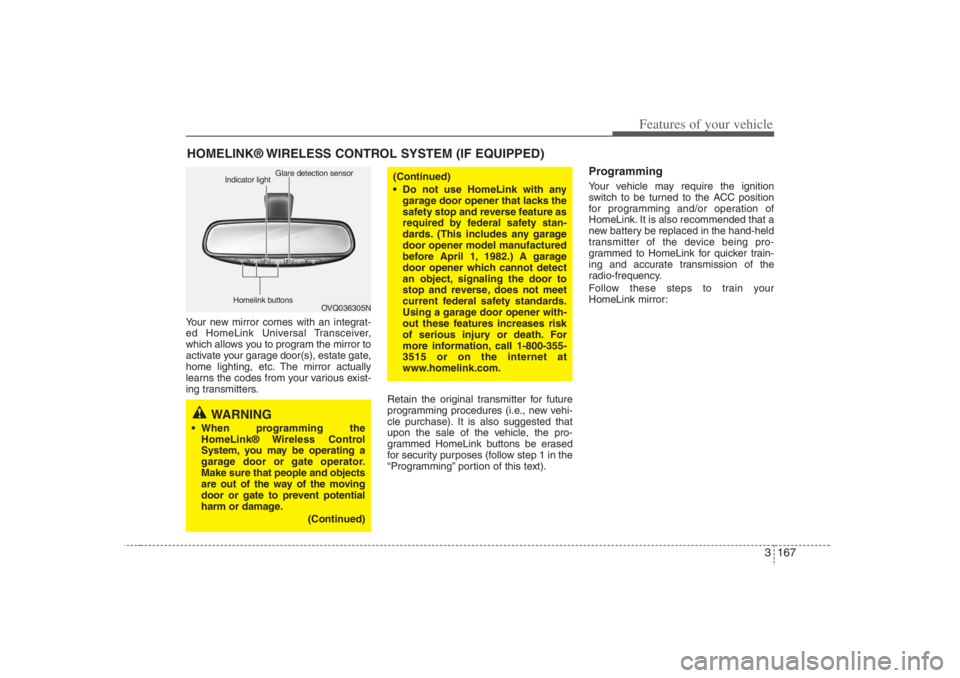
Your new mirror comes with an integrat-
ed HomeLink Universal Transceiver,
which allows you to program the mirror to
activate your garage door(s), estate gate,
home lighting, etc. The mirror actually
learns the codes from your various exist-
ing transmitters.
Retain the original transmitter for future
programming procedures (i.e., new vehi-
cle purchase). It is also suggested that
upon the sale of the vehicle, the pro-
grammed HomeLink buttons be erased
for security purposes (follow step 1 in the
“Programming” portion of this text).
ProgrammingYour vehicle may require the ignition
switch to be turned to the ACC position
for programming and/or operation of
HomeLink. It is also recommended that a
new battery be replaced in the hand-held
transmitter of the device being pro-
grammed to HomeLink for quicker train-
ing and accurate transmission of the
radio-frequency.
Follow these steps to train your
HomeLink mirror:
HOMELINK® WIRELESS CONTROL SYSTEM (IF EQUIPPED)
WARNING
When programming the
HomeLink® Wireless Control
System, you may be operating a
garage door or gate operator.
Make sure that people and objects
are out of the way of the moving
door or gate to prevent potential
harm or damage.
(Continued)
(Continued)
Do not use HomeLink with any
garage door opener that lacks the
safety stop and reverse feature as
required by federal safety stan-
dards. (This includes any garage
door opener model manufactured
before April 1, 1982.) A garage
door opener which cannot detect
an object, signaling the door to
stop and reverse, does not meet
current federal safety standards.
Using a garage door opener with-
out these features increases risk
of serious injury or death. For
more information, call 1-800-355-
3515 or on the internet at
www.homelink.com.
OVQ036305N Glare detection sensor
Indicator light
Homelink buttons
Page 271 of 398
425
Driving your vehicle
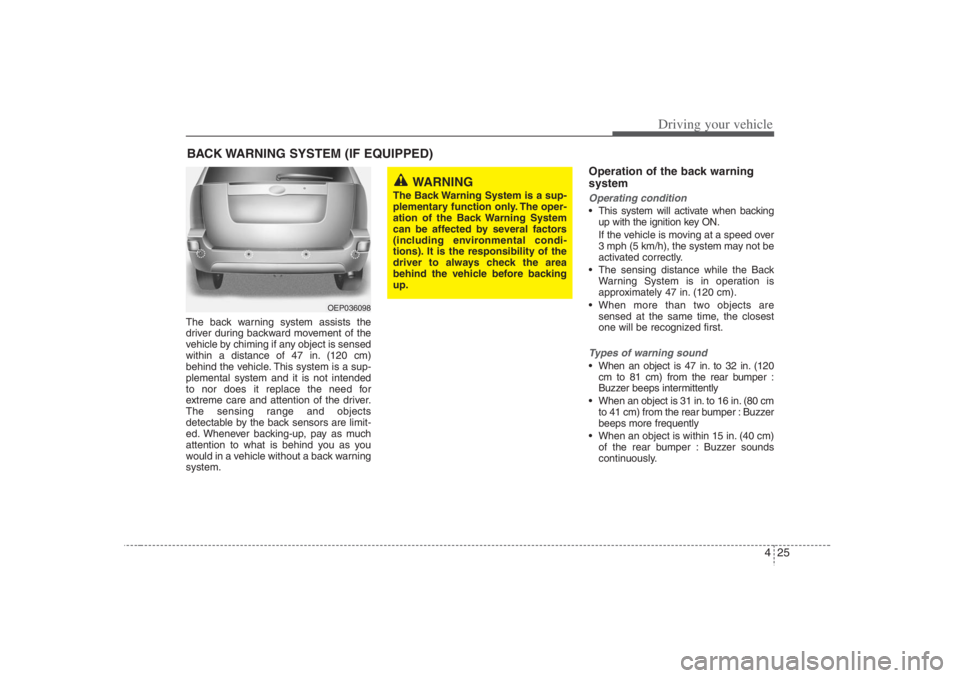
The back warning system assists the
driver during backward movement of the
vehicle by chiming if any object is sensed
within a distance of 47 in. (120 cm)
behind the vehicle. This system is a sup-
plemental system and it is not intended
to nor does it replace the need for
extreme care and attention of the driver.
The sensing range and objects
detectable by the back sensors are limit-
ed. Whenever backing-up, pay as much
attention to what is behind you as you
would in a vehicle without a back warning
system.
Operation of the back warning
systemOperating condition This system will activate when backing
up with the ignition key ON.
If the vehicle is moving at a speed over
3 mph (5 km/h), the system may not be
activated correctly.
The sensing distance while the Back
Warning System is in operation is
approximately 47 in. (120 cm).
When more than two objects are
sensed at the same time, the closest
one will be recognized first.Types of warning sound When an object is 47 in. to 32 in. (120
cm to 81 cm) from the rear bumper :
Buzzer beeps intermittently
When an object is 31 in. to 16 in. (80 cm
to 41 cm) from the rear bumper : Buzzer
beeps more frequently
When an object is within 15 in. (40 cm)
of the rear bumper : Buzzer sounds
continuously.
BACK WARNING SYSTEM (IF EQUIPPED)
WARNING
The Back Warning System is a sup-
plementary function only. The oper-
ation of the Back Warning System
can be affected by several factors
(including environmental condi-
tions). It is the responsibility of the
driver to always check the area
behind the vehicle before backing
up.
OEP036098
Page 272 of 398
Driving your vehicle26 4Non-operational conditions of
back warning systemThe back warning system may not
operate properly when:1. Moisture is frozen to the sensor. (It will
operate normally when the moisture
has been cleared.)
2. The sensor is covered with foreign
matter, such as snow or water, or the
sensor cover is blocked. (It will operate
normally when the material is removed
or the sensor is no longer blocked.)
3. Driving on uneven road surfaces
(unpaved roads, gravel, bumps, gradi-
ent).
4. Objects generating excessive noise
(vehicle horns, loud motorcycle
engines, or truck air brakes) are within
range of the sensor.
5. Heavy rain or water spray exists.
6. Wireless transmitters or mobile phones
are within range of the sensor.
7. The sensor is covered with snow.
8. Trailer towing
The detecting range may decrease
when:1. The sensor is stained with foreign mat-
ter such as snow or water. (The sens-
ing range will return to normal when
removed.)
2. Outside air temperature is extremely
hot or cold.The following objects may not be rec-
ognized by the sensor:1. Sharp or slim objects such as ropes,
chains or small poles.
2. Objects which tend to absorb the sen-
sor frequency such as clothes, spongy
material or snow.
3. Undetectable objects smaller than 40 in.
(1 m) and narrower than 6 in. (14 cm) in
diameter.
CAUTION
1. The back warning may not sound
sequentially depending on the
speed and shapes of the objects
detected.
2. The back warning system may
malfunction if the vehicle bumper
height or sensor installation has
been modified or damaged. Any
non-factory installed equipment
or accessories may also interfere
with the sensor performance.
3. The sensor may not recognize
objects less than 15 in. (40 cm)
from the sensor, or it may sense
an incorrect distance. Use cau-
tion.
4. When the sensor is frozen or
stained with snow, dirt, or water,
the sensor may be inoperative
until the stains are removed
using a soft cloth.
5. Do not push, scratch or strike the
sensor. Sensor damage could
occur.
Page 273 of 398
427
Driving your vehicle
✽ ✽
NOTICEIf you don’t hear an audible warning
sound or if the buzzer sounds intermit-
tently when shifting the gear to “R” posi-
tion, this may indicate a malfunction in
the back warning system. If this occurs,
have your vehicle checked by an author-
ized Hyundai dealer as soon as possible.
WARNING
Pay close attention when the vehi-
cle is driven close to objects on the
road, particularly pedestrians, and
especially children. Be aware that
some objects may not be detected
by the sensors, due to the object’s
distance, size or material, all of
which can limit the effectiveness of
the sensor. Always perform a visu-
al inspection to make sure the vehi-
cle is clear of all obstructions
before moving the vehicle in any
direction.
CAUTION
This system can only sense objects
within the range and location of the
sensors; It can not detect objects in
other areas where sensors are not
installed. Also, small or slim
objects, such as poles or objects
located between sensors may not
be detected by the sensors.
Always visually check behind the
vehicle when backing up.
Be sure to inform any drivers of the
vehicle that may be unfamiliar with
the system regarding the systems
capabilities and limitations.
Your new vehicle warranty does not
cover any accidents or damage to
the vehicle or its occupants due to
a back warning system malfunc-
tion. Always drive safely and cau-
tiously.