lock Hyundai Equus 2010 User Guide
[x] Cancel search | Manufacturer: HYUNDAI, Model Year: 2010, Model line: Equus, Model: Hyundai Equus 2010Pages: 374, PDF Size: 41.29 MB
Page 41 of 374
323
Safety features of your vehicle
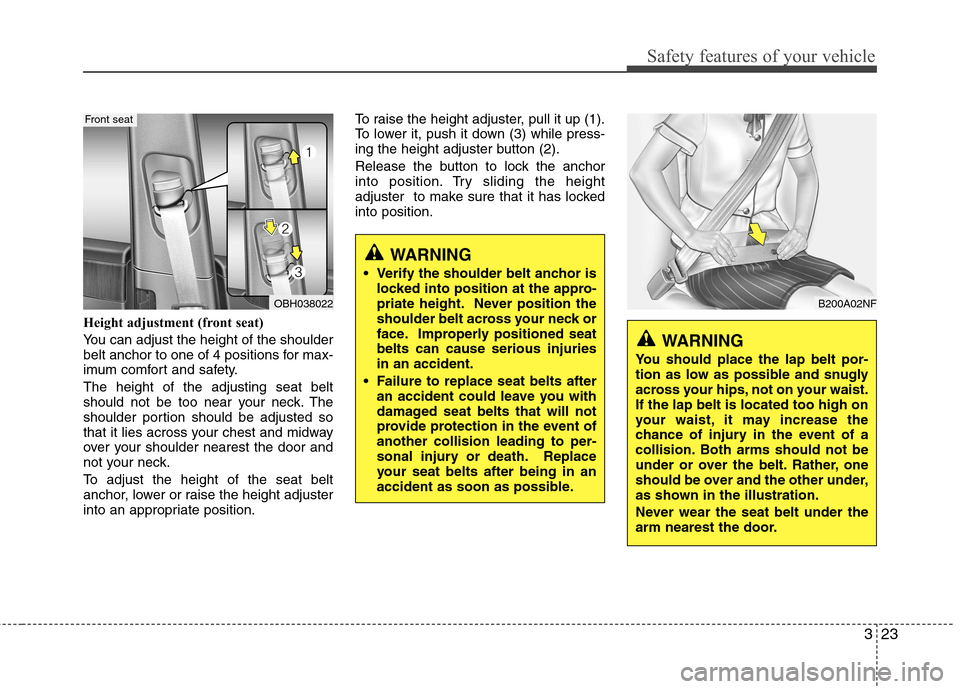
Height adjustment (front seat)
You can adjust the height of the shoulder
belt anchor to one of 4 positions for max-
imum comfort and safety. The height of the adjusting seat belt
should not be too near your neck. The
shoulder portion should be adjusted so
that it lies across your chest and midway
over your shoulder nearest the door and
not your neck.
To adjust the height of the seat belt
anchor, lower or raise the height adjuster
into an appropriate position.To raise the height adjuster, pull it up (1).
To lower it, push it down (3) while press-
ing the height adjuster button (2).
Release the button to lock the anchor
into position. Try sliding the height
adjuster to make sure that it has lockedinto position.
WARNING
Verify the shoulder belt anchor is locked into position at the appro-
priate height. Never position the
shoulder belt across your neck or
face. Improperly positioned seatbelts can cause serious injuriesin an accident.
Failure to replace seat belts after an accident could leave you with
damaged seat belts that will not
provide protection in the event ofanother collision leading to per-
sonal injury or death. Replace
your seat belts after being in an
accident as soon as possible.
B200A02NF
WARNING
You should place the lap belt por-
tion as low as possible and snugly
across your hips, not on your waist.If the lap belt is located too high on
your waist, it may increase the
chance of injury in the event of a
collision. Both arms should not be
under or over the belt. Rather, one
should be over and the other under,
as shown in the illustration.
Never wear the seat belt under the
arm nearest the door.
OBH038022
Front seat
Page 42 of 374
Safety features of your vehicle
24
3
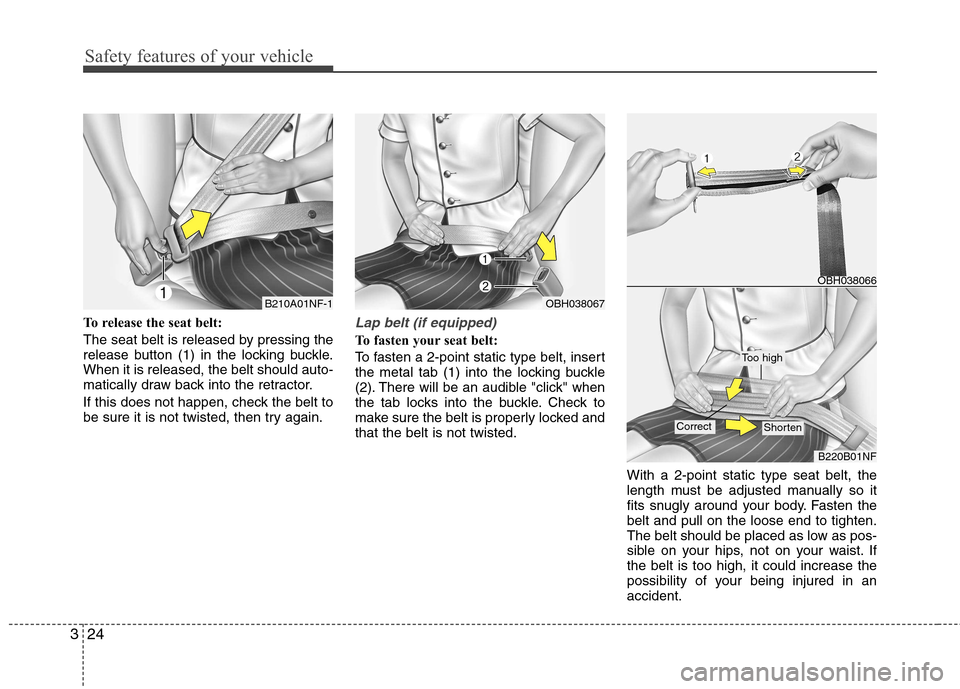
To release the seat belt:
The seat belt is released by pressing the
release button (1) in the locking buckle.When it is released, the belt should auto-
matically draw back into the retractor.
If this does not happen, check the belt to
be sure it is not twisted, then try again.Lap belt (if equipped)
To fasten your seat belt:
To fasten a 2-point static type belt, insert
the metal tab (1) into the locking buckle
(2). There will be an audible "click" when
the tab locks into the buckle. Check to
make sure the belt is properly locked andthat the belt is not twisted.
With a 2-point static type seat belt, the
length must be adjusted manually so it
fits snugly around your body. Fasten thebelt and pull on the loose end to tighten.
The belt should be placed as low as pos-
sible on your hips, not on your waist. Ifthe belt is too high, it could increase the
possibility of your being injured in anaccident.
OBH038067
OBH038066
B220B01NF
Too high
ShortenCorrect
B210A01NF-1
Page 43 of 374
325
Safety features of your vehicle
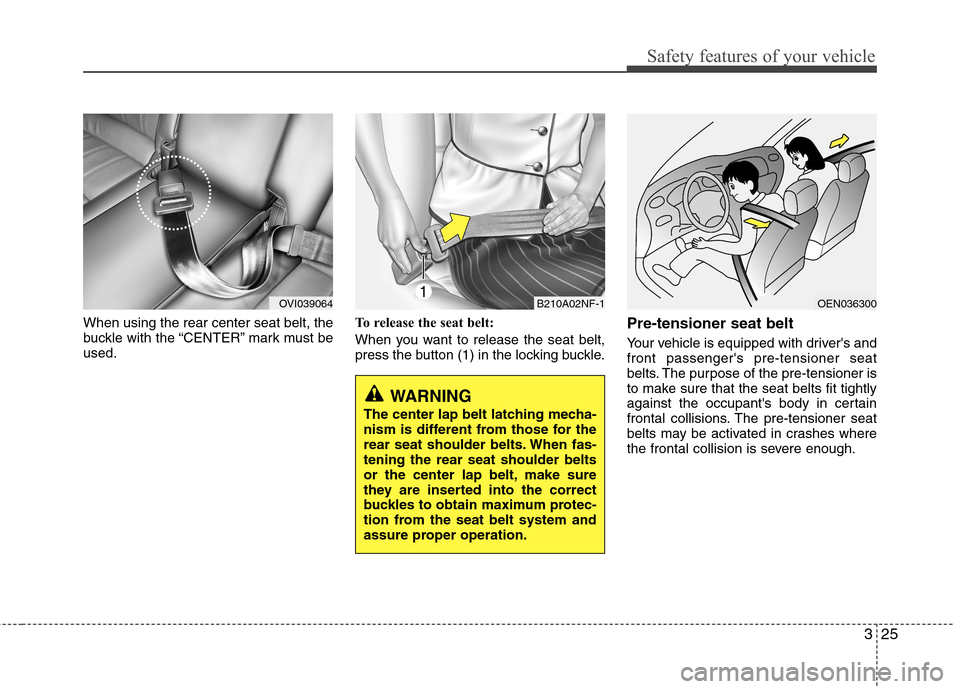
When using the rear center seat belt, the
buckle with the “CENTER” mark must beused.To release the seat belt:
When you want to release the seat belt,
press the button (1) in the locking buckle.Pre-tensioner seat belt
Your vehicle is equipped with driver's and front passenger's pre-tensioner seat
belts. The purpose of the pre-tensioner is
to make sure that the seat belts fit tightly
against the occupant's body in certain
frontal collisions. The pre-tensioner seat
belts may be activated in crashes where
the frontal collision is severe enough.
B210A02NF-1
WARNING
The center lap belt latching mecha-
nism is different from those for the
rear seat shoulder belts. When fas-tening the rear seat shoulder belts
or the center lap belt, make sure
they are inserted into the correct
buckles to obtain maximum protec-
tion from the seat belt system and
assure proper operation.
OVI039064OEN036300
Page 44 of 374
Safety features of your vehicle
26
3
When the vehicle stops suddenly, or if
the occupant tries to lean forward too
quickly, the seat belt retractor will lock
into position. In certain frontal collisions,
the pre-tensioner will activate and pullthe seat belt into tighter contact against
the occupant's body.
If the system senses excessive tension
on the driver or passenger's seat belt
when the pre-tensioner activates, theload limiter inside the pre-tensioner willrelease some of the pressure on the
affected seat belt. (if equipped)
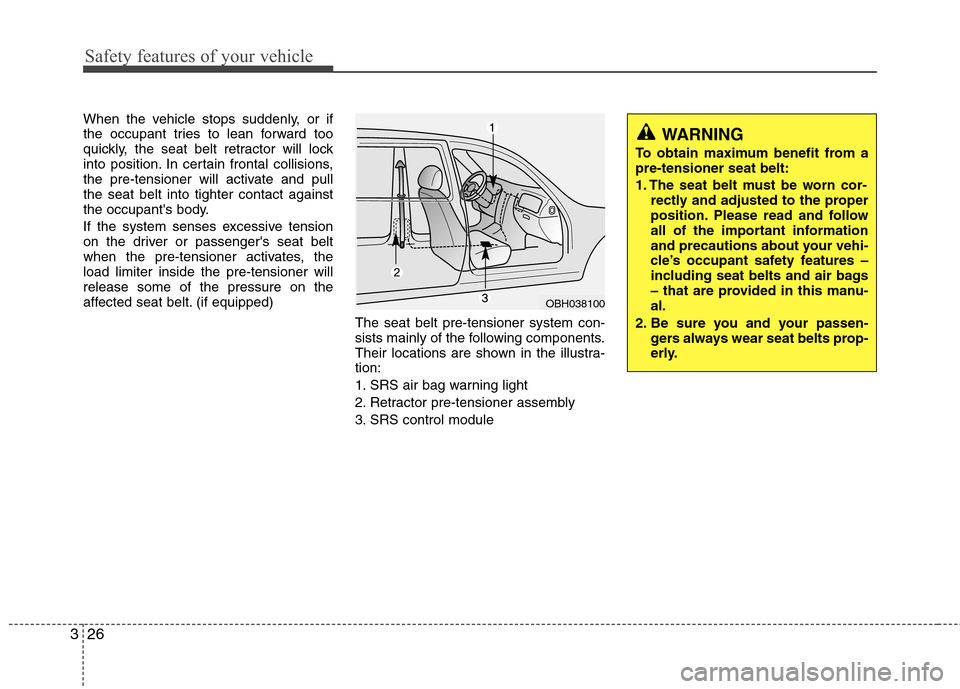
The seat belt pre-tensioner system con-
sists mainly of the following components.
Their locations are shown in the illustra-tion:
1. SRS air bag warning light
2. Retractor pre-tensioner assembly
3. SRS control module
OBH038100
WARNING
To obtain maximum benefit from a pre-tensioner seat belt:
1. The seat belt must be worn cor- rectly and adjusted to the proper
position. Please read and follow
all of the important information
and precautions about your vehi-
cle’s occupant safety features –
including seat belts and air bags
– that are provided in this manu-al.
2. Be sure you and your passen- gers always wear seat belts prop-
erly.
Page 52 of 374
Safety features of your vehicle
34
3
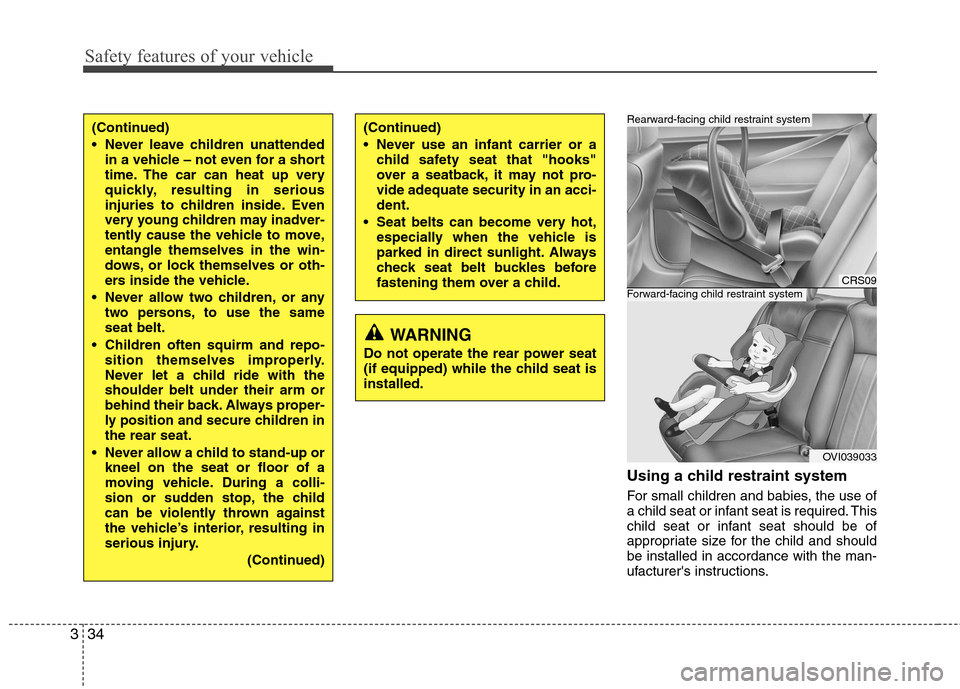
Using a child restraint system
For small children and babies, the use of
a child seat or infant seat is required. This
child seat or infant seat should be of
appropriate size for the child and shouldbe installed in accordance with the man-
ufacturer's instructions.
(Continued)
Never use an infant carrier or a
child safety seat that "hooks"
over a seatback, it may not pro-vide adequate security in an acci-dent.
Seat belts can become very hot, especially when the vehicle is
parked in direct sunlight. Always
check seat belt buckles before
fastening them over a child.
CRS09
OVI039033
Forward-facing child restraint system
Rearward-facing child restraint system(Continued)
Never leave children unattendedin a vehicle – not even for a short
time. The car can heat up very
quickly, resulting in serious
injuries to children inside. Even
very young children may inadver-
tently cause the vehicle to move,entangle themselves in the win-
dows, or lock themselves or oth-
ers inside the vehicle.
Never allow two children, or any two persons, to use the sameseat belt.
Children often squirm and repo- sition themselves improperly.
Never let a child ride with theshoulder belt under their arm or
behind their back. Always proper-
ly position and secure children inthe rear seat.
Never allow a child to stand-up or kneel on the seat or floor of a
moving vehicle. During a colli-
sion or sudden stop, the child
can be violently thrown against
the vehicle’s interior, resulting in
serious injury.
(Continued)
WARNING
Do not operate the rear power seat
(if equipped) while the child seat isinstalled.
Page 54 of 374
Safety features of your vehicle
36
3
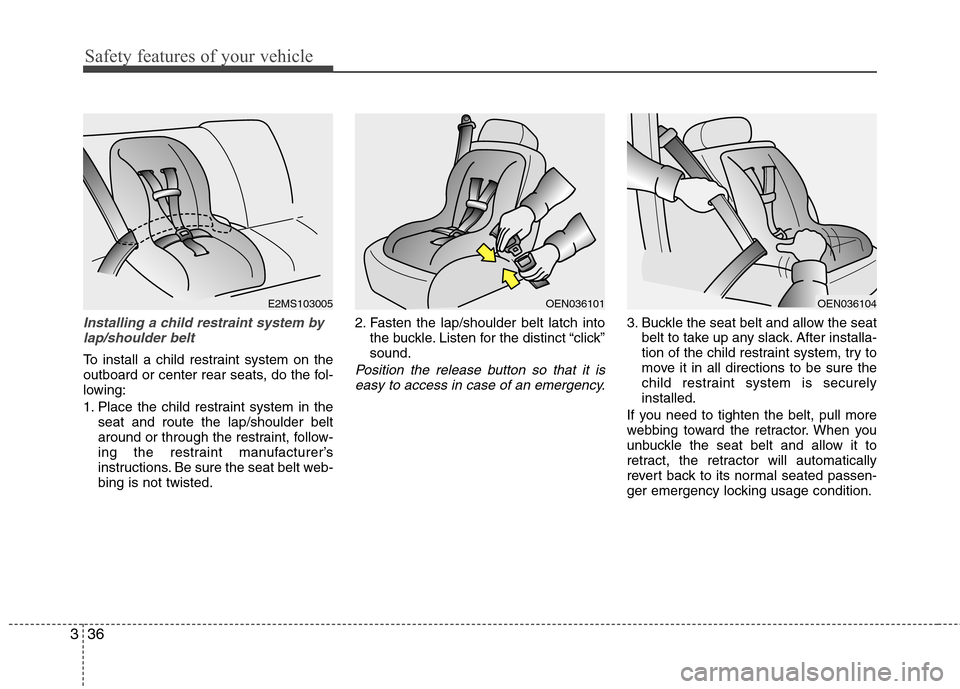
Installing a child restraint system by
lap/shoulder belt
To install a child restraint system on the
outboard or center rear seats, do the fol-
lowing:
1. Place the child restraint system in the seat and route the lap/shoulder belt
around or through the restraint, follow-
ing the restraint manufacturer’s
instructions. Be sure the seat belt web-bing is not twisted. 2. Fasten the lap/shoulder belt latch into
the buckle. Listen for the distinct “click”sound.Position the release button so that it is
easy to access in case of an emergency.
3. Buckle the seat belt and allow the seat belt to take up any slack. After installa-
tion of the child restraint system, try to
move it in all directions to be sure the
child restraint system is securelyinstalled.
If you need to tighten the belt, pull more
webbing toward the retractor. When you
unbuckle the seat belt and allow it to
retract, the retractor will automatically
revert back to its normal seated passen-
ger emergency locking usage condition.
OEN036101OEN036104E2MS103005
Page 62 of 374
Safety features of your vehicle
44
3
WARNING
Extreme Hazard! Do not use a rearward facing child restraint on
a seat protected by an air bag in
front of it!
Never put a child restraint in the front passenger’s seat. If the front
passenger air bag inflates, it cancause serious or fatal injuries.
When children are seated in the rear outboard seats of a vehicle
equipped with side and/or curtain
air bags, be sure to install the
child restraint system as far away
from the door side as possible,
and securely lock the childrestraint system in position.
Inflation of side and/or curtain air
bags could cause serious injury
or death to an infant or child.
Noise and smoke
When the air bags inflate, they make a
loud noise and they leave smoke and
powder in the air inside of the vehicle.
This is normal and is a result of the igni-
tion of the air bag inflator. After the air
bag inflates, you may feel substantial dis-
comfort in breathing due to the contact of
your chest with both the seat belt and the
air bag, as well as from breathing the
smoke and powder. Open your doors
and/or windows as soon as possible
after impact in order to reduce dis-
comfort and prevent prolonged expo-
sure to the smoke and powder.
Though the smoke and powder are non-
toxic, they may cause irritation to the skin
(eyes, nose and throat, etc). If this is the
case, wash and rinse with cold waterimmediately and consult a doctor if the
symptom persists.
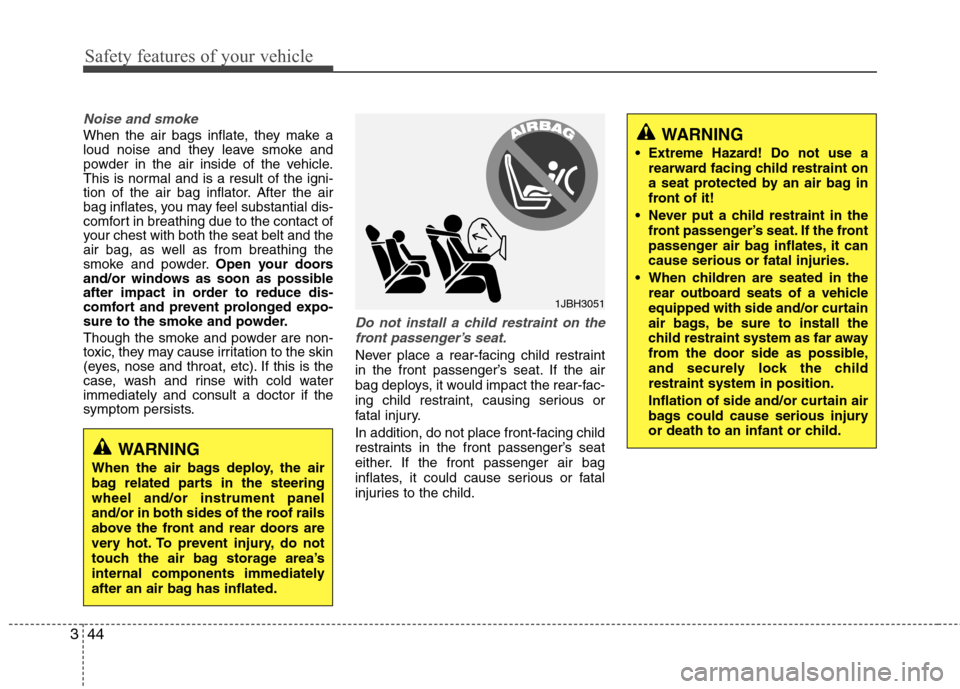
Do not install a child restraint on the
front passenger’s seat.
Never place a rear-facing child restraint
in the front passenger’s seat. If the air
bag deploys, it would impact the rear-fac-
ing child restraint, causing serious or
fatal injury.
In addition, do not place front-facing child
restraints in the front passenger’s seat
either. If the front passenger air bag
inflates, it could cause serious or fatal
injuries to the child.
1JBH3051
WARNING
When the air bags deploy, the air
bag related parts in the steeringwheel and/or instrument panel
and/or in both sides of the roof rails
above the front and rear doors are
very hot. To prevent injury, do not
touch the air bag storage area’s
internal components immediately
after an air bag has inflated.
Page 70 of 374
Safety features of your vehicle
52
3
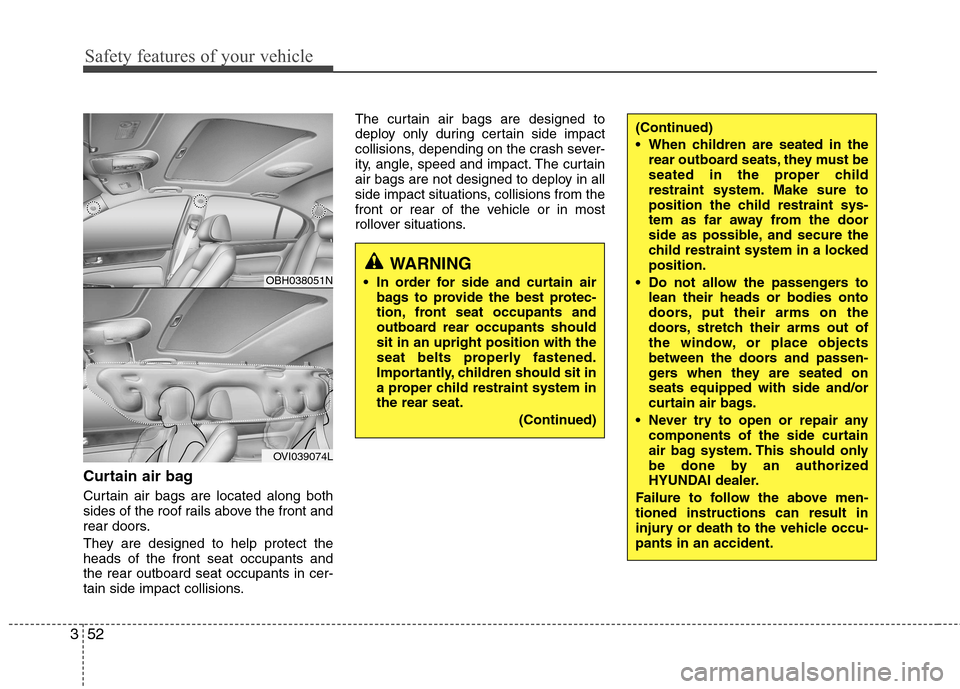
Curtain air bag
Curtain air bags are located along both
sides of the roof rails above the front and
rear doors.
They are designed to help protect the heads of the front seat occupants andthe rear outboard seat occupants in cer-
tain side impact collisions. The curtain air bags are designed to
deploy only during certain side impact
collisions, depending on the crash sever-
ity, angle, speed and impact. The curtain
air bags are not designed to deploy in all
side impact situations, collisions from the
front or rear of the vehicle or in most
rollover situations.
WARNING
In order for side and curtain air bags to provide the best protec-
tion, front seat occupants and
outboard rear occupants shouldsit in an upright position with the
seat belts properly fastened.
Importantly, children should sit in
a proper child restraint system inthe rear seat.
(Continued)OBH038051N
OVI039074L
(Continued)
When children are seated in therear outboard seats, they must be
seated in the proper child
restraint system. Make sure to
position the child restraint sys-
tem as far away from the door
side as possible, and secure the
child restraint system in a lockedposition.
Do not allow the passengers to lean their heads or bodies onto
doors, put their arms on the
doors, stretch their arms out of
the window, or place objects
between the doors and passen-
gers when they are seated onseats equipped with side and/or
curtain air bags.
Never try to open or repair any components of the side curtain
air bag system. This should only
be done by an authorized
HYUNDAI dealer.
Failure to follow the above men-tioned instructions can result in
injury or death to the vehicle occu-pants in an accident.
Page 79 of 374
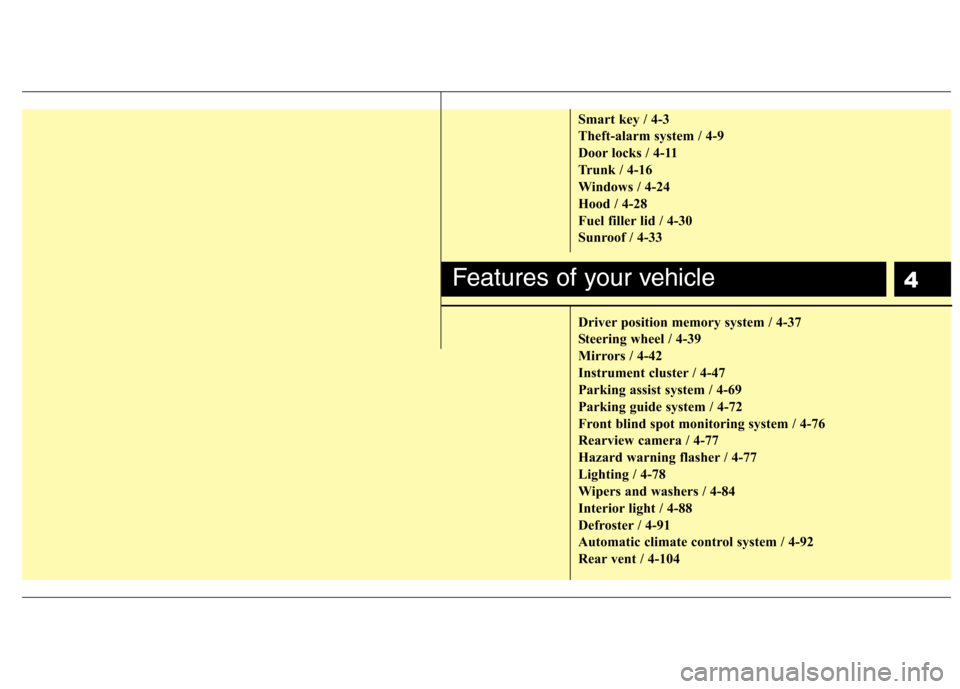
4
Smart key / 4-3
Theft-alarm system / 4-9
Door locks / 4-11
Trunk / 4-16
Windows / 4-24
Hood / 4-28
Fuel filler lid / 4-30
Sunroof / 4-33
Driver position memory system / 4-37
Steering wheel / 4-39
Mirrors / 4-42
Instrument cluster / 4-47
Parking assist system / 4-69
Parking guide system / 4-72
Front blind spot monitoring system / 4-76
Rearview camera / 4-77
Hazard warning flasher / 4-77
Lighting / 4-78
Wipers and washers / 4-84
Interior light / 4-88
Defroster / 4-91
Automatic climate control system / 4-92
Rear vent / 4-104
Features of your vehicle
Page 81 of 374

43
Features of your vehicle
With a smart key, you can lock or unlock
a door (and trunk) and even start the
engine without inserting the key.
Smart key functions
Carrying the smart key, you can lock and
unlock the vehicle doors (and trunk).
Also, you may start the engine. Refer to
the following for more details.Locking
Pressing the button of the outside door
handles with all doors (and trunk) closed
and any door unlocked, locks all the
doors (and trunk). The hazard warning
lights blink once to indicate that all doors
(and trunk) are locked. The button will
only operate when the smart key is with-in 0.7~1 m (28~40 in.) from the outside
door handle. If you put your hand in the
outside door handle to check that the
doors lock, doors may open.
If you want to make sure that a door has
locked or not, you should check the door
lock button inside the vehicle or check
that the hazard warning lights blink once.Even though you press the outside door
handle buttons, the doors will not lock
and the chime will sound for 3 seconds if
any of following occur:
• The smart key is in the vehicle.
The engine start/stop button is in ACC
or ON position.
Any door except the trunk is open.
Unlocking
Carrying the smart key with you while all
doors locked and if you put your hand in
the outside door handle for approximate-
ly 0.5 second, all doors will unlock. The
hazard warning lights blink twice to indi-
cate that all doors (and trunk) are
unlocked. You can open the door by
pulling the outside door handle. The
smart key is only recognized in the area0.7~1 m (28~40 in.) from the outside
door handle.
When the smart key is recognized in the area of 0.7~1 m (28~40 in.) from the out-
side door handle, other people can alsoopen the door without possession of the
smart key.
SMART KEY
OVI049001OVI049005
UnlockLock