headlights Hyundai Equus 2010 Owner's Manual
[x] Cancel search | Manufacturer: HYUNDAI, Model Year: 2010, Model line: Equus, Model: Hyundai Equus 2010Pages: 374, PDF Size: 41.29 MB
Page 120 of 374
Features of your vehicle
42
4
Inside rearview mirror
Adjust the rearview mirror so that the
center view through the rear window is
seen. Make this adjustment before you
start driving.
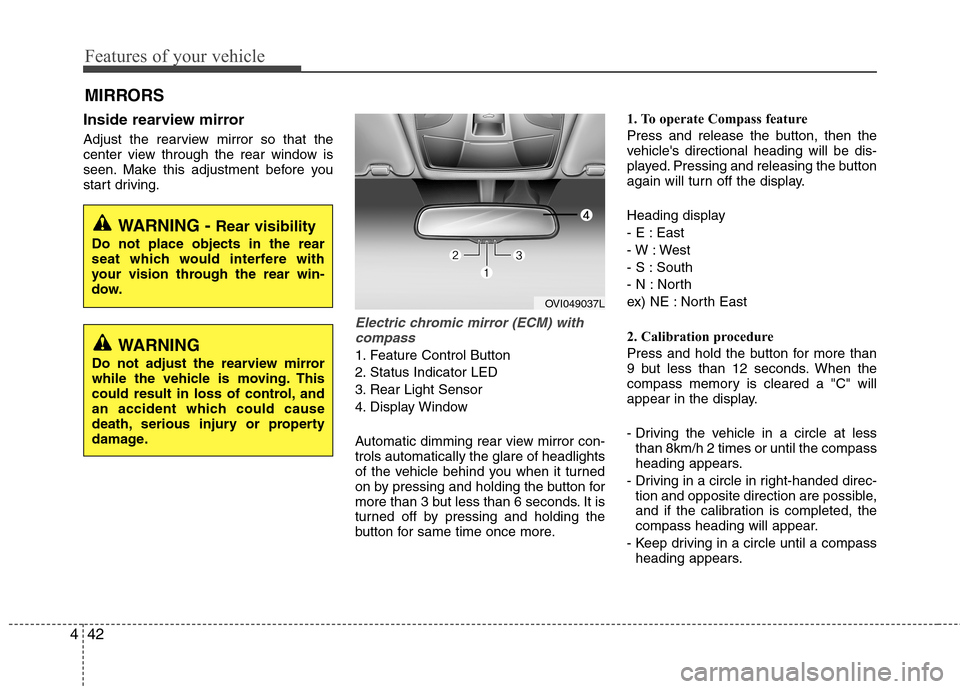
Electric chromic mirror (ECM) with
compass
1. Feature Control Button
2. Status Indicator LED
3. Rear Light Sensor
4. Display Window
Automatic dimming rear view mirror con- trols automatically the glare of headlights
of the vehicle behind you when it turned
on by pressing and holding the button for
more than 3 but less than 6 seconds. It is
turned off by pressing and holding the
button for same time once more. 1. To operate Compass feature
Press and release the button, then the
vehicle's directional heading will be dis-
played. Pressing and releasing the button
again will turn off the display.
Heading display
- E : East
- W : West
- S : South
- N : North
ex) NE : North East
2. Calibration procedure
Press and hold the button for more than
9 but less than 12 seconds. When the
compass memory is cleared a "C" will
appear in the display.
- Driving the vehicle in a circle at less
than 8km/h 2 times or until the compass
heading appears.
- Driving in a circle in right-handed direc- tion and opposite direction are possible,
and if the calibration is completed, the
compass heading will appear.
- Keep driving in a circle until a compass heading appears.
MIRRORS
WARNING -
Rear visibility
Do not place objects in the rear
seat which would interfere with
your vision through the rear win-
dow.
WARNING
Do not adjust the rearview mirror
while the vehicle is moving. This
could result in loss of control, and
an accident which could cause
death, serious injury or property
damage.
OVI049037L
Page 124 of 374
Features of your vehicle
46
4
Electric chromic mirror (ECM)
(if equipped)
The electric chromic mirror automatically controls the glare from the headlights of
the car behind you in nighttime or low
light driving conditions. The sensormounted in the mirror senses the light
level around the vehicle, and automati-cally controls the headlight glare from
vehicles behind you.
When the engine is running, the glare is
automatically controlled by the sensor
mounted in the rearview mirror.
Whenever the shift lever is shifted into R
(Reverse), the mirror will automatically
go to the brightest setting in order to
improve the drivers view behind the vehi-
cle. If the ECM of inside rear view mirror
operates, it will be working
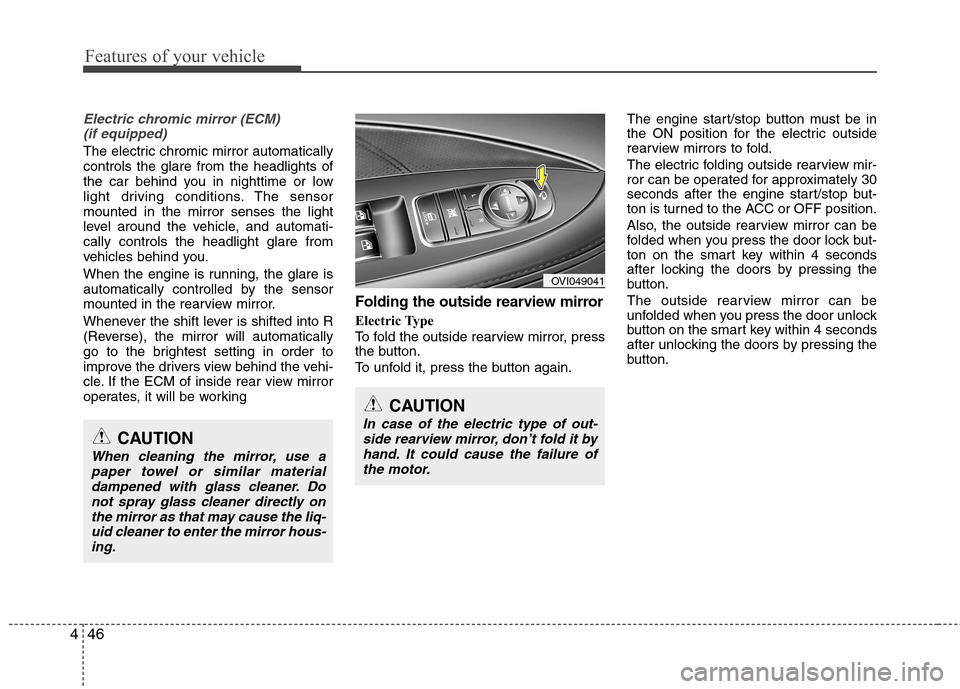
Folding the outside rearview mirror
Electric Type
To fold the outside rearview mirror, press
the button.
To unfold it, press the button again. The engine start/stop button must be in
the ON position for the electric outside
rearview mirrors to fold.
The electric folding outside rearview mir-
ror can be operated for approximately 30
seconds after the engine start/stop but-
ton is turned to the ACC or OFF position.
Also, the outside rearview mirror can be
folded when you press the door lock but-
ton on the smart key within 4 seconds
after locking the doors by pressing the
button.
The outside rearview mirror can be
unfolded when you press the door unlock
button on the smart key within 4 seconds
after unlocking the doors by pressing the
button.
OVI049041
CAUTION
In case of the electric type of out-
side rearview mirror, don’t fold it byhand. It could cause the failure of the motor.CAUTION
When cleaning the mirror, use apaper towel or similar materialdampened with glass cleaner. Donot spray glass cleaner directly on
the mirror as that may cause the liq-uid cleaner to enter the mirror hous- ing.
Page 126 of 374
Features of your vehicle
48
4
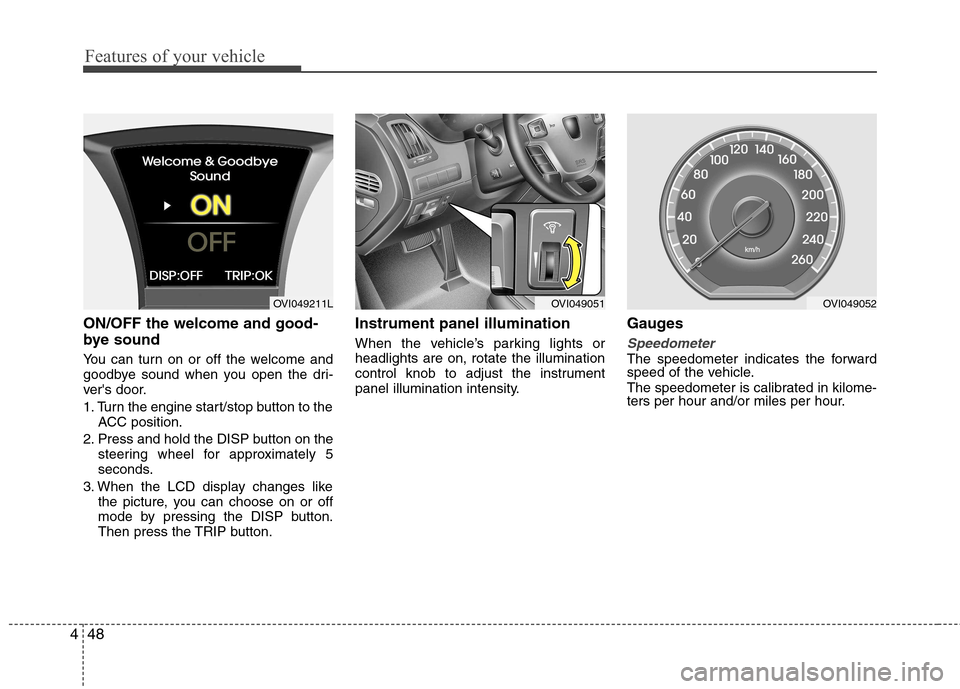
ON/OFF the welcome and good-
bye sound
You can turn on or off the welcome and
goodbye sound when you open the dri-
ver's door.
1. Turn the engine start/stop button to the
ACC position.
2. Press and hold the DISP button on the steering wheel for approximately 5
seconds.
3. When the LCD display changes like the picture, you can choose on or off
mode by pressing the DISP button.
Then press the TRIP button. Instrument panel illumination
When the vehicle’s parking lights or headlights are on, rotate the illumination
control knob to adjust the instrument
panel illumination intensity.
Gauges
Speedometer
The speedometer indicates the forward
speed of the vehicle.
The speedometer is calibrated in kilome-
ters per hour and/or miles per hour.
OVI049051OVI049211LOVI049052
Page 134 of 374
Features of your vehicle
56
4
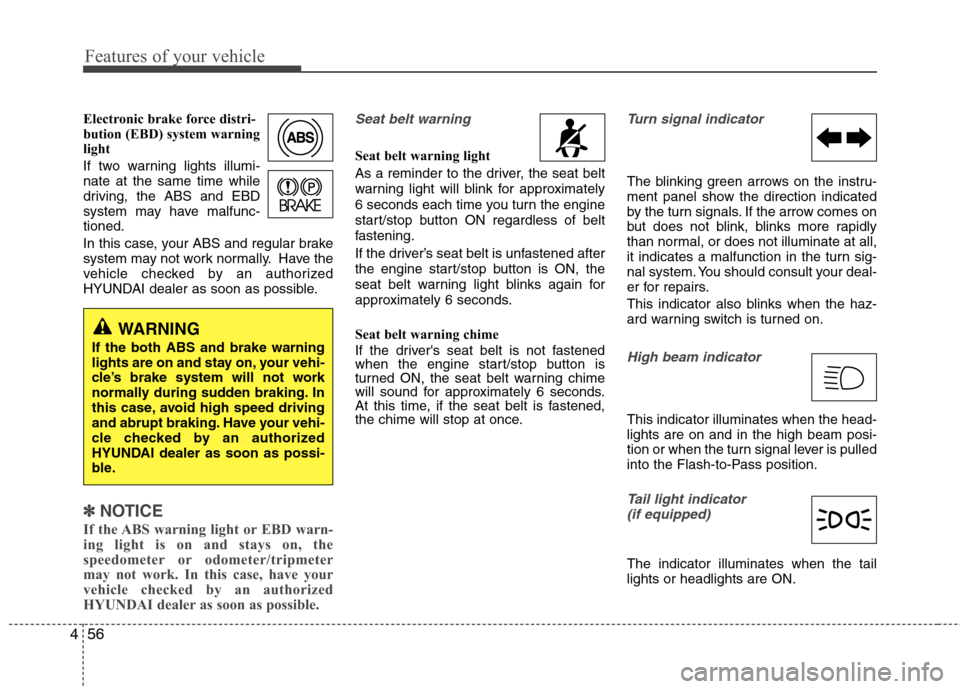
Electronic brake force distri-
bution (EBD) system warning
light
If two warning lights illumi- nate at the same time while
driving, the ABS and EBD
system may have malfunc-tioned.
In this case, your ABS and regular brake
system may not work normally. Have the
vehicle checked by an authorized
HYUNDAI dealer as soon as possible.
✽✽
NOTICE
If the ABS warning light or EBD warn-
ing light is on and stays on, the
speedometer or odometer/tripmeter
may not work. In this case, have your
vehicle checked by an authorized
HYUNDAI dealer as soon as possible.
Seat belt warning
Seat belt warning light
As a reminder to the driver, the seat belt
warning light will blink for approximately
6 seconds each time you turn the engine
start/stop button ON regardless of belt
fastening.
If the driver’s seat belt is unfastened after
the engine start/stop button is ON, the
seat belt warning light blinks again for
approximately 6 seconds.
Seat belt warning chime
If the driver's seat belt is not fastened
when the engine start/stop button is
turned ON, the seat belt warning chime
will sound for approximately 6 seconds.
At this time, if the seat belt is fastened,
the chime will stop at once.
Turn signal indicator
The blinking green arrows on the instru-
ment panel show the direction indicated
by the turn signals. If the arrow comes on
but does not blink, blinks more rapidly
than normal, or does not illuminate at all,
it indicates a malfunction in the turn sig-
nal system. You should consult your deal-
er for repairs.
This indicator also blinks when the haz-
ard warning switch is turned on.
High beam indicator
This indicator illuminates when the head- lights are on and in the high beam posi-
tion or when the turn signal lever is pulled
into the Flash-to-Pass position.
Tail light indicator (if equipped)
The indicator illuminates when the tail lights or headlights are ON.
WARNING
If the both ABS and brake warning
lights are on and stay on, your vehi-
cle’s brake system will not work
normally during sudden braking. In
this case, avoid high speed driving
and abrupt braking. Have your vehi-
cle checked by an authorized
HYUNDAI dealer as soon as possi-
ble.
Page 156 of 374
Features of your vehicle
78
4
Battery saver function
The purpose of this feature is to pre-
vent the battery from being dis-
charged. The system automatically
turns off the exterior lights when the
driver turns off the engine and opens
the driver-side door.
With this feature, the parking lights will be turned off automatically if the driver
parks on the side of road at night.
If necessary, to keep the lights on
when the engine start/stop button is
turned to the OFF position, perform the
following:
1) Open the driver-side door.
2) Turn the parking lights OFF and ON again using the light switch on the
steering column. Headlight escort function (if equipped)
If you turn the engine start/stop button to
the ACC or OFF position with the head-lights ON, the headlights (and/or tail
lights) remain on for about 20 minutes.
However, if the driver’s door is opened
and closed, the headlights are turned off
after 30 seconds.
The headlights can be turned off by
pressing the door lock button on the
smart key twice or turning the light switch
to the OFF or Auto position.
However, if you turn the light switch to the
Auto position when it is dark outside, the
headlights will not be turned off.
Rescue mode function (if equipped)
If your vehicle has any problem on the
vehicle network system, the headlights
(low beam) turn on automatically with the
engine start/stop button in the ON posi-
tion even though the headlight switch is
not turned on. At this time, the emer-
gency lighting is not turned off when the
headlight switch is turned off.
LIGHTING
CAUTION
If the rescue mode occurs, have
your vehicle checked by an author-
ized HYUNDAI dealer as soon aspossible.
Page 158 of 374
Features of your vehicle
80
4
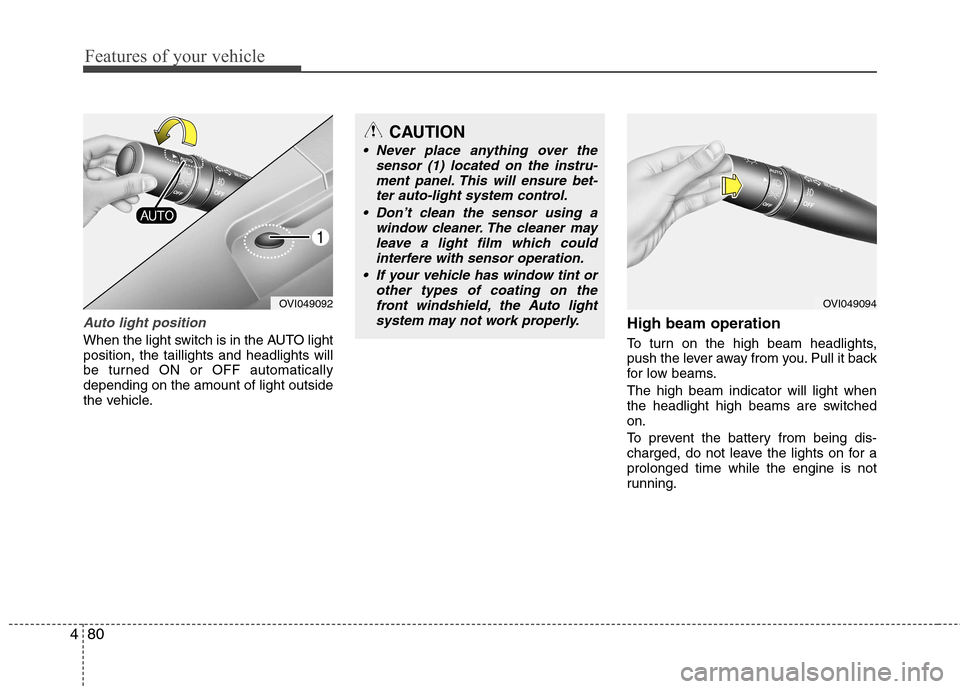
Auto light position
When the light switch is in the AUTO light position, the taillights and headlights will
be turned ON or OFF automaticallydepending on the amount of light outside
the vehicle. High beam operation
To turn on the high beam headlights,
push the lever away from you. Pull it back
for low beams. The high beam indicator will light when
the headlight high beams are switchedon.
To prevent the battery from being dis-
charged, do not leave the lights on for aprolonged time while the engine is not
running.
OVI049092
CAUTION
Never place anything over the
sensor (1) located on the instru-
ment panel. This will ensure bet-ter auto-light system control.
Don’t clean the sensor using a window cleaner. The cleaner may
leave a light film which could interfere with sensor operation.
If your vehicle has window tint or other types of coating on thefront windshield, the Auto light
system may not work properly.
OVI049094
Page 159 of 374
481
Features of your vehicle
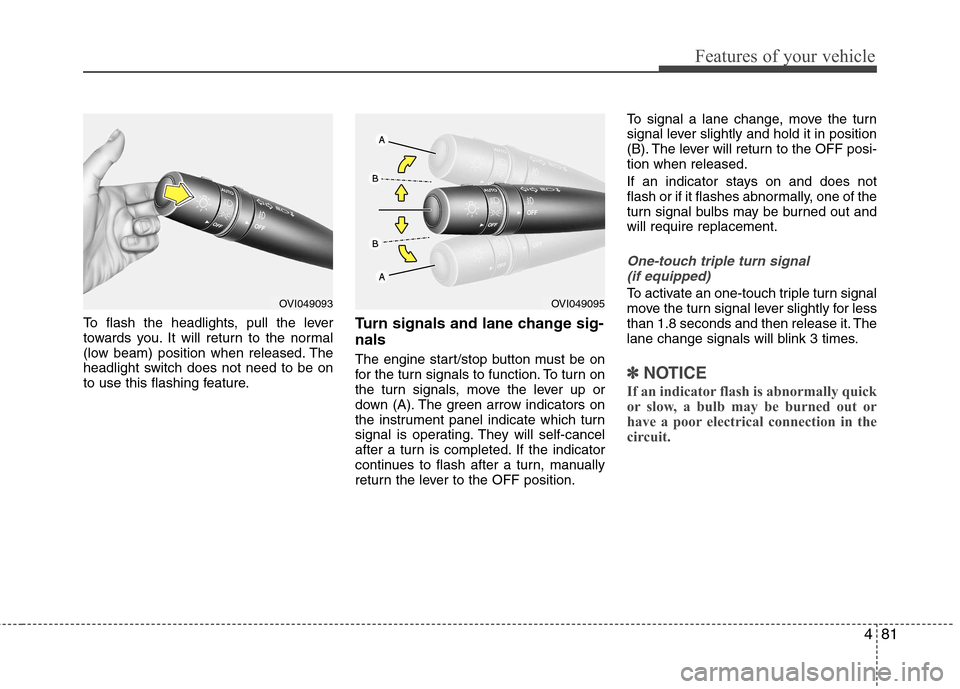
To flash the headlights, pull the lever
towards you. It will return to the normal
(low beam) position when released. The
headlight switch does not need to be on
to use this flashing feature.Turn signals and lane change sig- nals
The engine start/stop button must be on
for the turn signals to function. To turn on
the turn signals, move the lever up or
down (A). The green arrow indicators on
the instrument panel indicate which turn
signal is operating. They will self-cancel
after a turn is completed. If the indicator
continues to flash after a turn, manually
return the lever to the OFF position.To signal a lane change, move the turn
signal lever slightly and hold it in position
(B). The lever will return to the OFF posi-tion when released.
If an indicator stays on and does not
flash or if it flashes abnormally, one of the
turn signal bulbs may be burned out andwill require replacement.
One-touch triple turn signal
(if equipped)
To activate an one-touch triple turn signal
move the turn signal lever slightly for less
than 1.8 seconds and then release it. The
lane change signals will blink 3 times.
✽✽ NOTICE
If an indicator flash is abnormally quick
or slow, a bulb may be burned out or
have a poor electrical connection in the
circuit.
OVI049093OVI049095
Page 161 of 374
483
Features of your vehicle
AFLS (Adaptive Front Lighting System) (if equipped)
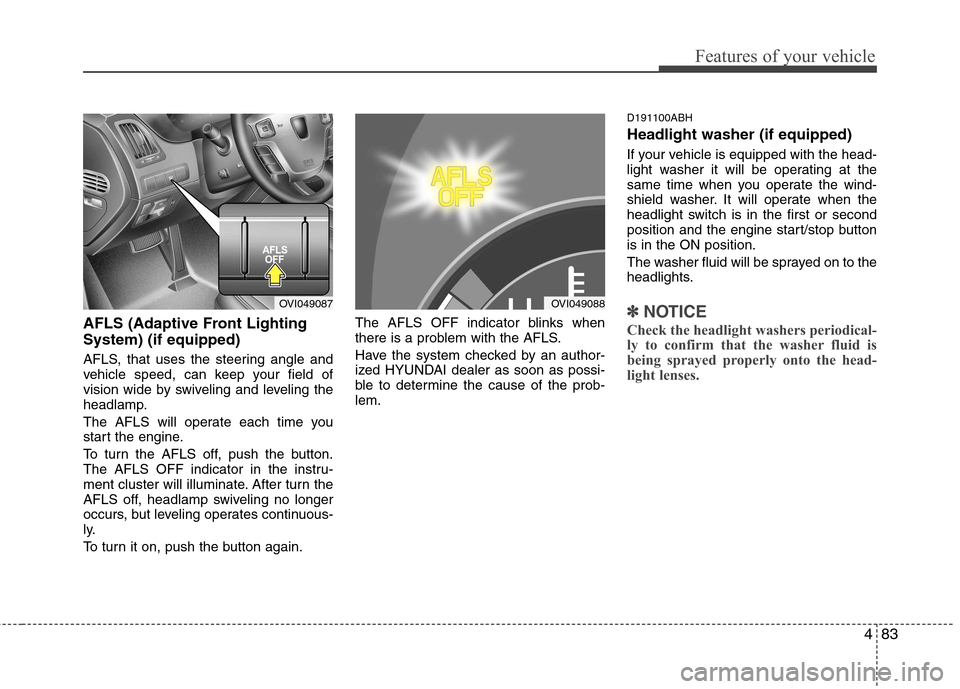
AFLS, that uses the steering angle and
vehicle speed, can keep your field of
vision wide by swiveling and leveling the
headlamp.
The AFLS will operate each time you
start the engine.
To turn the AFLS off, push the button.
The AFLS OFF indicator in the instru-
ment cluster will illuminate. After turn the
AFLS off, headlamp swiveling no longer
occurs, but leveling operates continuous-
ly.
To turn it on, push the button again.The AFLS OFF indicator blinks when
there is a problem with the AFLS.
Have the system checked by an author-
ized HYUNDAI dealer as soon as possi-
ble to determine the cause of the prob-lem.D191100ABH Headlight washer (if equipped)
If your vehicle is equipped with the head-
light washer it will be operating at the
same time when you operate the wind-
shield washer. It will operate when the
headlight switch is in the first or second
position and the engine start/stop buttonis in the ON position.
The washer fluid will be sprayed on to the
headlights.✽✽
NOTICE
Check the headlight washers periodical-
ly to confirm that the washer fluid is
being sprayed properly onto the head-
light lenses.OVI049087OVI049088
Page 260 of 374
Driving your vehicle
56
5
Adjust your mirrors to reduce the glare
from other driver's headlights.
Keep your headlights clean and prop- erly aimed on vehicles not equipped with the automatic headlight aiming
feature. Dirty or improperly aimed
headlights will make it much more diffi-cult to see at night.
Avoid staring directly at the headlights of oncoming vehicles. You could be
temporarily blinded, and it will take
several seconds for your eyes to read-
just to the darkness.
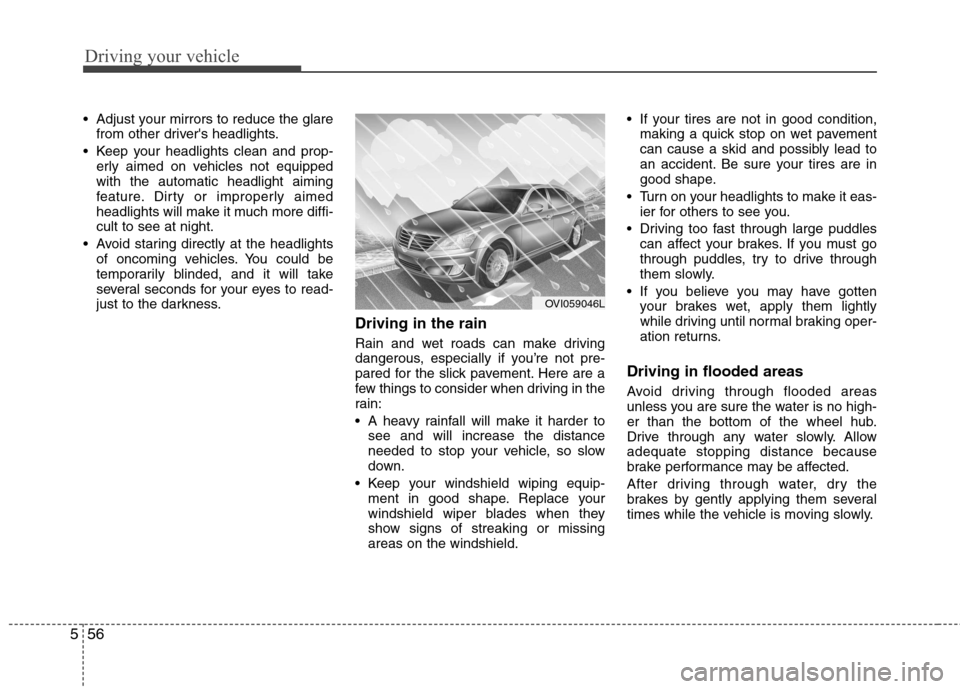
Driving in the rain
Rain and wet roads can make driving
dangerous, especially if you’re not pre-
pared for the slick pavement. Here are a
few things to consider when driving in the
rain:
A heavy rainfall will make it harder tosee and will increase the distance
needed to stop your vehicle, so slow
down.
Keep your windshield wiping equip- ment in good shape. Replace your
windshield wiper blades when they
show signs of streaking or missingareas on the windshield. If your tires are not in good condition,
making a quick stop on wet pavement
can cause a skid and possibly lead to
an accident. Be sure your tires are in
good shape.
Turn on your headlights to make it eas- ier for others to see you.
Driving too fast through large puddles can affect your brakes. If you must go
through puddles, try to drive through
them slowly.
If you believe you may have gotten your brakes wet, apply them lightly
while driving until normal braking oper-
ation returns.
Driving in flooded areas
Avoid driving through flooded areas
unless you are sure the water is no high-
er than the bottom of the wheel hub.
Drive through any water slowly. Allowadequate stopping distance because
brake performance may be affected.
After driving through water, dry the
brakes by gently applying them several
times while the vehicle is moving slowly.
OVI059046L
Page 322 of 374
731
Maintenance
Battery recharging
Your vehicle has a maintenance-free,
calcium-based battery.
If the battery becomes discharged in ashort time (because, for example, the
headlights or interior lights were left on
while the vehicle was not in use),
recharge it by slow charging (trickle)
for 10 hours.
If the battery gradually discharges because of high electric load while the
vehicle is being used, recharge it at 20-
30A for two hours.
(Continued)
Never attempt to recharge thebattery when the battery cables are connected.
The electrical ignition system works with high voltage. Never
touch these components with theengine running or the ignition
switched on.
Failure to follow the above warn-
ings can result in serious bodily
injury or death.WARNING - Recharging
battery
When recharging the battery,
observe the following precautions:
The battery must be removed from the vehicle and placed in an area with good ventilation.
Do not allow cigarettes, sparks, or flame near the battery.
Watch the battery during charg- ing, and stop or reduce the charg-
ing rate if the battery cells begin
gassing (boiling) violently or if
the temperature of the electrolyte
of any cell exceeds 49°C (120°F).
Wear eye protection when check- ing the battery during charging.
Disconnect the battery charger in the following order.
1. Turn off the battery charger main switch.
2. Unhook the negative clamp from the negative battery terminal.
3. Unhook the positive clamp from the positive battery terminal.
CAUTION
When you don’t use the vehicle
for a long time in the low temper-
ature area, separate the batteryand keep it indoors.
The power trunk is not closedcompletely when the battery isseparated. When you separate the
battery from the vehicle, refer to"Power trunk" in section 4.
Always charge the battery fully to prevent the battery case dam-
aged in low temperature area.
WARNING
Separating the battery from the
vehicle should be done in an
authorized HUNDAI dealer.