Jack Hyundai Equus 2013 Owner's Manual
[x] Cancel search | Manufacturer: HYUNDAI, Model Year: 2013, Model line: Equus, Model: Hyundai Equus 2013Pages: 479, PDF Size: 10.15 MB
Page 98 of 479
49
Features of your vehicle
Lock release
To release the trunk lock feature,
open the glove box with the mechan-
ical key and set the trunk lid control
button to ON position (pressed). In
this position the trunk will open with
the trunk lid button or smart key.Smart key precautions
✽NOTICE
• If, for some reason, you happen to
lose your smart key, you will not
be able to start the engine. Tow the
vehicle, if necessary, we recom-
mend that you contact an author-
ized HYUNDAI dealer.
• A maximum of 3 smart keys
including card type (if equipped)
can be registered to a single vehi-
cle. If you lose a smart key, we rec-
ommend that you contact an
authorized HYUNDAI dealer.
• The smart key will not work if any
of the following occurs:
- The smart key is close to a radio
transmitter such as a radio sta-
tion or an airport which can
interfere with normal operation
of the smart key.
- The smart key is near a mobile
two-way radio system or a cellu-
lar phone.
- Another vehicle’s smart key is
being operated close to your
vehicle.
(Continued)(Continued)
When the smart key does not work
properly, open and close the door
with the mechanical key. If you
have a problem with the smart
key, we recommend that you con-
tact an authorized HYUNDAI
dealer.
• If the smart key is in close proxim-
ity to your cell phone or smart
phone, the signal from the smart
key could be blocked by normal
operation of your cell phone or
smart phone. This is especially
important when the phone is
active such as making call, receiv-
ing calls, text messaging, and/or
sending/receiving emails. Avoid
placing the smart key and your
cell phone or smart phone in the
same pants or jacket pocket and
maintain adequate distance
between the two devices.
Page 113 of 479
Features of your vehicle
24 4
Power trunk non-opening condi-
tions
The power trunk will not open or close
automatically, when the vehicle is
moving more than 3 km/h (1.8 mph).
✽NOTICE
If there are obstacles such as snow
on the power trunk, it may not open
automatically. After remove the
obstacle, try to open it again.
✽NOTICE
• The power trunk can be operated
when the engine is not running.
However the power trunk opera-
tion consumes large amounts of
vehicle electric power. To prevent
the battery from being discharged,
do not operate it excessively e.g.:
more than approximately 10 times
repeatedly.
• To prevent the battery from being
discharged, do not leave the power
trunk in the open position for a
long lime.
• Do not apply excessive force while
operating the power trunk. This
could cause damage to the power
trunk.
• Do not modify or repair any part of
the power trunk by yourself. We
recommend that the system be serv-
iced by an authorized HYUNDAI
dealer.
• When jacking up the vehicle to
change a tire or repair the vehicle,
do not operate the power trunk.
This could cause the power trunk
to operate improperly.
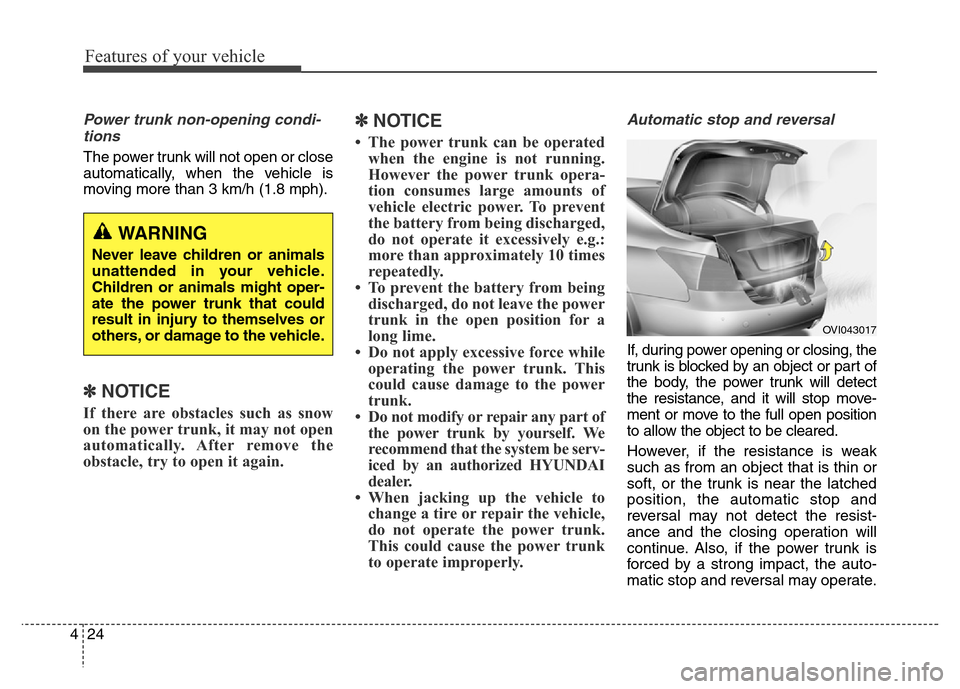
Automatic stop and reversal
If, during power opening or closing, the
trunk is blocked by an object or part of
the body, the power trunk will detect
the resistance, and it will stop move-
ment or move to the full open position
to allow the object to be cleared.
However, if the resistance is weak
such as from an object that is thin or
soft, or the trunk is near the latched
position, the automatic stop and
reversal may not detect the resist-
ance and the closing operation will
continue. Also, if the power trunk is
forced by a strong impact, the auto-
matic stop and reversal may operate.
WARNING
Never leave children or animals
unattended in your vehicle.
Children or animals might oper-
ate the power trunk that could
result in injury to themselves or
others, or damage to the vehicle.
OVI043017
Page 304 of 479
547
Driving your vehicle
✽ NOTICE
• When you drive over 70km/h, you
may not select the HIGH mode.
• Do not operate ECS when the air
filter of the compressor in the
lower part of the vehicle sinks
under the water.
In draft of water into the compres-
sor may happen, and ECS may not
operate normally.
ECS (electronic controlled
suspension) malfunction
warning message
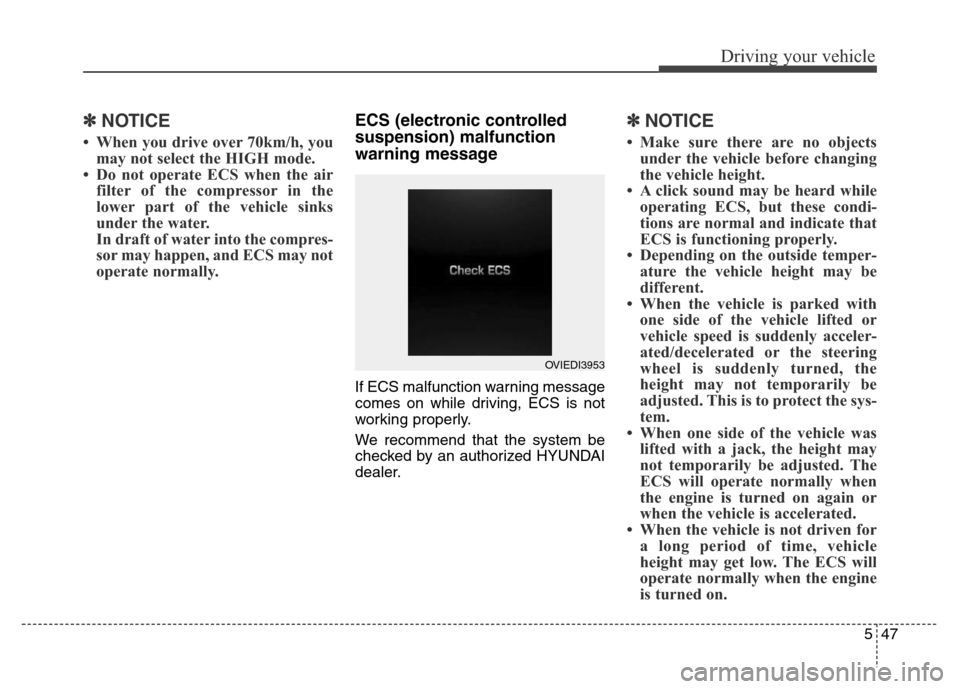
If ECS malfunction warning message
comes on while driving, ECS is not
working properly.
We recommend that the system be
checked by an authorized HYUNDAI
dealer.
✽ NOTICE
• Make sure there are no objects
under the vehicle before changing
the vehicle height.
• A click sound may be heard while
operating ECS, but these condi-
tions are normal and indicate that
ECS is functioning properly.
• Depending on the outside temper-
ature the vehicle height may be
different.
• When the vehicle is parked with
one side of the vehicle lifted or
vehicle speed is suddenly acceler-
ated/decelerated or the steering
wheel is suddenly turned, the
height may not temporarily be
adjusted. This is to protect the sys-
tem.
• When one side of the vehicle was
lifted with a jack, the height may
not temporarily be adjusted. The
ECS will operate normally when
the engine is turned on again or
when the vehicle is accelerated.
• When the vehicle is not driven for
a long period of time, vehicle
height may get low. The ECS will
operate normally when the engine
is turned on.
OVIEDI3953
Page 341 of 479
Driving your vehicle
84 5
Your vehicle's fuel economy depends
mainly on your style of driving, where
you drive and when you drive.
Each of these factors affects how
many miles (kilometers) you can get
from a gallon (liter) of fuel. To operate
your vehicle as economically as pos-
sible, use the following driving sug-
gestions to help save money in both
fuel and repairs:
• Drive smoothly. Accelerate at a
moderate rate. Don't make "jack-
rabbit" starts or full-throttle shifts
and maintain a steady cruising
speed. Don't race between stop-
lights. Try to adjust your speed to
that of the other traffic so you don't
have to change speeds unneces-
sarily. Avoid heavy traffic whenever
possible. Always maintain a safe
distance from other vehicles so
you can avoid unnecessary brak-
ing. This also reduces brake wear.
• Drive at a moderate speed. The
faster you drive, the more fuel your
car uses. Driving at a moderate
speed, especially on the highway,
is one of the most effective ways to
reduce fuel consumption.• Don't "ride" the brake pedal. This
can increase fuel consumption and
also increase wear on these com-
ponents. In addition, driving with
your foot resting on the brake pedal
may cause the brakes to overheat,
which reduces their effectiveness
and may lead to more serious con-
sequences.
• Take care of your tires. Keep them
inflated to the recommended pres-
sure. Incorrect inflation, either too
much or too little, results in unnec-
essary tire wear. Check the tire
pressures at least once a month.
• Be sure that the wheels are
aligned correctly. Improper align-
ment can result from hitting curbs
or driving too fast over irregular
surfaces. Poor alignment causes
faster tire wear and may also result
in other problems as well as
greater fuel consumption.• Keep your car in good condition.
For better fuel economy and
reduced maintenance costs, main-
tain your car in accordance with
the maintenance schedule in sec-
tion 7. If you drive your car in
severe conditions, more frequent
maintenance is required (see sec-
tion 7 for details).
• Keep your car clean. For maximum
service, your vehicle should be
kept clean and free of corrosive
materials. It is especially important
that mud, dirt, ice, etc. not be
allowed to accumulate on the
underside of the car. This extra
weight can result in increased fuel
consumption and also contribute to
corrosion.
• Travel lightly. Don't carry unneces-
sary weight in your car. Weight
reduces fuel economy.
• Don't let the engine idle longer
than necessary. If you are waiting
(and not in traffic), turn off your
engine and restart only when
you're ready to go.
ECONOMICAL OPERATION
Page 356 of 479
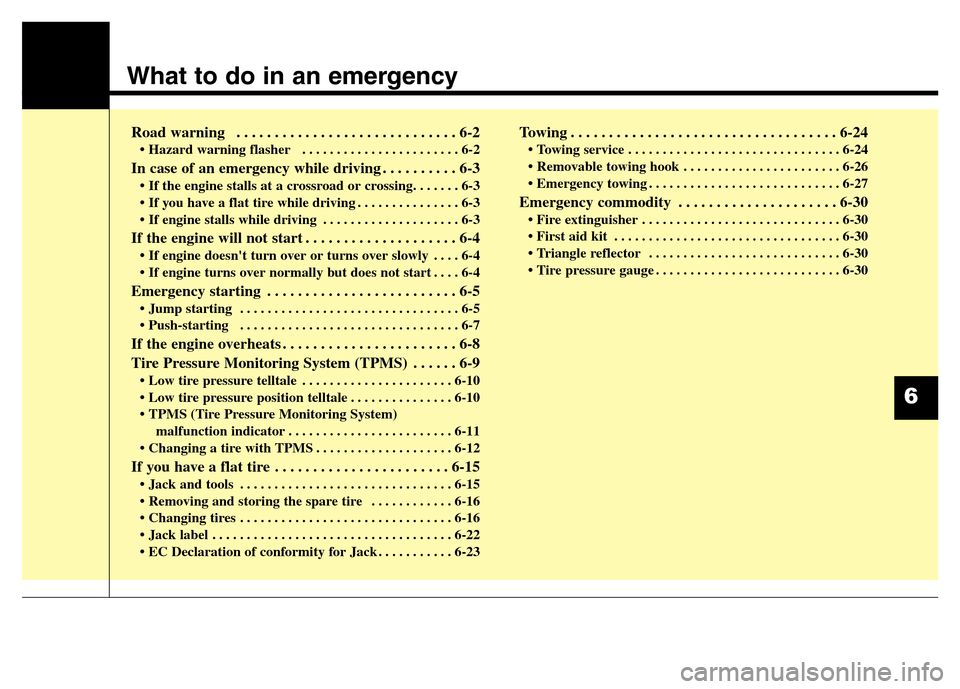
What to do in an emergency
Road warning . . . . . . . . . . . . . . . . . . . . . . . . . . . . . 6-2
• Hazard warning flasher . . . . . . . . . . . . . . . . . . . . . . . 6-2
In case of an emergency while driving . . . . . . . . . . 6-3
• If the engine stalls at a crossroad or crossing. . . . . . . 6-3
• If you have a flat tire while driving . . . . . . . . . . . . . . . 6-3
• If engine stalls while driving . . . . . . . . . . . . . . . . . . . . 6-3
If the engine will not start . . . . . . . . . . . . . . . . . . . . 6-4
• If engine doesn't turn over or turns over slowly . . . . 6-4
• If engine turns over normally but does not start . . . . 6-4
Emergency starting . . . . . . . . . . . . . . . . . . . . . . . . . 6-5
• Jump starting . . . . . . . . . . . . . . . . . . . . . . . . . . . . . . . . 6-5
• Push-starting . . . . . . . . . . . . . . . . . . . . . . . . . . . . . . . . 6-7
If the engine overheats . . . . . . . . . . . . . . . . . . . . . . . 6-8
Tire Pressure Monitoring System (TPMS) . . . . . . 6-9
• Low tire pressure telltale . . . . . . . . . . . . . . . . . . . . . . 6-10
• Low tire pressure position telltale . . . . . . . . . . . . . . . 6-10
• TPMS (Tire Pressure Monitoring System)
malfunction indicator . . . . . . . . . . . . . . . . . . . . . . . . 6-11
• Changing a tire with TPMS . . . . . . . . . . . . . . . . . . . . 6-12
If you have a flat tire . . . . . . . . . . . . . . . . . . . . . . . 6-15
• Jack and tools . . . . . . . . . . . . . . . . . . . . . . . . . . . . . . . 6-15
• Removing and storing the spare tire . . . . . . . . . . . . 6-16
• Changing tires . . . . . . . . . . . . . . . . . . . . . . . . . . . . . . . 6-16
• Jack label . . . . . . . . . . . . . . . . . . . . . . . . . . . . . . . . . . . 6-22
• EC Declaration of conformity for Jack . . . . . . . . . . . 6-23
Towing . . . . . . . . . . . . . . . . . . . . . . . . . . . . . . . . . . . 6-24
• Towing service . . . . . . . . . . . . . . . . . . . . . . . . . . . . . . . 6-24
• Removable towing hook . . . . . . . . . . . . . . . . . . . . . . . 6-26
• Emergency towing . . . . . . . . . . . . . . . . . . . . . . . . . . . . 6-27
Emergency commodity . . . . . . . . . . . . . . . . . . . . . 6-30
• Fire extinguisher . . . . . . . . . . . . . . . . . . . . . . . . . . . . . 6-30
• First aid kit . . . . . . . . . . . . . . . . . . . . . . . . . . . . . . . . . 6-30
• Triangle reflector . . . . . . . . . . . . . . . . . . . . . . . . . . . . 6-30
• Tire pressure gauge . . . . . . . . . . . . . . . . . . . . . . . . . . . 6-30
6
Page 370 of 479
615
What to do in an emergency
IF YOU HAVE A FLAT TIRE
Jack and tools
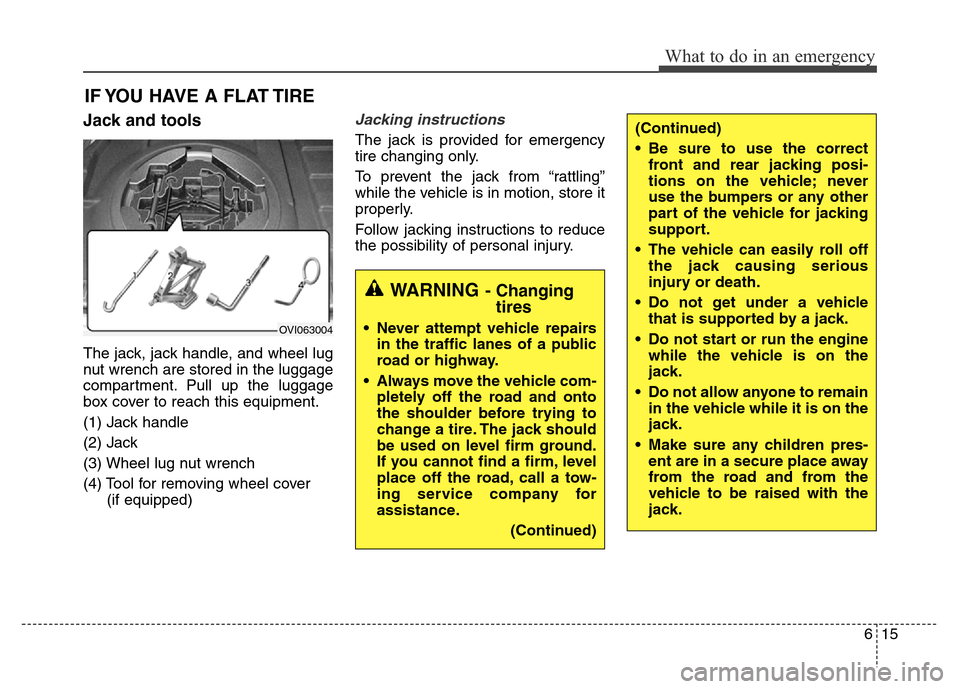
The jack, jack handle, and wheel lug
nut wrench are stored in the luggage
compartment. Pull up the luggage
box cover to reach this equipment.
(1) Jack handle
(2) Jack
(3) Wheel lug nut wrench
(4) Tool for removing wheel cover
(if equipped)
Jacking instructions
The jack is provided for emergency
tire changing only.
To prevent the jack from “rattling”
while the vehicle is in motion, store it
properly.
Follow jacking instructions to reduce
the possibility of personal injury.
OVI063004
(Continued)
• Be sure to use the correct
front and rear jacking posi-
tions on the vehicle; never
use the bumpers or any other
part of the vehicle for jacking
support.
• The vehicle can easily roll off
the jack causing serious
injury or death.
• Do not get under a vehicle
that is supported by a jack.
• Do not start or run the engine
while the vehicle is on the
jack.
• Do not allow anyone to remain
in the vehicle while it is on the
jack.
• Make sure any children pres-
ent are in a secure place away
from the road and from the
vehicle to be raised with the
jack.
WARNING- Changing
tires
• Never attempt vehicle repairs
in the traffic lanes of a public
road or highway.
• Always move the vehicle com-
pletely off the road and onto
the shoulder before trying to
change a tire. The jack should
be used on level firm ground.
If you cannot find a firm, level
place off the road, call a tow-
ing service company for
assistance.
(Continued)
Page 371 of 479
What to do in an emergency
16 6
Removing and storing the
spare tire
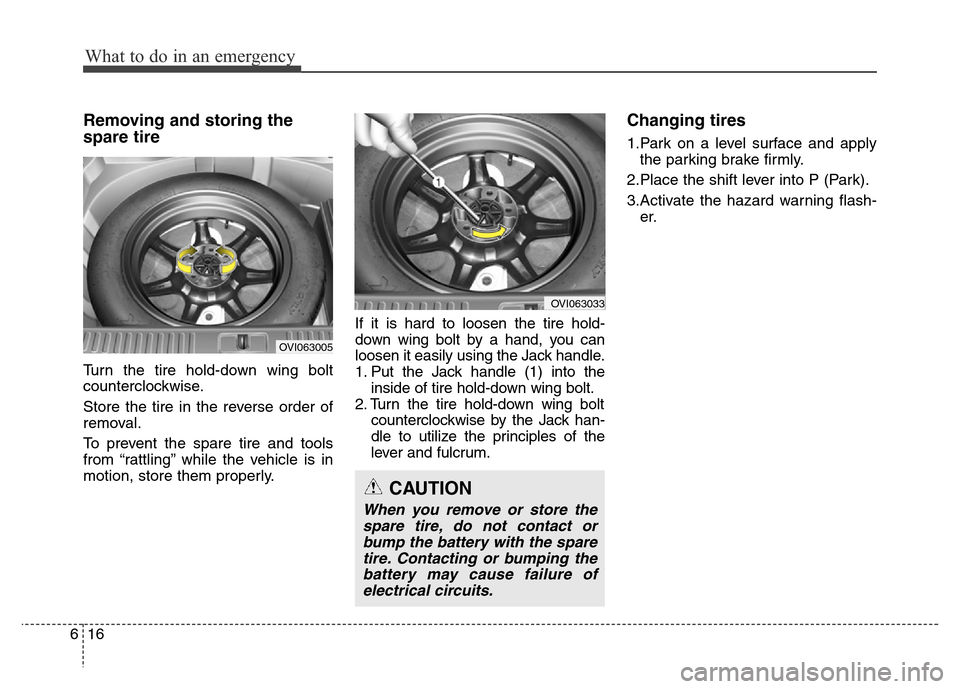
Turn the tire hold-down wing bolt
counterclockwise.
Store the tire in the reverse order of
removal.
To prevent the spare tire and tools
from “rattling” while the vehicle is in
motion, store them properly.If it is hard to loosen the tire hold-
down wing bolt by a hand, you can
loosen it easily using the Jack handle.
1. Put the Jack handle (1) into the
inside of tire hold-down wing bolt.
2. Turn the tire hold-down wing bolt
counterclockwise by the Jack han-
dle to utilize the principles of the
lever and fulcrum.
Changing tires
1.Park on a level surface and apply
the parking brake firmly.
2.Place the shift lever into P (Park).
3.Activate the hazard warning flash-
er.
OVI063005
CAUTION
When you remove or store the
spare tire, do not contact or
bump the battery with the spare
tire. Contacting or bumping the
battery may cause failure of
electrical circuits.
OVI063033
Page 372 of 479
617
What to do in an emergency
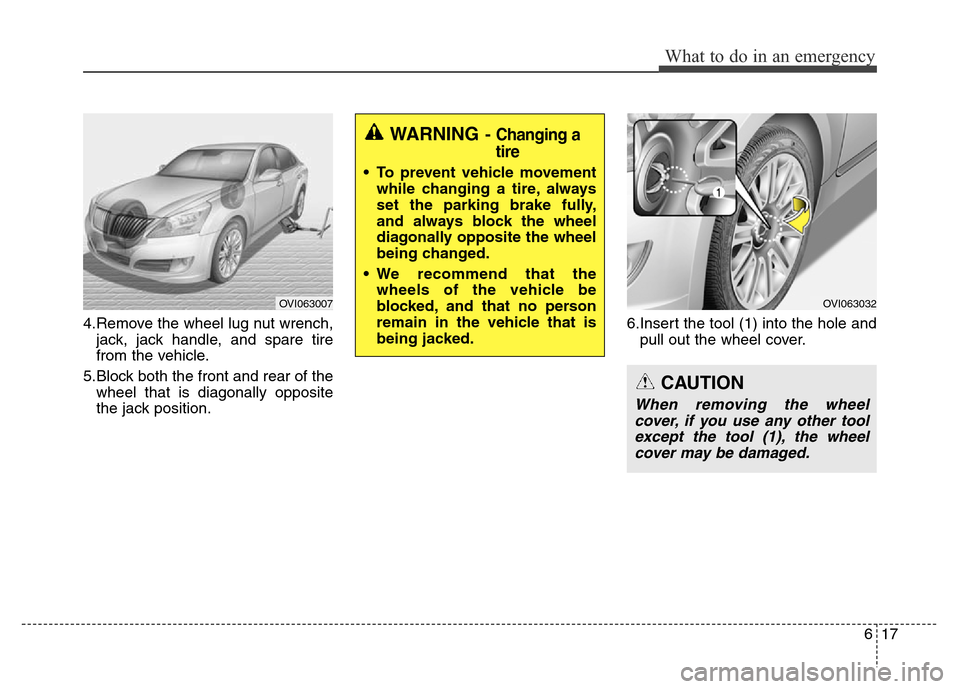
4.Remove the wheel lug nut wrench,
jack, jack handle, and spare tire
from the vehicle.
5.Block both the front and rear of the
wheel that is diagonally opposite
the jack position.6.Insert the tool (1) into the hole and
pull out the wheel cover.
OVI063007
WARNING- Changing a
tire
• To prevent vehicle movement
while changing a tire, always
set the parking brake fully,
and always block the wheel
diagonally opposite the wheel
being changed.
• We recommend that the
wheels of the vehicle be
blocked, and that no person
remain in the vehicle that is
being jacked.
OVI063032
CAUTION
When removing the wheel
cover, if you use any other tool
except the tool (1), the wheel
cover may be damaged.
Page 373 of 479
What to do in an emergency
18 6
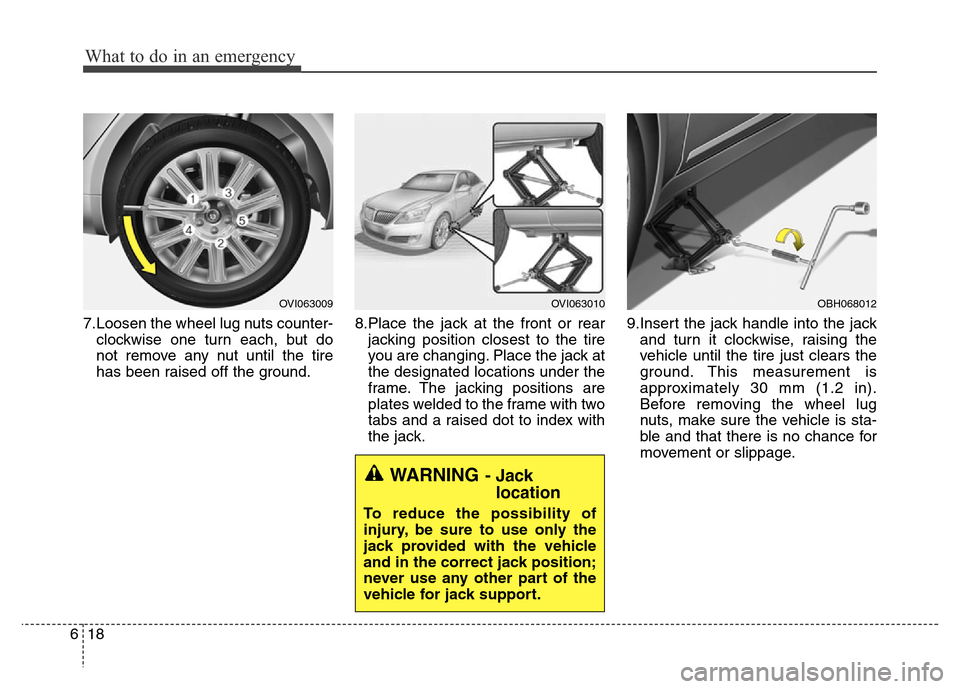
7.Loosen the wheel lug nuts counter-
clockwise one turn each, but do
not remove any nut until the tire
has been raised off the ground.8.Place the jack at the front or rear
jacking position closest to the tire
you are changing. Place the jack at
the designated locations under the
frame. The jacking positions are
plates welded to the frame with two
tabs and a raised dot to index with
the jack.9.Insert the jack handle into the jack
and turn it clockwise, raising the
vehicle until the tire just clears the
ground. This measurement is
approximately 30 mm (1.2 in).
Before removing the wheel lug
nuts, make sure the vehicle is sta-
ble and that there is no chance for
movement or slippage.
WARNING- Jack
location
To reduce the possibility of
injury, be sure to use only the
jack provided with the vehicle
and in the correct jack position;
never use any other part of the
vehicle for jack support.
OVI063010OBH068012OVI063009
Page 375 of 479
What to do in an emergency
20 6
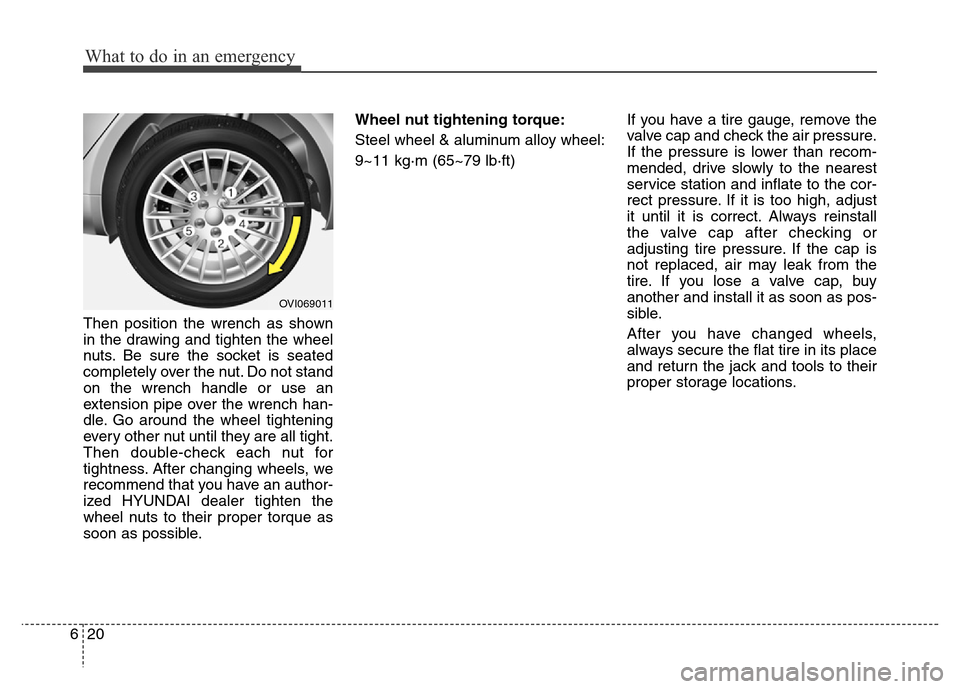
Then position the wrench as shown
in the drawing and tighten the wheel
nuts. Be sure the socket is seated
completely over the nut. Do not stand
on the wrench handle or use an
extension pipe over the wrench han-
dle. Go around the wheel tightening
every other nut until they are all tight.
Then double-check each nut for
tightness. After changing wheels, we
recommend that you have an author-
ized HYUNDAI dealer tighten the
wheel nuts to their proper torque as
soon as possible.Wheel nut tightening torque:
Steel wheel & aluminum alloy wheel:
9~11 kg·m (65~79 lb·ft)If you have a tire gauge, remove the
valve cap and check the air pressure.
If the pressure is lower than recom-
mended, drive slowly to the nearest
service station and inflate to the cor-
rect pressure. If it is too high, adjust
it until it is correct. Always reinstall
the valve cap after checking or
adjusting tire pressure. If the cap is
not replaced, air may leak from the
tire. If you lose a valve cap, buy
another and install it as soon as pos-
sible.
After you have changed wheels,
always secure the flat tire in its place
and return the jack and tools to their
proper storage locations.
OVI069011